Genesys Cloud - Admin - Create a group workspace
Workspaces (Groups) in Genesys Cloud
Workspaces in Genesys Cloud are created using Groups.
A workspace provides a shared collaboration environment where members can communicate, share files, and coordinate work inside the platform.
Purpose of Workspaces
| Purpose |
Description |
Example |
| Team Collaboration |
Provides a shared communication space for a team |
Support Team |
| Operational Coordination |
Allows teams to coordinate incidents or daily operations |
NOC Operations |
| Project Communication |
Dedicated space for project teams |
Migration Project |
| Knowledge Sharing |
Members share files, links, and information |
Engineering Workspace |
Workspace Components
| Component |
Description |
| Name |
Identifies the workspace |
| Description |
Explains the purpose of the workspace |
| Members |
Users who belong to the workspace |
| Owners |
Users who manage the workspace |
| Visibility |
Determines if the workspace is public or private |
| Tags |
Labels used to organize and search workspaces |
Example Workspace Configuration
| Field |
Example |
| Workspace Name |
Platform-NOC |
| Description |
Network Operations coordination workspace |
| Visibility |
Private |
| Owners |
NOC Manager |
| Members |
Network Engineers |
| Tags |
noc, infrastructure |
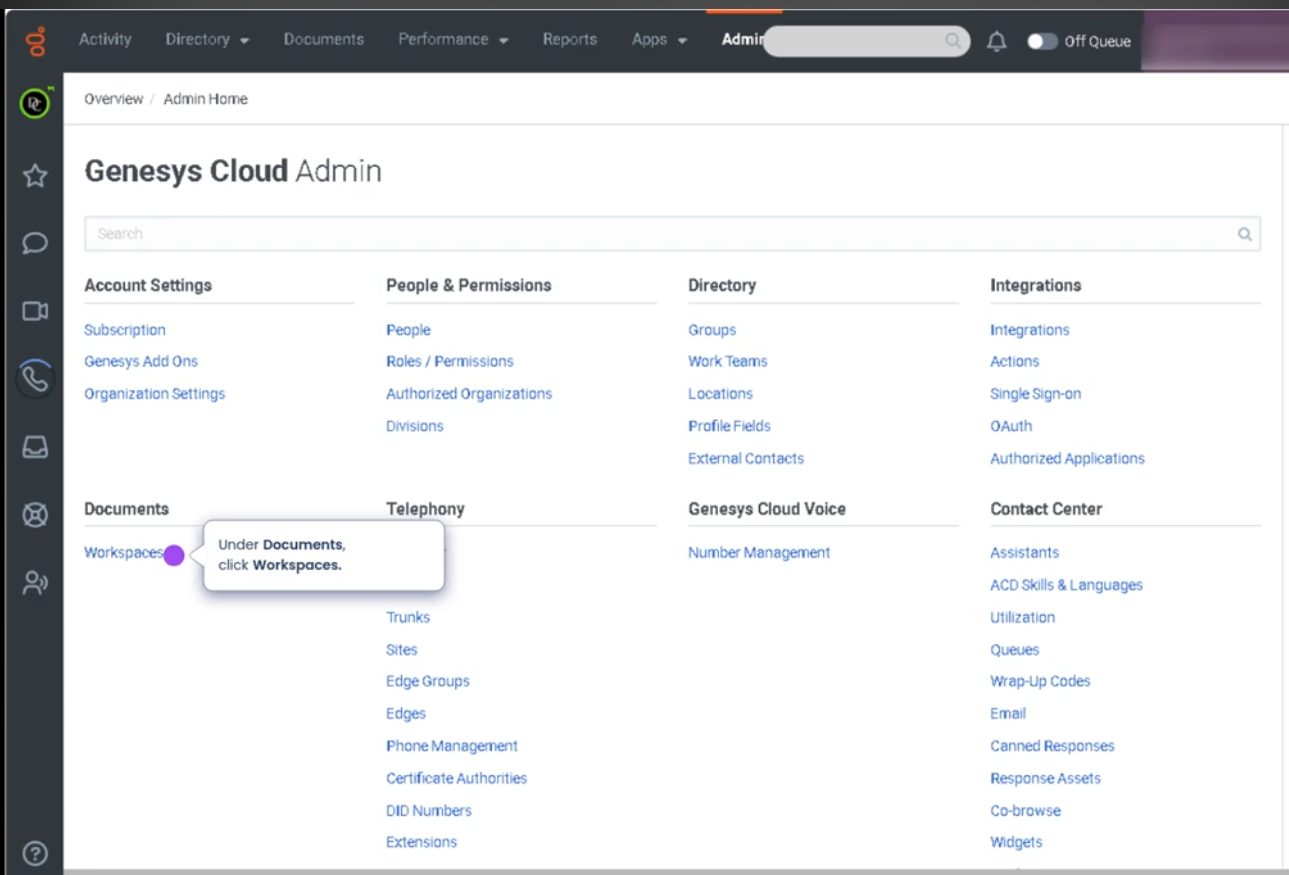
How to Create a Workspace
- Go to Admin
- Navigate to Directory → Groups
- Click Create Group
- Enter Name and Description
- Set Visibility
- Assign Owners
- Add Members
- Click Save
Example Workspace Structure
| Workspace |
Purpose |
| Support-Tier1 |
Customer support coordination |
| Dialer-Operations |
Outbound dialing operations |
| Network-NOC |
Infrastructure monitoring |
| Engineering-Voice |
Telephony engineering collaboration |
Best Practices
| Practice |
Reason |
| Use clear workspace names |
Helps users identify the purpose |
| Limit workspace owners |
Prevents configuration conflicts |
| Assign relevant members only |
Keeps communication focused |
| Use tags for organization |
Improves search and filtering |
Key Notes
| Statement |
Explanation |
| Workspaces are implemented as Groups |
Genesys Cloud uses groups as collaboration spaces |
| Membership controls access |
Users must be members to participate in private workspaces |
| Owners manage the workspace |
Owners can modify configuration and membership |
| Workspaces support collaboration |
Enables messaging and shared information across teams |
How to Implement
| Step |
Procedure |
| 1 |
Log in to Genesys Cloud with administrator privileges |
| 2 |
Navigate to Admin |
| 3 |
Select Directory |
| 4 |
Click Groups |
| 5 |
Select Create Group |
| 6 |
Enter group name and description |
| 7 |
Configure visibility settings |
| 8 |
Assign owners |
| 9 |
Add members |
| 10 |
Click Save |
Step by Step
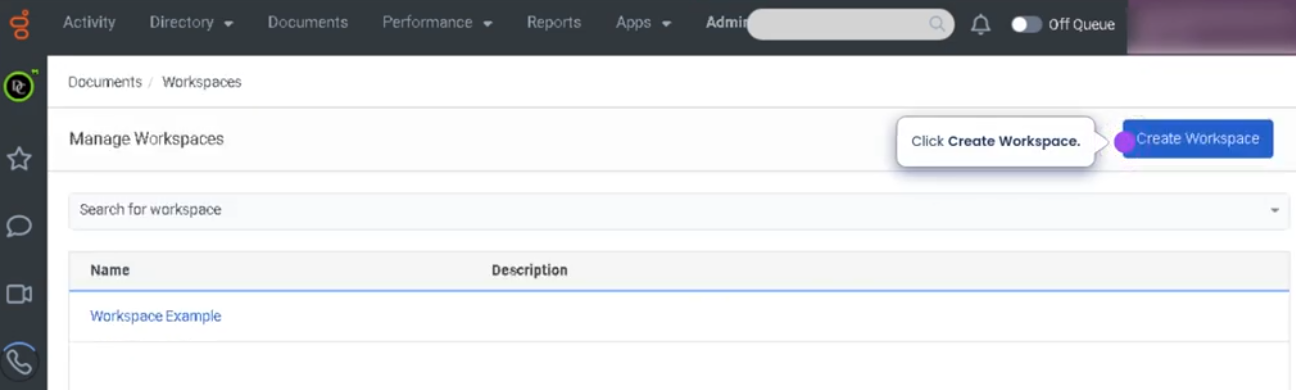
Navigate to Workspaces
Create workspace

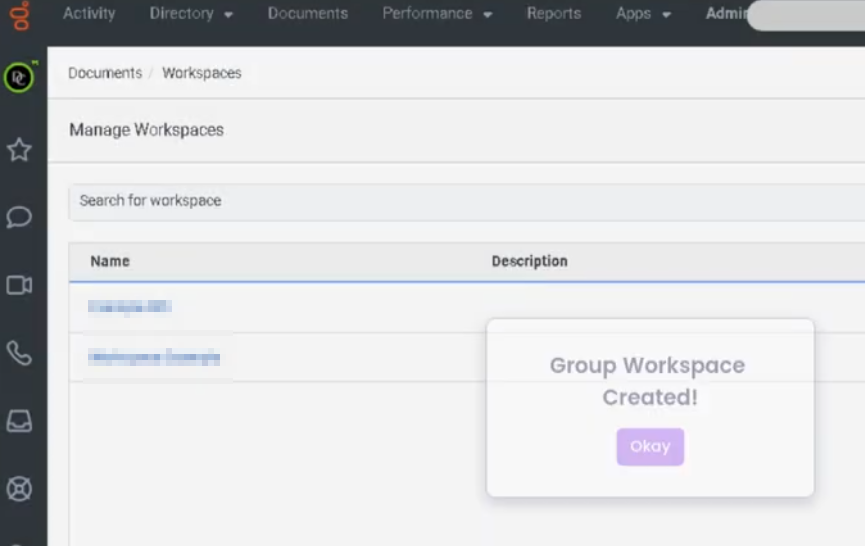
Type in the workspace name and workspace description and save
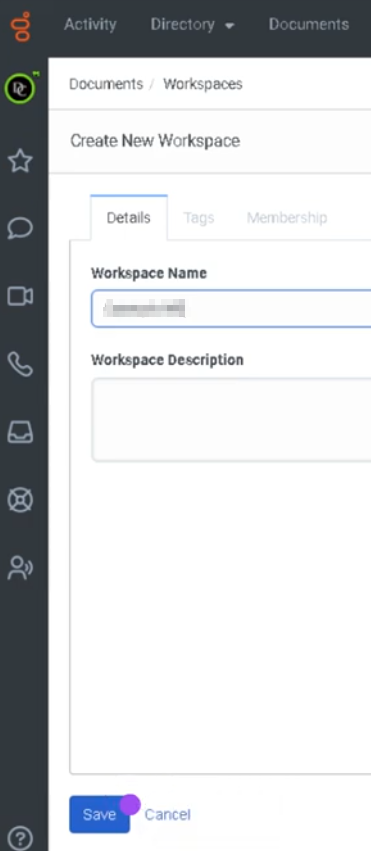
Workspace created

In Genesys Cloud, tags are metadata labels applied to groups (workspaces) to make them easier to organize, search, filter, and manage across the platform. They are especially useful in environments with many teams, departments, and operational groups.
Tags do not change permissions or functionality — they primarily improve classification and discoverability.
| Purpose |
Description |
Example |
| Organization |
Categorize groups by function or department |
support, engineering |
| Search |
Quickly locate groups using filters |
incident, dialer |
| Scalability |
Helps manage large environments with many groups |
project, migration |
| Classification |
Identify region or business unit |
na, latam, emea |
Common Tag Categories
| Category |
Example Tags |
Use Case |
| Department |
support, sales, engineering |
Organize by team |
| Function |
incident, escalation, dialer |
Operational classification |
| Region |
na, latam, emea |
Geographic grouping |
| Project |
migration, ai, analytics |
Temporary collaboration spaces |
Example Workspace Tag Configuration
Tag Best Practices
| Practice |
Reason |
| Use lowercase tags |
Prevents duplicate variations |
| Keep tags short |
Easier filtering and readability |
| Standardize naming |
Ensures consistency across teams |
| Limit tag count |
3–5 tags per workspace is recommended |
Example Tag Structure for Large Environments
| Tag Type |
Example |
| Department |
support |
| Function |
incident |
| Region |
latam |
| Project |
migration |
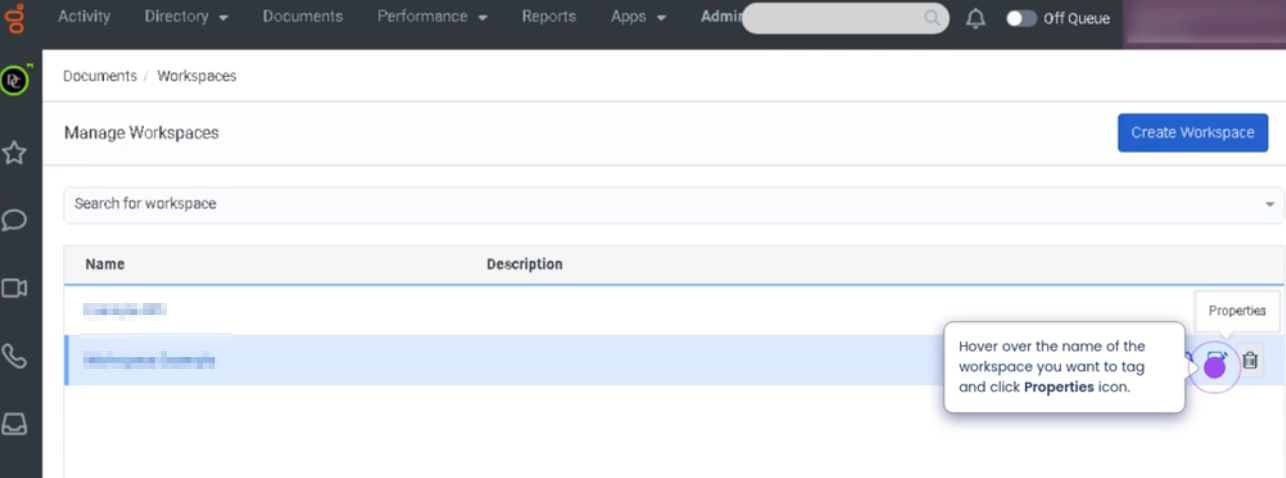
Navigate to workspaces and click on properties icon for your workspace
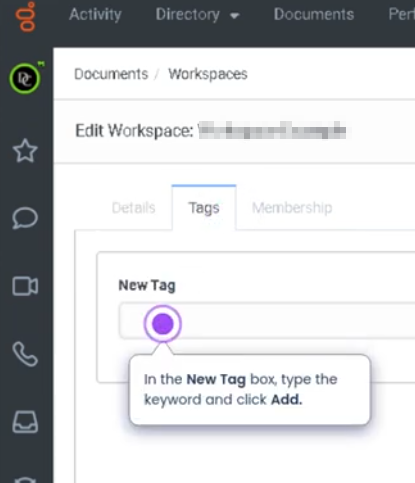
Navigate to tags tab and add your new tag

Why You Need to Assign Users to Workspaces (Membership)
Brief Summary
You assign users to a workspace (group membership) so they can access and participate in that workspace.
Membership controls who can see the group, join conversations, receive notifications, and collaborate with the team.
If a workspace is Private, users must be members to access it.
Why Membership Is Required
| Reason |
Explanation |
| Access Control |
Only members can access private workspaces |
| Collaboration |
Members can participate in workspace conversations |
| Notifications |
Members receive activity updates from the workspace |
| Team Organization |
Ensures communication stays within the appropriate team |
Access Levels
| Role |
Description |
Typical Use Case |
| Owner |
Full administrative control of the workspace. Can edit the group, manage members, and delete the group. |
Team leads, supervisors, administrators |
| Contributor |
Can participate in conversations, share files, and collaborate within the workspace. Cannot manage group configuration. |
Regular team members |
| Viewer |
Can view workspace content but cannot actively contribute or post messages. |
Stakeholders, auditors, observers |
Role Permissions Overview
| Capability |
Owner |
Contributor |
Viewer |
| View Workspace |
✓ |
✓ |
✓ |
| Participate in Conversations |
✓ |
✓ |
✗ |
| Share Files / Content |
✓ |
✓ |
✗ |
| Add or Remove Members |
✓ |
✗ |
✗ |
| Modify Group Settings |
✓ |
✗ |
✗ |
| Delete Workspace |
✓ |
✗ |
✗ |
Best Practice
| Recommendation |
Reason |
| Limit Owners |
Prevents accidental configuration changes |
| Use Contributor for most users |
Enables collaboration without administrative control |
| Use Viewer for monitoring roles |
Allows oversight without interaction |
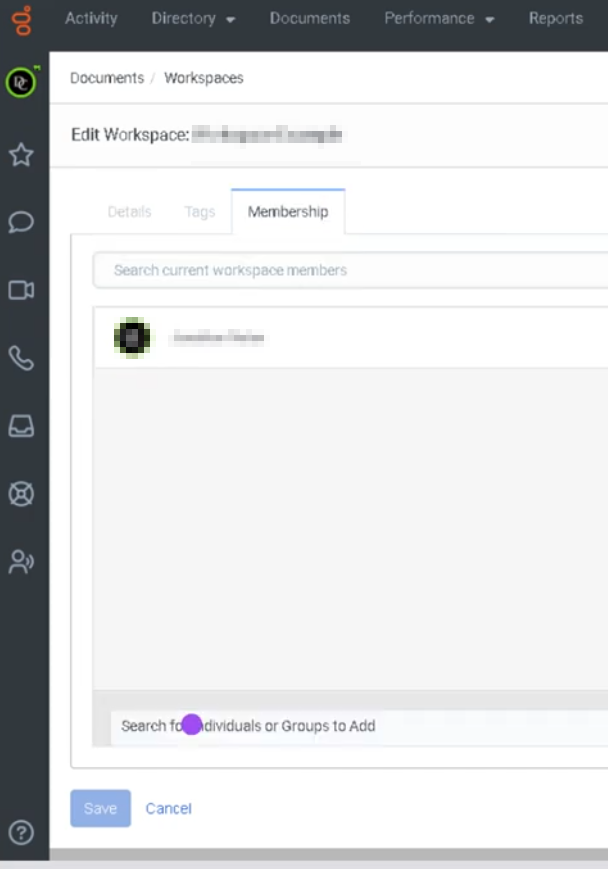
Assign users
Navigate to Documents / Workspaces / Properties of your workspace / Membership tab / Search for user and add, select role and save


No Comments