Widgets — Web Chat & Web Messenger
| Topic | Detail |
|---|---|
| Navigation (Web Messenger) | Admin → Message → Messenger Configurations and Messenger Deployments |
| Navigation (Web Chat v2) | Admin → Contact Center → Widgets |
| Purpose | Provide a chat interface on websites connecting customers to Genesys Cloud agents |
| Modern Standard | Web Messenger — persistent, asynchronous |
| Legacy | Web Chat v2 — session-based |
Web Messenger (Modern Standard)
Web Messenger offers a persistent, asynchronous experience — customers can leave the website and return later with their full conversation history still intact.
| Component | Description |
|---|---|
| Messenger Configurations | Defines look and feel — color palette, logo, features (file uploads, emojis, read receipts) |
| Messenger Deployments | Links a Messenger Configuration to an Architect Inbound Message Flow — this is where routing is assigned |
| Deployment Snippet | JavaScript code pasted into the website <head> or <body> to render the chat icon |
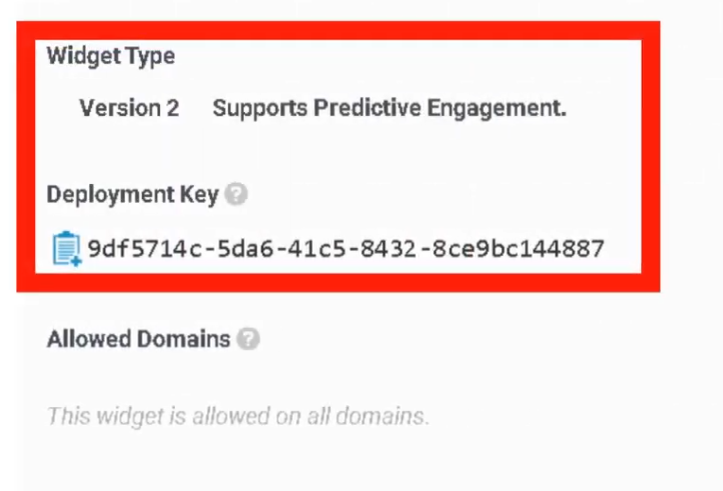
| Deployment ID | Unique GUID identifying which configuration the website loads |
| Allowed Domains | Security whitelist — only URLs listed here can render the widget |
Web Chat v2 (Legacy)
Strictly session-based — if the customer refreshes or closes the browser tab, the chat session is lost.
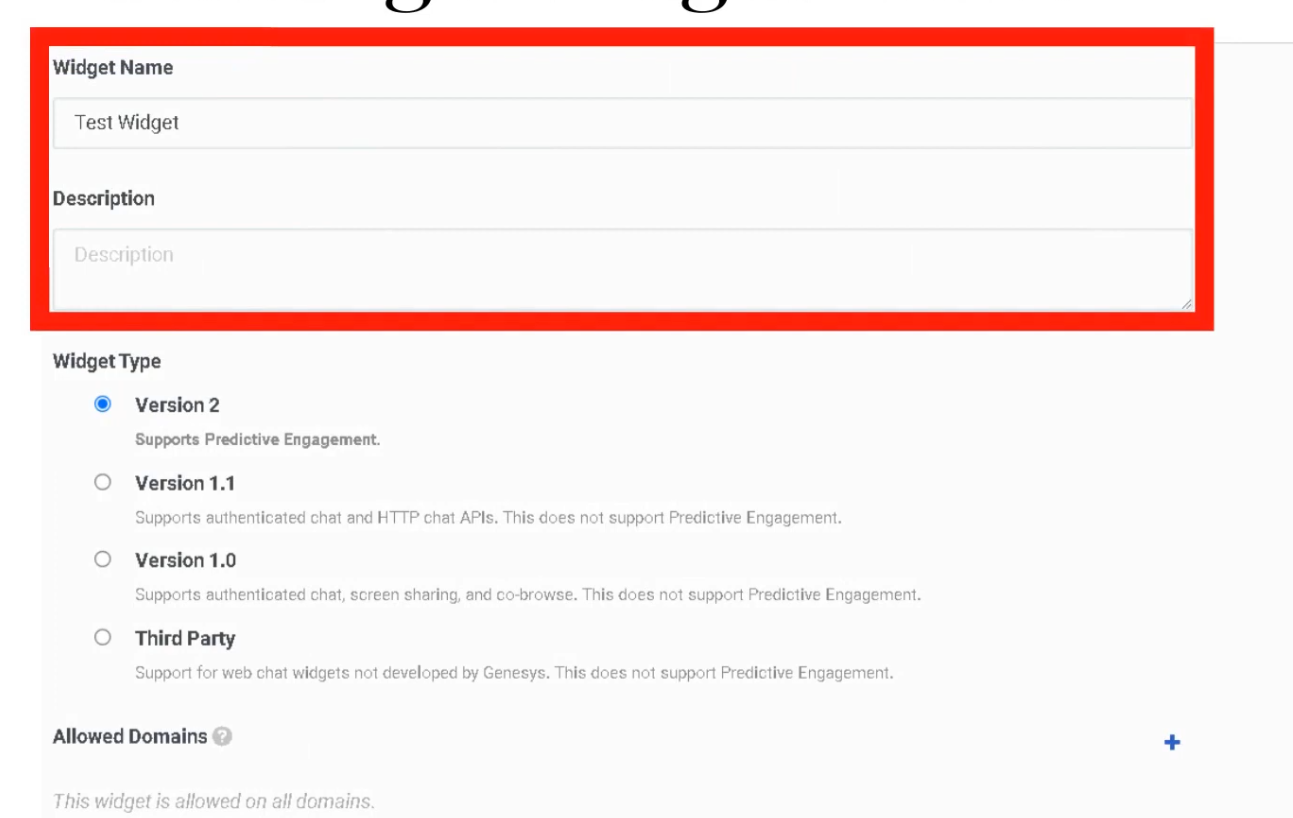
| Widget Type | Description |
|---|---|
| Standard | Simple chat window provided by Genesys |
| Third-Party | Uses Genesys as the routing engine while a completely custom UI is built by developers |
Widget Features
Both versions support the following controls:
| Feature | Description |
|---|---|
| File Uploads | Enable/disable customer ability to send images or documents |
| Typing Indicators | Shows when the agent or customer is typing |
| Read Receipts | Informs users when messages have been seen |
| Guest Chat | Allows unauthenticated chat, or require login to pull CRM data automatically |
| Pre-Chat Form | Collects Name, Email, Account Number before routing — data passed into Architect flow for intelligent routing |
Routing Logic
Widgets do not send chats directly to agents. They route to an Architect Inbound Message Flow first. The flow processes pre-chat form data and routes to the correct queue.
Customer Clicks Chat Widget
       ↓
Pre-Chat Form (Name, Email, Account Number)
       ↓
Architect Inbound Message Flow
       ↓
Data Evaluated / Customer Identified
       ↓
Transfer to Queue
       ↓
Agent
Deployment Steps (Web Messenger)
Connect to a chat flow:
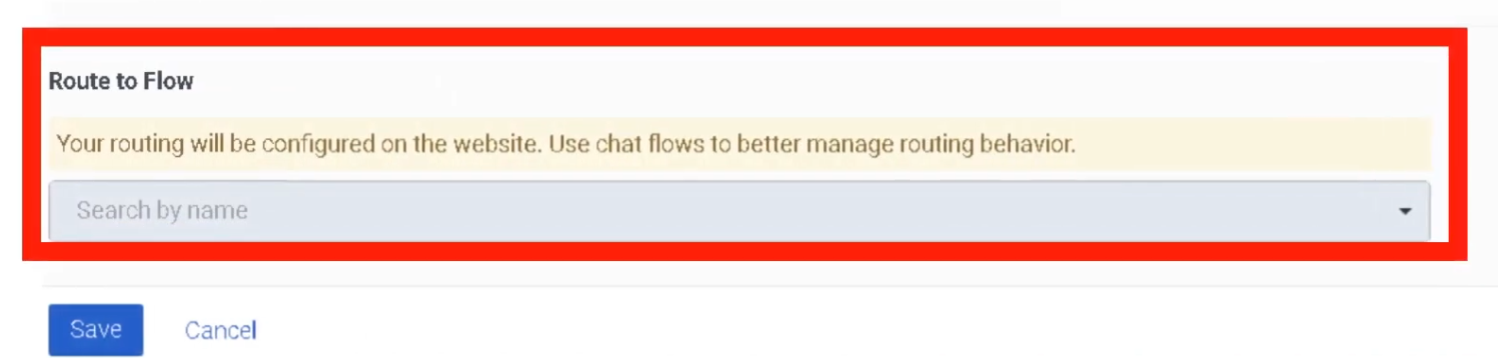
Deployment key generated:
Technical Reference
| Component | Detail |
|---|---|
| Snippet | JavaScript placed in <head> or <body> of the website |
| Deployment ID | Unique GUID — identifies which configuration loads |
| Allowed Domains | Must whitelist all URLs where the widget appears |
| Persistence | Web Messenger supports Persistent or Clearing Conversation session modes |
Web Messenger vs. Web Chat v2
| Feature | Web Messenger | Web Chat v2 |
|---|---|---|
| Session type | Persistent / asynchronous | Session-based (lost on refresh) |
| Conversation history | Retained across sessions | Lost when session ends |
| Routing | Architect Inbound Message Flow | Architect Inbound Chat Flow |
| Status | Current standard | Legacy — still supported |
| Customization | Full branding via Messenger Config | Limited |
Interview Cheat Sheet
| Question | Answer |
|---|---|
| What is the modern widget standard? | Web Messenger — persistent and asynchronous |
| What happens to a Web Chat v2 session on page refresh? | The session is lost |
| What does the Deployment ID identify? | Which Messenger Configuration loads on the website |
| What must be configured for security? | Allowed Domains whitelist |
| Where does the widget route interactions? | To an Architect Inbound Message Flow, not directly to agents |
| What is a Pre-Chat Form used for? | Collecting customer data before routing for intelligent queue assignment |