Avaya CM MST
Avaya MST-MDA extract & download log files & Sip trunk example tracing.
The reason for this document is to show you how to extract MST traces from the shell of CM as a dadmin or admin (Prof18) user , what happens if you try and extract the MST trace from the CM SMI web interface is that it will fail and tell you your file is to large , this is actually false your file may only be a couple of KB , but because CM has to try and create temporary files of your MST , it will fail because of the rest of the logs in the location it tries to copy your MST to.
So the following first shows you how to filter and turn on MST , then extract your MST from CM shell with win SCP.
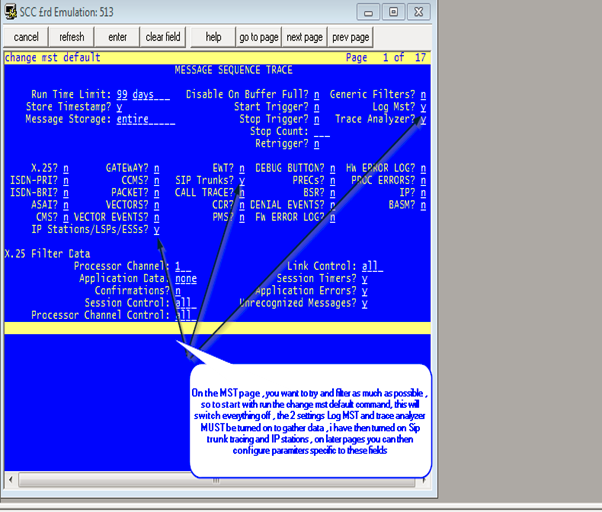
Step 1 , is to issue the command “clear mst” then “change mst default” this will reset all filter options, as in the screen shot from below, the log and trace options need to be selected for this to work.
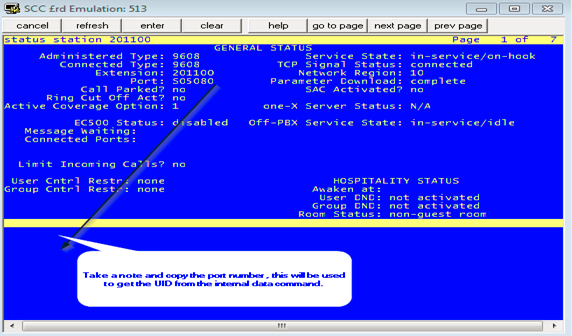
As I wanted to trace on both sip trunks and a specific sta I needed the port number for the station as below my port was S05080.
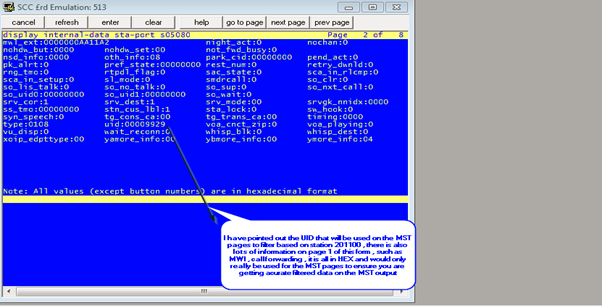
I then ran the command “disp internal data sta port s05080” , this was to obtain the UID of the station, take note of the below speech box , as it gives more information on this command and other useful data on that form.
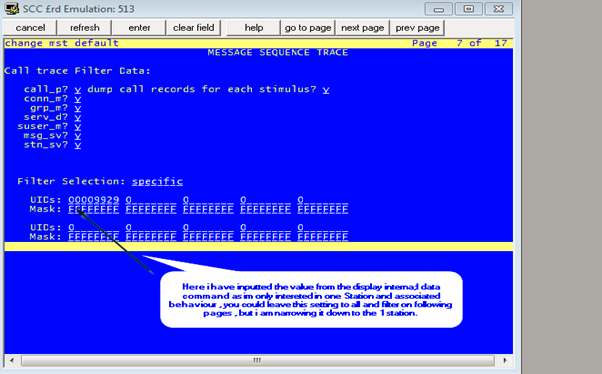
From there I returned back to the mst pages by issuing the “change mst” command rather than the “change mst default” just to ensure the log and analyser settings do not get switched off. And as below inputted the UID of my station obtained previously to ensure I was filtering as much as possible , as the below two screen shots show.

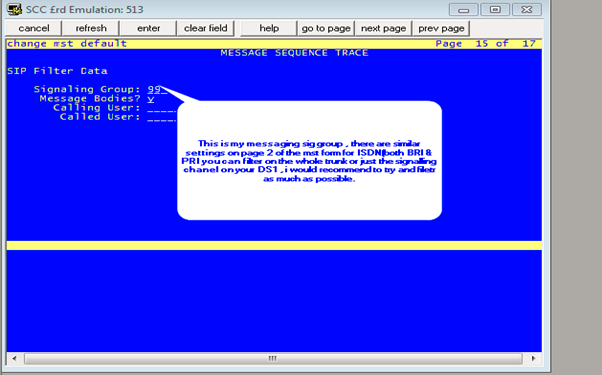
I then continued to filter based on my signalling group associated with the messaging trunk group that I am having issues with.
At this stage I was set, I saved the mst settings I had altered, and at that point enabled MST with the “enable MST” command ,a quick check with the “status mst” command will ensure it is enabled , at this point make your test calls and as soon as you have finished issue “disable mst” to allow collection of the trace.
The below instructions contains the details of how to collect the new MST logs , you need to putty(or similar) into CM to run the commands , you can then use WIN SCP to extract the trace files , in my case it was copied to the /tmp folder on CM
This command can be ran by `dadmin` user or prof18 superusers when accessing the MTA data by SSH into shell. The below string can be copy and pasted , you will just need to alter the time and date in the CLI string to match your MST trace time.
dadmin@labpbx> /usr/bin/sudo /opt/ecs/bin/logc -c 'view%mta' -t 0127:1300-0127:1400 > /tmp/mstdecoded.m
Where after the `t = time` switch user can define the start / end date of the interval for which they want to decode the MST data from ecs log files.
In the above example an hour interval is selected on the day 27th January between 1PM and 2PM and decoded data will be written into file /tmp/mstdecoded.m
.
No Comments