# Linux - Tips
# Maintenance
# Release/Clear cache memory RAM
Every Linux System has three options to clear cache without interrupting any processes or services.
**1.** Clear PageCache only.
```
# sync; echo 1 > /proc/sys/vm/drop_caches
```
**2.** Clear dentries and inodes.
```
# sync; echo 2 > /proc/sys/vm/drop_caches
```
**3.** Clear pagecache, dentries, and inodes.
```
# sync; echo 3 > /proc/sys/vm/drop_caches
```
Explanation of the above command.
**sync** will flush the file system buffer. Command Separated by `“;”` run sequentially. The shell waits for each command to terminate before executing the next command in the sequence. As mentioned in the kernel documentation, writing to **drop\_cache** will clean cache without killing any application/service, [command echo](https://www.tecmint.com/echo-command-in-linux/) is doing the job of writing to file.
f you have to clear the disk cache, the first command is safest in enterprise and production as `“...echo 1 > ….”` will clear the **PageCache** only. It is not recommended to use the third option above `“...echo 3 >”` in production until you know what you are doing, as it will clear **pagecache**, **dentries,** and **inodes**.
###### Is it a good idea to free Buffer and Cache in Linux that might be used by Linux Kernel?
#### Free Buffer and Cache in Linux
When you are applying various settings and want to check, if it is actually implemented specially on the I/O-extensive benchmark, then you may need to clear the buffer cache. You can drop cache as explained above without rebooting the System i.e., no downtime required.
Linux is designed in such a way that it looks into the disk cache before looking onto the disk. If it finds the resource in the cache, then the request doesn’t reach the disk. If we clean the cache, the disk cache will be less useful as the OS will look for the resource on the disk.
Moreover, it will also slow the system for a few seconds while the cache is cleaned and every resource required by OS is loaded again in the disk cache.
Now we will be creating a shell script to auto clear RAM cache daily at **2 am** via a cron scheduler task. Create a shell script **clearcache.sh** and add the following lines.
```
#!/bin/bash
# Note, we are using "echo 3", but it is not recommended in production instead use "echo 1"
echo "echo 3 > /proc/sys/vm/drop_caches"
```
Set execute permission on the **clearcache.sh** file.
```
# chmod 755 clearcache.sh
```
Now you may call the script whenever you are required to clear the ram cache.
Now set a cron to clear RAM cache every day at 2 am. Open **crontab** for editing.
```
# crontab -e
```
Append the below line, save and exit to run it at **2 am** daily.
```
0 2 * * * /path/to/clearcache.sh
```
For more details on how to cron a job, you may like to check our article on [11 Cron Scheduling Jobs](https://www.tecmint.com/11-cron-scheduling-task-examples-in-linux/).
###### Is it a good idea to auto clear the RAM cache on the production server?
#### Clear RAM Cache on Linux Production Server?
No! it is not. Think of a situation when you have scheduled the script to clear ram cache every day at **2 am**. Every day at 2 am the script is executed and it flushes your RAM cache. One day for whatsoever reason may be more than expected users are online on your website and seeking resources from your server.
At the same time, the scheduled script runs and clears everything in the cache. Now all the users are fetching data from the disk. It will result in a server crash and corrupt the database. So clear ram-cache only when required, and known your footsteps, else you are a Cargo Cult System Administrator.
#### How to Clear Swap Space in Linux?
If you want to clear Swap space, you may like to run the below command.
```
# swapoff -a && swapon -a
```
Also, you may add the above command to a cron script above, after understanding all the associated risks.
Now we will be combining both above commands into one single command to make a proper script to clear RAM Cache and Swap Space.
```
# echo 3 > /proc/sys/vm/drop_caches && swapoff -a && swapon -a && printf '\n%s\n' 'Ram-cache and Swap Cleared'
OR
$ su -c "echo 3 >'/proc/sys/vm/drop_caches' && swapoff -a && swapon -a && printf '\n%s\n' 'Ram-cache and Swap Cleared'" root
```
After testing both the above commands, we will run the command “**free -h**” before and after running the script and will check the cache.
[](https://www.tecmint.com/wp-content/uploads/2015/05/Clear-RAM-Cache.gif)
# Large files linux
df -h shows hard drive space
`sudo du -a /dir/ | sort -n -r | head -n 20`
##### this will list larger files/folders in /dir
find / -type f -size +20000k -exec ls -lh {} \\; 2> /dev/null | awk '{ print $NF ": " $5 }' | sort -nrk 2,2
this will find files larger than 20000k
# Find hidden process running
lsof -Pn|grep txt|grep "/\\."
# IP Tables
to list all ip tables by chain
iptables -L --line-numbers
add iptable on line
sudo iptables -I INPUT 1 -p tcp -s 10.190.195.123 --dport 22 -j ACCEPT
sudo iptables -I INPUT 2 -p tcp -s 10.190.227.123 --dport 22 -j ACCEPT
sudo iptables -I INPUT 3 -p tcp -s 10.190.195.123 --dport 8443 -j ACCEPT
sudo iptables -I INPUT 4 -p tcp -s 10.190.227.123 --dport 8443 -j ACCEPT
sudo iptables -I INPUT 5 -p tcp --dport 22 -j REJECT
sudo iptables -I INPUT 6 -p tcp --dport 8443 -j REJECT
delete existing chain line
iptables -D INPUT 2
this will delete rule 2
to save the iptables
service iptables save
# Buzz noise audio - KDE
Change your working directory to /etc/modprobe.d:
```
cd /etc/modprobe.d
```
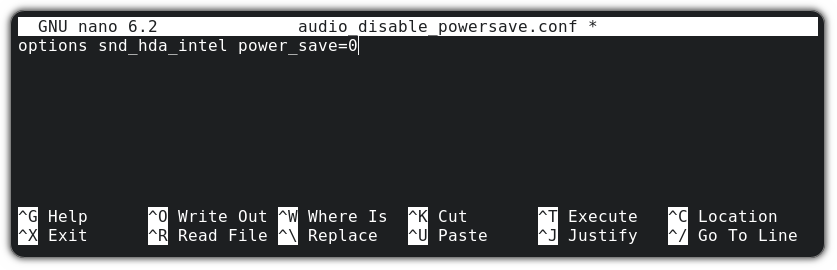
And now, create a new file named `audio_disable_powersave.conf` and open with the nano text editor using the given command:
```
sudo nano audio_disable_powersave.conf
```
And put the following lines in that file to turn off the power-saving setting in the sound card permanently:
```
options snd_hda_intel power_save=0
```
[](https://itsfoss.com/content/images/wordpress/2022/11/fix-buzzing-sound-in-linux.png)For **a USB sound card**, you can use `snd_usb_audio`:
```
options snd_usb_audio power_save=0
```
Now, [save changes and exit the Nano text editor](https://linuxhandbook.com/nano-save-exit/?ref=itsfoss.com) by pressing Ctrl+X keys. Reboot your system, and you can enjoy a noise-free workspace.
# epomaker keyboard detected as apple
## The Problem
Recently, my Keychron K8 keyboard has died (PCB 💀), so I started hunting for a new keyboard. Another Keychron was out of the question, so I decided to give Epomaker a try. I stumbled into a B-stock [Epomaker Galaxy80](https://epomaker.com/products/epomaker-feker-galaxy80) and decided to give it a shot. I am very happy with the feel of the keyboard, typing feels much better than the K8, at least to me.
However, I ran into a problem in linux (Fedora Workstation, although this is not distro-specific): I was unable to use the F-row (F1 - F12), so that Alt + F4 would not close the window, F11 would not trigger full screen etc. When I used the online [keyboard testers](https://en.key-test.ru/), it would register keys/commands such as “Files”, “Calculator”, “Volume Up/Down” etc.:

I searched the keyboard manual, thinking it must be some sort of an Fn lock being activated, but there does not seem to be a feature like that on my keyboard. Even worse, using the Fn key + one of the F-row keys was not triggering the actual F-row key either. I had no (useful) way to use my F-row keys!
This issue has been reported with many other Epomaker keyboards, such as EP84, TH80, RT80, RT100 or GMK87, but also with other brands (including some Keychrons). The good news is, the fix should be the same for all of them!
## The Solution
After some furious googling, I actually found the solution to the problem, which turns out to be on the system side rather than in the keyboard itself. Simply [reconfiguring](https://www.reddit.com/r/Epomaker/comments/1bte204/comment/l0trju0/) your [HID Apple module](https://gist.github.com/Joao-Peterson/dbd6ee1abe480afd6094d266af7ab051) fixes the issue. If you’re technically savvy and/or do not care about any further details, go use the module configuration and enjoy using your keyboard.
```
echo "options hid_apple fnmode=2" | sudo tee /etc/modprobe.d/hid_apple.conf
sudo dracut --regenerate-all --force
# reboot and enjoy your fully functioning keyboard!
```
*(courtesy of Reddit user Outrageous\_Opinion84 and Joao-Peterson on GitHub)*
## The Solution Explained
Below, I would like to go into more details for several reasons:
1. [Reddit is going to paywall some of the content](https://arstechnica.com/gadgets/2025/02/reddit-plans-to-lock-some-content-behind-a-paywall-this-year-ceo-says/), and other content might get authwalled - therefore the solution may not be readily available.
2. It took me some time to find the solution, so by writing this article, I’m hoping the more elaborate explanation will be more SEO-friendly than some of the existing answers scatted over the internet.
3. I am sure I will forget this solution next time I install a new system and writing it up will hopefully mean I will not need to re-figure it out.
4. I wanted to learn (and share) in a bit more detail what happens with the configuration files and how the fix works.
First, let’s take a look at how the Epomaker keyboard reports to the system when loaded up (the last but one row):

Now the problem is that the keyboard is being detected as an Apple wireless keyboard clone - [an abomination of a keyboard discontinued in 2015](https://en.wikipedia.org/wiki/Apple_Wireless_Keyboard):

By default, the F-row keys on the Apple wireless keyboard emit the media commands, which is how those keypresses will get interpreted by the `hid_apple` kernel module. Luckily, the module offers configurable function modes (`fnmode`), as documented on [Arch Wiki](https://wiki.archlinux.org/title/Apple_Keyboard) or [Ubuntu Wiki](https://help.ubuntu.com/community/AppleKeyboard). We are interested in the `fnmode=2` option:
- 2 - normally function keys, switchable to media keys by holding Fn key (=auto on non-Apple keyboards)
You can temporarily test the parameter by sending the fnmode parameter to the kernel module via sysfs:
(You likely need to do a `sudo su` first)
`echo 2 >> /sys/module/hid_apple/parameters/fnmode`
Now your keyboard should work as GodEpomaker intended! The problem is that this change will not be persisted after reboot.
The way to do it is through the `modprobe.d` configuration files, which allow to pass parameters to the modules when they are loaded during system boot.
The following command will create the configuration file for the `hid_apple` module and pass the `fnmode=2` parameter to it:
`echo "options hid_apple fnmode=2" | sudo tee /etc/modprobe.d/hid_apple.conf`
Now to apply the changes to the initramfs (a mini-image with your kernel, including its modules), you need to run the `dracut` command to re-generate initramfs.
`sudo dracut --regenerate-all --force`
**Note**: Some distributions may require a different command to re-generate initramfs, such as `sudo update-initramfs -u` for Ubuntu or `sudo mkinitcpio -P` in Arch.
Finally, all you need to do is either reboot your machine, or reload the module:
```
sudo rmmod hdi_apple
modprobe hdi_apple
```
[](https://blog.burkert.me/posts/solution-to-epomaker-keyboards-f-row-keys-in-linux/#top "Go to Top (Alt + G)")
# Installation
# Reinstall Grub after installing windows
1. Boot from a Live Linux USB drive. You can use any Live Linux distribution for this, such as Ubuntu, Fedora, or Debian.
2. Once you have booted into the Live Linux environment, open a terminal. For example; `Ctrl+Alt+T`
3. Type the following command to list all the partitions on your system: ```
sudo fdisk -l
```
4. Identify the partition where your Linux operating system is installed. Note the partition name, for example, `/dev/sda1>/code>.`
5. Mount the partition with the Linux operating system: ```
sudo mount /dev/sdx1 /mnt
```
Replace `/dev/sdx1` with the actual partition name.
6. Mount other necessary partitions: ```
sudo mount --bind /dev /mnt/dev
```
```
sudo mount --bind /proc /mnt/proc
```
```
sudo mount --bind /sys /mnt/sys
```
7. Chroot into the mounted Linux partition: ```
sudo chroot /mnt
```
8. Install the Grub bootloader: ```
sudo grub-install /dev/sdx
```
Again, replacing `/dev/sdx` with the actual device name of your hard drive. If you have more than one hard drive, make sure to select the one where the Linux operating system is installed.
9. Update the Grub configuration: ```
sudo update-grub
```
10. Exit the chroot environment: ```
exit
```
11. Unmount the partitions: ```
sudo umount /mnt/dev
```
```
sudo umount /mnt/proc
```
```
sudo umount /mnt/sys
```
```
sudo umount /mnt
```
12. Reboot your computer from the terminal. ```
sudo reboot
```
My Systemsudo fdisk -l
\[sudo\] password for csr:
Disk /dev/sda: 465.76 GiB, 500107862016 bytes, 976773168 sectors
Disk model: Samsung SSD 850
Units: sectors of 1 \* 512 = 512 bytes
Sector size (logical/physical): 512 bytes / 512 bytes
I/O size (minimum/optimal): 512 bytes / 512 bytes
Disklabel type: gpt
Disk identifier: 18F7B150-AD7B-4AC1-9864-0391968D7FE3
Device Start End Sectors SizeType
/dev/sda1 4096 1232895 1228800 600M EFI System
/dev/sda2 1232896 3330047 2097152 1G Linux filesystem
/dev/sda3 3330048 904714755 901384708 429.8G Linux filesystem
/dev/sda4 904714756 976768064 72053309 34.4G Linux swap
Disk /dev/nvme0n1: 953.87 GiB, 1024209543168 bytes, 2000409264 sectors
Disk model: addlink M.2 PCIE G3x4 NVMe
Units: sectors of 1 \* 512 = 512 bytes
Sector size (logical/physical): 512 bytes / 512 bytes
I/O size (minimum/optimal): 512 bytes / 512 bytes
Disklabel type: gpt
Disk identifier: 753AD7B1-9E5B-4DC8-A1BF-4966F9CA2801
Device Start End Sectors SizeType
/dev/nvme0n1p1 2048 206847 204800 100M EFI System
/dev/nvme0n1p2 206848 239615 32768 16M Microsoft reserved
/dev/nvme0n1p3 239616 1999320142 1999080527 953.2G Microsoft basic data
/dev/nvme0n1p4 1999321088 2000406527 1085440 530M Windows recovery environment
Disk /dev/zram0: 8 GiB, 8589934592 bytes, 2097152 sectors
Units: sectors of 1 \* 4096 = 4096 bytes
Sector size (logical/physical): 4096 bytes / 4096 bytes
I/O size (minimum/optimal): 4096 bytes / 4096 bytes
Disk /dev/sdb: 115.69 GiB, 124218507264 bytes, 242614272 sectors
Disk model: Ultra Fit
Units: sectors of 1 \* 512 = 512 bytes
Sector size (logical/physical): 512 bytes / 512 bytes
I/O size (minimum/optimal): 512 bytes / 512 bytes
Disklabel type: dos
Disk identifier: 0x0d320863
Device Boot Start End Sectors SizeIdType
/dev/sdb1 \* 2048 242548735 242546688 115.7G 7 HPFS/NTFS/exFAT
/dev/sdb2 242548736 242614271 65536 32M ef EFI (FAT-12/16/32)
mount | grep /dev/sda
/dev/sda3 on / type btrfs (rw,relatime,compress=zstd:1,ssd,discard=async,space\_cache=v2,subvolid=400,subvol=/@)
/dev/sda3 on /home type btrfs (rw,relatime,compress=zstd:1,ssd,discard=async,space\_cache=v2,subvolid=399,subvol=/@home)
/dev/sda2 on /boot type ext4 (rw,noatime)
/dev/sda1 on /boot/efi type vfat (rw,noatime,fmask=0022,dmask=0022,codepage=437,iocharset=ascii,shortname=mixed,errors=remount-ro)