Genesys Cloud Administration
- 1.- Platform Foundation
- Architectural Build Order
- Avaya-to-Genesys Cloud Reference Guide
- Locations & Floor Plans
- Licensing & Editions
- 2.- Organization Settings
- Global Settings
- Onboarding & Access
- Security & Compliance
- Status & Presence Management
- Technical & Routing Behaviours
- 3.- People and Access
- Access Policies (Attribute-Based Access Control)
- Authorized Organizations (Pairing)
- Divisions (Access Controls)
- Group Telephony & Routing
- Groups (People & Permissions)
- Roles & Permissions (RBAC)
- User profile management
- Work Teams
- 4.- Contact Center Configuration
- Call Routing & Message Routing
- Emergency Groups
- External Contacts
- Scheduling & Schedule Groups
- Queues
- ACD Skills & Languages
- Wrap-Up Codes
- Utilization
- Canned Responses & Response Assets
- Email — Domains & Routing
- Widgets — Web Chat & Web Messenger
- Analytics Settings
- Panel Manager
- Scripts
- Assistants
- Knowledge Base
- Chat & Messaging Configuration
- Outbound Dialing — Overview & Settings
- Outbound Dialing Modes
- Outbound — Contact Lists & DNC
- Outbound — Campaign Configuration
- Callbacks
- Predictive Routing
- Agent Copilot (Agent Assist)
- 5. - Architect & Call Flows
- Architect Overview
- Call Flow Components & Basics
- Genesys - Architect - Call Flow UI Overview
- Prompt Management
- Queue Configuration Reference
- Inbound Call Flows
- Inbound Message Flows
- Operating Schedules
- Data Tables
- Bot Flows
- Common Module Flows & Outbound Call Flows
- Inbound Email Flows & Inbound Chat Flows
- Secure Call Flows
- Virtual Agent Flows (Agentic)
- 6. - Platform Operations
- Disconnect Interactions
- API Usage
- Integration Management
- OAuth Clients
- Authorized Applications
- Single Sign-On (SSO)
- Audit Viewer
- GDPR and Data Subject Requests
- 7. - Telephony & Infrastructure
- Certificate Authorities
- DID & Toll-Free Numbers
- Edges & Edge Groups
- Extensions
- Sites
- Topology
- Trunks
- WebRTC Phone Management
- Phone Management
- E911 and Emergency Locations
- Telephony Connection Options — BYOC Cloud vs BYOC Premises
- 8. - Quality and Performance Management
- Development and Feedback
- Evaluators
- Evluation form
- External Metrics
- Policies
- Programs
- Quality Management
- Recording Management
- Sentiment Feedback
- Speech & Text Analytics
- Survey forms
- Topic Miner
- 9. - Workforce Management
- WFM OVerview & Setup
- Business & Management Units
- Forecasting
- Scheduling & Work Plans
- Intraday Management
- Time-off & Shift Trades
- Real-Time Adherence
- Service Goals & Planning Groups
- Capacity Planning
- Agent Self-Service
- 10. - AI Features
- AI Overview & Licensing
- AI Studio & AI Guides
- Agentic Virtual Agents
- Predictive Routing
- Agent Copilot
- AI Forecasting (WFM)
- Supervisor Copilot
- AI Tokens & Pricing
- 11. - API & Platform Integration
- API Architecture
- Genesys Cloud APIs & Platform Integration
- OAuth 2.0 Authentication Framework
- Authorization Code Grant
- Client Credentials Grant
- Authorization Code with PKCE
- OAuth Scopes and Permissions
- OAuth Client Management
- Rate Limiting, Token Management & Performance
- Real-World Integration Patterns & Deployment
- API Endpoints Reference
- Error Handling & Retry Strategy
- Rate Limiting & Throttling
- 12. - CRM Integration & Salesforce
1.- Platform Foundation
Architectural Build Order
This page is the master sequence for building a Genesys Cloud organization from scratch. Each item links to a dedicated reference page in this book. Follow this order — some objects cannot be moved between divisions after creation, and later steps depend on earlier ones being in place.
Phase 1: Global Foundation — The "Containers"
Define the logical and physical structure of the organization before adding any people or telephony.
| Step | Object | Why It Comes First |
|---|---|---|
| 1 | Divisions | Logical partitions for your org (e.g., Monterrey Support, U.S. Sales). Some objects cannot be moved between divisions after creation. |
| 2 | Roles | Review out-of-the-box roles. Copy and customize as needed (e.g., SBC Admin, Read-Only Supervisor). |
| 3 | Locations | Define physical street addresses. Required anchor for Emergency (E911) routing. |
Phase 2: Infrastructure — The "Pipes"
Connect the telephony infrastructure to the org structure you just created.
| Step | Object | Why It Comes Here |
|---|---|---|
| 4 | Sites | Create a Site and link it to a Location from Phase 1. |
| 5 | Edges & Trunks | For BYOC: configure the SIP trunk to your Oracle / AudioCodes SBC. Requires a Site. |
| 6 | Phone Management | Create Base Settings, then individual WebRTC or SIP phone profiles. Requires a Site and Trunk. |
Phase 3: People & Organization — The "Agents"
With infrastructure in place, bring in the staff.
| Step | Object | Notes |
|---|---|---|
| 7 | Users | Create profiles via Manual entry, CSV import, or SCIM. Assign each user a Division, a Phone, and Roles. Users must have at minimum the Employee and User roles to take calls. |
| 8 | Groups | Create General Groups for internal communication. Create Skill Expression Groups for automated expert routing. |
| 9 | Work Teams | Group agents under their specific Supervisors for performance tracking and reporting. |
Phase 4: Contact Center Logic — The "Routing"
Configure the ACD logic — this is where call routing decisions are defined.
| Step | Object | Notes |
|---|---|---|
| 10 | ACD Skills | Define languages and technical skills (e.g., VoIP, SIP, Spanish). Required before queue assignment. |
| 11 | Queues | Create ACD Queues and assign Users and Skills. Requires Skills and Users from previous phases. |
| 12 | Architect Flows | Build the IVR logic. This is where routing decisions are defined — e.g., "If the caller presses 1, send to the Monterrey Support Queue." Requires Queues to exist first. |
Reference Pages
Each item in this build order has a dedicated reference page in this book:
| Phase | Reference Page |
|---|---|
| Phase 1 | Organization Settings · Divisions · Roles & Permissions · Locations |
| Phase 2 | Telephony & Trunk Management · Sites · Phone Management |
| Phase 3 | User Profile Management · Group & Directory Management · Work Teams |
| Phase 4 | Queue & Routing Management · ACD Skills · Architect & Call Flows |
Pages marked with * indicate items with direct dependency on previous steps — do not skip order.
Avaya-to-Genesys Cloud Reference Guide
Audience: Telecom engineers and administrators migrating from Avaya (Aura, CM, Elite) or Aspect environments Purpose: Concept translation, mental model alignment, and key architectural differences
Concept Translation Table
| Avaya / Aspect Concept | Genesys Cloud Equivalent | Key Difference |
|---|---|---|
| VDN / Vector | Architect Flow | Architect is drag-and-drop, visual, and integrates real-time Data Actions (API calls) far more easily than Vectors. No proprietary scripting language required. |
| Hunt Group / Skill Group | Queue | Genesys Queues handle all routing logic. ACD Skills are assigned to agents (users) to determine eligibility, not to the queue directly. |
| BCMS / CMS / IQ | Performance Views | Reporting is real-time, browser-based, and built-in. No separate thick-client reporting software, no ODBC connectors, no CMS server. |
| Stations (96xx / 16xx / J-series) | WebRTC / SIP Phone | Genesys primarily uses WebRTC — the browser IS the phone. Physical SIP desk phones are supported but optional. No station administration required for WebRTC agents. |
| SBC (Session Border Controller) | Edge / BYOC | Genesys Edges perform many SBC-like functions natively. You can still use your existing Oracle, AudioCodes, or Ribbon SBC via BYOC Cloud or BYOC Premises. |
| Class of Restriction (COR) | Roles + Divisions | COR-style access control is handled through RBAC (Roles & Permissions) scoped by Divisions. More granular and auditable than COR. |
| Announcements / VAI | Architect Audio Prompts | Prompts are managed in Architect as TTS or uploaded audio files. No separate announcement board hardware. |
| ECH / UUI (User-to-User Info) | Data Actions / Attributes | Interaction attributes and data passing between flows is done via Data Actions (API calls) or flow variables — not UUI headers. |
| AES / CTI Link | Native API / Data Actions | Genesys has no separate CTI middleware layer. Screen pops, CRM integrations, and real-time data are handled directly via the Genesys Cloud API or built-in integrations. |
| Skill / Expert Agent Selection | ACD Skills + Routing Methods | Same concept — agents have skill proficiency levels (1–5). Queue routing uses Best Available, Most Idle, or Predictive routing to match. |
| VoIP Media Gateway | Edge (Cloud or On-Prem) | The Genesys Edge handles media, SIP signaling, and call recording. It can be a physical appliance, a virtual machine on AWS, or a Genesys-managed cloud Edge. |
| ARS / AAR Routing | Architect Flow + Trunks | Digit analysis and alternate routing are handled in Architect flows, not dial plan tables. Much more flexible — conditional logic, real-time data lookups. |
| Avaya Aura Conferencing | Genesys Cloud Collaborate | Internal conferencing, group chat, and video are handled natively in Genesys Cloud without a separate conferencing platform. |
Architectural Mental Model Shift
From Avaya's Server-Centric Model → Genesys Cloud's API-First Model
Avaya Aura architecture thinking:
PBX (CM) → AES → CTI App → Reporting Server → Admin Client
Genesys Cloud architecture thinking:
Everything is an API call → Browser UI → Cloud-native
There is no "server room" equivalent in Genesys Cloud for most functions. Configuration, routing logic, reporting, and administration are all browser-based and API-driven.
Infrastructure Hierarchy (Telecom Engineer View)
| Genesys Concept | Telecom Equivalent | Purpose |
|---|---|---|
| Location | Physical building / site address | Defines the physical address used for emergency services (ELIN/911) |
| Site | PBX logical partition / tenant | Groups Edges and Phones. Usually one Site = one Location. |
| Edge | Media Gateway + SBC hybrid | Handles audio media, SIP signaling, DTMF, and call recording |
| Trunk | SIP Trunk / T1/PRI circuit | External connection to the PSTN, SBC, or legacy PBX |
Location (Address / ELIN)
└── Site (Logical Hub)
└── Edge (Media + SIP Engine)
└── Trunk (PSTN / SBC / PBX connection)
BYOC Options — For Orgs Keeping Their SBC
Genesys offers two BYOC (Bring Your Own Carrier) models for orgs with existing SBC infrastructure:
| Model | What It Means |
|---|---|
| BYOC Cloud | Your SBC connects to Genesys Cloud via the internet. Genesys manages the Edge in the cloud. |
| BYOC Premises | Your SBC connects to a Genesys Edge device on your premises. More control, more hardware. |
Compatible SBCs include Oracle (ACME Packet), AudioCodes, Ribbon (formerly GENBAND/SONUS), and others.
Routing Logic Translation
Avaya Vector → Genesys Architect Flow
| Vector Step | Architect Equivalent |
|---|---|
goto step if... |
Logical / Decision action |
queue to skill |
Transfer to ACD → Queue |
busy / disconnect |
Disconnect action |
collect digits |
Collect Input action |
announcement |
Play Audio action |
goto vector |
Call Flow action (invoke sub-flow) |
adjunct routing |
Data Action (API call to external system) |
Key Architect Advantage Over Vectors
- Visual drag-and-drop — no scripting syntax to memorize
- Real-time API calls (Data Actions) built-in — no AES/CTI middleware needed
- Version control with Check In/Check Out
- Debug mode with call simulation
- Execution History for post-call flow tracing
Agent Experience Translation
| Avaya Agent Concept | Genesys Cloud Equivalent |
|---|---|
| Agent logged into a station | Agent logged into browser (WebRTC) or registered SIP phone |
| After Call Work (ACW) | After Call Work — configurable per queue (optional, mandatory, timeout) |
| Available / Busy / AUX | On Queue / Busy / Away / Break / etc. (admin-configurable statuses) |
| Skill assignment via CMS | ACD Skills assigned via Admin → People → ACD Skills tab (proficiency 1–5) |
| Supervisor monitoring (silent) | Supervisor joins interaction as silent monitor via Performance Views |
Licensing Model Translation
| Avaya Model | Genesys Cloud Equivalent |
|---|---|
| Port-based licensing | User-based licensing (per named user, per month) |
| Separate reporting license | Included in CX license tiers |
| Separate WFM license | WEM Add-on licenses (CX1 WEM Add-on I/II, or CX2/3 bundled) |
| One-time capex | SaaS subscription (OpEx model) |
Study Scenario
Scenario: A new manager joins the Monterrey Support team. They need to:
- Listen to their team's calls for coaching
- NOT be able to see calls from the U.S. Sales team
- Be able to create new agent screen pop scripts for their team
Genesys Solution:
- Assign the Supervisor role (+ User role) — enables silent monitoring and performance views
- Scope their role to the Monterrey Support Division only — blocks visibility into the U.S. Sales division
- Assign Script Designer permissions or the appropriate Quality/Admin role for script creation — scoped to their division
This mirrors a COR + skill group restriction in Avaya, but is implemented through Roles + Divisions in Genesys.
See Also
- Architectural Build Order — the recommended sequence for building a Genesys Cloud environment
- Telephony & Trunk Management — BYOC Cloud and BYOC Premises configuration
- Architect Overview — Architect flow building vs. Vector scripting
- Roles & Permissions — RBAC model replacing COR-style access
- Divisions & Access Control — scoping access by business unit
Locations & Floor Plans
What Are Locations?
Locations represent physical addresses in Genesys Cloud. They serve two distinct purposes:
- Emergency Services (911/112) — Locations are the source of address data sent to emergency dispatchers when a user dials an emergency number. This is the most critical function.
- User Directory — Locations appear on user profiles and are searchable in the org directory, helping colleagues find where someone is physically based.
Infrastructure Relationship
Locations connect the physical world to Genesys telephony:
Location (Physical Address)
└── Site (Logical Telephony Hub)
└── Edge (Telephony Engine — handles audio, SIP, recording)
└── Trunk (External connection to PSTN / SBC / PBX)
⚠️ A Site must be linked to a Location for emergency (911) routing to work. Without this link, Genesys cannot send the correct address to emergency dispatchers.
Creating a Location
- Admin → Directory → Locations
- Click Add Location
- Fill in:
| Field | Notes |
|---|---|
| Name | Descriptive name (e.g., "Monterrey HQ", "Dallas Office Floor 3") |
| Site Contact | A user in your org who is the primary contact for this building |
| Address | Physical street address — used for emergency services |
| Location Image | Optional building photo — JPEG, PNG, or GIF, max 10MB |
- Click Save
⚠️ Do not put floor numbers in the main address field. Use the dedicated Floors section instead. Mixing floors into the address breaks emergency routing accuracy.
Emergency Services Configuration
This is the highest-priority section for both production deployments and the admin exam.
In the Location Details tab after saving the location:
- Toggle Make this location available for use on sites → On
- Enter the Emergency Number — the callback number sent to emergency services
- Choose the ANI (Automatic Number Identification) logic:
| ANI Option | Behaviour |
|---|---|
| Use as the ANI only if the phone or user doesn't have one | Fallback — uses the location's emergency number only when the individual user has no assigned DID |
| Always use as the ANI | Override — forces this location's number to be sent to dispatchers regardless of the user's personal extension |
- Click Save
Why ANI Matters
In multi-line environments (large offices, contact centers), emergency dispatchers need the building address — not a random agent's personal extension. The ANI setting ensures the dispatcher receives a number that maps to the correct physical location so emergency responders go to the right place.
Genesys uses ELIN (Emergency Location Identification Number) for this. When a user at a Site dials 911, Genesys looks up the Location linked to that Site and sends the configured ELIN/ANI to the dispatcher.
Adding Floors & Floor Plans
Best practice: Add multiple floors to a single Location rather than creating a separate Location per floor.
To add a floor:
- In the location record, scroll to the Floors section
- Click Add Floor
- Click Upload a new floor plan and upload an image of the floor layout
- Click Save
Supported formats: JPEG, PNG, GIF — max 10MB per image
User Pins
Once a floor plan is uploaded, users can drop a pin on the map from their own profile to mark their exact desk location. This is not admin-controlled — it is self-service per user.
Why floor plans matter beyond aesthetics:
- In an emergency, supervisors can see exactly where each agent is sitting
- Speeds up emergency responder navigation in large facilities
- Helps remote managers understand physical seating arrangements
Location Visibility in the Directory
When a location is assigned to a user's profile:
- It appears on their directory profile card
- It is searchable — colleagues can find people by location name
- It displays the floor plan pin if the user has set one
Quick Reference — Key Facts
| Feature | Detail |
|---|---|
| Primary purpose | Emergency routing + user directory |
| Emergency standard | ELIN (Emergency Location Identification Number) |
| Site link required for 911 | Yes — Site must reference the Location |
| Floor plan formats | JPEG, PNG, GIF |
| Floor plan max size | 10MB |
| Floor best practice | Add floors to one Location — do not create a new Location per floor |
| ANI override option | "Always use as the ANI" — forces location number to dispatch |
| User pin | Self-service — users set their own pin on their profile |
See Also
- Architectural Build Order — Locations are created in Phase 1 (Global Foundation) before Sites and Edges
- Telephony & Trunk Management — Sites, Edges, and Trunks that reference Locations
- User Profile Management — where the Location field appears on user profiles
Licensing & Editions
Study Notes
| Topic | Description |
|---|---|
| Licensing Model | Subscription-based per-user licensing structure |
| Edition Types | Premium, Standard, and Partner editions available |
| Seat Management | Active user management and licensing enforcement |
| Compliance | License compliance monitoring and reporting |
| Trial Access | 14-day free trial available for new organizations |
Navigation
Admin → Organization Settings → Licensing & Editions OR Admin → Billing & Subscriptions → Licenses
Edition Overview
Premium Edition
- Full feature set including advanced analytics, workforce optimization, and contact center intelligence
- All modules and integrations available
- Best for enterprise organizations with complex requirements
- Price: Enterprise pricing model
Standard Edition
- Core contact center functionality
- Includes basic call routing, IVR, queuing, and reporting
- Suitable for mid-market organizations
- Reduced analytics and optimization features compared to Premium
Partner Edition
- Designed for partner organizations and resellers
- Limited feature set for specific use cases
- Support for multi-tenant environments
Study Notes - License Types
| License Type | Description | Use Case |
|---|---|---|
| Agent | Full contact center user with all capabilities | Customer service representatives |
| Supervisor | Management and team oversight capabilities | Team leads and supervisors |
| Executive | Reporting and dashboard access | Management and executives |
| Workforce Optimization | Advanced scheduling and forecasting | Workforce planners |
| Customer Insights | Interaction analytics and quality management | Quality assurance teams |
Implementation Guide
Step 1: Assess License Requirements
- Determine number of concurrent agents needed
- Identify required modules (voice, digital, analytics)
- Evaluate feature requirements by department
- Review integration needs
Step 2: Purchase Licenses
- Contact Genesys sales for quote
- Define license quantities per edition
- Establish billing cycle (monthly/annual)
- Set up payment method
Step 3: Activate & Manage Licenses
- Log in to Admin section
- Navigate to Organization Settings
- Add users to appropriate license tiers
- Assign modules and capabilities
- Monitor license consumption
Step 4: Monitor & Optimize
- Review monthly license usage reports
- Adjust licenses based on demand
- Reassign licenses to active users only
- Track compliance status
How to Implement
| Phase | Description |
|---|---|
| Planning | Audit current user needs and forecast growth |
| Procurement | Work with sales to select editions and add-ons |
| Deployment | Activate licenses and assign to users |
| Management | Monitor usage and adjust as needed |
| Optimization | Review quarterly and optimize allocations |
Licensing Architecture Diagram
Organization
↓
Subscription (Edition)
├── Premium
├── Standard
└── Partner
↓
License Pool
├── Agent Licenses
├── Supervisor Licenses
├── Executive Licenses
└── Add-on Modules
↓
User Assignment
├── Active Users
├── Inactive Users
└── License Status
License Features by Edition
Premium Edition Features
Core Platform
├── Voice (Inbound/Outbound)
├── Digital Channels (Chat, Email, Social)
├── Contact Center Intelligence
└── Advanced Routing
↓
Analytics & Reporting
├── Real-time Dashboards
├── Historical Reports
├── Custom Reports
└── Workforce Analytics
↓
Optimization
├── Workforce Management
├── Quality Management
├── Compliance Recording
└── Performance Analytics
↓
Integrations
├── CRM Integrations
├── Third-party APIs
├── Custom Integrations
└── Marketplace Apps
Standard Edition Features
Core Platform
├── Voice (Inbound/Outbound)
├── Digital Channels (Chat, Email)
├── Basic Routing
└── IVR / Menu Systems
↓
Analytics & Reporting
├── Basic Dashboards
├── Historical Reports
└── Queue Reports
↓
Limited Modules
├── Basic Quality Management
├── Recording
└── Basic Integrations
User License Assignments
Agent License (Most Common)
- Seats in queues
- Handle inbound/outbound contacts
- Access to omnichannel interactions
- Limited reporting access
- Cost: Standard per-seat cost
Supervisor License
- Team management capabilities
- Agent monitoring
- Performance reporting
- Coaching tools
- Cost: Premium over agent licenses
Executive License
- Dashboard and analytics access
- No agent seat required
- Read-only access to systems
- Strategic reporting
- Cost: Lower than agent licenses
Real Flow Scenario: New User License Assignment
New Hire Onboarding
↓
Determine Role (Agent/Supervisor/Executive)
↓
Check Available Licenses
↓
Assign License in Admin
↓
Activate User Account
↓
Grant Appropriate Permissions
↓
User Can Access System
Usage Scenarios
| Scenario | Solution |
|---|---|
| Company growing from 50 to 100 agents | Purchase additional Agent licenses and upgrade to Premium |
| Need advanced analytics | Add-on Workforce Optimization module |
| Support for multiple customer channels | Include digital channel add-ons (Chat, Email, Social) |
| Multi-site organization | Centralized licensing with site-based allocation |
| Seasonal staffing | Use grace period for temporary license overages |
License Management Checklist
| Task | Frequency | Owner |
|---|---|---|
| Review license utilization | Monthly | IT/Admin |
| Update user counts | As needed | HR/Admin |
| Check compliance status | Quarterly | Compliance |
| Audit inactive users | Monthly | Admin |
| Plan for growth | Quarterly | Management |
| Review billing | Monthly | Finance |
Best Practices
License Optimization
- Deactivate inactive users - Remove licenses from users not actively using the system
- Right-size editions - Don't over-provision when Standard meets requirements
- Plan for growth - Purchase licenses with 10-15% buffer for growth
- Monitor grace periods - Know overage policies during scaling
User Management
- Clean up regularly - Remove licenses from terminated employees immediately
- Use role-based assignments - Assign appropriate license tier to roles
- Track license inventory - Maintain spreadsheet of assignments
- Document changes - Keep audit trail of license modifications
Compliance & Reporting
- Enable audit logs - Track all license changes
- Monthly reviews - Generate usage reports
- Forecast needs - Plan for future requirements
- Coordinate with finance - Align licensing budget with subscriptions
Common Issues & Resolutions
| Issue | Cause | Resolution |
|---|---|---|
| Users cannot log in | License limit reached | Purchase additional licenses or deactivate unused accounts |
| Missing features in user account | Wrong edition assigned | Upgrade user to Premium edition |
| Excessive billing costs | Inactive users still licensed | Implement user deactivation process |
| License mismatch | No license assignment | Assign appropriate license tier to user |
| Add-on unavailable | Not included in edition | Purchase add-on module or upgrade edition |
Naming Convention for License Groups
<Department>_<Role>_LicenseGroup
Examples:
Support_Agent_LicenseGroupSales_Supervisor_LicenseGroupExecutive_Analytics_LicenseGroupWorkforce_Optimization_LicenseGroup
Add-on Modules & Pricing
| Module | Description | Best For |
|---|---|---|
| Workforce Optimization | Advanced scheduling, forecasting, analytics | Large contact centers |
| Quality Management | Call recording, evaluation, coaching | Quality assurance teams |
| Customer Insights | AI-powered interaction analytics | Compliance-focused orgs |
| Advanced Analytics | Custom dashboards and reporting | Data-driven organizations |
| Chat & Messaging | Digital channel support | Omnichannel centers |
| Social Media | Social channel integration | Customer engagement teams |
Licensing Compliance Monitoring
Key Metrics to Track
- Active licenses vs. purchased - Ensure no overages
- License utilization rate - Target 80-95% utilization
- Cost per seat - Monitor per-user cost trends
- Inactive user percentage - Flag unused licenses
- Module adoption - Track add-on usage and ROI
Compliance Reports Available
- License status report
- User assignment report
- Feature utilization report
- Grace period usage
- Billing reconciliation report
License Allocation by Department Example
Organization: TechCorp (500 users)
Premium Edition: 400 seats
├── Support Department (150 agents)
├── Sales Department (120 agents)
├── Back-office (80 supervisors/executives)
└── Operations (50 agents)
Standard Edition: 100 seats
├── Part-time support (60 agents)
└── Contractors (40 agents)
Add-ons by Department:
├── Workforce Optimization: Support + Sales (270 users)
├── Quality Management: Support + Sales QA (20 users)
└── Advanced Analytics: Management (15 users)
Trial Period & Onboarding
14-Day Free Trial
- Full access to selected features
- Up to 50 concurrent users
- All core modules included
- No credit card required
- Automatic conversion to paid plan or expiration
Trial Setup Steps
- Visit Genesys Cloud website
- Click "Start Free Trial"
- Enter organization details
- Verify email
- Set up initial users
- Explore features
- Convert to paid plan before day 14
Interview Cheat Sheet
| Question | Answer |
|---|---|
| What are the main Genesys PureCloud editions? | Premium, Standard, and Partner |
| Where do you manage licenses? | Admin → Organization Settings → Licensing & Editions |
| What is an Agent license used for? | Full contact center functionality for customer service reps |
| How do you handle license overages? | Grace period available; must purchase additional licenses |
| What should you do with inactive users? | Deactivate them to free up licenses for active users |
| Can you mix editions in one organization? | Yes, different users can have different edition licenses |
| What's the most cost-effective way to grow? | Right-size editions, avoid over-provisioning |
| How often should you review licenses? | Monthly for usage, Quarterly for compliance |
| What's the difference between Agent and Supervisor licenses? | Supervisor has team management, analytics, and coaching capabilities |
| What add-ons provide the most ROI? | Workforce Optimization and Quality Management for large centers |
Key Takeaways
- Subscription Model - Genesys PureCloud uses subscription-based licensing per user
- Three Main Editions - Premium (full features), Standard (core features), Partner (limited)
- License Types Vary - Agent, Supervisor, Executive with different capabilities and costs
- Active Management Required - Deactivate unused users to control costs
- Compliance Tracking - Monitor usage and ensure license compliance monthly
- Add-on Flexibility - Enhance core editions with specialized modules as needed
- Right-sizing Critical - Match edition to organizational needs to optimize ROI
- Grace Periods Exist - Temporary overages allowed but should be resolved quickly
- Audit Trail Important - Track all license changes for compliance
- Forecast Growth - Plan ahead for scaling to avoid service interruptions
Additional Resources
Official Documentation Links
- Genesys Cloud Licensing Guide: https://help.genesys.com/genesyscloud/current/en-us/LicensingEditions.html
- Admin Guide: https://help.genesys.com/genesyscloud/current/en-us/Admin/Licensing.html
- Billing & Subscriptions: https://help.genesys.com/genesyscloud/current/en-us/Billing.html
Support Contacts
- Genesys Sales: sales@genesys.com
- Genesys Support: https://support.genesys.com
- Community Forums: https://community.genesys.com
Document Version Info
Last Updated: March 2026
Source: Genesys PureCloud Official Documentation
Version: 1.0
2.- Organization Settings
Global Settings
Global Settings control the foundational behavior of your Genesys Cloud organization — how the platform identifies users, what language and region it operates in, and where internal issues are reported. These settings are configured under Admin → Account Settings → Organization Settings → Settings.
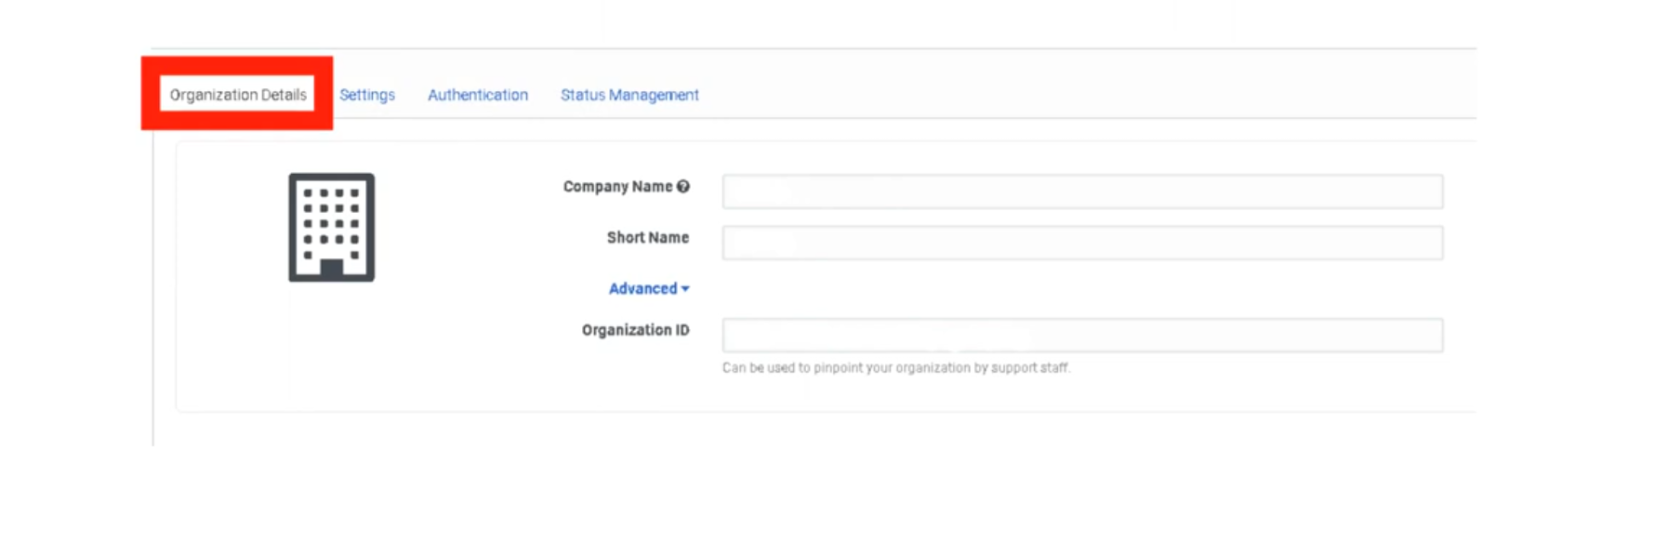
Organization Details
These fields identify your specific Genesys Cloud instance. Most are view-only after provisioning. Administration
| Setting | Description | Editable? |
|---|---|---|
| Organization Name | The display name of your org shown across the platform. | ✅ Yes |
| Organization ID | A unique, system-generated identifier for your cloud instance. Used in API calls and support tickets. | ❌ No |
| Short Name | A URL-safe identifier used in your Genesys Cloud login URL (e.g. yourcompany.mypurecloud.com). |
❌ No |
| Default Site | The telephony site assigned as the default for new users. | ✅ Yes |
📌 Note: If you are unsure of your Organization Short Name, navigate to Admin → Account Settings → Organization Settings. You will need it when configuring BYOC trunk integrations and SSO providers.
Geolocation Detection
| Setting | Description |
|---|---|
| Geolocation Detection | When enabled, Genesys Cloud automatically detects and displays user physical locations on the directory and presence map. Can be toggled off for privacy or compliance reasons. |
Default: On. Toggle off under Admin → Account Settings → Organization Settings → Settings → Turn off location detection.
Default Language & Country Code
These settings establish the regional baseline for the entire organization. They affect system-generated emails and phone number formatting across the platform.
| Setting | Description | Impact |
|---|---|---|
| Default Language | Sets the language used for system-generated emails such as user invitations and password reset messages. | System emails, platform UI default for new users |
| Default Country Code | Sets the default international dialing prefix for phone number formatting (e.g., +1 for United States, +52 for Mexico). | Phone number display, E.164 formatting, DID assignment |
📌 Important: The Default Country Code does not restrict which countries agents can dial. It only determines how phone numbers without an explicit country prefix are interpreted and formatted.
Issue Submission Destination
| Setting | Description |
|---|---|
| Issue Submission Destination | Defines where feedback and issue reports submitted by users through the in-app Help → Report a Problem feature are sent. Can be directed to an internal email address or ticketing system instead of Genesys Support. |
Useful for organizations that want to triage user-reported issues internally before escalating to Genesys Care.
Invite Links
| Setting | Description |
|---|---|
| Invite Link Configuration | Controls how new user invitation emails are generated and whether invitation links expire. Administrators can configure link behavior when onboarding users manually or via CSV import. |
Free Seating
| Setting | Description |
|---|---|
| Free Seating | When enabled, agents are not assigned a fixed physical phone. Instead, they log in and the system dynamically assigns them to whatever phone they are using. Reduces the need to pre-assign individual phone profiles to every user. |
📌 Note: Free Seating must be enabled at the org level before it can be applied to individual users. Requires compatible phone base settings.
Voicemail Settings
These settings apply to all users in the organization unless overridden at the user level.
| Setting | Description | Default |
|---|---|---|
| Voicemail PIN | Requires users to set and enter a PIN to access their voicemail. Can be disabled org-wide if your security policy does not require it. | On |
| Voicemail Timeout | Number of seconds a call rings before being forwarded to voicemail. | Configurable |
| Maximum Voicemail Length | Sets the maximum duration (in seconds) of a voicemail message a caller can leave. | Configurable |
| Voicemail Transcription | When enabled, Genesys Cloud transcribes voicemail audio to text and includes it in email notifications. | Off |
| Voicemail Notifications | Sends an email notification to the user when a new voicemail is received. | Configurable |
| Allow PII in Voicemail Email Notifications | When enabled, the voicemail email notification includes the caller's phone number and name. Disable for environments with strict PII handling requirements. | Off |
Default Text-to-Speech (TTS) Engine
| Setting | Description |
|---|---|
| Default TTS Engine | Sets the organization-wide TTS engine used in Architect flows when no specific engine is defined at the flow level. Options include Genesys TTS, Google TTS, and Microsoft Azure TTS (the latter two require AppFoundry integration). |
📌 Note (March 2026): Genesys plans to end native Enhanced TTS support for select Google and Microsoft voices on August 5, 2026. After that date, those voices require a third-party TTS integration via AppFoundry under the BYOT-A billing model. Plan accordingly if your flows use Google Standard or Microsoft voices.
Summary — What Lives Here vs. Other Pages
| Setting Area | This Page | Other Page |
|---|---|---|
| Org ID, name, short name | ✅ | — |
| Geolocation | ✅ | — |
| Default language / country code | ✅ | — |
| Invite links / free seating | ✅ | → Onboarding & Access |
| Voicemail settings | ✅ | → Onboarding & Access (detail) |
| Default TTS engine | ✅ | → Architect & Call Flows (usage) |
| Security & compliance | — | → Security & Compliance |
| Password policy / SSO / MFA | — | → Security & Compliance |
| Secondary statuses | — | → Status & Presence Management |
| Routing behaviors | — | → Technical Routing Behaviours |
| Role backfill / division-aware roles | — | → Security & Compliance |
| Execution data retention | — | → Technical Routing Behaviours |

Last verified against Genesys Cloud Resource Center – March 2026
Onboarding & Access
These settings control how new users are introduced to the platform, what email domains are permitted to join the organization, and how sessions are managed for security and compliance. Configured under Admin → Account Settings → Organization Settings → Settings → Onboarding People and Telephony Settings.
Navigation Path
| Step | Path |
|---|---|
| 1 | Click Admin |
| 2 | Under Account Settings, click Organization Settings |
| 3 | Click the Settings tab |
| 4 | Locate the Onboarding People and Telephony Settings section |
📌 Authentication settings (Password Policy, SSO, MFA) are on the Authentication tab, not the Settings tab. See the Security & Compliance page.
1. Invitation Settings
Auto Invite (Automatically Send Welcome Email)
| State | Behavior |
|---|---|
| Enabled | When a new user is created (manually or via bulk import), Genesys Cloud immediately sends a Welcome email containing a link to set their password. |
| Disabled | Users are created silently with no email sent. Admins must manually trigger invitations later from the People list. |
When to disable Auto Invite:
Useful when pre-loading a large batch of users (e.g., 100 agents before a go-live) and you don't want them logging in until a specific training date. Create all users, then bulk-send invitations when ready.
⚠️ Do not send manual email invitations to users who already received an automatic invite — they will receive duplicate emails.
Invitation Link Expiration
| Item | Detail |
|---|---|
| Expiry period | 30 days from the date the invitation is sent |
| What happens after expiry | The password-set link in the email becomes invalid |
| How to recover | Admin must go to Admin → People & Permissions → People, find the user, and click Resend Invite |
| Status check | Use the Welcome Sent column on the Manage People page to verify whether an invite has been sent to a user |
⚠️ Note: The invitation link expires after 30 days, not 48 hours.
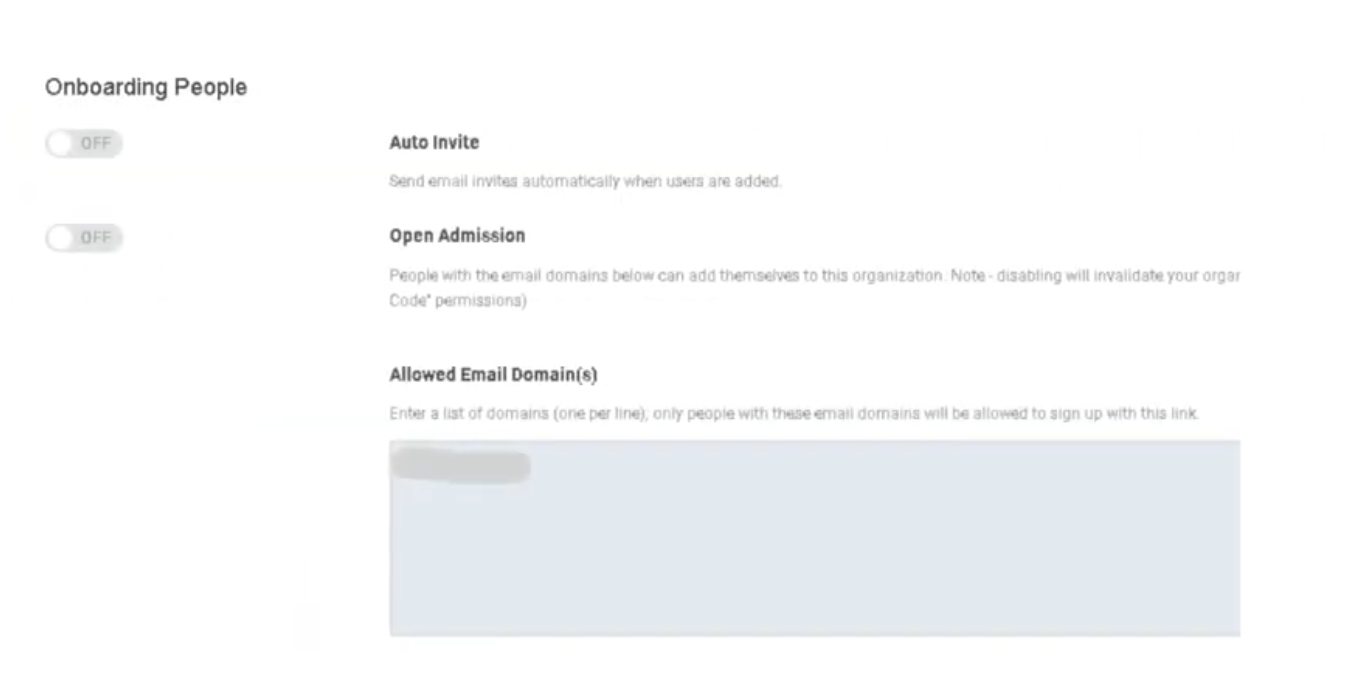
Open Admission (Self-Service Invite Link)
| Setting | Description |
|---|---|
| Open Admission / Invite Link | Generates a shareable link that allows people to add themselves to the organization. Anyone with the link can create an account (subject to Allowed Domains restrictions). |
| Disable to invalidate | Toggling this off immediately invalidates any previously shared link. Useful for closing off self-registration after an onboarding event. |
📌 Post the invite link on an internal SharePoint or intranet during structured onboarding, then disable it once all expected users have joined.
2. Allowed Email Domains
| Setting | Description |
|---|---|
| Allowed Email Domain(s) | A whitelist of email domains permitted to create accounts in the organization. Only users with a matching domain can be added or self-register. |
Example:
| Configured Domain | Result |
|---|---|
@telecom-corp.com |
✅ Users with @telecom-corp.com can be added |
@gmail.com |
❌ Blocked — cannot create an account |
@outlook.com |
❌ Blocked — cannot create an account |
⚠️ Important distinction: This setting controls who can join the org. It is not the same as the Contact Center Email Domain Allowlist, which controls outbound email routing. These are two different settings in two different locations.
3. Free Seating
| Setting | Description |
|---|---|
| Free Seating | When enabled, a station (WebRTC or physical phone) is released once an agent goes offline, making it available for the next user who logs in to that workstation. |
📌 Free Seating must be enabled here at the org level and configured on compatible phone base settings before it applies to individual users. See Technical & Routing Behaviours for how this interacts with station assignment logic.
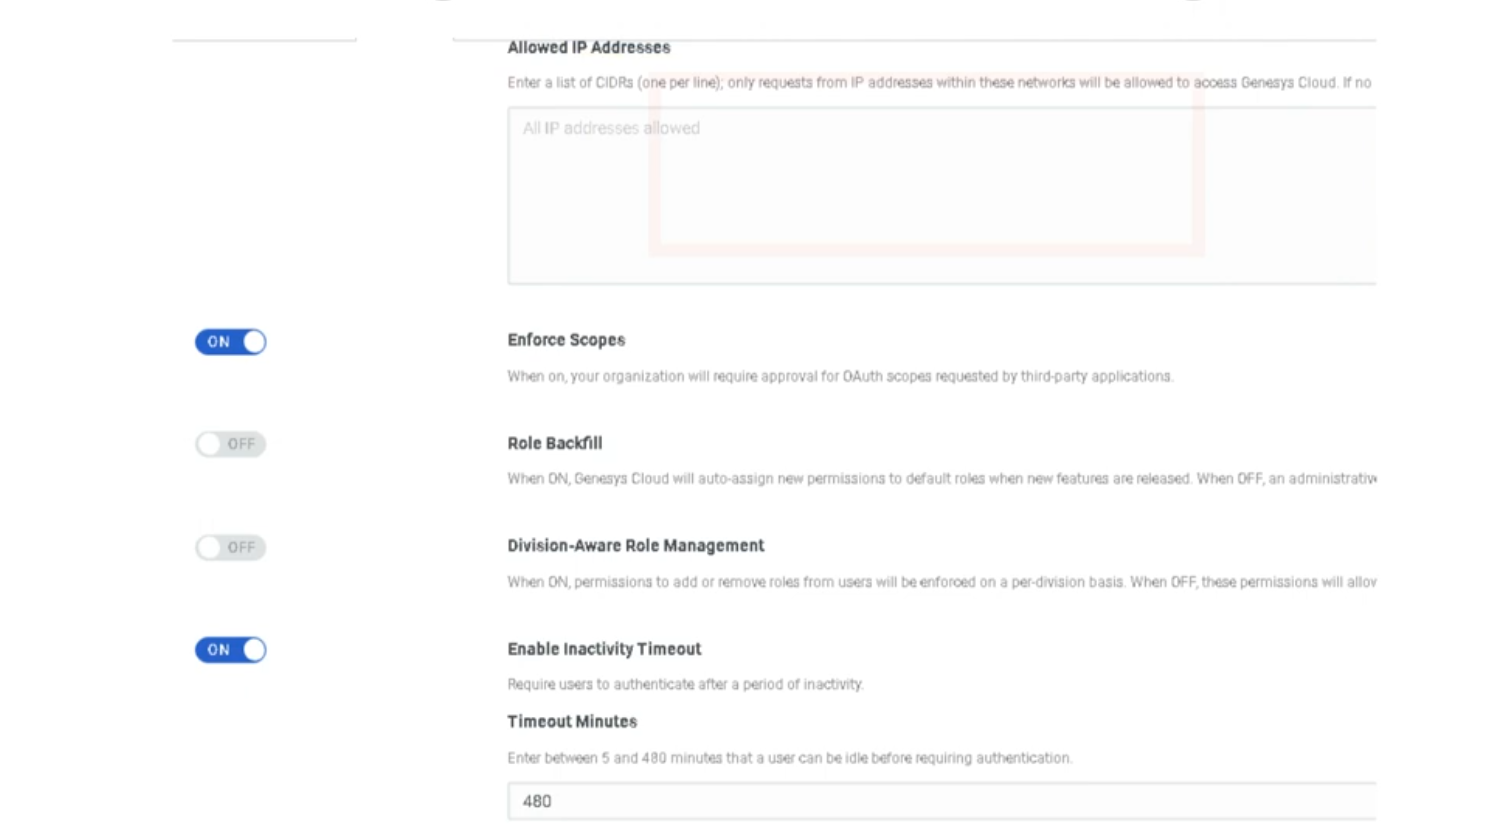
4. Inactivity Timeout
| Setting | Description |
|---|---|
| Inactivity Timeout | Automatically logs a user out of Genesys Cloud after a set period of idle time with no user input detected. |
Configuration range:
| Limit | Value |
|---|---|
| Minimum | 5 minutes |
| Maximum | 8 hours |
| HIPAA orgs | Mandatory maximum of 15 minutes — enforced even if the toggle is off |
Behavior notes:
| Scenario | Behavior |
|---|---|
| User is actively clicking/typing | Timer resets — no logout |
| Browser tab is open but no interaction | Timer counts down |
| Mobile app users | Not recommended — mobile apps handle session state differently and unexpected logouts may occur |
| Specific API calls | Certain API calls can be excluded from resetting the timer (configured separately) |
📌 License management tip: If agents leave browsers open overnight, an open session may still consume a license seat depending on your billing model. Inactivity Timeout closes those sessions automatically.
Onboarding Checklist
| Step | Setting | Recommended Action |
|---|---|---|
| 1 | Allowed Email Domains | Set to your corporate domain(s) before any users are added |
| 2 | Auto Invite | Decide enabled vs. disabled based on your go-live timeline |
| 3 | Open Admission Link | Enable during structured onboarding, disable afterward |
| 4 | Inactivity Timeout | Align with corporate security policy (typically 30–60 min); mandatory 15 min for HIPAA |
| 5 | Free Seating | Enable if shift workers share workstations |
| 6 | SSO / MFA | See Security & Compliance page |
Last verified against Genesys Cloud Resource Center – March 2026
Security & Compliance
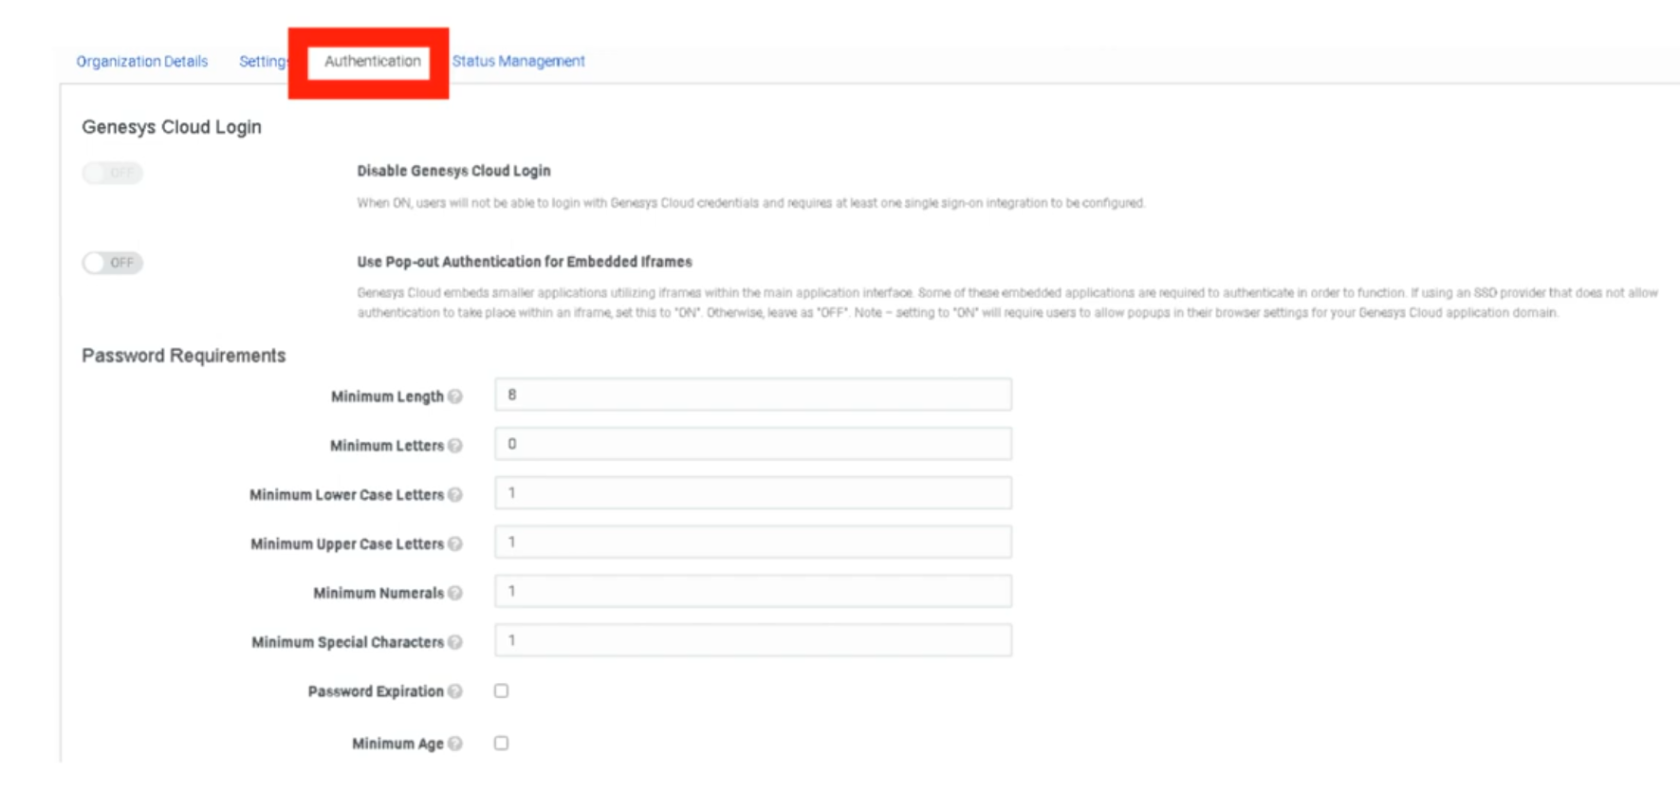
These settings govern how Genesys Cloud protects sensitive data, enforces compliance with regulatory standards, and controls access and authentication across the organization. Configured under Admin → Account Settings → Organization Settings → Settings → Security & Compliance and the Authentication tab.
Navigation Path
| Step | Path |
|---|---|
| 1 | Click Admin |
| 2 | Under Account Settings, click Organization Settings |
| 3 | Click the Settings tab → Security & Compliance section |
| 4 | For authentication settings → click the Authentication tab |
1. Regulatory Compliance Modes
These modes are not self-service toggles — they must be enabled by contacting Genesys Cloud Customer Care. Once enabled, they impose specific platform behaviors and restrictions.
HIPAA Compliance
| Item | Detail |
|---|---|
| What it does | Secures Protected Health Information (PHI) handled in the contact center. Imposes specific restrictions on data handling, recording, and storage. |
| Inactivity timeout impact | HIPAA organizations have a mandatory 15-minute maximum inactivity timeout, even if the inactivity timeout is toggled off. |
| How to enable | You must first obtain a Business Associate Agreement (BAA) from Genesys. Contact dataprivacy@genesys.com. Once you have a BAA, contact Genesys Cloud Customer Care to enable HIPAA mode. |
| Regions | Americas (HIPAA, HITRUST) |
PCI DSS Compliance
| Item | Detail |
|---|---|
| What it does | Enables PCI DSS-compliant handling of payment card data. Disables DTMF logging and media capture by the Edge to prevent cardholder data from being recorded. |
| Compliance level | Genesys Cloud is a Level 1 PCI DSS Service Provider assessed under PCI DSS version 4.0.1. |
| How to enable | Contact Genesys Cloud Customer Care. PCI DSS cannot be self-enabled. |
| Important | Only Genesys Cloud features noted in the Report on Compliance as PCI-certified can be used to process, transmit, or store credit card information. |
PCI DSS deployment options:
| Model | PCI Compliant? |
|---|---|
| Genesys Cloud Voice | ✅ Yes |
| BYOC Cloud | ✅ Yes |
| BYOC Premises | ✅ Yes |
PCI DSS transaction handling options:
| Method | Description |
|---|---|
| Secure Pause | Agent manually initiates a pause in recording before collecting card data. Only Secure Pause and Secure Call Flows are validated as Level 1 PCI DSS compliant by an external Qualified Security Assessor. |
| Secure Call Flow | Architect flow transfers the call to a secure flow for card data collection, keeping the agent out of scope. |
⚠️ Genesys recommends Secure Pause or Secure Call Flows as the first line of defense for PCI DSS. Automatic redaction (below) is best-effort only and is not a substitute for PCI DSS compliance.
2. Data Redaction
Sensitive Data Redaction
| Setting | Description |
|---|---|
| Sensitive Data Redaction for Payment Cards | Automatically redacts PCI entities (credit card numbers, CVVs) from recordings and voice transcriptions on a best-effort basis. |
| Sensitive Data Redaction for Personal Information | Automatically redacts personal information entities (SSNs, dates of birth, etc.) from recordings and voice transcriptions on a best-effort basis. |
Key limitations:
| Item | Detail |
|---|---|
| Availability | Only functions if Speech or Text Analytics is enabled for the interaction |
| Best-effort | Not a guaranteed redaction — not a substitute for Secure Pause or Secure Call Flows for PCI compliance |
| Override | Users with the Recording > Recording > ViewSensitiveData permission can still access the original unredacted recording |
Admin → Account Settings → Organization Settings → Settings → Security & Compliance → Sensitive Data Redaction
3. Access & Authentication Controls
IP Address Allowlist
| Setting | Description |
|---|---|
| IP Address Allowlist | Restricts Genesys Cloud access to specific IP addresses or CIDR ranges. Useful for enforcing that agents can only log in from corporate networks or VPNs. |
⚠️ Caution: Before adding IP restrictions, ensure your own admin IP address is included. Locking yourself out requires contacting Genesys Care.
Division-Aware Role Management
| Setting | Description |
|---|---|
| Division-Aware Role Management | When enabled, role assignments are scoped to specific divisions. A user assigned the Supervisor role in the Monterrey division can only supervise agents and resources in that division. |
📌 This is a significant architectural decision. Once enabled, all role assignments must be made with a division context. Coordinate with your access control design before enabling.
Automatic Role Permission Backfill
| Setting | Description |
|---|---|
| Automatically backfill roles with new permissions | When enabled, Genesys Cloud automatically adds new feature permissions to existing roles as new features are released. When disabled, administrators must manually review and assign new permissions as new features roll out. |
Recommendation:
| Organization Type | Recommended Setting |
|---|---|
| Small org, wants to stay current automatically | Enabled |
| Regulated org with strict change control | Disabled — review and approve permissions manually |
OAuth Scope Enforcement
| Setting | Description |
|---|---|
| Enable OAuth Scope Enforcement | Restricts what API integrations can access based on the OAuth scopes explicitly granted to them. Prevents integrations from accessing resources beyond their declared scope. |
4. Authentication Settings
Configured under the Authentication tab of Organization Settings, not the Settings tab.
Password Policy
| Setting | Description |
|---|---|
| Minimum Length | Minimum number of characters required |
| Uppercase Required | Forces at least one uppercase letter |
| Numbers Required | Forces at least one numeric character |
| Special Characters Required | Forces at least one special character |
| Password History | Prevents reuse of previous passwords |
Single Sign-On (SSO)
| Setting | Description |
|---|---|
| SSO Integration | Configure Genesys Cloud to authenticate through an external identity provider such as Azure AD, Okta, or Ping Identity. |
| SSO Only Mode | Forces all users to authenticate exclusively through SSO. Disables native Genesys username/password login entirely. |
📌 Always test SSO with a non-admin account before enabling SSO Only mode. If SSO is misconfigured and SSO Only is enabled, admin accounts may be locked out.
Multi-Factor Authentication (MFA)
| Setting | Description |
|---|---|
| MFA | Requires a second verification factor (e.g., authenticator app, SMS code) at login in addition to the password. |
⚠️ Mandate (March 2026): Genesys has mandated MFA for all administrator accounts with elevated permissions that do not authenticate through SSO. SSO accounts are exempt as SSO providers already enforce MFA. Pure username/password admin logins without MFA are no longer permitted as of this date.
Inactivity Timeout (cross-reference)
Inactivity Timeout is located in the Security & Compliance section of the Settings tab but is documented on the Onboarding & Access page since it also applies to general session management.
| Key detail | Value |
|---|---|
| Range | 5 minutes – 8 hours |
| HIPAA orgs | Mandatory 15-minute maximum |
5. Embedding & Anti-Clickjacking
| Setting | Description |
|---|---|
| Manage Genesys Cloud Embedding | Prevents external websites from embedding your Genesys Cloud instance in an iframe. Combats clickjacking attacks where a malicious site overlays your org's UI to capture credentials or actions. |
⚠️ Warning: Enabling this feature will break any Genesys Cloud integrations, apps, or embeddable framework implementations whose domain is not listed in the Allowed Embeddable Domains list. Read the Genesys embedding documentation and configure allowed domains before enabling this setting.
6. Supported Compliance Standards Reference
| Standard | Region | How to Enable |
|---|---|---|
| HIPAA | Americas | Contact Genesys Care + BAA required |
| HITRUST | Americas | Contact Genesys Care |
| PCI DSS | Global | Contact Genesys Care |
| GDPR | EMEA / Global | No configuration needed — applies to all AWS regions |
| HDS | France | Contact Genesys Care |
| FedRAMP (Moderate) | US Government | Contact Genesys Care |
| SOC 1 & SOC 2 Type 2 | Global | Attestation available under NDA |
| ISO 27001 / 27017 / 27018 | Global | Certifications maintained by Genesys |
| CCPA | California / Americas | No configuration needed |
| LGPD | Brazil | No configuration needed |
| IRAP | Australia | Contact Genesys Care |

Last verified against Genesys Cloud Resource Center – March 2026
Status & Presence Management
Status and Presence are the "line state" indicators that tell the ACD engine whether an agent is available to receive an interaction. While primary statuses are system-defined and cannot be deleted, administrators have significant control over secondary statuses for granular workforce tracking and reporting. Configured under Admin → Account Settings → Organization Settings → Status Management.
Navigation Path
| Step | Path |
|---|---|
| 1 | Click Admin |
| 2 | Under Account Settings, click Organization Settings |
| 3 | Click the Status Management tab |
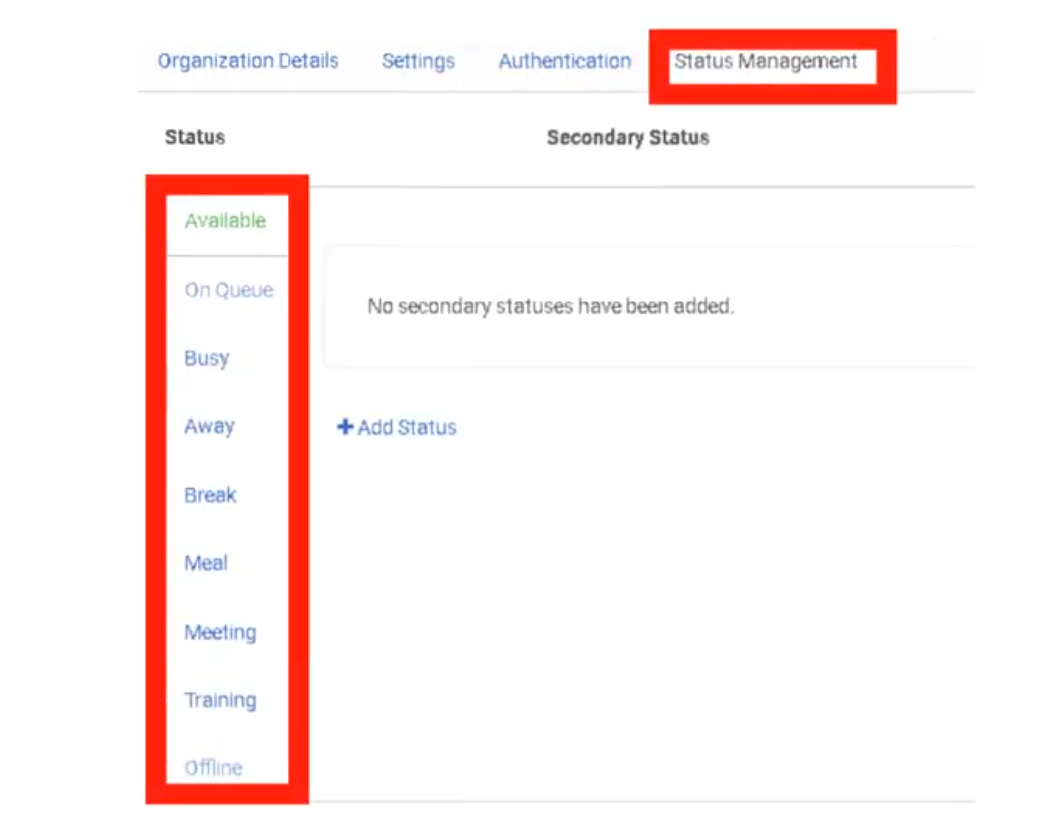
Required permission: Presence Definition > Edit
1. Status Hierarchy: Primary vs. Secondary
Genesys Cloud uses a two-level hierarchy for presence management.
Primary Statuses (System-Defined)
Primary statuses are hard-coded by Genesys Cloud and cannot be created, renamed, or deleted. They define the base routing behavior of the agent.
| Primary Status | ACD Behavior | Calls Accepted? |
|---|---|---|
| On Queue | Agent is active and available to receive ACD interactions | ✅ Yes |
| Available | Agent is logged in but not On Queue | ❌ No (non-ACD only) |
| Busy | Agent is occupied | ❌ No |
| Away | Agent is temporarily unavailable | ❌ No |
| Break | Agent is on a break | ❌ No |
| Meal | Agent is at lunch/meal | ❌ No |
| Meeting | Agent is in a meeting | ❌ No |
| Training | Agent is in training | ❌ No |
| Idle | Agent is logged in but idle | ❌ No |
| Offline | Agent is logged out | ❌ No |
Secondary Statuses (Admin-Defined)
Secondary statuses provide the "why" behind a primary status. They are created and managed by administrators and provide context for workforce reporting and management.
| Item | Detail |
|---|---|
| Maximum active secondary statuses | Up to 30 per primary status |
| Deactivated statuses | Do not count toward the 30-status limit. Can be reactivated later. |
| Required permission | Presence Definition > Edit + Admin role |
Examples:
| Primary Status | Secondary Status Examples |
|---|---|
| Away | Away – Lunch, Away – Break, Away – Team Meeting, Away – Training |
| Busy | Busy – Administration, Busy – After Call Work, Busy – Documentation |
| On Queue | On Queue – Inbound, On Queue – Outbound |
2. Configuration & Limits
| Limit | Value |
|---|---|
| Active secondary statuses per primary | 30 |
| Deactivated statuses | Unlimited (do not count toward limit) |
| Divisions per secondary status | One or more — can be restricted to specific divisions |
Status management actions available:
| Action | Description |
|---|---|
| Add | Create a new secondary status for a primary status |
| Deactivate | Remove a status from agent view without deleting it permanently |
| Reactivate | Restore a previously deactivated status |
| Translate | Add localized labels for multi-language organizations |
| Assign to Division | Restrict visibility of a status to specific divisions |
3. Division Assignment (Contextual Presence)
Secondary statuses can be scoped to specific divisions, so agents only see the status options relevant to their team.
| Without Division Assignment | With Division Assignment |
|---|---|
| All 30 statuses visible to all agents org-wide | Each division sees only its relevant statuses |
| Agents may be overwhelmed by irrelevant options | Cleaner UI, less agent confusion |
| Reporting is org-wide only | Reporting can be filtered by division-specific statuses |
Example use case:
| Division | Custom Statuses |
|---|---|
| Telecommunications | Away – SBC Maintenance, Away – Network Incident |
| Sales | Away – Prospect Call, Away – Demo |
| HR | Away – Interview, Away – Onboarding Session |
| All divisions | Away – Lunch, Away – Break (shared) |
4. Translations for Global Teams
For organizations with agents across multiple countries, secondary status labels can be translated into different languages. Each translation maps to the same underlying status for reporting purposes.
| Language | Status Label | Maps To |
|---|---|---|
| English | Away – Lunch | Away |
| Spanish (Mexico) | Ausente – Comida | Away |
| Polish | Nieobecny – Obiad | Away |
📌 Translations ensure that agents see status labels in their native language while supervisors and analytics always report against the same underlying primary/secondary status regardless of the language displayed to the agent.
5. Reporting & Workforce Management
Presence data is one of the primary inputs to Workforce Management (WFM) and real-time supervision.
Real-Time Views
Supervisors can monitor agent status in the Agent Activity view and Queue Activity view:
| View | What You Can See |
|---|---|
| Agent Activity | Current status, time in status, queue assignment, recent interactions |
| Queue Activity | Agents on queue, agents available, agents in each secondary status |
Historical Reporting
| Report Use | Description |
|---|---|
| Status Duration | Track exact time spent in each primary and secondary status per agent |
| Adherence Tracking | Compare scheduled status (from WFM) against actual status in real time |
| Team Trends | Identify if a team is spending excessive time in non-productive statuses (e.g., Busy – Administration) |
| Secondary Status Breakdown | Drill into Away – Lunch vs. Away – Meeting distributions across shifts |
6. Presence Restore on Reconnect
| Setting | Description |
|---|---|
| Restore previous presence for agents who disconnect and reconnect | When enabled, if an agent loses their connection and reconnects, Genesys Cloud automatically restores their presence to the status they had before disconnecting instead of defaulting to Offline or Away. |
📌 Prevents agents from inadvertently going offline in reporting due to brief connectivity drops, which would otherwise affect adherence scores and queue staffing.
Summary Reference
| Feature | Location | Key Limit |
|---|---|---|
| Secondary status creation | Admin → Organization Settings → Status Management | 30 active per primary |
| Division assignment | Status Management → Edit status | Per status |
| Translations | Status Management → Edit status → Translations | Per status per language |
| Deactivation / Reactivation | Status Management → Edit status | Deactivated don't count toward 30 |
| Presence restore | Organization Settings → Settings → Contact Center | Toggle on/off |
Last verified against Genesys Cloud Resource Center – March 2026
Technical & Routing Behaviours
These settings control low-level ACD engine behavior — how agent stations are managed, how skills travel with interactions during transfers, how agents are scored in queue, and global media defaults. Configured under Admin → Account Settings → Organization Settings → Settings → Contact Center Settings.
Navigation Path
| Step | Path |
|---|---|
| 1 | Click Admin |
| 2 | Under Account Settings, click Organization Settings |
| 3 | Click the Settings tab |
| 4 | Locate the Contact Center Settings section |
1. Station & Presence Behavior
Free Seating
| Setting | Description |
|---|---|
| Free Seating | When enabled, a station (WebRTC or physical phone) is released once an agent goes offline, making it available for the next user who logs in. When disabled, stations remain assigned to specific users and are not shared. |
Use cases:
| Scenario | Recommended Setting |
|---|---|
| 24/7 contact center with shift rotations sharing physical workstations | Enabled |
| Dedicated desks — one agent per station permanently | Disabled |
| Hot-desking environments or work-from-home with shared profiles | Enabled |
📌 Note: Free Seating must also be enabled at the org level before it can be applied to individual user profiles. Requires compatible phone base settings. See Onboarding & Access page for the user-level configuration.
ACD Routing Score Reset
| Setting | Description |
|---|---|
| Reset routing score after presence change | When enabled, an agent's idle time counter resets to zero whenever they change their presence status (e.g., Available → Away → Available). This sends them to the back of the queue priority order. When disabled, agents retain their accumulated idle time through status changes. |
How routing score works:
Genesys Cloud uses idle time to determine which agent receives the next interaction. The agent with the longest idle time (most idle) is prioritized.
| Configuration | Behavior |
|---|---|
| Reset enabled | Agent goes Available → Away → Available = starts at zero idle time, goes to back of the line |
| Reset disabled | Agent retains accumulated idle time through the status change, keeps their queue position |
📌 Telecom note: This is the Genesys equivalent of an Avaya "Most Idle Agent" reset. Use Reset for strict fairness enforcement; disable it to avoid penalizing agents for brief unavoidable status changes (e.g., system-triggered Away).
2. Routing & Transfer Logic
Skill Stripping on Blind Transfers
| Setting | Description |
|---|---|
| Strip skills from voice interactions on blind transfers by agents | When enabled, all ACD skill requirements attached to an interaction are removed when an agent performs a blind transfer to a queue. The interaction arrives at the target queue with no skill requirements, making it eligible for any available agent in that queue. |
Default behavior (skill stripping OFF):
When an agent transfers an ACD call to a queue, Genesys Cloud remembers both the priority and the skills-based information applied to the original call. This means the call will only route to agents in the new queue who also have the required skills.
With skill stripping ON:
All skill requirements are stripped at the moment of blind transfer. The interaction is treated as a fresh, unskilled interaction in the target queue.
| Scenario | Recommended Setting |
|---|---|
| Transfer to a specialized queue where agents may not share the original skills | Enabled — prevents calls getting stuck waiting for a skill no one has |
| Transfer within the same skill group where agents share skills | Disabled — preserves routing context |
⚠️ Important: To apply the Strip Skills on Blind Transfer setting, the agent must select the queue from the suggestions list during the blind transfer. The skill stripping does not apply if the agent manually types a queue name.
📌 Note: Consult transfers always discard skills regardless of this setting.
Preserve Routing Data for Callbacks and Voicemails
| Setting | Description |
|---|---|
| Preserve routing data from calls for callbacks and voicemails | When enabled, the skill and priority data from the original call is preserved when the interaction becomes a callback or voicemail. Ensures the callback or voicemail is routed back to an agent with the same skills that handled the original call. |
Routing Score (Conversation Score vs. Priority Score)
This is configured per queue, not at the org level, but understanding the two models is essential for org-wide routing strategy.
| Score Type | Formula | Best For |
|---|---|---|
| Conversation Score (default) | Arrival time + priority value. One priority point = 60,000 ms (1 minute) of simulated earlier arrival. | Standard fairness — balances wait time with priority. |
| Priority Score | Uses only the absolute priority value assigned in Architect. Time in queue is a tiebreaker only. | VIP lines — high-priority callers jump to the front regardless of how long others have waited. |
📌 Best practice: Set the scoring method at queue creation or when the queue has no waiting interactions. If you change the scoring method midway while the queue has interactions waiting, the waiting interactions may be assigned in an unexpected order. The new scoring method takes effect only after interactions that arrived before the change are routed.
3. Media & Timer Defaults
Voicemail Defaults
| Setting | Default | Description |
|---|---|---|
| Alert Time (Ring Timeout) | 18 seconds | How long the phone rings before the call is forwarded to voicemail. Equivalent to a "ring-no-answer" coverage path in traditional telephony. Configurable per org. |
| Maximum Voicemail Length | 3 minutes (180 seconds) | Maximum duration of a voicemail message a caller can leave. Caps file size for storage and prevents accidental extended recordings. |
| Voicemail PIN | On | Requires users to enter a PIN to retrieve voicemail. Can be disabled org-wide. |
| Voicemail Transcription | Off | Transcribes voicemail audio to text and includes it in email notifications. Requires Speech & Text Analytics. |
📌 See the Global Settings page for the full voicemail settings table including notifications and PII handling.
Default Text-to-Speech (TTS) Engine
| Setting | Description |
|---|---|
| Default TTS Engine | Sets the org-wide voice engine used in Architect flows when no specific engine is defined at the flow level. Affects every flow action that uses Play Audio with TTS or dynamic data playback. |
Available options:
| Engine | Notes |
|---|---|
| Genesys TTS (native) | Built-in, no additional configuration required |
| Google Cloud TTS | Requires AppFoundry integration |
| Microsoft Azure TTS | Requires AppFoundry integration |
| Amazon Polly | Requires AppFoundry integration |
⚠️ Deprecation notice (August 2026): Genesys will end native Enhanced TTS support for select Google and Microsoft voices on August 5, 2026. After that date, those voices require a third-party TTS AppFoundry integration under the BYOT-A billing model. Plan ahead if your Architect flows use Google Standard or Microsoft voices.
📌 Telecom note: Changing the default TTS engine affects every Architect flow that uses dynamic audio or text-to-speech blocks and has not explicitly specified an engine. Test in a non-production flow first.
4. Additional Contact Center Settings
| Setting | Description |
|---|---|
| Turn off file uploading in chats | Disables file attachment capability in Genesys Collaborate (internal chat). Useful for data loss prevention (DLP) compliance. |
| Route email to multiple destinations | Allows inbound email interactions to be sent to more than one queue or destination simultaneously. |
| Enable communication level After Call Work (ACW) | Enables ACW to be tracked and enforced at the individual communication level rather than the interaction level. |
| Enable agents to specify queue for scheduled callbacks | Allows agents to select which queue a scheduled callback is placed in, rather than defaulting to the originating queue. |
| Set maximum interaction data retention time | Controls how long interaction data is retained in Genesys Cloud before automatic deletion. Relevant for compliance and storage management. |
| Manage historical execution data | Configures which Architect flow execution data types are stored and for how long. Used for Replay Mode and flow troubleshooting. |
Telecom Engineer Summary
| Setting | What It Prevents |
|---|---|
| Skill Stripping | Calls stuck in new queues waiting for skills that agents there don't have |
| ACD Routing Reset | Agents gaming status changes to stay at the front of the queue |
| Conversation vs. Priority Score | Unexpected routing order when queue scoring changes mid-operation |
| Voicemail Alert Time | Callers waiting too long before hitting voicemail coverage |
| Free Seating | Unused station licenses being held by offline agents |
Last verified against Genesys Cloud Resource Center – March 2026
3.- People and Access
Access Policies (Attribute-Based Access Control)
What Are Access Policies?
Access Policies implement Attribute-Based Access Control (ABAC) — a layer of fine-grained permission logic that works alongside RBAC (Roles & Permissions) and Divisions.
Where RBAC answers "does this role have this permission?", ABAC answers "given the attributes of this user, this resource, and this environment — should access be allowed or denied?"
ℹ️ ABAC does not replace Roles or Divisions. It augments them. Authorization requires both ABAC policy evaluation and standard permission checks to pass.
Enable ABAC First
Before any access policies take effect, you must enable the feature at the org level:
Admin → Organization Settings → [toggle] Enable Attribute-Based Access Control
Policies can be created and saved before enabling, but they will not be enforced until the org setting is on.
Core Concepts
The Three Attribute Types
| Attribute Type | What It Describes |
|---|---|
| Subject | The user or entity requesting access (their roles, division, group membership, etc.) |
| Resource / Object | The thing being accessed (a user profile, a recording, a gamification scorecard, etc.) |
| Environment | Contextual factors (IP address, time of day, etc.) |
Policy Structure
Each policy contains:
| Element | Description |
|---|---|
| Name | Identifier for the policy |
| Description | Purpose and context |
| Target | The API calls this policy applies to — written as domain:entity:action (e.g., authorization:grant:add) |
| Subject | Who the policy applies to — user, group, client, or all |
| Effect | ALLOW or DENY |
| Conditions | Boolean logic (Any = OR, All = AND) using TypedAttribute key-value pairs |
Default-Deny Logic
⚠️ DENY overrides ALLOW. If a subject matches both an ALLOW and a DENY policy, access is denied.
Access is granted only when all three are true:
- Subject satisfies an ALLOW policy's conditions
- Subject has the required traditional permission
- Subject does not match any DENY policy
The Three Built-In Policy Types
Genesys Cloud ships three pre-built policy templates covering the most common ABAC use cases:
1. Cannot Grant New Roles
Purpose: Prevents non-admin users from granting roles they do not themselves hold.
Use case: Stops a supervisor from escalating privileges by assigning a role they don't have to another user — even if they technically have the authorization:grant:add permission.
How it works:
- Checks if the subject is an admin
- Checks if the subject already has the role being granted
- If neither condition is true → DENY
2. Cannot Update Certain User Profile Fields
Purpose: Prevents specified profile fields from being modified by regular users — while still allowing supervisors or admins to edit them.
Use case: Lock fields like employee ID, HR data, or contact info so agents cannot self-edit them, but managers can still update them.
How it works:
- Uses
profile.fieldscondition — case-insensitive check against a list of restricted field names - If the field being modified is in the restricted list AND the subject does not have a manager-level role → DENY
Restricted field values (configured in policy JSON as preset attributes):
| Category | Example Field Values |
|---|---|
| Name | name, name.firstName, name.lastName |
| Contact Info | contactInfo, contactInfo.phone_work, contactInfo.phone_work_2 |
| HR Fields | hr (entire section) |
| Images | images, images.profile |
| Biography | biography |
| Location | location |
| Relationships | relationships |
ℹ️ Using a section name (e.g.,
contactInfo) restricts the entire section — equivalent tocontactInfo.*. Add specific sub-fields only when partial restriction is needed.
Full list: Admin → People & Permissions → Access Policies → Templates → Cannot Update Certain User Profile Fields — or see the Genesys Resource Center Restricted fields value list.
3. Access Control for Gamification Scorecard and Insights
Purpose: Limits supervisors to viewing gamification data only for agents within their reporting hierarchy, while admins retain full access.
How it works (hierarchy tiers):
| Role | Access Scope |
|---|---|
| Supervisor | Direct reports only |
| Manager of managers | Up to 3 levels deep in hierarchy |
| Admin (designated role) | Full access to all gamification data |
Use case: Prevents supervisors from browsing gamification performance data for agents outside their team.
Creating an Access Policy
Option A — From a Template
- Admin → People & Permissions → Access Policies
- Click Templates
- Select the desired template
- Modify the
domain,entity, andactionfields in the target if needed - Edit the
subject,effect, andconditionsections in the Policy JSON - Optionally toggle Enable Policy to activate immediately
- Click Save
Option B — From Scratch
- Admin → People & Permissions → Access Policies
- Click Create Policy
- Write the full Policy JSON manually
- Use Validate Syntax tab to check for errors before saving
Policy JSON Syntax
{
"name": "Policy Name",
"description": "What this policy does",
"targets": [
{
"domain": "authorization",
"entity": "grant",
"action": "add"
}
],
"subject": {
"type": "user"
},
"effect": "DENY",
"conditions": {
"all": [
{
"attribute": "subject.role.names",
"operator": "notContains",
"value": "Admin"
}
]
}
}
Condition operators: equals, notEquals, contains, notContains, startsWith, in, notIn
Logical operators:
any→ OR (at least one condition must be true)all→ AND (every condition must be true)- These can be nested for complex logic
Validation and Testing
Before deploying a policy:
-
Click Validate Syntax tab — checks for:
- Missing mandatory fields
- Invalid attributes
- Incorrect data type comparisons
- Preset attribute conflicts
-
Click Test Policy tab — paste sample subject/resource/environment data and run a simulated evaluation to confirm expected ALLOW/DENY result before enabling
Enabling and Managing Policies
| Action | How |
|---|---|
| Enable a policy | Toggle Enable Policy on the policy detail page |
| Disable a policy | Toggle off — policy is retained but not enforced |
| Edit a policy | Admin → Access Policies → select policy → Edit |
| Delete a policy | Admin → Access Policies → select policy → Delete |
| View all policies | Admin → Access Policies → table view with status |
Permissions Required
| Action | Permission |
|---|---|
| Create / edit / delete policies | Authorization > Policy > Add, Edit, Delete |
| View policies | Authorization > Policy > View |
| Enable ABAC org setting | Organization Settings admin access |
⚠️ The ABAC feature itself must be enabled in Organization Settings before any policies are enforced, regardless of permissions.
Important Behaviours and Gotchas
- DENY always wins — if a user matches both an ALLOW and a DENY policy, they are denied
- ABAC + RBAC are additive — a user needs both the RBAC permission AND to satisfy the ABAC ALLOW policy to gain access
- Policies apply immediately after enabling — test in non-production if possible
- Preset attribute names must use only alphanumeric characters, periods, or underscores — no spaces or special characters
profile.fieldscondition is case-insensitive — field name matching does not require exact case
See Also
- Roles & Permissions — the RBAC layer that ABAC works alongside
- Divisions & Access Control — division scoping, which also intersects with ABAC subject conditions
- Organization Settings → Security & Compliance — where ABAC is enabled at the org level
- User Profile Management — for context on which profile fields can be restricted
Authorized Organizations (Pairing)
What Are Authorized Organizations?
Common use cases:
- A support vendor or MSP managing a customer's org
- A Genesys partner administering a client environment
- A parent company accessing a subsidiary org
- Genesys Product Support pairing with your org to troubleshoot
💡 Telecom analogy: Think of this like a Federated Trust between two PBX systems — a technician from System A uses their own credentials to manage System B without needing a local extension or station created for them in System B.
Hard Constraints (Exam Critical)
| Constraint | Detail |
|---|---|
| Same AWS region required | Pairing is only possible between orgs in the same AWS region — cross-region pairing is not supported |
| Max 25 users | A maximum of 25 users from the requesting org can be authorized to access the target org |
| No license consumption | Authorized users do not consume a license seat in the target org — they are billed to their home org |
| Admin tasks only | Authorized users cannot receive ACD interactions (calls, chats, emails), use internal chat, or access the agent dashboard |
| Division access | Authorized users are automatically granted access to all divisions assigned to the roles they receive in the target org |
How Pairing Works — Two Sides
Pairing involves two org administrators: one who requests access and one who grants it.
Side 1: Creating a Pairing Request (Requesting Org)
The org that wants access initiates the request:
- Admin → People & Permissions → Authorized Organizations
- Click Create Pair
- In the selection box, type and select the users or groups from your org who need access
- Click Create Pairing Link
- Click the copy icon to copy the unique URL
- Manually send the link to an administrator of the target org (via email, chat, etc. — Genesys does not send it automatically)
⚠️ The pairing link must be sent out-of-band. Genesys does not email it to the target org.
Side 2: Accepting a Pairing Request (Target Org)
The org being accessed approves and assigns permissions:
- Open the pairing link received from the requesting org
- Review the prompt and click Yes, I authorize access
- You are taken to the paired organization management page
- Click on the users or groups included in the request
- Assign the specific roles they need (e.g., Admin, Architect, Telephony Admin)
- Click Save
⚠️ Until roles are assigned, authorized users have zero permissions in the target org. Accepting the pairing alone grants no access.
Role Assignment in the Target Org
Roles assigned to authorized users work the same as regular role assignments with one important note:
- The roles assigned determine what the authorized user can do in the target org
- Division access is automatically scoped to all divisions attached to those roles
- Roles should follow least-privilege — only assign what the partner/vendor actually needs
Common role assignments for external access:
| Scenario | Suggested Roles |
|---|---|
| Genesys support troubleshooting | Admin (temporary, revoke after session) |
| Partner building Architect flows | Architect access, flow designer permissions |
| Vendor monitoring dashboards | Read-only supervisor / analytics roles |
| MSP full management | Admin or Master Admin (use with caution) |
Managing the Pairing
Revoking Access
- Go to Admin → People & Permissions → Authorized Organizations
- Delete the pairing
- This immediately terminates all active sessions for the authorized users in your org
Cloned Users
Pairing vs. Regular User Creation
| Factor | Authorized Org (Pairing) | Creating a User in Target Org |
|---|---|---|
| License in target org | Not consumed | Consumed |
| Identity / credentials | Home org credentials | Target org credentials (separate account) |
| ACD interactions | Not allowed | Allowed (if role permits) |
| Internal chat | Not available | Available |
| Max users | 25 | No pairing limit |
| Region requirement | Must match | No restriction |
| Best for | Temporary admin / vendor access | Permanent staff |
Permissions Required
| Action | Permission |
|---|---|
| Create pairing request | People & Permissions admin access |
| Accept pairing request | Admin in the target org |
| Assign roles to authorized users | Authorization > Grant > Add in the target org |
| Delete/revoke pairing | Admin in the target org |
See Also
- Roles & Permissions — role assignment principles that apply to authorized users
- Divisions & Access Control — how division scoping affects authorized user access
- Organization Settings → Security & Compliance — IP allowlists and auth controls that also apply to authorized users
Divisions (Access Controls)
Divisions are logical boundaries within a single Genesys Cloud organization. They allow you to group configuration objects — queues, flows, users, scripts, schedules — and then control who can see and manage them by scoping roles to specific divisions. This page covers how divisions work, what objects they control, their limits, and how they interact with roles.
Navigation Path
| Task | Path |
|---|---|
| Create and manage divisions | Admin → People & Permissions → Divisions |
| Move objects between divisions | Admin → People & Permissions → Divisions → select division → relevant object tab |
| Assign a division to a user's role | Admin → People & Permissions → People → select user → Edit Person → Roles tab → select role → Divisions box |
| Assign a division to a group's role | Admin → Directory → Groups → select group → Roles tab → Assign Roles → select division |
1. What Divisions Are
A division is a logical container inside your Genesys Cloud organization. You can organize them by business unit, office location, country, brand, or any classification that fits your org structure.
📌 Key concept: Divisions do not create separate organizations. Everything still lives inside one Genesys Cloud org. Divisions just control who can see and manage what within that org.
The access control model:
Role + Division = Scoped Access
Example:
Supervisor role + Indianapolis division
= Can only supervise agents and queues in Indianapolis
= Cannot see or modify anything in San Francisco division
2. Limits & Rules
| Item | Value / Behavior |
|---|---|
| Maximum divisions per org | 50 |
| Division name character limit | 500 characters |
| Objects per division | An object can belong to only one division at a time |
| Divisions per user | No limit — a user can have roles scoped to multiple divisions simultaneously |
| Home division | Every org has exactly one — cannot be deleted, can be renamed |
| Default for new objects | All new configuration objects are assigned to the Home division (also referred to as "All division") by default |
3. The Home Division
Every Genesys Cloud organization starts with a single division called the Home division.
| Behavior | Detail |
|---|---|
| Cannot be deleted | The Home division is permanent |
| Can be renamed | You can rename it to fit your naming convention (e.g., "Global", "Corporate") |
| Default assignment | All new objects — queues, flows, users, schedules — are assigned to Home by default when created |
| Access scope | A role assigned to "All divisions" covers the Home division plus all divisions you create |
⚠️ Operational note: When an admin creates a new configuration object, it automatically lands in the Home division. If that object should be restricted to a specific division, you must move it manually. New objects in Home are visible to anyone with org-wide access.
4. What Objects Can Be Assigned to a Division
Divisions control access to two categories of objects: configurable and transactional.
Configurable Objects (admin-placed)
These are objects you explicitly assign or move to a division:
| Category | Objects |
|---|---|
| Routing | Queues, Flows (Architect), Call routing, Message routing, Schedules, Schedule groups, Emergency groups |
| People | Users, Groups |
| Outbound | Contact lists, Campaigns, DNC lists, Rule sets |
| Quality & WFM | Scripts, Coaching appointments, Learning modules, Management units, Wrap-up codes |
| Data | Data tables |
Transactional Objects (auto-tagged)
These objects are automatically associated with divisions as they move through the system. You do not manually assign them.
| Transactional Object | How Division Is Applied |
|---|---|
| Voice, callback, chat, email, message conversations | Tagged with the divisions the interaction encounters as it routes |
| Recordings | Inherit the division of the interaction |
| Presence history | Associated with the user's division |
| Audit data | Tagged with the division of the object being modified |
📌 Reporting impact: Analytics views display data scoped to the user's division access. If Diane Able only has access to the Indianapolis division, she only sees metrics for conversations that touched Indianapolis queues or agents — even if those conversations also touched other divisions.
5. How Roles + Divisions Work Together
A role defines what a user can do. A division defines where they can do it.
Example org: Three divisions — Indianapolis, San Francisco, Corporate
| User | Role | Division | What They Can Access |
|---|---|---|---|
| Ellen Templar | Manager | All divisions | All queues, users, and flows across all three divisions |
| Diane Able | Supervisor | Indianapolis only | Only Indianapolis queues, users, and flows |
| Dex Cooper | Supervisor | San Francisco only | Only San Francisco queues, users, and flows |
📌 Important distinction: Ellen Templar's user object lives in the Indianapolis division (that's where her profile data resides). But Ellen's role access is scoped to all divisions. These are two separate things — the division an object belongs to vs. the divisions a user's role can access.
6. Assigning Divisions to Roles
When you assign a role to a user, you also select which division(s) that role applies to.
Via user profile:
Admin → People → Edit Person → Roles tab → select role → click Divisions box → type and select division → Save
Via role membership (bulk):
Admin → Roles/Permissions → locate role → More → Change Membership → select users → Save
📌 When assigning roles via a group, the division assignment is set on the group's Roles tab. All group members inherit that role+division combination. You cannot edit individual members' division assignments when inherited from a group — you must edit the group itself or remove the member from the group.
7. Moving Objects Between Divisions
Because every object must belong to exactly one division, moving objects is the primary way to organize your access control structure.
Admin → People & Permissions → Divisions → select target division → click the relevant object tab (Queues, Flows, Users, etc.) → add objects
⚠️ Exception — External Contacts: You cannot reassign existing External Contacts or External Organizations to a different division after they are created. If a contact is misconfigured into the wrong division, you must delete it and recreate it in the correct division.
8. Transfer & Search Restrictions by Division
By default, agents can search for and transfer interactions to users and queues in any division. You can restrict this so agents can only transfer within their own division.
Permission to restrict cross-division transfers:
Conversation > Communication > Target
Granting this permission to a user's role limits their search and transfer capabilities to only users and queues within the divisions assigned to their role.
| Without Target permission | With Target permission |
|---|---|
| Agent can search/transfer to any user or queue org-wide | Agent can only search/transfer within their assigned divisions |
9. Division-Aware Role Management
This is an org-level setting (see Security & Compliance page) that changes how role grants are controlled.
| Setting | Effect |
|---|---|
| Disabled (default) | Any admin can assign any role to any user regardless of division |
| Enabled | Admins can only grant roles within divisions they themselves have access to. An Indianapolis admin cannot grant roles that scope to San Francisco. |
⚠️ This is an architectural decision. Enabling Division-Aware Role Management is a significant change — all role assignments become division-scoped operations. Coordinate with your access control design before enabling.
10. Limitations
| Limitation | Detail |
|---|---|
| Not full data isolation | Divisions restrict access but do not provide 100% data separation. Some resources are shared org-wide regardless of division. |
| Edge devices are shared | Edge devices (telephony hardware/software) are shared across all divisions and cannot be scoped to a single division. |
| Max 50 divisions | Plan your division structure carefully — you cannot exceed 50 in a single org. |
| Need complete isolation? | If you require total data isolation for legal or high-security reasons (e.g., separate business entities), Genesys recommends creating separate organizations rather than divisions. |
Quick Reference: Build Order for Divisions
When setting up divisions for a new org, follow this sequence:
| Step | Action |
|---|---|
| 1 | Plan your division structure (by BU, location, brand, etc.) |
| 2 | Create divisions under Admin → People & Permissions → Divisions |
| 3 | Create your configuration objects (queues, flows, users) and assign them to the correct division at creation time |
| 4 | Move any existing objects from Home to their appropriate division |
| 5 | Assign roles to users with the correct division scope |
| 6 | Enable Division-Aware Role Management (optional — only if your org requires admin-level division scoping) |
📌 Cross-reference: Division assignment is part of the Architectural Build Order page — divisions belong in Phase 1 (Global Foundation) and must be created before queues and flows so objects can be assigned to the right division at creation time.
Last verified against Genesys Cloud Resource Center – March 2026
Group Telephony & Routing
What Is Group Telephony?
Group Telephony allows a General Group to have its own phone number or internal extension. When that number is called, Genesys routes the interaction to group members using one of three call route methods.
ℹ️ Group Telephony applies to General Groups (Official or Social) only. Work Teams and Skill Expression Groups do not support direct telephony configuration.
Enabling Calls on a Group
- Admin → Directory → Groups
- Open the target group
- Toggle Enable Calls to On (found on the left panel or top of the group profile)
- Click Edit next to the phone settings
- Configure the fields below
- Click Save
Phone Configuration Fields
| Field | Description |
|---|---|
| Phone Number / Extension | Assign a DID (external) or internal extension to the group |
| Call Route Type | How incoming calls are distributed to members — see below |
| Backup Group | A secondary group that receives calls if no member in the primary group answers |
Call Route Types
This is the most important setting in Group Telephony. Choose one of three methods:
Broadcast
- Rings all group members simultaneously (up to 1,000 members)
- First member to answer gets the call
- Best for: urgent notifications, on-call teams, small groups where speed matters
Sequential
- Rings members one by one in a defined list order
- Moves to the next member only if the current member does not answer
- Best for: tiered support escalation, defined coverage order
Rotary (Round-Robin)
- Rings the next person in the list based on who took the last call
- Distributes load evenly across the group over time
- Best for: shared coverage teams where equal distribution matters
Backup Group
If no member in the primary group answers, calls can overflow to a Backup Group.
- The backup group must already exist before it can be assigned
- The backup group uses its own Call Route Type independently
- Useful for: after-hours coverage, overflow to a supervisor group, redundancy
Group Voicemail (Optional)
If no one answers — including the backup group — calls can fall to a group voicemail box.
To configure:
- Toggle Voicemail to On on the group profile
- Configure the following:
| Setting | Description |
|---|---|
| Greeting | Click the red record button to record live, or upload a .wav file |
| Email Notifications | Sends an alert to group members when a new voicemail arrives |
| Transcription | Includes a text version of the voicemail in the email notification (if available for your org) |
Call Routing Flow (Summary)
Incoming call to group number/extension
│
▼
Call Route Type applies
(Broadcast / Sequential / Rotary)
│
├── Member answers → Interaction connected
│
└── No answer
│
▼
Backup Group (if configured)
│
├── Member answers → Interaction connected
│
└── No answer
│
▼
Group Voicemail (if enabled)
Key Differences: Group Telephony vs. ACD Queues
| Feature | Group Telephony | ACD Queue |
|---|---|---|
| Routing engine | Simple list-based (broadcast/sequential/rotary) | Full ACD (skills, priority, utilization) |
| Agent availability check | No — rings regardless of status | Yes — only routes to available agents |
| Reporting | Basic | Full performance views |
| Architect flow integration | No | Yes |
| Best for | Internal teams, small groups, direct extensions | Contact center interactions |
Permissions Required
| Action | Permission |
|---|---|
| Configure group telephony | Directory > Group > Edit |
| Assign phone numbers to groups | Telephony admin access may be required for DID assignment |
See Also
- Groups (People & Permissions) — creating and managing the group itself
- Queue & Routing Management — full ACD routing for contact center interactions
- Work Teams — supervisor-managed agent groups (no telephony)
Groups (People & Permissions)
Genesys Cloud has two distinct group systems that serve completely different purposes. This page covers Directory Groups — the groups used for access control, role assignment, queue membership, and communication. Do not confuse these with Work Teams (WFM-specific groupings) or group workspaces (document sharing). All group management lives under Admin → Directory → Groups.
Navigation Path
| Task | Path |
|---|---|
| Manage all groups | Admin → Directory → Groups |
| Create a group | Admin → Directory → Groups → Add Group |
| Edit a group | Admin → Directory → Groups → click group name |
| Assign roles to a group | Admin → Directory → Groups → select group → Roles tab |
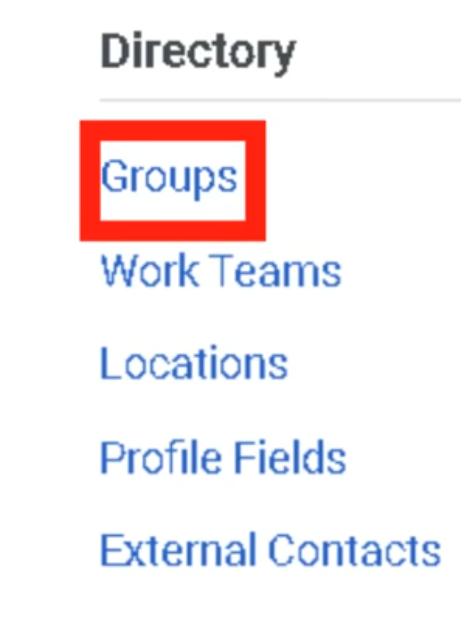
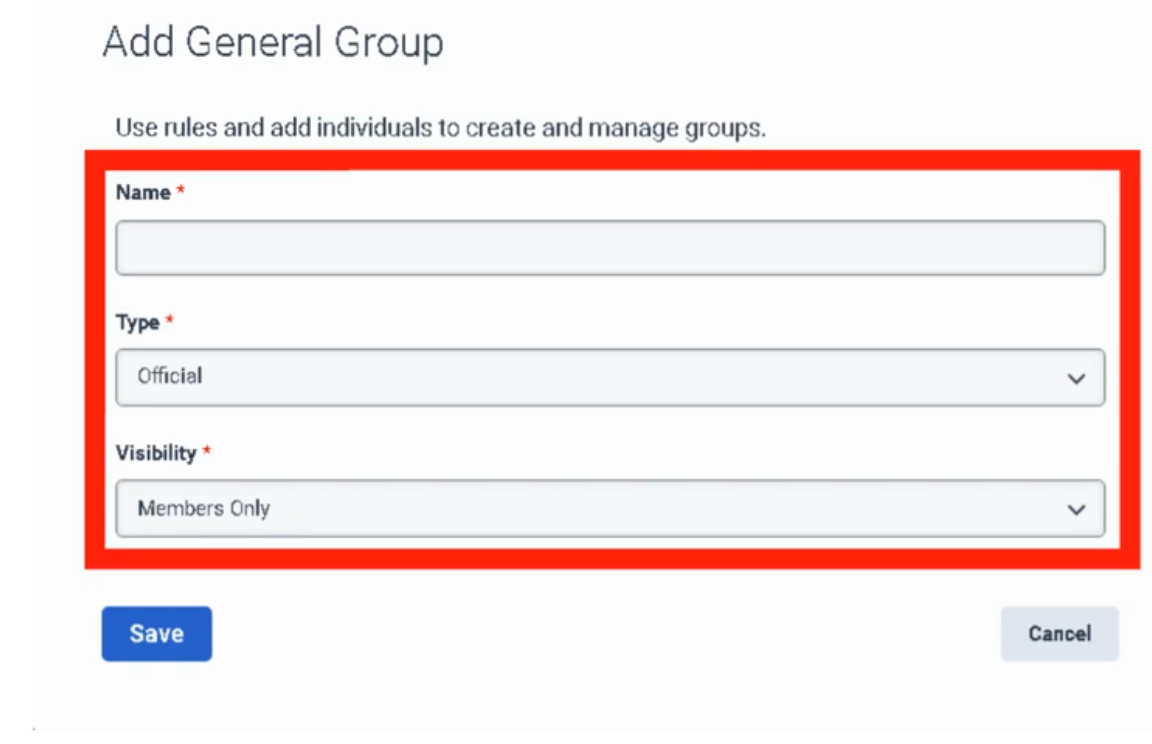
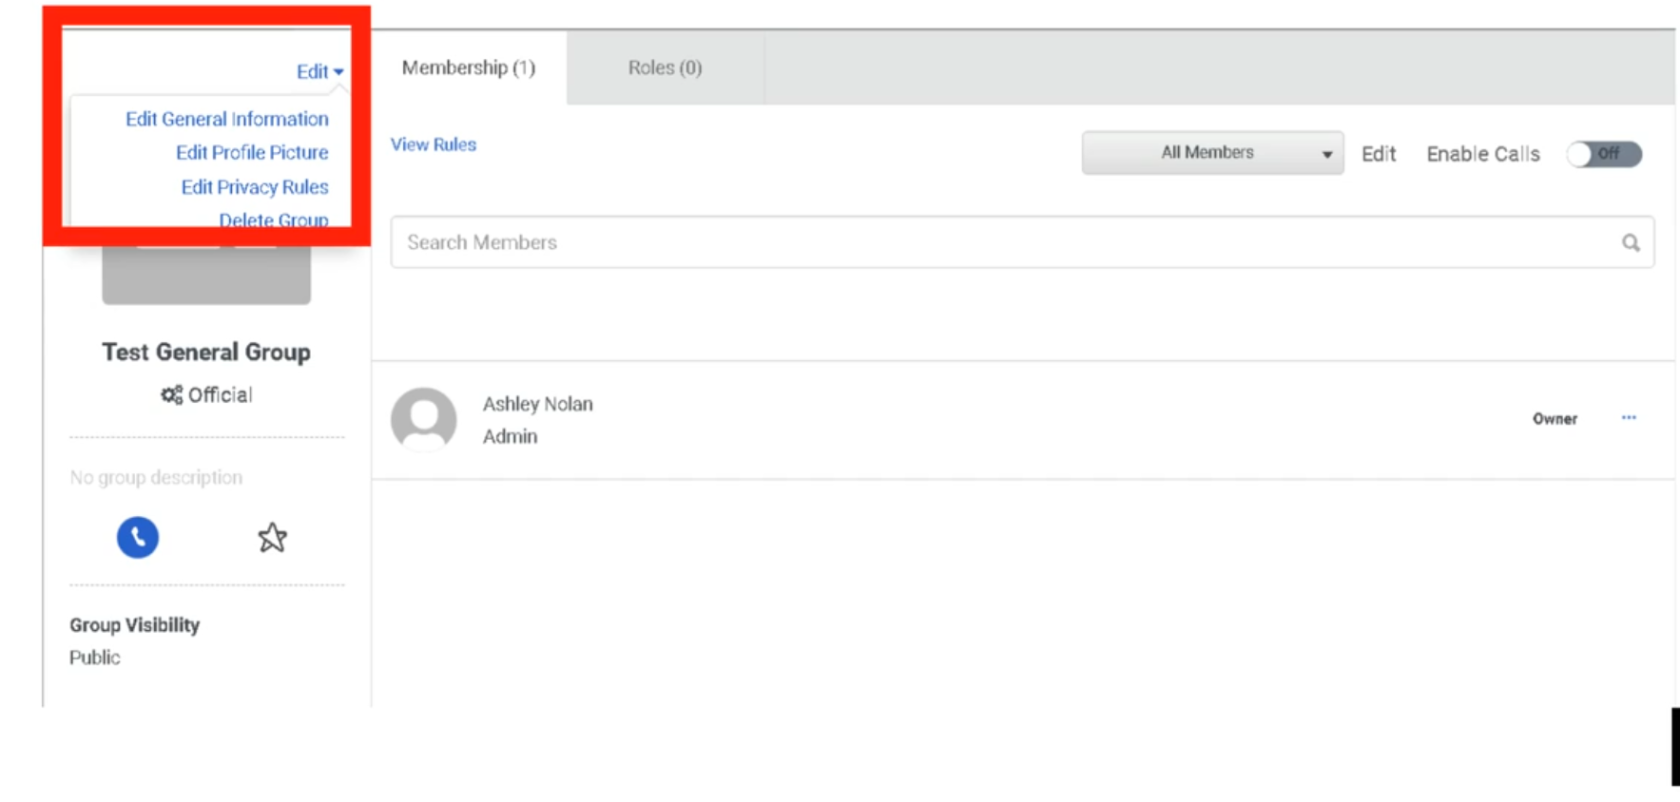
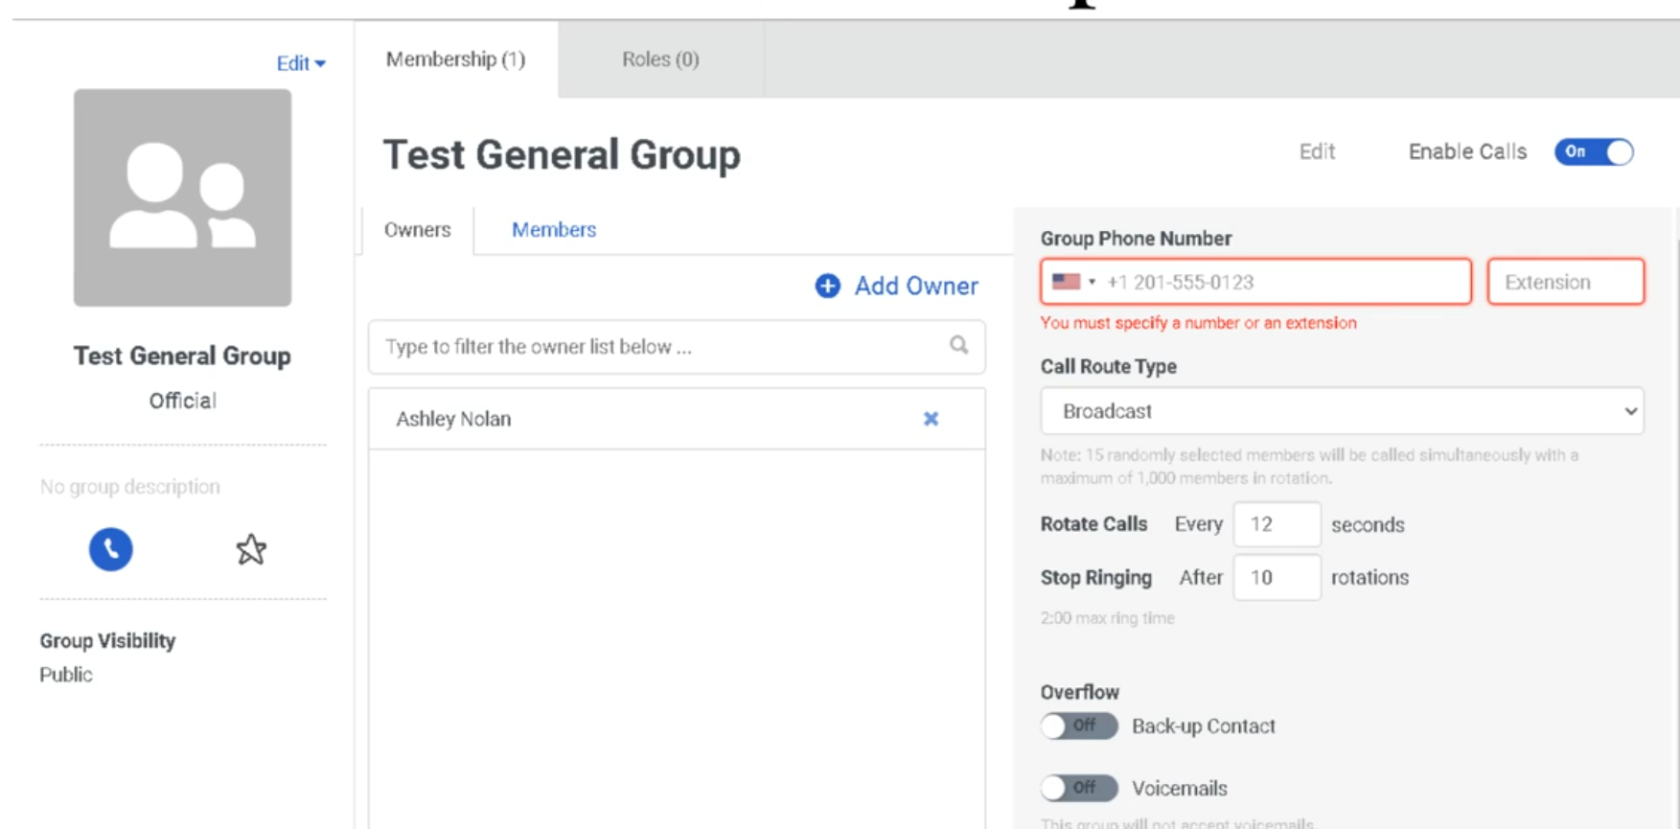
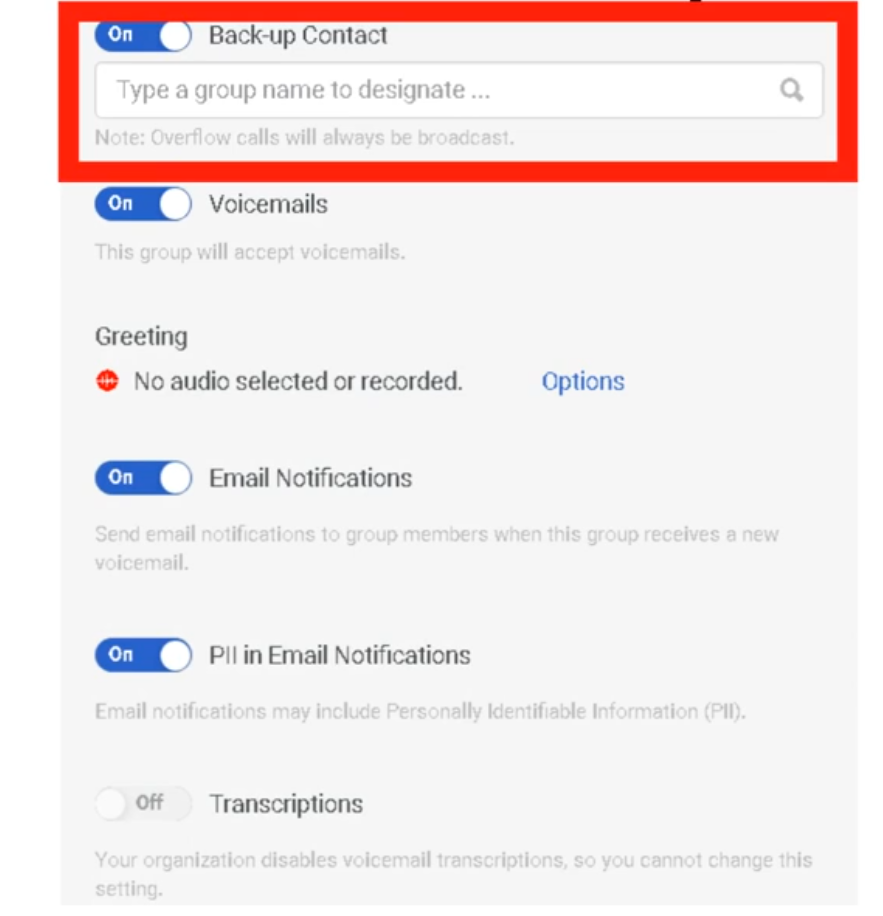
Required permissions:
| Permission | Required For |
|---|---|
Directory > Group > View |
Viewing groups |
Directory > Group > Edit |
Editing groups and managing membership |
Directory > Group > Add |
Creating new groups |
Directory > Group > Delete |
Deleting groups |
1. Two Types of Groups
Genesys Cloud has two fundamentally different group types, each with distinct behavior and use cases.
General Groups
Manual or rule-based groups used for communication, role assignment, and directory organization.
| Feature | Detail |
|---|---|
| Membership | Added manually one at a time, or automatically via membership rules based on profile data and org hierarchy relationships |
| Chat room | Genesys Cloud automatically creates a persistent chat room with the same name when a general group is created |
| Profile page | Has a group profile page showing members, contact info, and group photo |
| Roles | Can have roles assigned directly — all group members inherit those roles and division scopes |
| Group types | Can be designated as Official (work-related) or Social |
| Deletion | Deleting a general group does NOT delete the associated chat room. Chat rooms cannot be deleted. |
When to use general groups:
| Use Case | Example |
|---|---|
| Role assignment at scale | Create "Outbound Supervisors – Monterrey" group, assign the Supervisor role + Monterrey division once — all members inherit it automatically |
| SME identification | "SBC Experts" group makes specialists findable via directory search |
| Project teams | Temporary groups for cross-functional projects |
| Location-based teams | "Monterrey Floor 2" for announcements and group chat |
| Queue membership via Bullseye routing | Assign groups to bullseye routing rings in queue configuration |
Skill Expression Groups
Dynamic groups whose membership is automatically managed by the system based on ACD skill and language proficiency conditions.
| Feature | Detail |
|---|---|
| Membership | Fully automatic — the system adds/removes members when their ACD skill assignments or proficiency ratings change |
| Update speed | Membership changes take effect within approximately 1 minute of a skill change |
| Chat room | No chat room is created for skill expression groups |
| Primary use | Dynamically populating queue membership or bullseye routing rings based on agent skills |
| Inactive members | The Membership tab always shows total member count including inactive users |
Example skill expression:
| Expression | Meaning |
|---|---|
English > 3 |
Includes all agents whose English language skill proficiency is greater than 3 |
Spanish >= 4 AND SBC_Support >= 2 |
Includes agents with both Spanish proficiency ≥ 4 and SBC Support skill ≥ 2 |
📌 Key distinction: General groups are managed by admins or rules based on profile data. Skill expression groups are managed entirely by the ACD skill engine based on skill assignments. Use skill expression groups when your queue membership should automatically track skill levels.
2. Group Limits
| Limit | Value |
|---|---|
| General groups per org (recommended max) | 500 |
| Skill expression groups per org | 300 (contact Customer Care to exceed) |
| Primary conditions per skill expression group | 10 |
| Subconditions per primary condition | 10 |
| Groups a single user can belong to | Up to 100 official + 100 social (200 total) |
| Individual members added manually (recommended max) | 1,000 per group |
3. Group Membership — General Groups
Manual (Individual) Membership
Add users one at a time via the group's Membership tab.
Admin → Directory → Groups → select group → Membership tab → Edit → Individuals tab → search and add
📌 Members added individually are not affected by changes to membership rules. Manual additions are permanent until explicitly removed.
Automatic Membership Rules
Rules automatically add or remove members based on profile data and org hierarchy relationships.
| Rule Type | Example |
|---|---|
| Profile tags/certifications | All users tagged with "Cisco" |
| Reporting relationship — Superiors | Everyone in the management chain above a specific person |
| Reporting relationship — Subordinates | All direct reports below a specific manager |
| Inclusions / Exclusions | Include everyone from a rule, then exclude specific individuals |
Admin → Directory → Groups → select group → Membership tab → Edit → Inclusions tab → define rule
Owners vs. Members
| Role | Capabilities |
|---|---|
| Owner | Full editing rights — can modify group settings, membership, and roles |
| Member | Limited rights — can participate in group chat, appears in group directory |
📌 When you create a group, you are automatically its owner. If you create a group on behalf of someone else and don't want editing rights, remove yourself as an owner after creation. If you remove yourself as owner, you lose editing rights unless you have the
Directory > Group > ViewandDirectory > Group > Editpermissions assigned to your role.
4. Group Membership — Skill Expression Groups
Admin → Directory → Groups → Skill Expression tab → select group → Membership tab → Build Skill Expression
Membership is built by defining conditions using ACD skills and language proficiencies with relational operators (greater than, equal to, greater than or equal to, etc.) and logical operators (AND, OR).
⚠️ Skill expression groups are dynamic. If you modify an agent's ACD skill assignments or proficiency ratings, their membership in any skill expression group that references that skill updates automatically within approximately 1 minute.
5. Assigning Roles to Groups
One of the most powerful uses of general groups is bulk role assignment. When you assign a role (with a division) to a group, every current and future member of that group inherits that role scoped to that division automatically.
Admin → Directory → Groups → select group → Roles tab → Assign Roles → select role → select division → Save
| Behavior | Detail |
|---|---|
| New members | Automatically inherit all roles assigned to the group upon joining |
| Removed members | Lose all roles inherited from the group upon removal |
| Role editing | Roles inherited from a group cannot be edited on an individual user's Roles tab — you must edit the group or remove the user from the group |
| Division-Aware Role Management | If enabled org-wide, admins can only assign roles to groups within divisions they themselves have access to |
📌 Best practice: For large teams with shared permissions (e.g., all Monterrey supervisors), use a group + role assignment instead of assigning roles to each user individually. This dramatically reduces maintenance overhead when staff changes occur.
6. General Group Types: Official vs. Social
When creating a general group, you designate it as Official or Social. This affects how users can search and filter groups in the directory.
| Type | Use Case | Workspace Eligible? |
|---|---|---|
| Official | Work-related — teams, departments, projects, queues | ✅ Yes — can be added to group workspaces |
| Social | Non-work — interest groups, social clubs | ❌ No — social groups cannot be workspace members |
7. Groups and Chat Rooms
| Behavior | Detail |
|---|---|
| Creating a general group | Automatically creates a persistent chat room with the same name |
| Deleting a general group | Deletes the group but not the chat room — chat rooms cannot be deleted |
| Skill expression groups | No chat room is created |
📌 If you create test groups or temporary groups, be aware that their associated chat rooms persist indefinitely even after the group is deleted.
8. Limits & Operational Notes
| Item | Guidance |
|---|---|
| Keep org group count under 500 | Genesys recommends no more than 500 groups per org for performance |
| Limit individual manual members to 1,000 | For groups with larger populations, use membership rules instead |
| Disable group calls when adding members | For best results, temporarily disable group calls while bulk-adding members |
| Workspace access via groups | When an official group is added to a workspace, any user added to the group automatically gains workspace access — use carefully for sensitive files |
Quick Comparison: General vs. Skill Expression Groups
| Feature | General Group | Skill Expression Group |
|---|---|---|
| Membership management | Manual or profile/hierarchy rules | Automatic via ACD skill conditions |
| Chat room created | ✅ Yes | ❌ No |
| Profile page | ✅ Yes | ✅ Yes |
| Role assignment | ✅ Yes | ✅ Yes |
| Queue/bullseye routing | ✅ Yes (manual) | ✅ Yes (dynamic) |
| Max per org | 500 (recommended) | 300 |
| Membership update speed | On admin action or rule trigger | ~1 minute after skill change |
Last verified against Genesys Cloud Resource Center – March 2026
Roles & Permissions (RBAC)
Genesys Cloud uses a Role-Based Access Control (RBAC) model. Permissions are the individual "keys" that unlock specific actions. Roles are the "keyrings" — pre-packaged bundles of permissions assigned to users. Roles also control licensing: the license assigned to a user corresponds to the most expensive permission in any role they hold.
Navigation Path
| Task | Path |
|---|---|
| Manage roles and permissions | Admin → People & Permissions → Roles/Permissions |
| Assign roles to a user | Admin → People & Permissions → People → select user → More → Edit Person → Roles tab |
| View permissions assigned to a user | Admin → People & Permissions → People → select user → More → Edit Person → View Permissions tab |
1. How RBAC Works in Genesys Cloud
Organization
└── User
├── Role A (e.g., Employee) → permissions bundle
├── Role B (e.g., User/Agent) → permissions bundle
└── Role C (e.g., Supervisor) → permissions bundle
└── Each role scoped to a Division (optional)
| Concept | Description |
|---|---|
| Permission | A single granular toggle — e.g., Routing > Queue > Edit. Genesys Cloud has over 2,000 individual permissions. |
| Role | A named bundle of permissions. Assigned to users. |
| Division | An optional scope applied to a role assignment. Limits the role's power to objects in that division only. See the Divisions & Access Control page. |
| License | Automatically determined by the most expensive permission in any role assigned to the user. You don't choose a license directly — it follows the role. |
📌 Permission changes can take up to 5 minutes to take effect after being saved.
2. The Golden Rule of Default Roles
⚠️ Never modify the permissions of a default role directly.
Instead:
- Find the default role closest to what you need
- Click More → Copy Role
- Rename the copy
- Add or remove permissions from the copy
Why: Default roles receive automatic permission updates from Genesys as new features are released. If you modify a default role, you may lose those updates — or receive them unexpectedly. Keeping your custom logic in copied roles protects you from both problems.
To restore a default role to its original state:
Admin → Roles/Permissions → find role → Edit Role → Restore Default Role
⚠️ Restoring a default role removes any permissions you added and restores any you deleted. There is no partial restore.
3. Default Roles Reference
Foundation Roles (All Orgs)
| Role | Auto-Assigned? | Can Be Removed? | Purpose |
|---|---|---|---|
| Employee | ✅ Yes — all users | ❌ No | Baseline role. Allows basic system access: read org data, edit own profile, use Collaborate (chat). Does NOT allow receiving ACD queue calls. |
| Admin | ✅ Yes — org creator only | ✅ Yes (from others) | Full org control. Manages global settings, invites users, assigns roles. Automatically assigned to whoever creates the organization. |
| Master Admin | ❌ No | ✅ Yes | All permissions needed to administer the entire organization including contact center. Commonly assigned to partner/vendor support users who need full access. Has all Admin permissions plus contact center administrative rights. |
| People Admin | ❌ No | ✅ Yes | HR-style user management. Create, edit, and delete users; manage role and permission assignments. Only exists in organizations created after June 1, 2022. |
Contact Center Roles
| Role | Purpose | Key Requirement |
|---|---|---|
| User | The agent role. Required for anyone who needs to be a member of an ACD queue and receive routed interactions. Without this role, a user cannot be added to a queue. | Must be assigned alongside Employee |
| Supervisor | Floor manager. Monitor live calls, manage agent queues, view real-time dashboards, handle wrap-up codes, view Queue and Agent dashboards and reports. | Requires CX license |
| Outbound Admin | Manages outbound dialing campaigns, contact lists, DNC (Do Not Call) lists, and call analysis rules. | Requires Outbound license |
| Outbound Agent | Frontline role for outbound campaign agents. Gives the agent the specific interface to receive outbound dialing interactions. | Requires Outbound license |
| Quality Administrator | Manages encryption keys, recording policies, evaluation forms, and calibrations. Can be scoped by queue using permission conditions. | Requires CX 3 |
| Quality Evaluator | Listens to recordings, fills out evaluation forms, annotates recordings, provides coaching feedback. | Requires CX 3 |
| Script Designer | Builds the agent scripting pop-up screens that display customer data and talking points during interactions. | — |
| Planner Admin | Workforce Management role. Handles forecasting, agent scheduling, and adherence monitoring. | Requires WFM license |
| Wallboard User | Minimal permissions. Designed for a dedicated display computer showing real-time queue statistics on a wall screen. | — |
Telephony & Technical Roles
| Role | Purpose |
|---|---|
| Telephony Admin | Manages telephony infrastructure: Sites, Edge devices, phone stations, extension pools, and call routing. Focuses on the "pipes." |
| Genesys Cloud Voice Admin | For customers using Genesys as their carrier. Allows purchasing phone numbers, managing number inventory, and viewing voice billing. |
| Integration Server | Technical role used by Bridge Connectors (local software) to communicate securely with the Genesys Cloud API. |
| SCIM Integration | Provides the API permissions needed for System for Cross-domain Identity Management — used to auto-sync users from Azure AD, Okta, or similar IdPs. |
| Developer | For technical staff building custom integrations and external applications against the Genesys Cloud API. |
Communication Roles
| Role | Purpose |
|---|---|
| Communicate User | Allows a user to have a phone extension and make/receive standard business calls. Non-ACD only — not for queue agents. |
| Communicate Admin | Manages the non-contact-center telephony side: user-to-user calling, company-wide alerting. |
| Trusted External User | Minimum-permission guest role for users from a different Genesys Cloud organization granted temporary access for support or collaboration. Only available in orgs created on or after May 17, 2017. |
📌 Legacy role names: If your organization was created before 2020, you may see old role names. The current names are:
User(formerly PureCloud User / Engage User) andSupervisor(formerly PureCloud Supervisor / Engage Supervisor).
4. Roles and Licensing
⚠️ The license assigned to a user is determined by the most expensive permission in any role they hold. You do not manually assign licenses — they follow the roles.
| Example | Result |
|---|---|
| User has only Employee role | Collaborate license (lowest cost) |
| User has Employee + Communicate User | Communicate license |
| User has Employee + User (Agent) | CX 1 or higher (depends on queue config) |
| User has Quality Evaluator | CX 3 license triggered |
| Master Admin assigned to a digital-only org | May trigger full CX 2/CX 3 voice license — requires manual permission removal |
📌 If you run a digital-only organization (no voice), be careful with the Master Admin role. Its default permissions include voice-related rights that will trigger a full CX 2 or CX 3 license. Remove the voice permissions from Master Admin or use a custom role instead.
5. Custom Roles
When no default role fits your need exactly, create a custom role:
| Step | Action |
|---|---|
| 1 | Click Add Role (build from scratch) or find a similar default role and click More → Copy Role |
| 2 | Enter a name and optional description |
| 3 | Click the Permissions tab and select the checkboxes for each permission needed |
| 4 | Click Save |
Best practices:
| Practice | Reason |
|---|---|
| Copy an existing role rather than building from scratch | Faster, less risk of missing required permissions |
| Keep the number of roles minimal | Simpler to audit and maintain |
| Modify existing roles rather than creating new ones when possible | Reduces role sprawl |
| Only create a new role when a subset of users genuinely needs different permissions | Avoids unnecessary complexity |
6. Assigning Roles to a User
| Step | Action |
|---|---|
| 1 | Under View, select All to see all available roles |
| 2 | Search for the role name |
| 3 | Click the toggle in the Assigned column to enable it |
| 4 | Optionally, click the Divisions box to scope the role to specific divisions |
| 5 | Click Save |
📌 You can also assign roles in bulk from the role side:
Admin → Roles/Permissions → find role → More → Change Membership.
7. Minimum Role Set for a Standard Agent
Every agent in an ACD contact center needs at minimum:
| Role | Why |
|---|---|
| Employee | Auto-assigned. Cannot be removed. Baseline access. |
| User | Required to be a member of an ACD queue and receive routed interactions. |
Without the User role, you cannot add the person to a queue.
Last verified against Genesys Cloud Resource Center – March 2026
User profile management
User profiles are the "digital identity" of every person in the Genesys Cloud organization. They drive the internal directory, org hierarchy views, and ACD skill assignments. This page covers what profiles contain, who can edit what, and how admins configure profile fields org-wide.
Navigation Paths
| Task | Path |
|---|---|
| Edit a specific user's profile | Admin → People & Permissions → People → select user → More → Edit Person → Person Details tab |
| Configure org-wide profile fields | Admin → Directory → Profile Fields |
| View the org hierarchy | Any user profile → Hierarchy icon |
Required permissions:
| Permission | Required For |
|---|---|
Directory > User > View |
Viewing any user profile |
Directory > Userprofile > View |
Viewing profile field data |
Directory > Userprofile > Edit |
Editing profile field data |
Directory > Organization > Admin |
Configuring org-wide profile fields and sections |
1. What a Profile Contains
A Genesys Cloud user profile is more than a contact card — it feeds the internal directory search, the org hierarchy, and (indirectly) ACD routing via skills and certifications.
| Profile Section | Contents |
|---|---|
| Contact Information | Work phone, mobile, email, other numbers |
| Contact Preferences | Primary contact method — phone vs. email (set by the user) |
| Relationships | Manager field — drives the org hierarchy/reporting tree |
| Location | Office, city, floor (admins can upload floor plans) |
| Groups | Group memberships the user belongs to |
| Skills & Certifications | Tags that become keywords for directory search |
| Education | Optional — populated by the user |
| Photo | Must be uploaded by the user — admins cannot upload on behalf |
| Custom sections | Any additional sections configured by your admin via Profile Fields |
📌 Searchability: Every piece of data entered into a profile becomes a keyword in the advanced directory search. If you tag a user with "SBC" or "Spanish," other users and Architect flows can find them by that term.
2. Admin vs. User Responsibilities
A key distinction in Genesys Cloud profile management: some fields are user-controlled, others are admin-controlled.
| Action | Who Does It |
|---|---|
| Upload profile photo | User only — admins cannot upload photos on behalf of a user |
| Set primary contact preference (phone vs. email) | User only |
| Edit contact information, relationships, location | Admin (via Edit Person → Person Details tab) or User (via their own profile) |
| Add skills, certifications, tags | Admin (via Edit Person → ACD Skills tab or Person Details) |
| Set the Manager field (reporting hierarchy) | Admin |
| Configure org-wide profile sections and fields | Admin only (via Admin → Directory → Profile Fields) |
📌 Users without a manager assigned do not appear in the org hierarchy view. Always populate the Manager field when creating users if your org uses the hierarchy view for supervision or reporting.
3. Org Hierarchy View
The hierarchy view lets anyone in the org browse the reporting structure — who reports to whom, peers, and direct reports.
| Detail | Value |
|---|---|
| How it's built | Automatically generated from the Manager field on each user profile |
| Updates | Genesys Cloud updates the hierarchy view automatically when an admin changes the Manager field |
| Access | Available from any user's profile page |
| Requirement | Users must have a Manager assigned to appear in hierarchy views |
4. Profile Fields Configuration (Admin)
Admins can customize the org-wide profile structure by adding new sections and fields, renaming existing ones, reordering them, and enabling or disabling them.
What Admins Can Do
| Action | Notes |
|---|---|
| Add a new section | Creates a new grouping on all user profiles org-wide |
| Add fields to a section | Defines what data is collected in that section |
| Rename fields or sections | Change display labels; can be translated for multi-language orgs |
| Reorder fields and sections | Controls the order they appear on the profile |
| Disable a field or section | Hides it from profiles without deleting it |
| Enable a disabled field or section | Restores visibility |
Critical Limitation
⚠️ Profile sections cannot be deleted once created. They can only be disabled (hidden). Before adding any new section, ensure it has been approved by your organization — you cannot undo it.
This applies to sections specifically. Individual fields within sections can also not be deleted, only disabled.
5. Tags — Skills and Certifications
| Purpose | How It Works |
|---|---|
| Directory search | Tags become search keywords. Search "Cisco" or "SBC" and find all users tagged with those terms. |
| Group creation | Tags can be used as parameters to create dynamic groups of users who share a common attribute. |
📌 Tags are distinct from ACD Skills, which are the structured skills used by the routing engine to match interactions to agents. Tags are informal and used for human searchability; ACD Skills are formal and used by the system.
6. Locations
Admins can create Locations (office buildings, cities) and assign users to them via their profile.
| Feature | Detail |
|---|---|
| Create locations | Admin → Directory → Locations |
| Floor plan upload | Admins can upload a floor plan image for a location, enabling precise office mapping |
| Profile assignment | Users are assigned to a location via their profile's Location field |
Summary: Profile Editing Tabs (Edit Person Page)
When an admin opens Edit Person for a user, they see multiple tabs:
| Tab | What It Controls |
|---|---|
| Person Details | Full profile — contact info, relationships, location, custom fields. Opens in edit mode. |
| Roles | Assign/unassign roles. The license cost shown corresponds to the most expensive permission in the role. |
| Division & Licenses | Shows which division the user belongs to and which licenses are consumed |
| View Permissions | Read-only view of all permissions currently assigned to the user |
| Phone | Assign a phone station (WebRTC or physical) |
| ACD Skills | Assign ACD skills and languages with proficiency ratings for routing |
| Utilization | Configure how many simultaneous interactions the user can handle per media type |
Last verified against Genesys Cloud Resource Center – March 2026
Work Teams
Navigation: Admin → Directory → Work Teams Also accessible via: Menu → User Management → Work Teams

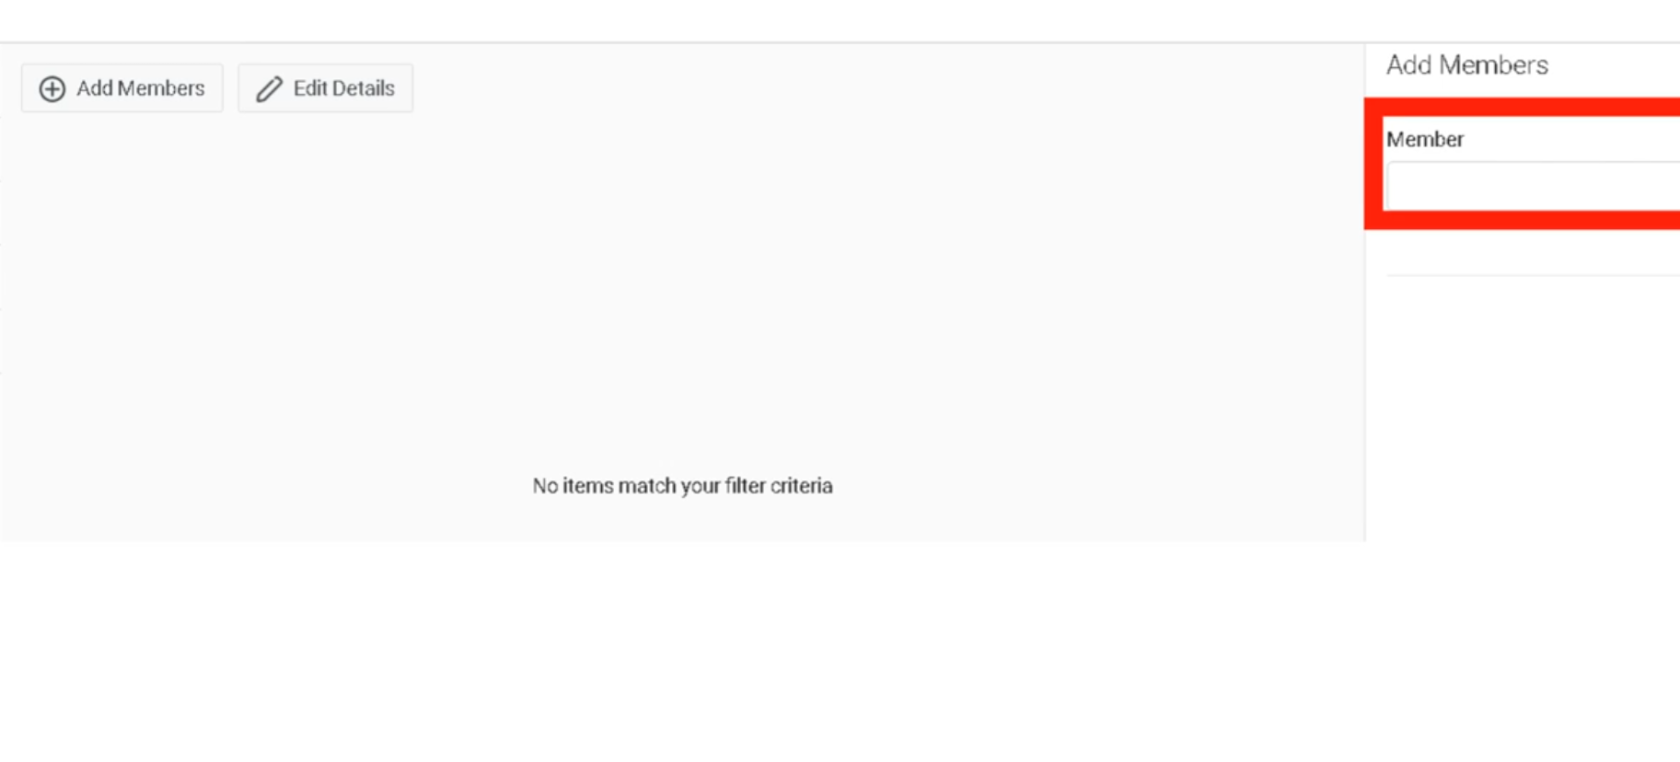
What Are Work Teams?
Work teams are supervisor-managed groups of agents used to monitor performance and manage workforce operations collectively. They are distinct from Groups (People & Permissions) in purpose and behaviour.
⚠️ Not related to Microsoft Teams. Genesys Cloud Work Teams and the Microsoft Teams integration are completely separate features.
Work Teams vs. Groups — Key Differences
| Feature | Work Teams | General Groups |
|---|---|---|
| Primary purpose | Performance management & WFM | Routing, chat, role assignment |
| Membership rule | One team per division per user | Users can belong to multiple groups |
| Division requirement | All members must share same division | Members can span divisions |
| Chat room created | No | Yes (automatic) |
| Role assignment | No | Yes |
| Queue membership | Yes (add team to queue) | Yes (add group to queue) |
| Schedule management | Yes (WFM schedules) | No |
| Automatic membership | No (manual only) | Yes (rule-based or skill expression) |
Org Limits
| Item | Limit |
|---|---|
| Work teams per org | 200 (contact Customer Care to increase) |
| Work teams per user | 1 per division |
| Division requirement | All members must belong to the team's assigned division |
Creating a Work Team
- Click Admin
- Under Directory, click Work Teams
- Click New Team
- Fill in the required fields:
| Field | Notes |
|---|---|
| Name | Appears in views and lists |
| Description | Purpose/context for the team |
| Division | All members must belong to this division |
- Add members — you can only add users from divisions where you have the Assign permission
- Save
Adding a Work Team to a Queue
Work teams can be assigned to queues in place of individual users.
⚠️ Mutually exclusive: You cannot mix individual users and a work team on the same queue. If you switch from users to a work team, the previously selected individual users are removed.
Steps:
- Admin → Contact Center → Queues → select queue
- Click the Members tab → Groups tab
- Click Add Group → search for and select the work team
- Click Add Selected → Save
What Supervisors Can Do with Work Teams
Work teams enable the following supervisor capabilities:
Performance Monitoring
- Filter Agent Performance / Detail views by work team
- Filter Agent Status view by work team
- Filter Agent Evaluation view by work team
- Filter Queue Performance Detail by work team
Workforce Management
- View and edit WFM schedules by work team
- Schedule activities for an entire work team at once
- Filter Real-time Adherence by work team
- Assign quality policies to a work team
Audit & Tracking
- Work team membership appears on the People page
- Changes to work team membership are recorded in the audit trail
Permissions Required
| Action | Permission |
|---|---|
| Create / manage work teams | Groups > Work Team > Add, Edit, Delete |
| Add members from a division | Groups > Work Team > Assign (for that division) |
| View work teams in WFM schedules | Groups > Work Team > View (non-conditional = all teams in management unit) |
ℹ️ If you have no Work Team permissions at all, the work team selector does not appear in WFM schedule views.
Relationship to Divisions
- When creating a work team, the division controls which users are eligible for membership
- A supervisor can only add users from divisions where they have the Assign permission
- Users can belong to one work team per division — so a user in multiple divisions could technically be in one work team in each
Relationship to WFM Business Units and Management Units
Work teams operate within the WFM scheduling hierarchy:
Business Unit
└── Management Unit(s)
└── Work Teams (filter / schedule view layer)
Work teams are not the same as management units. Management units group agents for forecasting and scheduling capacity (max 1,500 agents). Work teams are a supervisory filter and scheduling activity tool layered on top.
See Also
- Groups (People & Permissions) — for routing, role assignment, and chat rooms
- Queue & Routing Management — for assigning work teams to queues
- Divisions & Access Control — division membership rules affect work team eligibility
- Architectural Build Order — work teams are built in Phase 3 (People), after users and before queues
4.- Contact Center Configuration
Call Routing & Message Routing
Overview
Both Call Routing and Message Routing serve the same fundamental purpose: mapping an inbound address to an Architect flow. The difference is the channel.
| Feature | Call Routing | Message Routing |
|---|---|---|
| Channel | Voice (inbound phone calls) | Digital (SMS, web messaging, messaging apps) |
| Entry point | Inbound telephone number (DID) | Inbound messaging address or number |
| Flow type | Inbound Call Flow | Inbound Message Flow |
| Schedule support | Yes — via Schedule Groups | No — message flows handle scheduling internally |
| Emergency support | Yes — via Emergency Groups | No |
| Admin location | Admin → Routing → Call Routing | Admin → Routing → Message Routing |
Call Routing
What Is a Call Route?
A Call Route connects an inbound telephone number to an Architect inbound call flow, with optional schedule-based and emergency routing logic layered on top.
When a customer dials a number, Genesys Cloud:
- Identifies the matching call route
- Checks if an emergency group is active
- Evaluates the schedule group (open / closed / holiday)
- Executes the appropriate Architect flow
Call Route Components
| Component | Description |
|---|---|
| Route Name | Unique identifier |
| Division | Administrative ownership |
| Inbound Numbers | The DID(s) assigned to this route |
| Routing Mode | Always Open, or Schedule-Based |
| Schedule Group | Determines open/closed/holiday logic |
| Open Flow | Architect flow during open hours |
| Closed Flow | Architect flow during closed hours |
| Holiday Routing | Use Closed Flow, Route to Holiday Flow, or Bypass |
| Emergency Group | Overrides all routing when activated |
| Emergency Flow | Architect flow when emergency is active |
Routing Mode: Always Open vs. Schedule-Based
| Mode | When to Use |
|---|---|
| Always Open | 24/7 operations — one flow handles all calls regardless of time |
| Schedule-Based | Business hours operations — different flows for open, closed, and holidays |
Holiday Routing Options
| Option | Behaviour |
|---|---|
| Use Closed Flow | Holiday calls follow the same logic as after-hours |
| Route to Holiday Flow | Dedicated holiday Architect flow (custom message) |
| Bypass Holiday Routing | Holiday schedules are ignored — treats holiday as a normal day |
Creating a Call Route
- Admin → Routing → Call Routing
- Click Add
- Enter Route Name and select Division
- Assign Inbound Numbers (DIDs)
- Choose Routing Mode:
- If Always Open: select the single Call Flow
- If Schedule-Based: select Schedule Group, then assign Open Flow, Closed Flow, and Holiday options
- Optionally configure Emergency Routing:
- Enable emergency toggle
- Select Emergency Group
- Select Emergency Flow
- Click Save
Call Routing Decision Flow
Inbound call arrives on DID
↓
Call Route identified
↓
Emergency Group active?
YES → Emergency Flow
NO ↓
Always Open?
YES → Open Flow
NO ↓
Schedule Group evaluation
↓
┌──────────┬──────────┬──────────┐
│ Open │ Closed │ Holiday │
│ Flow │ Flow │ Flow │
└──────────┴──────────┴──────────┘
Prerequisites Before Creating a Call Route
- Inbound number (DID) provisioned and available in the org
- At least one published Architect inbound call flow
- Schedule Group configured (if using schedule-based routing)
- Emergency Group created (if emergency routing needed)
Call Route Example
| Setting | Value |
|---|---|
| Route Name | US_Support_Main |
| Division | Customer Support |
| Inbound Number | +1-800-555-1234 |
| Routing Mode | Schedule-Based |
| Schedule Group | US_Support_ScheduleGroup |
| Open Flow | Support_IVR_Main |
| Closed Flow | Support_AfterHours |
| Holiday Option | Route to Holiday Flow |
| Holiday Flow | Support_HolidayClosure |
| Emergency Group | US_Support_Emergency |
| Emergency Flow | Emergency_Announcement |
Message Routing
What Is Message Routing?
Message Routing maps an inbound messaging address or number to an Architect inbound message flow. When a customer sends an SMS or web message to a configured address, Genesys routes it to the associated flow for bot handling or agent queue delivery.
Message Routing Page Layout
The Message Routing page shows two columns:
| Column | Description |
|---|---|
| Inbound Message Flows | The Architect flow that will process the message |
| Inbound Address | The messaging number or address that triggers the flow |
Each routing entry links one or more addresses to one flow.
Message Routing Components
| Component | Description |
|---|---|
| Inbound Message Flow | A published Architect inbound message flow |
| Inbound Address | SMS number, web messaging address, or other digital channel address |
ℹ️ Unlike Call Routing, Message Routing has no built-in schedule group or emergency group fields. Time-based logic for messaging is handled inside the Architect message flow itself using Evaluate Schedule Group actions.
Creating a Message Route
- Admin → Routing → Message Routing
- Click + (Add)
- Click Select Flow → begin typing the flow name → select it
- Click Select Addresses → choose the inbound number(s) or address(es)
- Click Add
- Click Save
Prerequisites Before Creating a Message Route
- Messaging channel provisioned (SMS number, web messaging widget, etc.)
- Published Architect inbound message flow
Message Routing Workflow
Customer sends message
↓
Messaging channel (SMS / Web Messaging / App)
↓
Inbound address matched
↓
Message Routing entry found
↓
Architect Inbound Message Flow executes
↓
Bot / automation or agent queue
Common Message Flow Patterns
| Pattern | Flow Logic |
|---|---|
| Simple queue delivery | Send greeting → Transfer to ACD queue |
| Bot self-service | Collect intent → automated response → escalate if unresolved |
| Order status | Request order number → Data Action lookup → return status |
| Appointment scheduling | Collect date/time preference → create callback |
Message Route Example
| Setting | Value |
|---|---|
| Inbound Message Flow | Customer_Service_MessageFlow |
| Inbound Address | +1-800-555-8888 |
| Division | Customer Service |
Troubleshooting
Call Routing
| Issue | Cause | Fix |
|---|---|---|
| Calls not reaching flow | DID not assigned to route | Verify inbound number on the call route |
| Wrong flow playing | Incorrect schedule group or flow assignment | Review schedule group and flow assignments |
| Emergency routing not activating | Emergency group not activated | Go to Emergency Groups → activate |
| Calls always closed | Schedule group time zone wrong | Verify time zone on the schedule group |
| Flow not executing | Flow is unpublished in Architect | Publish the flow |
Message Routing
| Issue | Cause | Fix |
|---|---|---|
| Messages not reaching flow | Address not assigned to routing entry | Verify address assignment in message routing |
| Wrong flow triggered | Incorrect routing entry | Update the message routing entry |
| No automated response | Flow not published | Publish the Architect message flow |
| Duplicate routing | Address assigned to multiple entries | Check for conflicting routing entries |
Key Facts for Exam / Interview
| Question | Answer |
|---|---|
| Where is call routing configured? | Admin → Routing → Call Routing |
| What determines open/closed routing for voice? | Schedule Groups |
| How do you override all routing for voice calls? | Activate an Emergency Group |
| Where is message routing configured? | Admin → Routing → Message Routing |
| Does message routing have schedule group support? | No — time-based logic is built into the Architect message flow |
| What must exist before creating either route type? | A published Architect flow of the matching type |
See Also
- Scheduling & Schedule Groups — the schedule groups referenced by call routes
- Emergency Groups — the override mechanism for call routing
- Architect Overview — building the inbound call and message flows
- Prompt Management — audio messages used inside those flows
Emergency Groups
What Are Emergency Groups?
An Emergency Group is a switch that overrides all normal schedule-based call routing when activated. When an emergency group is active, inbound calls bypass the schedule group entirely and route directly to a designated emergency call flow.
Use cases: office closures, power outages, network failures, natural disasters, building evacuations, planned maintenance requiring full call redirection.
⚠️ Emergency Groups have the highest routing priority. They override Open / Closed / Holiday schedule logic. An active emergency group = all calls go to the emergency flow, regardless of time of day.
Emergency Group Components
| Component | Description |
|---|---|
| Name | Unique identifier for the group |
| Division | Administrative ownership and access scoping |
| Activation Status | On = emergency routing active; Off = normal routing |
| Usages | Shows which call routes and flows reference this group — critical for impact assessment |
Creating an Emergency Group
- Admin → Routing → Emergency Groups
- Click Add
- Enter a unique Emergency Group Name
- Select Division
- Click Save
The group is created in a deactivated state — it has no routing impact until activated.
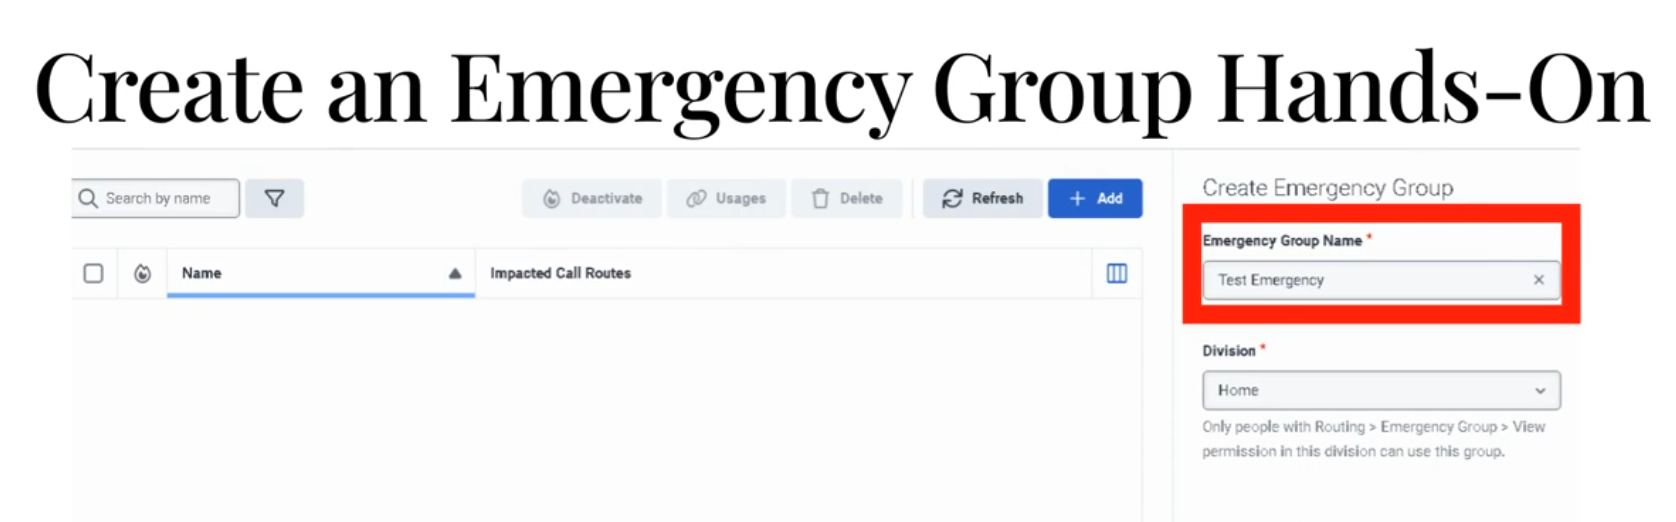
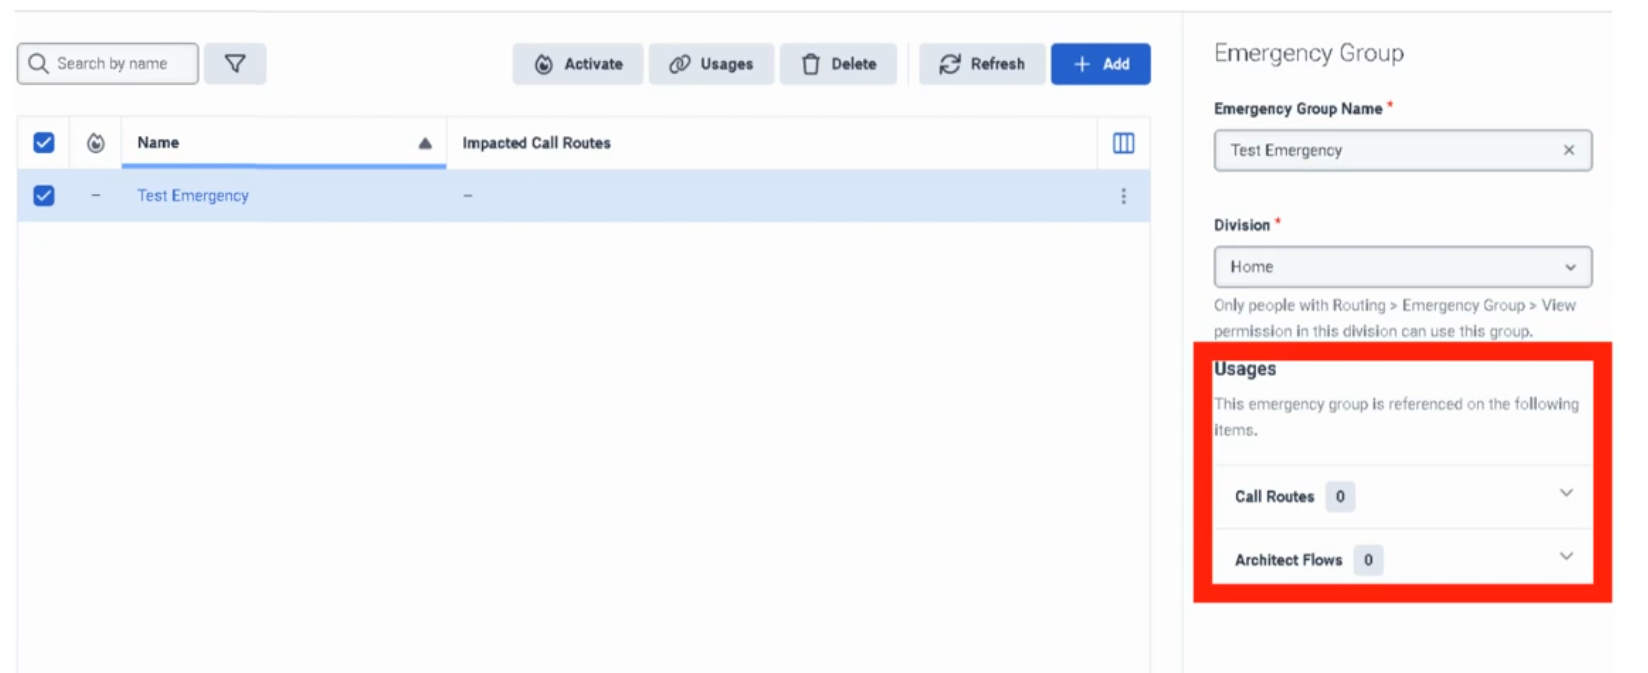
Connecting an Emergency Group to a Call Route
Creating the group alone does nothing. It must be assigned to a Call Route:
- Admin → Routing → Call Routing → open the target route
- Enable Emergency toggle
- In the Emergency Group field, select the group you created
- In the Emergency Flow field, select the published Architect flow to use during emergencies
- Click Save
Activating an Emergency Group
When an incident occurs:
- Admin → Routing → Emergency Groups
- Find the group
- Toggle Activation to On
- Calls immediately begin routing to the emergency flow
To restore normal routing:
- Return to Emergency Groups
- Toggle Activation to Off
✅ Best practice: Test activation/deactivation during a low-traffic window before a real incident occurs. Know exactly where to find this toggle under pressure.
Routing Priority Diagram
Incoming Call
↓
Call Route
↓
Emergency Group active?
↓
┌──── YES ─────────────────────┐
│ Emergency Flow executes │
│ (schedule ignored entirely) │
└──────────────────────────────┘
↓ NO
Schedule Group evaluated
↓
Open / Closed / Holiday → respective flow
Common Emergency Flow Designs
Simple Closure Announcement
Start
↓
Play Emergency Announcement
↓
Disconnect
Redirect to Backup Location
Start
↓
Play Brief Message ("We are experiencing an outage...")
↓
Transfer to backup contact center DID
Alternate Contact Information
Start
↓
Play Emergency Message
↓
Provide website / email / alternate number
↓
Disconnect
✅ Keep emergency flows simple. Complex logic is a liability during an outage. The goal is: play a clear message, offer an alternative, end the call.
The Usages Field
The Usages field on an emergency group shows every call route and Architect flow that references it. Always check this before making changes — it tells you the blast radius of any modification or activation.
Naming Convention
| Format | Example |
|---|---|
<Region>_<Dept>_Emergency |
US_Support_Emergency |
<Site>_<Function>_Emergency |
Monterrey_IVR_Emergency |
Troubleshooting
| Issue | Cause | Fix |
|---|---|---|
| Emergency routing not activating | Group not assigned to the call route | Edit call route → assign emergency group |
| Group is active but calls still follow normal schedule | Emergency flow not assigned to the route | Assign the emergency flow on the call route |
| Emergency flow errors out | Flow has unpublished changes or broken logic | Open Architect, validate, publish latest version |
| Wrong routes affected | Unexpected routes also reference the group | Check Usages field; scope the group correctly |
| Normal routing not restoring after deactivation | Underlying schedule or call route was already misconfigured | Test non-emergency routing path separately |
| Admin cannot modify group | Division permission issue | Verify division assignment and admin role permissions |
Troubleshooting Checklist
| Check | ✓ |
|---|---|
| Emergency group created | ☐ |
| Correct division selected | ☐ |
| Emergency group assigned to all relevant call routes | ☐ |
| Emergency flow is published in Architect | ☐ |
| Emergency flow assigned to call route | ☐ |
| Tested activation in non-production or low-traffic window | ☐ |
| Verified Usages field — no unexpected routes affected | ☐ |
| Confirmed normal routing works when group is deactivated | ☐ |
Key Facts for Exam / Interview
| Question | Answer |
|---|---|
| Where are emergency groups configured? | Admin → Routing → Emergency Groups |
| What does activating an emergency group do? | Overrides all schedule-based routing — all calls go to the emergency flow |
| What must be done after creating an emergency group? | Assign it to a call route AND assign an emergency flow on that route |
| How do you check what a group affects? | The Usages field on the group |
| What is the routing priority order? | Emergency Group → Schedule Group → Open/Closed/Holiday flows |
| What is the most common implementation mistake? | Creating the group but forgetting to assign it to the call route, or not assigning an emergency flow |
See Also
- Scheduling & Schedule Groups — the routing layer that emergency groups override
- Call Routing — where emergency groups are assigned to inbound numbers
- Architect Overview — building the emergency call flow that gets executed
External Contacts
What Are External Contacts?
External Contacts is the central repository for people and organizations outside your company — customers, vendors, partners, suppliers. Contact records surface in the agent workspace during live interactions, giving agents immediate context without switching systems.
There are two object types:
| Object | What It Represents |
|---|---|
| External Organization | A company or entity (e.g., "Oracle Support", "Acme Corp") |
| External Contact | An individual person, optionally linked to an External Organization |
✅ Best practice: Create the External Organization first, then create contacts linked to it. This allows you to track all individuals from the same company under one record.
Creating an External Organization
- Admin → Directory → External Contacts
- Click Add → Organization
- Fill in:
| Field | Notes |
|---|---|
| Name | Company name — required |
| Website | Company URL |
| Address | Physical address |
| Custom Fields | Org-specific fields you've configured (e.g., Account ID, SBC Serial Number) |
- Click Save
Creating an External Contact
- Admin → Directory → External Contacts
- Click Add → Contact
- Fill in:
| Field | Notes |
|---|---|
| First Name / Last Name | Required — the only mandatory fields |
| Associate Org | Link to an External Organization (search and select) |
| Work, cell, or home addresses | |
| Phone | Add one or more numbers |
| SMS Toggle | ⚠️ Click the SMS icon next to each phone number to explicitly enable or disable SMS — not enabled by default |
| Social Media | Add handles for WhatsApp, Twitter/X, Facebook, Line |
| Survey Opt-Out | Check to prevent automated post-call surveys from being sent to this contact |
| Notes | Free-text historical context not captured in standard fields |
| External System Link | A URL pointing to your own internal CRM or database record for this contact |
- Click Save
SMS Toggle — Important Detail
SMS capability on a phone number is not enabled by default. For each number on a contact record:
- Click the SMS icon next to the number
- Toggle to On to allow agents to send SMS to that number
- Toggle to Off to block SMS to that number
This must be set explicitly — there is no org-wide "enable SMS for all contacts" switch.
Survey Opt-Out
The Survey Opt-Out checkbox on a contact record:
- Prevents automated post-interaction surveys from being sent to that contact
- Applies across all survey methods configured in the org
- Should be set when a customer has explicitly requested no surveys
Custom Fields
Both External Organizations and External Contacts support custom schema fields:
- Fields are configured by admins at the schema level (not per-record)
- Examples: Account Tier, Contract ID, SBC Model, Support Level
- Appear in the contact/org record and in the agent workspace pop-up
Bulk Management
For large contact databases, manual entry is not practical. Three methods:
| Method | Best For |
|---|---|
| CSV Upload | One-time or periodic bulk imports from a spreadsheet |
| CRM Sync | Continuous sync from Salesforce or other supported CRMs — keeps contacts current automatically |
| External Contacts API | Custom integrations pushing data from internal systems (ticketing, billing, ERP, etc.) into Genesys |
Where Agents See This Data
During a live interaction, the CX Agent Workspace automatically surfaces the matching External Contact record when the caller's number matches a record in External Contacts. Agents see:
- Contact name and organization
- Phone numbers and email addresses
- Social handles
- Notes and custom fields
- Link to the external system (if configured)
This eliminates the need for agents to look up customer records manually during a call.
Division Behaviour
⚠️ External Contacts cannot be reassigned between divisions after creation. If a contact needs to move to a different division, you must delete the record and recreate it in the correct division.
Plan your division structure before bulk-importing contacts.
Quick Reference — Key Facts
| Feature | Detail |
|---|---|
| Object types | External Organization + External Contact |
| Required fields (Contact) | First Name and Last Name only |
| SMS | Must be explicitly toggled per phone number |
| Survey opt-out | Per-contact checkbox |
| Division reassignment | Not supported — delete and recreate |
| Bulk import | CSV, CRM sync (Salesforce), or API |
| Agent visibility | CX Agent Workspace during live interactions |
| Custom fields | Configurable at schema level for both Orgs and Contacts |
See Also
- Divisions & Access Control — division assignment at contact creation time
- Integration Management — CRM sync configuration (Salesforce, etc.)
- Queue & Routing Management — how interaction routing connects to contact lookup
Scheduling & Schedule Groups
Scheduling & Schedule Groups
| Section | Description |
|---|---|
| Module Context | Schedules are part of Routing and Architect decision logic in Genesys Cloud. |
| Purpose | A schedule stipulates when a flow runs based on date, time, or event. |
| Primary Use | Business hours, after-hours support, holidays, recurring events, maintenance windows, and special situations. |
| Admin Location | Admin → Routing → Scheduling |
Study Notes
| Topic | Explanation |
|---|---|
| Schedule | A time-based object that determines when routing or flow logic is active. |
| Schedule Group | Groups multiple schedules into Open, Closed, and Holiday categories for routing. |
| Architect Usage | Architect uses schedules to determine how inbound and outbound interactions should be handled. |
| Recurrence Support | Schedules can be one-time or repeating (daily, weekly, monthly, yearly, or custom iCal rule). |
| Evaluation Order | In Architect: Emergency → Holiday → Closed → Open |
| Default Branch | If no schedule matches, Closed is the default branch in Evaluate Schedule Group. |
| Time Zone | Set on the Schedule Group — most common misconfiguration is a wrong or missing time zone. |
Navigation
| Task | Navigation |
|---|---|
| View Schedules | Admin → Routing → Scheduling |
| Create Schedule | Admin → Routing → Scheduling → Add Schedule |
| View Schedule Groups | Admin → Routing → Scheduling → Schedule Groups |
| Use in Architect | Architect → Open Flow → Add Evaluate Schedule Group action |
Schedule Configuration Fields
| Field | Description | Example |
|---|---|---|
| Schedule Name | Unique name for the schedule | US_Support_BusinessHours |
| Division | Determines administrative ownership and access | Home |
| Repeating Event | Enables recurring schedule logic | Enabled |
| Start Date | Date when the schedule starts | 2026-03-01 |
| End Date | Date when the schedule ends | 2026-12-31 |
| Start Time | Time when the schedule starts | 08:00 |
| End Time | Time when the schedule ends | 18:00 |
| All Day | Enables full-day schedule instead of start/end times | Disabled |
| Repeats Every | Defines recurrence pattern | Weekly |
| Start Option | Defines when recurrence begins | On Date |
| End Option | Defines when recurrence stops | No End Date |
| iCal Rule | Advanced recurrence rule configuration | FREQ=WEEKLY;BYDAY=MO,TU,WE,TH,FR |
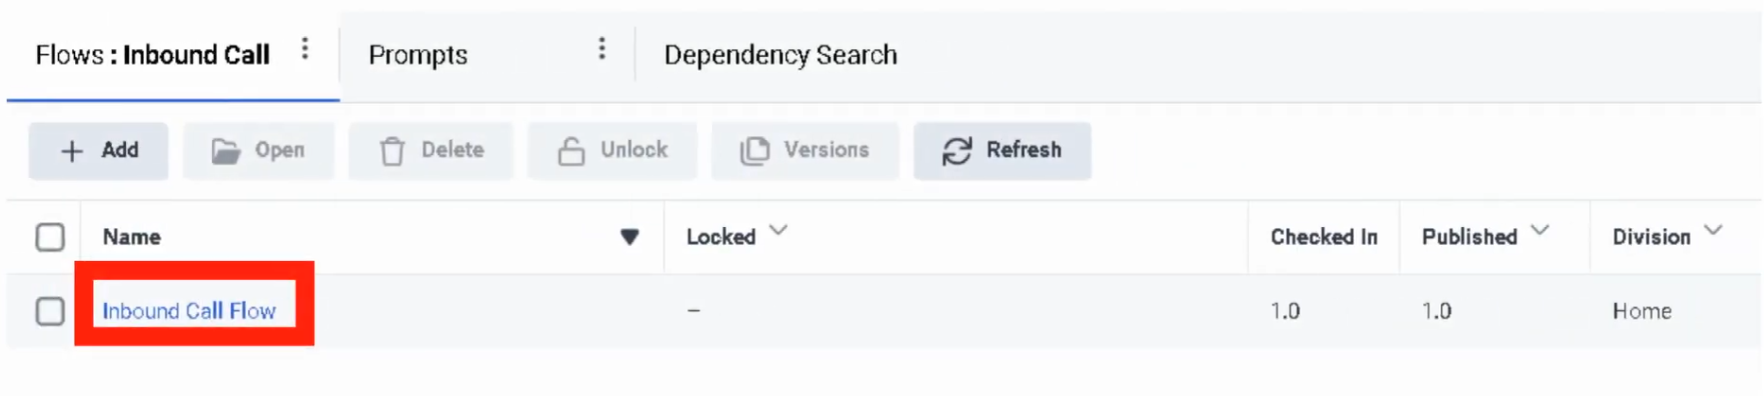
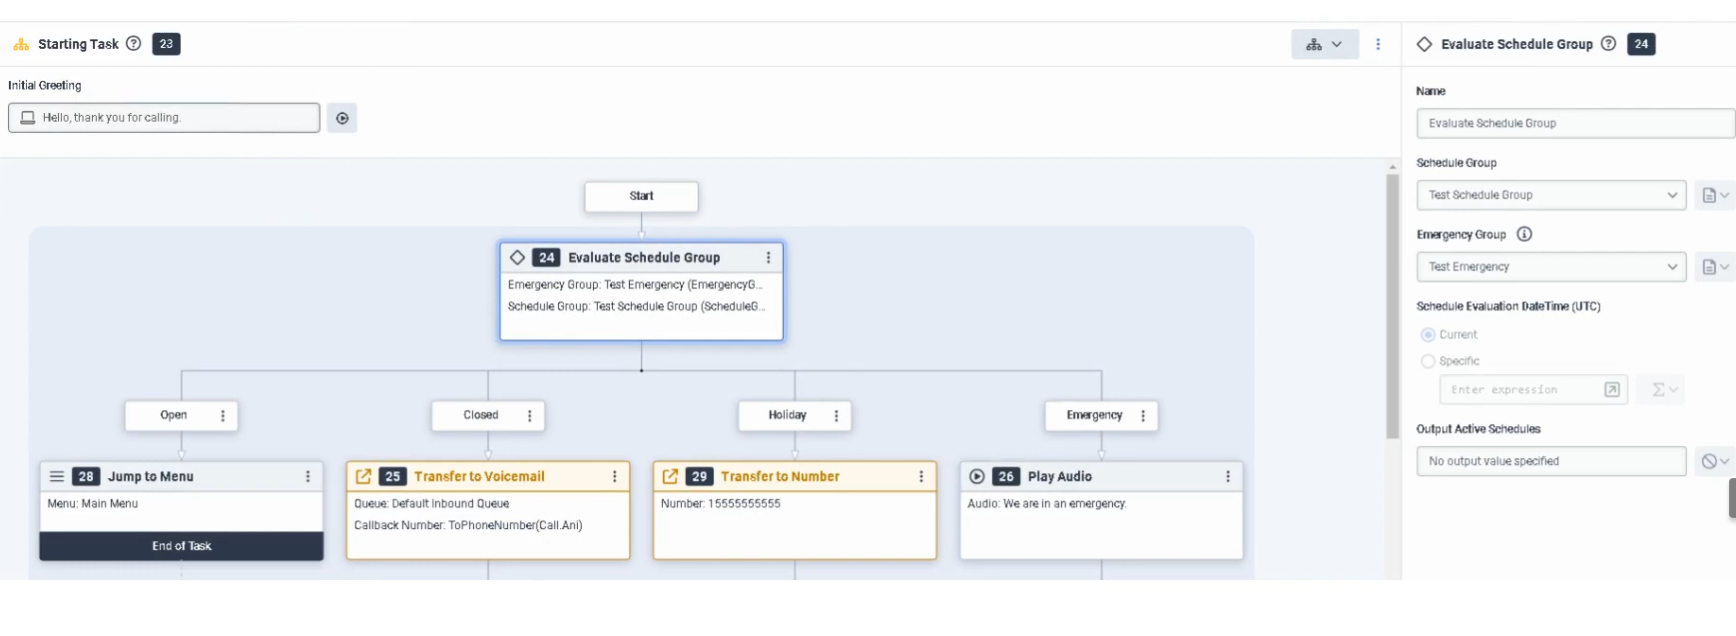
Schedule Types
| Schedule Type | Example |
|---|---|
| One-Time | July_4_Closure |
| Daily | After_Hours_Daily |
| Weekly | Mon_Fri_BusinessHours |
| Monthly | First_Monday_Maintenance |
| Yearly | Christmas_Holiday |
| Advanced Rule | FREQ=WEEKLY;BYDAY=MO,TU,WE,TH,FR |
Example business-hours schedule:
| Field | Value |
|---|---|
| Name | US_Support_BusinessHours |
| Repeating Event | Enabled |
| Repeats Every | Weekly |
| Days | Monday–Friday |
| Start Time | 08:00 |
| End Time | 18:00 |
| End Option | No End Date |
Schedule Group Configuration
| Component | Description |
|---|---|
| Open Schedule | Defines when the business is open |
| Closed Schedule | Defines after-hours or closure periods |
| Holiday Schedule | Defines holiday dates — overrides Open |
| Time Zone | Applied at the Schedule Group level — determines when schedules activate |
| Emergency Group | Separate object that overrides all schedule-based logic when activated |
⚠️ Most common misconfiguration: Setting the wrong time zone on the Schedule Group, causing callers to hit closed or holiday paths at unexpected times.
Architect Evaluation Order
Evaluate Schedule Group
↓
Emergency? (Emergency Group activated?)
↓
Holiday? (Current date/time matches a Holiday schedule?)
↓
Closed? (Current date/time outside Open schedule?)
↓
Open (Default — current date/time matches Open schedule)
If nothing matches, the Closed branch is taken by default.
Routing Architecture
Customer Interaction
↓
Call Route or Architect Flow
↓
Schedule / Schedule Group Evaluation
↓
Open / Closed / Holiday / Emergency
↓
Menu / Queue / Voicemail / External Transfer / Disconnect
Real Flow Scenarios
Scenario 1 — Business Hours Menu
Caller Enters Flow
↓
Evaluate Schedule Group
↓
Open
↓
Play Welcome Prompt → Send to Menu → Route to Agent
Scenario 2 — After-Hours Voicemail
Caller Enters Flow
↓
Evaluate Schedule Group
↓
Closed
↓
Play Closed Prompt → Route to Voicemail
Scenario 3 — Holiday Transfer
Caller Enters Flow
↓
Evaluate Schedule Group
↓
Holiday
↓
Play Holiday Prompt → Transfer to External Number
Scenario 4 — Emergency Shutdown
Caller Enters Flow
↓
Evaluate Schedule Group
↓
Emergency
↓
Play Issue Prompt → Disconnect Call
Implementation Steps
| Step | Action |
|---|---|
| Step 1 | Navigate to Admin → Routing → Scheduling |
| Step 2 | Click Add Schedule |
| Step 3 | Enter unique schedule name |
| Step 4 | Select division |
| Step 5 | Choose one-time or repeating event |
| Step 6 | Configure start date, end date, and time range (or All Day) |
| Step 7 | Configure recurrence settings if repeating |
| Step 8 | Save the schedule |
| Step 9 | Create a schedule group and assign schedules to Open / Closed / Holiday |
| Step 10 | Set the correct time zone on the schedule group |
| Step 11 | Use the schedule group in call routing or Architect |
Naming Convention
| Resource | Example |
|---|---|
| Schedule | US_Support_BusinessHours |
| Holiday Schedule | US_Support_Christmas |
| Maintenance Schedule | US_Support_MaintenanceWindow |
| Schedule Group | US_Support_Main_SG |
Recommended pattern: <Region>_<Department>_<Purpose>
Best Practices
| Practice | Reason |
|---|---|
| Use clear schedule names | Makes routing easier to understand and maintain |
| Separate business hours and holidays into distinct schedules | Improves flexibility and troubleshooting |
| Always use Schedule Groups for production routing | Simplifies open/closed/holiday branching |
| Set the correct time zone on the Schedule Group | Prevents incorrect routing behavior |
| Test all branches (Open, Closed, Holiday, Emergency) | Ensures callers hear the correct experience |
| Review holiday schedules annually | Keeps routing accurate over time |
Troubleshooting
| Issue | Cause | Resolution |
|---|---|---|
| Flow always routes Closed | Time zone mismatch or no active Open schedule | Verify schedule times and schedule group time zone |
| Holiday path never triggers | Holiday schedule not assigned to group | Add holiday schedule to schedule group |
| Emergency path does not work | Emergency group not activated or not assigned to flow | Verify emergency group setup and flow logic |
| Recurring schedule not firing | Recurrence settings incorrect | Review repeating event settings and end conditions |
| External transfer not reached | Holiday branch misconfigured | Check Architect holiday branch and external number |
| Schedule group unavailable in flow | Permission or object visibility issue | Confirm access and division permissions |
Interview Cheat Sheet
| Question | Answer |
|---|---|
| What is a schedule in Genesys Cloud? | A time-based object that determines when routing or flow logic is active |
| What can schedules be used for? | Business hours, after-hours, holidays, recurring events, and special situations |
| What is a schedule group? | A grouping of schedules into Open, Closed, and Holiday categories |
| What is the evaluation order in Architect? | Emergency → Holiday → Closed → Open |
| What happens if nothing matches? | Closed is the default path in Evaluate Schedule Group |
| What is the most common misconfiguration? | Wrong time zone set on the Schedule Group |
Queues
| Topic | Detail |
|---|---|
| Navigation | Admin → Contact Center → Queues |
| Purpose | Core ACD routing objects that hold interactions until an agent is available |
| Max Queues | 5,000 queues per organization |
| Max Members | 5,000 members per queue |
| Tabs | General, Routing, Members, Voice, Chat, Message, Email, Callback, Wrap-Up Codes |
Step 1 — Initial Queue Creation


Step 2 — General Tab
| Field | Description |
|---|---|
| After Call Work (ACW) Mode | Controls how agents transition out of ACW after each interaction |
| ACW Timeout | Maximum ACW duration in seconds — max is 900 seconds |
| Manual Assignment | Allows supervisors to manually push waiting interactions to specific agents (rarely used in high-volume environments) |
ACW Modes
| Mode | Behavior |
|---|---|
| Mandatory Timeboxed | Automatically returns agent to Available after the ACW timeout expires |
| Mandatory Discretionary | Agent stays in ACW until they manually click to finish |
| Optional | Agent can choose to enter ACW or skip it |
| Optional Timed | ACW is optional, but auto-ends after the timeout |
| None | No ACW — agent is immediately available after interaction ends |
⚠️ Mandatory Timeboxed is most common in high-volume voice environments. Mandatory Discretionary is preferred when agents need time to complete CRM updates before going available again.
Step 3 — Routing Tab
Routing Methods
| Method | Behavior |
|---|---|
| Standard | Routes to the longest-idle available agent matching skills |
| Bullseye | Starts with strict skill requirements; relaxes requirements in rings over time if no agent found |
| Predictive | Uses AI to match the best agent to the specific caller based on historical outcomes |
Evaluation Methods
| Method | Behavior |
|---|---|
| All Skills Matching | Agent must have every skill required by the interaction |
| Best Available Skills | Routes to the agent with the highest combined skill proficiency |
Scoring Methods
| Method | Formula / Behavior |
|---|---|
| Conversation Score | Score = (Minutes in Queue) + (Priority Value) — allows high-priority calls to jump ahead of older, lower-priority calls |
| Priority Score | Ranks strictly by priority value set in Architect flow; equal-priority interactions handled FIFO |

Step 4 — Members Tab
| Option | Description |
|---|---|
| Add User | Search for and add individual agents |
| Add Work Team | Add an entire Work Team to the queue |
⚠️ Generally add either individual users or a Work Team — not a mix of both for the same queue.


Step 5 — Media-Specific Tabs
Voice Tab
| Field | Description |
|---|---|
| Service Level | Target percentage of calls answered within the SLA window (e.g., 80%) |
| Service Level Target | Time goal in seconds (e.g., 20 seconds) |
| In-Queue Flow | Architect flow handling the caller's wait experience — plays hold music, EWT announcements, or offers callback |
| Calling Party Name/Number | Outbound caller ID shown to recipients when agents call on behalf of this queue |
| Alerting Timeout | Seconds a call rings at an agent's station before being routed to the next available agent |
| Default Script | Script that pops on the agent's screen when they answer |
| Whisper Prompt | Short audio clip played only to the agent just before the caller connects — helps agents pivot context across multiple queues |
| Auto-Answer | If enabled, call connects to agent automatically without requiring them to click Answer |
| Continue Voice Recording during Q-Wait | Enabled = records hold music; Disabled = recording starts only when agent and caller connect (saves storage) |

Chat Tab
| Field | Description |
|---|---|
| Service Level & Target | SLA goal — digital targets are typically slightly longer than voice (e.g., 80% within 30 seconds) |
| Alerting Timeout | Seconds chat request flashes on agent screen before rerouting to next available agent |
| Auto-Answer | Enabled = chat session connects automatically; Disabled = agent must click Answer |
| Default Script | Published script that loads for the agent — often includes Data Actions to look up customer account data |
| In-Queue Flow (Message Flow) | Architect flow managing the customer wait experience — handles welcome messages and position-in-queue announcements |

Message Tab
Covers SMS, WhatsApp, Facebook Messenger, and LINE. Messaging is asynchronous — customers may not reply immediately.
| Field | Description |
|---|---|
| Service Level & Target | SLA goal — messaging SLAs are typically more relaxed than voice (e.g., 80% within 60 seconds) |
| Alerting Timeout | Seconds the notification flashes for the agent before rerouting |
| Auto-Answer | Enabled = message thread pops open immediately; recommended for high-volume SMS/WhatsApp queues |
| In-Queue Message Flow | Architect Inbound Message Flow — acts as a digital IVR, can collect account number or reason for contact via bot |
| Default Script | Script displaying customer data such as phone number or WhatsApp display name |
| Outbound SMS Number | DID or Short Code used when an agent starts a new outbound SMS — must be provisioned in SMS Inventory |

Email Tab
| Field | Description |
|---|---|
| Service Level & Target | SLA goal — email targets are typically set in hours rather than seconds (e.g., 90% within 4 hours) |
| Alerting Timeout | Seconds email flashes on agent screen before moving to next agent |
| Auto-Answer | Enabled = email workspace opens immediately; best for high-volume ticket environments |
| Outbound Email Address | Address recipients see when an agent replies (e.g., support@company.com) |
| Email Domain | Verified domain used for outbound email — validates sender identity |
| In-Queue Email Flow | Architect Inbound Email Flow — can perform keyword routing (e.g., raise priority if subject contains "Billing") |
| Default Script | Script displaying customer history or canned response suggestions |
| Auto-Reply | Sends an immediate acknowledgement to the customer before an agent reviews the email |

Callback Tab
| Field | Description |
|---|---|
| Service Level & Target | SLA goal — callback clock typically starts when the agent's phone rings for the return call |
| Alerting Timeout | Seconds callback request flashes on agent screen before rerouting |
| Allow Agents to Take Ownership | Agents can claim a scheduled callback so it routes back specifically to them |
| Ownership Duration | How long callback remains reserved for the specific agent — 1 hour to 7 days |
| Advance Scheduling | How far in advance an agent can schedule a callback — 1 hour to 30 days |
| Auto-Answer | Enabled = system dials customer and connects agent automatically; Disabled = agent must manually click Call |

Wrap-Up Codes Tab
⚠️ Critical: If wrap-up codes are not added to the queue here, agents cannot tag their interactions even if the codes exist globally in the system.

Interview Cheat Sheet
| Question | Answer |
|---|---|
| Max queues per org? | 5,000 |
| Max members per queue? | 5,000 |
| Max ACW timeout? | 900 seconds |
| What does Bullseye routing do? | Starts with strict skills; relaxes requirements in rings over time |
| Conversation Score formula? | Minutes in Queue + Priority Value |
| When does an interaction count toward utilization? | When it starts Alerting (ringing), not when answered |
| Can you mix Users and Work Teams in a queue? | Not recommended — use one or the other |
ACD Skills & Languages
| Topic | Detail |
|---|---|
| Navigation | Admin → Contact Center → ACD Skills & Languages |
| Purpose | Define skills and languages used by the ACD routing engine to match interactions to the right agents |
| Proficiency Scale | 1 (Beginner) to 5 (Expert) |
| Skill Status | Active (default) or Inactive (retired — preserves historical reporting data) |
Creating a Skill
⚠️ Once created, a skill must be assigned to a User profile or referenced in an Architect flow before it has any effect on routing.


Creating a Language
Languages are treated separately from skills because Genesys Cloud has built-in logic to prioritize a caller's native language during routing.
Assigning Skills to Users
Individual Assignment
Bulk Assignment
In the People list: select multiple agents → More Actions → Assign Skill
Proficiency Ratings
| Rating | Meaning |
|---|---|
| 1 | Beginner / Trainee |
| 2 | Basic |
| 3 | Intermediate |
| 4 | Advanced |
| 5 | Expert / Subject Matter Expert |
Skill Expressions (Advanced Routing)
Instead of a single skill requirement, use a Skill Expression Group with AND/OR logic:
(Skill: SIP == 5) AND (Skill: Oracle_SBC >= 3)
This allows highly specific routing without requiring a separate queue for every possible skill combination. Skill Expression Groups are configured under Admin → People & Permissions → Groups.
How Routing Uses Skills
In Architect's Transfer to ACD action, you specify:
- Target queue
- Required skill(s) and minimum proficiency level
- Language requirement (if applicable)
The ACD engine then matches the interaction to an available agent who meets all requirements. With Bullseye routing, if no agent matches, the requirements are relaxed in configurable rings over time.
Interview Cheat Sheet
| Question | Answer |
|---|---|
| Where are ACD skills created? | Admin → Contact Center → ACD Skills & Languages |
| What does setting a skill to Inactive do? | Retires it from new routing logic without deleting historical data |
| What is proficiency scale? | 1 (Beginner) to 5 (Expert) |
| How do you assign skills to multiple agents at once? | People list → select agents → More Actions → Assign Skill |
| What is a Skill Expression? | AND/OR logic combining multiple skills for routing (e.g., SIP == 5 AND SBC >= 3) |
| Why are languages separate from skills? | Genesys has built-in native-language prioritization logic for languages |
Wrap-Up Codes
| Topic | Detail |
|---|---|
| Navigation | Admin → Contact Center → Wrap-Up Codes |
| Purpose | Allow agents to categorize the outcome of each interaction for reporting, analytics, and quality |
| Scope | Created globally at org level — must also be assigned to each queue individually |
Overview
Wrap-up codes are disposition tags agents apply at the end of each interaction to classify what happened (e.g., Resolved, Escalated, Follow-up Required, Technical Issue). They feed directly into:
- Historical analytics and reports
- Quality evaluations
- Workforce management data
- Contact reason tracking
Creating Wrap-Up Codes
Assigning Wrap-Up Codes to a Queue
Codes must be added to each queue individually — creating them globally is not enough.
⚠️ Critical: If wrap-up codes are not assigned to the queue, agents cannot tag their interactions — even if the codes exist in the system globally.
Best Practices
| Practice | Reason |
|---|---|
| Keep code names clear and consistent | Improves reporting accuracy and agent usability |
| Limit the number of codes per queue | Too many choices slow agents during ACW |
| Use division assignment | Restricts management to appropriate admin teams |
| Review codes periodically | Remove outdated codes to keep reporting clean |
| Align codes with business reporting needs | Ensures data collected matches what leadership tracks |
Interview Cheat Sheet
| Question | Answer |
|---|---|
| Where are wrap-up codes created? | Admin → Contact Center → Wrap-Up Codes |
| Where are they assigned for use? | In each queue's Wrap-Up Codes tab |
| What happens if codes aren't assigned to the queue? | Agents cannot tag interactions, even if codes exist globally |
| What do wrap-up codes feed into? | Analytics, historical reports, quality evaluations, WFM data |
Utilization
| Topic | Detail |
|---|---|
| Navigation | Admin → Contact Center → Utilization |
| Purpose | Controls how many simultaneous interactions an agent can handle and which channels can interrupt others |
| Levels | Organization-wide default + per-user override |
Overview
Utilization defines agent capacity — how many interaction "slots" an agent has per media type and what priority rules govern interruptions between channels. It prevents agents from being overwhelmed while ensuring high-priority interactions (like voice calls) are never missed.
Organization-Wide Configuration
| Media Type | Typical Capacity |
|---|---|
| Voice | 1 (almost always) |
| Chat | 2–3 |
| 4–5 | |
| Message | 2–3 |
| Callback | 1 |
- Configure Can be interrupted by checkboxes — defines which channels can interrupt an active interaction
- Example: If an agent is working on an Email, can a Voice call interrupt? If checked, the agent sees the incoming call alert while the email draft stays open
- Block calls when on a non-ACD call — prevents ACD queue calls from reaching an agent who is already on an internal/personal call (Busy-on-Busy logic)
- Click Save

User-Level Override
To set different utilization for a specific agent (e.g., a Lead Engineer or Super Agent):
Key Technical Rules
| Rule | Detail |
|---|---|
| Capacity | Number of simultaneous interaction slots per media type |
| Interruption | Priority override — defines if a new channel can interrupt an active one |
| Non-ACD Blocking | Busy-on-Busy for internal/direct calls vs. ACD queue calls |
| Alerting counts | An interaction counts toward utilization when it starts Alerting (ringing), not when the agent answers |
| Voice interrupt | Voice is always a "hard" interrupt — takes precedence over all digital channels |
| Transfers | Non-ACD calls (transfers or direct dials) are excluded from utilization count unless "Block calls" is checked |
Summary
| Term | Meaning |
|---|---|
| Capacity | How many slots/sessions the agent has per channel |
| Interruption | Priority override logic between channels |
| Non-ACD Blocking | Busy-on-Busy for internal extensions vs. ACD lines |
Interview Cheat Sheet
| Question | Answer |
|---|---|
| Where is utilization configured? | Admin → Contact Center → Utilization |
| What are the two configuration levels? | Organization-wide default and per-user override |
| When does an interaction count toward utilization? | When it starts Alerting (ringing), not when answered |
| What does "Block calls when on a non-ACD call" do? | Prevents queue calls from reaching agents already on internal/personal calls |
| What is the typical voice capacity? | 1 — voice is almost always a single-slot media type |
Canned Responses & Response Assets
Canned Responses
| Topic | Detail |
|---|---|
| Navigation | Admin → Contact Center → Canned Responses |
| Purpose | Pre-written answers agents can insert into Chat, Email, or Message interactions for consistency and speed |
| Structure | Libraries → Responses |
| Channels | Chat, Email, Message (WhatsApp, SMS, social) |
Libraries
Libraries group responses by team, department, or topic (e.g., Billing, Technical Support, General FAQ). Access is controlled at the library level — only relevant teams see specific content.
Creating a Canned Response

Response Types
| Type | Use Case | Constraint |
|---|---|---|
| Standard | Chat and Email replies | Can be edited or personalized by the agent before sending |
| Message Template | WhatsApp Business / proactive outbound | Requires pre-approval from Meta/WhatsApp — mandatory for messages sent 24+ hours after last customer message |
| Campaign SMS | Bulk SMS notifications | 160 characters per segment — carrier compliance required; supports variables/macros for personalization |
| Email Footer | Legal compliance / branding | Auto-appended to all outbound emails from the library — agents cannot see or remove it |
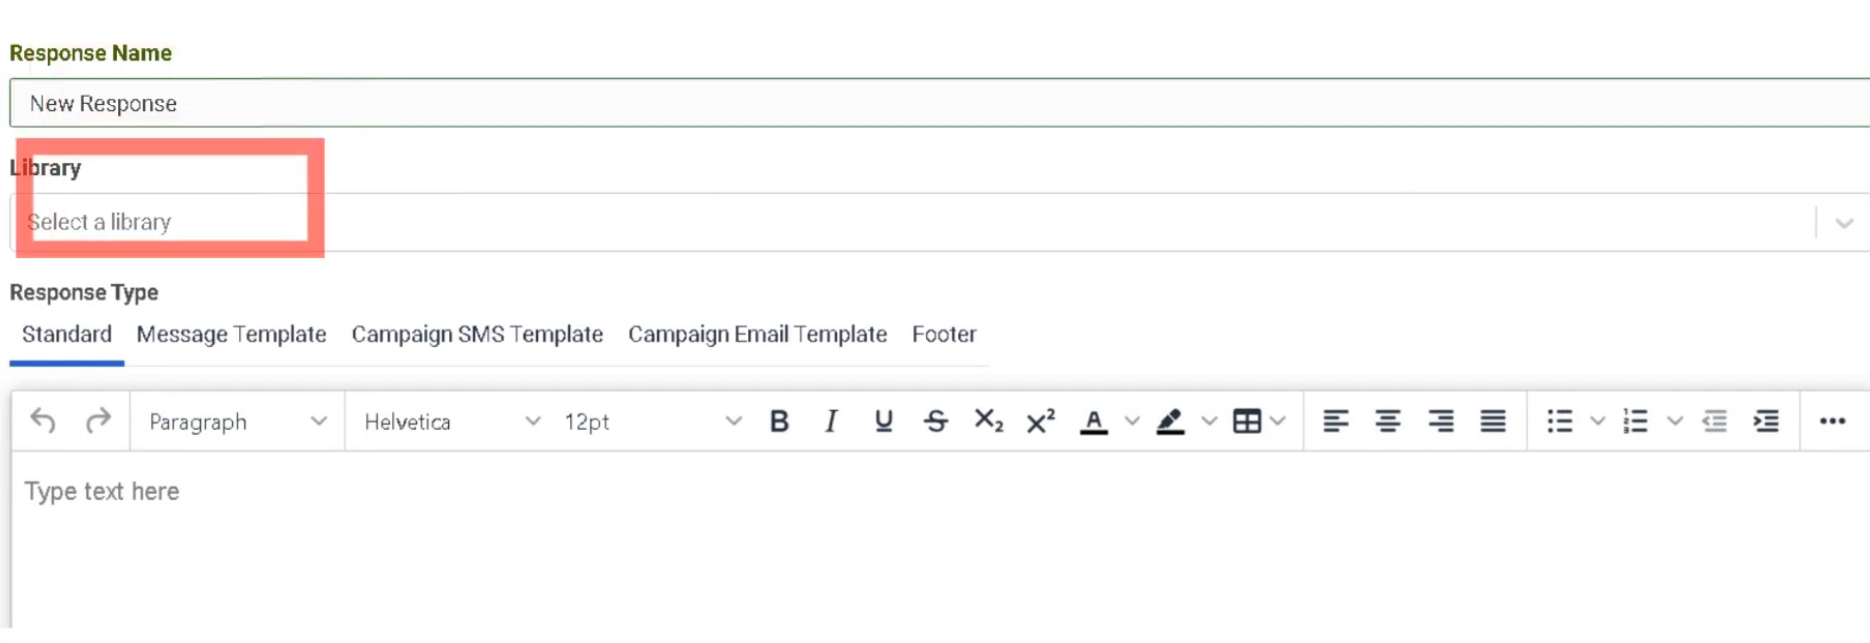
Agent Usage
| Mode | Description |
|---|---|
| Read-only | Agent reads the response to the customer — common for voice interactions |
| Insertion | Agent clicks to insert the full text directly into a chat, email, or messaging thread |
Best Practices
| Practice | Reason |
|---|---|
| Organize responses into focused libraries | Helps agents find responses quickly |
| Use clear response names | Agents search by name during live interactions |
| Keep standard responses concise | Long responses slow down chat interactions |
| Review Message Templates before WhatsApp campaigns | Meta approval can take days |
| Always configure Email Footer at library level | Prevents accidental removal of legal disclaimers |
Response Assets
| Topic | Detail |
|---|---|
| Navigation | Admin → Contact Center → Response Assets |
| Purpose | Central repository for images and documents embedded in Canned Responses |
| Supported Files | PNG, JPG (images); PDF (documents) |
Overview
Response Assets is a central media library. Images and documents must be uploaded here before they can be embedded in a Canned Response. This ensures agents always use the most current version of a file and prevents broken image links in customer emails.
Asset Repository
Embedding in Canned Responses
| Method | Description |
|---|---|
| Upload from Library | Select a pre-uploaded asset from the Response Asset collection — most secure and consistent |
| Insert from URL | Link to an externally hosted image — flexible but less secure |
| Upload New Image | Upload directly while editing a response — automatically populates the asset library |
Key Facts
| Feature | Detail |
|---|---|
| Centralization | Prevents broken image links in customer emails |
| Security | Internally hosted assets are scanned and verified by Genesys Cloud |
| Supported formats | PNG, JPG, PDF |
| Access | Accessible via a dedicated icon in the Canned Response editor |
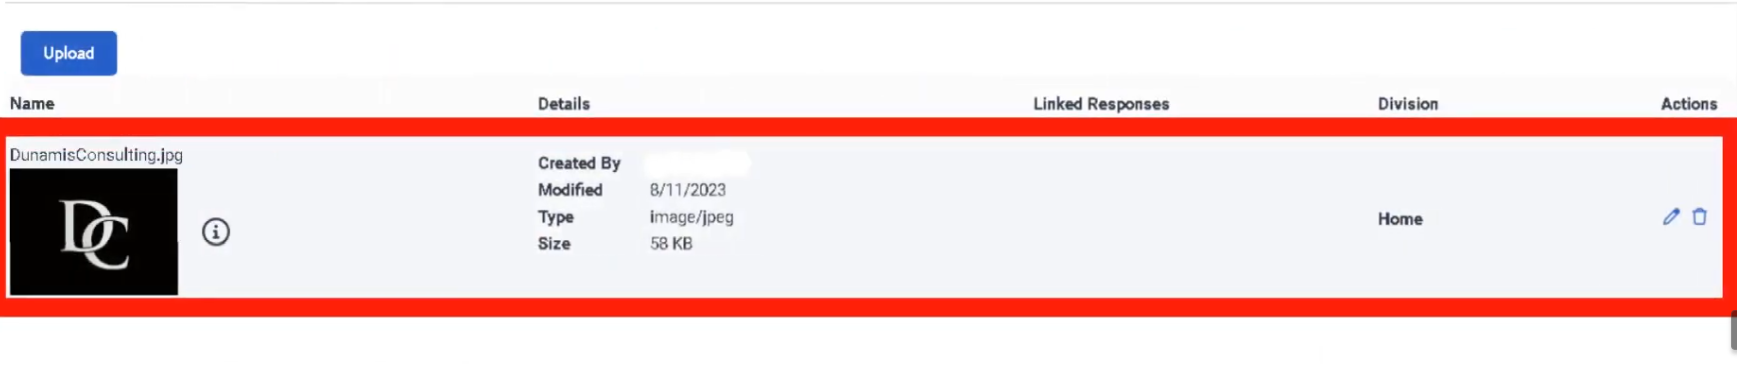
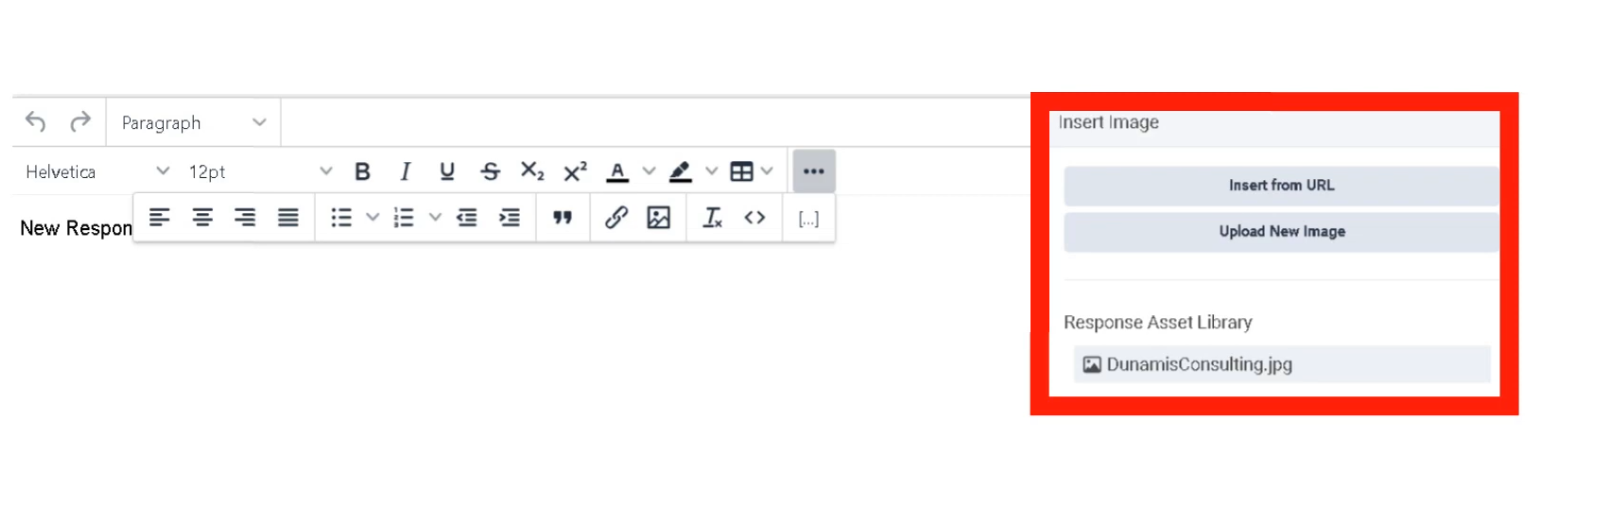
Interview Cheat Sheet
| Question | Answer |
|---|---|
| What is a Canned Response library? | A named grouping of responses organized by team or topic |
| What approval does a WhatsApp Message Template require? | Pre-approval from Meta/WhatsApp |
| What is the SMS segment character limit? | 160 characters per segment |
| What does Email Footer do? | Auto-appends legal/branding content to outbound emails — agents cannot remove it |
| Where must images be uploaded before embedding in a response? | Response Assets (Admin → Contact Center → Response Assets) |
Email — Domains & Routing
| Topic | Detail |
|---|---|
| Navigation | Admin → Contact Center → Email |
| Purpose | Configure email domains, addresses, routing logic, and agent experience settings |
| Max Recipients | 50 total (To + CC + BCC combined) |
| BCC Limit | Maximum 5 hidden recipients per email |
Step 1 — Email Domains
Before receiving email, define the domain:
| Domain Type | Description |
|---|---|
| Genesys Cloud | Built-in subdomain (e.g., company.mypurecloud.com) — no DNS configuration required |
| Custom | Corporate domain (e.g., support@company.com) — requires DNS MX record or forwarding + DNS verification |
| Campaign/Agentless | Used specifically for outbound-only notifications — no inbound routing |
Custom domains require DNS verification before Genesys Cloud can send or receive on your behalf.


Step 2 — Email Address Configuration
Once the domain is defined, create specific email addresses:
| Field | Description |
|---|---|
| Email Address | The inbound address customers use (e.g., support@company.com) |
| From Name | Friendly display name shown in the customer's inbox (e.g., "Global Support Team") |
| From Email Address | Address the recipient sees when an agent replies — must be verified within your Genesys Cloud domain |
| Reply To | Optional — overrides the From address when a customer clicks reply; useful for directing replies to a specific mailbox |
| BCC Recipients | Up to 5 hidden recipients on every outbound response — agents cannot see or remove these; count toward the 50-recipient limit |
| Email History | Controls whether the prior conversation thread is included in agent replies |
| Email Actions | Enables/disables Multiple Replies or Forwards within the same thread |
Email History Options
| Option | Behavior |
|---|---|
| Always | Automatically includes the full prior thread |
| Never | Sends a clean reply without history |
| Let Agent Decide | Provides the agent a toggle to include or exclude history |
Step 3 — Routing & Handling Logic
| Routing Option | Description |
|---|---|
| Route to a Queue | Directly assigns email to an agent group — can also set ACD Skills, Language, and Priority |
| Route to a Flow | Sends email to an Architect Inbound Email Flow for automated processing or keyword-based routing |
| Do Not Route | For outbound-only addresses — no inbound routing expected |
Spam Routing
| Option | Behavior |
|---|---|
| Route Spam to a Flow | Sends flagged emails to a specific Architect flow for manual supervisor review |
| Disconnect | Automatically drops spam so it never reaches an agent |
Email Quick Reference
| Field | Constraint |
|---|---|
| Max Recipients | 50 total (To + CC + BCC) |
| BCC Limit | 5 addresses maximum |
| Priority | Added to Time in Queue in minutes for routing rank |
| Spam Handling | Disconnect or Route to Flow |
| Enqueue Flow | Architect flow handling the email while it waits in queue |

Queue Email Tab Settings
These settings are configured per queue under the Email tab of the Queue configuration:
| Field | Description |
|---|---|
| Service Level & Target | SLA goal — typically set in hours (e.g., 90% within 4 hours) |
| Alerting Timeout | Seconds email flashes on agent screen before moving to next agent |
| Auto-Answer | Enabled = email workspace opens immediately; best for high-volume environments |
| Outbound Email Address | Address recipients see when an agent replies from this queue |
| Email Domain | Verified domain used for outbound email |
| In-Queue Email Flow | Architect Inbound Email Flow — can perform keyword routing |
| Default Script | Script displaying customer history or canned response suggestions |
| Auto-Reply | Sends an immediate acknowledgement before an agent reviews the email |
Interview Cheat Sheet
| Question | Answer |
|---|---|
| What are the three domain types? | Genesys Cloud (built-in), Custom (DNS verified), Campaign/Agentless (outbound only) |
| Max total recipients per email? | 50 (To + CC + BCC combined) |
| Max BCC recipients? | 5 |
| How does Priority affect email routing? | It adds minutes to the Time in Queue for ranking |
| What are the spam routing options? | Disconnect or Route to Flow |
| What must be done before using a custom domain? | DNS verification |
Widgets — Web Chat & Web Messenger
| Topic | Detail |
|---|---|
| Navigation (Web Messenger) | Admin → Message → Messenger Configurations and Messenger Deployments |
| Navigation (Web Chat v2) | Admin → Contact Center → Widgets |
| Purpose | Provide a chat interface on websites connecting customers to Genesys Cloud agents |
| Modern Standard | Web Messenger — persistent, asynchronous |
| Legacy | Web Chat v2 — session-based |
Web Messenger (Modern Standard)
Web Messenger offers a persistent, asynchronous experience — customers can leave the website and return later with their full conversation history still intact.
| Component | Description |
|---|---|
| Messenger Configurations | Defines look and feel — color palette, logo, features (file uploads, emojis, read receipts) |
| Messenger Deployments | Links a Messenger Configuration to an Architect Inbound Message Flow — this is where routing is assigned |
| Deployment Snippet | JavaScript code pasted into the website <head> or <body> to render the chat icon |
| Deployment ID | Unique GUID identifying which configuration the website loads |
| Allowed Domains | Security whitelist — only URLs listed here can render the widget |
Web Chat v2 (Legacy)
Strictly session-based — if the customer refreshes or closes the browser tab, the chat session is lost.
| Widget Type | Description |
|---|---|
| Standard | Simple chat window provided by Genesys |
| Third-Party | Uses Genesys as the routing engine while a completely custom UI is built by developers |
Widget Features
Both versions support the following controls:
| Feature | Description |
|---|---|
| File Uploads | Enable/disable customer ability to send images or documents |
| Typing Indicators | Shows when the agent or customer is typing |
| Read Receipts | Informs users when messages have been seen |
| Guest Chat | Allows unauthenticated chat, or require login to pull CRM data automatically |
| Pre-Chat Form | Collects Name, Email, Account Number before routing — data passed into Architect flow for intelligent routing |
Routing Logic
Widgets do not send chats directly to agents. They route to an Architect Inbound Message Flow first. The flow processes pre-chat form data and routes to the correct queue.
Customer Clicks Chat Widget
↓
Pre-Chat Form (Name, Email, Account Number)
↓
Architect Inbound Message Flow
↓
Data Evaluated / Customer Identified
↓
Transfer to Queue
↓
Agent
Deployment Steps (Web Messenger)
Connect to a chat flow:

Deployment key generated:

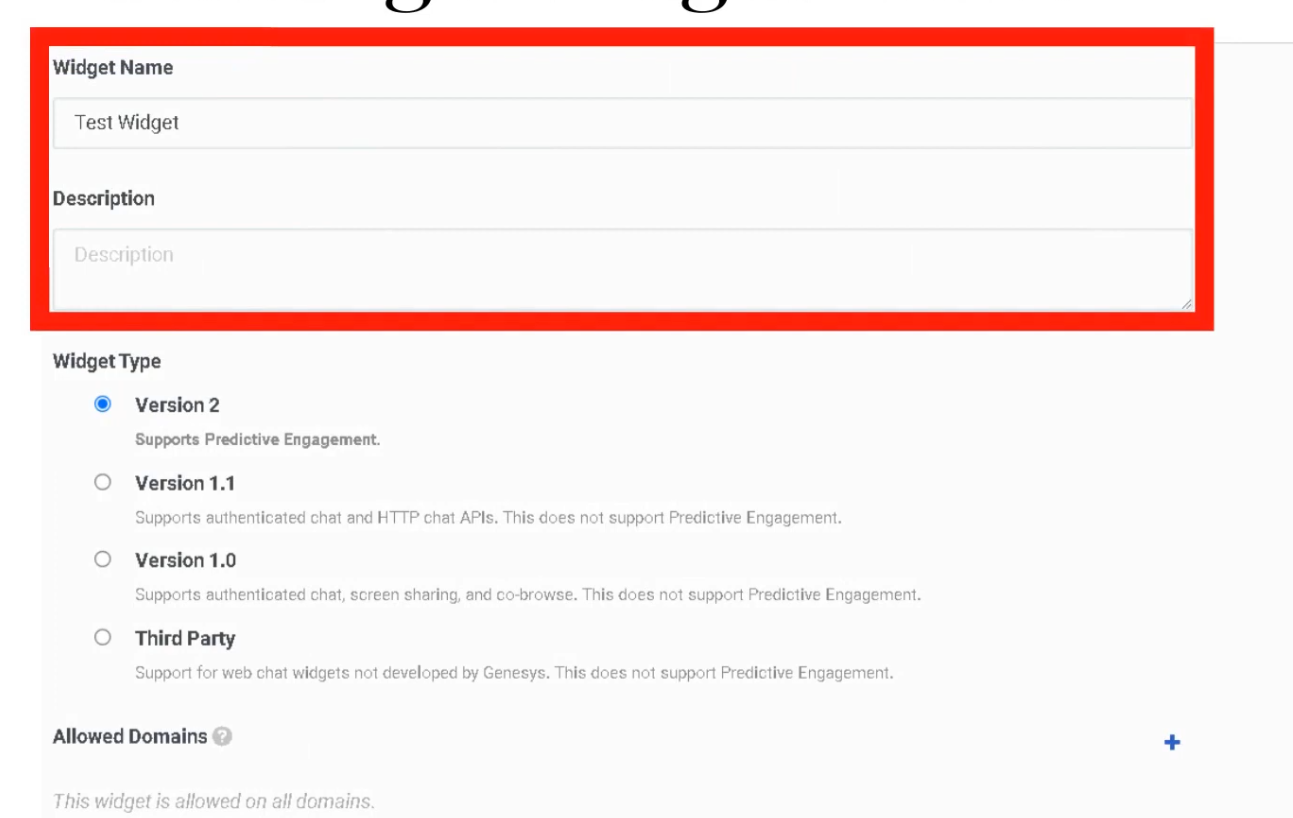
Technical Reference
| Component | Detail |
|---|---|
| Snippet | JavaScript placed in <head> or <body> of the website |
| Deployment ID | Unique GUID — identifies which configuration loads |
| Allowed Domains | Must whitelist all URLs where the widget appears |
| Persistence | Web Messenger supports Persistent or Clearing Conversation session modes |
Web Messenger vs. Web Chat v2
| Feature | Web Messenger | Web Chat v2 |
|---|---|---|
| Session type | Persistent / asynchronous | Session-based (lost on refresh) |
| Conversation history | Retained across sessions | Lost when session ends |
| Routing | Architect Inbound Message Flow | Architect Inbound Chat Flow |
| Status | Current standard | Legacy — still supported |
| Customization | Full branding via Messenger Config | Limited |
Interview Cheat Sheet
| Question | Answer |
|---|---|
| What is the modern widget standard? | Web Messenger — persistent and asynchronous |
| What happens to a Web Chat v2 session on page refresh? | The session is lost |
| What does the Deployment ID identify? | Which Messenger Configuration loads on the website |
| What must be configured for security? | Allowed Domains whitelist |
| Where does the widget route interactions? | To an Architect Inbound Message Flow, not directly to agents |
| What is a Pre-Chat Form used for? | Collecting customer data before routing for intelligent queue assignment |
Analytics Settings
| Topic | Detail |
|---|---|
| Navigation | Admin → Contact Center → Analytics Settings |
| Purpose | Configure abandon intervals and analytics capture settings for queue reporting |
| Abandon Intervals | 7 configurable intervals (A–G) categorizing when customers disconnect from queue |
Overview
Analytics in Genesys Cloud transforms raw interaction data into actionable insights. Configuration here directly affects how abandonment is measured and reported across all queues.
Abandon Intervals
Abandon intervals measure how long customers waited in queue before disconnecting without reaching an agent. This metric helps identify queue tolerance, IVR issues, and staffing problems by grouping abandons into time ranges.
| Interval | Default Wait Range | Interpretation |
|---|---|---|
| A | 0–6 seconds | Immediate disconnects — misrouting, robocalls, misdials, IVR confusion |
| B | 6–20 seconds | Early abandons after entering queue |
| C | 20–40 seconds | Short wait abandonment |
| D | 40–60 seconds | Moderate wait abandonment |
| E | 60–120 seconds | Customers leaving after ~1–2 minutes |
| F | 120–240 seconds | Long queue wait frustration |
| G | >240 seconds | Very long wait abandonment |
⚠️ A large percentage in Interval A typically indicates misrouting, IVR confusion, or non-intentional calls — not a staffing problem.
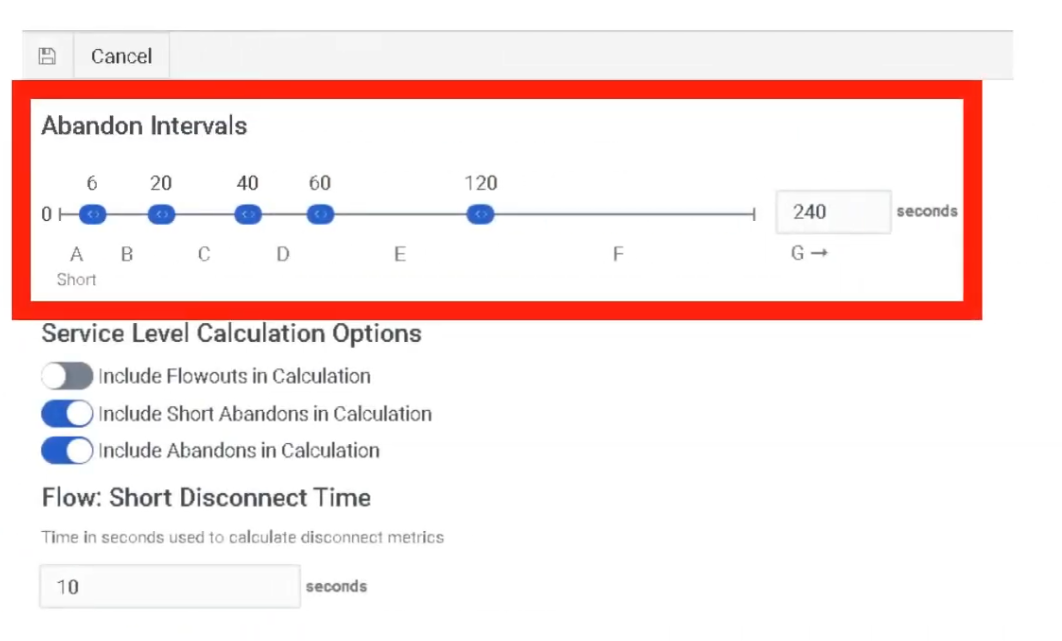
Analytics Implementation Steps
| Step | Action |
|---|---|
| Step 1 | Set Service Level targets per queue — Admin → Contact Center → Queues |
| Step 2 | Configure Abandon Intervals — Admin → Contact Center → Analytics Settings |
| Step 3 | Ensure all queues have Wrap-Up Codes assigned so agents can tag interactions |
| Step 4 | Create Dashboards at Performance → Dashboards with relevant KPI widgets |
Real-Time Analytics
| Feature | Location |
|---|---|
| Performance Views | Performance → Workspace — pre-built views for Queues, Agents, and Interactions |
| Dashboards | Customizable screens with widgets for KPIs (Service Level, Agents On-Queue, Active Interactions, etc.) |
| Alerting Rules | Trigger email or browser notifications when metrics hit thresholds (e.g., Wait Time > 5 minutes) |
Historical Analytics
| Feature | Description |
|---|---|
| Standard Reports | Pre-packaged PDF or CSV reports (e.g., Queue Abandonment Detail, Agent Log-level Report) |
| Dynamic Views | Filter by date range, media type, wrap-up codes |
| Exporting | Manual export or scheduled delivery to S3 bucket or email address |
Core Analytics Metrics
Interaction Volume
| Metric | Description |
|---|---|
| Offered | Total interactions entering the queue |
| Answered | Interactions handled by agents |
| Flow-Outs | Interactions exiting queue through routing or IVR actions |
| Connected | Interactions successfully connected to agents |
Queue Performance
| Metric | Description |
|---|---|
| Service Level | Percentage of interactions answered within SLA target |
| ASA | Average Speed of Answer — average time before agent answers |
| Average Wait Time | Average time customers wait in queue |
| Longest Wait | Longest interaction currently waiting |
Customer Behavior
| Metric | Description |
|---|---|
| Abandoned | Interactions disconnected before reaching an agent |
| Abandon % | Abandoned ÷ Offered |
| Average Abandon Time | Average wait time before customer hangs up |
| Short Abandon | Disconnects within a configured short-time threshold |
Agent Handling
| Metric | Description |
|---|---|
| AHT | Average Handle Time = Talk Time + Hold Time + ACW |
| Talk Time | Active speaking time with customer |
| Hold Time | Time interaction placed on hold |
| ACW | After Call Work time |
| Transfers | Interactions transferred between agents or queues |
IVR / Flow Metrics
| Metric | Description |
|---|---|
| Flow Outcomes | Where customers exit an Architect flow (Success vs. Failure) |
| Containment Rate | Percentage of interactions resolved within IVR without reaching an agent |
| IVR Disconnects | Customers disconnecting during IVR navigation |
Advanced Metrics
| Metric | Description |
|---|---|
| Agent Utilization | Percentage of agent time spent handling interactions |
| Concurrency | Simultaneous digital interactions handled |
| Callback Rate | Percentage of callers choosing callback instead of waiting |
| Recontact Rate | Customers contacting support again after a recent interaction |
High Abandonment Troubleshooting
When investigating high abandonment, analyze these five together:
- ASA — Is average wait time excessive?
- Abandon Intervals — Which interval has the highest %? (Interval A = routing/IVR issue; Interval F/G = staffing issue)
- Service Level — Is the SLA target being met?
- Queue Staffing — How many agents are On-Queue vs. interactions waiting?
- Flow Outcomes — Are callers exiting the IVR before reaching the queue?
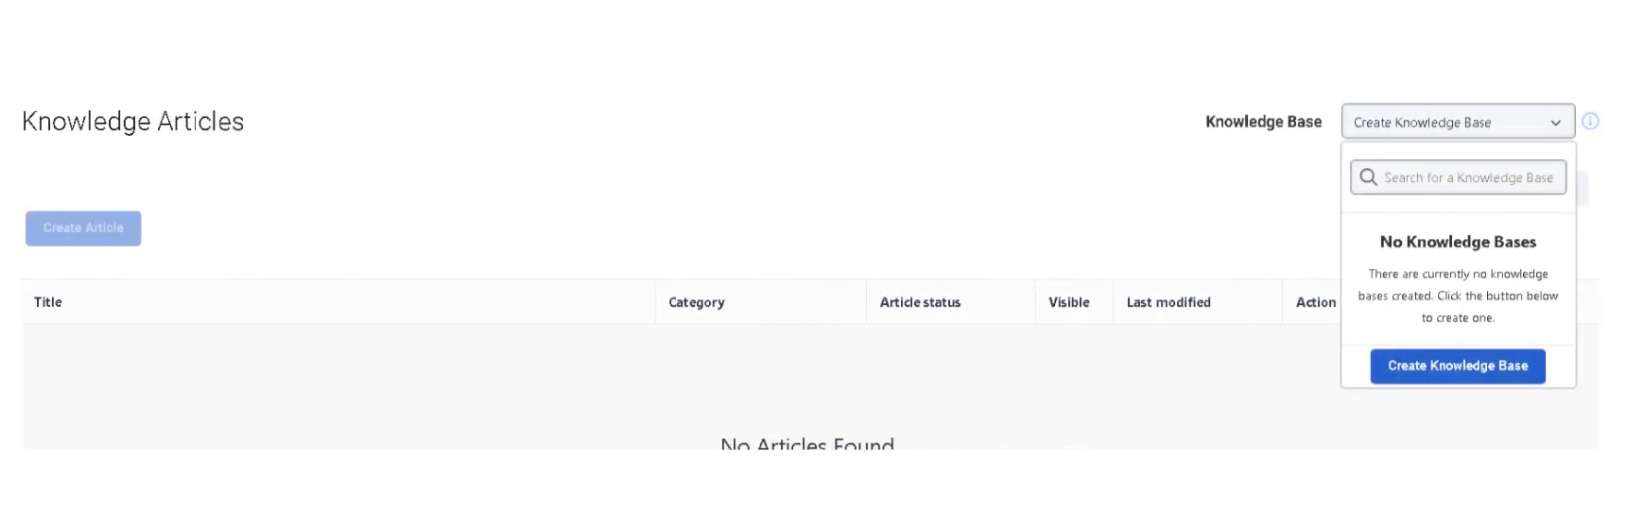
Knowledge Analytics
Knowledge Analytics measures how effectively knowledge base articles help resolve customer issues — for both agents and bots.
Search & Discovery
| Metric | Description |
|---|---|
| Knowledge Searches | Total searches performed in the knowledge base |
| Search Success Rate | Percentage of searches that returned useful articles |
| Search Failure Rate | Searches that produced no relevant results |
| Popular Search Terms | Most frequently searched keywords |
Article Usage
| Metric | Description |
|---|---|
| Article Views | Number of times a knowledge article was opened |
| Articles Shared | Articles sent to customers during interactions |
| Top Articles | Most frequently accessed articles |
| Article Feedback | Ratings or feedback from agents or customers |
Self-Service & Automation
| Metric | Description |
|---|---|
| Knowledge Match | Bot successfully finds a relevant knowledge article |
| Confidence Score | AI confidence in the article match |
| Knowledge Fallback | Bot cannot find a suitable article |
| Containment Rate | Issues resolved through self-service without an agent |
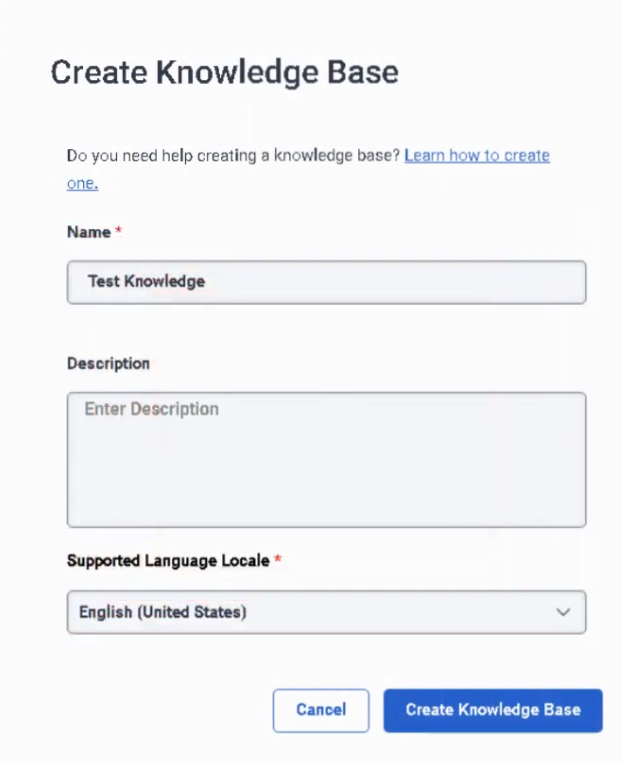

Interview Cheat Sheet
| Question | Answer |
|---|---|
| What do Abandon Intervals measure? | How long customers waited before disconnecting without reaching an agent |
| What does high % in Interval A suggest? | Misrouting, IVR confusion, or non-intentional calls — not a staffing problem |
| What is AHT? | Average Handle Time = Talk Time + Hold Time + ACW |
| What is ASA? | Average Speed of Answer — average wait time before an agent answers |
| What is Containment Rate? | Percentage of interactions resolved in IVR without reaching an agent |
| Where are Abandon Intervals configured? | Admin → Contact Center → Analytics Settings |
Panel Manager
| Topic | Detail |
|---|---|
| Navigation | Admin → Contact Center → Panel Manager |
| Purpose | Create custom UI panels embedded in the agent desktop for CRM systems, internal tools, dashboards, or web apps |
| Security Requirement | All embedded panel URLs must use HTTPS |
Overview
Panel Manager allows administrators to embed external tools directly into the Genesys Cloud agent workspace, eliminating the need for agents to switch between multiple applications during interactions.
Two Types of Panels in the Agent Desktop
| Type | Description |
|---|---|
| Interaction Panels | System panels automatically created when a customer interaction occurs (voice, chat, email, etc.) — manage the conversation itself |
| Custom Panels (Panel Manager) | Administrator-created panels embedding external tools, CRMs, dashboards, or internal applications — provide supporting context |
Custom Panel Configuration Fields
| Field | Description |
|---|---|
| Panel Name | Name displayed to agents in the desktop |
| URL | Web application URL loaded in the panel — must be HTTPS |
| Icon | Visual identifier shown in the agent interface |
| Default State | Whether the panel loads automatically when an interaction begins |
| Role Assignment | Controls which users can see and access the panel |
| Width / Layout | Determines panel size and position in the desktop |
How to Create a Panel
Best Practices
| Practice | Reason |
|---|---|
| Use HTTPS only | Security requirement — HTTP URLs will not load |
| Keep UI lightweight | Heavy applications slow the agent desktop and increase handle time |
| Limit total panels | Too many panels reduce usability and create cognitive overload |
| Align panels with workflows | Panels should directly support what agents do during calls |
| Use role-based access | Only expose panels to the teams that need them |
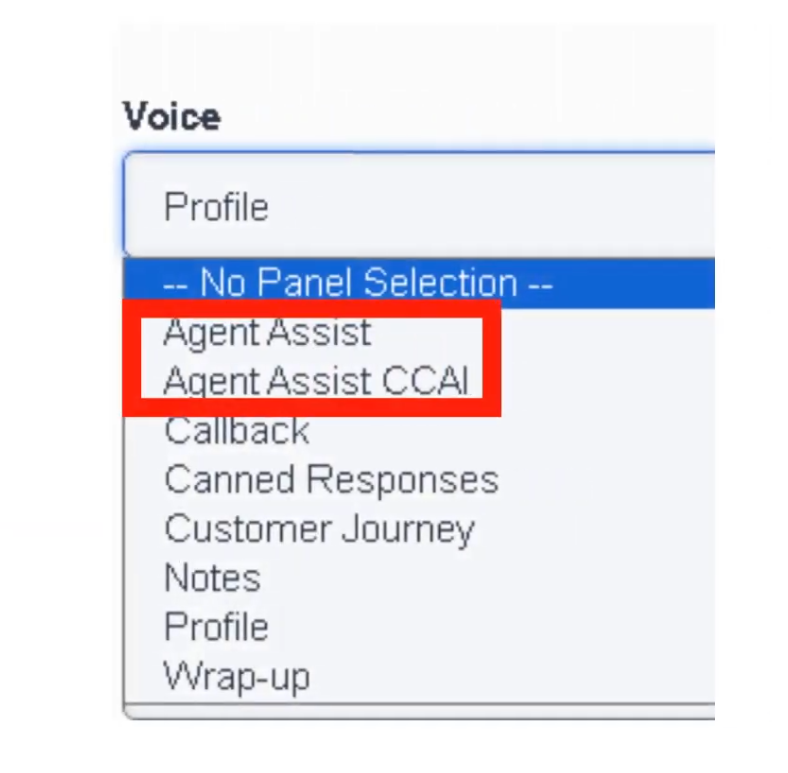
Voice Interaction Panels
The following panels are available within the Voice Interaction workspace. Availability depends on enabled features, integrations, and licenses in the environment.
| Panel | Description |
|---|---|
| Agent Assist | Real-time transcription, AI suggestions, knowledge article recommendations, intent detection |
| Agent Assist (CCAI) | Google Contact Center AI — speech-to-text, smart reply suggestions, knowledge recommendations |
| Callback | Displays callback interactions assigned to agent with dial controls and outcome tracking |
| Canned Responses | Insert predefined messages from response libraries during voice interactions |
| Customer Journey | Interaction timeline showing previous customer touches across all channels |
| Notes | Record interaction notes for documentation and follow-up |
| Profile | Customer identity, contact attributes, and synchronized CRM data |
| Wrap-Up | Classify interaction outcome with wrap-up codes and manage ACW |
Interaction Panels by Channel
System-created panels that appear when an interaction is active:
| Channel | Panel Features |
|---|---|
| Voice | Call controls (hold, mute, transfer, conference), dial pad, notes, wrap-up codes |
| Chat | Real-time messaging, canned responses, file sharing, typing indicators |
| Message (WhatsApp/SMS) | Asynchronous conversations, persistent thread history, attachments |
| Email composition, templates, attachments, threaded conversation history | |
| Callback | Scheduled callback details, dial controls, wrap-up codes |
| Social Messaging | Social platform messages, thread tracking, media attachments |
Interview Cheat Sheet
| Question | Answer |
|---|---|
| What is Panel Manager used for? | Embedding external tools (CRM, dashboards, internal apps) into the agent desktop |
| What URL protocol is required? | HTTPS — HTTP will not load |
| What is the difference between Interaction Panels and Custom Panels? | Interaction panels manage conversations; custom panels provide supporting tools |
| What is the Agent Assist panel? | AI-driven panel with real-time transcription, suggestions, and knowledge recommendations |
| What does the Customer Journey panel show? | Previous customer interactions across all channels |
Scripts
| Topic | Detail |
|---|---|
| Navigation | Admin → Contact Center → Scripts |
| Purpose | Guided UI forms presented to agents during interactions — collect data, enforce workflows, ensure compliance |
| Channels | Primarily voice; also supports chat and messaging workflows |
| Deployment | Must be Published before agents can use them; assign to queue or Architect flow |
Overview
Scripts are agent-facing forms that pop on the agent desktop when an interaction begins. They guide agents through structured workflows, collect customer information, enforce compliance steps, and integrate with backend systems via interaction attributes.
Script Components
| Component | Description |
|---|---|
| Labels | Static instructions or text displayed to agents |
| Text Input | Free text data entry field |
| Number Input | Numeric value field |
| Dropdown List | Selection from predefined options |
| Checkbox | Binary selection (Yes/No) |
| Buttons | Trigger actions such as form submission or navigation to next step |
| Page Sections | Organize the script layout visually |
| Data Bindings | Connect script fields to interaction attributes for use in Architect flows or reporting |
Implementation Steps
| Step | Action |
|---|---|
| 1 | Navigate to Admin → Contact Center → Scripts |
| 2 | Click Create Script |
| 3 | Define script name and interaction type (Voice, Chat, Email, etc.) |
| 4 | Design the layout using UI components |
| 5 | Bind fields to interaction attributes |
| 6 | Apply conditional display logic if needed |
| 7 | Publish the script |
| 8 | Assign script to a queue (via queue's Default Script field) or Architect flow |
⚠️ Scripts must be Published before they can be assigned or used by agents. Unpublished scripts are not available for selection.
Conditional Logic
Scripts support conditional display — fields appear or hide based on previous selections:
| Condition | Result |
|---|---|
| Issue Type = Billing | Display billing section only |
| Issue Type = Technical | Display troubleshooting checklist |
| Issue Type = Sales | Display sales workflow and offer prompts |
Script Data Integration
| Integration | Description |
|---|---|
| Interaction Attributes | Stores collected data during the interaction — accessible in reporting and Architect |
| Architect Flows | Scripts pass captured data into flow logic for routing decisions or automations |
| CRM Systems | Data entered by agents can be pushed to external CRM systems via Data Actions |
| APIs | Scripts can trigger backend processes through integrations |
Example Agent Workflow
| Step | Agent Action |
|---|---|
| 1 | Customer call arrives |
| 2 | Script automatically opens on agent desktop |
| 3 | Agent verifies customer information |
| 4 | Agent selects issue category |
| 5 | Script dynamically displays relevant fields |
| 6 | Agent collects required information |
| 7 | Data stored in interaction attributes |
| 8 | Agent selects wrap-up code |
Best Use Scenarios
| Scenario | Benefit |
|---|---|
| Customer Verification | Ensures identity checks are completed consistently |
| Sales Calls | Guides agents through offers and upsell prompts |
| Technical Support | Provides structured troubleshooting steps |
| Compliance Workflows | Ensures required regulatory statements are delivered |
| Case Creation | Collects structured data for CRM tickets |
Best Practices
| Practice | Recommendation |
|---|---|
| Keep scripts simple | Avoid excessive fields that slow agents during live calls |
| Use conditional logic | Display only fields relevant to the current issue type |
| Integrate with CRM | Auto-populate customer data where possible |
| Reuse templates | Maintain standardized workflows across teams |
| Test before deployment | Validate with real call scenarios before publishing |
| Publish before assigning | Scripts must be published to appear in queue or flow assignment dropdowns |
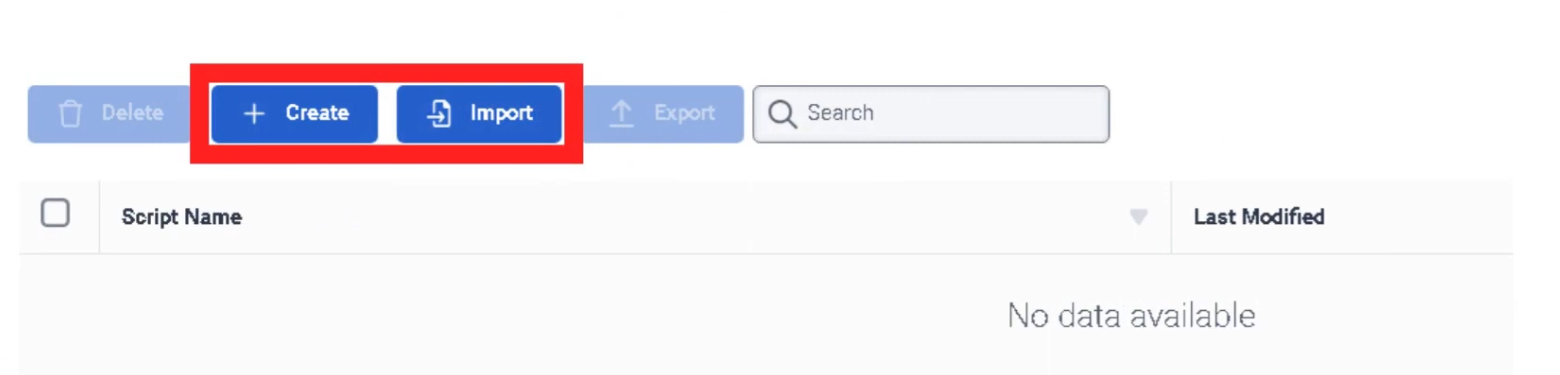
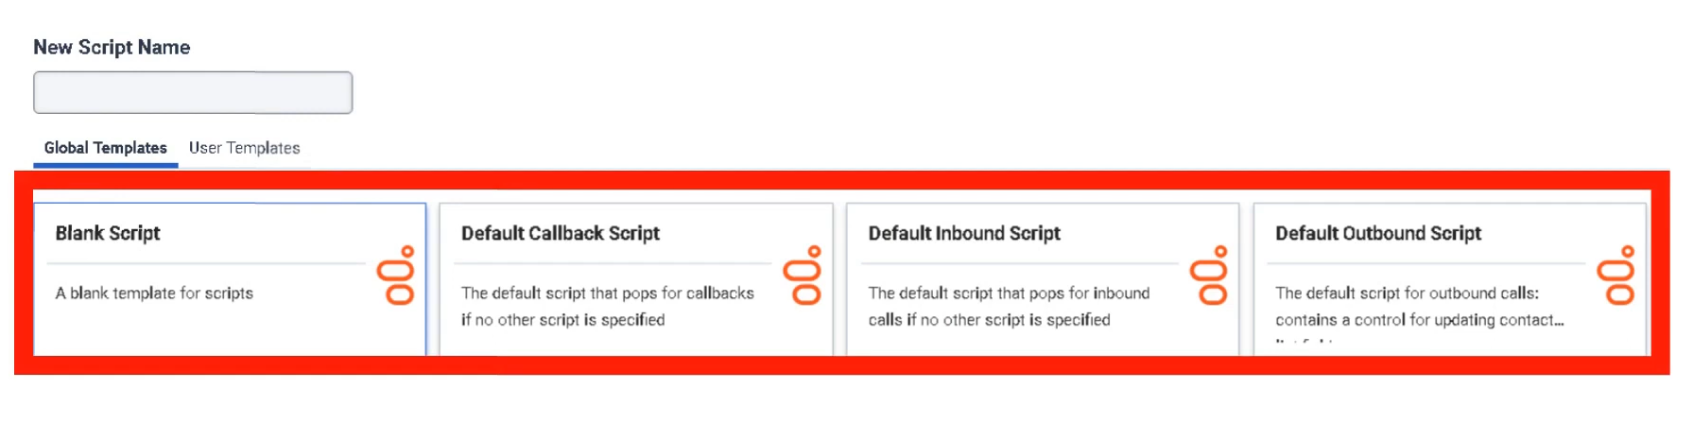
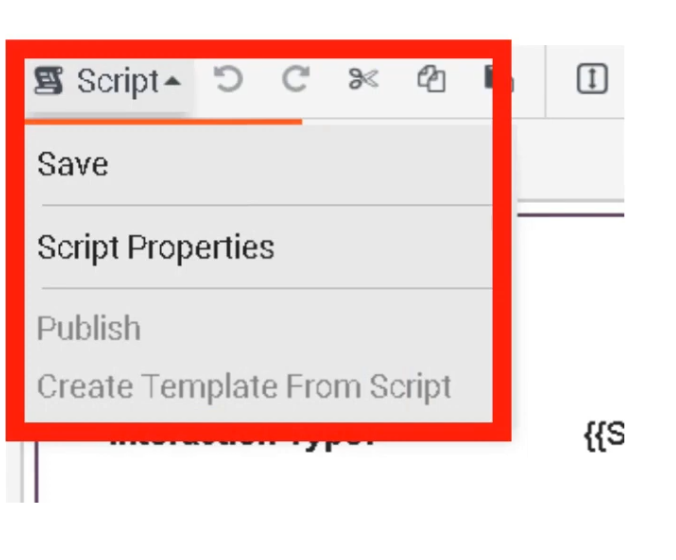
Interview Cheat Sheet
| Question | Answer |
|---|---|
| What is a Script in Genesys Cloud? | A guided UI form that pops on the agent desktop during interactions |
| What must happen before a script can be used? | It must be Published |
| Where can scripts be assigned? | To a queue (Default Script field) or Architect flow |
| What are Data Bindings? | Connections between script fields and interaction attributes |
| What does conditional display do? | Shows or hides fields based on previous agent selections |
| What channels support scripts? | Primarily voice, also chat and messaging |
Assistants
| Topic | Detail |
|---|---|
| Navigation | Admin → Contact Center → Assistants |
| Purpose | AI-powered virtual agents (bots) using NLU to handle voice and digital interactions automatically |
| Technology | Natural Language Understanding (NLU) |
| Integration | Works with Knowledge Base and Architect flows |
Overview
Assistants are AI-powered automation tools that enable organizations to build virtual agents capable of interacting with customers through voice and digital channels. They use Natural Language Understanding (NLU) to interpret customer requests and respond using knowledge articles, intents, and Architect flows.
Assistants are most effective for automating predictable, repetitive interactions — reducing call volume, improving self-service, and lowering operational costs.
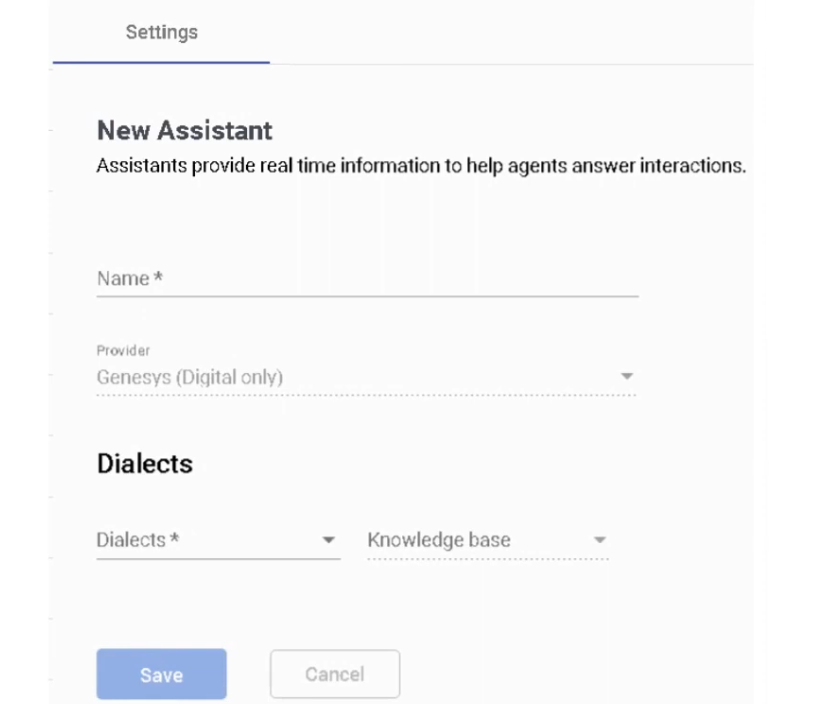
Assistant Components
| Component | Description |
|---|---|
| Intents | The goal or purpose of the customer's request (e.g., Check_Order_Status, Reset_Password) |
| Utterances | Example phrases customers might say to express an intent — used to train the NLU model |
| Entities | Variables extracted from customer input (e.g., order number, city, product name) |
| Slots | Structured data fields collected during a conversation to fulfill an intent |
| Actions | Responses or operations the assistant performs when an intent is matched |
| Knowledge Integration | Allows the assistant to answer questions directly from knowledge base articles |
| Architect Flow Integration | Transfers conversation control to an Architect flow for advanced routing or logic |
Configuration Settings
| Option | Description |
|---|---|
| Language | NLU processing language — determines which utterance model is used |
| Confidence Threshold | Minimum confidence score required to trigger an intent — below this, fallback intent fires |
| Fallback Intent | Default action when no intent is recognized (e.g., transfer to agent) |
| Disambiguation | Prompts the customer to clarify when multiple intents closely match |
Example Assistant Flow
Customer: "I want to check my order status"
↓
Intent Detected: Order_Status
↓
Extract Entity: Order_Number
↓
Call API via Data Action / Architect Flow
↓
Return Response to Customer
↓
(If unresolved) Escalate to Human Agent
Best Use Scenarios
| Scenario | Description |
|---|---|
| Customer Self-Service | Resolve common issues without agent involvement |
| FAQ Automation | Answer frequently asked questions automatically using knowledge articles |
| Order / Account Status | Retrieve order status, balance, or appointment info via API |
| Call Routing by Intent | Identify customer intent and route to the correct queue |
| After-Hours Support | Provide automated assistance when agents are unavailable |
Integration Points
| Integration | Description |
|---|---|
| Architect Flows | Advanced routing or automation logic triggered by the assistant |
| Knowledge Base | Automated responses using knowledge articles — improves containment rate |
| Digital Channels | Chat, messaging (WhatsApp, SMS), and Web Messaging |
| Voice Channels | Voice bots for IVR interactions — speech recognition + NLU |
| Data Actions | API calls triggered by the assistant to retrieve or update external data |
Best Practices
| Practice | Recommendation |
|---|---|
| Start with high-volume intents | Automate the most frequent customer requests first for maximum impact |
| Keep intents simple | Avoid overly complex intent structures that reduce NLU accuracy |
| Use knowledge articles | Well-written articles dramatically improve bot containment rate |
| Train with real customer data | Use actual customer utterances — not hypothetical ones |
| Monitor analytics continuously | Review bot performance, confidence scores, and fallback rates regularly |
| Provide easy escalation | Always ensure customers can reach a human agent quickly when needed |
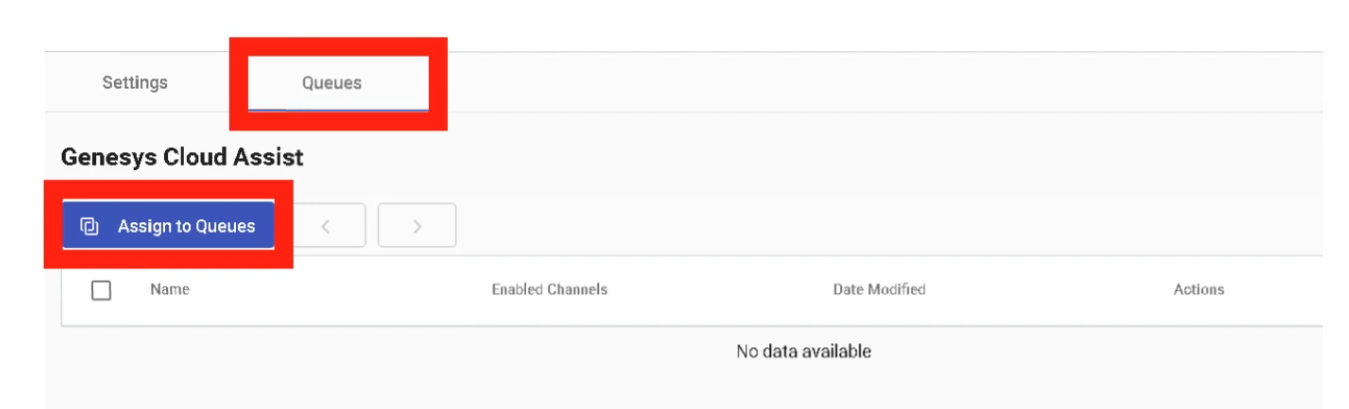
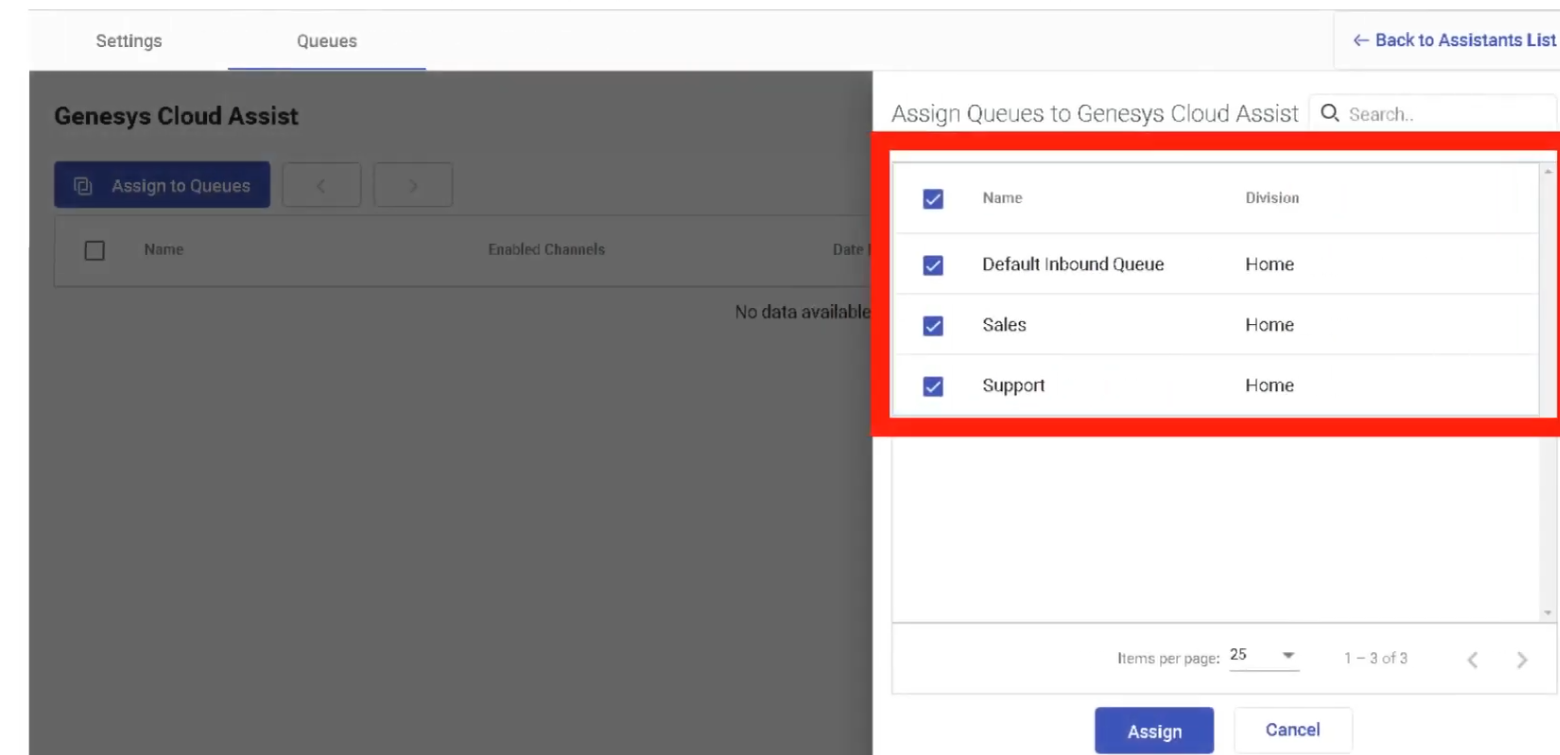
Interview Cheat Sheet
| Question | Answer |
|---|---|
| What technology do Assistants use? | Natural Language Understanding (NLU) |
| What is an Intent? | The goal or purpose of the customer's request |
| What are Utterances used for? | Training the NLU model with example customer phrases |
| What is an Entity? | A variable extracted from customer input (e.g., order number) |
| What happens when confidence is below the threshold? | The Fallback Intent fires — typically escalates to a human agent |
| What is Disambiguation? | Prompts the customer to clarify when multiple intents closely match |
Knowledge Base
| Topic | Detail |
|---|---|
| Navigation | Admin → Knowledge |
| Purpose | Create and manage AI-powered knowledge bases with Q&A articles surfaced to agents, bots, and self-service portals |
| Technology | Natural Language Understanding (NLU) + Generative AI answer generation |
| Max Knowledge Bases | 500 per organization |
| Max Articles per KB | 15,000 articles |
✅ Verified against Genesys Cloud Resource Center — March 2026
Licensing Requirements
| License | Knowledge Access |
|---|---|
| Genesys Cloud CX 1 | Not included — requires Digital Add-on II or AI Experience tokens |
| Genesys Cloud CX 1 + AI Experience tokens | Access granted without Digital Add-on II |
| Genesys Cloud CX 1 Digital Add-on II | Included |
| Genesys Cloud CX 2 / CX 2 Digital | Included |
| Genesys Cloud CX 3 / CX 3 Digital | Included |
| Genesys Cloud CX 4 | Included |
Required Permissions
| Permission | Purpose |
|---|---|
Knowledge > All |
Full knowledge base administration |
Analytics > Knowledge Aggregate > All |
View knowledge analytics |
Responses > Library > All |
Manage response libraries |
Response Assets > Asset > All |
Manage embedded media assets |
Overview — How Knowledge Base Works
The knowledge base stores question and answer (Q&A) pairs called articles. When a customer or agent asks a question, Genesys Cloud AI uses Natural Language Understanding to find the closest matching article and return the answer.
The knowledge base powers four key touchpoints:
| Touchpoint | Description |
|---|---|
| Agent Copilot | Automatically surfaces relevant articles to agents during live interactions — no manual search required |
| Virtual Agents / Bots | Architect bot flows query the knowledge base and return answers to customers during self-service |
| Knowledge Portal | Customer-facing self-service website — customers search articles, browse by category, or escalate to an agent |
| Messenger | Web Messenger deployments can query knowledge articles in bot conversations |
Step 1 — Create a Knowledge Base
⚠️ Language selection is permanent — it determines which NLU model processes the content. Create separate knowledge bases for each supported language if your contact center is multilingual.
Step 2 — Create Categories & Labels (Optional)
Categories and labels organize articles for easier management and navigation.
Categories
Categories group articles by topic and support nested hierarchies (parent → child).
Labels
Labels are color-coded tags for quick filtering and content reuse across portals.
- Click the Labels tab
- Enter a Label Name
- Select a Label Color
- Click Create Label
💡 March 2026: Knowledge portals can now be configured to return only articles matching specific labels — a single article can be reused across multiple portals with different label filters applied.
Step 3 — Create Articles
Articles are individual Q&A pairs. Each article has one primary question and one answer.
Create a New Article
Import Articles (Bulk)
- Open the knowledge base → Click Import
- Select a .json file containing Q&A pairs
- Genesys Cloud validates the file for errors
- Click Import to confirm — pairs are imported as individual FAQ articles
Step 4 — Format Articles
| Format Option | Description |
|---|---|
| Text Styling | Bold, italic, bullet lists, headings |
| Images | Upload images directly into the answer body |
| Videos | Embed video via URL |
| Rich Text | Full HTML-style formatting for structured answers |
Step 5 — Add Phrasings (Alternative Questions)
Phrasings are alternative ways customers might phrase the same question — used to train the NLU model for better matching accuracy.
- Open an article → click the Phrasings tab
- Add an alternative phrase (e.g.,
How do I change my password?,Forgot my password) - Optional: Enable Autocomplete — generates the phrase as a search prediction when customers type in the portal
- Click Save
💡 More phrasings = better NLU accuracy. Use real customer language, not formal documentation language.
Step 6 — Test Articles
- Open the knowledge base
- In the Test Articles pane, type a test question and press Enter
- The system returns the matched article with a Confidence Percentage
| Confidence Level | Meaning |
|---|---|
| High (80–100%) | Strong match — article surfaces reliably |
| Medium (50–79%) | Acceptable — consider adding more phrasings |
| Low (<50%) | Weak match — improve phrasing or content |
Step 7 — Publish Articles
- Open the article
- Click Publish to publish and continue editing
- Or Publish & Close to publish and exit
⚠️ Unpublished articles are invisible to all touchpoints — agents, bots, and the portal will not see them.
Article Touchpoint Variations
The same article can have different answer content per touchpoint — tailoring responses for agents vs. bots vs. self-service portals.
| Touchpoint | Use Case |
|---|---|
| Agent Assist / Agent Copilot | Detailed internal answer with troubleshooting steps and escalation guidance |
| Bot Flow (Dialog Engine / Digital) | Short, conversational response suitable for bot delivery |
| Knowledge Portal | Formatted customer-facing answer with images and links |
| Messenger | Concise answer for Web Messenger bot conversations |
Third-Party Knowledge Base Integration
Genesys Cloud supports connecting external knowledge systems so their content appears in Agent Copilot, Messenger, and the portal alongside native articles.
| Integration | Sync Type | Notes |
|---|---|---|
| Salesforce Knowledge | Automatic or Manual | Select channels and categories to sync |
| ServiceNow Knowledge | Automatic or Manual | Standard template articles only |
| SharePoint | Via Knowledge Fabric | Configured through Knowledge Configuration |
Adding a Third-Party Source
⚠️ The third-party integration must first be configured in
Admin → Integrationsbefore it appears as a source option here.
Knowledge Configuration (Knowledge Fabric)
Knowledge Configuration defines how knowledge is presented across Genesys touchpoints using a unified layer that can combine multiple knowledge bases and third-party sources.
| Feature | Detail |
|---|---|
| Navigation | Admin → Knowledge → Knowledge Configuration |
| Purpose | Unified knowledge source for Agent Copilot and Virtual Agents — supports generative AI answers |
| AI Answer Generation | Combines content from multiple relevant articles into a single dynamic response |
| Virtual Agent Use | From February 2026 — bots use either Knowledge Workbench V2 or Knowledge Fabric — one at a time, selected in Architect |
💡 February 2026: Bot authors can now select a Knowledge Fabric configuration in Architect and control generative answer mode and bias settings per flow. Existing rules-based bots using Workbench V2 are unaffected.
Agent Copilot & Knowledge
Agent Copilot uses the knowledge base to automatically surface articles to agents during live interactions.
| Feature | Description |
|---|---|
| Automatic Surfacing | Articles appear in the Agent Copilot panel based on conversation context |
| Answer Highlighting | Highlights the most relevant passage within a lengthy article |
| Knowledge Sharing | Agents can send articles directly to customers with one click |
| Interaction Summaries | AI-generated summaries at end of interactions using conversation + knowledge context |
| Wrap-Up Code Suggestions | Copilot suggests wrap-up codes based on the conversation |
Knowledge Portal
The Knowledge Portal is a customer-facing self-service website powered by the knowledge base.
| Feature | Description |
|---|---|
| Article Search | Customers search using natural language — NLU finds the best match |
| Category Browsing | Customers navigate by category hierarchy |
| Chatbot Access | Customers can escalate to a bot or live agent directly from the portal |
| Label Filtering | Portals can filter articles by label (March 2026 feature) |
| Customization | Configurable colors, messaging, and branding |
Knowledge Analytics
| Metric | Description |
|---|---|
| Top Articles | Most frequently accessed articles by agents and customers |
| Search Success Rate | Percentage of searches returning a useful result |
| Search Failure Rate | Searches returning no relevant result — indicates content gaps |
| Confidence Scores | AI match confidence per article returned |
| Containment Rate | Issues resolved through self-service without agent escalation |
Interview Cheat Sheet
| Question | Answer |
|---|---|
| Max knowledge bases per org? | 500 |
| Max articles per knowledge base? | 15,000 |
| What must happen before an article is live? | It must be Published |
| What is a Phrasing? | An alternative way a customer might ask the same question — trains the NLU model |
| What does Confidence Percentage mean? | How closely a query matches the article — higher = better match |
| What are the four main touchpoints for knowledge? | Agent Copilot, Virtual Agents/Bots, Knowledge Portal, Messenger |
| What is the Knowledge Portal? | A customer-facing self-service website for searching and browsing articles |
| What third-party sources can be integrated? | Salesforce Knowledge, ServiceNow Knowledge, SharePoint (via Knowledge Fabric) |
| What is Knowledge Fabric / Knowledge Configuration? | A unified knowledge layer combining multiple sources with generative AI answers for Agent Copilot and Virtual Agents |
| Can a bot use both Workbench V2 and Knowledge Fabric? | No — one at a time, selected in Architect per bot flow (February 2026) |
Chat & Messaging Configuration
| Topic | Detail |
|---|---|
| Navigation | Menu → Digital and Telephony → Message → Platform Integrations |
| Purpose | Connect third-party messaging channels (WhatsApp, Facebook, Instagram, SMS, LINE, X/Twitter, Apple Messages) to Genesys Cloud ACD routing |
| Routing Engine | All messaging interactions route through Architect Inbound Message Flows |
| Conversation Grouping | Multiple messages from the same customer within 72 hours are grouped into a single interaction |
✅ Verified against Genesys Cloud Resource Center — March 2026
Overview — ACD Messaging
Genesys Cloud ACD messaging enables agents to send and receive interactions from messaging channels like Facebook Messenger, X (Twitter) DM, LINE, WhatsApp, SMS, web messaging, and open messaging. Messages work like other interaction types — you can set alerting timeouts, service levels, use scripts, and view analytics.
Key behaviors:
- Genesys Cloud attempts to route message replies to the last handling agent.
- Messages are asynchronous but Genesys Cloud groups multiple messages into a single interaction if they occur within 72 hours — allowing the same agent to handle all messages in the conversation and see the interaction history.
- Agents complete wrap-up on each portion of a multi-message interaction.
Supported Messaging Channels
| Channel | Type | Notes |
|---|---|---|
| Web Messaging | Native Genesys | Persistent/async — configured via Messenger Deployments (see Widgets page) |
| SMS | Native | Requires provisioned DID or Short Code in SMS Inventory |
| WhatsApp Business | Third-party | Requires Meta Business Manager account + voice/SMS number ownership |
| Facebook Messenger | Third-party | Requires a Business Facebook page with Messenger enabled |
| Instagram DM | Third-party | Requires a business Instagram account |
| X (Twitter) DM | Third-party | Requires a registered X business handle |
| Apple Messages for Business | Third-party | Separate ACD setup required |
| LINE | Third-party | Supported via API/professional services |
| Open Messaging | Custom API | Connects any custom channel via outbound notification webhook |
Platform Integration Setup
All third-party messaging channels are configured from a central location:
You can create and manage integrations for the following platforms: Apple Messaging for Business, Direct Messaging, Facebook, Instagram Social Listening, WhatsApp, and X (Twitter). All integrations can be managed and updated from the centralized Messaging Platforms page.
WhatsApp Configuration
Prerequisites
- Meta Business Manager account — business must be verified with Meta
- A voice or SMS number provisioned and owned by the customer (not Genesys)
- Customer retains ownership of the number while the WhatsApp account is active
Setup Path
Key WhatsApp Rules
| Rule | Detail |
|---|---|
| 24-hour response window | Agents must reply within 24 hours of the customer's last message |
| After 24 hours | Only Message Templates (pre-approved by Meta) can be sent — free-text responses are blocked |
| Opt-in requirement | Meta requires explicit customer opt-in before outbound WhatsApp messages can be sent — captured via IVR, website, or SMS |
| Outbound throughput | Up to 18,000 messages/minute for outbound campaigns; up to 3,000 messages/minute for agentless API messages (as of February 2026) |
| Voice notes | Agents can play back, record, and download .ogg voice note files within WhatsApp conversations |
Facebook Messenger Configuration
Prerequisites
- A business Facebook page with Messenger enabled
- Facebook Business account
Setup Path
Instagram Direct Message Configuration
Prerequisites
- A business Instagram account linked to a Facebook Business page
Setup Path
X (Twitter) Direct Message Configuration
Prerequisites
- A registered X (Twitter) business handle
Setup Path
Open Messaging (Custom Channels)
Open Messaging allows connection to any custom messaging platform not natively supported by Genesys Cloud — such as Telegram, WeChat, custom apps, or proprietary enterprise messaging tools.
| Feature | Detail |
|---|---|
| Method | Outbound Notification Webhook — Genesys sends and receives messages via your middleware |
| Middleware | Customer is responsible for building and maintaining middleware between Open Messaging and the external platform |
| Routing | Full ACD routing, skills, queues, and analytics apply like any native channel |
Routing Architecture for All Messaging Channels
All messaging channels — without exception — route through Architect Inbound Message Flows before reaching an agent.
Customer sends message (WhatsApp / FB / SMS / etc.)
↓
Platform Integration receives message
↓
Architect Inbound Message Flow
├── Bot automation (optional)
├── Customer identification
├── Data collection
└── Transfer to ACD Queue
↓
Agent receives interaction
Character Limits by Channel
Message composition supports channel-specific character limits: WhatsApp and web messaging (4,000), Facebook (2,000), Instagram (1,000), SMS (160/765), and Apple Messages for Business (2,000).
| Channel | Character Limit |
|---|---|
| 4,000 | |
| Web Messaging | 4,000 |
| Facebook Messenger | 2,000 |
| Apple Messages for Business | 2,000 |
| Instagram DM | 1,000 |
| SMS (standard segment) | 160 |
| SMS (Unicode/extended) | 765 |
File Attachments by Channel
| Channel | Supported Formats | Max Size |
|---|---|---|
| JPG, PNG, GIF, PDF, voice notes (.ogg) | Platform limit | |
| Facebook Messenger | JPG, PNG, GIF | Platform limit |
| Apple Messages for Business | Multiple formats | 100 MB |
| Web Messaging | JPG, PNG, GIF | Platform limit |
Multiple file attachments are sent as individual messages — not bundled.
Agent Behavior — Messaging Interactions
| Feature | Detail |
|---|---|
| Conversation history | Agents see prior bot and agent conversation transcripts |
| Delivery status | Pending / Delivered / Failed indicators per message |
| Canned responses | Available in all messaging channels |
| Voice notes | WhatsApp only — agents can record, play back, and download |
| Data filtering | From February 2026 — outbound messages can be checked against admin-defined content filters (profanity, regex patterns) |
| Authentication indicator | Green shield shown for authenticated web messaging sessions |
Customer Responsibilities
When integrating third-party messaging channels, the customer (not Genesys) is responsible for:
| Responsibility | Detail |
|---|---|
| Platform accounts | Owning and maintaining all third-party business accounts (Meta, X, Instagram) |
| Number ownership | WhatsApp phone numbers are owned by the customer, not Genesys |
| Meta Business Verification | Required before WhatsApp can be activated |
| Terms of Service compliance | Must adhere to each platform's messaging terms and policies |
| Open Messaging middleware | Custom channel integrations require customer-built middleware |
Interview Cheat Sheet
| Question | Answer |
|---|---|
| Where are messaging platform integrations configured? | Menu → Digital and Telephony → Message → Platform Integrations |
| How long before messages from the same customer are grouped? | 72 hours |
| What happens with WhatsApp after 24 hours? | Free-text replies are blocked — only pre-approved Message Templates can be sent |
| What is the WhatsApp outbound campaign throughput limit? | 18,000 messages per minute (February 2026) |
| What is Open Messaging used for? | Connecting custom or unsupported channels via webhook + customer middleware |
| Who owns the WhatsApp phone number? | The customer — not Genesys |
| What is the SMS character limit per standard segment? | 160 characters |
| What routes all messaging interactions? | Architect Inbound Message Flows |
| What is the file attachment limit for Apple Messages for Business? | 100 MB |
Outbound Dialing — Overview & Settings
| Topic | Detail |
|---|---|
| Navigation | Admin → Outbound or Menu → Digital and Telephony → Outbound |
| Purpose | Configure and run automated outbound call and messaging campaigns to contact lists of customers |
| Dialing Modes | Preview, Progressive, Power, Predictive, Agentless, External |
| Campaign Types | Voice Campaigns, Digital Campaigns (SMS/Email/WhatsApp) |
✅ Verified against Genesys Cloud Resource Center — March 2026
Outbound Module Overview
Outbound in Genesys Cloud allows organizations to proactively reach customers through automated dialing campaigns. The system manages who to call, when to call them, how to dial, and what happens based on the result — including compliance controls like Do Not Call (DNC) lists and callable time windows.
Key Outbound Objects
| Object | Description |
|---|---|
| Contact Lists | The list of people to contact — phone numbers, names, and custom data fields |
| DNC Lists | Do Not Call lists — numbers the system will never dial |
| Campaigns | The configuration that defines dialing mode, contact list, queue, rules, and schedule |
| Attempt Controls | Limits on how many times a contact can be attempted |
| Callable Time Sets | Time windows defining when dialing is allowed (by time zone) |
| Call Analysis Response Tables | Rules for what to do when a live person, answering machine, or busy signal is detected |
| Rule Sets | Logic-based call rules and campaign rules applied during dialing |
| Campaign Sequences | Chained campaigns that run in order — start/stop the sequence instead of individual campaigns |
| Wrap-Up Code Mappings | Maps agent wrap-up codes to campaign outcomes (e.g., "Resolved" = stop calling this contact) |
Outbound Settings (Org-Level)
Admin → Outbound → Outbound Settings
These settings apply to all campaigns in the organization.
| Setting | Description | Default / Limit |
|---|---|---|
| Max Calls Per Agent | Maximum simultaneous outbound calls placed per available agent | 1.0–15.0 |
| Max Line Utilization | Percentage of Edge lines available for outbound campaigns | Configurable |
| Compliance Abandon Threshold | Seconds allowed before a queue-transferred call is classified as a Compliance Abandon | 2 seconds default |
| Calls Subject to Compliance Abandon Rate | Choose: All Calls or Calls That Reached the Queue | Configurable |
| Reschedule Time Zone Skipped Contacts | Automatically reschedules contacts skipped due to time zone restrictions | Optional |
| Max Calls Per Second (CPS) | Maximum calls dialed per second across the entire org | 15 CPS default — increase via Care case |
⚠️ Each Edge handles up to 350 lines. To increase CPS beyond 15, open a Genesys Care case with telephony model and business justification. Turnaround is typically 10 business days.
Outbound Organization Limits
| Object | Limit |
|---|---|
| Simultaneous voice campaigns running | 50 |
| Simultaneous digital campaigns running | 25 |
| Skills-based dialing campaigns | 5 |
| Max contacts per organization | 5,000,000 |
| Max contacts per contact list | 1,000,000 |
| Max DNC records per DNC list | 1,000,000 |
| Max DNC records per org | 2,000,000 |
| Max contact list columns | 50 |
| Max phone number columns per list | 10 |
| Max queue members (skills-based dialing) | 500 |
| Max queue members (agent-owned campaign) | 200 |
| Max queue members (any campaign) | 1,000 |
| Campaign priority range | 1 (lowest) to 5 (highest) |
| Preview campaign duration | 1 second to 20 minutes |
| Callback advance scheduling | Up to 30 days |
| Phone number minimum digits | 10 digits, E.164 format |
| Schedules per campaign | 1 |
| Schedule intervals per campaign | 500 |
Automatic Time Zone Mapping (ATZM)
ATZM automatically assigns a time zone to each contact record based on their phone number or postal code, ensuring calls are only placed during compliant hours.
| Setting | Default |
|---|---|
| Mapped contacts calling window | 8:00 AM – 9:00 PM local time |
| Unmapped contacts calling window | 2:00 PM – 8:00 PM EST |
| Supported countries | United States (default), Canada (opt-in) |
⚠️ ATZM from outside North America to dial North American numbers requires the Genesys Cloud org to reside in a North American AWS region. Canadian postal codes must use the format
A1A 1A1(7 characters with space after 3rd character).
Campaign Priority
When multiple campaigns share the same queue, Priority (1–5) determines proportional call distribution:
- Higher priority campaigns receive more calls per agent over time
- Equal priority campaigns share lines proportionally
- Agents participate automatically in multiple campaigns via shared queues
Access Control (Divisions)
Outbound campaigns support division-based access control — different admin teams can be restricted to manage only their own campaigns:
- Assign the Outbound Admin role to a group
- Assign a specific Division to that role
- Only campaigns in that division are visible and manageable by that group
Interview Cheat Sheet
| Question | Answer |
|---|---|
| Where are org-level outbound settings configured? | Admin → Outbound → Outbound Settings |
| What is the default CPS limit? | 15 calls per second — increase via Care case |
| What is the default compliance abandon threshold? | 2 seconds |
| What is ATZM? | Automatic Time Zone Mapping — assigns time zones to contacts to enforce compliant calling windows |
| Default calling window for mapped contacts? | 8:00 AM – 9:00 PM local time |
| Default calling window for unmapped contacts? | 2:00 PM – 8:00 PM EST |
| Max contacts per org? | 5,000,000 |
| Max contacts per contact list? | 1,000,000 |
| How many voice campaigns can run simultaneously? | 50 |
| How many digital campaigns can run simultaneously? | 25 |
Outbound Dialing Modes
| Topic | Detail |
|---|---|
| Navigation | Admin → Outbound → Campaign Management |
| Purpose | Select the dialing strategy that determines how the system places calls and connects agents |
| Default Mode | Preview |
| Number of Modes | 6 — Preview, Progressive, Power, Predictive, Agentless, External |
✅ Verified against Genesys Cloud Resource Center — March 2026
Dialing Mode Comparison
| Mode | Who Dials | Agent Required | Best For | Min Agents |
|---|---|---|---|---|
| Preview | Agent manually | Yes | High-value sales, debt collections, B2B | 1+ |
| Progressive | System — 1 call per agent | Yes | Compliance-sensitive, moderate volume | Any |
| Power | System — multiple per agent | Yes | High volume with controlled abandonment | 15+ recommended |
| Predictive | System — AI-paced | Yes | Maximum efficiency, large call centers | 15+ required |
| Agentless | System — no agent | No | Notifications, surveys, IVR delivery, reminders | None |
| External | System — routes to external | Yes | Routing to external agents or systems | Any |
Preview Mode
In Preview mode, the agent receives a contact record and manually decides when to dial.
| Feature | Detail |
|---|---|
| Agent control | Agent reviews contact info before calling |
| Timer | Optional countdown — system auto-dials when timer expires |
| Agent-owned records | Agents can own specific contacts and handle all retries |
| Efficiency | Lowest efficiency — highest quality per contact |
| Compliance | Safest mode — no risk of abandoned calls from over-dialing |
| Best use | Collections, high-value B2B sales, sensitive outreach requiring personalization |
⚠️ Preview campaigns ignore pacing options — the agent controls the pace entirely.
Progressive Mode
In Progressive mode, the system automatically dials exactly one call per available agent.
| Feature | Detail |
|---|---|
| Dialing ratio | 1 call : 1 available agent — always |
| Abandoned calls | Near-zero risk — there is always an agent ready when a contact answers |
| Call analysis | Detects live person vs. answering machine before connecting to agent |
| Efficiency | Moderate — no wasted agent time waiting for answers, but no over-dialing |
| Compliance | Excellent — guarantees agent availability; no abandoned call risk |
| Best use | Compliance-sensitive environments, smaller agent pools, regulated industries |
💡 Progressive is the recommended mode when you have fewer than 15 agents and cannot use Predictive.
Power Mode
Power mode dials multiple calls per available agent using a pacing algorithm.
| Feature | Detail |
|---|---|
| Dialing ratio | More than 1 call per agent — determined by pacing algorithm |
| Pacing | Algorithm predicts when an agent becomes available and pre-dials accordingly |
| Call analysis | Required — system drops or routes unanswered/machine calls |
| Abandoned calls | Risk exists — compliance abandon monitoring required |
| Efficiency | High — maximizes agent talk time |
| Compliance | Monitor abandon rate carefully — FTC/OFCOM limits apply |
| Best use | High-volume campaigns where efficiency is more important than zero abandons |
| Min agents recommended | 15+ |
Predictive Mode
Predictive mode uses a patented stage-based AI algorithm to forecast agent availability and pre-dial contacts accordingly.
| Feature | Detail |
|---|---|
| Dialing | System automatically places calls based on predicted agent availability |
| Algorithm | Patented pacing — adjusts dynamically based on real-time agent stats |
| Call analysis | Full detection — live person, answering machine, busy, no answer |
| Efficiency | Highest — maximizes talk time, minimizes idle time |
| Abandoned calls | Risk exists — pacing must be tuned to stay within compliance thresholds |
| Min agents required | 15 agents minimum — smaller pools make predictions inaccurate |
| Best use | Large-volume outbound operations (sales, collections, surveys) with 15+ agents |
⚠️ With fewer than 15 agents, Predictive's algorithm lacks sufficient data — use Progressive instead.
Agentless Mode
Agentless mode dials contacts and delivers pre-recorded messages, surveys, or IVR flows without connecting to a live agent.
| Feature | Detail |
|---|---|
| Agent required | No |
| Content | Recorded voice messages, IVR flows, opt-out prompts |
| Opt-out | Include "Press 9 to opt out" in the IVR flow to manage DNC compliance |
| Answering machine | System can detect and play a different message for machines vs. live answers |
| Live party | Call is transferred to an Architect Inbound Call Flow for IVR handling |
| Requires Inbound | Agentless campaigns require Inbound call routing to be implemented |
| Best use | Appointment reminders, payment notifications, fraud alerts, surveys, outage notifications |
External Calling Mode
External calling routes answered calls to an external phone number or SIP destination instead of an internal Genesys Cloud queue.
| Feature | Detail |
|---|---|
| Routing | Calls are bridged to an external system or phone number |
| Use case | Third-party agent environments, outsourced contact centers |
Call Analysis
Call Analysis (also called AMD — Answering Machine Detection) is the process of detecting what answered the call before connecting it to an agent or playing a message.
| Detection Result | Default Action |
|---|---|
| Live Person | Connect to agent or play IVR |
| Answering Machine | Disconnect, play message, or leave voicemail |
| Busy Signal | Record result, retry based on attempt control |
| No Answer | Record result, retry based on attempt control |
| Invalid Number | Mark uncallable |
Call analysis is configured in a Call Analysis Response Table, which is then assigned to a campaign.
Campaign Priority
When multiple campaigns share the same ACD queue, priority determines how lines are distributed:
| Priority | Effect |
|---|---|
| 1 | Lowest — fewest calls per agent relative to other campaigns |
| 5 | Highest — proportionally more calls per agent |
Agents participate in multiple campaigns automatically via the queues they are active in. No manual assignment per campaign is needed.
Choosing the Right Dialing Mode
| Scenario | Recommended Mode |
|---|---|
| High-value B2B sales — agent needs to personalize each call | Preview |
| Collections — compliance-sensitive, regulated | Progressive |
| High-volume sales, 15+ agents, moderate compliance risk | Power |
| Maximum efficiency, large center, 15+ agents | Predictive |
| Appointment reminders, payment alerts, fraud notifications | Agentless |
| Fewer than 15 agents, need auto-dialing | Progressive |
Interview Cheat Sheet
| Question | Answer |
|---|---|
| What is the default campaign dialing mode? | Preview |
| Which mode dials 1 call per available agent? | Progressive |
| Which mode requires minimum 15 agents? | Predictive (and recommended for Power) |
| Which mode has no agents involved? | Agentless |
| What is Call Analysis? | Detection of live person, answering machine, busy, or no answer before connecting to agent |
| What is the abandoned call risk in Progressive mode? | Near-zero — one call per agent guarantees availability |
| What happens with fewer than 15 agents in Predictive mode? | Pacing predictions become inaccurate — use Progressive instead |
| What must Agentless campaigns implement? | Inbound call routing (Architect flow) |
Outbound — Contact Lists & DNC
| Topic | Detail |
|---|---|
| Navigation | Admin → Outbound → Contact Lists and Admin → Outbound → DNC Lists |
| Purpose | Manage the lists of contacts to dial and the numbers that must never be dialed |
| Max contacts per org | 5,000,000 |
| Max contacts per list | 1,000,000 |
| Max DNC records per list | 1,000,000 |
| Max DNC records per org | 2,000,000 |
✅ Verified against Genesys Cloud Resource Center — March 2026
Contact Lists
A contact list is the "phone book" for a campaign — it contains the names, phone numbers, and custom data fields for every person the campaign will attempt to reach.
Contact List Structure
| Field | Detail |
|---|---|
| Columns | Up to 50 columns per list |
| Phone number columns | Up to 10 phone number columns per list (e.g., mobile, home, work) |
| Column header character limit | 128 characters |
| Column entry character limit | 512 characters |
| Phone number format | Minimum 10 digits, E.164 format required |
| One campaign at a time | A contact list can only be on one running campaign at a time |
Creating a Contact List
Importing Contacts
- Open the contact list
- Click Import
- Upload a CSV file — columns must match the list definition
- The system validates and imports contacts
💡 Contact lists can be generated from CRM or marketing systems and uploaded on a one-time, recurring, or trigger-based basis.
Contact List Filters
Contact list filters allow you to run a campaign against a subset of a contact list without creating a separate list:
- Filter by any column value (e.g., only contacts in a specific state or with a specific status)
- Assigned to a campaign in the Campaign Editor
- Up to 1,000 contact list filters per org
Attempt Controls
Attempt controls limit how many times a contact or phone number can be called, preventing excessive re-dialing.
| Setting | Description |
|---|---|
| Max attempts per phone number | Stop calling a specific number after N attempts |
| Max attempts per contact | Stop calling the entire contact record after N total attempts |
| Recall time | How long to wait before retrying a contact |
| Reset period | After this period, the attempt counter resets (e.g., every 24 hours) |
| Phone type-specific limits | February 2026 update — configure different attempt limits per phone type (mobile, home, work) |
💡 February 2026 update: Administrators can now set phone type-specific attempt limits, extend recall times, and adjust reset periods with greater precision.
DNC Lists (Do Not Call)
A DNC list is a data source of phone numbers that must never be dialed by any campaign. The system checks contact phone numbers against all assigned DNC lists before placing each call.
Types of DNC
| Type | Description |
|---|---|
| Internal DNC | Organization's own DNC list — uploaded and managed in Genesys Cloud |
| Campaign-specific DNC | Assigned to specific campaigns only |
| Wrap-up triggered DNC | Agent selects a wrap-up code that automatically adds a number to DNC |
| Contact-level DNC | Agent or system flags an entire contact (not just a number) as uncallable |
Creating a DNC List
Importing DNC Numbers
- Open the DNC list
- Click Import
- Upload a CSV of phone numbers
- The system validates and imports
Assigning DNC to a Campaign
DNC lists are assigned in the Campaign Editor during campaign configuration. A campaign can have multiple DNC lists assigned — all are checked before each dial attempt.
Agent-Triggered DNC
To allow agents to add numbers to DNC during a call:
- Configure a wrap-up code mapped to the DNC action
- Or include a DNC button in the agent Script
- The number is immediately flagged and will not be dialed again
Callable Time Sets
Callable time sets define when a campaign is allowed to dial for each time zone. This works alongside ATZM to ensure compliance with regulations like the Telephone Consumer Protection Act (TCPA).
| Feature | Description |
|---|---|
| Navigation | Admin → Outbound → Callable Time Sets |
| Purpose | Define allowed dialing hours by day of week and time zone |
| Integration | Assigned to a campaign — overrides or supplements ATZM defaults |
| Override | Callable times can be overridden; callable days cannot |
Contact Management During a Campaign
| Action | Description |
|---|---|
| Dynamic queueing | Contacts are re-sorted at attempt time — most current data is used |
| Filter changes honored | If a contact list filter changes during a running campaign, the campaign honors the update |
| Skip time zone contacts | Contacts outside the callable window are skipped and optionally rescheduled via ATZM |
| Mark uncallable | A wrap-up code or call rule can flag a number or entire contact as permanently uncallable |
Interview Cheat Sheet
| Question | Answer |
|---|---|
| Max contacts per org? | 5,000,000 |
| Max contacts per contact list? | 1,000,000 |
| Max DNC records per list? | 1,000,000 |
| Max DNC records per org? | 2,000,000 |
| Max phone number columns per contact list? | 10 |
| Can a contact list be on multiple running campaigns? | No — only one running campaign at a time |
| What format must phone numbers use? | E.164 format, minimum 10 digits |
| What is an Attempt Control? | Limits on how many times a contact or number can be dialed |
| What does a DNC list do? | Prevents listed numbers from being dialed by any campaign it is assigned to |
| How can agents add a number to DNC? | Via wrap-up code mapped to DNC action, or DNC button in agent script |
Outbound — Campaign Configuration
| Topic | Detail |
|---|---|
| Navigation | Admin → Outbound → Campaign Management |
| Purpose | Create and configure outbound campaigns — defines who to call, how to dial, and what rules to apply |
| Campaign Types | Voice Campaigns, Digital Campaigns (SMS, Email, WhatsApp) |
✅ Verified against Genesys Cloud Resource Center — March 2026
Campaign Editor Overview
The Campaign Editor is a step-by-step configuration wizard. The first decision is always the Dialing Mode — this determines which other settings are available.
Campaign Editor Required Resources
Before creating a campaign, ensure the following exist:
| Resource | Why It's Needed |
|---|---|
| Contact List | The list of contacts to dial |
| ACD Queue | Where answered calls route to (agent-assisted modes) |
| DNC List (optional) | Numbers to exclude |
| Callable Time Set (optional) | Allowed dialing hours |
| Call Analysis Response Table | What to do with live answer / machine / busy / no answer |
| Agent Script (optional) | Screen pop for agents when they receive the call |
| Rule Set (optional) | Logic-based conditions applied pre-call or at wrap-up |
Creating a Campaign
Core Campaign Settings
General
| Field | Description |
|---|---|
| Campaign Name | Unique name for the campaign |
| Division | Controls which admin teams can manage this campaign |
| Dialing Mode | Preview, Progressive, Power, Predictive, Agentless, External |
| Priority | 1 (lowest) to 5 (highest) — affects line distribution when sharing a queue |
Contact List & Filtering
| Field | Description |
|---|---|
| Contact List | The source list of contacts to dial |
| Contact List Filter | Optional — dial only a subset of the contact list |
| Contact Sort | Define sort order before dialing begins (up to 4 sort columns) |
| Dynamic Queueing | Re-sort contacts at attempt time — uses most current data |
Queue & Routing
| Field | Description |
|---|---|
| ACD Queue | Queue where answered calls are delivered to agents |
| Script | Script that pops on agent desktop when call connects |
| Caller ID | The number displayed to the contact being called |
| Skills-Based Routing | Optional — match agents based on ACD skills during campaign |
DNC & Compliance
| Field | Description |
|---|---|
| DNC Lists | One or more lists — all are checked before every dial attempt |
| Callable Time Set | Enforces calling hours by time zone |
| Attempt Controls | Limits re-dial attempts per contact or phone number |
| Compliance Abandon Rate | Monitor and alert on FTC/OFCOM abandon thresholds |
Call Analysis Response Table
Defines system behavior based on call detection result:
| Detection | Example Action |
|---|---|
| Live Person | Connect to queue → Agent |
| Answering Machine | Disconnect, play message, or leave voicemail |
| Busy | Schedule retry via attempt control |
| No Answer | Schedule retry via attempt control |
| Invalid Number | Mark as uncallable |
Outbound Lines Distribution
Controls how campaign lines are shared when multiple campaigns run on the same Edge group or Site:
| Option | Description |
|---|---|
| Weight | Proportional share — default weight is 10 per campaign |
| Reserved Lines | Campaign reserves a fixed number of lines (used for Agentless) |
| Equal Distribution | All campaigns share lines equally |
💡 Line weight is relative: Campaign A (weight 50) + Campaign B (weight 25) = Campaign A gets 67% of available lines, Campaign B gets 33%.
Campaign Scheduling
Each campaign can have one schedule with up to 500 intervals:
Campaigns can also be organized into Campaign Sequences — chained campaigns that run one after another, started and stopped as a group.
Wrap-Up Code Mappings
Wrap-up codes used by agents can be mapped to campaign actions — defining what happens to the contact after the call ends:
| Wrap-Up Code | Campaign Action |
|---|---|
| Resolved | Stop all future contact attempts |
| Callback Requested | Schedule a callback |
| Wrong Number | Mark phone number as uncallable |
| Do Not Call | Add to DNC list |
| Follow Up | Schedule retry with custom recall time |
Wrap-up code mappings are configured at Admin → Outbound → Wrap-Up Code Mappings.
Rule Sets
Rule sets define logic-based conditions that trigger actions before or after a call:
| Rule Type | Timing | Example |
|---|---|---|
| Pre-call Rule | Before dialing | Skip contact if account balance < $0 via Data Action lookup |
| Wrap-Up Rule | After call ends | Schedule callback if wrap-up = "Call Back Later" |
| Limit | Detail |
|---|---|
| Max data action conditions per rule set | 2 |
| Max data actions per rule set | 10 |
| API call rate from rules | 5 per second (pre-call and wrap-up) |
Digital Campaigns
In addition to voice, Genesys Cloud supports outbound digital campaigns:
| Channel | Use Case | Notes |
|---|---|---|
| Marketing, notifications, billing | Requires verified email domain | |
| SMS | Alerts, reminders, surveys | 160 characters per segment; requires SMS inventory number |
| High-volume notifications | Pre-approved Message Templates required; up to 18,000 msg/min |
Digital campaigns use the same Campaign Editor but with channel-specific settings instead of call analysis.
Campaign Monitoring (Real-Time)
| View | Location |
|---|---|
| Outbound Campaigns Dashboard | Performance → Outbound Campaigns |
| Campaign Details View | Select a campaign — shows stats, interactions, callbacks |
| Diagnostics Window | March 2026 feature — real-time diagnostics for voice campaign health (queues, agents, contact rates) |
| Refresh Rate | Interaction data refreshes every 10 seconds |
| Historical Interactions | View interactions for current day, last 7 days, or last 30 days |
Interview Cheat Sheet
| Question | Answer |
|---|---|
| Where are campaigns created? | Admin → Outbound → Campaign Management |
| What is the first decision in the Campaign Editor? | Dialing Mode |
| What does Campaign Priority control? | Proportional line distribution when multiple campaigns share the same queue |
| What is a Callable Time Set? | Defines allowed dialing hours by time zone — enforces compliance |
| What does a Call Analysis Response Table define? | System actions based on call detection result (live person, machine, busy, no answer) |
| What is the default outbound line weight per campaign? | 10 |
| How does wrap-up code mapping work? | Maps agent wrap-up codes to campaign outcomes (stop calling, add to DNC, schedule callback, etc.) |
| Can multiple DNC lists be assigned to one campaign? | Yes |
| How often does campaign interaction data refresh? | Every 10 seconds |
| What is new in March 2026 for campaign monitoring? | A dedicated diagnostics window with real-time campaign health data |
Callbacks
| Section | Description |
|---|---|
| Feature Area | Contact Center / Queue Configuration |
| Navigation (Scheduled Callbacks view) | Performance → Workspace → Contact Center → Scheduled Callbacks |
| Navigation (Queue callback settings) | Admin → Contact Center → Queues → [select queue] → Callback tab |
| Navigation (Architect Create Callback) | Available in Inbound Call, In-Queue, and Outbound Call flows via the Toolbox |
| Primary Function | Allow customers to request a return call instead of waiting on hold; reduce abandonment and improve satisfaction |
A callback is a request a caller makes to have their call returned when an agent is unavailable. Callbacks improve customer satisfaction by eliminating hold time. They also help agents who cannot complete an interaction immediately and need to follow up. Genesys Cloud supports several callback types that originate from different points in the contact center workflow.
Study Notes — Callback Types
| Callback Type | Origin | Description |
|---|---|---|
| In-Queue Callback | Architect flow (in-queue or inbound) | Customer requests a callback while waiting in queue — exits the queue and the callback object takes their position |
| Scheduled Callback | Agent-initiated during an interaction | Agent schedules a return call for a future date/time — up to 30 days in advance |
| Agent-Owned Callback | Scheduled callback with ownership | Agent takes personal ownership — callback waits for that specific agent to become available |
| Customer First Callback | Queue-level configuration | System dials the customer first, connects them to an agent only after the customer answers |
| Campaign Callback | Outbound campaign Schedule Callback action | Automatically created by outbound dialing campaign rules |
In-Queue Callback (via Architect)
The Create Callback action is added to an Inbound Call, In-Queue, or Outbound Call flow.
| Attribute | Detail |
|---|---|
| Architect Action | Create Callback (in Flow category of Toolbox) |
| Supported In | Inbound Call flows · In-Queue Call flows · Outbound Call flows |
| What happens | Callback object is placed on the specified queue; original call exits the queue |
| Queue position | Callback object takes the position in queue of the original call — same skill requirements and priority are automatically inherited |
| ANI (Caller ID) | Callback uses the queue's ANI, not the agent's ANI |
| Caller ID customization | Cannot set caller ID with Create Callback action — use a Call Data action first if you need to set caller ID or caller name |
| Script requirement | Script used by the callback must have the Callback property enabled in script settings (disabled by default) |
| Skills/priority retention | Not retained when placing a callback — skills and priority are reacquired from queue position, not the original interaction |
| In-queue flow limit | Max 30 in-queue flows per email or message interaction (prevents loop when target queue = current queue) |
Scheduled Callback (Agent-Initiated)
Agents can schedule a return call during an active voice interaction.
| Attribute | Detail |
|---|---|
| Maximum advance scheduling | 30 days |
| Default routing | Routes to the queue that received the original interaction |
| Agent can override | Agent can specify a different queue or select "Route callback to me if possible" |
| Ownership | If admin enables agent-owned callbacks, agent can select Take Ownership |
| If agent misses the callback | Immediately routes to the next available agent in queue |
| If no agent is available | Callback remains in queue until an agent becomes available |
| Edit restriction | Cannot edit an owned callback within 15 minutes of scheduled time |
Agent-Owned Callbacks
| Attribute | Detail |
|---|---|
| Definition | A callback where a specific agent takes personal ownership — waits for that agent to become available |
| Prerequisite | Admin must enable agent-owned callbacks on the queue; at least one Preferred Agent Routing rule must be set |
| Ownership duration | Admin configures the wait period — 1 hour to 30 days |
| On expiration (if Assign to Queue enabled) | Callback returns to the queue for the next available agent |
| On expiration (if Assign to Queue NOT enabled) | Callback is removed from queue and disconnected |
| Effect of preferred agent routing | Preferred agent routing does NOT affect scheduled callbacks — scheduled callbacks are unaffected |
Customer First Callback (Queue Configuration)
| Attribute | Detail |
|---|---|
| Default behavior | Agent First — system waits for agent to answer before dialing the customer |
| Customer First behavior | System dials the customer before connecting to an agent; once customer answers, interaction returns to queue |
| Configure where | Queue settings → Callback tab → select Customer First |
| Pacing Modifier | Values 1–10 — controls the rate at which Customer First callbacks are dialed based on online agent count |
| Retry attempts | Configurable — max 0–20 retries for unsuccessful callbacks; retry interval up to 24 hours |
| Voicemail recommendation | Genesys recommends not using voicemails in Customer First callback queues — voicemails also dial the customer first and the agent cannot listen before the customer connects |
| Script used | Customer First callbacks use the voice script for callbacks (callback-specific agent scripts are not supported) |
| Analytics | Agents do not receive Customer First callback-specific metrics (handle time, talk time, time to first dial/connect) — only voice metrics after connection |
| Outbound routes | As of July 2025, administrators can specify a telephony site or edge group per queue for Customer First callback outbound dialing |
Callbacks & Preferred Agent Routing
| Interaction Type | Preferred Agent Routing Behavior |
|---|---|
| Email and messaging interactions | Preferred agent routing overrides — Genesys no longer routes to last agent |
| Inbound callbacks | Preferred agent routing overrides — Genesys no longer routes to last agent |
| Scheduled callbacks | Unaffected by preferred agent routing |
Scheduled Callbacks View (Performance Dashboard)
| Attribute | Detail |
|---|---|
| Navigation | Performance → Workspace → Contact Center → Scheduled Callbacks |
| Permissions required | Analytics > Conversation Detail > View · Routing > Queue > View · Outbound > Campaign > View |
| What it shows | All callbacks scheduled by agents during interactions, and callbacks created by the Schedule Callback action |
| Agent-owned callbacks | Show the agent owner's name in the Agent Owner column |
| Non-owned callbacks | Agent Owner column is blank |
| Actions available | Cancel (single or bulk) · Reschedule · Reassign to another queue/agent (agent-owned only) |
| Export limit | Up to 10,000 conversations per 12-hour period for recent interactions; up to 1,000,000 for older data |
| View does NOT auto-refresh | Must manually refresh to see current data |
Key Limits & Rules (Exam Critical)
| Rule | Value |
|---|---|
| Maximum advance scheduling | 30 days |
| Agent-owned callback duration range | 1 hour to 30 days |
| Pacing modifier range (Customer First) | 1–10 |
| Max callback retry attempts | 0–20 |
| Retry interval maximum | 24 hours |
| Cannot edit owned callback before scheduled time | 15 minutes |
| Inactive callback auto-end | If no date specified and no updates within 14 days of creation, analytics ends the conversation (callback may still be active) |
| In-queue flow limit | 30 per email/message interaction |
| Callback uses queue ANI | Not agent ANI |
| Skills/priority retained from original call | No |
Architect Create Callback Action — Configuration Fields
| Field | Description |
|---|---|
| Name | Label for the action in the flow |
| Callee Name | Optional — name to identify the callback recipient |
| Callback Number | Required — string expression for the callback number (auto-captured from ANI data) |
| Queue | Queue where the callback request is placed |
| Script | Optional — a script with the Callback property enabled |
Note: ANI data from the call is automatically examined at runtime to capture the caller's telephone number. You cannot specify caller ID or name directly from this action — use a Call Data action first.
Callback Routing Logic (Inbound)
Caller enters Inbound Call Flow
↓
Wait time exceeds threshold (or caller selects option)
↓
Create Callback action executes
↓
Callback object placed in queue at caller's original position
(inherits skill requirements and priority)
↓
Original call disconnects
↓
Agent becomes available → Callback object routed to agent
↓
Agent manually dials customer (Agent First)
OR System dials customer first (Customer First)
↓
Outbound call placed → linked to queue for analytics
Callback Automation (Queue Settings)
Queues can be configured to automate callback handling, removing manual agent steps:
| Automation Option | Description |
|---|---|
| Auto-Answer | Callback interaction is automatically answered when routed to agent |
| Auto-Dial | Agent's outbound call is automatically placed when callback is answered |
| Auto-End Callback | Callback segment is automatically ended after the call completes |
These settings are found under
Admin → Contact Center → Queues → [queue] → Callbacktab.
Skill/Priority Preservation (January 2025 Update)
As of January 2025, administrators can optionally preserve skills and priorities from the original call for callbacks and ACD voicemails. This applies to:
- In-queue callbacks
- Scheduled callbacks
- Skilled campaign callbacks
- ACD voicemails
This is an opt-in setting and was not the default behavior prior to this update.
Best Practices
| Practice | Reason |
|---|---|
| Do not enable agent-owned callbacks without Preferred Agent Routing rules on the queue | Ownership requires at least one PAR rule to function |
| Always handle the case where a callback cannot be placed | Add alternate routing in the flow's failure path |
| Avoid internal ACD voicemails | Creates a callback segment where Agent A's utilization is consumed until the callback is resolved |
| Do not use voicemails in Customer First queues | Agent cannot listen to voicemail before customer connects |
| Set a realistic ownership period | If too long, callbacks may wait excessively for unavailable agents |
| Enable "Assign to Queue on ownership expiration" | Ensures expired owned callbacks don't just disconnect |
Key Takeaways
| Topic | Summary |
|---|---|
| In-queue callback | Uses Create Callback action in Architect; callback takes original call's queue position |
| Scheduled callback | Agent-initiated; max 30 days advance; routes to original queue by default |
| Agent-owned callback | Waits for specific agent; requires PAR rule; 1hr–30day ownership period |
| Customer First | System dials customer before connecting to agent; Pacing Modifier 1–10 |
| Skills not retained | Callbacks do not inherit skills/priority (unless optional preservation is enabled) |
| ANI | Callbacks use queue ANI, not agent ANI |
| Inactive auto-end | 14-day limit for unscheduled callbacks with no updates |
| Scheduled Callbacks view | Performance → Workspace → Contact Center → Scheduled Callbacks |
Predictive Routing
Study Notes
| Topic | Description |
|---|---|
| Predictive Routing | AI-powered routing system that optimizes agent assignment |
| Engine | Machine learning algorithms analyze skills, availability, and contact history |
| Purpose | Maximize first-contact resolution and customer satisfaction |
| Activation | Requires Premium edition and Workforce Optimization module |
| Benefit | Reduces handle time and improves customer outcomes |
Navigation
Admin → Architect → Routing → Predictive Routing OR Admin → Contact Center → Routing Configuration → Enable Predictive Routing
Predictive Routing Overview
Predictive Routing is an AI-powered contact routing system that dynamically matches incoming contacts to the most suitable available agent based on multiple factors:
Key Capabilities
- Skill-based routing - Matches agent skills to contact requirements
- Historical performance - Learns from agent interaction outcomes
- Availability prediction - Anticipates agent availability and readiness
- Real-time optimization - Adjusts routing in real-time based on system state
- Omnichannel support - Works across voice, chat, email, and messaging
How It Works
- Contact arrives at system
- Contact intent and requirements analyzed
- System evaluates all available agents
- Machine learning algorithm predicts best match
- Contact routed to optimal agent
- Interaction data captured for learning
Edition & Module Requirements
| Requirement | Details |
|---|---|
| Minimum Edition | Premium Edition required |
| Module | Workforce Optimization add-on module |
| License Type | Agent licenses with predictive routing enabled |
| Setup | Admin configuration in Architect |
Study Notes - Routing Factors
| Factor | Description | Impact |
|---|---|---|
| Agent Skills | Capabilities and certifications | High - Core matching criteria |
| Proficiency Level | Skill mastery degree | High - Affects quality |
| Availability | Agent ready state and status | High - Real-time factor |
| Handling Capacity | Available slots for new contacts | High - Prevents overload |
| Historical Performance | Past interaction outcomes | Medium - Learning factor |
| Queue Wait Time | Customer wait duration | Medium - Fairness factor |
| Contact Type | Voice, chat, email, etc. | High - Channel match |
| Language Proficiency | Supported languages | High - Communication match |
| Customer History | Previous interaction records | Medium - Context factor |
| Agent State | Idle, working, after-call work | High - Real-time factor |
Implementation Guide
Step 1: Prerequisites & Planning
- Ensure organization has Premium edition
- Purchase Workforce Optimization module
- Audit existing agent skills database
- Document required skill sets
- Review current routing rules
- Plan migration from legacy routing
Step 2: Configure Skill Definitions
Step 3: Enable Predictive Routing
- Go to Admin → Contact Center → Routing
- Select queue to enable predictive routing
- Enable "Predictive Routing" toggle
- Configure routing rules (optional overrides)
- Set skill matching parameters
- Define fallback routing behavior
Step 4: Testing & Validation
- Route test calls through system
- Monitor agent assignment accuracy
- Verify skill matching
- Check queue distribution
- Validate omnichannel routing
- Review abandonment rates
Step 5: Monitoring & Optimization
- Review routing analytics daily
- Monitor first-contact resolution rates
- Track agent utilization
- Measure customer satisfaction
- Optimize skill assignments
- Adjust thresholds as needed
How to Implement
| Phase | Description | Timeline |
|---|---|---|
| Analysis | Audit current routing and skills | Week 1-2 |
| Configuration | Set up skills, queues, and rules | Week 2-3 |
| Testing | Validate routing logic and assignments | Week 3-4 |
| Pilot | Deploy to test queue with monitoring | Week 4-6 |
| Full Rollout | Enable across all queues | Week 6-8 |
| Optimization | Monitor, tune, and improve | Ongoing |
Predictive Routing Architecture
Incoming Contact
↓
Contact Metadata Analysis
├── Contact Intent
├── Contact Type (Voice/Chat/Email)
├── Language Requirements
└── Skill Requirements
↓
Predictive Routing Engine
├── Machine Learning Models
├── Real-time Agent Analysis
├── Skill Matching Algorithm
└── Performance Prediction
↓
Agent Evaluation
├── Available Agents
├── Skill Match Score
├── Proficiency Level
├── Historical Performance
└── Queue Load Balance
↓
Optimal Agent Selection
↓
Route Contact
↓
Agent Assignment
Routing Decision Flow
Contact Arrives
↓
Extract Contact Data
├── Intent
├── Channel Type
├── Language
└── Queue Assignment
↓
Predictive Routing Engine Evaluates
├── Agent Availability Status
├── Skill Compatibility
├── Proficiency Levels
├── Current Workload
└── Historical Performance Score
↓
Machine Learning Model Predicts
├── Best Agent Match
├── Estimated Resolution Probability
└── Customer Satisfaction Likelihood
↓
Route to Optimal Agent
↓
If No Optimal Agent Available
├── Queue with Priority Calculation
├── Monitor for Next Available Match
└── Apply Fallback Routing Rules
↓
Agent Accepts Contact
Routing Rules & Overrides
Hard Rules (Always Applied)
Rule Priority: High
├── Agent Availability
├── Required Skills Present
├── Language Match
└── Queue Assignment
Rule Priority: Medium
├── Skill Proficiency Threshold
├── Agent Capacity
├── Contact Type Capability
└── Channel Configuration
Rule Priority: Low
├── Load Balancing
├── Historical Performance
└── Fairness Rotation
Skill Configuration Example
Technical Support Queue
Required Skills:
├── Product Knowledge (Level 3+)
│ ├── Software (Level 4)
│ ├── Hardware (Level 3)
│ └── Cloud Services (Level 3)
├── Troubleshooting (Level 3+)
├── Customer Service (Level 2+)
└── English Fluency (Level 3+)
Optional Skills:
├── Advanced Certifications (bonus)
├── Spanish Fluency (secondary channel)
└── VIP Customer Experience (specialized)
Bilingual Sales Queue
Required Skills:
├── Sales Techniques (Level 3+)
├── Product Knowledge (Level 3+)
├── English Fluency (Level 4+)
├── Spanish Fluency (Level 4+)
└── Customer Service (Level 3+)
Optional Skills:
├── Enterprise Sales (bonus)
├── Account Management (bonus)
└── Negotiation (specialized)
Real Flow Scenario: Predictive Routing in Action
Customer Calls Support Line
↓
System Analyzes: "Technical issue with mobile app"
↓
Route Requirements:
├── Skill: Mobile Development (Level 3+)
├── Skill: Customer Service (Level 2+)
├── Language: English
├── Channel: Voice
└── Queue: Technical Support
↓
Predictive Engine Evaluates All Available Agents:
Agent 1 (Sarah)
├── Mobile Development: Level 4 ✓
├── Customer Service: Level 4 ✓
├── Current Load: 1 contact
├── Avg Handle Time: 8 mins
├── FCR Rate: 85% ✓ (BEST MATCH)
Agent 2 (James)
├── Mobile Development: Level 2 (Below threshold)
├── Current Load: 2 contacts
├── FCR Rate: 72%
Agent 3 (Maria)
├── Mobile Development: Level 3 ✓
├── Customer Service: Level 3 ✓
├── Current Load: 3 contacts
├── FCR Rate: 78%
↓
Route to Agent Sarah (Highest Probability of Resolution)
↓
Sarah Answers Call
↓
System Logs Interaction for Future Learning
Omnichannel Predictive Routing
Voice Channels
Inbound Calls
↓
Predictive Routing
↓
Skill-based Queue
↓
Agent Answer
Digital Channels
Chat/Email/Social Arrival
↓
Predictive Routing Engine
↓
Agent Availability Check (across channels)
↓
Route to Agent with Capacity
↓
Agent Manages Omnichannel Load
Contact Blending Example
Agent Can Handle:
├── 1 Voice Call
├── 2 Chat Conversations
├── 1 Email Thread
└── 1 Social Media Message
Total Capacity: 5 Concurrent Contacts
Current Load: 3 Contacts
Available Slots: 2
Real Flow Scenario: Omnichannel Assignment
Multiple Contacts in Queue:
├── Inbound Call (Technical)
├── Chat (Billing Question)
└── Email (Complaint)
Predictive Engine Evaluates:
↓
Agent 1 Capacity: 2 slots available
├── Skills: Technical, Billing, Customer Service ✓
├── Current: 1 Call + 1 Chat
├── Assignment: Route Email (write capability available)
↓
Agent 2 Capacity: 1 slot available
├── Skills: Technical, Billing ✓
├── Current: 1 Chat
├── Assignment: Route Call (available)
↓
Queue Assignment Complete
Usage Scenarios
| Scenario | Solution | Outcome |
|---|---|---|
| High call volume with variable skill requirements | Enable predictive routing with skill-based queues | Reduced wait times, improved FCR |
| Multiple agent skill levels | Set proficiency thresholds in routing rules | Appropriate complexity matching |
| Omnichannel contact center | Use predictive routing across all channels | Optimized agent utilization |
| International operations | Configure language skills and regional routing | Better customer satisfaction |
| Seasonal staffing fluctuations | Adjust skill assignments dynamically | Maintained service quality |
| VIP customer handling | Create specialized skill for VIP interactions | Enhanced customer experience |
Predictive Routing Configuration Settings
Queue-Level Settings
Queue Configuration: Technical Support
Routing Mode: Predictive Routing ✓
Skill Matching:
├── Required Skills: Product Knowledge, Troubleshooting
├── Proficiency Threshold: Level 3+
├── Language Match: Required
└── Strict Matching: Enabled
Fallback Behavior:
├── If no perfect match: Lower proficiency threshold
├── Escalation path: Senior support queue
└── Timeout: 30 seconds to find match
Load Balancing:
├── Max contacts per agent: 3
├── Considering ACW time: Yes
└── Fair distribution: Enabled
Monitoring & Analytics Dashboard
Key Metrics to Track
| Metric | Target | Purpose |
|---|---|---|
| First Contact Resolution (FCR) | >80% | Measure routing effectiveness |
| Average Handle Time (AHT) | Baseline - 5% | Track efficiency |
| Agent Utilization | 80-90% | Optimize resource use |
| Customer Satisfaction (CSAT) | >85% | Measure outcomes |
| Skill Match Rate | >95% | Verify routing accuracy |
| Queue Abandonment | <5% | Monitor wait times |
| Call Transfer Rate | <10% | Reduce routing errors |
Real-Time Dashboard View
Predictive Routing Performance (Live)
Queue: Technical Support
├── Active Contacts: 24
├── Available Agents: 8
├── Avg Match Score: 4.2/5 ✓
├── Current AHT: 9.2 mins
└── Skill Match %: 96.4%
Top Performing Skills Today:
├── Mobile Development (8 contacts, 87% FCR)
├── Cloud Services (6 contacts, 82% FCR)
└── Hardware Support (4 contacts, 85% FCR)
Agent Performance:
├── Sarah: 4 contacts, 8.1 avg mins, 88% FCR
├── James: 3 contacts, 9.5 avg mins, 79% FCR
└── Maria: 2 contacts, 8.8 avg mins, 84% FCR
Best Practices
Skill Management
- Keep skills current - Update agent skills quarterly or after training
- Avoid over-specialization - Limit skill count to 8-10 per agent
- Balance proficiency - Mix Level 3-4 and Level 2 agents in queues
- Document requirements - Clearly define skill needs per queue
- Regular training - Invest in skill development to improve proficiency
Routing Optimization
- Start with hard rules - Use required skills and language matching first
- Monitor thresholds - Adjust proficiency requirements based on performance
- Test changes - Implement rule changes gradually
- Leverage analytics - Use data to identify routing improvements
- Continuous tuning - Predictive routing improves over time with more data
Agent Management
- Clear skill assignments - Agents must know their assigned skills
- Growth paths - Provide training to increase proficiency levels
- Regular feedback - Share routing and performance data
- Incentivize learning - Reward skill development
- Load balance fairly - Ensure equitable work distribution
Monitoring & Reporting
- Daily reviews - Check key metrics and anomalies
- Weekly analysis - Identify trends and improvement opportunities
- Monthly optimization - Adjust skills and rules as needed
- Quarterly planning - Forecast and plan for seasonal changes
- Annual strategy - Evaluate overall routing effectiveness
Common Configuration Scenarios
Scenario 1: Small Team (15 agents, 3 skill levels)
Configuration:
├── Premium Edition ✓
├── Workforce Optimization Module ✓
├── Single Queue (Support)
├── 3 Skill Categories (Level 1-4 scaling)
└── Basic Routing Rules
Expected Results:
├── 20-30% improvement in FCR
├── 10-15% reduction in AHT
└── Higher agent satisfaction
Scenario 2: Large Enterprise (200+ agents, multiple queues)
Configuration:
├── Premium Edition ✓
├── Workforce Optimization Module ✓
├── 5-8 Queues (Technical, Billing, Sales, etc.)
├── 15+ Skill Categories with proficiency levels
├── Advanced Routing Rules and Overrides
└── Omnichannel Blending
Expected Results:
├── 25-40% improvement in FCR
├── 15-25% reduction in AHT
├── Significant CSAT increase
└── Better resource utilization
Scenario 3: Multilingual Contact Center (5 languages)
Configuration:
├── Language Skills for each agent
├── Language Matching in Routing Rules
├── Regional Queue Assignment
├── Skill + Language Combination Routing
└── Overflow to general queue if no match
Expected Results:
├── Improved customer satisfaction
├── Reduced transfers
├── Better first contact resolution
└── International service quality
Troubleshooting Guide
| Issue | Cause | Resolution |
|---|---|---|
| Contacts routing to wrong skill level | Proficiency threshold too low | Increase threshold in routing rules |
| Long wait times | Predictive routing disabled for queue | Enable predictive routing in queue config |
| High transfer rates | Skill mismatch in routing | Review and update skill definitions |
| Uneven agent load | Skill imbalance among agents | Provide training to level skill distribution |
| Poor FCR rates | Insufficient skill matching | Add more skill categories to definitions |
| Agents overloaded | Capacity settings too high | Reduce max contacts per agent |
| Low agent utilization | Skill requirements too strict | Relax proficiency thresholds slightly |
| Routing delays | Too many hard rules | Simplify rules and priorities |
| Language mismatch | Language skills not configured | Add language proficiency to agent setup |
| Module not working | Feature not enabled | Verify Premium edition and module purchase |
Real-World Implementation Timeline
Week 1-2: Assessment & Planning
Day 1-2: Kick-off meeting
Day 3-5: Audit current routing and skills
Day 6-10: Design new skill structure
Day 11-14: Plan change management
Week 3-4: Configuration
Day 15-18: Create skill definitions
Day 19-22: Configure queues and rules
Day 23-25: Set up monitoring dashboard
Day 26-28: Document configuration
Week 5-6: Testing & Pilot
Day 29-32: Conduct routing tests
Day 33-36: Deploy to pilot queue
Day 37-40: Monitor pilot performance
Day 41-42: Gather feedback and optimize
Week 7-8: Full Deployment
Day 43-44: Plan rollout schedule
Day 45-52: Deploy to remaining queues
Day 53-56: Monitor and support agents
Naming Convention
Queue Naming with Routing Type
<Department>_<Function>_<RoutingType>_Queue
Examples:
Support_Technical_PredictiveRouting_QueueSales_Enterprise_PredictiveRouting_QueueBilling_Collections_PredictiveRouting_Queue
Skill Naming Convention
<Category>_<SubCategory>_<Level>
Examples:
Product_MobileApp_SkillLanguage_Spanish_FluencyService_VIP_HandlingTechnical_CloudServices_Certification
Integration with Other Systems
Workforce Management (WFM)
Predictive Routing ←→ WFM
├── Share agent availability
├── Schedule compliance
├── Forecasting data
└── Staffing adjustments
Quality Management
Predictive Routing ←→ Quality Management
├── Interaction recordings
├── Performance metrics
├── Coaching opportunities
└── Training recommendations
Customer Data Platform
Predictive Routing ←→ Customer Data
├── Customer history
├── Preferences
├── Previous resolutions
└── VIP status
Performance Benchmarks
Industry Standard Improvements
| Metric | Typical Improvement |
|---|---|
| First Contact Resolution | +15-40% |
| Average Handle Time | -10-25% |
| Customer Satisfaction | +10-25% |
| Agent Utilization | +5-15% |
| Queue Abandonment | -20-50% |
| Cost Per Contact | -10-20% |
Ramp-Up Timeline
Day 1-30: Learning phase, marginal improvement
Month 2-3: System learns patterns, 10-15% improvement
Month 4-6: Optimized configuration, 25-35% improvement
Month 6+: Mature state, 30-40% improvement
Predictive Routing vs. Traditional Routing
| Feature | Predictive Routing | Traditional Routing |
|---|---|---|
| Skill Matching | AI-optimized | Rules-based |
| Agent Selection | Predictive | Sequential |
| Learning | Continuous | None |
| Complexity | High | Low |
| Setup Time | Medium | Low |
| Optimization | Automatic | Manual |
| FCR Improvement | 25-40% | Baseline |
| Cost | Higher | Lower |
Interview Cheat Sheet
| Question | Answer |
|---|---|
| What is Predictive Routing? | AI-powered routing system that optimizes agent assignment using ML |
| What are the requirements? | Premium edition + Workforce Optimization module |
| How does it select agents? | Analyzes skills, availability, performance, and predicts best match |
| What factors does it consider? | Skills, proficiency, availability, workload, language, history |
| Can you use it with omnichannel? | Yes, works with voice, chat, email, and messaging |
| How is it different from skill-based routing? | Uses ML to predict best match vs. just checking skills |
| Where do you configure it? | Admin → Contact Center → Routing |
| What's the expected improvement? | FCR +25-40%, AHT -10-25%, CSAT +10-25% |
| How long does setup take? | 4-8 weeks depending on complexity |
| What are critical success factors? | Accurate skills data, proper proficiency levels, continuous monitoring |
| How do you monitor performance? | Daily dashboard review, weekly analytics, monthly optimization |
| What if no perfect agent match exists? | System queues contact with fallback routing rules |
| Can you override predictive routing? | Yes, hard rules take precedence (availability, required skills) |
| How does machine learning help? | Learns from past outcomes to improve future routing |
| What's the ROI timeline? | 2-3 months to see significant improvements |
Key Takeaways
- AI-Powered Optimization - Predictive routing uses machine learning to match contacts to best-fit agents
- Skill-Based Foundation - Requires well-defined skills and proficiency levels
- Omnichannel Capable - Works across voice, chat, email, and messaging channels
- Continuous Learning - System improves routing decisions over time
- Premium Feature - Requires Premium edition and Workforce Optimization module
- Significant ROI - Typical improvements: FCR +25-40%, AHT -10-25%
- Real-Time Optimization - Routes contacts dynamically based on current system state
- Fallback Rules Matter - Hard rules ensure quality even without perfect matches
- Change Management Critical - Proper implementation and monitoring are essential
- Ongoing Monitoring Required - Daily reviews and monthly tuning maximize benefits
Migration Path from Traditional Routing
Phase 1: Preparation (Weeks 1-2)
├── Audit current routing rules
├── Document all skills currently used
├── Identify skill gaps
└── Plan queue restructuring
Phase 2: Setup (Weeks 3-4)
├── Create comprehensive skill definitions
├── Assign skills and proficiency to agents
├── Configure predictive routing queues
└── Establish monitoring dashboards
Phase 3: Pilot (Weeks 5-6)
├── Enable on low-risk queue
├── Monitor closely for issues
├── Gather team feedback
└── Optimize configuration
Phase 4: Rollout (Weeks 7-8)
├── Disable traditional routing rules
├── Enable predictive on remaining queues
├── Support agents through transition
└── Celebrate early wins
Additional Resources
Official Documentation Links
- Genesys Cloud Routing Guide: https://help.genesys.com/genesyscloud/current/en-us/Routing.html
- Predictive Routing Setup: https://help.genesys.com/genesyscloud/current/en-us/PredictiveRouting.html
- Workforce Optimization: https://help.genesys.com/genesyscloud/current/en-us/WFO.html
Support Contacts
- Genesys Sales: sales@genesys.com
- Genesys Support: https://support.genesys.com
- Community Forums: https://community.genesys.com
Document Version Info
Last Updated: March 2026
Source: Genesys PureCloud Official Documentation
Version: 1.0
Agent Copilot (Agent Assist)
Study Notes
| Topic | Description |
|---|---|
| Agent Copilot | AI-powered real-time guidance system for agents |
| Also Known As | Agent Assist, Copilot Assistant |
| Purpose | Provides real-time recommendations and knowledge during customer interactions |
| Activation | Requires Premium edition and Customer Insights module |
| Benefit | Reduces handle time, improves first-contact resolution, enhances agent confidence |
Navigation
Admin → Architect → Agent Copilot OR Admin → Contact Center → Agent Assistance → Copilot Configuration
Agent Copilot Overview
Agent Copilot is an AI-powered assistant that provides real-time guidance and recommendations to agents during customer interactions. It analyzes the conversation in real-time and suggests relevant knowledge articles, scripts, and next steps to improve interaction quality and resolution.
Key Capabilities
- Real-time recommendations - Suggests actions based on conversation context
- Knowledge article suggestions - Recommends relevant articles automatically
- Script guidance - Provides talking points and recommended language
- Sentiment analysis - Monitors customer emotion and suggests de-escalation
- Next action recommendations - Predicts optimal next steps
- Agent learning - Improves over time with agent feedback
How It Works
- Agent answers contact
- Copilot monitors conversation in real-time
- AI analyzes conversation intent and context
- System searches knowledge base for relevant information
- Recommendations displayed in agent interface
- Agent reviews and applies suggestions
- Feedback loop improves future recommendations
Edition & Module Requirements
| Requirement | Details |
|---|---|
| Minimum Edition | Premium Edition required |
| Module | Customer Insights add-on module |
| License Type | Agent licenses with Copilot enabled |
| Setup | Admin configuration in Architect |
| Integration | Knowledge management system required |
Study Notes - Copilot Features
| Feature | Description | Use Case |
|---|---|---|
| Knowledge Recommendations | AI-suggested articles from knowledge base | Technical support, FAQs |
| Script Guidance | Real-time conversation scripts and talking points | Sales, compliance-heavy calls |
| Sentiment Monitoring | Real-time emotion analysis of customer | De-escalation, empathy guidance |
| Next Action Suggestions | Recommended next steps for agent | Call routing, transfer decisions |
| Agent Performance Tips | Real-time coaching during interaction | Training reinforcement |
| Historical Context | Customer interaction history suggestions | Personalization, context |
| Product Recommendations | Sales-specific recommendations | Upsell, cross-sell opportunities |
| Compliance Reminders | Real-time compliance guidance | Regulatory requirements |
Implementation Guide
Step 1: Prerequisites & Planning
- Ensure organization has Premium edition
- Purchase Customer Insights module
- Audit existing knowledge base
- Document Copilot use cases by queue
- Plan knowledge article optimization
- Review agent readiness and training needs
Step 2: Knowledge Base Configuration
Step 3: Enable Agent Copilot
- Go to Admin → Architect → Agent Copilot
- Enable "Agent Copilot" toggle
- Select knowledge base source
- Configure recommendation parameters
- Set recommendation types to display
- Choose recommendation frequency
Step 4: Customize by Queue
- Create queue-specific Copilot settings
- Configure knowledge sources per queue
- Set relevance thresholds
- Define script templates
- Establish sentiment trigger rules
- Test queue-specific configurations
Step 5: Agent Training & Rollout
- Train agents on Copilot interface
- Explain recommendation types
- Practice with sample interactions
- Gather initial feedback
- Monitor early adoption
- Provide ongoing support
Step 6: Monitoring & Optimization
- Review Copilot engagement metrics
- Monitor agent utilization of recommendations
- Track recommendation accuracy
- Gather agent feedback
- Optimize knowledge articles
- Adjust recommendation parameters
How to Implement
| Phase | Description | Timeline |
|---|---|---|
| Planning | Audit knowledge base and define use cases | Week 1-2 |
| Setup | Configure Copilot and knowledge sources | Week 2-3 |
| Content | Create/optimize knowledge articles | Week 3-5 |
| Training | Educate agents on features and usage | Week 5-6 |
| Pilot | Deploy to single queue with monitoring | Week 6-7 |
| Rollout | Enable across all queues | Week 7-8 |
| Optimization | Monitor and tune performance | Ongoing |
Agent Copilot Architecture
Incoming Contact
↓
Agent Accepts Contact
↓
Copilot Monitoring Begins
├── Real-time Conversation Analysis
├── Intent Detection
└── Context Extraction
↓
AI-Powered Recommendation Engine
├── Knowledge Base Search
├── Relevance Scoring
├── Sentiment Analysis
└── Prediction Models
↓
Recommendation Generation
├── Knowledge Articles
├── Scripts & Talking Points
├── Next Action Suggestions
├── Sentiment De-escalation Tips
└── Product/Service Recommendations
↓
Display to Agent Interface
↓
Agent Reviews Recommendations
↓
Agent Applies (or Dismisses) Suggestions
↓
Feedback Loop Updates AI Model
Real-Time Recommendation Flow
Customer Says: "I've been trying to reset my password for hours"
Copilot Analyzes:
├── Intent: Password Reset Help
├── Sentiment: Frustrated/Angry
├── Context: Technical Issue
└── Duration: Extended problem
↓
Copilot Recommendations Display:
1. KNOWLEDGE ARTICLE (High Confidence)
├── "Password Reset Troubleshooting"
├── Relevance: 94%
└── Steps: 5-7 minute resolution
2. SENTIMENT GUIDANCE (Urgent)
├── Suggest: Apologize for inconvenience
├── Tone: Empathetic
└── De-escalation: Acknowledge frustration
3. NEXT ACTION (Suggested)
├── Offer: Manual password reset
├── Escalation: If still unresolved
└── Followup: Offer premium support
4. SCRIPT SUGGESTION (Optional)
├── "I completely understand how frustrating that is..."
├── "Let me walk you through the fastest solution..."
└── "If this doesn't work, I'll reset it for you personally"
↓
Agent Applies Recommendations
↓
Customer Issue Resolved
↓
System Captures Feedback
Copilot Interface Components
Agent Desktop View:
┌─────────────────────────────────────────┐
│ Current Interaction │
│ Customer: John Smith │
│ Queue: Technical Support │
│ Duration: 3:45 │
├─────────────────────────────────────────┤
│ COPILOT RECOMMENDATIONS │
├─────────────────────────────────────────┤
│ │
│ 📚 KNOWLEDGE ARTICLES │
│ ├─ Password Reset Guide (94% match) │
│ ├─ Two-Factor Auth Setup (87% match) │
│ └─ Account Recovery (76% match) │
│ │
│ 😟 SENTIMENT ALERT │
│ ├─ Customer: FRUSTRATED │
│ └─ Suggestion: De-escalate & empathize│
│ │
│ ➡️ NEXT ACTIONS │
│ ├─ Offer manual password reset │
│ ├─ Provide security questions │
│ └─ Escalate if unsuccessful │
│ │
│ 💬 SUGGESTED SCRIPT │
│ "I understand how frustrating this is. │
│ Let me walk you through the quickest │
│ way to get this resolved..." │
│ │
│ [👍 Helpful] [👎 Not Helpful] │
└─────────────────────────────────────────┘
Real Flow Scenario: Sales Queue with Copilot
Agent: "Hi, thanks for calling. How can I help?"
Customer: "I'm interested in upgrading my plan"
Copilot Recommendations Appear:
1. KNOWLEDGE - Sales Playbook
├─ Current Plan Analysis
├─ Available Upgrades
└─ Pricing Information
2. PRODUCT RECOMMENDATIONS
├─ Upsell: Premium Plan (+40% revenue potential)
├─ Cross-sell: Support Package
└─ Offer: 2-month discount if upgrading today
3. NEXT ACTION SUGGESTIONS
├─ Qualify: Ask about usage patterns
├─ Present: Show cost-benefit analysis
└─ Close: Offer contract details
4. SCRIPT SUGGESTION
"Based on your usage, the Premium Plan
would save you money and give you these
benefits: [list]. Can I set that up?"
↓
Agent Applies Script & Recommendations
↓
Customer Upgrades (upsell successful)
↓
System Logs: Agent applied recommendation
↓
Next Sale: System learns and improves recommendations
Real Flow Scenario: Support Queue with Sentiment
Customer Calls (Angry Tone)
Agent Answers
Copilot Immediately Detects:
├─ Sentiment: NEGATIVE (85% confidence)
├─ Emotion: Frustrated/Angry
├─ Risk: Potential churn
└─ Recommended Action: De-escalate NOW
↓
Sentiment Alert in Copilot:
"Customer is frustrated.
Suggested response:
'I'm sorry you're experiencing this issue.
I'm going to personally make sure we get
this resolved for you right now.'"
↓
Copilot Provides Knowledge:
├─ Issue Resolution Articles
├─ Escalation Path (if needed)
└─ Retention Options
↓
Agent Applies De-escalation Approach
↓
Customer Sentiment Improves
↓
System Logs Improvement
↓
Issue Resolved Successfully
Omnichannel Copilot Support
Voice Interactions
Real-time Copilot assistance during calls
├── Conversation transcription
├── Intent analysis
├── Real-time knowledge suggestions
└── Sentiment monitoring
Chat Interactions
Suggested responses during chat
├── Pre-written messages
├── Quick knowledge links
├── Canned responses with personalization
└── Sentiment-based guidance
Email Interactions
Copilot assistance with draft responses
├── Knowledge recommendations
├── Tone suggestions
├── Template recommendations
└── Compliance checking
Social Media Interactions
Real-time assistance for public responses
├── Tone and brand consistency
├── Knowledge suggestions
├── De-escalation for negative sentiment
└── Escalation recommendations
Usage Scenarios
| Scenario | Solution | Outcome |
|---|---|---|
| High call volume with complex issues | Copilot suggests knowledge articles | Reduced AHT, faster resolution |
| New agents lacking experience | Real-time script and guidance | Improved FCR, faster ramp-up |
| Compliance-heavy calls | Compliance reminders and scripts | Reduced risk, better compliance |
| Frustrated customers | Sentiment analysis with de-escalation tips | Improved satisfaction, retention |
| Sales team underperforming | Upsell/cross-sell recommendations | Increased revenue per interaction |
| Quality issues with call handling | Real-time coaching suggestions | Improved quality scores |
| Agent knowledge gaps | Targeted knowledge recommendations | Improved FCR, fewer escalations |
| Multilingual support | Language-specific scripts and guidance | Consistent quality across languages |
Knowledge Base Organization for Copilot
Knowledge Base Structure:
├─ TECHNICAL SUPPORT
│ ├─ Password Reset
│ │ ├─ Steps 1-5
│ │ ├─ Common Issues
│ │ └─ When to Escalate
│ ├─ Two-Factor Auth
│ ├─ Account Recovery
│ └─ Billing Issues
│
├─ SALES
│ ├─ Plan Comparison
│ ├─ Pricing Information
│ ├─ Promotional Offers
│ ├─ Upsell Scenarios
│ └─ Contract Terms
│
├─ CUSTOMER SUCCESS
│ ├─ Onboarding Steps
│ ├─ Best Practices
│ ├─ Feature Usage
│ └─ Integration Guides
│
└─ COMPLIANCE
├─ Required Disclosures
├─ Privacy Policies
├─ Legal Requirements
└─ Prohibited Actions
Copilot Performance Metrics
Recommendation Quality
| Metric | Target | Purpose |
|---|---|---|
| Recommendation Accuracy | >85% | Agent finds recommendations helpful |
| Agent Acceptance Rate | >60% | Agents actively use suggestions |
| Relevance Score | >4/5 | Recommendations match context |
| Time to Resolution | -15% | Faster with Copilot assistance |
| Knowledge Article Match Rate | >90% | Correct article suggested |
Agent Performance
| Metric | Target | Purpose |
|---|---|---|
| First Contact Resolution | +10-25% | Copilot guidance improves outcomes |
| Average Handle Time | -10-20% | Faster resolution with suggestions |
| Customer Satisfaction | +5-15% | Better agent performance |
| Quality Score | +5-10% | Improved call quality |
| Agent Confidence | +20-30% | Subjective improvement |
Best Practices
Knowledge Base Optimization
- Keep articles current - Update quarterly or when processes change
- Write for clarity - Use simple language agents can understand quickly
- Include visuals - Screenshots and diagrams help comprehension
- Provide examples - Real scenarios help agents apply knowledge
- Tag thoroughly - Use keywords and metadata for better matching
- Test accuracy - Verify all knowledge is correct before publishing
Copilot Configuration
- Start simple - Begin with high-confidence recommendations only
- Tune relevance - Adjust thresholds based on agent feedback
- Monitor adoption - Track which recommendations agents use
- Gather feedback - Ask agents what would help them more
- Iterate quickly - Update knowledge and rules frequently
- A/B test - Try different recommendation approaches
Agent Enablement
- Provide training - Agents need to understand Copilot features
- Share success stories - Show how other agents use it effectively
- Encourage experimentation - Let agents find what works for them
- Make feedback easy - Simple thumbs up/down for recommendations
- Celebrate improvements - Recognize agents who adopt well
- Continuous learning - Regular coaching on Copilot usage
Monitoring & Optimization
- Track recommendations - See which articles agents use most
- Monitor accuracy - Ensure recommendations are helpful
- Gather sentiment - Ask agents about Copilot effectiveness
- Review metrics - Check impact on FCR, AHT, CSAT
- Optimize content - Update articles agents find unhelpful
- Plan improvements - Use data to guide enhancements
Common Implementation Scenarios
Scenario 1: Technical Support with Knowledge-Heavy Topics
Configuration:
├── Knowledge base with 200+ articles
├── Intent-based recommendation
├── Sentiment monitoring enabled
├── De-escalation scripts
└── Escalation pathways
Expected Results:
├── FCR improvement: 15-25%
├── AHT reduction: 12-18%
└── Agent confidence: +25%
Scenario 2: Sales Team with Upsell Focus
Configuration:
├── Product recommendation engine
├── Upsell/cross-sell playbooks
├── Customer history integration
├── Pricing recommendations
└── Contract template suggestions
Expected Results:
├── Revenue per call: +15-30%
├── Sales conversion: +10-20%
└── Agent productivity: +20%
Scenario 3: Multilingual Support
Configuration:
├── Knowledge base in multiple languages
├── Language-specific scripts
├── Tone guidance per language
├── Cultural sensitivity prompts
└── Translation recommendations
Expected Results:
├── FCR consistent across languages
├── Quality standardization
└── Customer satisfaction: +10-15%
Troubleshooting Guide
| Issue | Cause | Resolution |
|---|---|---|
| No recommendations appearing | Knowledge base empty or not indexed | Populate knowledge base and index |
| Irrelevant recommendations | Poor knowledge article tagging | Review and improve metadata/keywords |
| Agents ignoring recommendations | Not helpful or slow to appear | Adjust relevance thresholds and review content |
| Slow recommendation loading | Too many articles to search | Add more specific keywords and metadata |
| Sentiment detection inaccurate | Model needs more training data | Collect more interactions and retrain |
| High false positive sentiment | Threshold too sensitive | Adjust sensitivity settings lower |
| Copilot not working for all queues | Not enabled for specific queues | Enable in queue configuration |
| Knowledge articles outdated | No review process | Establish content review cycle |
| Low agent adoption | Agents don't understand value | Provide additional training |
| Module not appearing | License not purchased or enabled | Verify Premium edition and module purchase |
Agent Copilot vs. Traditional Knowledge Base
| Feature | Agent Copilot | Traditional Knowledge |
|---|---|---|
| Real-time suggestions | Yes, automatic | Manual search required |
| Context awareness | AI-powered, contextual | Search-based only |
| Sentiment analysis | Yes | No |
| Next action prediction | Yes | No |
| Script guidance | Automatic | Manual lookup |
| Learning capability | Improves over time | Static |
| Setup complexity | Medium-High | Low |
| Ongoing maintenance | High (ML tuning) | Medium |
| Agent productivity | +20-30% potential | Baseline |
| Customer satisfaction | +5-15% improvement | Baseline |
Sentiment Analysis in Copilot
Sentiment Detection Levels
Extremely Negative (-2)
├─ Angry, frustrated, hostile
├─ Risk: High churn likelihood
└─ Action: Immediate de-escalation
Negative (-1)
├─ Disappointed, concerned
├─ Risk: Medium churn likelihood
└─ Action: Empathy + quick resolution
Neutral (0)
├─ Standard interaction tone
├─ Risk: Low
└─ Action: Normal service
Positive (+1)
├─ Satisfied, pleased
├─ Risk: None
└─ Action: Reinforce positive experience
Extremely Positive (+2)
├─ Happy, delighted
├─ Opportunity: Upsell/cross-sell
└─ Action: Leverage positive sentiment
Integration Scenarios
With Workforce Optimization
Copilot + WFO
├── Agent assisted by Copilot
├── Interaction recorded
├── Quality scored with AI
├── Coaching recommendations generated
└── Coaching delivered back to agent
With Predictive Routing
Copilot + Predictive Routing
├── Best agent routed to contact
├── Copilot assists during interaction
├── Recommendations improve outcome
└── System learns for future routing
With Analytics
Copilot + Analytics
├── Copilot recommendation usage tracked
├── Impact on metrics measured
├── Dashboards show Copilot effectiveness
└── Data guides optimization
Interview Cheat Sheet
| Question | Answer |
|---|---|
| What is Agent Copilot? | AI-powered real-time guidance system for agents |
| Also known as? | Agent Assist or Copilot Assistant |
| What are the requirements? | Premium edition + Customer Insights module |
| What does it recommend? | Knowledge articles, scripts, next actions, sentiment guidance |
| How does sentiment analysis help? | Detects customer frustration and suggests de-escalation |
| Where is it configured? | Admin → Architect → Agent Copilot |
| What channels does it support? | Voice, chat, email, social media |
| How does it improve performance? | FCR +10-25%, AHT -10-20%, CSAT +5-15% |
| What's required for success? | Quality knowledge base and agent training |
| How does machine learning help? | System learns from recommendations agents use vs. ignore |
| Can agents reject recommendations? | Yes, agents decide what to apply |
| How long until ROI? | 4-8 weeks to see significant improvement |
| What if knowledge base is empty? | Copilot won't have content to recommend |
| How does it work with omnichannel? | Provides channel-specific guidance (voice, chat, email, etc.) |
| What's the biggest success factor? | Quality, current, well-organized knowledge base |
Key Takeaways
- Real-Time AI Assistance - Copilot provides in-the-moment guidance during interactions
- Knowledge-Driven - Quality depends on knowledge base content and organization
- Sentiment Awareness - Monitors emotion and suggests appropriate responses
- Omnichannel Support - Works across voice, chat, email, and social channels
- Premium Feature - Requires Premium edition and Customer Insights module
- Significant Impact - FCR improvements of 10-25% typical
- Machine Learning - System improves recommendations based on agent actions
- Agent Adoption Critical - Success depends on agents trusting and using recommendations
- Ongoing Content Management - Knowledge base requires regular updates
- Quick ROI - 4-8 weeks to measurable improvements
Migration Path from Manual Knowledge Search
Phase 1: Assessment (Weeks 1-2)
├── Audit current knowledge base
├── Identify content gaps
├── Plan reorganization
└── Set quality standards
Phase 2: Content Preparation (Weeks 2-4)
├── Create/update knowledge articles
├── Add metadata and keywords
├── Organize by intent and queue
└── Quality review all content
Phase 3: Copilot Setup (Weeks 4-5)
├── Enable Agent Copilot
├── Configure recommendations
├── Set relevance thresholds
└── Establish monitoring
Phase 4: Agent Training (Week 5-6)
├── Educate on Copilot features
├── Practice with sample interactions
├── Explain recommendation types
└── Share best practices
Phase 5: Pilot & Optimization (Weeks 6-8)
├── Deploy to single queue
├── Monitor and gather feedback
├── Optimize recommendations
└── Plan full rollout
Phase 6: Full Deployment (Week 8+)
├── Enable across all queues
├── Provide ongoing support
├── Monitor metrics
└── Continuous improvement
Additional Resources
Official Documentation Links
- Genesys Cloud Agent Copilot Guide: https://help.genesys.com/genesyscloud/current/en-us/AgentCopilot.html
- Knowledge Management Setup: https://help.genesys.com/genesyscloud/current/en-us/KnowledgeManagement.html
- Customer Insights Module: https://help.genesys.com/genesyscloud/current/en-us/CustomerInsights.html
Support Contacts
- Genesys Sales: sales@genesys.com
- Genesys Support: https://support.genesys.com
- Community Forums: https://community.genesys.com
Document Version Info
Last Updated: March 2026
Source: Genesys PureCloud Official Documentation
Version: 1.0
5. - Architect & Call Flows
Architect Overview
What Is Architect?
Architect is Genesys Cloud's visual flow design environment. It is where administrators build, manage, and publish the interaction routing logic that handles every inbound call, message, email, and chat that enters the contact center.
Architect operates independently from the Admin console — it opens in its own browser window and has its own toolbar, canvas, and toolbox.
⚠️ If Architect does not open, check your browser's pop-up blocker and allow pop-ups from your Genesys Cloud domain.
Accessing Architect
- Log in to Genesys Cloud
- Click Admin
- Search or scroll to Architect
- Architect opens in a new browser window
Interface Areas
| Area | Description |
|---|---|
| Toolbar | Save, validate, publish, version history, debug, and execution history controls |
| Toolbox | Drag-and-drop action categories used to build flow logic |
| Workspace | Flow design canvas where components are placed and connected |
| Properties Panel | Configuration panel for the currently selected component |
| Flow Outline | Auto-generated structural outline of the flow |
Toolbar Reference
| Tool | Description |
|---|---|
| Save | Saves the current state without affecting the live production version — must publish separately to go live |
| Check In | Saves the version and releases the edit lock so other users can open and edit the flow |
| Undo / Redo | Reverses or reapplies recent changes made during the current edit session |
| Zoom In / Out | Adjusts the visual scale of the canvas for navigating large or complex flows |
| Validate | Checks for configuration issues — yellow = warnings (publishing still allowed); red = errors (must resolve before publishing) |
| Publish | Deploys the flow to the live contact center; status displays as Validating → Publishing → Published; a version number appears in the Published column after success |
| Debug | Creates a debug-enabled version accessible via SIP address (YourCallFlow-debug@localhost) to test from the caller's perspective; requires no validation errors; English-language flows only |
| Execution History | Lists all previous execution instances with name, version, flow type, and timestamps; click any instance to open in Replay Mode |
| Search | Finds components, milestones, actions, and variables within the flow — useful in large or complex flows |
| Version History | Shows all saved versions with publish status, check-in date, and author; previous versions open read-only — from there you can export, use Save As, or unpublish the active version |
| Import / Export | Imports or exports the flow as a file; each flow type uses a distinct extension (e.g. .i3InboundFlow, .i3OutboundFlow) to prevent importing incompatible types |
| Print / PDF | Exports a visual or printable representation of the flow |
Toolbox Categories
Available categories vary by flow type and license plan.
| Category | Description |
|---|---|
| Audio | Play prompts (TTS or recorded), whisper audio to agents, flush queued audio |
| Bot | Integrate conversational AI bots (Genesys Dialog Engine or external platforms) |
| Data | Retrieve or manipulate data via APIs, data tables, or external services — includes Call Data Action, Data Table Lookup, Update Data, Encrypt/Decrypt Data |
| Find | Dynamically locate resources at runtime — queues, users, schedules, groups, language skills |
| Flow | Interaction-level actions — Create Callback, Set Screen Pop, Set Wrap-Up Code, post-flow routing |
| Logical | Decision-making and schedule-based routing — Decision (if/else), Switch, Evaluate Schedule, Evaluate Schedule Group |
| Loop | Repeat sections of a task sequence — Loop, Next Loop, Exit Loop; supports fixed count, collection iteration, and condition-based looping |
| Menu | IVR menus for DTMF or speech input — Menu, Repeat Menu, Previous Menu, Jump to Menu |
| Task | Group logic into reusable routines — Task, Call Task, Jump to Reusable Task, End Task |
| Transfer | Route callers to a destination — Transfer to ACD, Transfer to User, Transfer to Number, Transfer to Group, Transfer to Flow, Transfer to Secure Flow, Transfer to Voicemail |
| Disconnect | End the call or interaction — terminal action when no further routing is needed |
Workspace and Canvas
| Feature | Description |
|---|---|
| Canvas | Primary drag-and-drop area where flow components are placed, arranged, and connected |
| Connections | Visual lines representing execution paths — update automatically as components are linked or moved |
| Flow Variables | System variables (e.g. caller ANI) and user-defined variables used to control behaviour and pass data between actions |
| Selected Component Properties | Configuration area for the active component — variable bindings, routing targets, behaviour options |
ℹ️ Copy/paste tip: You can cut, copy, and paste components within a flow or between flows — up to 10 task editor actions at a time. Clipboard content does not persist across browser tabs.
Properties Panel
| Setting | Description |
|---|---|
| Component Configuration | Operational settings — routing behaviour, prompts, logic conditions, integration parameters |
| Input / Output Variables | Variables used to receive or return data during execution — commonly used with Data Actions |
| Default Paths | Fallback execution route when no specific condition is met — ensures the flow continues safely |
| Language Settings | Multi-language prompt and behaviour configuration — languages must be enabled in Supported Languages before use at the component level |
| Component Validation | Missing or incorrect settings highlighted in red (errors) or yellow (warnings) |
Debug and Replay Mode
| Tool | Description |
|---|---|
| Debug Mode | Activated from the Publish menu → Debug; creates a testable version via SIP address; lets you hear the flow as a caller and see decision outcomes and action results; requires clean validation; English only |
| Execution History | Toolbar access; lists all previous execution instances with name, version, flow type, and timestamps; click any instance to open in Replay Mode |
| Replay Mode | Step-by-step playback of a previous execution — use play, pause, step in/out/over, and breakpoints to inspect each action; panels show variable state, communication data, and stack info at each point; used for root cause analysis on routing issues |
Flow Management
| Feature | Description |
|---|---|
| Create / Copy / Delete | Flows can be created from scratch, copied from existing flows, or deleted — always review dependencies before deleting |
| Dependency Review | Identifies where a flow is referenced across the platform — prevents accidental removal of flows still in use |
| Import / Export | Export flow config files for backup or migration; distinct file extensions per flow type prevent incompatible imports |
| Check In / Check Out | Checkout locks the flow under your account; check in saves the version and releases the lock |
| Read-Only Mode | Applies when another user has the flow locked, you only have View permission, or you are viewing a previous version — you can export or Save As but cannot edit or publish |
| Execution History & Replay | Monitor behaviour, troubleshoot routing issues, and analyse execution paths post-publish |
Best Practices
| Practice | Why |
|---|---|
| Save and check in frequently | Prevents losing progress; enables collaboration with other flow authors |
| Use meaningful names | Flows, tasks, menus, and variables should be self-documenting — reduces time spent inspecting logic during troubleshooting |
| Add descriptions to flows | Documents intent and expected behaviour for future admins |
| Keep the canvas organised | Logical alignment and grouping improves readability in complex flows |
| Use Reusable Tasks and Menus | Breaks large flows into modular components — simplifies maintenance and enables logic reuse |
| Validate before publishing | Resolve all red errors; review yellow warnings even if they don't block publish |
| Test with Debug Mode | Always test from the caller's perspective before pushing to production |
| Monitor with Execution History | Use Replay Mode to verify behaviour and trace unexpected outcomes after calls |
| Review dependencies before deleting | Prevents breaking other flows, queues, or integrations that reference the resource |
| Document flow logic | Wiki entries or internal notes describing design decisions and dependencies support long-term maintainability |
Flow Types Reference
| Flow Type | Used For |
|---|---|
| Inbound Call | Handling inbound voice calls |
| Inbound Message | SMS and digital messaging interactions |
| Inbound Email | Inbound email handling |
| Inbound Chat | Web chat interactions |
| Outbound | Outbound campaign call handling |
| In-Queue Call | Logic running while a caller waits in queue |
| Secure Call | PCI-compliant DTMF capture flows |
| Bot | Conversational bot flows |
See Also
- Call Flow UI – Complete Reference — left panel sections, flow configuration, and dependencies in detail
- Call Flow Components & Basics — action-by-action reference for building flows
- Prompt Management — creating and managing the audio used inside flows
- Call Routing & Message Routing — how inbound numbers and addresses connect to flows
- Lab: Explore the Architect Interface — hands-on walkthrough (How-To book)
Call Flow Components & Basics
Module 3 Study Guide | Source: Lecture + Verified against Genesys Cloud Resource Center (2025–2026)
1. What Is a Call Flow?
A call flow is a structured, visual representation of the sequence of events and actions that occur within a telephony or contact center system when handling incoming or outgoing calls.
- Determines how calls are handled, processed, and routed
- Ensures efficient operations and high-quality customer experiences
- Replaces simple "call goes to a phone" routing with intelligent, rule-based logic
- Enables: schedule-based routing, self-service options, queue management, voicemail, and more
📌 Key Concept: Architect matches incoming interactions to flows based on criteria like the phone number dialed, then routes based on time, calendar, and logic rules.
2. Call Flow Components
Call flow components are pre-built, drag-and-drop elements used in Genesys Cloud Architect to build call flow logic.
They are organized in the Toolbox (right-side panel) into expandable categories:
| Category | Purpose |
|---|---|
| Audio | Play prompts or TTS to callers |
| Bot | Integrate conversational AI bots |
| Common | Shared/reusable utility actions |
| Data | Retrieve or update data from APIs/tables |
| Disconnect | End the call or interaction |
| Find | Dynamically locate queues, users, schedules at runtime |
| Flow | Callbacks, screen pops, wrap-up codes |
| Logical | Decision, Switch, Schedule evaluation |
| Loops | Repeat sections of flow logic |
| Menus | IVR menus for caller DTMF or speech input |
| Tasks | Group logic into reusable routines |
| Transfer | Route callers to queues, agents, numbers, voicemail, other flows |
📌 Note (Current as of 2026): Action availability in the Toolbox varies by your Genesys Cloud license plan. The maximum number of actions Architect can run per flow invocation is 10,000 — exceeding this triggers error handling (default: disconnect).
3. Common Call Flow Components
These are the most frequently used components when building a basic call flow:
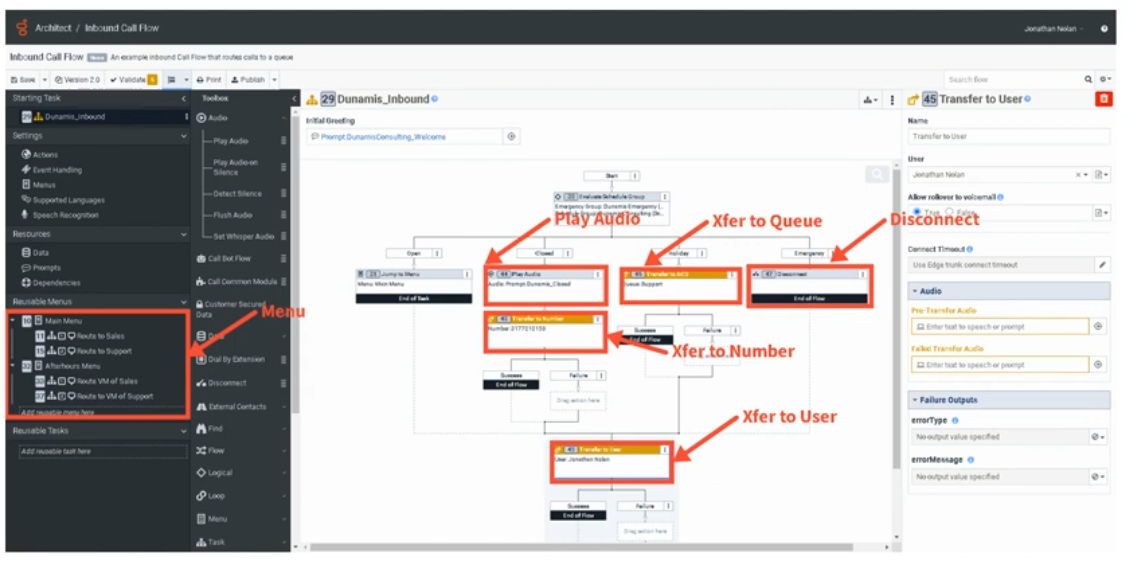
🔊 Play Audio
- Plays a pre-recorded prompt or text-to-speech (TTS) message to the caller
- Output: a prompt file uploaded to Genesys Cloud, or a TTS string
- Drag from Toolbox → Audio → Play Audio
📋 Menu
➡️ Transfer to ACD
- Sends the interaction to a queue (group of agents) for routing
- Available in: call flow menus, inbound flows, in-queue flows, chat, email, bot flows
- Supports: priority settings, preferred agents (up to 100), language skills, ACD skills
- Has Success and Failure output paths
⚠️ Current Doc Note: In secure flows, Genesys Cloud overrides the failure path and disconnects the call using blind transfers instead of consultation transfers.
📞 Transfer to User
- Sends the call directly to a specific agent
- The selected user must have logged into Genesys Cloud at least once
🔢 Transfer to Number
- Routes the call to an external phone number (e.g., after-hours vendor, third-party support)
- Flow author presets the number; callers cannot change it
- Architect tries to use the same trunk/site as the inbound call
📬 Transfer to Voicemail
- Sends caller directly to a user's, queue's, or group's voicemail
- Voicemail interactions retain the original call priority and route to the next available agent
- Maximum voicemail length: 3 minutes
- Callers can: Send, Review, Re-record, or Cancel via DTMF or speech
- Voicemail must be enabled for the org; grayed-out users have no voicemail configured
❌ Disconnect
- Ends the call/interaction
- Used for: emergency closures, no-routing scenarios, end of flow logic
4. Connecting Components
How to Connect
- Click and drag components from the Toolbox onto the canvas
- Reposition by clicking and dragging to a new location
- Right-click an arrowhead on a component to select the next step from a context menu
Component Outputs
Each component has one or more output circles on its right side representing possible outcomes:
| Component | Output Example |
|---|---|
| Play Audio | TTS string or uploaded prompt file |
| Transfer to ACD | Queue name |
| Transfer to Number | External phone number |
| Menu | One output path per DTMF key or speech option |
| Decision | True / False paths |
Connection Properties
- Some components have connection properties (configured in the Properties Panel)
- Others (like Play Audio) have no connection properties — just an output
- Properties Panel shows on the right when a component is selected
Building the Flow
- Drag a component to the canvas
- Configure it in the Properties Panel
- Connect its output arrow(s) to the next component
- Continue until the flow ends with a Disconnect or Transfer
- Repeat as needed
5. Schedule-Based Routing Example
A common pattern using the Evaluate Schedule or Evaluate Schedule Group action:
Schedule Group
├── Open → Play Greeting Prompt → Transfer to ACD (Support Queue)
├── Closed → Transfer to Voicemail (Support Queue)
└── Holiday → Transfer to External Number (Third-party vendor)
└── Emergency → Disconnect
📌 Each branch is a separate output path from the schedule component, connecting to different actions.
6. Best Practices for Designing Call Flows
| Practice | Why It Matters |
|---|---|
| Keep it simple | Easier to troubleshoot, maintain, and hand off |
| Use Reusable Tasks | Isolate logic (schedule checks, data actions) for independent editing |
| Use Reusable Menus | Avoid duplicating menus used in multiple places |
| Use meaningful names | Allows quick review without drilling into every component |
| Test before deploying | Use Architect's built-in Debug Tool before go-live |
| Consolidate Update Data actions | Reduces flow size — multiple updates in one action vs. many single-update actions |
| Avoid duplicating Data Actions | Call Data Action, Create Callback, and Set Screen Pop are resource-heavy |
📌 Current Doc Addition (2026): Genesys now includes a Flow Size indicator under Insights & Optimizations to help you track resource usage and optimize before publishing. Common module flows have a lower size limit than other flow types.
7. Key UI Components (Canvas)
| UI Element | Purpose |
|---|---|
| Toolbox | Source of all drag-and-drop actions |
| Canvas | Visual workspace where flow is built |
| Properties Panel | Configure selected component's settings |
| Output Circles | Connection points on right side of each component |
| Arrows/Connections | Visual paths between components |
| Debug Tool | Test flow internally without a real phone |
| Validation | Check for errors before publishing |
| Flow Insights | View execution frequency overlay (read-only mode, up to 7 days of history) |
8. Additional Current Features
These are confirmed-current Genesys Cloud Architect features you may encounter:
- Flow Insights — Visual overlay showing how often each component executes; helps identify drop-off points and optimization opportunities
- Flow Size Indicator — Shows % of maximum flow size used; warns when approaching limits
- AI-Powered Slots — Bot flows now support special characters, customizable continuation prompts, and multi-turn test widget conversations
- Virtual Agent Performance Dashboard — Track bot containment rates, transfers, and ROI
- Preferred Agents (Transfer to ACD) — Supports up to 100 preferred agents with scoring
9. Quick Reference Cheat Sheet
| I want to... | Use this component |
|---|---|
| Play a message to the caller | Play Audio |
| Let callers press 1 for Sales | Menu |
| Route to a group of agents | Transfer to ACD |
| Route to a specific agent | Transfer to User |
| Route to an outside number | Transfer to Number |
| Send to voicemail | Transfer to Voicemail |
| Check if office is open | Evaluate Schedule / Evaluate Schedule Group |
| Make a True/False decision | Decision |
| Look up data from an API | Call Data Action |
| End the call | Disconnect |
| Reuse logic across the flow | Reusable Task / Call Task |
Last verified against Genesys Cloud Resource Center — January/February 2026
Genesys - Architect - Call Flow UI Overview
The Architect call flow editor contains multiple UI sections that define how calls are processed, routed, and managed. These sections appear in the left navigation panel, toolbox, and configuration panels within the call flow editor.
Flow Configuration Panel (Left Navigation)
| Section | Description |
|---|---|
| Starting Task | Entry point of the flow. The first logic executed when a call arrives — typically used for initial checks such as caller identification, block lists, or routing decisions. |
| Settings | Defines default behavior for the flow including timeout handling, event handling, and fallback routing logic if unexpected errors occur. |
| Menu Defaults | Defines standard IVR behavior such as how many times a menu repeats and how long the system waits for caller input before timing out. |
| Supported Languages | Configures the languages available in the flow. Each language can use pre-recorded prompts or text-to-speech engines. |
| Speech Recognition | Enables or disables voice recognition so callers can speak commands instead of using DTMF keypresses. |
| Resources | Displays variables used in the flow including system variables (such as caller ANI) and user-created variables used for routing logic. |
| Prompts | Lists audio prompts referenced directly in the flow such as greetings, announcements, or menu prompts. |
| Dependencies | Displays resources used by the flow such as prompts, data tables, or tasks to prevent accidental deletion of required objects. |
| Reusable Menus | Stores reusable IVR menus that can be called from multiple parts of the flow to simplify management and reduce duplication. |
| Reusable Tasks | Stores reusable logic blocks used for background processing such as schedule checks or routing decisions. |
Architect Toolbox Categories
The Toolbox contains all actions used to build call flow logic. It is available on the flow's main page and inside the task editor. Categories are collapsible, and a search bar lets you quickly filter and find any action by name. Action availability varies by Genesys Cloud license plan and flow type.
| Category | Description |
|---|---|
| Audio | Plays prompts, text-to-speech, or other audio to the caller. Also handles whisper audio to agents, transcription, audio monitoring, and flushing queued audio. |
| Bot | Integrates conversational bots such as Genesys Dialog Engine Bot Flows, Amazon Lex, Google Dialogflow (ES and CX), Nuance Mix, or external voice bots via Audio Connector. |
| Common | Executes logic stored in a previously created Common Module flow, allowing shared logic to be reused across multiple flows. |
| Customer Secured Data | Handles sensitive data within flows using encryption. Includes Get Secured Data, Set Secured Data, Encrypt Data, and Decrypt Data. |
| Data | Retrieves or manipulates data from external services, APIs, or internal data tables. Includes Call Data Action, Data Table Lookup, Collect Input, Update Data, Set/Get Participant Data, Set UUI Data, Call Decision Table, Get/Set SIP Headers, and Set External Tag. |
| Dial | Enables Dial by Extension, allowing callers to dial and be transferred to a specific extension directly. |
| Disconnect | Ends the call or interaction. Used as the terminal action when no further routing is needed. |
| External Contacts | Retrieves information from the Genesys Cloud External Contacts system. Includes Get External Contact, Get External Organization, and Promote External Contact. |
| Find | Dynamically locates resources at IVR runtime by name or ID. Includes Find Queue, Find Queue by ID, Find User, Find User by ID, Find Users by ID, Find Group, Find Skill, Find Language Skill, Find Schedule, Find Schedule Group, Find Emergency Group, Find System Prompt, Find User Prompt, and Find Utilization Label. |
| Flow | Interaction-level actions including Create Callback, Set Screen Pop, Set Wrap-Up Code, Set Language, Set/Clear Post-Flow, Initialize/Set Flow Outcome, Add Flow Milestone, Set/Clear Utilization Label, and Enable Participant Recording. |
| Logical | Decision-making and schedule-based routing. Includes Decision (if/else), Switch, Evaluate Schedule, and Evaluate Schedule Group. |
| Loop | Repeats sections of a task sequence. Includes Loop, Next Loop, and Exit Loop. Supports fixed count, collection iteration, and condition-based looping. |
| Menu | Creates IVR menus where callers choose options via DTMF keypresses or speech recognition. Includes Menu, Jump to Menu, and Previous Menu. |
| Task | Groups related actions into reusable routines. Includes Task, Call Task, Jump to Reusable Task, and End Task. |
| Transfer | Routes callers to a destination. Includes Transfer to ACD (queue), Transfer to User, Transfer to Number, Transfer to Group, Transfer to Flow, Transfer to Secure Flow, and Transfer to Voicemail. |
📌 Note: The Communicate category does not exist in inbound call flows. Action availability differs across flow types (inbound, outbound, in-queue, bot, email, message, etc.) and Genesys Cloud license plans.
Toolbox Actions – Common Examples
Audio
| Action | Description |
|---|---|
| Play Audio | Plays a prompt or text-to-speech message to the caller. |
| Play Audio on Silence | Plays a message to completion when silence is detected. |
| Flush Audio | Clears any queued audio within the call flow. |
| Set Whisper Audio | Plays a message to the agent before they answer the call to indicate which queue the caller came from. |
| Transcription | Enables the voice transcription feature for the call flow. |
| Audio Monitoring | Starts or stops streaming conversation audio to a third-party service for real-time analysis. |
Bot
| Action | Description |
|---|---|
| Call Bot Flow | Launches an existing Genesys Dialog Engine Bot Flow within the call flow. |
| Call Lex Bot / Call Lex V2 Bot | Integrates Amazon Lex (v1 or v2) for self-service and intent processing. |
| Call Dialogflow Bot / Call Dialogflow CX | Integrates Google Dialogflow (ES or CX) for self-service and intent processing. |
| Call Nuance Bot | Integrates a Nuance Mix bot into the call flow. |
| Call Audio Connector | Streams conversation audio to an external voice bot and returns audio back to Genesys Cloud. |
Common
| Action | Description |
|---|---|
| Call Common Module | Executes reusable logic stored in a previously created Common Module flow. Allows shared logic to be maintained in one place and referenced across multiple flows. |
Customer Secured Data
| Action | Description |
|---|---|
| Get Secured Data | Retrieves a secured data attribute from an interaction participant. |
| Set Secured Data | Assigns a secured data attribute value to a call participant. |
| Encrypt Data | Encrypts sensitive data using your organization's encryption key. |
| Decrypt Data | Decrypts previously encrypted data within a flow. |
Data
| Action | Description |
|---|---|
| Call Data Action | Retrieves customer data from a default or custom data actions integration (e.g. Salesforce, external API). |
| Call Decision Table | Executes a rule-based decision table previously configured by an administrator. |
| Collect Input | Prompts a caller to enter a string of digits (e.g. account number). |
| Data Table Lookup | Retrieves a value stored in a Genesys Cloud data table. |
| Get Participant Data | Retrieves a participant attribute previously set on the interaction. |
| Set Participant Data | Sets a named attribute value on the call participant — persists across flows and is accessible to agents and integrations. |
| Update Data | Assigns or modifies flow or task-level variables. |
| Set UUI Data | Passes User-to-User Information (UUI) data through transfer and disconnect actions. |
| Get SIP Headers / Get Raw SIP Headers | Retrieves BYOC Cloud SIP headers for use in routing logic. |
| Set External Tag | Associates the interaction with a record in an external CRM or system of record (SOR). |
Dial
| Action | Description |
|---|---|
| Dial by Extension | Allows the caller to dial a specific extension and be transferred directly to it. |
Find
| Action | Description |
|---|---|
| Find Queue / Find Queue by ID | Dynamically locates a queue by name or ID at IVR runtime. |
| Find User / Find User by ID / Find Users by ID | Locates a specific agent or multiple agents at runtime. |
| Find Group | Retrieves a Genesys Cloud group at runtime. |
| Find Skill | Finds an ACD skill by name at runtime for use with Transfer to ACD routing. |
| Find Language Skill | Retrieves a language skill at runtime for use with Transfer to ACD routing. |
| Find Schedule / Find Schedule Group | Retrieves a schedule or schedule group at runtime for dynamic routing decisions. |
| Find Emergency Group | Retrieves an emergency group at runtime. |
| Find System Prompt / Find User Prompt | Dynamically looks up a prompt by name for playback. |
| Find Utilization Label | Dynamically retrieves a utilization label by name at runtime. |
Flow
| Action | Description |
|---|---|
| Create Callback | Offers callers the option to receive a callback instead of waiting in queue. |
| Set Screen Pop | Selects a predefined script to display to the agent when the interaction arrives. |
| Set Wrap-Up Code | Automatically assigns a wrap-up code to the interaction. |
| Set Language | Allows callers to select the language in which they hear prompts. |
| Set Post-Flow / Clear Post-Flow | Assigns or removes a post-flow action (e.g. voice survey or transfer) that executes after the interaction ends. |
| Initialize Flow Outcome / Set Flow Outcome | Tracks and sets success or failure outcomes for analytics and reporting. |
| Add Flow Milestone | Adds a milestone marker to the flow for granular reporting and customer journey tracking. |
| Set Utilization Label / Clear Utilization Label | Dynamically applies or removes a utilization label on the interaction. |
| Enable Participant Recording | Gives callers the option to consent to call recording. |
Logical
| Action | Description |
|---|---|
| Decision | Routes the flow based on a true/false condition (if/else). |
| Switch | Routes the flow based on multiple possible case values. |
| Evaluate Schedule | Routes calls based on whether a schedule is open, closed, or in a holiday state. |
| Evaluate Schedule Group | Routes calls using a schedule group that combines multiple schedules. |
Loop
| Action | Description |
|---|---|
| Loop | Repeats a series of actions before continuing to the next action. Supports fixed count, collection iteration, and condition-based modes. |
| Next Loop | Skips the remaining actions in the current iteration and moves to the next. |
| Exit Loop | Exits the loop entirely and continues execution with the next action after the loop. |
Menu
| Action | Description |
|---|---|
| Menu | Creates an IVR submenu where callers select options by pressing a digit or speaking a valid speech recognition entry. |
| Jump to Menu | Transfers the caller immediately to a designated menu within the flow. |
| Previous Menu | Returns the caller to the menu they came from. |
Task
| Action | Description |
|---|---|
| Task | Groups related logic steps into a named routine within the flow. |
| Call Task | Executes another task within the same flow. |
| Jump to Reusable Task | Executes a previously created reusable task. |
| End Task | Ends execution of the current task and returns control to the calling action. |
Transfer
| Action | Description |
|---|---|
| Transfer to ACD | Sends the interaction to a queue for agent routing. Supports preferred agents, skills-based routing, and pre-transfer audio. |
| Transfer to User | Sends the call directly to a specific agent or user. |
| Transfer to Number | Transfers the call to an external phone number. |
| Transfer to Group | Transfers the call to a Genesys Cloud group. |
| Transfer to Flow | Transfers the call to another Architect call flow. |
| Transfer to Secure Flow | Transfers to a secure call flow for handling sensitive data such as payment card information. |
| Transfer to Voicemail | Sends the caller directly to a voicemail destination. |
Workspace UI Components
| Component | Description |
|---|---|
| Canvas | The main visual area where flow components are placed, arranged, and connected to build interaction logic. |
| Connections | Visual lines representing the execution path between flow components, updated as components are linked. |
| Properties Panel | Displays configuration options for the currently selected component. |
| Validation | Checks the flow for configuration errors. Red = must fix before publishing; yellow = warning, publishing still allowed. |
| Debug Tool | Activates a testable version of the flow reachable via SIP address (YourFlowName-debug@localhost) to hear the flow from the caller's perspective before publishing. English-language flows only. |
📌 Limits reminder: The maximum number of actions Architect runs per flow invocation is 10,000. If exceeded, the flow enters error handling (default: disconnect). Flow authors can configure an alternative path such as Transfer to ACD, Jump to Menu, or Jump to Reusable Task — Architect grants an additional 1,000 actions for error handling. Exceeding that limit results in a silent disconnect.
Last verified against Genesys Cloud Resource Center – March 2026
Prompt Management
What Are Prompts?
Prompts are audio or text-to-speech messages played to customers during interactions inside Architect flows. Every piece of audio a caller hears — welcome greetings, menu options, hold messages, closure announcements — is a prompt.
Two Types of Prompts
| Type | Description | Editable? |
|---|---|---|
| System Prompts | Pre-built by Genesys for generic use (dates, numbers, days, months, standard phrases) | Cannot be renamed or deleted |
| User Prompts | Custom prompts created by administrators for org-specific messaging | Fully configurable |
ℹ️ System prompts are used internally by Architect for things like reading back times, dates, and digits. You do not create or manage them — you only create User Prompts.
Prompt Content Options
Each User Prompt can use one or both content types:
| Option | Description |
|---|---|
| Text-to-Speech (TTS) | Type the message text — Genesys synthesizes it using the org's configured TTS engine |
| Uploaded Audio (WAV) | Upload a professionally recorded audio file |
✅ Best practice: Use TTS for dynamic or frequently changing messages. Use uploaded WAV for polished, permanent messages like main greetings where audio quality matters most.
Prompt Naming Rules
| Rule | Detail |
|---|---|
| No spaces | Use underscores instead (e.g., US_Support_WelcomePrompt) |
| No special characters | Letters, numbers, and underscores only |
| Cannot start with a number | Must start with a letter |
| Must be unique | No two prompts can share the same name in the org |
Creating a Prompt
- Admin → Architect → Prompts
- Click Add
- Enter the Prompt Name (follow naming rules above)
- Optionally add a Description
- Click Create Prompt
- In the prompt editor:
- For TTS: type your message text in the Text-to-Speech field
- For audio: click Add Audio and upload a WAV file
- Click Save
Managing Prompts
| Task | How |
|---|---|
| Edit a prompt | Admin → Architect → Prompts → click prompt name |
| Update TTS text | Open prompt → edit text field → Save |
| Replace audio file | Open prompt → Add Audio → upload new WAV → Save |
| Add a language variant | Open prompt → add TTS or audio for additional supported language |
Multi-Language Prompts
A single prompt can have content defined for multiple languages. Architect selects the appropriate language variant at runtime based on the flow's language configuration. If a variant for the active language doesn't exist, Architect falls back to the default.
Using Prompts in Architect Flows
Prompts are referenced inside flows using the Play Audio action (or within Menu actions for IVR options). The flow does not embed the audio — it references the prompt by name from the central library.
Result: Updating a prompt in the library automatically updates it everywhere it is used, without republishing flows.
Architect Flow
↓
Play Audio action
↓
References prompt: US_Support_WelcomePrompt
↓
Prompt library serves TTS or WAV
↓
Customer hears message
↓
Flow continues
Common Prompt Use Cases
| Prompt Type | Example |
|---|---|
| Welcome Greeting | "Thank you for calling Customer Support." |
| IVR Menu | "Press 1 for Sales, 2 for Support, 3 for Billing." |
| Queue Hold Message | "All agents are currently busy. Your call is important to us." |
| Estimated Wait | "Your estimated wait time is approximately [X] minutes." |
| Holiday Closure | "Our offices are closed for [holiday]. We will reopen on [date]." |
| After Hours | "You have reached us outside our business hours." |
| Maintenance | "We are currently performing scheduled maintenance." |
Naming Convention
| Format | Example |
|---|---|
<Region>_<Dept>_<Purpose> |
US_Support_WelcomePrompt |
<Dept>_<Function>_Prompt |
Support_MenuPrompt |
<Region>_<Service>_Announcement |
EU_Service_HolidayAnnouncement |
Troubleshooting
| Issue | Cause | Fix |
|---|---|---|
| Prompt not playing in flow | Prompt not referenced in the Play Audio action | Open flow → verify the prompt action points to correct prompt |
| Audio playback failure | Incorrect file format | Re-upload as a valid WAV file |
| TTS not working | Text formatting issue (special characters, symbols) | Review and clean the TTS text content |
| Prompt change not reflected in live calls | Flow not republished after prompt update | Prompts update without republish — if issue persists, check the flow's prompt reference is correct |
| Wrong prompt playing | Incorrect prompt name referenced in flow | Update the Play Audio action to reference the correct prompt |
ℹ️ Unlike flow changes, prompt content updates (TTS text or audio replacement) take effect without republishing the flow. However, if you rename a prompt or create a new prompt to replace an old one, you must update the flow reference and republish.
Troubleshooting Checklist
| Check | ✓ |
|---|---|
| Prompt created in Architect | ☐ |
| TTS text entered or WAV file uploaded | ☐ |
| Prompt saved | ☐ |
| Play Audio action in flow references correct prompt | ☐ |
| Flow published (if flow changes were made) | ☐ |
| Test call/interaction confirms correct audio | ☐ |
Key Facts for Exam / Interview
| Question | Answer |
|---|---|
| Where are prompts managed? | Admin → Architect → Prompts |
| What two content types can a prompt have? | Text-to-Speech (TTS) and uploaded WAV audio |
| Can system prompts be deleted or renamed? | No |
| What file format is required for uploaded audio? | WAV |
| Do prompt updates require republishing the flow? | No — content updates are live immediately; only flow reference changes require republish |
| Can one prompt serve multiple languages? | Yes — add language variants within the same prompt |
See Also
- Architect Overview — where prompts are used inside flows
- Call Flow Components & Basics — the Play Audio and Menu actions that reference prompts
- Organization Settings → Global Settings — Default TTS Engine configuration
Queue Configuration Reference
1. What Is a Queue?
A queue is a holding area where interactions (calls, chats, emails, callbacks) wait to be routed to an available agent. Queues are the backbone of ACD (Automatic Call Distribution) routing in Genesys Cloud — every Transfer to ACD action in Architect points to a queue.
📌 Genesys Cloud supports up to 5,000 queues with a maximum of 5,000 members per queue for voice and chat channels.
2. How to Navigate to Queues
Two ways to get there:
- Search bar → type "Queues"
- Admin menu → Contact Center → Queues
⚠️ Permissions required: You must have administrative credentials with the
Routing > Queuepermission to create or edit queues. Users with onlyRouting > QueueMember > Managepermission can manage membership only — not queue settings.
3. Creating a New Queue
📌 Naming tip: Use a consistent naming convention (e.g.,
Support_Inbound,Sales_Chat) so queues are easy to identify in Architect flow dropdowns and reports.

4. Queue Configuration Tabs
After saving, the queue opens with several configuration tabs:
📋 General Tab
| Setting | Description |
|---|---|
| Name | Unique identifier — cannot contain asterisks |
| Division | Organizes the queue within your org's division structure |
| Description | Optional notes about the queue's purpose |
| After Call Work (ACW) | Controls agent wrap-up behavior after each interaction |
| Auto Answer | Automatically answers interactions for agents on this queue (digital channels) |
| Last Agent Routing (LAR) | Routes interactions to the last agent who handled that customer |
| Manual Assignment | Allows supervisors/agents to pull interactions from the queue manually |
⏱️ After Call Work (ACW) Modes
The lecture covers this partially — here is the complete list per current documentation:
| ACW Mode | Description |
|---|---|
| Optional | Agent can enter ACW manually or skip it entirely |
| Mandatory Discretionary | ACW is required but agent decides when to end it and return to queue |
| Mandatory Time-boxed | ACW has a set time limit; agent can end early and return to queue before timer expires |
| Mandatory Time-boxed – No Early Exit | Agent must wait the full time before returning to queue; cannot exit early |
| Agent Requested | Agent can request ACW; not automatically triggered |
📌 Maximum ACW timeout: 3,600 seconds (1 hour). If an agent fails to complete ACW within the timeout, Genesys automatically assigns the default wrap-up code
ININ-WRAP-UP-TIMEOUT.
🔀 Routing Tab
The Routing Tab is where you configure how interactions are matched to agents. The lecture mentions this is "based around skills" — here is the full picture:
Routing Methods (5 available)
| Routing Method | Description |
|---|---|
| Standard | Default method. Routes based on skills evaluation method you choose. |
| Bullseye | Skills-based routing with expansion rings — widens the agent pool over time if no match found. Supports up to 5 rings with configurable delays. |
| Predictive | Uses machine learning to analyze historical data and predict the best agent-interaction match to optimize a chosen KPI. Supports voice, email, and async messages. |
| Preferred Agent | Routes to specific preferred agents first, then falls back to bullseye rules. Supports up to 6 rings. |
| Conditional Group | Routes based on real-time KPI conditions (e.g., queue wait time, agents available). Supports up to 5 rules with 10 conditions per rule. |
Evaluation Methods (used with Standard and Bullseye routing)
| Evaluation Method | Description |
|---|---|
| All Skills Matching | Agent must have ALL required skills to receive the interaction |
| Best Available Skills | Routes to the agent with the highest skill proficiency available |
| Disregard Skills / Next Agent | Ignores skills entirely; routes to the agent idle longest |
Scoring Methods
| Scoring Method | Description |
|---|---|
| Conversation Score | Combines arrival time and priority value to rank waiting interactions |
| Priority Score | Uses only the priority value; time in queue used as tiebreaker |
📌 Best practice: Set the scoring method at queue creation or when the queue has no waiting interactions. Changing it mid-queue can cause unexpected routing order.
👥 Members Tab
- Add individual users or groups to the queue
- Members must be added for the queue to receive and route interactions
- For Bullseye routing, members can be assigned to specific rings
- For Preferred Agent routing, agent score pairs (0–100) define priority
🏷️ Wrap-Up Codes Tab
- Assign specific wrap-up codes agents can select after completing an interaction on this queue
- Wrap-up codes are used for reporting and interaction categorization
- If no code is selected by the agent within ACW timeout,
ININ-WRAP-UP-TIMEOUTis automatically assigned
📌 The lecture notes wrap-up codes are covered in a separate course — but be aware this tab exists and connects directly to reporting.
🔊 Voice Tab (Additional Settings)
Not covered in the lecture — but present in the UI:
| Setting | Description |
|---|---|
| Alerting Timeout | How long an agent's phone rings before the interaction is redirected |
| Service Level | Target % of interactions answered within a defined number of seconds |
| In-Queue Flow | Assign an Architect in-queue flow (e.g., music on hold, queue position announcements) |
| Whisper Prompt | Audio played to the agent just before they answer the call |
5. Queue Limits & Permissions Reference
| Item | Limit / Detail |
|---|---|
| Max queues per org | 5,000 |
| Max members per queue | 5,000 (voice and chat) |
| ACW max timeout | 3,600 seconds |
| Preferred agent rings | Up to 6 |
| Bullseye rings | Up to 5 |
| Conditional Group rules | Up to 5 rules, 10 conditions each |
| Queue name | Must be unique; no asterisks |
| Required permission (create/edit) | Routing > Queue > Edit |
| Required permission (members only) | Routing > QueueMember > Manage |
6. How Queues Connect to Call Flows
Once a queue is created, it's referenced inside Architect flows using the Transfer to ACD action:
Call Flow → Evaluate Schedule → Open → Transfer to ACD → [Select Queue Name]
This is the core connection between Architect and Queues — the queue you create here is what you select in your Transfer to ACD action.
7. Best Practices
| Practice | Why It Matters |
|---|---|
| Use consistent naming conventions | Easy to find in Architect dropdowns and reporting |
| Set ACW mode intentionally | Impacts agent productivity and reporting accuracy |
| Choose routing method at creation | Changing scoring methods mid-queue can cause unexpected routing |
| Assign an In-Queue flow | Controls caller hold experience (music, position announcements) |
| Test queue before connecting to live flow | Validate routing behavior without impacting real callers |
| Don't leave queues without members | Calls will wait indefinitely with no agent to answer |
8. Quick Reference Cheat Sheet
| I want to... | Where to configure |
|---|---|
| Create a new queue | Admin → Contact Center → Queues → + Create |
| Control how long agents do wrap-up | General tab → After Call Work |
| Change how calls are routed to agents | Routing tab → Routing Method |
| Add agents to the queue | Members tab → Add Users/Groups |
| Assign wrap-up codes to the queue | Wrap-Up Codes tab |
| Set hold music or queue announcements | Voice tab → In-Queue Flow |
| Play a message to agent before answering | Voice tab → Whisper Prompt |
| Reference the queue in a call flow | Architect → Transfer to ACD → select queue |
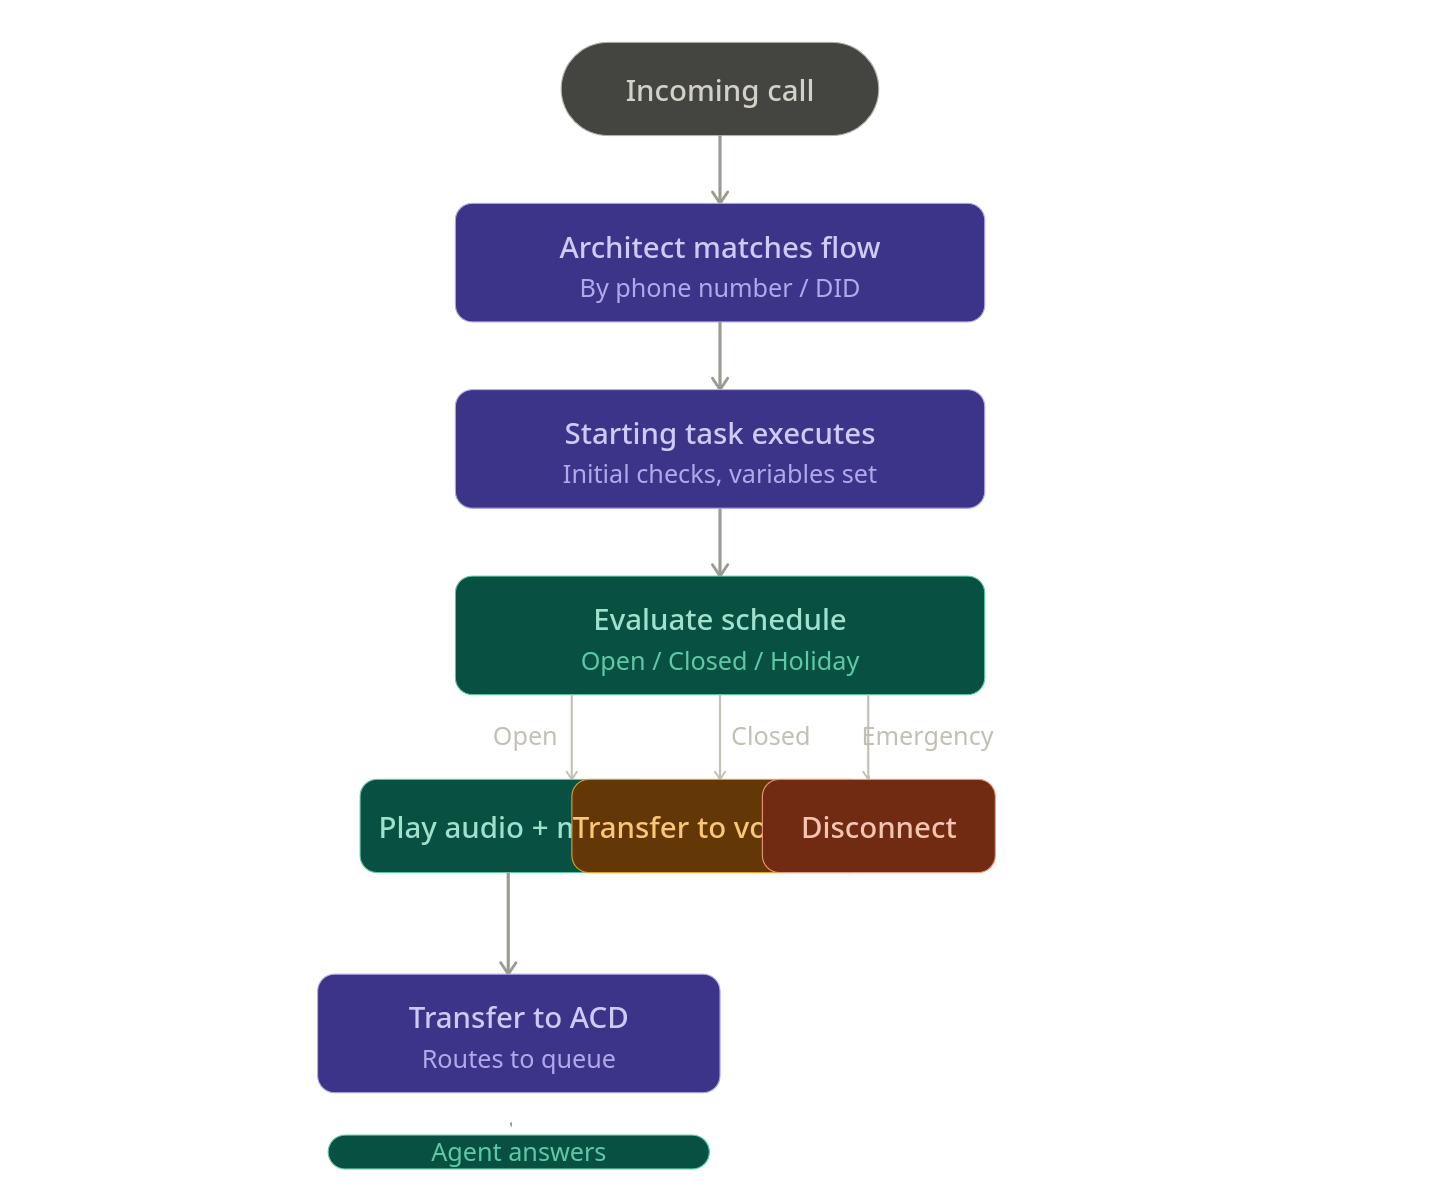
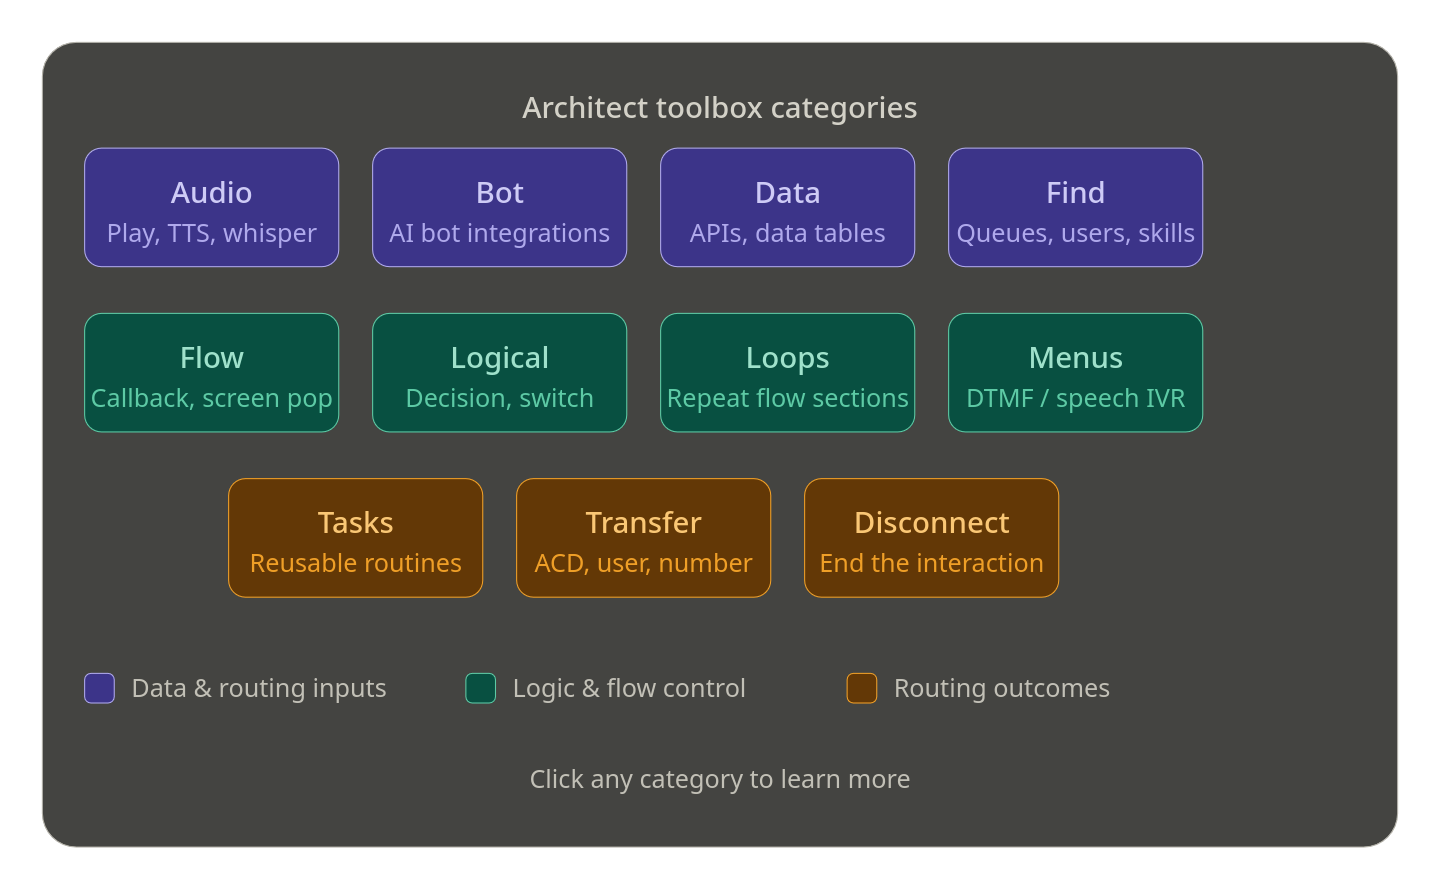
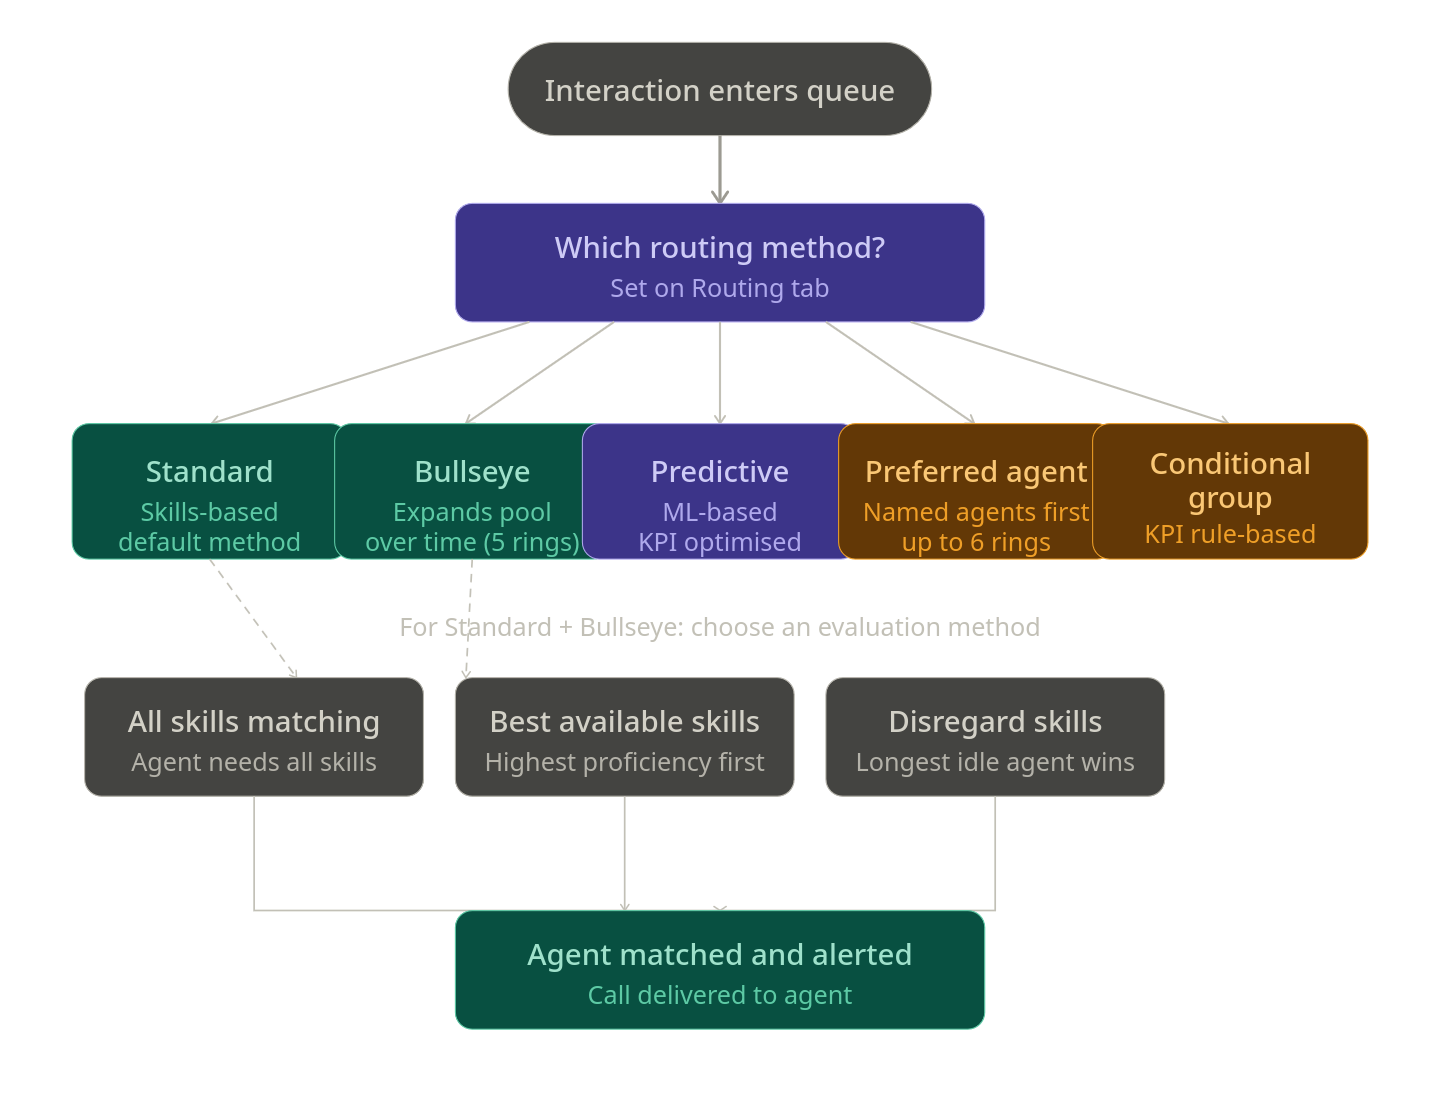
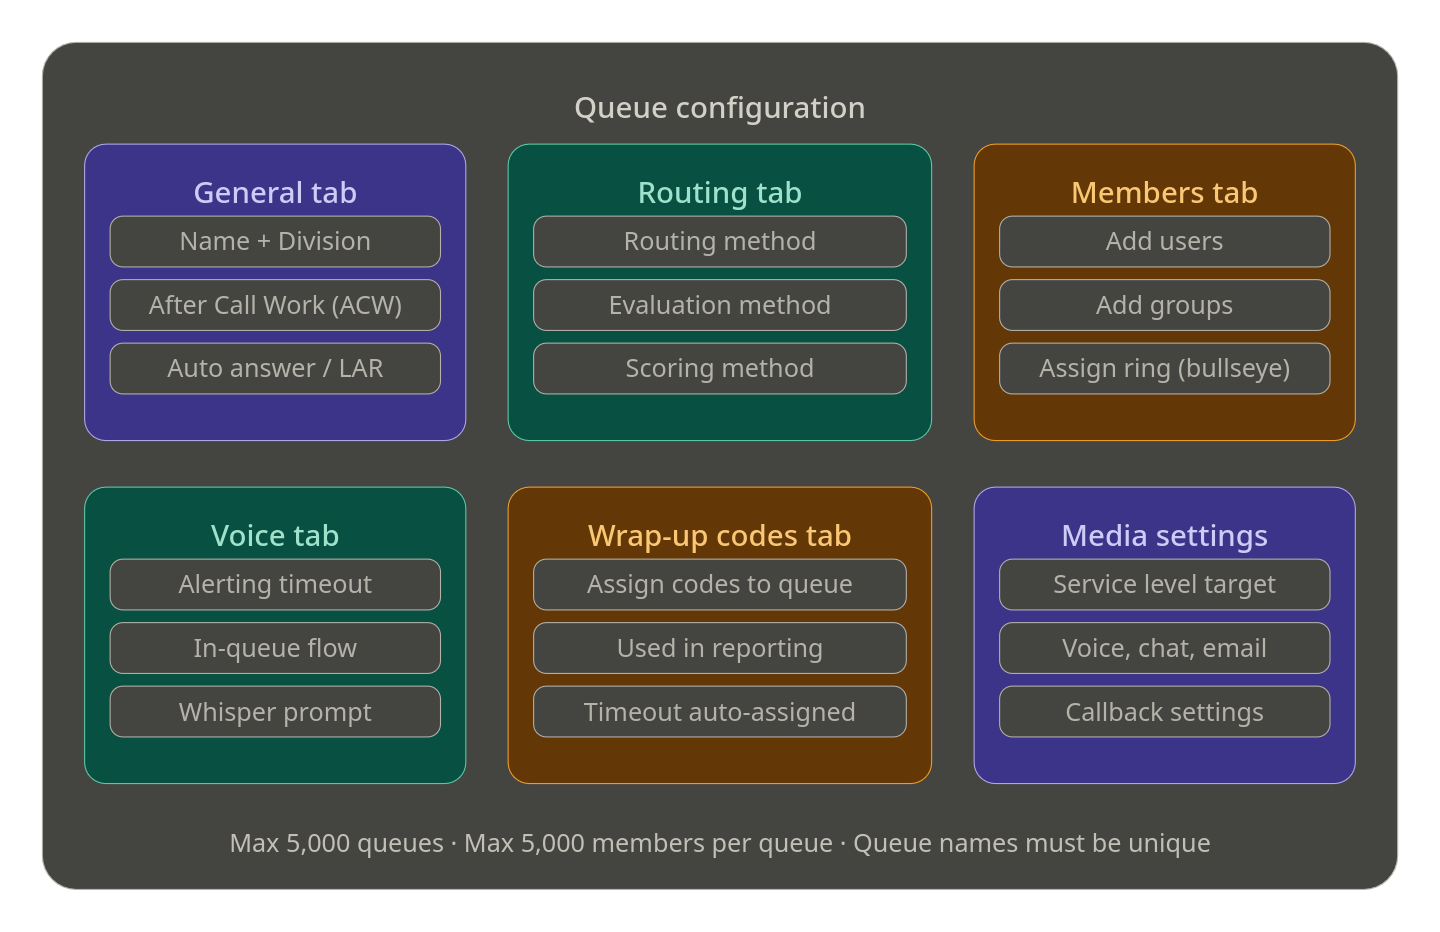
Inbound Call Flows
Study Notes
| Topic | Description |
|---|---|
| Inbound Call Flow | Flow that handles voice calls entering the contact center |
| Trigger | Activated by call routing configuration |
| Components | Prompts, menus, queues, transfers |
Navigation
Admin → Architect → Flows → Inbound Call Flow
Implementation Guide
- Create new inbound call flow
- Add greeting prompt
- Create IVR menu
- Configure queue transfers
- Publish flow
How to Implement
| Phase | Description |
|---|---|
| Design | Build IVR structure |
| Testing | Simulate inbound calls |
| Deployment | Assign flow to call route |
Workflow
Customer Call
↓
Call Route
↓
Inbound Call Flow
↓
Menu
↓
Queue
Real Flow Scenario
Customer Calls
↓
Greeting Prompt
↓
Menu Options
↓
Support Queue
Architecture Diagram
Customer
↓
Carrier
↓
Genesys Cloud
↓
Call Route
↓
Inbound Call Flow
↓
Queue / Agent
Usage Scenarios
| Scenario | Description |
|---|---|
| IVR Navigation | Route callers to departments |
| Self-Service | Automated call handling |
| Queue Routing | Send callers to agents |
Implementation Example
Start
↓
Welcome Prompt
↓
Main Menu
↓
Queue Transfer
Design Example
Start
↓
Greeting
↓
Menu
↓
Department Selection
Best Practices
Naming Convention
<Region>_<Service>_InboundCallFlow
Example:
US_Support_InboundCallFlow
Troubleshooting
| Issue | Cause | Fix |
|---|---|---|
| Call not reaching flow | Routing misconfigured | Check call route |
| Menu not working | Flow logic issue | Review IVR design |
Interview Cheat Sheet
| Question | Answer |
|---|---|
| What triggers inbound call flows? | Call routing configuration |
| Where are flows built? | Architect |
Key Takeaways
- Inbound call flows control IVR behavior
- Connected to call routing
Inbound Message Flows
Study Notes
| Topic | Description |
|---|---|
| Inbound Message Flow | Handles digital messaging interactions |
| Channels | SMS, Web Messaging, Messaging Apps |
| Trigger | Activated by message routing |
Navigation
Admin → Architect → Flows → Inbound Message Flow
Implementation Guide
- Create inbound message flow
- Configure greeting message
- Capture user input
- Route to queue or bot
- Publish flow
How to Implement
| Phase | Description |
|---|---|
| Flow Design | Build messaging conversation logic |
| Integration | Connect with message routing |
| Deployment | Publish flow |
Workflow
Customer Message
↓
Message Routing
↓
Inbound Message Flow
↓
Automation / Agent
Real Flow Scenario
Customer SMS
↓
Greeting Message
↓
Ask Question
↓
Transfer to Queue
Architecture Diagram
Customer
↓
Messaging Channel
↓
Genesys Cloud
↓
Message Routing
↓
Inbound Message Flow
↓
Agent
Usage Scenarios
| Scenario | Description |
|---|---|
| SMS Support | Customers text support |
| Automated Help | Bots answer questions |
| Appointment Scheduling | Automated booking |
Implementation Example
Start
↓
Greeting Message
↓
Capture Input
↓
Transfer to Agent
Design Example
Start
↓
Greeting
↓
Intent Detection
↓
Agent Transfer
Best Practices
- Keep conversations simple
- Use automation where possible
- Always allow agent escalation
Naming Convention
<Region>_<Service>_MessageFlow
Example:
US_Support_MessageFlow
Troubleshooting
| Issue | Cause | Fix |
|---|---|---|
| Messages not routed | Routing misconfigured | Check message routing |
| Flow not responding | Flow unpublished | Publish flow |
Interview Cheat Sheet
| Question | Answer |
|---|---|
| What handles messaging interactions? | Inbound message flows |
| What connects messages to flows? | Message routing |
Key Takeaways
- Inbound message flows manage digital interactions
- Integrated with message routing
Operating Schedules
| Section | Detail |
|---|---|
| Navigation | Admin → Routing → Operating Schedules |
| Alt Navigation | Menu → Orchestration → Routing → Operating Schedules |
| Required Permission | Routing > Schedule > Add, Edit, View, Delete |
| Module Context | Part of Routing & Architect in Genesys Cloud |
| Purpose | Control when routing flows run based on date, time, or event |
✅ Verified against Genesys Cloud Resource Center — March 2026
Overview
Operating schedules determine how Genesys Cloud manages routing for inbound and outbound interactions based on time and events. They are used to support business hours, after-hours support, holidays, recurring events, maintenance windows, and special situations.
Architect uses operating schedules to determine which flow to execute — for example, routing callers to a live queue during open hours and to voicemail during closed hours.
⚠️ Naming note: The official Genesys Cloud term is Operating Schedules (not just "Schedules"). This distinction matters in the UI navigation and exam contexts.
Evaluation Order (Exam Critical)
When Genesys Cloud evaluates a schedule group, it checks conditions in this specific order:
Emergency (only if Emergency routing is activated)
↓
Holiday
↓
Closed
↓
Open
⚠️ Emergency is not part of the base evaluation order. It is a separate override that fires first only when Emergency routing has been actively turned on. The default hierarchy without Emergency active is: Holiday → Closed → Open.
⚠️ Default fallback: If no schedule in the group matches the current date/time, Closed is the default path in Architect's Evaluate Schedule Group action.
Key Concepts
| Topic | Explanation |
|---|---|
| Operating Schedule | A time-based object defining when a particular routing condition is active |
| Operating Schedule Group | Groups multiple schedules into a single routing definition with Open, Closed, and Holiday categories |
| Emergency Group | A separate object that adds emergency override behavior — activates/deactivates independently |
| Recurrence | Schedules can be one-time or repeating (daily, weekly, monthly, yearly, or custom iCal rule) |
| All Day | Runs the schedule for the full duration of the selected date(s) — no start/end time needed |
| Multi-Day Span | Use the "This occurrence spans multiple days" checkbox to configure a schedule that runs across consecutive days |
| Division | Controls which administrators can manage the schedule — every schedule must belong to a division (default: Home) |
| Copy Schedule | Existing schedules can be copied to create modified versions quickly |
| Usage Tracking | You can view which schedule groups and call flows any schedule is associated with |
Navigation
| Task | Steps |
|---|---|
| View Operating Schedules | Admin → Routing → Operating Schedules or Menu → Orchestration → Routing → Operating Schedules |
| Create a Schedule | Operating Schedules page → Add Schedule |
| View Schedule Groups | Operating Schedules page → Schedule Groups tab or Menu → Orchestration → Routing → Operating Schedule Groups |
| Copy a Schedule | Operating Schedules list → More (⋮) → Copy |
| View Schedule Usage | Operating Schedules list → click schedule name → view associated groups and flows |
| Use in Architect | Architect → Open Flow → Add Evaluate Schedule Group action |
Configuration Fields
| Field | Description | Example |
|---|---|---|
| Schedule Name | Unique name identifying the schedule | US_Support_BusinessHours |
| Division | Administrative ownership — restricts which admins can manage it | Home |
| Single Day / Multi-Day | Single day sets one date; multi-day uses "This occurrence spans multiple days" checkbox | Multi-day |
| From / To | Start and end date/time for multi-day schedules | 2026-01-01 08:00 → 2026-12-31 18:00 |
| All Day | Runs for the full duration of selected date(s) — no time range needed | Disabled |
| Recurrence | How often the schedule repeats | Weekly |
| iCal Rule | Advanced recurrence rule for custom patterns | FREQ=WEEKLY;BYDAY=MO,TU,WE,TH,FR |
Creating an Operating Schedule
Recurrence Types
| Type | Description | Example |
|---|---|---|
| Does not repeat | One-time event | July_4_Closure |
| Daily | Repeats every day or every N days | After_Hours_Daily |
| Weekly | Repeats on selected days each week | Mon_Fri_BusinessHours |
| Monthly | Repeats on a specific day each month | First_Monday_Maintenance |
| Yearly | Repeats on the same date each year | Christmas_Holiday |
| Custom (iCal) | Advanced rule using iCal RRULE syntax | FREQ=WEEKLY;BYDAY=MO,TU,WE,TH,FR |
Operating Schedule Groups
Schedule groups combine multiple operating schedules into a single routing definition. Each schedule in a group is assigned a type:
| Type | Purpose |
|---|---|
| Open Hours | Active during business hours — must have at least one open schedule |
| Closed Hours | Active during off-hours or non-business periods |
| Holiday | Active on designated holiday dates |
Schedule groups also have a time zone setting that determines how all schedules in the group are evaluated. This accounts for daylight saving time automatically.
⚠️ A schedule group must contain at least one Open schedule to function correctly.
Architecture: Schedule Group Evaluation
Customer Interaction Arrives
↓
Call Route or Architect Flow
↓
Evaluate Schedule Group action
↓
Emergency active? ──→ Yes ──→ Emergency path
↓ No
Holiday match? ────→ Yes ──→ Holiday path
↓ No
Closed match? ─────→ Yes ──→ Closed path
↓ No
Open ──────────────────────→ Open path
Real Flow Scenarios
Scenario 1 — Business Hours Menu
Caller Enters Flow → Evaluate Schedule Group → Open
→ Play Welcome Prompt → IVR Menu → Route to Queue
Scenario 2 — After-Hours Voicemail
Caller Enters Flow → Evaluate Schedule Group → Closed
→ Play Closed Prompt → Route to Voicemail
Scenario 3 — Holiday Transfer
Caller Enters Flow → Evaluate Schedule Group → Holiday
→ Play Holiday Prompt → Transfer to External Number
Scenario 4 — Emergency Override
Caller Enters Flow → Evaluate Schedule Group → Emergency (activated)
→ Play Emergency Prompt → Disconnect
Schedule Group Design Example
Schedule: US_Support_BusinessHours (Open, Mon–Fri 08:00–18:00, weekly)
Schedule: US_Support_Christmas (Holiday, Dec 25, yearly)
Schedule: US_Support_Closed (Closed, all remaining times)
↓
Schedule Group: US_Support_Main_SG (Time zone: America/New_York)
↓
Open → Business hours IVR and queue
Closed → Voicemail routing
Holiday → External after-hours provider
Emergency → Emergency prompt + disconnect (via Emergency Group)
Screenshots
Best Practices
| Practice | Reason |
|---|---|
| Use the official term "Operating Schedules" | Matches UI and avoids confusion with WFM scheduling |
| Use clear, descriptive names | Easier to manage and troubleshoot routing logic |
| Separate business hours and holiday schedules | Provides flexibility without rebuilding open schedule logic |
| Always use schedule groups for production routing | Simplifies open/closed/holiday branching in one object |
| Set the correct time zone on the group | Prevents incorrect routing due to UTC or DST mismatches |
| Test all branches before go-live | Ensures each path (open/closed/holiday/emergency) routes correctly |
| Review holiday schedules annually | Keeps routing accurate as holidays change year to year |
| Use the Copy feature for similar schedules | Speeds up creation without starting from scratch |
| Check schedule usage before deleting | Avoid breaking flows that reference the schedule |
Naming Convention
| Resource | Pattern | Example |
|---|---|---|
| Business Hours Schedule | <Region>_<Dept>_BusinessHours |
US_Support_BusinessHours |
| Holiday Schedule | <Region>_<Dept>_<Holiday> |
US_Support_Christmas |
| Maintenance Schedule | <Region>_<Dept>_Maintenance |
US_Support_MaintenanceWindow |
| Schedule Group | <Region>_<Dept>_SG |
US_Support_Main_SG |
Security Considerations
| Control | Description |
|---|---|
| Division Assignment | Limits which admins can view, edit, or delete a schedule |
| Permission-based access | Routing > Schedule > Add, Edit, View, Delete controls all schedule management |
| External transfer verification | Confirm approved numbers before using them in holiday or emergency branches |
| Test before production | Misconfigured schedules can silently misroute customers |
Limitations & Constraints
| Constraint | Description |
|---|---|
| Division required | Every schedule must belong to a division — cannot be division-less |
| Open schedule required | A schedule group must have at least one Open Hours schedule |
| Emergency is separate | Emergency routing uses Emergency Groups, not schedule types — must be separately activated |
| Default fallback is Closed | If no schedule matches the current time, Architect defaults to the Closed path |
| Time zone on group, not schedule | Individual schedules don't have time zones — the time zone is set at the schedule group level |
Troubleshooting
| Issue | Cause | Resolution |
|---|---|---|
| Flow always routes Closed | Time zone mismatch or no active Open schedule | Verify schedule times and schedule group time zone |
| Holiday path never triggers | Holiday schedule not assigned to group | Add holiday schedule to the schedule group |
| Emergency path does not fire | Emergency group not activated | Verify emergency group is active and connected to the flow or call route |
| Recurring schedule not firing | Recurrence settings incorrect | Review repeating event settings and end conditions |
| External transfer not reached | Holiday branch misconfigured | Check Architect holiday branch action and verify external number |
| Schedule group unavailable in Architect | Permission or division visibility issue | Confirm Routing > Schedule > View permission and division access |
| Schedule won't delete | Schedule is in use by a group or call route | Remove the schedule from all groups and routes first |
Exam Cheat Sheet
| Question | Answer |
|---|---|
| What is an Operating Schedule? | A time-based object that controls when routing or flow logic is active |
| What permission is required? | Routing > Schedule > Add, Edit, View, Delete |
| What are the navigation paths? | Admin → Routing → Operating Schedules or Menu → Orchestration → Routing → Operating Schedules |
| What is the base evaluation order? | Holiday → Closed → Open |
| Where does Emergency fit in? | Evaluated first, but only when Emergency routing is actively turned on |
| What is the default fallback if nothing matches? | Closed |
| What is a Schedule Group? | A grouping of Open, Closed, and Holiday schedules with a shared time zone |
| Does a schedule group need an Open schedule? | Yes — at least one Open schedule is required |
| Where is the time zone set? | On the Schedule Group, not on individual schedules |
| Can schedules be copied? | Yes — use More (⋮) → Copy to duplicate and modify |
| What recurrence types are supported? | Does not repeat, Daily, Weekly, Monthly, Yearly, Custom (iCal) |
| What does "All Day" do? | Runs the schedule for the entire selected day — no start/end time |
Chapter Placement
❌ Operating Schedules does NOT belong in the Platform Operations chapter.
It belongs in the Routing & Architect chapter — alongside Call Routing, Emergency Groups, Schedule Groups, and Architect flows. Platform Operations covers platform-level administration (OAuth, SSO, Authorized Apps, API Usage). Operating Schedules is a routing configuration topic that directly controls call flow behavior and caller experience.
See Also
- Operating Schedule Groups — combine schedules into open/closed/holiday routing definitions
- Emergency Groups (
Admin → Routing → Emergency Groups) — override routing during critical events - Call Routing — map call flows to dialed addresses using schedule groups
- Architect → Evaluate Schedule Group — action used in flows to branch by schedule state
- Divisions Overview — understand how division assignment affects schedule visibility
Data Tables
| Section | Description |
|---|---|
| Feature Area | Architect / Orchestration Assets |
| Navigation | Admin → Architect → Data Tables |
| Alt Navigation | Menu → Orchestration → Orchestration Assets → Data Tables |
| Primary Function | Store configuration data locally so Architect flows can look it up dynamically during an interaction |
| Typical Use Cases | CRM-to-queue mapping, account routing, dynamic prompt selection, large lookup sets that exceed switch statement limits |
| Key Dependency | Architect flows use the Data Table Lookup action to retrieve values at runtime |
Data tables allow you to store data locally so Architect can access it within an interaction. They are particularly useful for data sets larger than what a switch statement can handle, and for combining Genesys Cloud with third-party integrations — for example, mapping an account number returned by a CRM to a Genesys Cloud queue.
Important: Data tables are intended for configuration data only. They must not contain personal information or any data that could identify a natural, living person.
Study Notes
| Topic | Explanation |
|---|---|
| Data Table | A structured lookup table stored within Genesys Cloud, accessible by Architect flows |
| Reference Key | The primary key of the table — uniquely identifies each row. Required. Cannot be changed after a row is created. |
| Reference Key Label | A descriptive name for the reference key column (e.g., "Account Number"). Cannot include / or \ |
| Custom Fields | Additional columns beyond the reference key. Up to 50 fields per table. Cannot be deleted after the table is saved. |
| API Field ID | Auto-populated from the field label — used when loading data via API. Cannot be changed after creation. |
| Data Table Lookup Action | The Architect action used inside a flow to query a data table by reference key and map results to flow variables |
| Division | Each data table is assigned to a division for access control |
| Import/Export | Tables support CSV import (append or replace) and export |
Org Limits (Exam Critical)
| Limit | Value |
|---|---|
| Maximum data tables per organization | 200 |
| Maximum rows per table | 5,000 |
| Maximum fields per table | 50 |
| Maximum characters in a reference key value | 256 |
| Maximum characters in a table name | 256 |
To request higher limits, contact Genesys Cloud Customer Care.
Permissions
| Action | Permission Required |
|---|---|
| View data table | Architect > Datatable > View |
| Add data table | Architect > Datatable > Add |
| Edit data table | Architect > Datatable > Edit |
| Delete data table | Architect > Datatable > Delete |
| View data table row | Architect > Datatable Row > View |
| Add data table row | Architect > Datatable Row > Add |
| Edit data table row | Architect > Datatable Row > Edit |
| Delete data table row | Architect > Datatable Row > Delete |
| All permissions shortcut | Architect > Datatable > All + Architect > Datatable Row > All |
Navigation
| Task | Navigation Path |
|---|---|
| Open Data Tables | Admin → Architect → Data Tables |
| Alt Navigation | Menu → Orchestration → Orchestration Assets → Data Tables |
| Create a table | Click Add |
| Edit a table | Hover over row → click Edit |
| Delete a table | Hover over row → click Delete (cannot delete if table is in use by a flow) |
| View table rows | Click the table name or hover → click View |
| Import data | Click Manage Imports |
| Export data | Click Export Data |
Configuration Fields (UI Form Fields)
Data Tables List Page
| UI Field | Description |
|---|---|
| Name | Table name — unique, max 256 characters, no duplicates |
| Reference Key Label | Describes the primary key purpose (e.g., "Account Number") — no / or \ |
| Description | Optional — helpful context about the table |
| Division | Division the table belongs to |
| Export Data | Exports table rows to CSV |
| Manage Imports | Import rows via CSV (append or replace) |
| Delete | Delete selected tables (cannot delete a table used in a flow) |
| Refresh | Reload the table list |
| Add | Create a new data table |
| View (hover) | View table rows |
| Edit (hover) | Edit table structure or rows |
| Delete (hover) | Delete individual table |
Create Data Table Form
| UI Field | Description | Notes |
|---|---|---|
| Name | Unique table name | Max 256 characters; no duplicates |
| Division | Division assignment | Required |
| Description | Optional context | Free text |
| Reference Key Label | Name for the primary key column | Cannot include / or \ |
| Add Field → Boolean | Checkbox field | Set "True by default" option |
| Add Field → Integer | Whole number field | Set default value |
| Add Field → Decimal | Decimal number field | Set default value |
| Add Field → String | Text field | Set default text value |
| API Field ID | Auto-populated from field label | Read-only — cannot be changed after creation |
| Save | Save table | Required before adding rows |
Permanent limitations once saved:
- You cannot delete a custom field after saving the table
- You cannot change the API Field ID of a custom field — only the label can be changed
- You cannot modify the reference key value of an existing row
Add Table Row Form
| UI Field | Description |
|---|---|
| Reference Key | Value for the primary key (e.g., the account number) |
| Custom Field values | One entry per configured custom field |
| Save & Close | Save row and return to table |
| Save & Create Another | Save row and immediately add another |
Data Table Lookup Action (in Architect Flows)
| Attribute | Details |
|---|---|
| Action Name | Data Table Lookup |
| Purpose | Query a data table using a reference key value and map results to flow variables |
| Required Permission | Architect > Data Table > All |
| Input | Reference Key value (can come from a flow variable, e.g., entered by caller) |
| Output | Custom field values mapped to flow variables |
| Failure Path | Flow continues via failure path if key is not found |
Example use in a flow:
Caller enters Account Number
↓
Data Table Lookup action
Input: Account Number (reference key)
Table: CRM_Queue_Mapping
↓
Output: Queue Name → flow variable
↓
Transfer to Queue using variable
Import / Export
| Feature | Description |
|---|---|
| Export | Downloads all table rows as a CSV file. Exported file retains original API field keys (not display labels). |
| Import | Upload a CSV to append rows or replace all existing rows |
| Manage Imports | View import history and any import errors |
When exporting, the CSV retains the original API field keys, not the display labels — relevant if labels were renamed after creation.
Dependencies
| Component | Purpose |
|---|---|
| Architect Flows | Consume data tables via the Data Table Lookup action |
| Divisions | Control which users/flows can access a given table |
| CRM / External Systems | Common source of data loaded into tables |
| Flow Variables | Receive output values from Data Table Lookup |
Platform Integration / Related Components
| Component | Relationship |
|---|---|
| Inbound Call Flows | Most common flow type using Data Table Lookup |
| Inbound Message Flows | Can also use Data Table Lookup for digital routing |
| Data Actions | Alternative for real-time external API lookups (vs. static data in tables) |
| Decision Tables | Related feature under Rule-Based Decisions — logic-based conditional routing |
| Switch Action | Alternative for small, static lookup sets directly in the flow |
Related Topics / Further Reading
| Topic | Description |
|---|---|
| Data Table Lookup Action | Architect action that queries a data table at runtime |
| Import or Export Data Tables | Load data via CSV |
| Decision Tables | Rule-based routing decisions (separate feature under Admin → Rule-Based Decisions) |
| Architect Overview | Parent feature area |
| Flow Variables | Store and pass values within a flow |
Implementation Checklist
| Task | Status |
|---|---|
| Identify what data needs to be looked up in the flow | ☐ |
| Design the table schema (reference key + custom fields) | ☐ |
| Create the data table and define fields | ☐ |
| Populate rows (manually or via CSV import) | ☐ |
| Add the Data Table Lookup action to the flow | ☐ |
| Map output fields to flow variables | ☐ |
| Test the flow with known reference key values | ☐ |
| Handle the failure path (key not found) | ☐ |
Implementation Guide
| Step | Action |
|---|---|
| Step 1 | Navigate to Admin → Architect → Data Tables |
| Step 2 | Click Add |
| Step 3 | Enter a unique Name, select a Division, add optional Description |
| Step 4 | Enter a descriptive Reference Key Label |
| Step 5 | Click Save |
| Step 6 | Add Custom Fields (Boolean, Integer, Decimal, String) |
| Step 7 | Save field configuration |
| Step 8 | Add rows manually or import via Manage Imports (CSV) |
| Step 9 | In Architect, add a Data Table Lookup action to your flow |
| Step 10 | Configure the lookup: select table, set reference key input, map outputs to variables |
| Step 11 | Handle the failure path for keys not found |
Workflow
Admin Creates Data Table
↓
Fields Defined (Reference Key + Custom Fields)
↓
Rows Populated (Manual or CSV Import)
↓
Architect Flow Uses Data Table Lookup Action
↓
Caller Input (e.g., Account Number) Passed as Reference Key
↓
Matching Row Found → Custom Field Values Returned
↓
Values Stored in Flow Variables
↓
Flow Uses Variable (e.g., Queue Name) for Routing
Architecture Diagram
External CRM / System
↓
CSV Export
↓
Data Table (Genesys Cloud)
Reference Key: Account Number
Field 1: Queue Name
Field 2: VIP Flag
Field 3: Language Preference
↓
Architect Flow
Data Table Lookup Action
↓
Flow Variables → Routing Logic
Real Flow Scenarios
Scenario 1 — CRM-to-Queue Mapping
Caller enters Account Number via IVR
↓
Data Table Lookup: AccountNumber → DepartmentQueue
↓
Matched: "Billing" queue name returned
↓
Transfer to Billing Queue
Scenario 2 — VIP Routing
Caller enters Customer ID
↓
Data Table Lookup: CustomerID → VIPFlag, PreferredQueue
↓
VIPFlag = True → Transfer to Priority Queue
VIPFlag = False → Transfer to Standard Queue
Scenario 3 — Language Preference
Caller enters Account Number
↓
Data Table Lookup: AccountNumber → LanguagePreference
↓
Play prompt in preferred language
Usage Scenarios
| Scenario | Description |
|---|---|
| CRM queue mapping | Map external account IDs to internal queues |
| VIP identification | Flag high-value customers for priority routing |
| Language preference routing | Route to language-appropriate queue |
| Dynamic prompt selection | Retrieve prompt names stored in table |
| Product-based routing | Look up department by product code |
| Configuration data storage | Store environment-specific values accessible to flows |
Best Practices
| Practice | Reason |
|---|---|
| Design your schema carefully before creating the table | Fields cannot be deleted after saving |
| Use descriptive Reference Key Labels | Makes the table purpose clear to other admins |
| Do not store personal data | Violates Genesys data use policy for data tables |
| Use Import/Export for bulk data management | Faster and more reliable than manual row entry |
| Always handle the Lookup failure path in the flow | Prevents unhandled routing failures when a key is not found |
| Keep table size within limits | Max 5,000 rows; contact Customer Care for higher limits |
| Use separate tables per business domain | Easier to maintain and audit |
| Validate imported CSV against table schema | API Field IDs in CSV must match table schema |
Naming Convention
| Resource | Example |
|---|---|
| Data Table | CRM_AccountQueue_Mapping |
| Data Table | VIP_Customer_Flags |
| Data Table | Language_Preference_Lookup |
| Reference Key Label | Account Number / Customer ID |
Naming pattern:
<Source>_<Purpose>_<Type>
Security Considerations
| Control | Description |
|---|---|
| Division Assignment | Controls which flows and users can access the table |
| Role-Based Permissions | Granular Architect > Datatable permissions per action |
| No PII | Data tables must not contain personal identifiable information |
| API Field ID immutability | Prevents accidental schema changes after deployment |
Limitations / Constraints
| Constraint | Value / Description |
|---|---|
| Max tables per org | 200 (can request increase via Customer Care) |
| Max rows per table | 5,000 (can request increase) |
| Max fields per table | 50 |
| Max reference key length | 256 characters |
| Max table name length | 256 characters |
| Cannot delete custom fields | Once saved, fields are permanent — create a new table if needed |
| Cannot change API Field ID | Only display labels can be changed after creation |
| Cannot change reference key value | Row reference key values are immutable once created |
| Cannot delete a table in use | Must remove flow references first |
| Reference key label restrictions | Cannot contain / or \ |
Troubleshooting
| Issue | Cause | Resolution |
|---|---|---|
| Lookup returns no match | Reference key value not in table | Verify data is loaded; check for whitespace or case mismatch |
| Cannot delete table | Table is referenced in one or more flows | Remove Data Table Lookup references in flows first |
| Cannot delete a field | Fields are permanent after saving | Create a new table with the correct schema |
| Import fails | CSV column keys don't match API Field IDs | Export the table first to get the correct column headers |
| API Field ID unexpected | Label renamed after creation | API Field ID is fixed at creation; only label changed |
| Flow variable empty after lookup | Failure path taken — key not found | Check row exists; add default handling in failure path |
Interview Cheat Sheet
| Question | Answer |
|---|---|
| What is a data table in Genesys Cloud? | A locally stored lookup table that Architect flows can query during an interaction |
| What is the purpose of the Reference Key? | It is the primary key that uniquely identifies each row — used as the lookup input |
| What are the org limits? | 200 tables / 5,000 rows per table / 50 fields per table |
| What can you NOT do after saving a data table? | Delete custom fields or change API Field IDs |
| What can you NOT do to a row's reference key? | Modify it — reference key values are immutable once created |
| What Architect action reads from a data table? | Data Table Lookup |
| Can data tables store personal information? | No — configuration data only |
| What navigation opens Data Tables? | Admin → Architect → Data Tables or Menu → Orchestration → Orchestration Assets → Data Tables |
| How do you load data in bulk? | CSV import via Manage Imports |
| Can you delete a table being used by a flow? | No — must remove flow references first |
Key Takeaways
| Topic | Summary |
|---|---|
| Data Tables | Local configuration data storage for Architect flows |
| Reference Key | Primary, immutable key for each row — required |
| Field Types | Boolean, Integer, Decimal, String — permanent after save |
| Limits | 200 tables / 5,000 rows / 50 fields |
| Data Table Lookup Action | Retrieves values from a table at runtime using a reference key |
| No PII | Personal data must never be stored in data tables |
| Import/Export | CSV-based bulk data management |
| Failure Path | Always handle the case where a key is not found |
Bot Flows
| Section | Description |
|---|---|
| Feature Area | Architect / AI & Bots |
| Navigation | Admin → Architect → select flow type from the flow list |
| Primary Function | Build native AI-powered bots that automate customer conversations before routing to a live agent |
| Flow Types | Dialog Engine Bot Flow (voice + digital) · Digital Bot Flow (digital only) |
Genesys Cloud offers two native bot flow types built directly inside Architect. Both use Natural Language Understanding (NLU) to interpret customer input and guide conversations. The key distinction is the channel scope and PCI compliance status.
Study Notes
| Topic | Explanation |
|---|---|
| Dialog Engine Bot Flow | Native bot for voice, chat, and message channels. PCI DSS-compliant — can be used in secure call flows |
| Digital Bot Flow | Native bot for digital/messaging channels only (chat, messaging). Not PCI DSS-compliant — cannot be used in secure call flows |
| Intent | A customer goal or request the bot is trained to recognize (e.g., "Check Balance", "Cancel Order") |
| Utterance | A sample phrase the customer might say to express an intent — used to train the NLU model |
| Slot | A piece of information the bot needs to extract from the conversation (e.g., account number, date) |
| Slot Type | Defines the format/type of a slot: built-in (e.g., date, number), custom list, regex, dynamic list, or AI-powered |
| Confirmation | A step where the bot confirms captured slot values with the customer before proceeding |
| Learning | The bot reviews unrecognized utterances and suggests additions to improve NLU over time |
| Intent Health | Dashboard that shows how well intents are performing and highlights training gaps |
| Optimization Dashboard | Per-flow dashboard showing total interactions, average duration, average turns, and end states |
| NLU | Natural Language Understanding — the AI model that maps customer input to intents and slots |
| Call Bot Flow action | Architect action used in an Inbound Call, Chat, or Message Flow to invoke a Dialog Engine Bot Flow |
| Call Digital Bot Flow action | Architect action used in a Message Flow to invoke a Digital Bot Flow |
| Virtual Agent | Advanced AI bot powered by Genesys AI — generates intents and utterances from descriptions |
| Intent Miner | Analyzes transcripts/recordings to discover real customer intents that can be imported into a bot |
| Knowledge Integration | Bots can query a Knowledge Base to answer customer questions automatically |
| Rich Media (Digital) | Digital Bot Flows support quick replies, cards, and carousels for structured customer choices |
Bot Flow Type Comparison (Exam Critical)
| Attribute | Dialog Engine Bot Flow | Digital Bot Flow |
|---|---|---|
| Channels | Voice, Chat, Message | Digital (Chat, Message) only |
| PCI DSS Compliant | Yes — can be used in secure call flows | No — must not be used in secure call flows |
| Used In (Architect) | Inbound Call, Chat, or Message flows via Call Bot Flow action | Message flows via Call Digital Bot Flow action |
| Pricing — Voice | Per minute (15-second increments) | N/A |
| Pricing — Digital | Per session | Per session |
| Rich Media | Quick replies, cards, carousels (on messaging) | Quick replies, cards, carousels |
| Knowledge Base | Yes | Yes |
| Virtual Agent | Yes | Yes |
| Intent Miner | Yes | Yes |
| DTMF Input | Yes (voice) | N/A |
Permissions
| Permission | Purpose |
|---|---|
Architect > UI > View |
Access Architect |
Architect > Flow > Add |
Create bot flows |
Architect > Flow > Edit |
Edit bot flows |
Architect > Flow > Delete |
Delete bot flows |
Language Understanding > All |
Required for NLU/intent management in bot flows |
For Virtual Agent specifically:
Architect > virtualAgentFlow > Edit
Navigation
| Task | Path |
|---|---|
| Open Architect | Admin → Architect (opens in separate window) |
| Create a Dialog Engine Bot Flow | Architect → flow type list → select Bot Flow → Add |
| Create a Digital Bot Flow | Architect → flow type list → select Digital Bot Flow → Add |
| View Optimization Dashboard | Architect → [selected Bot or Digital Bot Flow] → Insights & Optimizations → Optimization Dashboard |
| View Intent Health | Architect → [selected flow] → NLU menu → Intent Health |
Key Concepts in Detail
Intents
An intent represents a specific customer goal. Each intent is trained with a set of utterances that the NLU model learns to recognize.
| Attribute | Detail |
|---|---|
| Definition | A categorized customer goal the bot recognizes |
| Training input | Utterances (sample phrases) |
| Best practice | Provide a diverse set of utterances per intent |
| Intent Health | Tool to identify weak or conflicting intents |
Slots
Slots are the specific data points the bot collects during a conversation.
| Slot Type | Description |
|---|---|
| Built-in | Pre-built types: date, time, number, currency, etc. |
| Custom List | Fixed list of values (e.g., product names) |
| Custom Dynamic List | List fetched at runtime via a data action |
| Custom Regex | Pattern-matched input (e.g., account number format) |
| AI-Powered | Uses Genesys AI to extract free-form values — recommended over free-form text slots |
| Timeslot | For appointment scheduling (e.g., available time picker) |
AI-Powered slots are recommended by Genesys. Free-form slot capture should be used carefully — see Virtual Agent slot authoring recommendations.
Utterances
Sample phrases used to train the bot's NLU model. More diverse, realistic utterances improve recognition accuracy.
Confirmations
Optional step that reads back captured slot values and asks the customer to confirm before the bot proceeds.
Learning
Reviews utterances the bot did not recognize and suggests adding them to improve the model over time.
Optimization Dashboard Metrics
| Metric | Description |
|---|---|
| Total Bot Interactions | Total number of customers who interacted with the bot |
| Average Duration | Average length of time customers spent in the bot |
| Average Turns | Average number of steps a customer went through |
| Contained | Interactions fully resolved within the bot (no agent handoff) |
| Transferred | Interactions handed off to ACD |
| Agent Escalation | Customer explicitly requested a human agent |
| Abandoned | Customer disconnected before completing or transferring |
| Recognition Failure | Bot could not match customer input to a known intent |
| Error | System/expression errors during the interaction |
Data retention: Utterance history and the Bot Conversation Library are available for the last 10 days.
Rich Media (Digital Bot Flows)
| Type | Description |
|---|---|
| Quick Replies | Pre-defined response buttons the customer taps to reply — structured, fast responses |
| Cards | Bot message with image, title, body text, and action buttons |
| Carousels | Multiple cards displayed in a scrollable horizontal layout |
| List Pickers | Structured lists for guided selection (e.g., appointment time slots, Apple Messages for Business) |
Architect Actions (Used in Parent Flows)
| Action | Used In | Purpose |
|---|---|---|
| Call Bot Flow | Inbound Call / Chat / Message flows | Invokes a Dialog Engine Bot Flow |
| Call Digital Bot Flow | Message flows | Invokes a Digital Bot Flow |
| Call Dialog Engine Bot | Voice / Chat / Message flows | Legacy action for Dialog Engine bots (in-flow reference) |
How Bot Flows Integrate with Inbound Flows
Inbound Call / Message Flow
↓
Call Bot Flow action (or Call Digital Bot Flow)
↓
Bot Flow Runs (NLU processes customer input)
↓
Bot resolves intent → Collects slots → Confirms
↓
Exit Reason: Contained / Transfer to ACD / Agent Escalation
↓
Parent flow continues based on exit reason
Third-Party Bot Options (For Reference)
If a native Genesys bot is not used, the following third-party options are available:
| Integration | Channel |
|---|---|
| Amazon Lex V2 | Voice (Inbound Call flows) |
| Google Dialogflow CX | Voice / Message flows |
| Google Dialogflow ES | Voice / Message flows |
| Nuance Mix Bot | Voice flows |
| Genesys Bot Connector | Message flows (up to 5 third-party bots) |
| Genesys Digital Bot Connector | Message flows (up to 5 third-party bots) |
Third-party bots are configured under
Admin → Integrations.
PCI DSS Compliance Note (Exam Critical)
| Flow Type | PCI Compliant | Can Use in Secure Call Flow |
|---|---|---|
| Dialog Engine Bot Flow | Yes | Yes |
| Digital Bot Flow | No | No — must not be used in Architect secure call flows |
Pricing Overview
| Channel | Dialog Engine Bot Flow | Digital Bot Flow |
|---|---|---|
| Voice | Charged per minute, billed in 15-second increments | N/A |
| Digital (chat/messaging) | Charged per session | Charged per session |
Contact your Customer Success Manager or Genesys Sales for volume discounts.
Best Practices
| Practice | Reason |
|---|---|
| Use AI-Powered slot types where possible | More flexible than free-form; Genesys-recommended |
| Provide varied, realistic utterances per intent | Improves NLU accuracy and reduces recognition failures |
| Use Intent Health regularly | Identifies weak intents before they impact customers |
| Handle all exit reasons in the parent flow | Ensures graceful routing regardless of bot outcome |
| Use Dialog Engine Bot Flow for voice/PCI contexts | Only compliant option for secure call flows |
| Use Intent Miner on existing transcripts | Discovers real customer intents faster than manual authoring |
| Monitor the Optimization Dashboard | Track contained vs. transferred rates to measure bot effectiveness |
Key Takeaways
| Topic | Summary |
|---|---|
| Two native bot types | Dialog Engine Bot Flow (voice + digital, PCI-compliant) · Digital Bot Flow (digital only, not PCI-compliant) |
| Built in Architect | Both types are authored directly in Architect — no separate tool needed |
| Core NLU concepts | Intents → trained with utterances; Slots → extract data; Confirmations → verify data |
| Parent flow connection | Use Call Bot Flow or Call Digital Bot Flow action in parent Inbound flows |
| Optimization Dashboard | Tracks interactions, duration, turns, and exit states including contained vs. transferred |
| PCI distinction | Dialog Engine = PCI DSS compliant; Digital Bot = not compliant |
| Pricing | Voice: per minute (15s increments); Digital: per session |
| AI enhancement | Virtual Agent, Intent Miner, Knowledge Base, and AI-Powered Slots available in both |
Common Module Flows & Outbound Call Flows
Two additional Architect flow types that complete the flow coverage for Chapter 5.
Common Module Flows
| Section | Description |
|---|---|
| Feature Area | Architect / Flows |
| Flow Type | Common Module |
| Navigation | Admin → Architect → Flows → Common Module |
| Primary Function | Build reusable logic once and call it from multiple flows — reduces duplication across flow types |
A common module flow is a reusable container of Architect logic. Instead of rebuilding the same authentication check, language selection, or routing block in every flow, you build it once as a common module and call it from any compatible flow using the Call Common Module action.
Study Notes
| Topic | Explanation |
|---|---|
| Common Module | A flow that contains reusable logic callable from other Architect flows |
| Call Common Module action | The action used within a parent flow to invoke a common module — available in all flow types |
| Compatible Flow Types | Defined when creating the common module — determines which flow types can call it |
| Snapshot behavior | When a consuming flow publishes, Architect snapshots the current version of the common module into that flow |
| Update behavior | Changes to a common module do not automatically propagate — consuming flows must be republished to pick up changes |
| Older version usage | If you want a consuming flow to stay on an older version, publish the consuming flow before updating the common module |
| Size limit | Common module flows have a lower size limit than other flow types |
| Input variables | Optional — pass values into the common module from the calling flow |
| Output variables | Returned from the common module back to the calling flow (visible in the right panel) |
| Dependency tracking | Use dependency tracking to view common module version numbers in use |
Compatible Flow Types
When creating a common module, you select which flow types it's compatible with. The available actions inside the common module depend on these selections — flow-specific actions are not shared.
| Flow Type Category | Examples |
|---|---|
| Voice | Inbound Call, Outbound Call, In-Queue Call, Secure Call |
| Digital | Inbound Message, Inbound Email, Inbound Chat |
| Back-office / Automation | Workflow, Workitem |
| Bot | Bot Flow, Digital Bot Flow |
You can add or remove compatible flow types after creation under
Settings → Common Module Settings.
Common Module vs Reusable Task (within a flow)
| Attribute | Common Module | Reusable Task (in-flow) |
|---|---|---|
| Scope | Callable from multiple flows | Only within a single flow |
| Where defined | Separate Common Module flow | Within the flow itself |
| Callable from | Any compatible flow type via Call Common Module action | Only the parent flow |
| Versioning | Snapshot taken at publish time | Part of the parent flow's version |
Call Common Module Action
| Attribute | Detail |
|---|---|
| Available in | All flow types |
| Configuration | Name the action · Select common module flow · Select version (Published or Debug) |
| Input variables | Map values from the calling flow into the common module |
| Output variables | Appear in the calling flow's right panel after the action |
| Version note | Always uses the most recently published version unless you explicitly select an older published version |
Size Limit
Common module flows have a lower size limit than other Architect flow types. Monitor the flow size indicator under Insights & Optimizations → Flow Size (available at 4 levels: Low / Medium / High / Full).
Use Cases
| Use Case | Example |
|---|---|
| Authentication block | Verify account number → look up in data table → set customer tier variable |
| Language selection menu | Play language options → capture choice → set language variable |
| Business hours check | Evaluate schedule → return open/closed flag |
| Emergency routing check | Check emergency group status → return emergency flag |
| Standard queue transfer | Unified transfer logic used across multiple flows |
Key Takeaways — Common Modules
| Topic | Summary |
|---|---|
| Purpose | Reusable logic across multiple flows — reduces duplication |
| Call action | Call Common Module — available in all flow types |
| Snapshot on publish | Consuming flow snapshots the common module at publish time |
| Must republish to update | Changes don't auto-propagate — consuming flow must be republished |
| Lower size limit | Common modules have stricter size constraints than other flows |
| Compatible flow types | Defined at creation — determines available actions |
Outbound Call Flows
| Section | Description |
|---|---|
| Feature Area | Architect / Flows |
| Flow Type | Outbound Call |
| Navigation | Admin → Architect → Flows → Outbound Calls |
| Primary Function | Process outbound calls placed by dialing campaigns — handles live answers and voicemails for agentless outbound |
| Key Dependency | Requires a Contact List and a default Wrap-Up Code before the flow can be created |
Outbound flows process calls that are made without agents — specifically those made by Outbound Dialing Campaigns. The campaign's Call Analysis Response determines which outbound flow handles a live answer versus a voicemail, so the IVR can behave differently depending on what answered the call.
Study Notes
| Topic | Explanation |
|---|---|
| Outbound Flow | An Architect flow that handles calls placed by an outbound campaign — no agent connected |
| Contact List | Required — must be associated when creating the outbound flow; provides the call.contact variable and its properties |
| Default Wrap-Up Code | Required — must be selected at creation; used to tag the interaction if no other wrap-up is set during the flow |
call.contact variable |
Automatically available in outbound flows — contains properties from the associated contact list (name, phone, custom fields) |
| Call Analysis Response | Configured in Outbound Dialing — determines which outbound flow receives a live answer vs a voicemail |
| Agentless use case | The flow handles the entire interaction with no agent handoff — plays a message, collects data, or transfers |
| Flow author vs admin | Flow authors design the routing logic; outbound admins configure which flow runs for a given campaign |
Outbound Flow vs Inbound Flow — Key Differences
| Attribute | Inbound Call Flow | Outbound Call Flow |
|---|---|---|
| Initiator | Inbound customer call | Outbound campaign dials the contact |
| Agent involvement | Routes to agent | No agent — fully automated unless transferred |
| Contact List required | No | Yes — required at creation |
| Wrap-Up Code required | No | Yes — required at creation |
call.contact variable |
Not available | Automatically available |
| Assigned via | Call Routing config | Outbound → Call Analysis Responses |
Creation Requirements
Before creating an outbound flow, the following must exist in the org:
| Prerequisite | Why |
|---|---|
| At least one Contact List | Required field at flow creation |
| At least one Wrap-Up Code | Required default selection at flow creation |
Navigation
| Task | Path |
|---|---|
| Create Outbound Flow | Admin → Architect → Flows → Outbound Calls → Add |
| Configure outbound settings within the flow | Settings → Outbound (within the flow's configuration page) |
| Assign flow to a campaign | Admin → Outbound → Campaign Management → Call Analysis Response |
Configuration Fields (Create Flow Dialog)
| Field | Description | Required |
|---|---|---|
| Name | Unique name for the flow (max 200 characters) | Yes |
| Description | Optional context | No |
| Default Language | Language for TTS in the flow | Yes |
| Division | Division assignment | Yes |
| Contact List | The contact list associated with this flow | Yes |
| Default Wrap-Up Code | Wrap-up code applied if no other code is set | Yes |
Toolbox Limitations
Some Architect Toolbox actions are not available in Outbound Call flows (not displayed in the toolbox). Outbound flows share most features with inbound flows but have certain omissions related to inbound-specific functions (e.g., queue wait, in-queue handling).
Call Analysis Response — Connection to Outbound Flows
The Call Analysis Response (configured in Outbound Dialing) is what connects a campaign to specific outbound flows:
| Call Analysis Result | Action |
|---|---|
| Live Voice Answer | Route to the live answer outbound flow |
| Answering Machine / Voicemail | Route to the voicemail outbound flow |
| Busy / No Answer | Configure retry behavior |
This means an organization will typically have separate outbound flows for live answers and voicemails within the same campaign.
Key Takeaways — Outbound Call Flows
| Topic | Summary |
|---|---|
| Purpose | Handle agentless outbound campaign calls (live answer + voicemail) |
| Required at creation | Contact List + Default Wrap-Up Code |
| call.contact variable | Auto-available — contains contact list field values |
| Assigned to campaign | Via Outbound → Call Analysis Response |
| Flow author role | Designs the logic; does not specify which campaign uses the flow |
| Outbound admin role | Configures which flow the campaign uses via Call Analysis Response |
| Differs from inbound | No inbound queue routing; contact list required; call.contact available |
Inbound Email Flows & Inbound Chat Flows
These are two distinct Architect flow types, each handling a specific digital channel. Both share structural similarities with Inbound Message flows but have channel-specific behaviors and limitations.
Inbound Email Flows
| Section | Description |
|---|---|
| Feature Area | Architect / Flows |
| Flow Type | Inbound Email |
| Navigation (Architect) | Admin → Architect → Flows → Inbound Email |
| Navigation (Connect to domain) | Admin → Contact Center → Email → [domain] → Route Settings → select flow |
| Primary Function | Route incoming ACD emails to the correct queue based on sender, subject, keywords, or scheduling logic |
What Inbound Email Flows Do
Inbound email flows allow administrators to route and deliver incoming email messages to the right queue based on customer identity and intent. The flow is assigned to an email domain in the Email routing settings and runs when a new inbound email arrives.
Email Flow Characteristics
| Attribute | Value / Description |
|---|---|
| Does NOT have failure/success paths | Unlike call flows — errors are handled by configuring an action's path (e.g., Disconnect, Transfer to Queue) |
| No language settings | Inbound email flows do not support language configuration |
| No in-queue handling | Cannot trigger an in-queue flow from within the email flow itself |
| No audio controls | No DTMF, no text-to-speech |
| Maximum wait time | 72 hours |
| In-queue flow limit | 30 in-queue flows per email interaction (prevents looping when target queue = current queue) |
| In-queue flow initial period | 60 seconds (recurring states run every 5 minutes + 5 second added wait) |
| Auto-generated email handling | Configurable — default is Disconnect; can be set to "Process as normal" |
Auto-Generated Email Detection
Genesys Cloud automatically identifies auto-generated emails by confirming all three of these headers:
| Header | Value That Triggers Auto-Generated Flag |
|---|---|
Auto-Submitted |
Not equal to "no" |
Precedence |
Contains "bulk" |
X-Autoreply |
Contains "yes" |
Default behavior: auto-generated emails are disconnected. Setting location:
Architect → Flows → Settings → Inbound Email.
Common Routing Logic in Email Flows
| Routing Scenario | Architect Technique |
|---|---|
| Route by keyword in subject line | Contains() function in a Decision action |
| Route by sender's email domain | EmailAddressDomainPart() function in a Decision action |
| Route by case ID in body | Contains() on the body text |
| Route by schedule (business hours) | Evaluate Schedule or Evaluate Schedule Group action |
| Auto-reply after hours | Send Auto Reply action |
| Route internal vs external senders | EmailAddressDomainPart() — send internal employees to employee queue, everyone else to standard queue |
Permissions
| Permission | Purpose |
|---|---|
Architect > Flow > Add |
Create email flows |
Architect > Flow > Edit |
Edit email flows |
Architect > Flow > View |
View email flows |
Architect > Flow > Delete |
Delete email flows |
How Email Flows Connect to Email Domains
- Create and publish the Inbound Email flow in Architect
- Navigate to
Admin → Contact Center → Email - Select the email domain and configure routing settings
- Assign the published Inbound Email flow
Inbound Chat Flows
| Section | Description |
|---|---|
| Feature Area | Architect / Flows |
| Flow Type | Inbound Chat |
| Navigation (Architect) | Admin → Architect → Flows → Inbound Chat |
| Primary Function | Route ACD web chat interactions to the correct queue; optionally invoke bot flows before agent handoff |
| Channel | Web chat (via Web Chat widget / Web Messenger — deprecated web chat; Inbound Chat flows are for legacy Web Chat) |
What Inbound Chat Flows Do
Inbound Chat flows handle chat interactions arriving via Genesys web chat widgets. They route chats to agents, invoke bots, and perform logic based on available agent capacity, schedules, or customer data. This flow type is distinct from Inbound Message flows, which handle ACD messaging channels (SMS, social, messaging apps, Web Messenger).
Chat Flow Characteristics
| Attribute | Value / Description |
|---|---|
| Failure/success paths | No — same as email; errors handled via action-level path configuration |
| In-queue handling | No in-queue flow within chat flows |
| Audio controls | No — no DTMF, no TTS |
| Language setting | Yes — chat flows do support a default language setting |
| Error event transfer queue | Configurable at flow creation — optional queue to transfer the flow to if Architect detects an error |
| Maximum wait time | 72 hours |
| Bot integration | Can invoke a Dialog Engine Bot Flow or Digital Bot Flow via Call Bot Flow / Call Digital Bot Flow action |
Permissions
| Permission | Purpose |
|---|---|
Architect > Flow > Add |
Create chat flows |
Architect > Flow > Edit |
Edit chat flows |
Architect > Flow > View |
View chat flows |
Architect > Flow > Delete |
Delete chat flows |
Comparison: Email vs Chat vs Message Flows
| Attribute | Inbound Email | Inbound Chat | Inbound Message |
|---|---|---|---|
| Channel | Email (ACD) | Web Chat (legacy) | ACD Messaging (SMS, social, Web Messenger) |
| Failure/success paths | No | No | No |
| Language setting | No | Yes | No |
| In-queue handling | No | No | No |
| Audio / DTMF / TTS | No | No | No |
| Maximum wait time | 72 hours | 72 hours | 72 hours |
| In-queue flow limit | 30 per interaction | N/A | 30 per interaction |
| Bot integration | No (email-specific) | Yes | Yes |
| Auto-generated handling | Yes (configurable) | No | No |
Shared Architect Flow Notes for Digital Flows
| Rule | Applies To |
|---|---|
| No failure or success paths | Email, Chat, Message |
| In-queue flow limit of 30 | Email and Message |
| Cannot loop transfer to same queue | Email and Message |
| 72-hour max wait time | Email, Chat, Message |
| All require publishing before use | All flow types |
| Assigned at channel config level | Email → Email domain settings; Chat → Web Chat widget; Message → Messaging config |
Key Takeaways
| Topic | Summary |
|---|---|
| Inbound Email flow | Routes ACD emails; no audio, no failure paths, no language; max 72hr wait; auto-generated email detection |
| Auto-generated detection | Three headers: Auto-Submitted ≠ "no", Precedence = "bulk", X-Autoreply = "yes" |
| Email routing techniques | Contains(), EmailAddressDomainPart(), Evaluate Schedule, Send Auto Reply |
| In-queue flow limit | 30 per email/message interaction |
| Inbound Chat flow | Routes legacy web chat; similar to email but does support language setting |
| Chat vs Message | Inbound Chat = legacy Web Chat widget; Inbound Message = ACD messaging channels (SMS, social, Web Messenger) |
| Both lack in-queue handling | Neither email nor chat flows trigger in-queue flows internally |
Secure Call Flows
| Section | Description |
|---|---|
| Feature Area | Architect / Flows |
| Flow Type | Secure Call Flow |
| Navigation | Admin → Architect → Flows → Secure Call |
| Primary Function | Temporarily mask audio and prevent recording/agent access to sensitive customer data (PCI payments, PII collection) |
| Compliance | PCI DSS compliant |
Secure call flows protect sensitive customer data by masking audio paths and preventing system recording during specific portions of an interaction. The most common use case is collecting credit card or bank account information for payment processing without exposing that data to agents or recording systems.
Study Notes
| Topic | Explanation |
|---|---|
| Secure Flow | A flow type in Architect that masks audio and data captured during an interaction to meet PCI/PII compliance requirements |
| Secure IVR | Bundles multiple tools — secure flows, secure variables, and secure actions — into a complete PCI-safe data collection approach |
| Secure Action | Any action in Architect marked as "secure" — triggers the flow to operate in secure mode |
| Secure Variable | A variable whose content is flagged as secure — also triggers secure mode when consumed |
| Key Icon | Visual indicator in Architect showing that an action or action beneath it is either secure or consuming secure data |
| PCI DSS | Payment Card Industry Data Security Standard — secure call flows help organizations comply with this standard for phone-based payments |
| Protocol Capture risk | Enabling trunk diagnostics/protocol capture logs all data, including data entered in secure flows — sensitive data is not encrypted. Avoid enabling when using secure flows |
| PCI DSS setting | If enabled in org settings, Genesys Cloud automatically disables Media Capture and Protocol Capture settings |
Two Secure Flow Scenarios
| Scenario | Description |
|---|---|
| Agent-referred secure session | Agent is on an active call with the customer → agent initiates the transfer to a secure flow → flow collects sensitive data → flow returns caller to the agent via Return to Agent action |
| IVR-only secure session | No live agent involved — caller interacts entirely with the automated flow — sensitive data collected and processed — flow ends with Disconnect action |
Key Actions in Secure Flows
| Action | Purpose |
|---|---|
| Transfer to Secure Flow | Used in an Inbound, Outbound, or In-Queue flow to transfer the caller into a secure flow |
| Return to Agent | Terminating action in a secure flow — reconnects caller to the agent after the secure session ends; passes stored variable values (e.g., confirmation number) back to agent's script |
| Disconnect | Terminating action for IVR-only secure sessions with no agent |
| Extract Secure Data | Retrieves secure variable values within a secure flow |
| Call Secure Data | Used to pass secure data between flow components |
The Transfer to Secure Flow action is available in Inbound, Outbound, and In-Queue flows. For transfer actions within a secure flow: Genesys Cloud uses blind transfers (not consult). The defined failure path is overridden and the call is disconnected if the transfer fails.
Return to Agent Action — Key Details
| Attribute | Detail |
|---|---|
| Type | Terminating action — ends the secure flow |
| Where used | Secure flows (agent-referred scenario) |
| What it does | Reconnects caller to the original agent; sends stored variable values to agent's script |
| If agent left before caller returns | Call is disconnected |
| Cannot transfer to new destination | Return to Agent does not support transferring to a different agent or number |
| Monitoring restriction | If a supervisor is actively monitoring the interaction, the agent cannot initiate the Transfer to Secure Flow; monitoring must be ended first |
Analytics Impact
Secure flows affect the following agent metrics:
| Metric Affected | Description |
|---|---|
| Time in IVR | Time spent in the secure flow counts against IVR time |
| Average Time in IVR | Affected by secure flow duration |
| Agent Handle Time | Impacted because the agent is technically handling the interaction during the secure session |
| Average Agent Handle Time | Affected |
| Agent Talk Time | Affected |
Bot Integration with Secure Flows
If a bot session is initiated from a secure call flow, the bot inherits the secure characteristics of the secure call flow. This prevents logging and recording of data at the bot level, maintaining PCI/PII compliance.
Note: Dialog Engine Bot Flows are PCI DSS compliant and can be used in secure call flows. Digital Bot Flows are not PCI DSS compliant and must not be used in secure call flows.
Protocol Capture Warning (Exam Critical)
| Situation | Risk |
|---|---|
| Protocol captures enabled for trunk diagnostics | System does not encrypt data — all data including secure flow inputs is logged |
| PCI DSS setting enabled in org | Genesys Cloud automatically disables Media Capture and Protocol Capture settings |
| Best practice | Never enable protocol captures while using secure call flows in production |
Permissions
| Permission | Purpose |
|---|---|
Architect > Flow > Add |
Create secure flows |
Architect > Flow > Edit |
Edit secure flows |
Architect > Flow > View |
View secure flows |
Architect > Flow > Delete |
Delete secure flows |
Workflow — Agent-Referred Secure Session
Agent on call with customer
↓
Agent initiates transfer (Transfer to Secure Flow action in inbound/in-queue flow)
Note: If supervisor is monitoring, transfer cannot be initiated until monitoring ends
↓
Secure Flow begins — audio masked — recording paused
Agent can no longer hear customer input
↓
Customer enters sensitive data (e.g., credit card number) via DTMF
↓
Secure Flow processes payment or stores confirmation number in secure variable
↓
Return to Agent action executes
Confirmation number passed to agent's script
↓
Customer reconnected to agent
Workflow — IVR-Only Secure Session
Customer calls in — routed directly to Secure Flow
↓
No agent involved
↓
Secure Flow processes sensitive data (e.g., account number, payment)
↓
Disconnect action terminates interaction
Key Takeaways
| Topic | Summary |
|---|---|
| Purpose | Mask audio and prevent recording during sensitive data collection |
| PCI DSS compliant | Yes — designed for PCI compliance |
| Triggering condition | Any secure action or secure variable consumed in a flow activates secure mode |
| Two scenarios | Agent-referred (returns to agent after) · IVR-only (ends with Disconnect) |
| Transfer to Secure Flow | Available in Inbound, Outbound, and In-Queue flows |
| Return to Agent | Terminating action — passes data back to agent; call disconnects if agent left |
| Protocol Capture risk | Never enable protocol capture when using secure flows; PCI DSS setting disables it automatically |
| Bot support | Dialog Engine Bot Flows only (PCI-compliant); Digital Bot Flows must NOT be used |
| Analytics impact | Secure flow time counts against IVR metrics and agent handle time |
| Key icon | Visual indicator in Architect showing secure action/variable in use |
Virtual Agent Flows (Agentic)
Study Notes
| Topic | Description |
|---|---|
| Virtual Agent Flows | AI-powered autonomous agent workflows for handling customer interactions |
| Also Known As | Agentic Flows, AI Agent Automation, Autonomous Agents |
| Purpose | Automate routine interactions without human agent intervention |
| Activation | Requires Premium edition and Genesys Cloud CX module |
| Benefit | 24/7 availability, reduced operational costs, faster resolution for routine issues |
Navigation
Admin → Architect → Flows → Virtual Agent Flows OR Admin → Contact Center → Automation → Virtual Agent Configuration
Virtual Agent Flows Overview
Virtual Agent Flows are AI-powered autonomous agents that handle customer interactions without human agent involvement. They use natural language processing, machine learning, and conversation design to understand customer intent and resolve issues independently or escalate when necessary.
Key Capabilities
- Natural language understanding - Comprehends customer intent without rigid menu systems
- Conversational AI - Engages in natural dialogue with customers
- Intent recognition - Identifies customer goals and required actions
- Multi-turn conversations - Maintains context across conversation turns
- Seamless escalation - Routes to human agents when needed
- Learning capability - Improves responses based on interactions
- Omnichannel support - Operates across voice, chat, email, messaging
- Integration with systems - Accesses backend systems for real-time data
How It Works
- Customer initiates contact (voice, chat, email, etc.)
- Virtual agent receives interaction
- NLP analyzes customer intent
- Agent determines if it can handle the request
- Agent engages in conversation to gather information
- Agent performs action or retrieves information
- Agent provides resolution or escalates to human
- System learns from interaction for improvement
Edition & Module Requirements
| Requirement | Details |
|---|---|
| Minimum Edition | Premium Edition required |
| Module | Genesys Cloud CX Automation or Virtual Agent add-on |
| License Type | Virtual agent license (separate from agent seats) |
| Setup | Configuration via Architect flows |
| Integration | Backend system APIs for transactions |
Study Notes - Virtual Agent Capabilities
| Capability | Description | Use Case |
|---|---|---|
| Self-Service Resolution | Handle routine requests independently | Password resets, account balance checks |
| Information Retrieval | Access and provide customer data | Account status, order tracking |
| Transaction Processing | Execute system actions safely | Payment processing, appointment booking |
| Sentiment Analysis | Monitor customer emotion during interaction | De-escalate, escalate when frustrated |
| Context Preservation | Maintain conversation history | Multi-turn dialogues, follow-ups |
| Proactive Outreach | Initiate contacts with customers | Payment reminders, service updates |
| Knowledge Integration | Access knowledge base articles | Answer FAQs, provide guidance |
| Escalation Logic | Intelligent routing to human agents | Complex issues, preference-based |
| Multi-language Support | Communicate in multiple languages | Global customer base support |
| Compliance Monitoring | Ensure interactions meet regulations | Legal requirements, disclosures |
Implementation Guide
Step 1: Assessment & Strategy
- Identify suitable use cases (routine interactions)
- Map customer journeys to automate
- Determine escalation scenarios
- Audit backend system integrations needed
- Estimate volume and ROI
- Plan change management approach
Step 2: Virtual Agent Design
Step 3: Conversation Design
- Create dialogue trees for common scenarios
- Write natural conversation language
- Define follow-up questions for clarity
- Build error handling for misunderstandings
- Create fallback responses
- Add personality/brand voice guidelines
- Test conversation flows
Step 4: System Integration
- Connect to knowledge base
- Integrate with CRM/customer systems
- Set up payment processing (if needed)
- Configure appointment systems
- Enable account system access
- Set up notification systems
- Test all integrations
Step 5: Testing & Validation
- Conduct conversation scenario testing
- Test integration endpoints
- Validate escalation triggers
- Test error handling
- Performance and load testing
- Security validation
- Compliance review
Step 6: Deployment & Monitoring
- Deploy to production queues
- Monitor interaction success rates
- Track escalation patterns
- Gather customer feedback
- Optimize based on metrics
- Refine conversations
- Continuous improvement
How to Implement
| Phase | Description | Timeline |
|---|---|---|
| Planning | Identify use cases and design approach | Week 1-2 |
| Design | Create conversation flows and intents | Week 2-4 |
| Development | Build flows and integrations | Week 4-6 |
| Testing | Validate all scenarios and systems | Week 6-7 |
| Pilot | Deploy to subset of traffic | Week 7-8 |
| Rollout | Full deployment to production | Week 8-9 |
| Optimization | Monitor and improve performance | Ongoing |
Virtual Agent Flow Architecture
Customer Contact
↓
Virtual Agent Entry Point
├── Voice (IVR-to-Agent transition)
├── Chat Bot Interface
├── Email Automation
└── Messaging Platform
↓
NLP & Intent Recognition Engine
├── Language Understanding
├── Entity Extraction
├── Intent Classification
└── Confidence Scoring
↓
Conversation Management
├── Context Preservation
├── State Management
├── History Tracking
└── Multi-turn Handling
↓
Action Determination
├── Self-Service Resolution Check
├── Required Information Gathering
├── System Access Requirement
└── Escalation Threshold Assessment
↓
Execution Path
├── Self-Service Path
│ ├── Database Query
│ ├── Transaction Processing
│ └── Information Retrieval
├── Guided Path
│ ├── Ask Clarifying Questions
│ ├── Provide Information
│ └── Collect Input
└── Escalation Path
├── Human Agent Queue
├── Context Transfer
└── Warm Handoff
↓
Response Generation
├── Natural Language Generation
├── Personality/Brand Voice
└── Accessibility Compliance
↓
Customer Receives Response
↓
Interaction Logged & Analyzed
Common Virtual Agent Use Cases
Use Case 1: Self-Service Password Reset
Customer: "I forgot my password"
↓
Virtual Agent:
├── Understands: Password reset request
├── Verification: "Let me verify your identity
│ with security questions"
├── Questions: "What's your account email?
│ What was your first pet's name?"
├── Action: Reset password, send new one
└── Confirmation: "Your password has been reset.
Check your email. Need anything else?"
↓
Resolution Rate: 95%+ (self-service)
Use Case 2: Order Status Inquiry
Customer: "Where's my order?"
↓
Virtual Agent:
├── Retrieves: Customer account
├── Questions: "What's your order number?"
├── Lookup: Accesses order system
├── Tracking: "Your order is out for delivery
today. You can track it here: [link]"
└── Offer: "Can I help with anything else?"
↓
Resolution Rate: 90%+ (self-service)
Use Case 3: Appointment Scheduling
Customer: "I need to schedule a service call"
↓
Virtual Agent:
├── Understands: Appointment request
├── Gathers: "What service do you need?
What days work for you?"
├── Checks: Availability in scheduling system
├── Confirms: "Got you down for March 15
at 10 AM. You'll get a reminder."
└── Summary: Sends appointment confirmation
↓
Resolution Rate: 85%+ (self-service)
Use Case 4: Payment Processing
Customer: "I want to pay my bill"
↓
Virtual Agent:
├── Verification: Confirms identity
├── Info: "Your balance is $150.00.
How much would you like to pay?"
├── Collection: Securely gathers payment info
├── Processing: Processes payment
├── Confirmation: "Payment of $100 processed.
New balance: $50. Receipt sent."
↓
Resolution Rate: 92%+ (self-service)
Use Case 5: Escalation to Human Agent
Customer: "This is too complicated"
↓
Virtual Agent:
├── Sentiment: Detects frustration
├── Assessment: Issue beyond agent capability
├── Escalation: "I understand this is complex.
Let me connect you with a specialist
who can help better."
├── Transfer: Warm handoff with context
└── Human Agent Receives: Full interaction history
↓
Human Agent: "Hi Sarah, I see you were
working on a billing dispute. Let me
take it from here..."
Virtual Agent Conversation Flow Design
Simple Conversation Example
INTENT: Account Balance Check
Virtual Agent: "Hi! What can I help with?"
User: "I need my account balance"
Virtual Agent: [Detects intent]
"I can help with that. Let me verify
who you are. What's your account email?"
User: "john.smith@email.com"
Virtual Agent: [Verifies identity]
"Thanks. What's your account PIN?"
User: "5432"
Virtual Agent: [Confirms identity]
"Perfect. Your current balance is $2,150.
Would you like to make a payment?"
User: "No, that's all I needed"
Virtual Agent: "Great! Is there anything
else I can help with today?"
User: "No thanks"
Virtual Agent: "Thanks for contacting us.
Have a great day!"
[Interaction Complete - Self-Service Resolution]
Complex Conversation with Escalation
INTENT: Billing Dispute
Virtual Agent: "Hi! What's going on today?"
User: "I was charged twice for the same order"
Virtual Agent: [Detects: Billing dispute]
"I'm sorry that happened. I can help
investigate. What's your order number?"
User: "ORD-123456"
Virtual Agent: [Looks up order]
"I see the issue. You're right - there
are two charges. Let me credit one back."
[Processes refund]
"The refund of $99.99 has been processed.
You should see it in 2-3 business days."
User: "But I need it today - I'm short on funds"
Virtual Agent: [Sentiment: Frustrated]
"I understand this is urgent. While I
can't speed up the refund, I can connect
you with our billing specialist who might
have other options. One moment..."
[Initiates escalation]
Virtual Agent: "Sarah from billing is ready
to help. I'm connecting you now..."
↓
[Warm Handoff to Human Agent]
Human Agent: "Hi, I see the double charge
issue. Let's explore what we can do..."
Multi-Channel Virtual Agent Flows
Voice Channel (IVR-like)
Customer Calls
↓
Virtual Agent Answers (Voice Synthesized)
↓
Conversation via Speech Recognition/TTS
├── "Welcome. Say what you need help with."
├── Customer speaks: "I want my balance"
├── Agent understands: Account inquiry
└── Agent responds with balance information
↓
[Natural voice conversation, not menu-based]
Chat Channel
Customer Opens Chat
↓
Virtual Agent Responds (Text-based)
↓
Conversation via Text
├── "Hi there! How can I help?"
├── Customer: "Where's my order?"
├── Agent: [Provides tracking info with links]
└── Conversation continues naturally
Email Channel
Customer Sends Email
↓
Virtual Agent Processes (Async)
↓
Email Response Generated
├── Understands customer question
├── Retrieves relevant information
├── Drafts personalized response
└── Sends reply with solution/escalation
Messaging Apps (SMS, WhatsApp)
Customer Sends SMS/WhatsApp
↓
Virtual Agent Receives
↓
Concise Text-based Conversation
├── "Hi! What do you need?"
├── Customer: "Bill amount?"
├── Agent: "Your bill is $150"
└── Natural conversational flow
Escalation Scenarios & Logic
Escalation Decision Tree:
Virtual Agent Receives Request
↓
Can handle self-service?
├─ YES: Process request
│ └─ Return result to customer
│ ├─ Success → End interaction
│ └─ Failure → Escalate
│
└─ NO: Determine escalation type
├─ Capability-based
│ └─ "I'm not able to handle that.
│ Let me connect you with someone
│ who can help."
│
├─ Complexity-based
│ └─ "This needs expert analysis.
│ Connecting you with a specialist..."
│
├─ Sentiment-based
│ └─ Customer frustrated
│ "I understand your frustration.
│ Let me get you a specialist..."
│
├─ Preference-based
│ └─ Customer requests human
│ "Of course, I'll connect you
│ with an agent right now."
│
└─ Business-based
└─ High-value customer
"This deserves personalized
attention. One moment..."
↓
Queue to Appropriate Agent Group
↓
Warm Handoff with Full Context
↓
Human Agent Assists Customer
Virtual Agent Performance Metrics
Interaction Success
| Metric | Target | Purpose |
|---|---|---|
| Self-Service Resolution Rate | >75% | Measure autonomous handling |
| Successful Escalations | >95% | Ensure proper handoffs |
| Escalation Rate | <25% | Control human agent workload |
| First-Contact Resolution | >80% | Avoid repeat contacts |
| Customer Satisfaction | >80% | Measure customer experience |
Operational Efficiency
| Metric | Target | Purpose |
|---|---|---|
| Automated Interactions | >60% of volume | Measure automation impact |
| Avg Interaction Time | Baseline -30% | Track efficiency gains |
| Cost Per Interaction | -40-60% vs agent | Measure ROI |
| 24/7 Availability | 100% | Measure uptime |
| Peak Hour Handling | 100% capacity | Measure scalability |
Quality Metrics
| Metric | Target | Purpose |
|---|---|---|
| Intent Recognition Accuracy | >90% | Verify understanding |
| Conversation Completion | >85% | Measure flow success |
| Compliance Adherence | 100% | Ensure regulatory met |
| Sentiment Stability | No escalation due to tone | Measure conversational quality |
| Knowledge Article Accuracy | 100% | Ensure correct information |
Real Flow Scenario: 24/7 Self-Service
Scenario: Customer calls at 2 AM with password reset
Timeline:
2:00 AM - Customer Calls
↓
Virtual Agent Answers (No wait!)
"Welcome to ABC Company. I'm your
virtual assistant. How can I help?"
Customer: "I can't log in"
↓
Virtual Agent - Intent Recognition
Identified: "Password Reset Request"
Confidence: 98%
↓
Virtual Agent - Verification
"I can help you reset your password.
Let me verify your identity first.
What email is on your account?"
Customer: "john@email.com"
↓
Virtual Agent - System Access
[Queries customer database]
[Retrieves security questions]
↓
Virtual Agent - Authentication
"What's your mother's maiden name?"
Customer: "Smith"
↓
Virtual Agent - Verification Complete
[Identity confirmed]
[Generates temporary password]
[Sends via SMS]
↓
Virtual Agent - Confirmation
"Perfect! I've sent a temporary
password to your phone. Use that to
log in, then set a new password.
Need anything else?"
Customer: "No, thanks"
↓
Virtual Agent - Closing
"Great! You're all set. Have a
good night!"
↓
2:03 AM - Issue Resolved
Resolution: Self-service (Zero human involvement)
Cost: ~$0.15 per interaction
Customer Satisfaction: Immediate resolution
Best Practices
Conversation Design
- Natural language - Avoid robotic responses, use conversational tone
- Context awareness - Remember previous statements in multi-turn dialogue
- Graceful degradation - Handle misunderstandings without frustration
- Clear escalation - Explain why escalating to human when needed
- Personality - Match brand voice (professional, friendly, etc.)
- Conciseness - Keep responses brief and to the point
Intent Recognition
- Comprehensive training - Train model with many user utterance variations
- Entity extraction - Accurately identify account numbers, dates, etc.
- Confidence thresholds - Only process high-confidence intents
- Fallback handling - Ask clarifying questions for low confidence
- Regular updates - Continuously improve model with real interactions
- Error capture - Log misunderstandings for model improvement
Escalation Strategy
- Clear criteria - Define when escalation is triggered
- Warm handoffs - Provide full context to human agent
- Preference respect - Allow customer to request human anytime
- Sentiment triggers - Escalate frustrated customers automatically
- Complexity assessment - Escalate issues beyond agent capability
- Smooth transition - Make escalation seamless and professional
System Integration
- Secure access - Validate all backend system connections
- Transaction safety - Implement verification for financial transactions
- Data protection - Encrypt sensitive customer information
- Audit trails - Log all agent actions for compliance
- Error handling - Gracefully handle system unavailability
- Real-time sync - Keep agent data current with systems
Continuous Improvement
- Monitor metrics - Track resolution rates and satisfaction daily
- Gather feedback - Survey customers about virtual agent experience
- Analyze conversations - Review failed interactions for improvement
- Update conversations - Refine dialogue based on real interactions
- A/B testing - Test different conversation approaches
- Quarterly reviews - Assess overall performance and ROI
Common Implementation Scenarios
Scenario 1: Small Business (Simple Use Case)
Configuration:
├── Single virtual agent
├── 2-3 use cases (balance, order status, hours)
├── Basic escalation to agent queue
└── Email & chat channels
Setup Time: 4-6 weeks
Expected Automation: 60-70% of routine inquiries
ROI Timeline: 3-4 months
Cost Savings: $2,000-5,000/month
Scenario 2: Enterprise (Multi-Use Case)
Configuration:
├── Multiple specialized virtual agents
├── 10+ use cases (billing, support, sales, etc.)
├── Intelligent routing based on intent
├── All channels (voice, chat, email, messaging)
├── Advanced escalation logic
└── Integration with CRM, billing, ticketing systems
Setup Time: 12-16 weeks
Expected Automation: 50-70% of volume
ROI Timeline: 2-3 months
Cost Savings: $50,000-100,000+/month
Scenario 3: 24/7 Global Support
Configuration:
├── Multi-language virtual agents (5+ languages)
├── Timezone-aware routing
├── Global escalation queues
├── Multiple backend system integrations
├── Compliance per region
Setup Time: 16-20 weeks
Expected Automation: 40-60% of global volume
ROI Timeline: 4-6 months
Cost Savings: $100,000-250,000+/month
Troubleshooting Guide
| Issue | Cause | Resolution |
|---|---|---|
| Low resolution rate | Poor intent recognition | Improve NLP training with more examples |
| High escalation rate | Agent not handling enough cases | Expand conversation design and capabilities |
| Customer frustration | Misunderstood requests | Add better error handling and fallbacks |
| Slow response time | System latency | Optimize integrations and database queries |
| Integration failures | Backend system down | Implement fallback flows and escalation |
| Incorrect information | Stale data in systems | Ensure real-time system synchronization |
| Compliance issues | Missing required language | Add required disclosures and messaging |
| Security concerns | Data exposed | Review access controls and encryption |
| Poor escalation | Missing context | Ensure full interaction history transfer |
| Low adoption | Customers prefer agents | Improve virtual agent experience and marketing |
Virtual Agent vs. Traditional IVR
| Feature | Virtual Agent | Traditional IVR |
|---|---|---|
| User Experience | Natural conversation | Menu-driven |
| Understanding | NLP-based intent | Keyword matching |
| Conversation Type | Multi-turn dialogue | Sequential selections |
| Error Handling | Contextual recovery | Repeat menu |
| Personalization | Personalized responses | Generic options |
| Flexibility | Handles variations | Follows fixed paths |
| Resolution Rate | 70-80%+ | 40-60% |
| Learning | Improves with data | Static |
| Cost | Medium-High | Low |
| Customer Satisfaction | High | Medium |
| Setup Time | 8-16 weeks | 2-4 weeks |
Interview Cheat Sheet
| Question | Answer |
|---|---|
| What are virtual agent flows? | AI-powered autonomous agents that handle customer interactions without humans |
| What are they also called? | Agentic flows, autonomous agents, AI automation |
| What edition is required? | Premium edition with Genesys Cloud CX Automation module |
| What technology do they use? | Natural language processing, machine learning, conversation management |
| What channels do they support? | Voice, chat, email, SMS, WhatsApp, messaging apps |
| What can they handle? | Routine requests: password resets, order tracking, payments, scheduling |
| When do they escalate? | Complex issues, customer preference, sentiment triggers, capability limits |
| What's the expected automation rate? | 50-70% of routine interactions |
| What's the ROI timeline? | 2-4 months to see significant cost savings |
| What's most important for success? | Quality conversation design and NLP training |
| How do they improve over time? | Machine learning from interactions, feedback, and updates |
| What about security? | Secure authentication, encrypted data, audit trails |
| Can customers always reach humans? | Yes, escalation available anytime on demand |
| What's the biggest benefit? | 24/7 availability at 60-80% cost reduction |
| What's the biggest challenge? | Complex conversation design and integration setup |
Key Takeaways
- Autonomous Operation - Virtual agents handle interactions without human involvement
- AI-Powered - Uses NLP and machine learning for natural conversations
- Cost Reduction - 60-80% lower cost than human agents for routine interactions
- 24/7 Availability - Provide support outside business hours automatically
- Omnichannel - Work across voice, chat, email, and messaging channels
- Intelligent Escalation - Routes to humans when needed seamlessly
- Continuous Learning - Improves recommendations and handling over time
- Significant Automation - Can handle 50-70% of routine inquiries
- Customer Preference - Allows escalation to human anytime
- Quick ROI - 2-4 months to see measurable cost and efficiency improvements
Migration Path from Traditional IVR
Phase 1: Planning (Weeks 1-2)
├── Audit current IVR flows
├── Identify suitable use cases
├── Design new virtual agent conversations
├── Plan escalation logic
└── Estimate volume and ROI
Phase 2: Development (Weeks 3-6)
├── Build virtual agent flows
├── Create conversation scenarios
├── Configure NLP and intents
├── Integrate backend systems
└── Set up escalation routing
Phase 3: Testing (Weeks 6-8)
├── Conduct conversation testing
├── Validate integrations
├── Test escalation paths
├── Performance load testing
└── Security validation
Phase 4: Pilot (Weeks 8-10)
├── Deploy to test traffic
├── Monitor success rates
├── Gather customer feedback
├── Collect metric baseline
└── Optimize based on learnings
Phase 5: Rollout (Weeks 10-12)
├── Redirect production traffic
├── Disable old IVR
├── Monitor closely
├── Provide agent support
└── Scale up gradually
Phase 6: Optimization (Ongoing)
├── Monitor performance daily
├── Improve conversation design
├── Update intents based on data
├── Gather ongoing feedback
└── Continuous improvement
Advanced: Custom Agent Configurations
Multi-Agent Orchestration
Contact Arrives
↓
Main Virtual Agent
├── Understands intent
├── Routes to specialized agent
│ ├── Billing Agent
│ ├── Support Agent
│ ├── Sales Agent
│ └── Technical Agent
├── Specialized agent handles interaction
└── Escalates if needed
Hybrid Agent Approach
Virtual Agent + Human
├── Virtual agent starts interaction
├── Gathers information
├── Handles simple part
├── Transfers to human for complex part
└── Virtual agent confirms resolution
Proactive Agent
System Trigger
├── "Bill due in 3 days"
├── Virtual agent proactively contacts customer
├── "Your payment is due March 15. Pay now?"
├── Processes payment if requested
└── Sends confirmation
Additional Resources
Official Documentation Links
- Genesys Cloud Virtual Agent Guide: https://help.genesys.com/genesyscloud/current/en-us/VirtualAgent.html
- Architect Flows: https://help.genesys.com/genesyscloud/current/en-us/ArchitectFlows.html
- NLP & Intent Configuration: https://help.genesys.com/genesyscloud/current/en-us/NLPConfiguration.html
Support Contacts
- Genesys Sales: sales@genesys.com
- Genesys Support: https://support.genesys.com
- Community Forums: https://community.genesys.com
Document Version Info
Last Updated: March 2026
Source: Genesys PureCloud Official Documentation
Version: 1.0
6. - Platform Operations
Disconnect Interactions
What Is the Disconnect Interactions Tool?
The Disconnect Interactions tool allows administrators to manually terminate an interaction that is stuck in the system — one that remains active in queues, real-time views, or reports even though the customer and agent have both disconnected.
This is a break-glass operational tool, not a routine configuration item.
When to Use It
| Symptom | Likely Cause |
|---|---|
| Interaction shows active in real-time dashboard after agent ended the call | System failed to clear interaction state |
| Queue statistics show an interaction that cannot be answered | Interaction stuck in queue with no active parties |
| Agent stuck in ACW or handling state for a call that ended | WebRTC session or signaling not closed cleanly |
| Ghost interaction visible in Performance Views | Platform sync delay or session persistence issue |
Common root causes: persistent WebRTC sessions, SIP signaling not terminating cleanly, interactions left on hold with no parties, platform synchronization issues.
⚠️ Risk: If an interaction is still genuinely active (customer still on hold, agent still connected), using this tool will immediately drop the call. Always verify the interaction is truly stuck before disconnecting.
How to Use It
- Admin → Routing → Disconnect Interactions
- Locate the Interaction ID of the problematic interaction
- Enter the Interaction ID in the input field
- Click Disconnect Interaction
- Verify the interaction no longer appears in real-time views or queue statistics
Finding the Interaction ID
The Interaction ID is a UUID-format string. Find it from:
| Source | How |
|---|---|
| Real-time Performance Views | Click the stuck interaction → copy the Interaction ID from the details panel |
| Interaction Details report | Search by agent, queue, or time range → find the interaction |
| Analytics API | Query for active interactions if the UI doesn't surface it easily |
What Happens When You Disconnect
- The interaction is immediately terminated
- It is removed from queue statistics and real-time views
- The system logs the disconnection
- If the interaction was genuinely still active, the call is dropped — no warning is given to the customer or agent
Limitations
| Limitation | Detail |
|---|---|
| Some interactions cannot be disconnected | System-level lock or platform state prevents it |
| Dashboard may not update instantly | Real-time views have a refresh delay — wait a moment before concluding it didn't work |
| Root cause is not resolved | The tool terminates the stuck interaction but does not fix the underlying cause (WebRTC issue, network problem, etc.) |
| Requires escalation | If the tool fails, contact Genesys Cloud Customer Care with the Interaction ID |
Operational Workflow
Stuck interaction identified in real-time view or queue
↓
Validate — confirm no active parties (agent + customer both gone)
↓
Locate Interaction ID
↓
Admin → Routing → Disconnect Interactions
↓
Enter ID → Disconnect Interaction
↓
Verify interaction removed from views
↓
Document the incident (ID, time, root cause if known)
↓
If persists → escalate to Genesys Customer Care
Troubleshooting
| Issue | Cause | Fix |
|---|---|---|
| Interaction cannot be disconnected | Platform-level state lock | Escalate to Genesys Customer Care with Interaction ID |
| Interaction still visible after disconnect | Dashboard refresh delay | Wait 30–60 seconds and refresh the view |
| Interaction ID not found | Wrong ID copied | Re-verify the ID from interaction details or analytics |
| Multiple stuck interactions simultaneously | Systemic WebRTC or network issue | Investigate root cause; check Edge health and network connectivity |
Troubleshooting Checklist
| Check | ✓ |
|---|---|
| Confirmed interaction is actually stuck (not active) | ☐ |
| Interaction ID captured from performance view or reports | ☐ |
| Disconnect tool accessed at Admin → Routing | ☐ |
| Interaction ID entered and disconnect executed | ☐ |
| Verified interaction no longer in queue or real-time view | ☐ |
| Incident documented | ☐ |
| Escalated to Genesys Care if tool failed | ☐ |
Key Facts for Exam / Interview
| Question | Answer |
|---|---|
| Where is the Disconnect Interactions tool? | Admin → Routing → Disconnect Interactions |
| What is required to use it? | The Interaction ID of the stuck interaction |
| What happens immediately when you disconnect? | The interaction is terminated and removed from active sessions |
| What if the tool doesn't work? | Escalate to Genesys Cloud Customer Care |
| What is the risk of using this tool carelessly? | Disconnecting a genuinely active call drops the customer without warning |
See Also
- Platform Usage & Monitoring — real-time views where stuck interactions are typically spotted
- Queue & Routing Management — queue statistics affected by stuck interactions
- Architect Overview — WebRTC and SIP session handling context
API Usage
| Topic | Detail |
|---|---|
| Navigation (Admin Report) | Admin → Platform Usage → API Usage |
| Navigation (Alt) | Menu → IT and Integrations → API Usage |
| Navigation (Analytics View) | Performance > Workspace > Other > API Usage or Menu → Analytics → Analytics Workspace → API Usage |
| Purpose | Monitor API request consumption, identify high-volume clients, detect failures, stay within the Genesys Cloud Fair Use Policy |
| Required Permission | OAuth > Client > View |
| Data Calculation | Daily aggregate — all requests 00:00:00–23:59:59 UTC |
| Current Day | Not included — report always lags by one day |
| Timezone Note | Dates display in local time but are calculated in UTC — date shown may differ from client-side date |
✅ Verified against Genesys Cloud Resource Center — March 2026
Overview
Genesys Cloud provides two separate tools for monitoring API usage — the API Usage Report (Admin UI) and the API Usage View (Analytics Workspace). Both tools require the same permission, cover the same data sources, and exclude the same request types. This page covers both.
The API Usage report shows how many API requests your contact center makes and which clients generate those requests. If you exceed the Fair Use Policy for APIs, this report helps determine which clients make the most requests and which request types your organization uses most — allowing you to streamline API usage and avoid or plan for overages.
What Is Included
| Source | Included |
|---|---|
| Custom or third-party application integrations | ✅ Yes |
| AppFoundry applications | ✅ Yes |
| Data Actions calling the Genesys Cloud Public API | ✅ Yes |
| Embeddable Framework applications | ✅ Yes (subject to API usage allocations) |
| PUT, POST, GET, DELETE calls | ✅ Yes |
What Is Excluded
| Source | Excluded |
|---|---|
| Genesys Cloud browser, web, and mobile app internal requests | ❌ Not included |
| Outbound Data Actions calling external platforms | ❌ Not included |
| Genesys Cloud for Chrome | ❌ Not included |
| Genesys Cloud for Firefox | ❌ Not included |
| Genesys Cloud for Salesforce | ❌ Not included |
| Genesys Cloud for Zendesk | ❌ Not included |
API Usage Report — Dashboard Overview
The API Usage dashboard is divided into three main sections: Most Active Requests, OAuth Client Requests, and URL Requests. Each section contains graphs and shows the count of total API requests and total OAuth clients.

Section 1 — Most Active Requests
Top 5 Requests by OAuth Client
Displays the top five clients that made the most API requests in the selected time period. Helps identify the number of successful and failed API calls per client. Exportable as CSV.

HTTP Response Status Codes
Displays the total number of successful or failed API calls by status — across all clients.
| Status Code | Meaning |
|---|---|
| 200 | Request succeeded |
| 300 | Redirect — user can select a preferred representation |
| 400 | Bad request — malformed syntax the server cannot understand |
| 429 | Too many requests — rate limiting triggered |
| 500 | Server error — unexpected condition prevented fulfillment |
⚠️ Note: The documented status codes in this dashboard are 200, 300, 400, 429, and 500. Common codes like 401 and 404 are not broken out separately in this view.

Top 5 Requested URLs
Displays the five API endpoints receiving the highest number of requests. Helps identify endpoints with failed API calls and reduce unnecessary API traffic. High usage may indicate inefficient polling or integration design.

Section 2 — OAuth Client Requests
Request Counts by OAuth Client
Shows a count of API calls made by the selected OAuth clients during the selected timeframe. Identifies which integrations are responsible for the most API traffic.

HTTP Response Status Codes — Per Client View
Breaks down successful and failed responses per OAuth client. Useful for diagnosing integration-specific authentication or request issues:
- Many 400 responses → integration sending malformed requests
- Many 429 responses → client exceeding rate limits
- Many 500 responses → server-side issue with specific endpoint

Request URL Counts by OAuth Client
Displays all URLs that resulted in high API calls per client. Helps identify which endpoints each client is accessing and where failures are concentrated.
💡 Click OAuth Client Settings → Client URL View Selections to specify exactly which OAuth clients and URLs appear in these graphs. Selections persist until manually reset.

Section 3 — URL Requests
URL Requests (Detail List)
Displays a list of API requests by URL — individual endpoints used, request frequency, and HTTP response outcomes. Helpful for deep analysis of API usage patterns.
💡 Click URL Request Settings → Template URL View Selections to specify which URLs appear in this section's graphs. Selections persist until manually reset.

Total Successful vs. Failed Requests
Summarizes the overall success and failure rates for all API requests. A spike in failed requests may indicate authentication failures, endpoint configuration errors, or integration outages.

Dashboard Panel Summary
| Panel | Section | What It Shows |
|---|---|---|
| Top 5 Requests by OAuth Client | Most Active Requests | Clients generating highest request volume |
| HTTP Response Status Codes | Most Active Requests | 200/300/400/429/500 distribution across all calls |
| Top 5 Requested URLs | Most Active Requests | Most frequently called API endpoints |
| Request Counts by OAuth Client | OAuth Client Requests | Per-client API call counts |
| HTTP Response Status Codes (per client) | OAuth Client Requests | Success/failure breakdown per OAuth client |
| Request URL Counts by OAuth Client | OAuth Client Requests | Which endpoints each client is calling |
| URL Requests | URL Requests | Detailed per-endpoint request list |
| Total Success / Fail | URL Requests | Overall platform request health |
API Usage View (Analytics Workspace)
The API Usage View is a separate tool from the Admin report. Navigate to:
Performance > Workspace > Other > API Usage, orMenu → Analytics → Analytics Workspace → API Usage
The view contains a graph and two main filterable sections:
- OAuth Clients — Lists all clients that made API requests in the selected period. Click a client to cross-highlight its requests in the API Requests section.
- API Requests — Lists all PUT, POST, GET, DELETE calls. Click a request to highlight which clients made it.
Each section has four default columns: client/request name, number of requests, percentage of total requests, and a visual bar. When you apply a filter by clicking a row, a fifth column appears showing the filtered percentage alongside the overall total.
⚠️ You can only filter by one OAuth client or one API request at a time.
⚠️ The graph does not display data when you select a single day as the date range — use multi-day ranges to see the graph.
💡 Click Save to persist your filter and date selections in the view.
Filtering & Export
| Feature | Detail |
|---|---|
| Date Range Presets | Previous 7 days, Previous 30 days, This month, Last month, Previous 3 months |
| Custom Date Range | Configurable start and end date |
| Current Day | Never included — no date range shows today's data |
| Export | Click Export API Usage Data → downloads CSV |
| OAuth Client Filter | Click OAuth Client Settings to select specific clients for Section 2 graphs |
| URL Filter | Click URL Request Settings to select specific endpoints for Section 3 graphs |
| Save View Settings | Available in the API Usage View — persists filter and date selections |
Best Practices
| Practice | Reason |
|---|---|
| Monitor API usage regularly | Prevent exceeding fair use limits |
| Limit unnecessary API calls | Improve platform performance |
| Use caching strategies | Reduce repeated requests to the same endpoint |
| Optimize integration polling intervals | Avoid excessive traffic from scheduled jobs |
| Investigate 429 errors immediately | Rate limiting can break integrations silently |
| Monitor failed API requests | Detect integration issues before they impact agents |
Troubleshooting
| Issue | Cause | Resolution |
|---|---|---|
| Excessive API usage | Integration polling too frequently | Adjust polling interval or add caching |
| High 400 error rate | Malformed API requests | Verify endpoint and request format |
| High 429 error rate | Rate limit exceeded | Reduce request frequency or spread load over time |
| High 500 error rate | Server-side issue | Check Genesys Cloud status page; review endpoint |
| Unknown API traffic | Unrecognized OAuth client generating calls | Investigate OAuth clients in Admin → Integrations → OAuth |
| Data appears on wrong date | UTC vs. local time zone offset | Remember report dates are calculated in UTC |
| Graph not showing in View | Single day selected as date range | Select a multi-day date range to display the graph |
Exam Cheat Sheet
| Question | Answer |
|---|---|
| What does the API Usage report show? | API request activity across integrations and OAuth clients |
| What HTTP methods are tracked? | GET, POST, PUT, DELETE |
| What are the documented status codes in this dashboard? | 200, 300, 400, 429, 500 |
| What does a 429 status code mean? | Too many requests — rate limiting triggered |
| Does the report include today's data? | No — never includes data for the current day |
| What timezone is data calculated in? | UTC — displayed in local time, but calculated in UTC |
| What is excluded from the report? | Internal Genesys UI requests, outbound Data Actions to external platforms, and all embedded clients (Chrome, Firefox, Salesforce, Zendesk) |
| Are Embeddable Framework apps tracked? | Yes — they are subject to API usage allocations |
| What permission is required? | OAuth > Client > View |
| What are the two tools for API usage monitoring? | Admin Report (Admin → Platform Usage → API Usage) and Analytics View (Performance > Workspace > Other > API Usage) |
| What happens to the graph when you select 1 day in the View? | The graph does not display — use a multi-day range |
| What does the OAuth Client Settings button do? | Filters which clients and URLs appear in the OAuth Client Requests section graphs |
| Where is the second Admin navigation path? | Menu → IT and Integrations → API Usage |
See Also
- Fair Use Policy for APIs — limits that this report helps you monitor against
- Roles & Permissions —
OAuth > Client > Viewpermission details - About Platform Usage — broader platform consumption monitoring
- Resource Usage on Your Invoice — billing alignment with UTC usage calculations
Integration Management
| Section | Description |
|---|---|
| Module Context | Integration Management covers OAuth Clients, Authorized Applications, and Single Sign-On (SSO) in Genesys Cloud Administration. |
| Admin Location | Admin → Integrations |
| Purpose | Enables secure API authentication, third-party application connectivity, and enterprise identity federation. |
OAuth Clients
Overview
| Topic | Explanation |
|---|---|
| OAuth Client | An application registered in Genesys Cloud that can request access tokens to call Platform APIs. |
| OAuth Standard | Genesys Cloud implements the OAuth 2.0 authorization framework for secure API authorization. |
| Access Token | Temporary credential used to authenticate API calls. |
| Token Lifetime | Configurable between 300 seconds and 172,800 seconds (2 days). |
| OAuth Scopes | Define the level of access an application has to organization data. |
| Role-Based Access | OAuth permissions are determined by roles assigned to the OAuth client. |
| Integration Role | OAuth clients are commonly used for integrations, data actions, AppFoundry apps, and external systems. |
OAuth allows organizations to share information with applications without sharing user credentials, and uses scopes and roles to restrict access to resources.
Navigation
| Task | Navigation |
|---|---|
| View OAuth Clients | Admin → Integrations → OAuth |
| Create OAuth Client | Admin → Integrations → OAuth → Add Client |
| Review Authorized Apps | Admin → Integrations → Authorized Applications |
Configuration Fields
| Field | Description | Example |
|---|---|---|
| App Name | Name displayed when authorization occurs | CRM_Integration_Client |
| Description | Brief description of the OAuth client purpose | Salesforce Data Sync |
| Token Duration | Lifetime of OAuth access tokens (300–172,800 seconds) | 3600 |
| Grant Types | Defines how an application obtains a token | Client Credentials |
| Roles | Permissions assigned to the OAuth client | Master Admin |
| Client ID | Unique identifier generated automatically | Generated |
| Client Secret | Secret key used to authenticate token requests | Generated |
| Authorized Redirect URI | Used with Authorization Code or Implicit grants | https://app.example.com/callback |
Grant Types
| Grant Type | Description | Typical Use |
|---|---|---|
| Client Credentials | Machine-to-machine authentication; no user context | Server integrations, data actions |
| Authorization Code | User-delegated access with redirect | Web apps requiring user context |
| Implicit | Simplified flow for browser-based apps | Legacy browser apps |
| SAML2 Bearer | SSO-based token exchange | Federated identity scenarios |
⚠️ After selecting Client Credentials, a Roles tab appears — assign the minimum required role. Use least-privilege roles in production.
After selecting Client Credentials, the Roles tab appears — assign Master Admin or a least-privilege role.
Implementation Steps
| Step | Action |
|---|---|
| Step 1 | Navigate to Admin → Integrations → OAuth |
| Step 2 | Click Add Client |
| Step 3 | Enter application name and description |
| Step 4 | Configure token expiration |
| Step 5 | Select OAuth grant type |
| Step 6 | Assign roles to the OAuth client |
| Step 7 | Save configuration |
| Step 8 | Copy generated Client ID and Client Secret — store securely |
Creating an Integration Using OAuth Credentials
After creating an OAuth client, use the credentials to configure an integration:
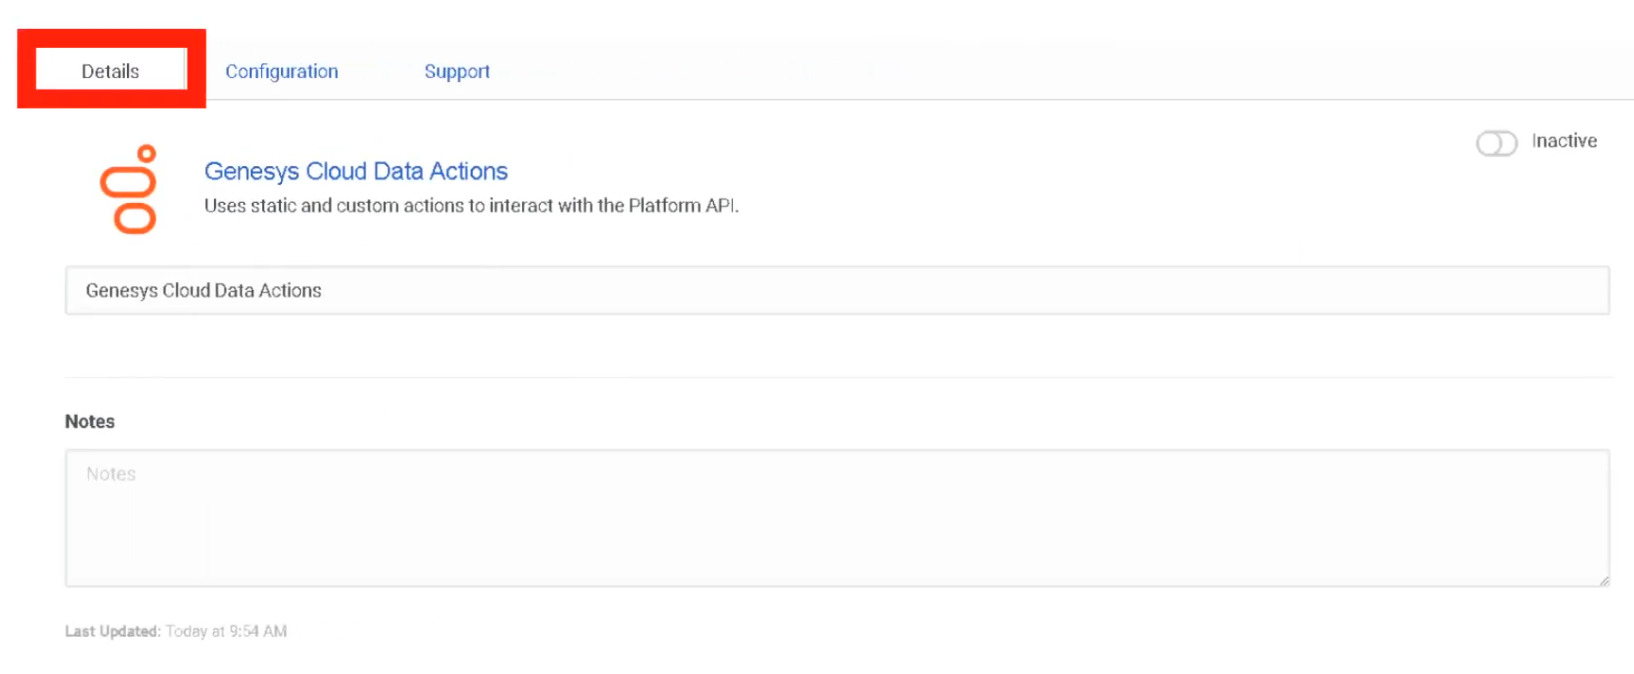
Add the integration using the OAuth credentials:
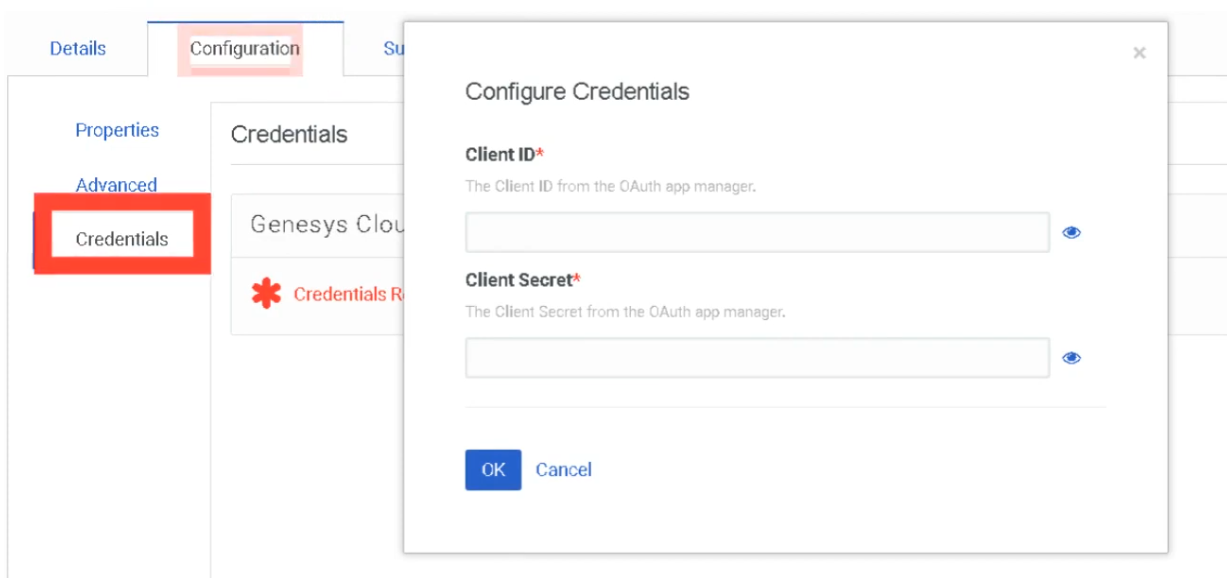
Creating a Data Action
After the integration is configured, create a Data Action to call APIs from Architect flows:

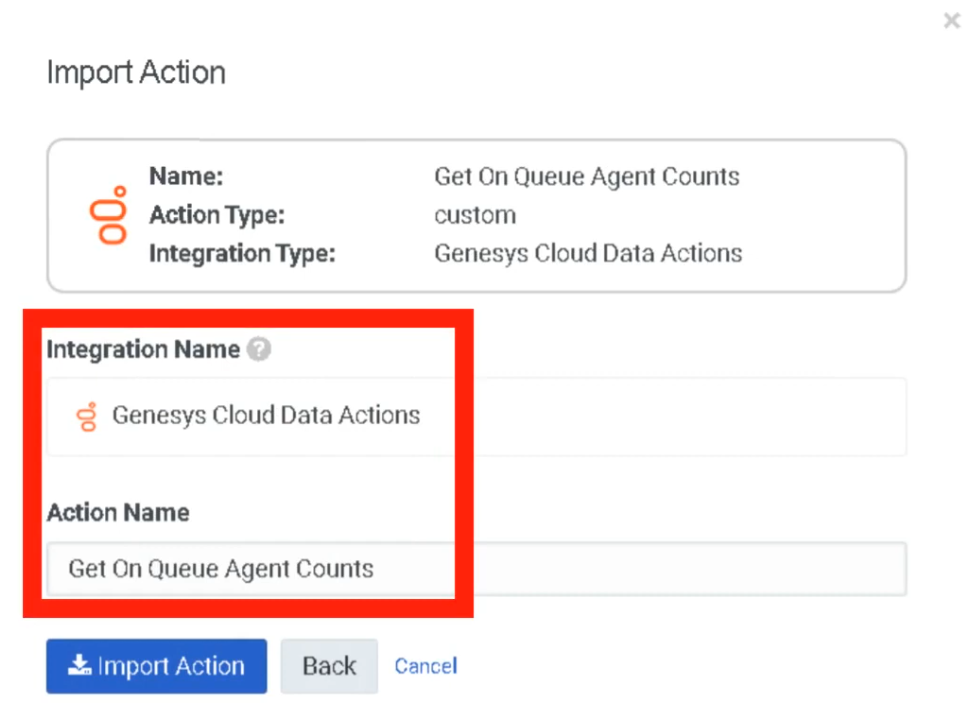

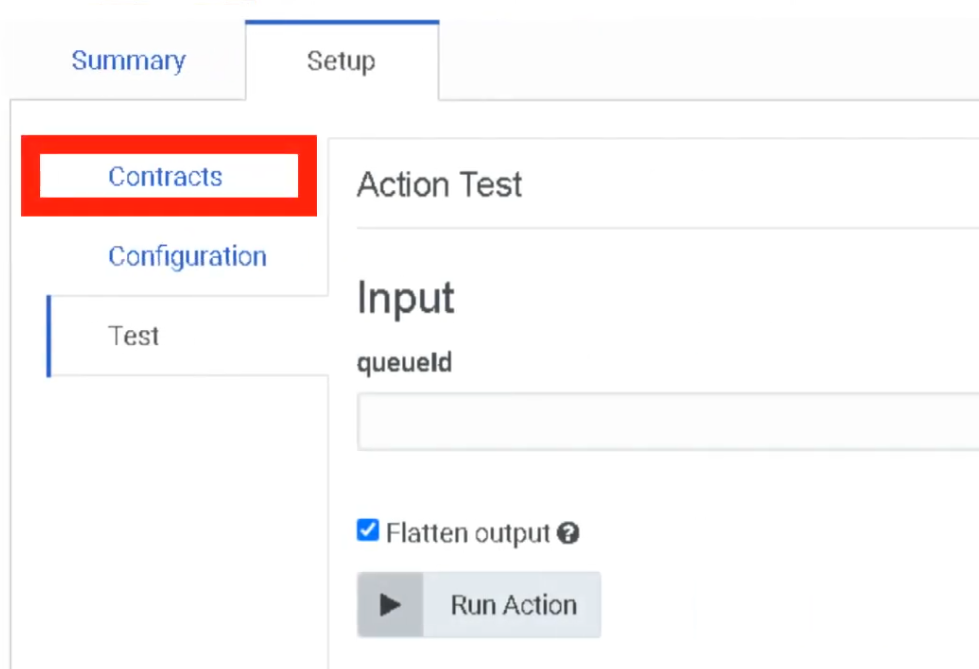
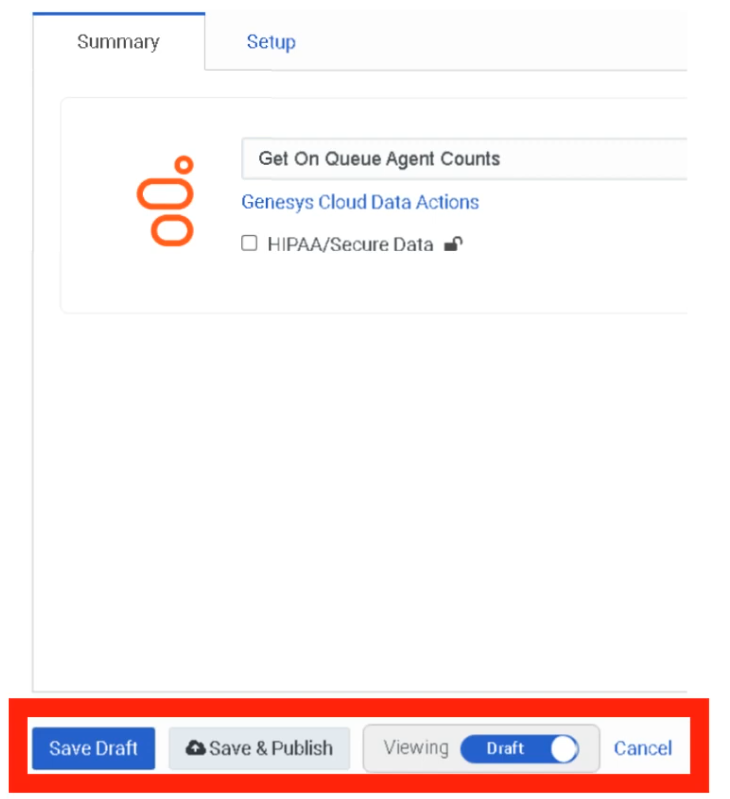
End-to-End Flow: OAuth → Integration → Data Action → Architect
External System
↓
OAuth Client Authentication
↓
Access Token Issued
↓
Integration / Data Action
↓
Architect Flow
↓
Customer Interaction
Security Considerations
| Security Control | Description |
|---|---|
| Least Privilege Access | Assign minimal permissions to OAuth clients |
| Token Expiration | Shorter token lifetimes reduce exposure |
| Secure Storage | Store client secrets in secure vaults |
| API Monitoring | Track requests via Platform Usage dashboard |
| Credential Protection | Client ID + Secret function like a username/password — protect accordingly |
Troubleshooting
| Issue | Cause | Resolution |
|---|---|---|
| Token request fails | Invalid client credentials | Verify client ID and secret |
| API access denied | Missing role permissions | Assign correct roles |
| Token expired | Token lifetime exceeded | Request new token |
| Authentication errors | Incorrect grant type | Verify OAuth configuration |
| Integration failure | Credentials not configured | Update integration credentials |
Interview Cheat Sheet
| Question | Answer |
|---|---|
| What is OAuth used for in Genesys Cloud? | Authenticate applications and authorize API access |
| What is an OAuth access token? | Temporary credential used to authenticate API requests |
| What grant types are supported? | Client Credentials, Authorization Code, Implicit, SAML2 Bearer |
| What controls API access permissions? | OAuth client roles and scopes |
| Maximum token lifetime? | 172,800 seconds |
Authorized Applications
Overview
| Topic | Explanation |
|---|---|
| Authorized Application | An application that has been granted permission to access Genesys Cloud via OAuth. |
| Application State | Applications can be Pending, Approved, or Revoked. |
| Scopes | Define the specific permissions granted to an application. |
| Security Importance | Allows administrators to control external application access and revoke permissions when necessary. |
Navigation
| Task | Navigation |
|---|---|
| View Authorized Applications | Admin → Integrations → Authorized Applications |
| Edit Application Permissions | Click ⋮ (three dots) beside the application |
| Revoke Application Access | Select Revoke from application menu |
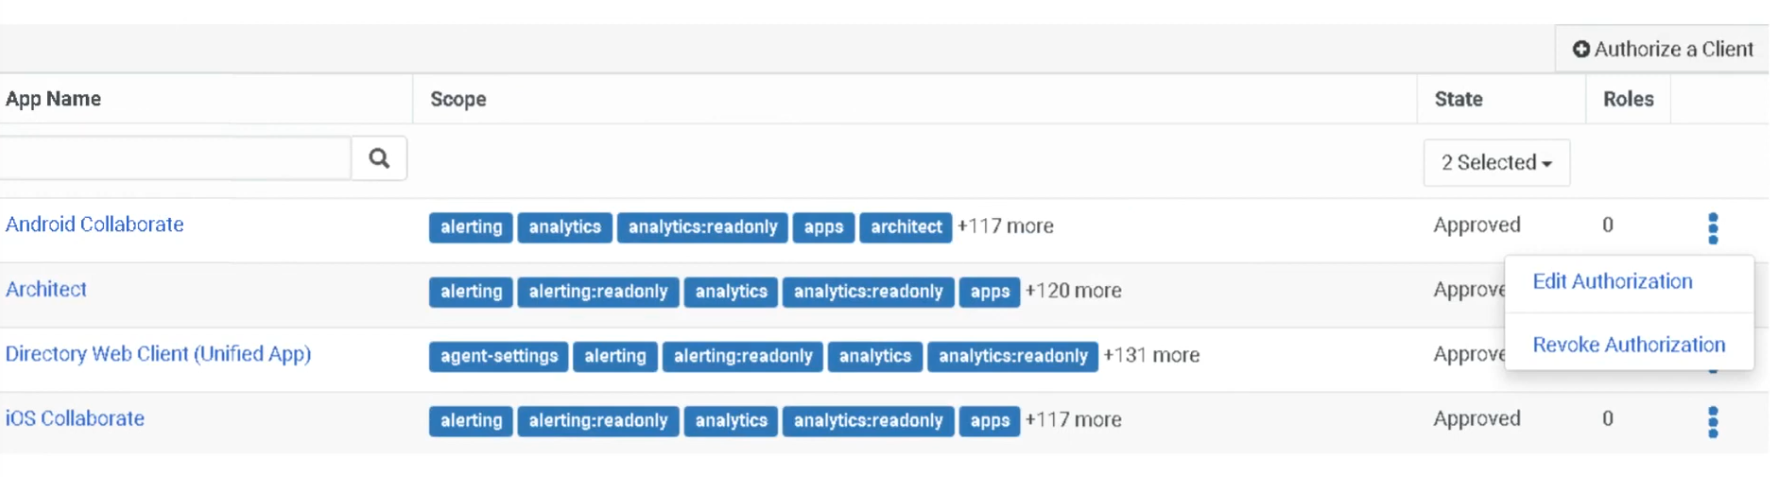
Configuration Fields
| Field | Description | Example |
|---|---|---|
| App Name | Name of the OAuth client application | CRM_Integration_App |
| Scopes | Permissions granted to the application | analytics:read |
| State | Current authorization status | Approved |
| Roles | Roles assigned to the application | Master Admin |
| Actions Menu | Options to edit or revoke access | Edit / Revoke |
Application States
| State | Meaning |
|---|---|
| Pending | Application has requested access but not yet approved |
| Approved | Application is authorized to access Genesys Cloud APIs |
| Revoked | Application access has been removed; API calls are immediately blocked |
⚠️ Revoking an application immediately blocks all API access. Use with caution for active integrations.
Best Practices
| Practice | Reason |
|---|---|
| Regularly review authorized apps | Ensure only trusted applications have access |
| Apply least privilege roles | Limit application permissions |
| Revoke unused applications | Reduce security risk |
| Monitor API activity | Detect unusual usage patterns |
| Document integrations | Maintain governance over external access |
Interview Cheat Sheet
| Question | Answer |
|---|---|
| What are Authorized Applications? | Applications granted OAuth permission to access Genesys Cloud APIs |
| What controls application permissions? | OAuth scopes and assigned roles |
| Where are authorized apps managed? | Admin → Integrations → Authorized Applications |
| What happens if an app is revoked? | It can no longer access the platform APIs — immediately |
Single Sign-On (SSO)
Overview
| Topic | Explanation |
|---|---|
| Single Sign-On | Authentication method allowing users to log into Genesys Cloud using corporate identity provider credentials. |
| Identity Provider (IdP) | External authentication service such as Azure AD, Okta, Google Workspace, or OneLogin. |
| Service Provider (SP) | Genesys Cloud acts as the service provider in SSO integrations. |
| Protocol | SAML 2.0 — the only supported SSO protocol. |
| Authentication Flows | Supports Service Provider–initiated and Identity Provider–initiated login flows. |
| User Requirement | Users must already exist in Genesys Cloud before SSO authentication will work. |
| Certificate Risk | Expired IdP certificates will break authentication for all SSO users. |
Navigation
| Task | Navigation |
|---|---|
| Configure SSO | Admin → Integrations → Single Sign-On |
| Add Identity Provider | Admin → Integrations → Single Sign-On → Add Identity Provider |
| Download Genesys Certificate | Available within the SSO configuration page |

Configuration Fields
| Field | Description | Example |
|---|---|---|
| Identity Provider Name | Name of the configured SSO provider | AzureAD_SSO |
| Display Name | Name displayed on login page | Company SSO |
| Identity Provider Type | External authentication service | Azure AD |
| SAML Metadata File | XML configuration file provided by IdP | idp_metadata.xml |
| Issuer URI | Unique identifier of the IdP | https://login.microsoftonline.com |
| SSO URL | URL used to authenticate users | https://login.microsoftonline.com/... |
| Logout URL | Optional logout redirect URL | https://login.microsoftonline.com/logout |
| Certificate | Security certificate for validating SAML responses | Base64 certificate |
SSO Authentication Flow
User Login Request
↓
Redirect to Identity Provider
↓
User Authentication (+ MFA if configured in IdP)
↓
SAML Assertion Sent to Genesys Cloud
↓
Genesys Cloud Validates Assertion
↓
User Access Granted
Implementation Steps
| Step | Action |
|---|---|
| Step 1 | Obtain SAML metadata XML from identity provider |
| Step 2 | Navigate to Admin → Integrations → Single Sign-On |
| Step 3 | Click Add Identity Provider |
| Step 4 | Import SAML metadata file |
| Step 5 | Configure login display settings (name, logo) |
| Step 6 | Save configuration |
| Step 7 | Test authentication before enabling for all users |
| Step 8 | Enable SSO for organization users |
Limitations & Constraints
| Constraint | Description |
|---|---|
| Protocol Support | Only SAML 2.0 is supported — no OIDC or WS-Federation |
| User Provisioning | Users must exist in Genesys Cloud before they can authenticate via SSO |
| IdP Configuration | Requires configuration on both IdP and Genesys Cloud sides |
| Certificate Expiration | Expired certificates break authentication for all SSO users — monitor and rotate proactively |
Troubleshooting
| Issue | Cause | Resolution |
|---|---|---|
| SSO login failure | Incorrect SAML configuration | Verify metadata configuration |
| Invalid assertion | Certificate mismatch | Update SAML certificate |
| User cannot authenticate | User not provisioned in Genesys Cloud | Create the user first |
| Login redirect loop | Incorrect IdP URL | Verify identity provider configuration |
| SSO test fails | Incorrect metadata | Re-import metadata file |
Interview Cheat Sheet
| Question | Answer |
|---|---|
| What is SSO in Genesys Cloud? | Authentication using corporate identity providers instead of separate Genesys credentials |
| Which protocol is supported? | SAML 2.0 only |
| What must exist before SSO works? | The user account must already exist in Genesys Cloud |
| Where is SSO configured? | Admin → Integrations → Single Sign-On |
| What breaks SSO? | Expired certificates or users not provisioned in Genesys Cloud |
OAuth Clients
| Topic | Detail |
|---|---|
| Navigation | Admin → Integrations → OAuth |
| Purpose | Register applications that need secure API access to Genesys Cloud without exposing user credentials |
| Standard | OAuth 2.0 authorization framework |
| Token Lifetime | 300 seconds (5 min) to 172,800 seconds (48 hrs) — SCIM integration up to 450 days |
✅ Verified against Genesys Cloud Resource Center — March 2026
Overview
An OAuth Client is an application registered in Genesys Cloud that can request access tokens to call Platform APIs. OAuth allows organizations to share information with applications without sharing user credentials, using scopes and roles to restrict access to specific resources.
OAuth is required for: Integrations, Data Actions, AppFoundry apps, custom external applications, and automation scripts.
Grant Types
The grant type defines how an application obtains an access token. This is the most important decision when creating an OAuth client.
| Grant Type | Authentication Steps | Best For | Status |
|---|---|---|---|
| Client Credentials | Single-step — no user interaction | Server-to-server integrations, Data Actions, scheduled jobs, Windows Services | ✅ Current — most common for admin integrations |
| Authorization Code / PKCE | Two-step — user authenticates, then code exchanged for token | Server-side web apps, thin desktop clients, maximum security | ✅ Current — recommended for user-facing apps |
| SAML2 Bearer | Uses SAML assertion from Identity Provider | SSO-integrated environments | ✅ Current |
| Token Implicit Grant (Browser) | Single-step browser-based | Legacy JavaScript/desktop apps | ⚠️ DEPRECATED — see below |
⚠️ Implicit Grant Deprecation
| Date | Action |
|---|---|
| May 2026 | Token Implicit Grant option removed from new OAuth client creation |
| May 2027 | Existing OAuth clients using Implicit Grant stop working — must migrate |
| Action Required | Migrate all Implicit Grant clients to Authorization Code with PKCE before May 2027 |
PKCE (Proof Key for Code Exchange) is already supported in Genesys Cloud and is the recommended replacement — it provides stronger security by preventing authorization code interception.
Configuration Fields
| Field | Description | Notes |
|---|---|---|
| App Name | Display name shown during authorization | e.g., CRM_Integration_Client |
| Description | Brief purpose of this client | Optional but recommended for governance |
| Token Duration | Lifetime of access tokens in seconds | 300–172,800s; Genesys recommends 64,800s (18 hours) for agent workday alignment; HIPAA orgs enforce 15-min idle timeout |
| Grant Type | How the token is obtained | See Grant Types table above |
| Roles | Permissions assigned to this client | Only available for Client Credentials grant — Roles tab appears after selecting Client Credentials |
| Divisions | Scope of resource access per role | Assign alongside each role |
| Authorized Redirect URIs | Where auth codes are posted after login | Required for non-Client Credentials grants; max 125 URIs |
| OAuth Scopes | Fine-grained permission scopes | Required for non-Client Credentials grants |
| Client ID | Auto-generated unique identifier | Copy and store — used in integration configuration |
| Client Secret | Auto-generated password for token requests | ⚠️ One-time viewable — only shown at creation or when regenerated; store securely immediately |
⚠️ Client Secret — Critical Security Note (November 2025)
The Client Secret is only visible once — at the moment of creation or when you explicitly regenerate it. It no longer appears in API responses after that point. If you lose it, you must regenerate a new one (which invalidates the old one).
Creating an OAuth Client
After selecting Client Credentials, the Roles tab appears — assign Master Admin or least-privilege role:
OAuth → Integration → Data Action → Architect Flow
The full integration chain shows how OAuth credentials power everything downstream:
OAuth Client Created (Client ID + Secret)
↓
Integration Configured (credentials entered here)
↓
Data Action Created (uses the integration)
↓
Architect Flow (calls the Data Action)
↓
Customer Interaction (result returned to flow)
Step 1 — Create the Integration
Enter the OAuth credentials into the Integration configuration:
Step 2 — Create a Data Action
Token Request Example (Client Credentials)
POST /oauth/token
Host: login.mypurecloud.com
Authorization: Basic BASE64(client_id:client_secret)
Content-Type: application/x-www-form-urlencoded
grant_type=client_credentials
Security Best Practices
| Practice | Reason |
|---|---|
| Use least-privilege roles | Minimize blast radius if credentials are compromised |
| Store Client Secret in a secure vault immediately | It cannot be retrieved after creation — only regenerated |
| Set shortest acceptable token lifetime | Reduces window of exposure for a leaked token |
| Use PKCE instead of Implicit Grant | More secure — prevents authorization code interception |
| Rotate secrets periodically | Reduces risk from long-term credential exposure |
| Monitor via Platform Usage dashboard | Detect abnormal API call patterns |
| Document all OAuth clients | Maintain governance — know what every client is used for |
Troubleshooting
| Issue | Likely Cause | Resolution |
|---|---|---|
| Token request fails | Wrong Client ID or Secret | Verify credentials — regenerate secret if lost |
| API access denied | Role missing required permission | Assign correct role to OAuth client |
| Token expired | Lifetime exceeded | Reduce token duration or implement token refresh logic |
| Roles tab not visible | Grant type is not Client Credentials | Switch grant type — Roles only appear for Client Credentials |
| Secret not visible after creation | Expected — security change Nov 2025 | Copy at creation time; regenerate if lost |
| Integration fails after secret rotation | Old secret cached | Update integration configuration with new secret |
Interview Cheat Sheet
| Question | Answer |
|---|---|
| What is OAuth used for in Genesys Cloud? | Authenticate applications and authorize API access without exposing user credentials |
| What are the current supported grant types? | Client Credentials, Authorization Code / PKCE, SAML2 Bearer (Implicit Grant deprecated May 2026) |
| Which grant type is most common for admin integrations? | Client Credentials |
| When does the Roles tab appear? | Only after selecting Client Credentials as the grant type |
| What is the token lifetime range? | 300 seconds (5 min) to 172,800 seconds (48 hrs); SCIM up to 450 days |
| What is Genesys' recommended token duration? | 64,800 seconds (18 hours) — aligns with a typical agent workday |
| What happens to the Client Secret after creation? | It is only viewable once — copy it immediately; regenerate if lost |
| What is PKCE? | Proof Key for Code Exchange — replacement for Implicit Grant; prevents auth code interception |
| What is the max number of redirect URIs? | 125 |
| When must Implicit Grant clients migrate to PKCE? | By May 2027 |
Authorized Applications
| Section | Detail |
|---|---|
| Navigation | Admin → Integrations → Authorized Applications |
| Alt Navigation | Menu → IT and Integrations → Authorized Applications |
| Required Permission | OAuth > Client > Authorize |
| Purpose | View, modify, and revoke OAuth application access to your Genesys Cloud organization |
| Module Context | Part of Integration Management in Genesys Cloud |
✅ Verified against Genesys Cloud Resource Center — March 2026
Overview
💡 Authorized Applications vs. Authorized Organizations: These are two different features. Authorized Organizations grants user access across orgs (pairing). Authorized Applications grants application access via OAuth scopes — used for integrations, AppFoundry apps, and third-party tools.
Authorized Applications View — Columns
| Column | Description |
|---|---|
| App Name | Name of the authorized OAuth client application. Click the name to edit its scope or revoke its authorization. |
| Scope | The OAuth scopes granted to the application. Scopes define exactly what the app is allowed to do within your org. |
| State | Current authorization status of the application — Approved, Pending, or Revoked. Use the State dropdown to filter by status. |
| Role | Displays the number of roles available to the application (not the role names). |
| Actions | Click More (⋮) to open the action menu — options are Edit Authorization or Revoke Authorization. |
Application States
| State | Meaning |
|---|---|
| Approved | Application is authorized and can obtain access tokens |
| Pending | Authorization request has been submitted but not yet approved |
| Revoked | Authorization has been removed — app cannot obtain access tokens |
⚠️ Revocation is permanent and cannot be undone. A revoked application cannot get a new access token. To restore access, you must fully reauthorize the application from scratch.
Key Concepts
| Topic | Explanation |
|---|---|
| Authorized Application | An application that has been granted permission to access Genesys Cloud via OAuth |
| OAuth Client | The credential set (Client ID / Secret) that an application uses to authenticate and request tokens |
| Scopes | Define the specific API permissions granted to an application — limit what the app can access or do on behalf of a user or org |
| Roles | Determine the level of access the application has within Genesys Cloud (assigned per application, visible as a count in the view) |
| Revocation | Immediately and permanently blocks the application from obtaining access tokens — reauthorization required to restore |
Navigation
| Task | Steps |
|---|---|
| View Authorized Applications | Admin → Integrations → Authorized Applications |
| Edit Application Scopes | Click More (⋮) beside the application → Edit Authorization → select/deselect scopes → Save |
| Revoke Application Access | Click More (⋮) beside the application → Revoke Authorization → confirm Revoke |
| Filter by Application State | Use the State dropdown to filter by Approved, Pending, or Revoked |
| Open App Details | Click the application name directly |
Editing Application Authorization
To modify the scopes assigned to an application:
- Locate the application in the list
- In the Actions column, click More (⋮)
- Select Edit Authorization (or click the app name directly)
- Select or deselect scopes as required
- Click Save
💡 Only modify scopes to what the application actually needs. If unsure whether a scope is required, check with the application developer before approving.
Revoking Application Authorization
- Locate the application in the list
- In the Actions column, click More (⋮)
- Select Revoke Authorization
- Confirm by clicking Revoke
⚠️ Revocation is immediate and irreversible. The app loses the ability to obtain access tokens instantly. To restore access, the application must be fully reauthorized.
Authorization Workflow
External Application
↓
OAuth Client Authentication (Client ID + Secret)
↓
Application Requests Authorization
↓
Admin Reviews & Approves in Authorized Applications
↓
Scopes Assigned
↓
Access Token Issued
↓
Application Accesses Genesys Cloud APIs
Dependencies
| Component | Purpose |
|---|---|
| OAuth Clients | Authorized applications rely on OAuth client credentials for authentication |
| Scopes | Define granular API permissions — limit app access beyond just role-based permissions |
| Roles & Permissions | Determine what actions an application can perform inside Genesys Cloud |
| Genesys Cloud Platform API | The API endpoints that authorized applications access via OAuth tokens |
| Data Actions | Architect flows may call data actions that rely on authorized OAuth apps |
| Platform Usage (API Usage) | API activity from authorized apps appears in the API Usage report and view |
Usage Scenarios
| Scenario | Description |
|---|---|
| CRM Integration | Authorize a CRM system to sync customer data with Genesys Cloud |
| Analytics Platforms | Grant read access to retrieve interaction and performance data |
| Automation Systems | Authorize tools that execute automated workflows via the Platform API |
| Custom Applications | Internal or partner-built apps requiring scoped API access |
| AppFoundry Apps | Marketplace applications authorized through this view |
Best Practices
| Practice | Reason |
|---|---|
| Regularly review authorized apps | Ensure only trusted, active applications have access |
| Apply least-privilege scopes | Limit application permissions to only what is required |
| Revoke unused or retired applications | Reduce attack surface and security risk |
| Monitor API activity | Detect unusual usage from authorized apps via the API Usage report |
| Confirm scopes with app developers | Avoid granting unnecessary permissions during authorization |
| Document all authorized integrations | Maintain governance and auditability over external access |
Security Considerations
| Security Control | Description |
|---|---|
| Scope Control | Applications can only access permitted API scopes — not the full platform |
| Role Assignment | Assign minimal required roles to limit application reach |
| Revocation Capability | Ability to revoke application access instantly if a threat is detected |
| API Monitoring | Monitor API calls from authorized apps via Platform Usage |
| Credential Protection | OAuth Client ID and Secret must be protected by the application owner |
Limitations & Constraints
| Constraint | Description |
|---|---|
| OAuth Dependency | Applications must use OAuth to appear in Authorized Applications |
| Revocation is irreversible | Once revoked, the app cannot get a token — must be reauthorized from scratch |
| Scope-only editing | Edit Authorization modifies scopes only, not other application settings |
| Role count, not names | The Role column shows the number of roles, not which roles are assigned |
Troubleshooting
| Issue | Cause | Resolution |
|---|---|---|
| Application cannot access API | Missing or incorrect scope | Edit Authorization and add the required scope |
| Authorization fails at login | OAuth client misconfigured | Verify Client ID and Secret in Admin → Integrations → OAuth |
| Access denied on API call | Role permissions insufficient | Review and assign appropriate roles to the OAuth client |
| App shows as Revoked unexpectedly | Access was revoked by an admin | Reauthorize the application from scratch |
| Integration failure after change | Authorization revoked or scope removed | Reauthorize or restore the required scope via Edit Authorization |
Exam Cheat Sheet
| Question | Answer |
|---|---|
| What are Authorized Applications? | Applications granted OAuth permission to access Genesys Cloud APIs |
| What permission is required to manage them? | OAuth > Client > Authorize |
| Where are they managed? | Admin → Integrations → Authorized Applications |
| What are the three application states? | Approved, Pending, Revoked |
| What does Edit Authorization change? | Only the OAuth scopes assigned to the application |
| What does the Role column show? | The number of roles available — not the role names |
| What happens when you revoke an app? | It immediately loses the ability to get access tokens — cannot be undone |
| How do you restore a revoked app? | Fully reauthorize it from scratch |
| How is this different from Authorized Organizations? | Authorized Organizations grants user access across orgs; Authorized Applications grants application-level API access via scopes |
| What do scopes control? | The specific API permissions an app has — an additional layer beyond role-based permissions |
See Also
- OAuth Clients (
Admin → Integrations → OAuth) — where OAuth client credentials are created and managed - Authorize an OAuth Client — process for approving a new application
- About OAuth Scopes for Applications — full scope reference on the Genesys Developer Center
- Authorized Organizations — separate feature for granting user (not application) access across orgs
- Platform Usage → API Usage — monitor API activity from authorized applications
Single Sign-On (SSO)
| Section | Detail |
|---|---|
| Navigation | Admin → Integrations → Single Sign-On |
| Alt Navigation | Menu → IT and Integrations → Single Sign-On |
| Required Permission | Single Sign-On > Provider > Add, Delete, Edit, View |
| Also Requires | Admin role in your organization's identity provider account |
| Protocol | SAML 2.0 |
| Max SSO Integrations | Up to 30 per organization (same or mixed IdPs) |
| Module Context | Part of Integration Management / Platform Access Control |
✅ Verified against Genesys Cloud Resource Center — March 2026
Overview
Genesys Cloud SSO allows users to authenticate using existing corporate identity provider (IdP) credentials instead of separate Genesys usernames and passwords. Genesys Cloud acts as the Service Provider (SP) and delegates authentication to a trusted external Identity Provider (IdP) via the SAML 2.0 protocol.
Genesys Cloud uses a client integration strategy — rather than supporting fully open-ended custom SAML integrations, it provides pre-built integrations for common providers and a Generic SSO Provider option for any IdP that supports SAML 2.0.
💡 SSO vs. OAuth: SSO authenticates users into the platform. OAuth authenticates applications and integrations to access the Platform API. They serve different purposes and work alongside each other.
Key Concepts
| Topic | Explanation |
|---|---|
| Identity Provider (IdP) | External authentication service (e.g., Microsoft Entra ID / Azure AD, Okta, Google Workspace, OneLogin) |
| Service Provider (SP) | Genesys Cloud — receives and validates SAML assertions from the IdP |
| SAML 2.0 | Open standard protocol for exchanging authentication information between IdP and SP |
| SAML Assertion | Cryptographically signed XML message the IdP sends to Genesys Cloud confirming user identity |
| Metadata File | XML file provided by the IdP containing Issuer URI, SSO URL, SLO URL, and certificate info — importing it auto-populates Genesys Cloud config fields |
| SP-Initiated SSO | User starts at Genesys Cloud login page → redirected to IdP → authenticated → returned to Genesys Cloud |
| IdP-Initiated SSO | User logs into IdP portal → selects Genesys Cloud → lands directly in the platform |
| Clock Skew Limit | The time difference between Genesys Cloud and the IdP cannot exceed 10 seconds — larger skew causes authentication failures |
Supported Identity Providers
Genesys Cloud provides pre-built integrations for the most common SAML 2.0 providers including Microsoft Entra ID (Azure AD), Okta, Google Workspace, OneLogin, and others. A Generic SSO Provider option is also available for any IdP that supports SAML 2.0.
💡 If your IdP is not listed, use the Generic SSO Provider tab. You can also submit a request to Genesys to have your provider added.
Prerequisites
| Requirement | Detail |
|---|---|
| Genesys Cloud permission | Single Sign-On > Provider > Add, Delete, Edit, View |
| Identity provider admin access | Admin role in your organization's IdP account |
| Matching email address | User email must be the same in both the IdP account and Genesys Cloud |
| IdP metadata file | XML file from your IdP containing issuer URI, SSO URL, SLO URL, and certificate |
| Encoded public certificate | X.509 certificate from your IdP for SAML signature validation |
| Users pre-provisioned | Users must already exist in Genesys Cloud before authenticating via SSO |
SSO Page Overview
The Single Sign-On page lists all configured SSO integrations with the following details per integration:
| Column | Description |
|---|---|
| Name | Login display name for the SSO integration |
| Logo | Provider logo displayed on the login page |
| Identity Provider | Name of the IdP type configured |
| Certificate Expiration | Expiry date of the X.509 certificate — monitor to prevent auth failures |
| Actions | Click More (⋮) to edit or delete the integration |
Columns can be sorted by Name, Identity Provider, and Certificate Expiration. The page also provides buttons to Add an Identity Provider and Download Genesys Certificate.
⚠️ Only 6 SSO integrations display directly on the Genesys Cloud login page. If more than 6 are configured, the additional providers appear in a dropdown list on the login page.
Creating an SSO Integration
Step-by-Step
- Click Admin → Integrations → Single Sign-On
- Click Add an Identity Provider
- Enter a name for the integration
- Select Display Name On Login Page if you want the name visible on the login screen (not available if you have more than 6 providers)
- Select or type your Identity Provider Name from the list
- Upload a logo (SVG format only, max 25 KB) — or drag and drop the file
- In the Identity Provider Data section, click Select SAML metadata to import (or drag and drop the file) — this auto-populates all required fields
- Review and confirm the populated fields
- Click Save
After saving, Genesys Cloud generates its own SAML metadata for you to provide back to your IdP.
Identity Provider Configuration Fields
| Field | Description |
|---|---|
| Issuer URI | The IdP's unique Issuer ID (entityID) |
| Single Sign-On URI | The IdP's SSO URL where authentication requests are sent |
| Single Sign-On Binding | Sign-in binding specified by the IdP |
| Sign Authentication Requests | Optional — digitally signs outbound SAML requests for added security |
| Single Logout URI | The IdP's logout URL |
| Single Logout Binding | Logout binding specified by the IdP (default: HTTP Redirect) |
| Name Identifier Format | Format specified by the IdP (use Unspecified if unknown) |
| Certificate | X.509 certificate for SAML signature validation — supports up to 5 certificates per SSO config for continuity during rotation |
💡 Importing the IdP metadata file automatically populates all of the above fields.
Certificate Management
Each SSO integration supports up to 5 X.509 certificates. This allows certificate rotation without breaking authentication — if one certificate expires or becomes invalid, Genesys Cloud uses the next valid certificate automatically.
To download the Genesys Cloud certificate to send to your IdP, click Download Genesys Certificate on the SSO page.
SAML Assertion Decryption (November 2025)
Genesys Cloud supports SAML assertion decryption, adding an additional security layer for SSO. IdPs can encrypt SAML assertions using the Genesys Cloud public encryption certificate — Genesys Cloud then decrypts the assertion securely during authentication.
- No configuration required in Genesys Cloud to enable this
- Download the Genesys Encryption Certificate from either the main SSO page or the individual provider config page and send it to your IdP to configure encrypted assertions on their end
SAML Attributes
If the following attributes are present in the SAML assertion, Genesys Cloud acts on them. All attributes are case-sensitive.
| Attribute | Behaviour |
|---|---|
| AuthorizedClientIDs | Enumerates which OAuth client IDs the authenticated user is authorized to access. If the user attempts to access an unlisted client, they are redirected back to the IdP for re-verification. Useful for controlling access to specific apps (e.g., WebRTC Media Helper, Genesys Tempo) without using the more restrictive IP Allowlist feature. |
| OrganizationName | For IdP-initiated SSO: use the org short name. For SP-initiated SSO: must match the org name selected at login. Required when one IdP manages multiple Genesys Cloud orgs. |
| ServiceName | Optional. A valid URL to redirect to after successful authentication, or one of these keywords: directory (redirects to Genesys Cloud Collaborate) or directory-admin (redirects to the Admin UI). |
SSO Authentication Workflow
User Opens Genesys Cloud Login
↓
Selects SSO Provider (SP-Initiated)
— OR —
Logs into IdP Portal (IdP-Initiated)
↓
Redirected to Identity Provider
↓
User Authenticates with Corporate Credentials
↓
IdP Sends Signed SAML Assertion to Genesys Cloud
↓
Genesys Cloud Validates Assertion (certificate + clock skew check)
↓
User Session Created — Access Granted per Genesys Roles
Genesys Cloud Metadata Exchange
Pairing requires configuration on both sides:
| Direction | What to Exchange |
|---|---|
| IdP → Genesys Cloud | IdP provides SAML metadata XML (Issuer URI, SSO URL, SLO URL, certificate) |
| Genesys Cloud → IdP | After saving, download Genesys Cloud SAML metadata and send to your IdP for their configuration |
Limitations & Constraints
| Constraint | Detail |
|---|---|
| Protocol | Only SAML 2.0 supported for SSO |
| User pre-provisioning required | Users must exist in Genesys Cloud before SSO authentication |
| Clock skew | Max 10 seconds allowed between Genesys Cloud and IdP system clocks |
| Max integrations | Up to 30 SSO configurations per org |
| Login page display limit | Only 6 SSO providers shown directly on login page; additional providers appear in dropdown |
| Logo format | SVG only, max 25 KB |
| Certificates per config | Maximum of 5 X.509 certificates per SSO integration |
| Assertion encryption | Genesys Cloud does not support assertion encryption for outbound requests — channel is TLS-encrypted instead |
| Desktop app limitation | The Genesys Cloud desktop app does not support browser extensions. Azure Conditional Access policies requiring a browser extension will not work with the desktop app — use a supported browser instead |
| Dual-side configuration | SSO requires configuration both in Genesys Cloud and in the identity provider |
Best Practices
| Practice | Reason |
|---|---|
| Use a trusted, enterprise-grade IdP | Ensures reliable and secure authentication |
| Enforce MFA at the IdP level | Adds a second factor before SAML assertion is issued |
| Upload multiple certificates proactively | Prevents auth failures during certificate rotation |
| Monitor certificate expiration dates | Expired certificates silently break SSO logins |
| Test SSO in a non-production org first | Avoid login disruptions when rolling out |
| Keep IdP and SP clock times in sync | Clock skew > 10 seconds causes authentication failures |
| Document all SSO integrations | Maintain governance, especially when managing up to 30 configs |
Troubleshooting
| Issue | Cause | Resolution |
|---|---|---|
| SSO login failure | Incorrect SAML configuration | Re-import metadata file and verify all fields |
| Invalid assertion error | Certificate mismatch | Update or upload the correct certificate |
| User cannot authenticate | User not provisioned in Genesys Cloud | Create the user account before they attempt SSO login |
| Login redirect loop | Incorrect IdP SSO URL or binding | Verify SSO URI and binding type in config |
| Clock skew error | System time difference > 10 seconds | Sync clocks between Genesys Cloud and IdP |
| SSO not working in desktop app | Browser extension required by Azure policy | Use a supported browser with the extension installed |
| More than 6 providers not visible on login | Login page limit reached | Providers 7+ appear in a dropdown — expected behaviour |
Exam Cheat Sheet
| Question | Answer |
|---|---|
| What protocol does Genesys Cloud SSO use? | SAML 2.0 |
| What permission is required to configure SSO? | Single Sign-On > Provider > Add, Delete, Edit, View |
| Where is SSO configured? | Admin → Integrations → Single Sign-On |
| How many SSO integrations can one org have? | Up to 30 |
| How many providers appear directly on the login page? | 6 — additional providers appear in a dropdown |
| What does importing a SAML metadata file do? | Auto-populates all IdP config fields |
| What is the max number of certificates per SSO config? | 5 — allows rotation without breaking authentication |
| What is the clock skew limit? | 10 seconds between IdP and Genesys Cloud |
| What are the two authentication flows? | SP-Initiated (starts at Genesys login) and IdP-Initiated (starts at IdP portal) |
| Do users need to exist in Genesys Cloud for SSO? | Yes — users must be pre-provisioned before they can SSO in |
| What is SAML assertion decryption? | A feature (added Nov 2025) where IdPs encrypt assertions using Genesys's public encryption cert — no Genesys config required |
| What does the AuthorizedClientIDs SAML attribute do? | Controls which OAuth clients an SSO-authenticated user can access |
| What logo format is required for SSO providers? | SVG only, max 25 KB |
| Does the Genesys desktop app support SSO with browser extensions? | No — Azure Conditional Access policies requiring browser extensions won't work with the desktop app |
Chapter Placement
✅ SSO belongs in the same chapter as OAuth Clients, Authorized Applications, and Authorized Organizations — all fall under Integration Management / Platform Access Control within the Platform Operations chapter. They form a cohesive set of topics covering how users and applications authenticate and gain access to Genesys Cloud.
See Also
- OAuth Clients (
Admin → Integrations → OAuth) — application-level authentication, counterpart to user-level SSO - Authorized Applications — manage OAuth application scopes and revocation
- Authorized Organizations — grant user access across Genesys Cloud orgs (pairing)
- Generic SSO Provider — configure SSO for any SAML 2.0-compatible IdP not in the pre-built list
- Configure Genesys Cloud to Authenticate with SSO Only — optionally disable native Genesys login entirely
Audit Viewer
| Section | Description |
|---|---|
| Feature Area | Troubleshooting / IT and Integrations |
| Navigation | Admin → Troubleshooting → Audit Viewer |
| Alt Navigation | Menu → IT and Integrations → Audit Viewer |
| Primary Function | Monitor, filter, and review all admin configuration change events across the Genesys Cloud organization |
| Typical Use Cases | Compliance auditing, change management, security review, troubleshooting unexpected configuration changes |
The Audit Viewer enables administrators to filter and view events that Genesys Cloud generates based on service actions for administrative functions. It provides two modes: a full-page viewer with detailed filtering and a mini footer viewer accessible from any admin page.
Study Notes
| Topic | Explanation |
|---|---|
| Audit Viewer | Tool that logs and displays admin-level configuration events across the org |
| Full-Page Viewer | Main audit interface with complete filtering and event detail — opened from Admin or Menu |
| Mini Viewer (Footer) | Lightweight version available at the bottom of any admin page; less detail than full viewer |
| Event | A logged action triggered by a user or an upstream service/API |
| Entity | The object being acted upon (e.g., a queue, a flow, a user) |
| Property Changes | Detail view shows values before and after each change |
| Related Events | Upstream or downstream events linked to the selected event |
| RemoteIP | IP address of the user who triggered the event (visible in event details) |
| Real-time vs Async | The UI viewer shows real-time query results only; async queries require the API or Amazon EventBridge |
| Amazon EventBridge | Integration that allows orgs to consume all audit events — useful for backup or ingestion into external log tooling |
Permissions
| Action | Permission Required |
|---|---|
| View audit events | Audits > Audit > View |
| View interaction audit trail (separate) | Audits > Interaction Details > View |
The Admin role is also listed as a prerequisite for full use of the Audit Viewer.
Navigation
| Task | Path |
|---|---|
| Open full-page viewer | Admin → Troubleshooting → Audit Viewer |
| Alt full-page path | Menu → IT and Integrations → Audit Viewer |
| Open mini footer viewer | Bottom of any admin page under Menu → IT and Integrations → hover → click Show audits footer |
| Close mini footer viewer | Click Hide audits footer |
| Go from footer to full page | Click Link to full page audit viewer icon in the footer |
Viewer Modes
| Mode | Description | Detail Level |
|---|---|---|
| Full-Page Viewer | Main audit log interface with date range, service filter, entity filter, user filter, and event detail panel | Full |
| Mini Viewer (Footer) | Lightweight footer panel visible from any admin page | Limited |
Filtering Options (Full-Page Viewer)
| Filter | Description |
|---|---|
| Date Range | Select Start and End dates/times. Default: current day. Maximum interval: last 14 days |
| Filter by Service | Select Service Name → Entity Type → Action to narrow results |
| Filter by Entity | Enter an Entity ID to find all events affecting a specific object (e.g., a specific queue ID) |
| Filter by User | Enter a user name to see all events performed by that user |
| Refresh | Apply filters and reload results |
Important: The UI viewer only supports queries for the last 14 days. For events older than 14 days, use the Audit APIs available in the Genesys Cloud Developer Center.
Event Detail View
Clicking any event in the results opens the Details panel, which shows:
| Detail Field | Description |
|---|---|
| Who performed the action | User name, or API / upstream service if system-generated |
| Causing event link | If an upstream service triggered the event, a related link is available |
| RemoteIP | IP address of the user who triggered the event |
| Property Changes | Before and after values for each changed property |
| Related Events | Linked upstream or downstream events — click See related audits |
Data Retention & API Access
| Method | Scope | Notes |
|---|---|---|
| Audit Viewer UI | Last 14 days (real-time query) | Date interval cannot exceed 14 days |
| Audit APIs (Developer Center) | Beyond 14 days | Use asynchronous query endpoints |
| Amazon EventBridge | All available audit events | Useful for backup or ingestion into external SIEM/log tooling |
Interaction Audit Trail (Related but Separate Feature)
The Audit Viewer covers org-wide admin changes. There is a separate Audit Trail tab on individual interactions that tracks recording and evaluation-level access:
| Attribute | Detail |
|---|---|
| Navigation | Performance → Workspace → Interactions → click interaction → Audit Trail tab → Load All Audits |
| Alt Navigation | Menu → Analytics → Analytics Workspace → Interactions tab |
| Permission Required | Audits > Interaction Details > View |
| Roles | Quality Administrator, Quality Evaluator |
| Objects tracked | Evaluations, Annotations, Recordings, Calibrations, Screen Recordings, Surveys |
Compliance Use Cases
| Regulation | How Audit Viewer Helps |
|---|---|
| GDPR | Track who accessed or changed user/contact data configurations |
| HIPAA | Verify access controls and configuration change history |
| PCI-DSS | Audit routing, recording, and security configuration changes |
| Internal Change Management | Identify who changed a queue, flow, role, or schedule and when |
Best Practices
| Practice | Reason |
|---|---|
| Review audit logs regularly | Required by many compliance frameworks |
| Use Filter by Service to scope searches | Reduces noise when investigating a specific area |
| Use Filter by Entity for targeted investigations | Quickly find all changes to a specific object by its ID |
| Export or stream to external tooling via EventBridge | Retain events beyond the 14-day UI window |
Grant Audits > Audit > View only to appropriate roles |
Audit logs contain sensitive config change history |
Key Takeaways
| Topic | Summary |
|---|---|
| Navigation | Admin → Troubleshooting → Audit Viewer or Menu → IT and Integrations → Audit Viewer |
| Permission | Audits > Audit > View |
| Viewer modes | Full-page (detailed) and mini footer (lightweight) |
| Date limit | Last 14 days in UI; older data via Audit API |
| Event details | Who, what, before/after values, RemoteIP, related events |
| Filtering | By date range, service, entity ID, or user |
| Real-time only | UI shows real-time query results; async data via API or EventBridge |
| Interaction Audit Trail | Separate feature on individual interactions — different permission and navigation |
GDPR and Data Subject Requests
| Section | Description |
|---|---|
| Feature Area | Platform Operations / Compliance |
| Navigation | API-based (Developer Center) — no dedicated Admin UI page |
| Alt Navigation (Audit Viewer) | Admin → Troubleshooting → Audit Viewer (for change-event monitoring) |
| Primary Function | Enable organizations to respond to data subject requests for access, rectification, and deletion of personal data under GDPR, CCPA, and similar regulations |
| Genesys Role | Data Processor (under GDPR Article 28) — customers are the Data Controllers |
Study Notes
| Topic | Explanation |
|---|---|
| GDPR | General Data Protection Regulation — EU regulation protecting individuals' rights over their personal data |
| Data Subject | The individual whose personal data is being processed — your contact center's customer |
| Data Controller | The organization that determines how and why personal data is processed — your organization |
| Data Processor | The vendor that processes data on behalf of the controller — Genesys Cloud |
| DPA | Data Processing Agreement — a contract required under GDPR Article 28 between controller and processor; contact dataprivacy@genesys.com |
| GDPR API | Genesys Cloud's preferred self-service mechanism for customers to respond to data subject requests |
| Rate Limits | The GDPR API is rate-limited — it is designed for individual requests, not bulk deletion |
| CCPA | California Consumer Privacy Act — data subject rights are similar to GDPR; Genesys Cloud uses the same GDPR API to respond to CCPA requests |
| No enabling required | GDPR compliance does not require any Genesys Cloud configuration to be enabled — the GDPR API is available to all customers |
| No GDPR certification | No official GDPR certification exists for cloud providers; Genesys Cloud maintains compliance through independent reviews (HIPAA audits, etc.) |
The Three Fundamental Data Subject Rights (Relevant Articles)
| GDPR Article | Right | GDPR API Request Type |
|---|---|---|
| Article 15 | Right of Access | Export — retrieve all personal data Genesys Cloud holds for this subject |
| Article 16 | Right to Rectification | Update — correct/update personal data |
| Article 17 | Right to Erasure ("Right to be Forgotten") | Delete — remove or anonymize personal data |
When the request type is Delete, some services may anonymize personal data rather than fully delete it, depending on the service. Processing happens asynchronously — the request is created and initiated but may not complete immediately.
GDPR API — Two Endpoints
1. Subjects Endpoint
Used to identify which subjects match a given search term before submitting a request.
| Attribute | Detail |
|---|---|
| Purpose | Find which individuals a search term matches — reduces risk of accidental data changes |
| Accepted search term types | Name · Address · Phone number · Email address · Social media handle |
| Returns | List of matching subjects — each is a userId, externalContactId, or dialerContactId |
| Best practice | Always use subjects endpoint first before submitting a requests endpoint call |
2. Requests Endpoint
Used to initiate an actual GDPR request (Get, Export, Update, or Delete).
| Attribute | Detail |
|---|---|
| Accepted search term types | Name · Address · Phone · Email · Social media handle · User ID · External Contact ID · Dialer Contact ID |
| Request types | Get · Export (Article 15) · Update (Article 16) · Delete (Article 17) |
| Multiple identifiers | Submit one request per identifier — if a person has name + phone + email, submit three separate requests |
| ID resolution | If a User ID or External Contact ID is provided, Genesys resolves it to the full record first |
| Processing | Asynchronous |
Services That Require a Subject to Be Included
The following services require a subject (not just a search term) in the GDPR API request:
- Outbound Dialing
- Directory
- External Contacts
Social Media Search Fields
| Channel | Searchable Fields |
|---|---|
| Twitter / X | screenName (@ handle) · id (account ID) |
scopedId · handle (username) |
|
scopedId |
|
| Apple Messages for Business | opaqueId (Apple-generated per-account identifier) |
File Attachments in ACD Interactions
Genesys Cloud does not search the contents of file attachments for personal data. Instead:
- A GDPR request using an External ID will find the conversation and any associated file attachments
- On a Delete request, associated file attachments are removed regardless of content
- Requirement: ACD interactions containing personal data in file attachments must be associated with a contact profile in External Contacts — otherwise they cannot be found via the GDPR API
Merged Contacts (Single Customer View)
If your org uses the single customer view (contact merging):
| Step | Action |
|---|---|
| Subjects endpoint | May return multiple External Contact IDs for the same person (same merge set) |
| Identify merge sets | Use External Contacts API — fetch each contact and check canonicalContact field |
| Requests endpoint | Submit only one request per merge set using the canonical contact ID |
| Behavior | GDPR API automatically duplicates the request for each contact in the merge set |
| Related requests | Each related request succeeds or fails independently — inspect each individually |
What Personal Data Should NOT Be Stored in Genesys Cloud
To ensure the GDPR API can locate and manage personal data correctly, avoid storing personal data in these locations:
| Location | Why to Avoid |
|---|---|
| Architect flow names, descriptions, state names, task names, action names | GDPR API cannot search these |
| Prompt text-to-speech values | Not searchable |
| Directory personal status | Not searchable via GDPR API |
| Custom attributes (unless associated with an External Contact) | GDPR API cannot find data in custom variables unless linked to a contact |
Response Timeframes (Approximate)
| Request Type | Approximate Processing Time |
|---|---|
| Access / Export (Article 15) | 1–2 days |
| Removal / Delete (Article 17) | Up to 14 days |
These are approximate values. Actual times may vary.
Genesys Cloud's GDPR Governance Structure
| Role | Responsibility |
|---|---|
| Chief Privacy Officer | Oversees company-wide data privacy program |
| European Data Protection Officer (DPO) | Oversees compliance with European data protection law |
| VP Security & GRC | Security and regulatory compliance oversight |
| Security & Compliance team | Holds IAPP (International Association of Privacy Professionals) certification |
GDPR and Other Regulations
| Regulation | How Genesys Cloud Addresses It |
|---|---|
| GDPR (EU) | GDPR API; data processor role; DPA available; IAPP-trained staff |
| CCPA (California) | Same GDPR API handles CCPA data subject requests — no separate configuration needed |
| HIPAA | Independent third-party audits |
| PCI DSS | Secure call flows; recording controls; policy exclusions |
| HDS (France) | Genesys Cloud has undergone independent audit to achieve HDS certification |
| LGPD (Brazil) | Aligned with GDPR principles |
Best Practices
| Practice | Reason |
|---|---|
| Always use the subjects endpoint first | Identify exact individuals before submitting a modification or deletion request |
| Submit a request per identifier | If the person has a name, phone, and email — submit three separate requests |
| Associate ACD interactions with External Contact profiles | Required for GDPR API to locate file attachments |
| Do not store PII in flow names or prompt values | GDPR API cannot search these |
| Do not use GDPR API for bulk deletion | Rate limits will restrict bulk operations — use the API for individual requests only |
| Contact dataprivacy@genesys.com for DPA | Required under GDPR Article 28 for organizations subject to GDPR |
Key Takeaways
| Topic | Summary |
|---|---|
| Genesys role | Data Processor — you are the Data Controller |
| GDPR API | Preferred self-service solution for responding to data subject requests |
| Two endpoints | Subjects (identify who) → Requests (initiate the action) |
| Request types | Export (Article 15) · Update (Article 16) · Delete (Article 17) |
| Delete behavior | Some services anonymize rather than fully delete |
| Processing | Asynchronous |
| Rate limits | Designed for individual requests only — not bulk operations |
| No UI | GDPR API is developer/API-based — no Admin UI page |
| CCPA | Same GDPR API handles CCPA requests |
| Timeframes | Access: 1–2 days; Removal: up to 14 days |
7. - Telephony & Infrastructure
Certificate Authorities
What Are Certificate Authorities?
⚠️ This page applies primarily to BYOC Premises deployments. For BYOC Cloud TLS trunk configuration, refer to the BYOC Cloud TLS trunk transport documentation instead.
Certificate Types
| Type | Who Manages It | Purpose | Editable? |
|---|---|---|---|
| Managed | Genesys | Creates trusted TLS connections for the Edge and managed phones; allows remote SIP devices to trust secure connections to external trunks connected to the Edge | No — cannot be added, edited, or deleted |
| Remote | Customer (you) | Imported CA that allows the Edge to trust a remote TLS endpoint such as an SBC or PBX | Yes — can be added, edited, and deleted |
ℹ️ There is only one managed certificate per organization. Genesys maintains it automatically.
Navigation
| Task | Path |
|---|---|
| Open Certificate Authorities | Admin → Telephony → Certificate Authorities |
| Add remote certificate authority | Certificate Authorities → Add |
| Edit remote certificate authority | Certificate Authorities → select entry → Edit |
| Delete remote certificate authority | Certificate Authorities → select entry → Delete |
Required permission: Telephony > Plugin > All
Adding a Remote Certificate Authority
| Step | Action |
|---|---|
| Step 1 | Navigate to Admin → Telephony → Certificate Authorities |
| Step 2 | Click Add |
| Step 3 | Choose import method: Upload from computer or Paste text from a file |
| Step 4 | Upload the .crt file or paste the certificate text |
| Step 5 | In Select Service for Use, choose the appropriate telephony service(s) |
| Step 6 | Click Save Certificate Authority |
| Step 7 | Test the secure TLS connection to the remote endpoint |
UI Fields
| Field | Description |
|---|---|
| Type column | Identifies whether the CA is Managed or Remote |
| Common Name | Certificate authority common name |
| Add Certificate Authority | Import method selector — Upload from computer or Paste text from a file |
| Browse | Opens file browser to locate the .crt file |
| Enter Your Certificate Authority | Text box for pasted certificate contents |
| Select Service for Use | Associates the CA with one or more telephony services |
| Save Certificate Authority | Saves the new or edited remote CA |
Key Rules
| Rule | Detail |
|---|---|
| Managed CAs are read-only | Cannot be added, edited, or deleted |
| Remote CAs are fully manageable | Add, edit service associations, or delete as needed |
| Supported import formats | .crt file upload or pasted certificate text |
| BYOC Premises scope | This feature area is for BYOC Premises; BYOC Cloud has its own TLS trunk documentation |
When to Use a Remote Certificate Authority
| Situation | Action |
|---|---|
| BYOC Premises Edge must trust a remote SBC or PBX TLS endpoint | Import remote CA |
| Remote carrier presents a certificate signed by an internal/private CA | Import remote CA |
| Managed phones require trusted TLS | Use the Genesys-managed CA — no action needed |
| BYOC Cloud TLS trunk setup | Do NOT use this page — use BYOC Cloud TLS trunk transport documentation |
Troubleshooting
| Issue | Cause | Resolution |
|---|---|---|
| Remote TLS endpoint not trusted | Required remote CA not imported | Import the correct CA and assign service usage |
| Cannot edit certificate authority | Selected CA is of type Managed | Managed CAs are read-only — only Remote CAs can be edited |
| Service still fails after import | Wrong certificate or wrong service association | Recheck the certificate chain and selected service(s) |
| Admin cannot access CA management | Missing permission | Grant Telephony > Plugin > All |
| Used wrong workflow for BYOC Cloud | This page is for BYOC Premises | Use the BYOC Cloud TLS trunk transport documentation instead |
Quick Reference
| Question | Answer |
|---|---|
| What two certificate types exist? | Managed and Remote |
| Who manages the Managed CA? | Genesys |
| What is a Remote CA used for? | Allows the Edge to trust a remote TLS endpoint |
| How can a remote CA be imported? | Upload from computer or paste text from a file |
| Can Managed CAs be edited? | No |
| Does this apply to BYOC Cloud? | No — BYOC Cloud has its own TLS trunk documentation |
See Also
- Trunks — configure SIP connectivity; TLS transport is selected per trunk
- Edges & Edge Groups — BYOC Premises media appliances that rely on CA trust
- Sites — telephony routing configuration
Screenshots

Create New
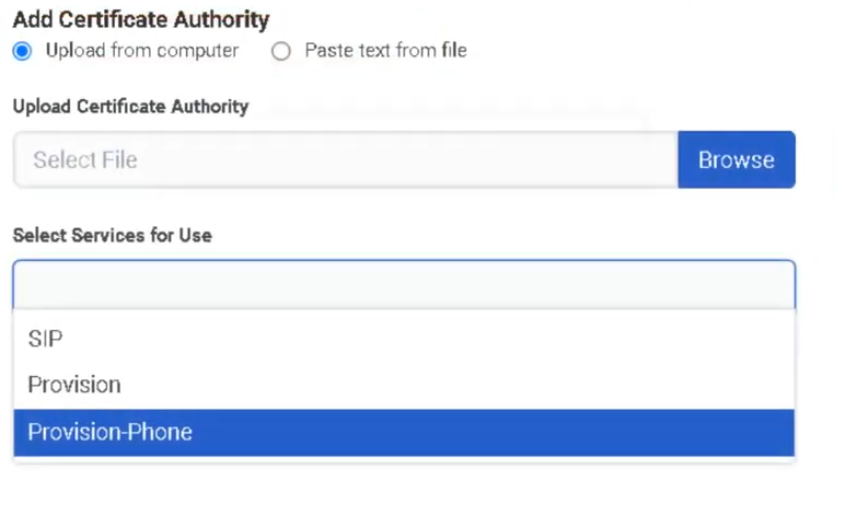
DID & Toll-Free Numbers
What Are DID and Toll-Free Numbers?
DID (Direct Inward Dial) and toll-free numbers are the inbound phone numbers your organization uses. They must be added to Genesys Cloud as inventory before they can be assigned to a person, phone, or call flow.
| Number Type | Description |
|---|---|
| DID | Geographic number with a local area code; used for direct user or department dialing |
| Toll-Free | Non-geographic number (800, 833, 844, 855, 866, 877, 888); typically used for public-facing inbound access |
Both DID and toll-free numbers are managed in the same workflow under Admin → Telephony → DID Numbers.
Two Main Areas
| Tab | Purpose |
|---|---|
| DID Ranges | Add and manage blocks of DID or toll-free numbers |
| DID Assignments | Assign individual numbers to a person, phone, or call flow; view and manage current assignments |
Navigation
| Task | Path |
|---|---|
| Open DID Numbers | Admin → Telephony → DID Numbers |
| Open DID Ranges | DID Numbers → DID Ranges tab |
| Create a range | DID Ranges → Create Range |
| Open DID Assignments | DID Numbers → DID Assignments tab |
| Assign a number | DID Assignments → select number → Assign |
| Unassign a number | DID Assignments → select assigned number → Unassign |
Step 1: Create a DID or Toll-Free Range
Numbers must be added as a range before they can be assigned.
| Step | Action |
|---|---|
| Step 1 | Navigate to Admin → Telephony → DID Numbers |
| Step 2 | Open the DID Ranges tab |
| Step 3 | Click Create Range |
| Step 4 | In DID Start, select the country and enter the first number |
| Step 5 | In DID End, select the same country and enter the last number |
| Step 6 | Enter the Service Provider (carrier/provider name) |
| Step 7 | Save the range |
Range Creation Fields
| Field | Description |
|---|---|
| DID Start | First number in the range — country selector + number |
| DID End | Last number in the range — same country as Start |
| Service Provider | Carrier or provider name associated with this block |
ℹ️ For a single number, enter the same value in both Start and End.
Step 2: Assign a Number
Once numbers are in inventory, assign them from the DID Assignments tab.
| Step | Action |
|---|---|
| Step 1 | Open the DID Assignments tab |
| Step 2 | Locate the desired number (search or filter by assignment status) |
| Step 3 | Select the number |
| Step 4 | Choose the assignment target type |
| Step 5 | Select the specific Person, Phone, or Call Flow |
| Step 6 | Save the assignment |
| Step 7 | Test inbound routing |
Assignment Target Types
| Target | Use Case |
|---|---|
| Person | Assign a direct number to a specific user |
| Phone | Assign a number to a specific device |
| Call Flow | Assign a number to an inbound Architect flow (IVR / queue entry point) |
Common Assignment Scenarios
| Scenario | Target |
|---|---|
| Employee direct inward dial | Person |
| Main inbound IVR number | Call Flow |
| Shared lobby or reception device | Phone |
| Public-facing toll-free number | Call Flow |
| Branded toll-free for a department | Call Flow |
Unassigning a Number
Select the assigned number in DID Assignments and choose Unassign. The number returns to available inventory and can be reassigned.
Troubleshooting
| Issue | Cause | Resolution |
|---|---|---|
| Number not visible | Range not created or not imported | Recheck DID Ranges and provider data |
| Number cannot be assigned | Already assigned or not in available inventory | Filter by assignment status; unassign first if needed |
| Calls do not reach destination | Wrong assignment target or downstream routing issue | Verify the assignment target and its call flow/phone/user setup |
| Wrong user or flow receives calls | Incorrect assignment | Unassign and reassign correctly |
| Toll-free not available | Number not yet purchased, ported, or activated | Confirm procurement or porting status with carrier |
Quick Reference
| Question | Answer |
|---|---|
| Where do you manage DID and toll-free numbers? | Admin → Telephony → DID Numbers |
| What are the two main tabs? | DID Ranges and DID Assignments |
| What can a number be assigned to? | A person, a phone, or a call flow |
| What fields are needed to create a range? | DID Start, DID End, and Service Provider |
| Can toll-free numbers be managed here too? | Yes — same workflow |
| What must happen before a number can be assigned? | It must exist in a DID Range |
Naming Convention
| Resource | Example |
|---|---|
| DID Range (provider) | CarrierA_US_DID_Block_01 |
| Toll-Free main entry | US_TF_Main_Inbound |
See Also
- Call Routing & Message Routing — DID numbers are associated with inbound call routes
- Architect Overview — call flows are the assignment target for main inbound numbers
- Extensions — separate from DIDs; extensions are internal-only dialing numbers
- Architectural Build Order — DID numbers are configured in Phase 2
Screenshots
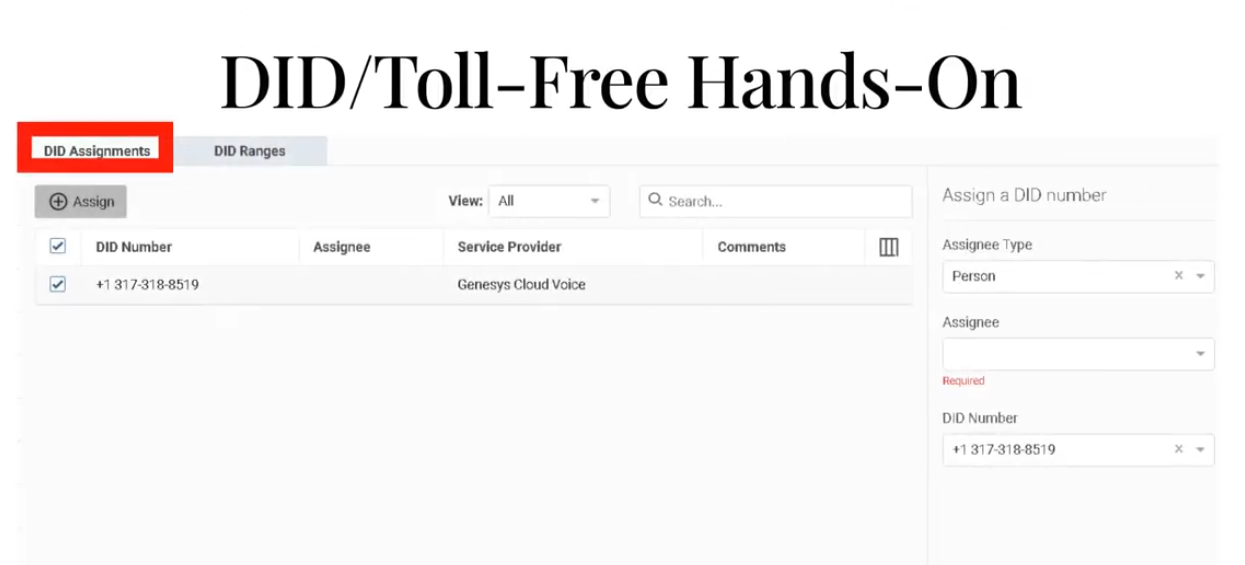
To unassign
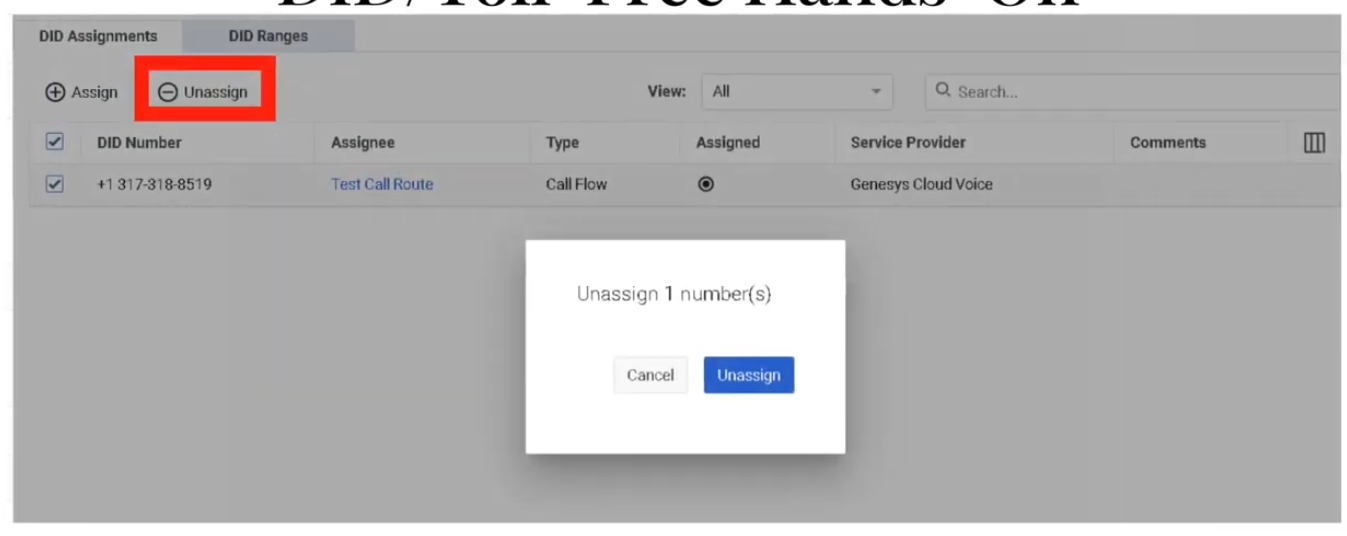
DID Ranges
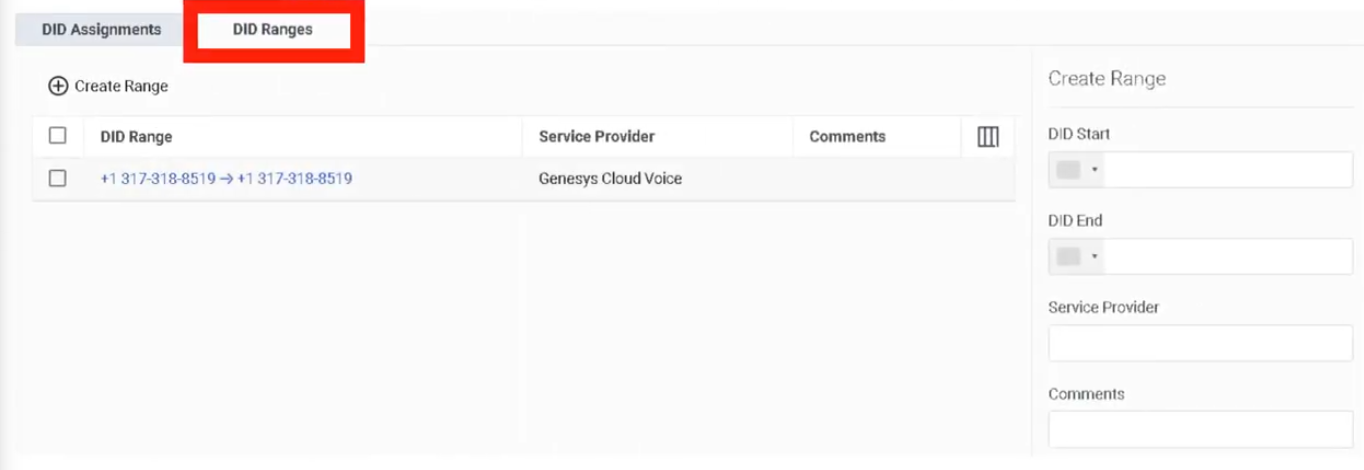
Edges & Edge Groups
What Are Edges?
An Edge is a BYOC Premises network appliance that handles local media and provides telephony services including media server, SIP registrar, and SIP proxy functions. Edges are the core infrastructure component of BYOC Premises deployments.
ℹ️ Edges and Edge Groups are a BYOC Premises concept. They do not apply to BYOC Cloud or Genesys Cloud Voice deployments.
What Are Edge Groups?
An Edge Group is a set of BYOC Premises Edges directly connected over a high-bandwidth, low-latency network (LAN or WAN). Edges in the same group can share trunks and related telephony resources with each other.
| Resource Types That Can Be Shared | Examples |
|---|---|
| Phone trunks | SIP phone trunks |
| Communication provider trunks | Carrier SIP trunks |
| External gateways | SBC/gateway resources |
| SIP carriers and VoIP gateways | Shared across grouped Edges |
⚠️ Different Edge Groups do not share resources with each other. Only group Edges that are on a suitably low-latency, high-bandwidth link.
Navigation
| Task | Path |
|---|---|
| Open Edges | Admin → Telephony → Edges |
| Provision new Edge | Edges → Provision New Edge |
| View Edge details | Edges → select Edge → information panel |
| Open Edge Groups | Admin → Telephony → Edge Groups |
| Create Edge Group | Edge Groups → Create |
Provisioning an Edge
| Step | Action |
|---|---|
| Step 1 | Navigate to Admin → Telephony → Edges |
| Step 2 | Click Provision New Edge |
| Step 3 | Enter Edge Name |
| Step 4 | Select the hardware solution type (e.g. BYOC Premises – Customer Hardware Solution) |
| Step 5 | Enter Serial Number and confirm it |
| Step 6 | Click Provision Edge |
| Step 7 | Configure the Edge's network interface(s) |
| Step 8 | Associate with the correct Site and Edge Group |
Edge Provisioning Fields
| Field | Description |
|---|---|
| Edge Name | Identifier for the Edge |
| Hardware Solution Type | Selects the Edge model/solution (e.g. Customer Hardware Solution) |
| Serial Number | Physical hardware serial number |
| Confirm Serial Number | Confirmation field to prevent entry errors |
Edge Information Panel
After provisioning, the Edge information panel shows:
| Field | Description |
|---|---|
| Connectivity status | Cloud connectivity and operational state |
| Trunk status | Associated trunk state |
| Software version | Installed/staged version |
| Hardware model | Edge hardware model |
| Serial number | Hardware serial number |
| Pairing ID | Used during provisioning |
| Metrics | Call capacity and CPS visibility |
Creating an Edge Group
| Step | Action |
|---|---|
| Step 1 | Navigate to Admin → Telephony → Edge Groups |
| Step 2 | Click Create |
| Step 3 | Enter the Edge Group Name |
| Step 4 | Add one or more Edges to the group |
| Step 5 | Associate trunk(s) as needed |
| Step 6 | Save |
ℹ️ Plan sites and trunks before creating Edge Groups. Genesys recommends determining required trunks and sites first.
Redundancy
Genesys recommends N+1 redundancy for BYOC Premises Edges. Managed phones register with both a primary and secondary Edge. If the primary Edge becomes unavailable, phones switch to the secondary — though UI lag of up to 15 seconds may occur during the transition.
For proper load distribution, keep Edge call capacities similar within the same design.
Edge Security
| Security Feature | Description |
|---|---|
| Mutual TLS | Edge control communications use mTLS/HTTPS to Genesys Cloud |
| Outbound-only connections | Edges initiate connections outbound — no need to expose the Edge directly on the internet |
| CA trust | Related to Certificate Authorities configuration for remote TLS endpoints |
Key Design Rules
| Rule | Detail |
|---|---|
| Network requirement | Edge Groups require high-bandwidth, low-latency LAN or WAN between grouped Edges |
| Cross-group isolation | Different Edge Groups do not share resources |
| Build order | Create sites and plan trunks before grouping Edges |
| Capacity | Keep Edge capacities similar for predictable load distribution and failover |
Troubleshooting
| Issue | Cause | Resolution |
|---|---|---|
| Edge offline / unavailable | Network, pairing, software, or service issue | Check Edge information panel, connectivity, software version, and network path |
| Trunks not shared across Edges | Edges not in same Edge Group or network latency too high | Verify Edge Group membership and low-latency connectivity |
| Phones fail over unexpectedly | Primary Edge unavailable | Validate primary/secondary Edge design and registration behavior |
| Calls fail after update | Edge software change or maintenance timing issue | Review staged/installed version; schedule updates with call draining |
| Edge not provisioning | Incorrect hardware type or serial entry | Verify hardware type and serial number before reprovisioning |
Quick Reference
| Question | Answer |
|---|---|
| What is an Edge? | A BYOC Premises media appliance — media server, SIP registrar, and SIP proxy |
| What is an Edge Group? | A set of BYOC Premises Edges on a high-bandwidth, low-latency network that share trunks and resources |
| What fields are used to provision an Edge? | Name and serial number |
| Why use Edge Groups? | To share trunks/resources and support local routing and resiliency |
| What redundancy model does Genesys recommend? | N+1 |
| Do different Edge Groups share resources? | No |
Naming Convention
| Resource | Example |
|---|---|
| Edge | MTY_Edge_01 |
| Edge | MTY_Edge_02 |
| Edge Group | MTY_Core_Group |
| Customer Hardware Edge | MTY_CHS_Edge_01 |
Pattern: <Location>_<ObjectType>_<Sequence>
See Also
- Sites — Edges are assigned within site-based telephony design
- Trunks — External SIP trunks attach to Edges and are shared through Edge Groups
- Certificate Authorities — required for TLS trust between Edge and remote endpoints
- Topology — visualize Edge status and phone-to-edge assignments
- Architectural Build Order — Edges are built in Phase 2
Screenshots

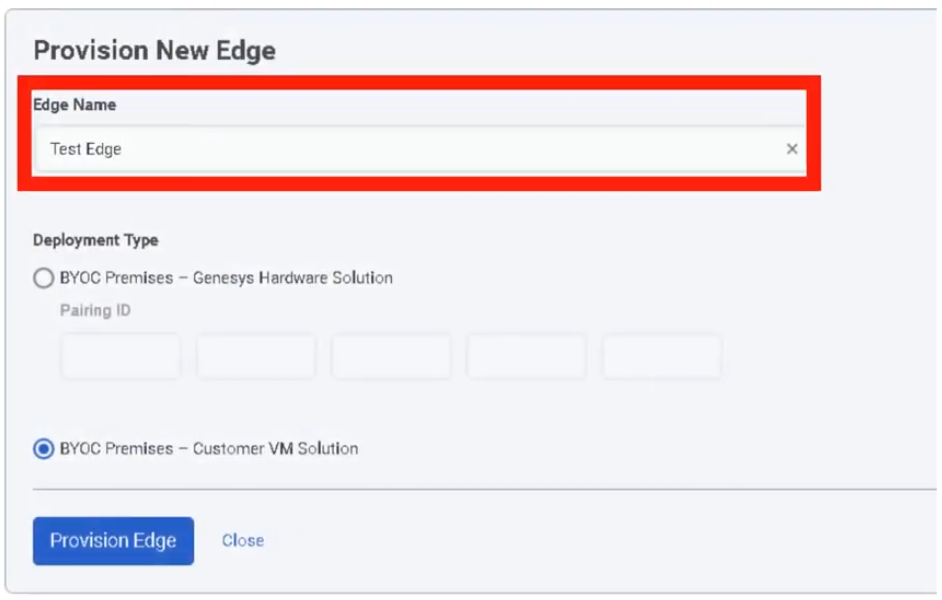
Extensions
What Are Extensions?
Extensions are internal dialing numbers that allow users to reach each other within the organization without using a full DID number. Before an extension can be assigned to a user, it must first exist in an Extension Pool.
Two Main Areas
| Tab | Purpose |
|---|---|
| Extension Pools | Create and manage the inventory of available extension numbers |
| Assignments | Search and review how extensions are currently assigned to users |
The Pool-First Model
Create Extension Pool
↓
Assign Pool to a Division
↓
Extensions become available for assignment
↓
Assign extension to user via Contact Information
⚠️ You cannot assign an extension to a user until it exists in an Extension Pool.
Navigation
| Task | Path |
|---|---|
| Open Extensions | Admin → Telephony → Extensions |
| Open Extension Pools | Extensions → Extension Pools tab |
| Open Assignments | Extensions → Assignments tab |
| Add extension(s) | Extension Pools → Add |
| Assign to user | Admin → People and Permissions → People → [User] → Contact Information |
Required permissions:
Telephony > Plugin > AllTelephony > Extensions > Add, Edit, View, and Delete
Step 1: Create an Extension Pool
| Step | Action |
|---|---|
| Step 1 | Navigate to Admin → Telephony → Extensions |
| Step 2 | Open the Extension Pools tab |
| Step 3 | Click Add |
| Step 4 | Enter Extension Start (single number, or first in a range) |
| Step 5 | Enter Extension End — leave blank for a single extension, or fill for a range |
| Step 6 | Select the Division |
| Step 7 | Click Create |
Extension Pool Fields
| Field | Description |
|---|---|
| Extension Start | Single extension number, or first number in a range |
| Extension End | Last number in a range; leave blank for a single extension |
| Division | Access-control boundary for this pool |
Step 2: Assign Extension to a User
Extensions are assigned through the user's profile, not from the Extensions page directly.
| Step | Action |
|---|---|
| Step 1 | Navigate to Admin → People and Permissions → People |
| Step 2 | Search for the user and open Edit Person |
| Step 3 | Open the Person Details tab |
| Step 4 | Click View Edit Mode |
| Step 5 | In Contact Information, click Edit |
| Step 6 | Under Phone, enter the extension in the ext. field of an empty Work Phone entry |
| Step 7 | Click Save |
| Step 8 | Return to Extensions → Assignments to confirm the extension appears |
⚠️ Critical: Enter the extension only in a Work Phone entry that does not already have a phone number. Adding an extension to an entry that already contains a number prevents Genesys Cloud from generating a dial plan for the user, and the extension will not appear in the Assignments page.
Key Rules
| Rule | Detail |
|---|---|
| Pool first | Extension must exist in a pool before it can be assigned |
| Unique extensions | Duplicate extension numbers are not allowed |
| Empty Work Phone entry | Extension must be entered in an empty Work Phone slot, not alongside an existing number |
| DID and extension are separate | If a user has both, they must be separate phone entries |
| Range deletion | If an extension was added as part of a range, the entire range may need to be deleted — you cannot delete a single number from within a range |
| Assigned range deletion | Cannot delete an extension pool while any extension in its range is assigned to a user |
| Propagation delay | After assigning an extension, it can take up to 60 minutes before it is accessible in a Dial By Extension action |
Assignments View
The Assignments tab lets you:
- Search by extension number
- View which user each extension is assigned to
- Open the user's profile directly from search results
- Customize visible columns and row density
Troubleshooting
| Issue | Cause | Resolution |
|---|---|---|
| Extension not assignable | Not added to an Extension Pool | Add it to Extension Pools first |
| Duplicate extension error | Same number already exists | Use a unique extension |
| Extension not visible in Assignments | Entered in a Work Phone entry that already had a number | Remove and re-enter in an empty Work Phone entry |
| Cannot delete extension | Belongs to a range or is currently assigned | Remove the user assignment first, or delete the entire range |
| User not receiving calls by extension | Profile or dial-plan issue | Verify pool membership, user profile entry, and permissions |
| Dial By Extension not working immediately | Propagation delay | Wait up to 60 minutes and retest |
Quick Reference
| Question | Answer |
|---|---|
| Where do you manage extensions? | Admin → Telephony → Extensions |
| What are the two main areas? | Extension Pools and Assignments |
| What must happen before assigning an extension? | It must be added to an Extension Pool |
| Can duplicate extensions exist? | No |
| Where is the extension assigned to a user? | In the user's Contact Information, in the ext. field |
| Can you delete one number from a range? | Not if it was originally entered as part of a range |
| How long can Dial By Extension take to recognize a new extension? | Up to 60 minutes |
Naming Convention
| Resource | Example |
|---|---|
| Extension Pool | Support_Ext_Pool_4100_4199 |
| Extension Pool | Sales_Ext_Pool_4200_4299 |
Pattern: <Division>_Ext_Pool_<Start>_<End>
See Also
- DID & Toll-Free Numbers — external numbers; different from internal extensions
- User Profile Management — Contact Information is where extensions are assigned to users
- Divisions & Access Control — divisions are required when creating extension pools
- Architectural Build Order — extensions are assigned during Phase 3 (People)
Screenshots
Sites
What Is a Site?
A site is the home of a set of phones. It defines the telephony dialing properties, call classification rules, and outbound routing rules for the phones assigned to it. Every phone in Genesys Cloud belongs to a site, and the site determines where calls go and how numbers are interpreted.
Sites are used across all telephony deployment models: BYOC Cloud, Genesys Cloud Voice, and BYOC Premises.
⚠️ The Media Model (Cloud or Premises) cannot be changed after site creation. Choose carefully.
Site Tabs
| Tab | Purpose |
|---|---|
| General | Description, default site toggle, media regions, Relay/TURN behavior, outbound caller ID |
| Number Plans | Classify and normalize dialed numbers; default plans provided; max 200 per site |
| Outbound Routes | Route calls to external trunks; Sequential or Random distribution |
| Simulate Call | Validate routing configuration without placing an actual call |
Navigation
| Task | Path |
|---|---|
| Open sites | Admin → Telephony → Sites |
| Create site | Sites → Create New |
| Configure General settings | Sites → [Site] → General |
| Add number plans | Sites → [Site] → Number Plans |
| Create outbound route | Sites → [Site] → Outbound Routes |
| Run call simulator | Sites → [Site] → Simulate Call |
Creating a Site — Field Reference
Create Form
| Field | Description | Notes |
|---|---|---|
| Site Name | Unique name for the site | Required |
| Location | Location assigned to the site | Only locations marked as available for sites appear; required |
| Time Zone | Time zone for the site | Required |
| Media Model | Cloud or Premises | Cannot be changed after creation |
General Tab
| Field | Description | Notes |
|---|---|---|
| Description | Free-text description | Optional |
| Make this Site my default Site | Sets org-wide default | Only one default site allowed |
| Media Regions | Select media regions for WebRTC / Global Media Fabric | Relevant for WebRTC deployments |
| Relay/TURN Behavior | Controls TURN relay region selection for WebRTC calls | Two options: Any media region set on this site / Lowest latency via Geo-Lookup |
| Caller Address | Outbound caller number | Must be in E.164 format |
| Caller Name | Outbound caller name | Text |
Number Plans Tab
Genesys provides default number plans. Custom plans can be added to control what users can dial and how numbers are normalized before route selection. Maximum of 200 number plans per site.
Outbound Routes Tab
| Field | Description |
|---|---|
| Route Name | Name for the outbound route |
| Classification | Number plan classification this route handles |
| External Trunk(s) | One or more trunks the route uses |
| Distribution | Sequential (ordered failover) or Random (load distribution) |
| State | Enable/disable the route |
Simulate Call Tab
Enter a destination number or SIP address and click Simulate. The tool validates:
- Number normalization
- Number plan classification
- Outbound route selection
- Trunk settings
- In-service Edges (BYOC Premises)
- Destination site
ℹ️ Simulate Call validates configuration but does not place an actual call.
Media Model Selection
| Deployment | Media Model |
|---|---|
| BYOC Cloud | Cloud |
| Genesys Cloud Voice | Cloud |
| BYOC Premises | Premises |
Step-by-Step: Create a Site
| Step | Action |
|---|---|
| Step 1 | Navigate to Admin → Telephony → Sites |
| Step 2 | Click Create New |
| Step 3 | Enter Site Name, select Location, Time Zone, and Media Model |
| Step 4 | Click Create Site |
| Step 5 | On General, add description and optionally set as default site |
| Step 6 | Configure Caller Address (E.164) and Caller Name |
| Step 7 | Configure Media Regions and Relay/TURN Behavior if using WebRTC |
| Step 8 | Add number plans on Number Plans tab |
| Step 9 | Create one or more outbound routes on Outbound Routes tab |
| Step 10 | Run Simulate Call to validate routing before going live |
Key Constraints
| Constraint | Detail |
|---|---|
| Media Model | Cannot be changed after creation |
| Location availability | Only locations marked available for sites appear in the selector |
| Default site | Only one site can be the default |
| Number plans per site | Maximum 200 |
| Caller Address format | Must be E.164 (e.g. +528181234567) |
Troubleshooting
| Issue | Cause | Resolution |
|---|---|---|
| Location not visible in selector | Location not marked as available for sites | Update the location setting |
| Caller ID not displaying correctly | Caller Address not in E.164 or overridden by Prioritized Caller Selection | Recheck format and caller selection config |
| Calls not routing | Number plan or outbound route mismatch | Use Simulate Call to trace normalization, classification, and route selection |
| No route selected | Route disabled or no matching classification | Verify route state, classification, and selected trunks |
| Simulator shows failure | Site, trunk, Edge, or destination settings incomplete | Review each simulator output field in order |
Quick Reference
| Question | Answer |
|---|---|
| What is a Site? | The home of a set of phones; defines classification, routing, and dialing rules |
| What are the four tabs? | General, Number Plans, Outbound Routes, Simulate Call |
| What media models exist? | Cloud and Premises |
| Can you change the media model later? | No |
| What does Simulate Call do? | Validates routing config without placing a real call |
| What distribution patterns exist for outbound routes? | Sequential and Random |
| What format must Caller Address use? | E.164 |
Naming Convention
| Resource | Example |
|---|---|
| Cloud site | MTY_Main_Cloud |
| Premises site | MTY_Branch_Prem |
| Outbound route | PSTN_Main |
| Number plan | MX_National_Dialing |
Pattern: <Location>_<Purpose>_<MediaModel>
See Also
- Trunks — create trunks before configuring outbound routes
- Locations & Floor Plans — locations must exist before creating sites
- Edges & Edge Groups — BYOC Premises sites use Edge assignments
- WebRTC Phone Management — Media Regions and Relay/TURN Behavior are configured here
- Architectural Build Order — Sites are built in Phase 2
Screenshots
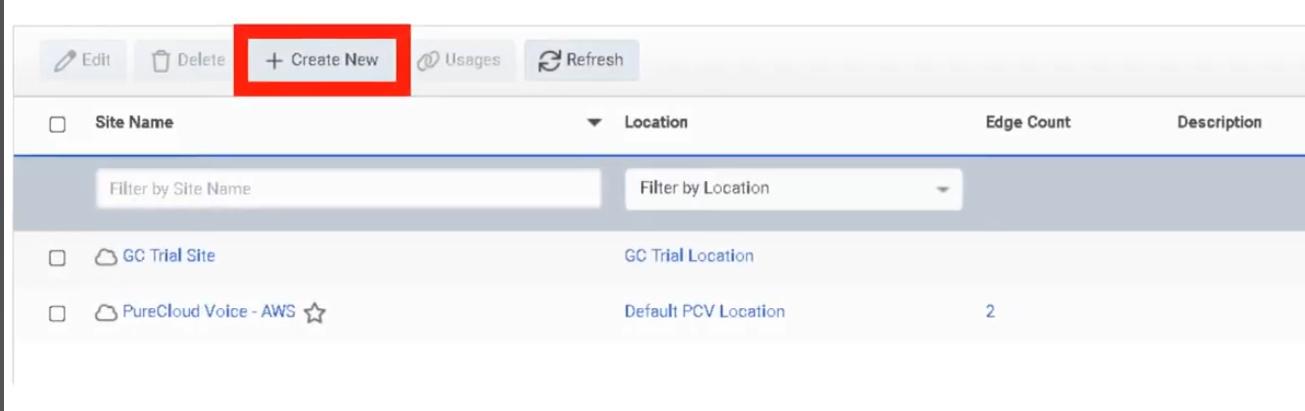
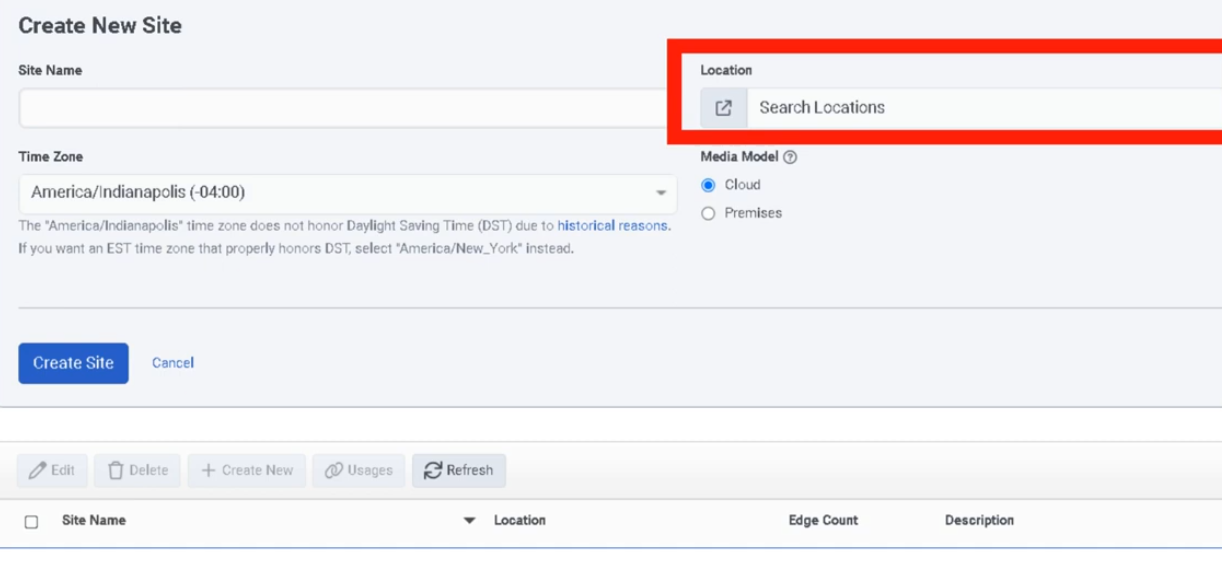
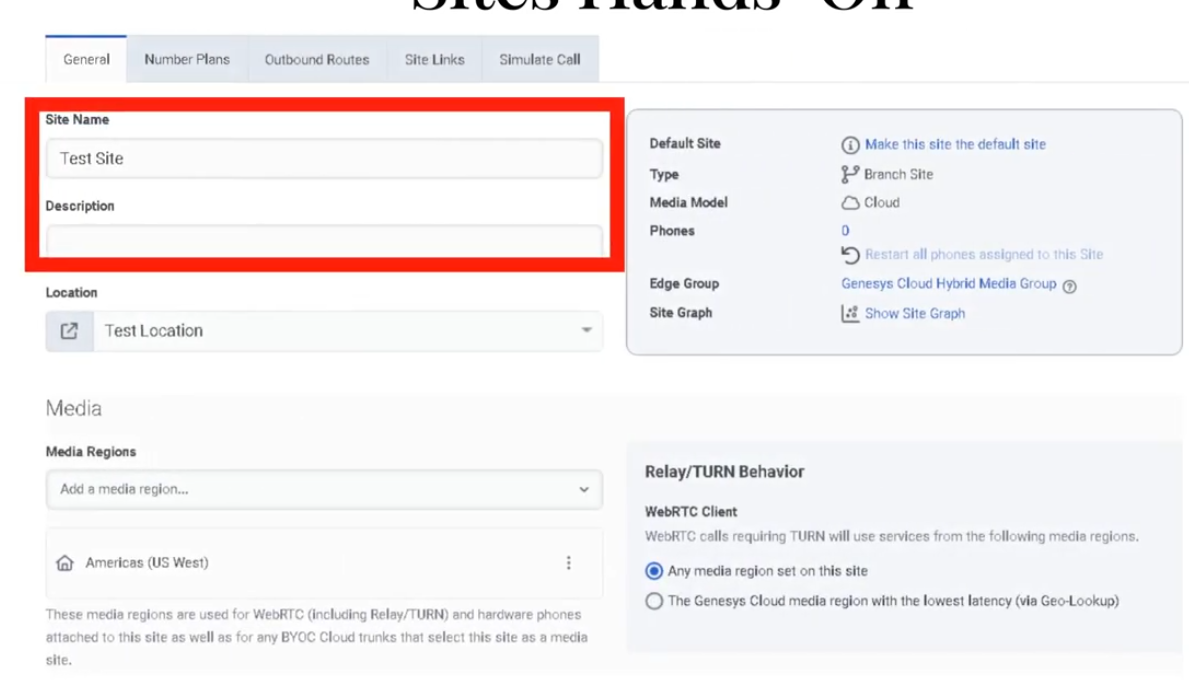
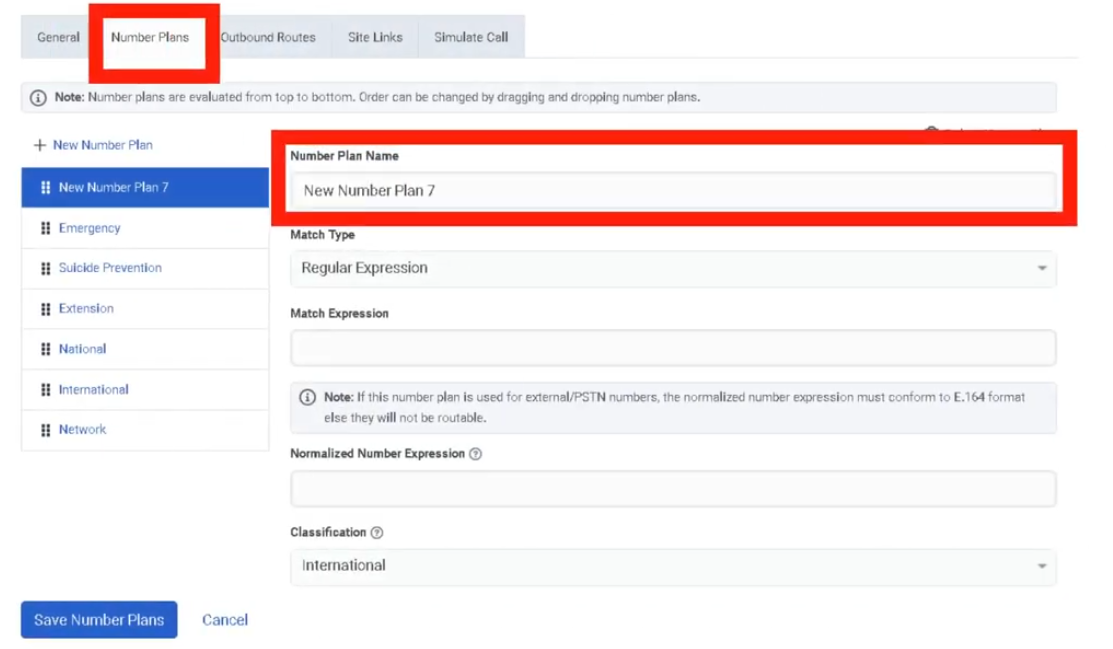
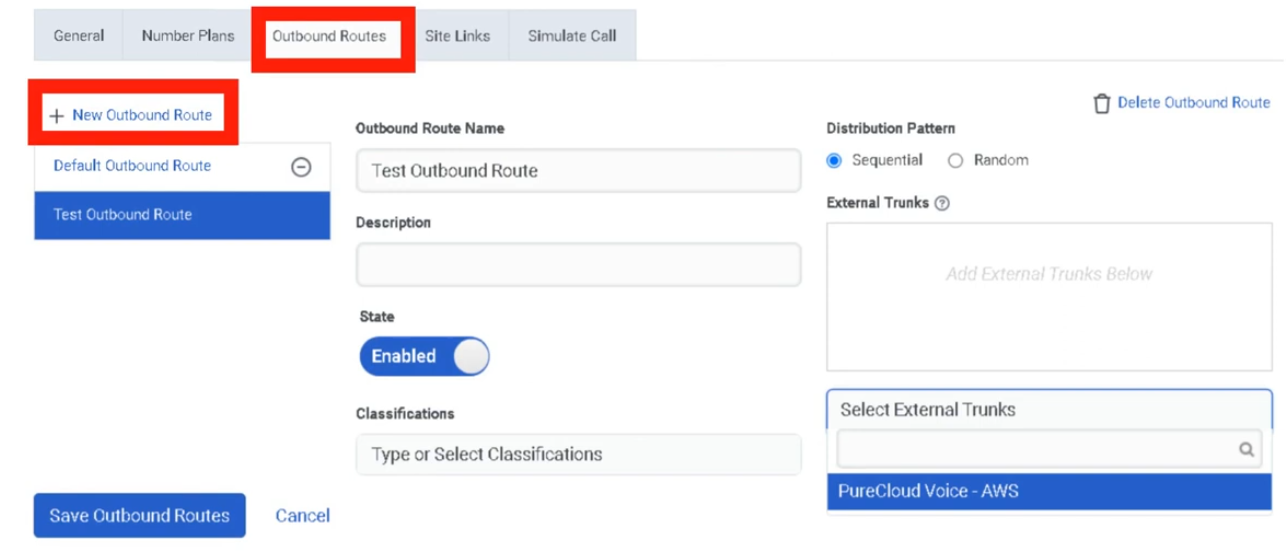
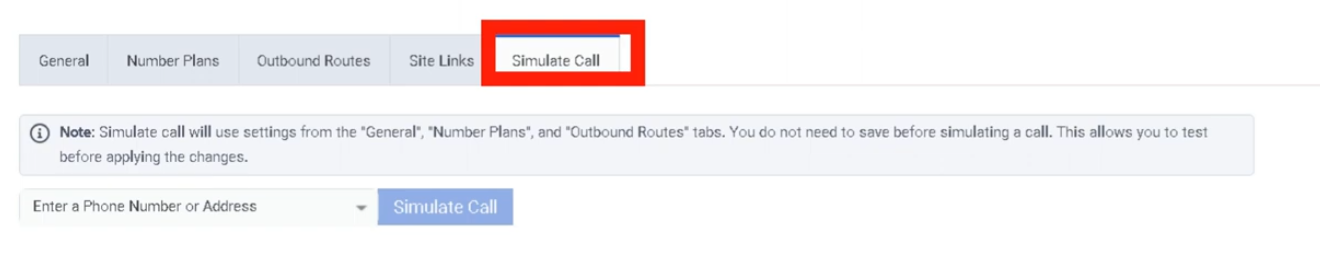
Topology
What Is Topology?
Topology is the administrative map view of the Genesys Cloud telephony network. It displays how telephony components relate to each other — sites, phones, edges, and trunks — and is especially useful for troubleshooting offline or out-of-service edges and validating phone-to-edge assignments.
ℹ️ Topology is a monitoring and diagnostic tool, not a provisioning wizard. Changes to telephony objects are made in their respective admin pages; Topology is where you confirm the result.
Navigation
| Task | Path |
|---|---|
| Open Topology | Admin → Telephony → Topology |
| Drill into an object | Click any site, edge, trunk, or phone in the map |
| Troubleshoot edges | Select the edge object to view status details |
What Topology Shows
| Object | Description |
|---|---|
| Sites | Logical telephony routing entities |
| Edges | Media-handling devices in the telephony environment |
| Trunks | Carrier or PBX connectivity into Genesys Cloud |
| Phones | Endpoints and their edge/site assignments |
| Phone-to-Edge Assignments | Shows which phones connect to which edges, including primary and secondary site relationships |
| Status Indicators | Visual state of objects — helps identify offline or out-of-service edges |
How to Use Topology
| Step | Action |
|---|---|
| Step 1 | Navigate to Admin → Telephony → Topology |
| Step 2 | Review the map for your organization's telephony objects |
| Step 3 | Look for offline or out-of-service edge indicators |
| Step 4 | Click into a suspect object to drill down into its details |
| Step 5 | Enable phone-to-edge assignment view to validate primary/secondary site relationships |
| Step 6 | Use findings to continue troubleshooting in the relevant admin page (Sites, Trunks, Edges) |
Key Use Cases
| Scenario | Description |
|---|---|
| Incident triage | Quickly visualize where a telephony problem exists before diving into logs |
| Post-change validation | Confirm expected object relationships after site, trunk, or edge changes |
| Resiliency review | Validate phone-to-edge assignments and primary/secondary site design |
| Edge troubleshooting | Identify offline or out-of-service edges at a glance |
| Onboarding review | Confirm a new telephony deployment is connected as designed |
Troubleshooting
| Issue | Cause | Resolution |
|---|---|---|
| Edge appears offline | Edge, network, or service issue | Drill into the edge; continue in Admin → Telephony → Edges |
| Phones not where expected | Assignment or site relationship misconfiguration | Review phone-to-edge assignments and site design |
| Map looks incomplete | Telephony objects not yet configured or not in expected state | Verify sites, trunks, edges, and phones exist and are correctly assigned |
| Trunk/site relationship unclear | Naming inconsistency or design ambiguity | Standardize naming; compare with site/trunk config pages |
Best Practices
| Practice | Reason |
|---|---|
| Review Topology after major telephony changes | Visually confirms that relationships updated as expected |
| Use Topology early when troubleshooting | Narrows the fault domain before deeper investigation |
| Validate phone-to-edge assignments regularly | Prevents unnoticed resiliency or registration issues |
| Keep site and trunk naming consistent | Makes the map easier to read and interpret |
| Use Topology for visibility; use admin pages for fixes | Topology shows the problem — the fix happens elsewhere |
Quick Reference
| Question | Answer |
|---|---|
| What does Topology show? | Sites, phones, edges, and trunks in a visual map |
| What is it mainly used for? | Visualization and troubleshooting |
| Can you make changes in Topology? | No — it is read-only for monitoring and diagnostics |
| What edge issue does it help with? | Identifying offline or out-of-service edges |
| Does it show resiliency design? | Yes — phone-to-edge assignments show primary/secondary site relationships |
See Also
- Sites — configure telephony routing and dial plans
- Trunks — configure carrier/PBX SIP connectivity
- Edges & Edge Groups — manage BYOC Premises media appliances
- WebRTC Phone Management — manage softphone endpoints
Screenshots
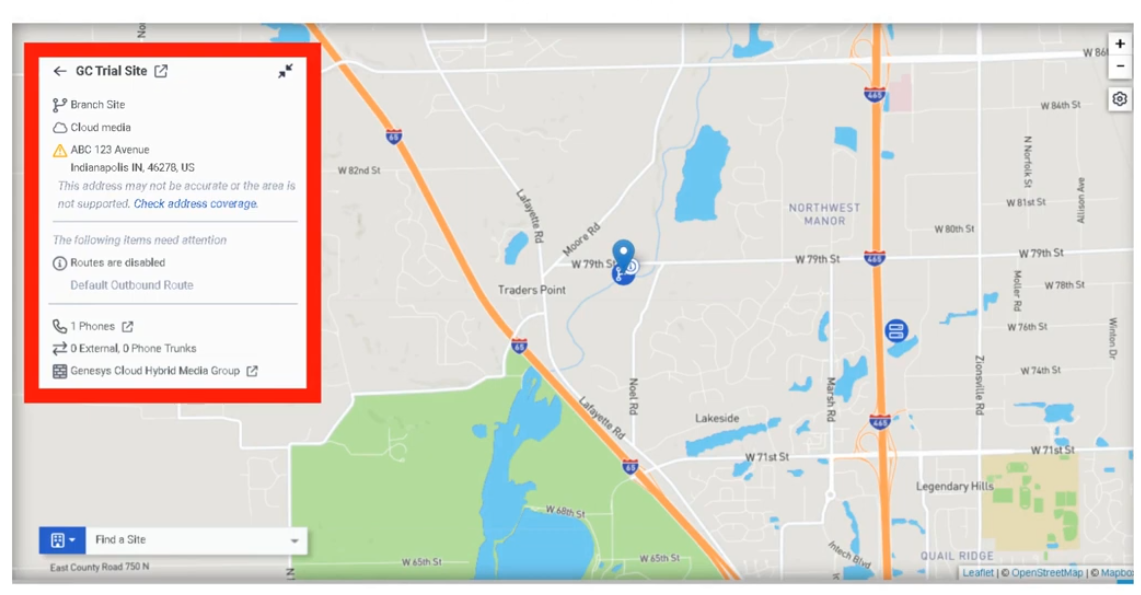
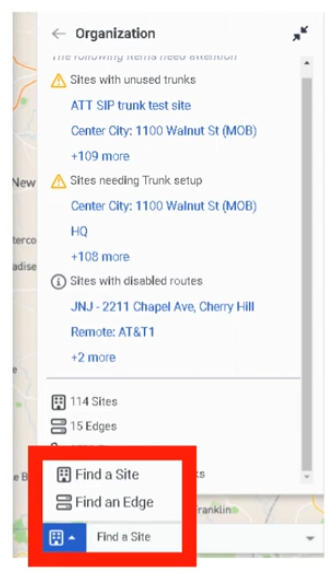

Trunks
What Are Trunks?
A trunk is the SIP communications link between Genesys Cloud and an external carrier or PBX. Trunks carry inbound and outbound SIP signaling and are consumed by Sites via Outbound Routes to send calls to the PSTN or connected telephony infrastructure.
Trunk Types
| Trunk Type | Deployment Model | Used For |
|---|---|---|
| BYOC Carrier | BYOC Cloud | Third-party SIP carrier connectivity over the public internet |
| BYOC PBX | BYOC Cloud | SIP interconnect with an existing IP-PBX over the public internet |
| External SIP | BYOC Premises | On-premises SIP carrier or PBX connectivity through an Edge |
ℹ️ BYOC Carrier and BYOC PBX are for BYOC Cloud. External SIP is for BYOC Premises. Do not mix deployment models.
Navigation
| Task | Path |
|---|---|
| Open trunks | Admin → Telephony → Trunks |
| Open BYOC Cloud trunks | Admin → Telephony → BYOC Cloud → Trunks |
| Create a trunk | Trunks → Create Trunk |
| Edit a trunk | Trunks → select trunk → Edit |
| Use trunk in routing | Admin → Telephony → Sites → [Site] → Outbound Routes |
Creating a BYOC Carrier Trunk — Field Reference
| Field | Description | Notes |
|---|---|---|
| Name | Trunk name | Use a descriptive, consistent naming convention |
| Type | BYOC Carrier / BYOC PBX / External SIP | Determined by your deployment model |
| Subtype | Vendor/carrier profile where applicable | Optional |
| State | Operational state | Set to In Service when ready for production |
| Transport Protocol | SIP transport used to send calls | UDP / TCP / TLS — does not control inbound protocol |
| Inbound SIP Termination Identifier | Regionally unique ID for inbound SIP routing | Required for BYOC Carrier; confirm with carrier |
| Outbound Request URI | Controls SIP request routing for outbound calls | Carrier-specific |
| SIP Servers / Proxies | Remote SIP server or proxy addresses | Carrier-provided |
| Digest Authentication | SIP authentication | Enable if required by the carrier or PBX |
| Caller Address / Caller ID | Outbound caller number | E.164 format |
| Caller Name | Outbound caller name | Text |
| SIP Access Control | IP allowlist for inbound SIP signaling | Restrict to carrier signaling IPs only |
| PBX Passthrough | Enables PBX passthrough where supported | Optional |
| Custom SIP Headers | Additional SIP header configuration | Optional |
Transport Protocol Behaviour
| Protocol | Notes |
|---|---|
| UDP | Standard, connectionless — widely supported |
| TCP | Connection-oriented, more reliable for SIP |
| TLS | Encrypted SIP signaling; pairs with SRTP for full call security |
⚠️ For BYOC Cloud, the transport protocol setting controls how Genesys sends calls on the trunk. It is not enforced on calls received on that trunk.
Step-by-Step: Create a BYOC Carrier Trunk
| Step | Action |
|---|---|
| Step 1 | Navigate to Admin → Telephony → BYOC Cloud → Trunks |
| Step 2 | Click Create Trunk |
| Step 3 | Select BYOC Carrier as the trunk type |
| Step 4 | Enter the trunk Name |
| Step 5 | Set State to In Service |
| Step 6 | Select Transport Protocol |
| Step 7 | Enter the Inbound SIP Termination Identifier |
| Step 8 | Configure Outbound Request URI |
| Step 9 | Enter SIP Servers / Proxies |
| Step 10 | Enable Digest Authentication if required |
| Step 11 | Under Calling, set Caller ID and Caller Name |
| Step 12 | Configure SIP Access Control IP rules |
| Step 13 | Save the trunk |
| Step 14 | Add the trunk to a Site → Outbound Route |
| Step 15 | Validate with test calls or Simulate Call |
Dependencies
| Component | Purpose |
|---|---|
| Sites | Outbound routes on sites reference external trunks |
| Number Plans | Classify dialed numbers before route/trunk selection |
| Outbound Routes | Select one or more trunks with Sequential or Random distribution |
| Carrier / PBX | Remote SIP endpoint the trunk connects to |
| Certificate Authorities | Required when using TLS trunks (BYOC Premises) |
Troubleshooting
| Issue | Cause | Resolution |
|---|---|---|
| Trunk not sending calls | Wrong transport protocol or routing config | Recheck protocol, URI, and remote endpoint requirements |
| Inbound calls fail | Incorrect inbound SIP identifier | Validate inbound SIP termination identifier with carrier |
| Secure calls fail | TLS/certificate mismatch | Validate TLS support and certificate/trust configuration |
| Unauthorized SIP traffic | SIP ACL not configured | Restrict signaling IPs using SIP Access Control |
| Wrong outbound identity | Caller ID/name misconfigured | Recheck Calling section values |
| Route not selecting trunk | Number plan or outbound route misconfiguration | Validate number plans, route classification, trunk selection |
Quick Reference
| Question | Answer |
|---|---|
| What trunk types exist? | BYOC Carrier, BYOC PBX, External SIP |
| Which are for BYOC Cloud? | BYOC Carrier and BYOC PBX |
| Which is for BYOC Premises? | External SIP |
| What transport protocols are supported? | UDP, TCP, TLS |
| What does SIP Access Control do? | Permits signaling only from specific IP addresses |
| What is the Inbound SIP Termination Identifier? | A regionally unique ID used for inbound SIP routing on BYOC Carrier |
Naming Convention
| Resource | Example |
|---|---|
| Carrier trunk | CarrierA_BYOCCarrier_Prod |
| PBX trunk | CorpPBX_BYOCPBX_Test |
| Premises SIP trunk | HQ_ExternalSIP_Primary |
Pattern: <Provider>_<TrunkType>_<Environment>
See Also
- Sites — outbound routes are configured here and reference trunks
- Certificate Authorities — required for TLS trunk trust (BYOC Premises)
- Edges & Edge Groups — BYOC Premises trunks attach to Edges
- Architectural Build Order — trunks are built in Phase 2
Screenshots
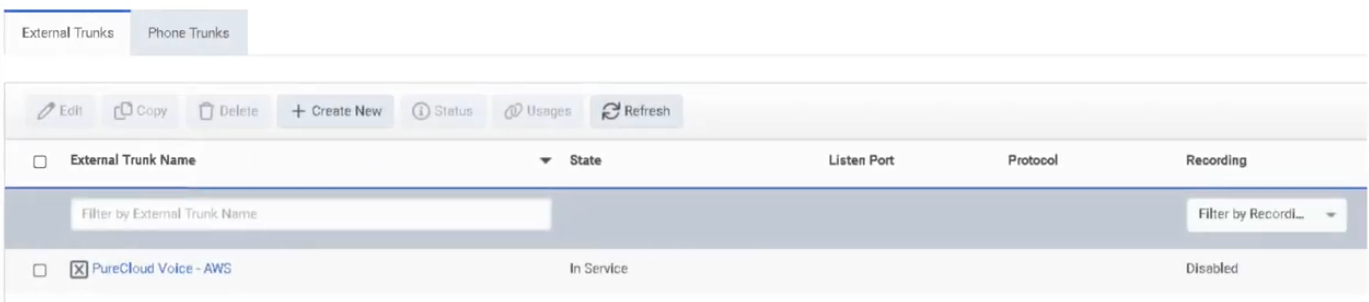
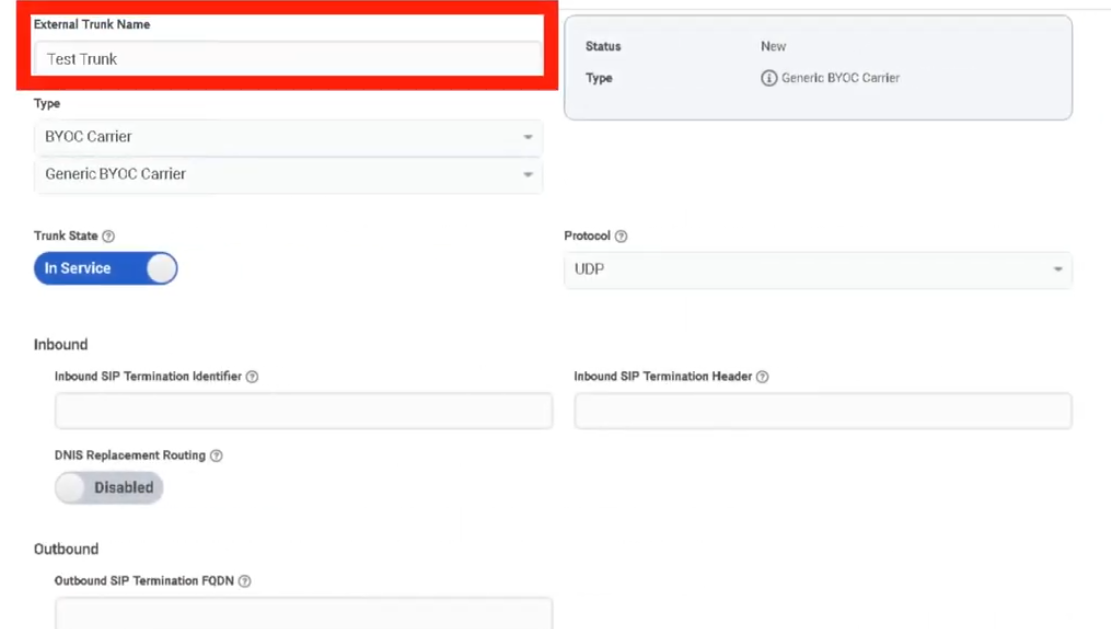
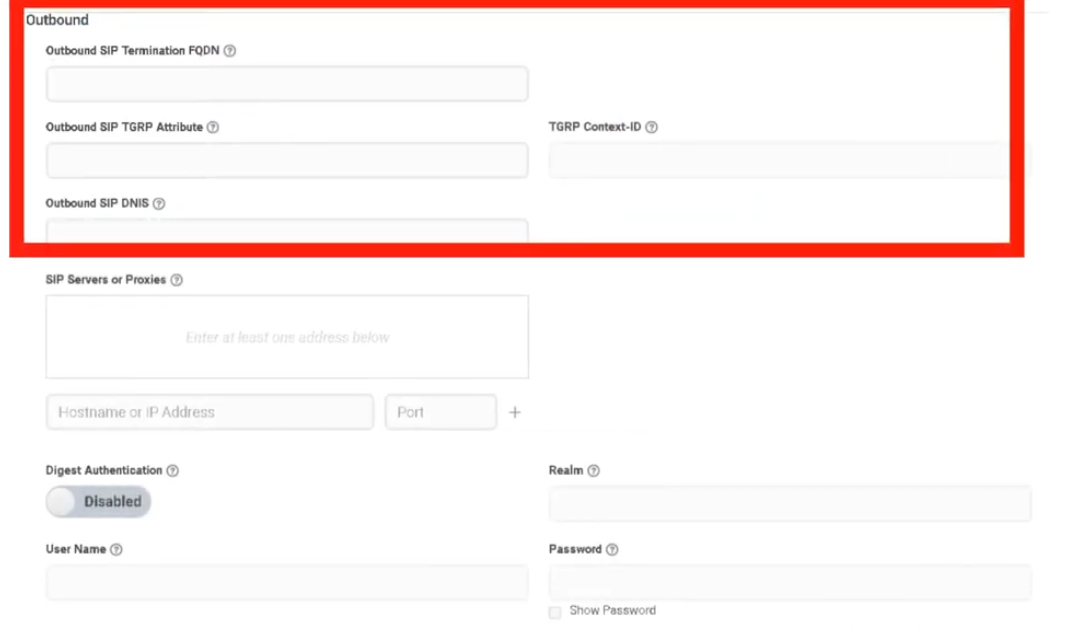
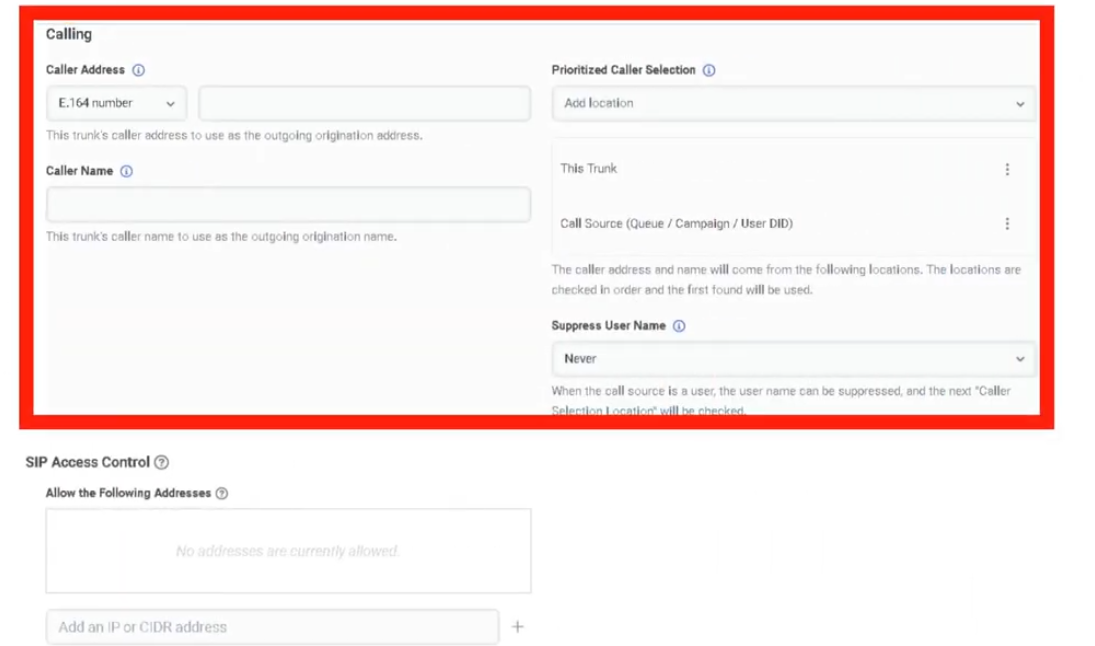
WebRTC Phone Management
What Is a WebRTC Phone?
A Genesys Cloud WebRTC phone is a browser or desktop app-based softphone that lets users place and receive calls directly in the Genesys Cloud client — no physical desk phone required. It is the most common phone type for contact center agents, remote users, and fast deployments.
Provisioning Model
WebRTC phones are provisioned in two steps:
Step 1: Create Base Settings
↓
Step 2: Create the Phone object
Base Settings is a shared configuration profile that defines how the WebRTC phone behaves. The Phone is the individual user-assigned record that uses those settings. Always build Base Settings first.
Navigation
| Task | Path |
|---|---|
| Open Phone Management | Admin → Telephony → Phone Management |
| Create WebRTC Base Settings | Phone Management → Base Settings tab → Add |
| Create WebRTC Phone | Phone Management → Phones tab → Create New |
| Configure global WebRTC behavior | Admin → Telephony → Global Telephony Settings |
| Configure site media behavior | Admin → Telephony → Sites → [Site] → General |
| User selects WebRTC phone | Genesys Cloud client → Calls panel → phone selector |
Required permission: Telephony > Plugin > All
Step 1: Create Base Settings
| Step | Action |
|---|---|
| Step 1 | Navigate to Admin → Telephony → Phone Management |
| Step 2 | Open the Base Settings tab |
| Step 3 | Click Add |
| Step 4 | Enter a Base Settings Name |
| Step 5 | In Phone Make and Model, select Genesys Cloud WebRTC Phone |
| Step 6 | Enable Persistent Connection if needed |
| Step 7 | Configure Transport DSCP Value and Media DSCP Value |
| Step 8 | Click Save Base Settings |
Base Settings Fields
| Field | Description | Notes |
|---|---|---|
| Base Settings Name | Name for this configuration profile | Use a descriptive name e.g. Support_WebRTC_Standard |
| Phone Make and Model | Select the phone type | Choose Genesys Cloud WebRTC Phone |
| Persistent Connection | Keeps the WebRTC connection open after calls end | Improves subsequent call handling speed |
| Persistent Connection Timeout | How long the connection stays active | Configure based on call volume patterns |
| Transport DSCP Value | QoS marking for SIP signaling traffic | Align with enterprise voice network policy |
| Media DSCP Value | QoS marking for audio/media traffic | Align with enterprise voice network policy |
Step 2: Create the Phone
| Step | Action |
|---|---|
| Step 1 | In Phone Management, open the Phones tab |
| Step 2 | Click Create New |
| Step 3 | Enter the Phone Name |
| Step 4 | Select the Site |
| Step 5 | Select the Base Settings profile created in Step 1 |
| Step 6 | Assign the User |
| Step 7 | Click Save |
| Step 8 | Have the user select the WebRTC phone in the client and test calling |
Persistent Connection
Keeping the WebRTC connection open after a call ends allows subsequent calls to alert faster because the connection is already established.
| Setting | Behaviour |
|---|---|
| Disabled | Connection closes after each call; next call requires fresh connection setup |
| Enabled | Connection stays open for the timeout period; subsequent calls alert immediately |
⚠️ Important: If you enable Persistent Connection after users are already logged in, they must log out and back in for the setting to apply. Genesys recommends making this change outside business hours.
QoS / DSCP
DSCP values mark WebRTC SIP and media traffic so your network can prioritize it. Set these values to match your organization's enterprise voice QoS policy.
| DSCP Field | Applies To |
|---|---|
| Transport DSCP | SIP signaling traffic |
| Media DSCP | Audio/RTP media traffic |
Site-Level WebRTC Media Settings
These are configured on the Site, not in Base Settings. Validate these for every site that will host WebRTC users.
| Field | Options | Description |
|---|---|---|
| Media Regions | Available Home/Core/Satellite regions | Select and prioritize regions for WebRTC / Global Media Fabric |
| Relay/TURN Behavior | Any media region set on this site / Lowest latency via Geo-Lookup | Controls how Genesys selects TURN relay regions for WebRTC calls that need relay services |
| Relay/TURN Option | Best For |
|---|---|
| Any media region set on this site | Strict control — limits TURN relay to configured regions only |
| Lowest latency via Geo-Lookup | Best performance — Genesys dynamically selects lowest-latency TURN region |
⚠️ Forcing TURN relay can reduce resiliency and force RTP through relay services when not otherwise necessary.
User Experience
Users select and manage the WebRTC phone from the Calls panel in the Genesys Cloud client:
- Choose microphone and speaker device
- Adjust volume
- Run audio diagnostics
ℹ️ Recommend using a quality headset rather than laptop built-in speakers and microphone to avoid echo and audio quality issues.
Troubleshooting
| Issue | Cause | Resolution |
|---|---|---|
| User cannot answer calls reliably | Persistent connection disabled or not applied | Enable it; have user log out and back in |
| No audio | Wrong microphone/speaker selected | Verify audio devices in WebRTC phone client settings |
| Poor call quality | DSCP/network/headset issue | Check QoS policy, headset, and local network |
| WebRTC phone not visible to user | Phone not created or not assigned to correct user | Recheck phone assignment |
| Calls do not route | Site/routing configuration issue | Validate site, number plans, and trunks |
| Settings change not applied | User session retained old settings | Log out and back in |
| Unexpected TURN/media path | Site Media Regions or Relay/TURN Behavior misconfigured | Review assigned Site's General tab |
Quick Reference
| Question | Answer |
|---|---|
| How do you add a WebRTC phone? | Create Base Settings first, then create the Phone |
| What model do you select? | Genesys Cloud WebRTC Phone |
| Why enable Persistent Connection? | Improves subsequent call handling speed |
| Where is Relay/TURN Behavior configured? | On the Site, not in Base Settings |
| What should users do after Persistent Connection is enabled later? | Log out and back in |
Naming Convention
| Resource | Example |
|---|---|
| Base Settings | Support_WebRTC_Standard |
| Base Settings | Sales_WebRTC_Remote |
| Phone | AgentName_WebRTC |
Pattern: <BusinessArea>_WebRTC_<Purpose>
See Also
- Sites — Media Regions and Relay/TURN Behavior are configured here
- Topology — confirm phone-to-edge assignments and site relationships
- Architectural Build Order — phones are assigned in Phase 3 (People)
Screenshots
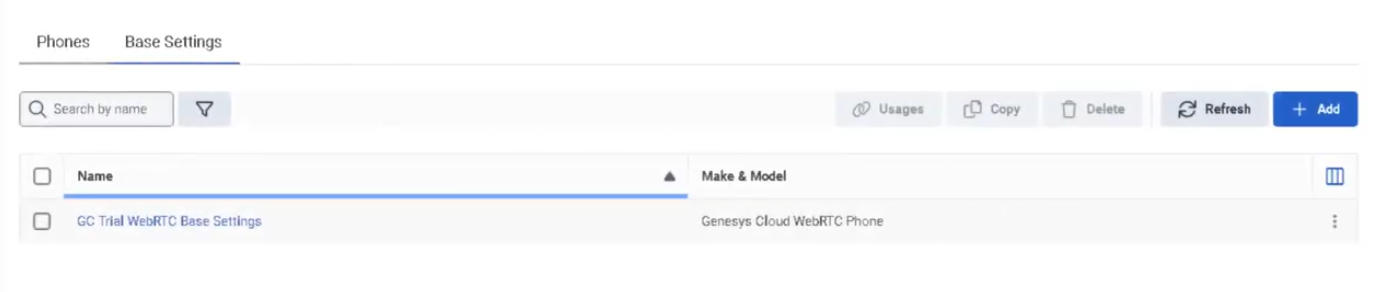
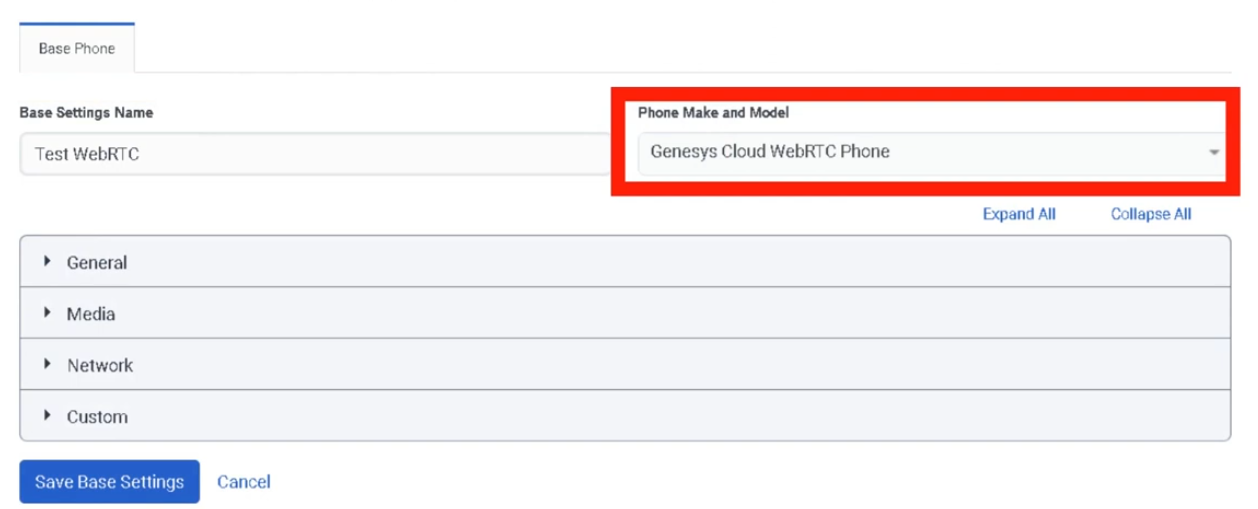
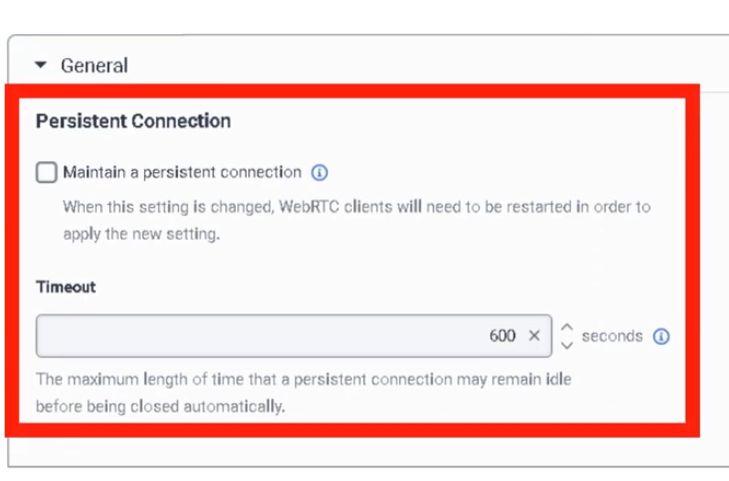
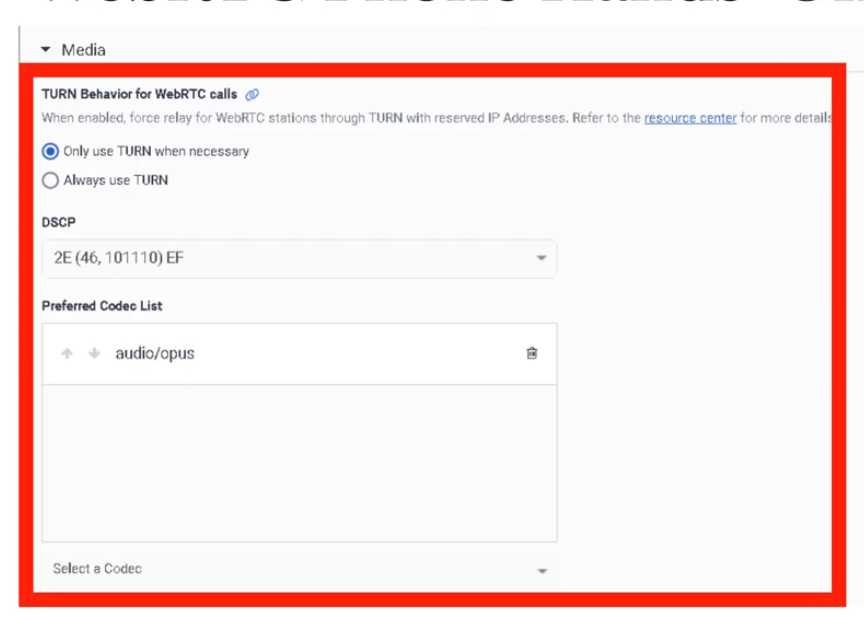
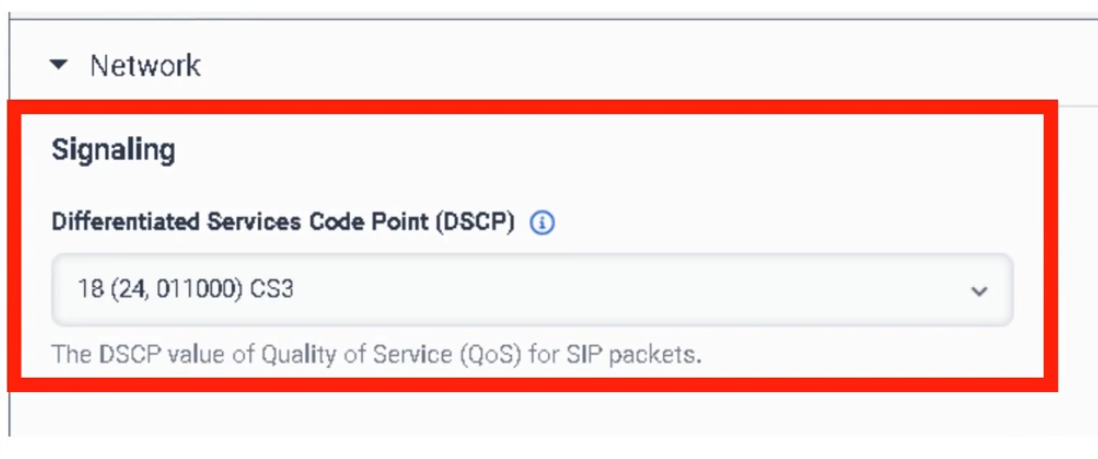
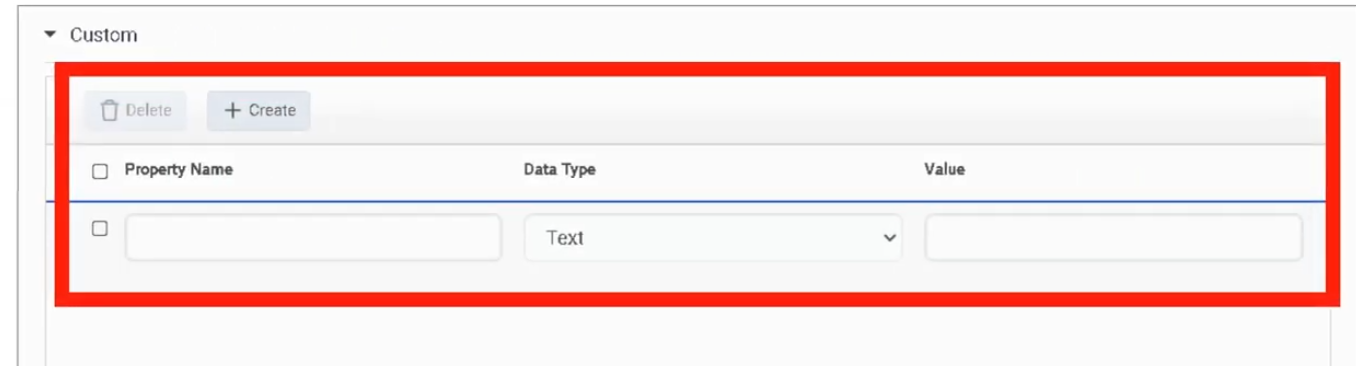
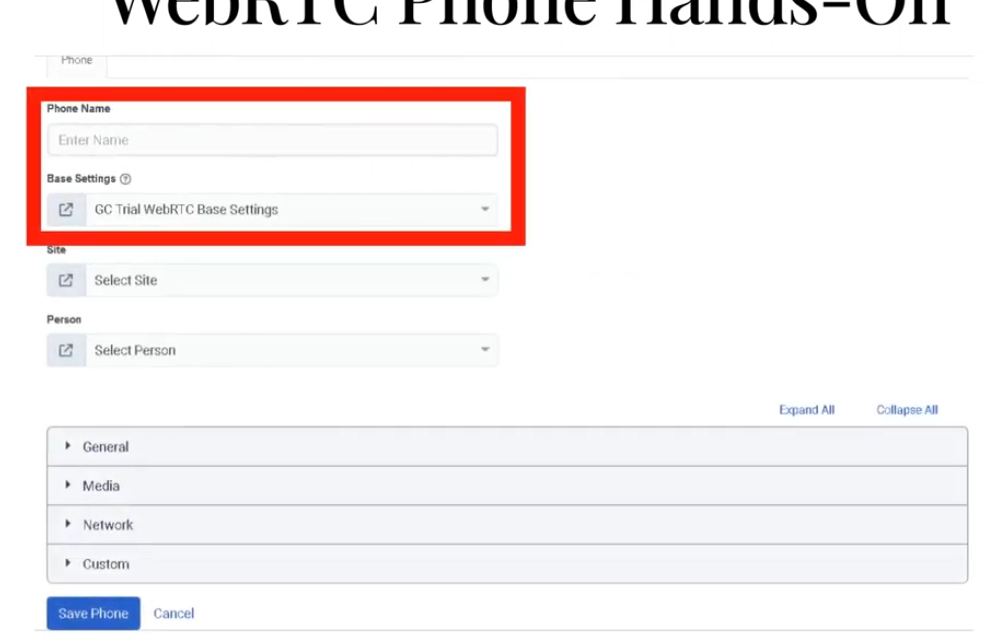
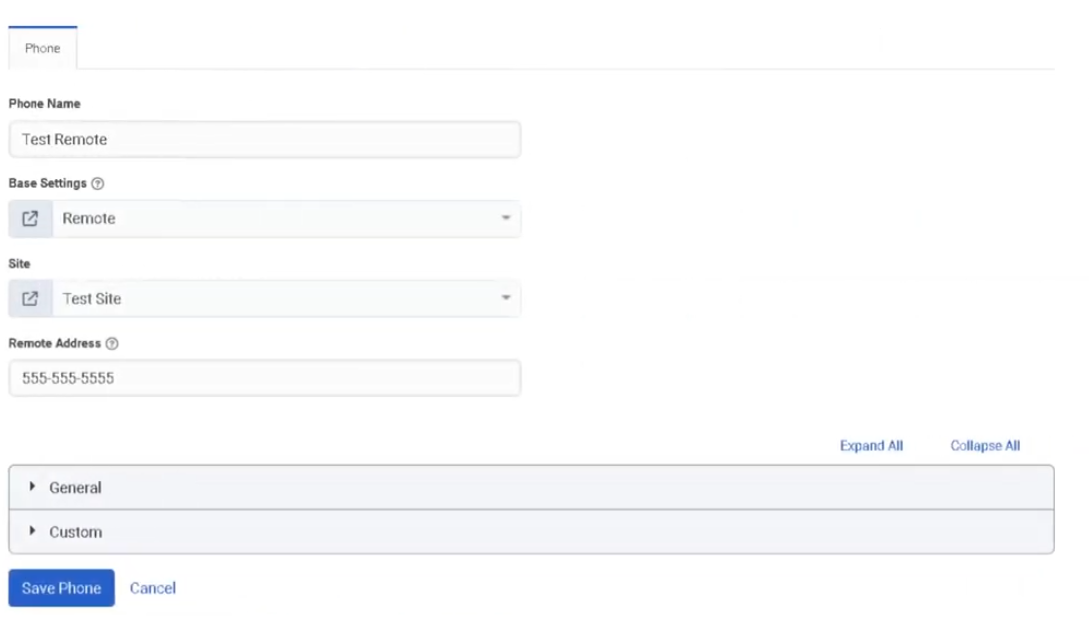
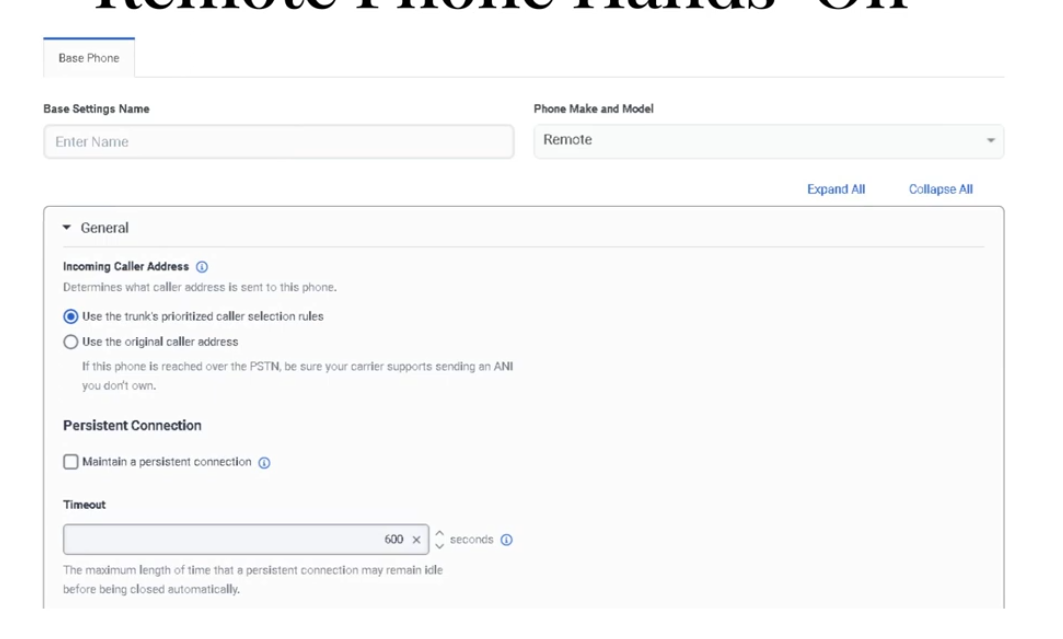
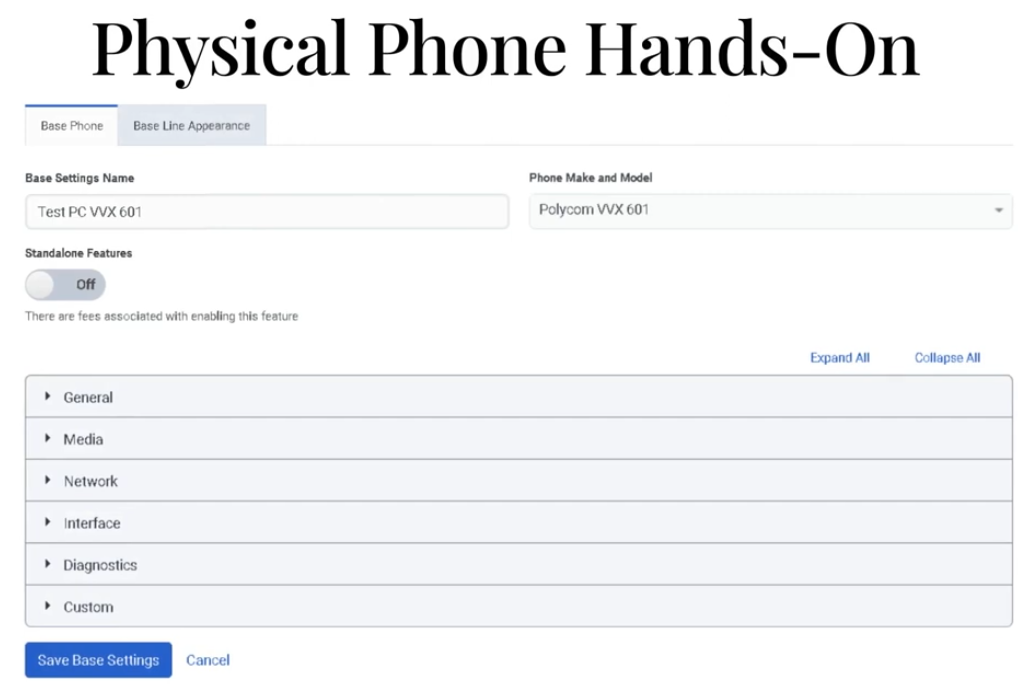
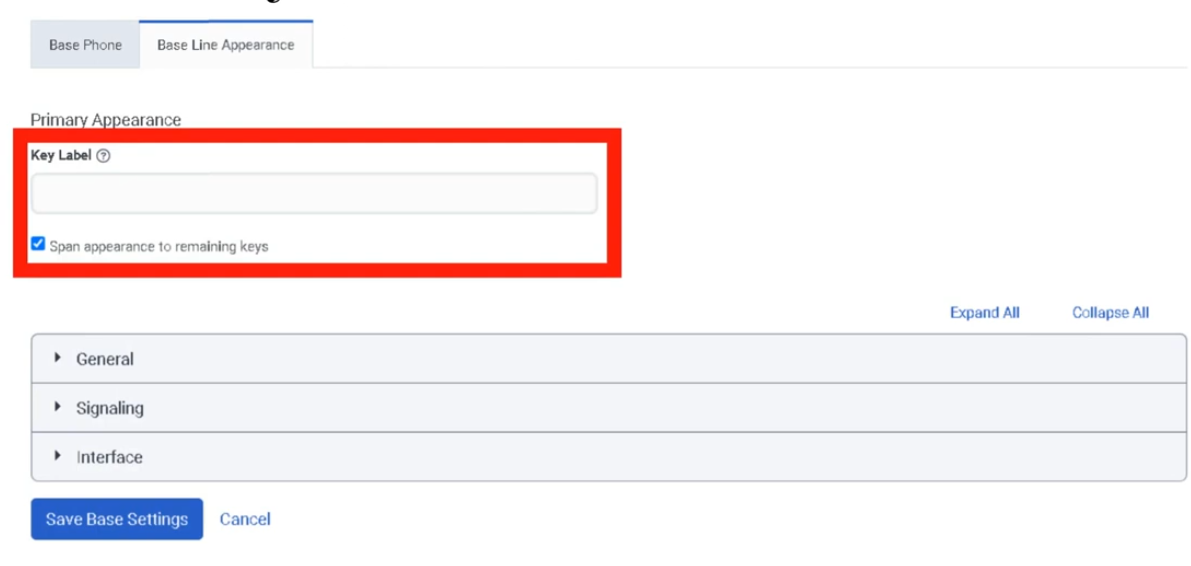
Now Add a phone

Phone Management
| Section | Description |
|---|---|
| Feature Area | Telephony Infrastructure |
| Navigation | Admin → Telephony → Phone Management |
| Alt Navigation | Menu → Digital and Telephony → Telephony → Phone Management |
| Primary Function | Configure, provision, and manage the physical and software phones used by agents to make and receive calls |
Genesys Cloud supports multiple phone types. Phone Management is where administrators create phone records, assign base settings, connect phones to sites, and manage provisioning.
Study Notes
| Topic | Explanation |
|---|---|
| Phone Management | Admin area for creating and managing phone configurations — assigns phones to users and sites |
| Base Settings | A reusable configuration profile applied to phones — defines codec, DTMF method, TLS settings, Quality of Service, and more |
| Site | A logical grouping of telephony resources (trunks, number plans, outbound routes) — phones are assigned to a site |
| Provisioning | The process of automatically delivering a phone's configuration from Genesys Cloud to the physical device |
| Zero Touch Provisioning (ZTP) | Managed phones can self-configure by contacting the Genesys provisioning server on first boot |
| Hardware ID | The identifier used to associate a phone record with a physical device (e.g., MAC address for hardware phones, FQDN for softphones) |
| Line Keys | Configurable buttons on a hardware phone — can be assigned to speed dial, BLF (Busy Lamp Field), or line registrations |
| HELD | HTTP-Enabled Location Delivery — protocol allowing Poly phones to retrieve precise location from a LIS server for E911 accuracy |
Four Phone Categories
| Category | Description | Configuration | Use Case |
|---|---|---|---|
| Managed | Genesys Cloud controls the full configuration — provisioned via HTTPS with TLS and redundancy | Configured entirely in Genesys Cloud via Phone Management and Base Settings | Hardware desk phones (Poly VVX, Poly Edge E, AudioCodes) |
| Unmanaged | Phone registers with Genesys Cloud but is configured externally | Only basic SIP connection info in Genesys Cloud; uses a generic SIP base settings profile | Any SIP-compliant device; FXS analog adapters |
| WebRTC | Browser-based softphone — no hardware or separate software required | Enabled per-user; headset connected to computer | Agents working in browser; remote workers |
| Remote | An external phone number or SIP address (e.g., cell phone) | Configured as a remote number — calls are bridged to the remote device when an interaction is accepted | Mobile workers; home phones; non-networked devices |
Managed vs Unmanaged — Key Differences
| Attribute | Managed | Unmanaged |
|---|---|---|
| Configuration source | Genesys Cloud (provisioned via HTTPS) | External to Genesys Cloud |
| Default base settings profiles | Yes — Genesys provides model-specific defaults | No — uses generic SIP profile |
| TLS / SRTP | Automatic via provisioning | Possible but requires manual configuration |
| Redundancy (primary + secondary SIP) | Automatic | Possible but not automatic |
| Mutual authentication (Genesys Cloud Voice) | Standard | Not supported |
| ZTP support | Yes | No |
| Examples | Poly Edge E, Poly VVX, AudioCodes | Generic SIP devices, FXS adapters |
WebRTC Phones
| Attribute | Detail |
|---|---|
| No hardware required | Runs entirely in the browser |
| No software download | Built into Genesys Cloud web app |
| Setup | Enable WebRTC phone per user; connect a headset |
| Creates a dedicated phone line | Provisioning a WebRTC phone creates a specific phone line for that user |
| Recommended for | Remote workers, browser-first environments |
Remote Phones
| Attribute | Detail |
|---|---|
| What it is | An external phone number or SIP address used to connect a user to Genesys Cloud calls |
| How it works | When a call is placed/answered in the browser, Genesys Cloud calls the remote number to bridge the connection |
| Routing | Follows the site's numbering plans and outbound routes |
| Typical use | Mobile workers, agents who use personal cell phones |
Navigation and Configuration
| Task | Path |
|---|---|
| Open Phone Management | Admin → Telephony → Phone Management |
| View/manage phones | Phone Management → Phones tab |
| View/manage base settings | Phone Management → Base Settings tab |
| Add a phone | Phone Management → Phones → Add Phone |
| Assign base settings to a phone | Select phone → choose Base Settings profile |
| Assign phone to a site | Select phone → choose Site |
| Restart a phone | Phone Management → select phone → Restart |
| Log out a phone | Phone Management → select phone → Log Out |
| Migrate base settings | Phone Management → select phones → Migrate Base Settings |
Base Settings
Base Settings are reusable configuration templates applied to one or more phones of the same model. They define:
| Setting Category | Examples |
|---|---|
| General | Dynamic Reload (auto-updates without manual restart) |
| Media / Quality of Service | DSCP value for RTP packets; RTP Audio Port Start Range (default 4000; range 1024–65,535) |
| Codecs | Preferred codec list (MIME format, priority-ordered) |
| DTMF | RTP Events (out-of-band, RFC 4733 — default) or In-band Audio; payload type 96–127 for RTP Events |
| Security | TLS certificate authority selection; mutual authentication |
| Provisioning | Firmware version; firmware update settings |
| E911 / HELD | Enable HELD; provide LIS URL and Emergency Routing Service Account ID (for Poly VVX, CCX, Edge E) |
Managed Phone Provisioning Process
Phone powers on
↓
Phone contacts Genesys Cloud provisioning server (HTTPS)
↓
Genesys Cloud delivers configuration (base settings, line keys, TLS certs, SIP credentials)
↓
Phone registers with Genesys Cloud SIP infrastructure
↓
Phone is ready — appears as Online in Phone Management
Supported Managed Phone Brands (Examples)
| Brand | Example Models |
|---|---|
| Poly (formerly Polycom) | Poly Edge E Series (E100/E220/E300/E320/E350/E400/E450/E500/E550) · VVX Series · SoundPoint IP · SoundStation |
| AudioCodes | Various models (note: some AudioCodes models are incompatible with Genesys Cloud Voice/BYOC Cloud) |
| Spectralink | 84-Series (incompatible with Genesys Cloud Voice/BYOC Cloud) |
Compatibility note: Most managed phones are compatible with Genesys Cloud Voice and BYOC Cloud. Some AudioCodes models and certain older SoundPoint models are incompatible — refer to the Genesys Cloud Voice / BYOC Cloud compatible phones matrix before purchasing.
Phone Management Operations
| Operation | Description |
|---|---|
| Add Phone | Create a new phone record; assign name, base settings, site, and hardware ID |
| Import Phones | Bulk import via CSV |
| Restart Phone | Sends a restart command to the managed phone over the network |
| Log Out Phone | Logs the user off the phone remotely |
| Migrate Base Settings | Move phones to a different base settings profile (e.g., after a model upgrade) |
| Edit Phone | Change name, base settings, site assignment, line key configuration |
| Check Status | View online/offline status for each phone |
| Filter | Filter phone list by site, base settings, status, or name |
Permissions
| Permission | Purpose |
|---|---|
Telephony > Plugin > All |
Full access to telephony admin including Phone Management |
Telephony > SitesManagedPhones > View/Add/Edit/Delete |
Phone-specific permissions |
Key Takeaways
| Topic | Summary |
|---|---|
| Phone categories | Managed · Unmanaged · WebRTC · Remote |
| Managed phones | Fully provisioned by Genesys Cloud via HTTPS — TLS, redundancy, ZTP automatic |
| Unmanaged phones | Configured externally; only SIP registration info in Genesys Cloud; uses generic profile |
| WebRTC | Browser-based; no hardware; headset required; per-user enablement |
| Remote | External number (cell phone, SIP address) bridged to calls |
| Base Settings | Reusable profile — codec, DTMF, TLS, QoS, firmware, HELD |
| Navigation | Admin → Telephony → Phone Management |
| Phones tab | Manage individual phone records |
| Base Settings tab | Manage configuration templates |
E911 and Emergency Locations
| Section | Description |
|---|---|
| Feature Area | Telephony Infrastructure |
| Navigation (Sites / Number Plans) | Admin → Telephony → Sites → [site] → Number Plans tab |
| Navigation (E911 Kari's Law) | Contact Genesys Cloud Voice support directly to configure Kari's Law notifications |
| Navigation (HELD for Poly phones) | Admin → Telephony → Trunks → External Trunks → [trunk] → General → Outbound → Location Conveyance |
| Navigation (Location Details) | Admin → Telephony → Locations (for physical address configuration) |
| Primary Function | Route emergency calls (911) to the correct Public Safety Answering Point (PSAP) based on the caller's location, and comply with Kari's Law requirements |
Study Notes
| Topic | Explanation |
|---|---|
| E911 | Enhanced 911 — automatically transmits the caller's address and telephone number to the emergency dispatcher when 911 is dialed; no need for the caller to state their location |
| Traditional 911 | Caller must identify their location manually |
| PSAP | Public Safety Answering Point — the regional emergency services dispatch center that receives 911 calls |
| Kari's Law | US federal law (effective February 16, 2018) — requires multi-line telephone systems (MLTS) to: (1) allow direct 911 dialing without a prefix, and (2) send a notification to a designated person when 911 is dialed |
| MLTS | Multi-Line Telephone System — any phone system with multiple lines; contact centers are MLTS operators |
| Location Details | Configuration in Genesys Cloud that stores a physical location address — used for E911 routing and Kari's Law notifications |
| HELD | HTTP-Enabled Location Delivery — protocol that allows Poly phones to query a Location Information Server (LIS) for their precise network-based location at call time |
| LIS | Location Information Service — a server that maps network location data (IP, MAC) to a civic address for E911 purposes |
Kari's Law Requirements (US Only)
Kari's Law applies to Genesys Cloud Voice customers in the United States.
| Requirement | Genesys Cloud Voice Behavior |
|---|---|
| Direct 911 dialing (no prefix) | Automatically satisfied — no customer action required |
| Notification to designated location when 911 is dialed | Requires configuration — must be set up with Genesys Cloud Voice support |
How to Configure Kari's Law Compliance (Genesys Cloud Voice)
- Contact Genesys Cloud Voice support
- Provide the following:
- Full location address (US addresses only — Canadian addresses do not support notification)
- Email addresses or email-as-text addresses to notify when 911 is dialed (e.g.,
user@company.com,5551234567@txt.att.net)
Notification is triggered based on the physical location address configured in Location Details.
Configuring Emergency Numbers in Sites
For all telephony options, emergency numbers are configured at the site level.
| Step | Path |
|---|---|
| Open Admin | Admin → Telephony → Sites |
| Select site | Choose the appropriate site |
| Open Number Plans tab | Click Number Plans |
| Select Emergency plan | Click on the Emergency number plan in the list |
| Enter emergency number | Type the emergency services number (e.g., 911 for the US) |
| Kari's Law note | US users must not alter the 911 number with a prefix or any other modification |
Warning: Do not assign an emergency number plan to a BYOC trunk unless you have verified with your carrier that they provide emergency services and that the carrier has the correct location for your phone numbers.
BYOC and Emergency Services
Genesys Cloud Voice includes built-in E911 support. BYOC customers must arrange E911 separately:
| Option | E911 Approach |
|---|---|
| Genesys Cloud Voice | E911 included — configured through Location Details and Kari's Law setup with Genesys support |
| BYOC Cloud | Must check with your carrier — carrier must support E911 for your numbers and locations |
| BYOC Premises | Must check with your carrier — same requirement; also need to verify site-level number plan configuration |
For BYOC E911 setup: Admin → Telephony → Trunks → BYOC trunk → configure as directed by your carrier
Reference article: "Set up emergency services with BYOC" in the Genesys Cloud Resource Center.
HELD — HTTP-Enabled Location Delivery (Poly Phones)
HELD allows Poly phones to retrieve their precise network location from a LIS server and include it in the SIP INVITE when a 911 call is placed, enabling more accurate emergency routing.
Supported phones: Poly VVX, Poly CCX, Poly Edge E
HELD Configuration Steps
| Step | Where |
|---|---|
| 1. Enable Location Conveyance on trunk | Admin → Telephony → Trunks → External Trunks → [trunk] → General → Outbound → check Location Conveyance |
| 2. Enter Emergency Routing Service Account ID | From your emergency service provider (or token ID if token authentication is required) |
| 3. Enter Location Information Server URL | URL to send HELD requests to |
| 4. Enable HELD in phone Base Settings | Admin → Telephony → Phone Management → Base Settings → [Poly base settings] → enable HELD |
How E911 Works — Genesys Cloud Voice
Agent dials 911
↓
Genesys Cloud Voice looks up the physical location address associated with the agent's number / location
↓
Call routed to appropriate PSAP for that address
↓
PSAP receives caller's address and telephone number automatically (E911)
↓
Kari's Law notification sent to designated email/SMS addresses
Locations Configuration
Physical location addresses are configured in:
Admin → Telephony → Locations
Each location stores:
- Full physical street address
- Used by E911 routing (Genesys Cloud Voice)
- Used by Kari's Law notification configuration
- Assigned to sites, phones, or users as appropriate
E911 for Remote Workers
Remote workers present a challenge because their physical location is not fixed. Genesys Cloud Voice provides E911 configuration options for remote workers — the physical location address must be kept current for accurate PSAP routing.
| Consideration | Detail |
|---|---|
| Accurate location data required | Inaccurate location may route the 911 call to the wrong PSAP — potentially causing delays |
| National fallback | If E911 cannot locate the caller, the call may route to a national emergency response service (less accurate, slower) |
| Remote workers | Must have their location updated when they change physical locations |
Key Takeaways
| Topic | Summary |
|---|---|
| E911 vs 911 | E911 automatically transmits caller address and number to PSAP; traditional 911 requires caller to state location |
| Kari's Law | US federal law — MLTS must allow direct 911 dialing AND notify a designated person when 911 is dialed |
| Kari's Law — Genesys Cloud Voice | Direct 911 dialing is automatic; notification requires setup with Genesys Voice support |
| Kari's Law — BYOC | Customer must check with their carrier |
| Emergency number config | Admin → Telephony → Sites → Number Plans → Emergency plan |
| BYOC warning | Do not assign emergency number plan to BYOC trunk without verifying carrier support |
| HELD | Protocol for Poly phones to deliver precise location to E911 — configured on trunk + base settings |
| Supported HELD phones | Poly VVX · Poly CCX · Poly Edge E |
| Locations | Admin → Telephony → Locations — stores physical addresses for E911 and Kari's Law |
Telephony Connection Options — BYOC Cloud vs BYOC Premises
| Section | Description |
|---|---|
| Feature Area | Telephony Infrastructure |
| Navigation | Admin → Telephony → Trunks |
| Alt Navigation | Menu → Digital and Telephony → Telephony → Trunks |
| Primary Function | Connect Genesys Cloud to a third-party telecommunications carrier using SIP trunks |
Genesys Cloud offers three telephony connection options. Understanding the differences between them — and between the two BYOC variants in particular — is a common exam topic.
Three Telephony Connection Options
| Option | Description | Who Controls the Carrier? |
|---|---|---|
| Genesys Cloud Voice | Genesys-provided telephony service over AWS infrastructure — fully managed by Genesys | Genesys provides the carrier service |
| BYOC Cloud | Customer brings their own carrier; SIP trunks terminate in Genesys Cloud's AWS-based Media Tier over the public internet | Customer — uses their own carrier contract |
| BYOC Premises | Customer brings their own carrier; SIP trunks terminate at a premises-based Edge hardware device | Customer — uses their own carrier contract + their own on-premises Edge hardware |
Study Notes
| Topic | Explanation |
|---|---|
| BYOC | Bring Your Own Carrier — allows organizations to keep their existing carrier contract while using Genesys Cloud for contact center functionality |
| SIP Trunk | A virtual phone line over IP that connects Genesys Cloud to the PSTN (public telephone network) via a carrier |
| BYOC Cloud | Cloud-to-cloud — SIP trunks connect a third-party carrier directly to Genesys Cloud's Media Tier (AWS) over the public internet |
| BYOC Premises | Hybrid — SIP trunks connect a third-party carrier to a Genesys Cloud Edge appliance installed on the customer's premises |
| Genesys Cloud Edge | A physical hardware device installed on the customer's premises — required for BYOC Premises |
| Media Tier | Genesys Cloud's AWS-based media processing infrastructure — where BYOC Cloud SIP trunks terminate |
| Trunk Type | BYOC Cloud uses BYOC Carrier or BYOC PBX trunk types; BYOC Premises uses External SIP trunk type |
BYOC Cloud vs BYOC Premises — Side-by-Side Comparison (Exam Critical)
| Attribute | BYOC Cloud | BYOC Premises |
|---|---|---|
| Where SIP trunks terminate | Genesys Cloud Media Tier (AWS, cloud) | Genesys Cloud Edge (on-premises hardware) |
| Connectivity | Over the public internet | On-premises network + internet for cloud connectivity |
| Hardware required | None — fully cloud-based | Yes — Genesys Cloud Edge appliance |
| Trunk types used | BYOC Carrier · BYOC PBX | External SIP |
| Third-party device | Can be a cloud-based carrier OR a premises-based carrier device / SBC | Can connect to a premises-based carrier device (SBC/SIP gateway) or cloud-based carrier device |
| E911 | Customer must verify E911 support with carrier | Customer must verify E911 support with carrier |
| Kari's Law | Customer must check with carrier for compliance | Customer must check with carrier for compliance |
| BYOC Premises hardware deprecation | N/A | Genesys Hardware Solution end of support: December 1, 2026 (announced March 2025) |
Trunk Types in Detail
| Trunk Type | Used With | Description |
|---|---|---|
| BYOC Carrier | BYOC Cloud | SIP trunk to a third-party carrier (telephone company) |
| BYOC PBX | BYOC Cloud | SIP trunk to a third-party PBX (private branch exchange) |
| External SIP | BYOC Premises | SIP trunk from a premises-based Edge device to a third-party system |
| SIP Phone Trunk | All | Internal trunk type for SIP phones |
| WebRTC Phone Trunk | All | Internal trunk type for WebRTC phones |
BYOC Cloud — How It Works
Third-party carrier (cloud or premises-based)
↓ (SIP trunk over public internet)
Genesys Cloud Media Tier (AWS)
↓
Genesys Cloud contact center features
↓
Agent desktop (WebRTC or managed/unmanaged phone)
Configuration: Admin → Telephony → Trunks → External Trunks → Add → BYOC Carrier or BYOC PBX
BYOC Premises — How It Works
Third-party carrier (cloud or on-premises SBC/gateway)
↓ (SIP trunk to Edge appliance)
Genesys Cloud Edge (on-premises hardware)
↓ (internet connection to Genesys Cloud)
Genesys Cloud contact center features
↓
Agent desktop (phone on same premises network or WebRTC)
Configuration: Admin → Telephony → Trunks → External Trunks → Add → External SIP
Genesys Cloud Edge (BYOC Premises Hardware)
The Edge is the on-premises appliance that bridges the customer's local SIP trunks to Genesys Cloud. It handles media processing and call control locally before relaying to the cloud.
| Hardware Solution | Notes |
|---|---|
| Genesys Hardware Solution | Deprecated — End of Support: December 1, 2026 |
| Customer-provided Edge (virtual or third-party hardware) | Customers should plan migration to alternative Edge solutions before the EOS date |
If you are on Genesys-provided BYOC Premises hardware, plan your migration strategy before December 1, 2026.
Emergency Services with BYOC
Unlike Genesys Cloud Voice (which includes built-in E911 via AWS), BYOC customers must work with their carrier for emergency services compliance:
| Scenario | E911 Approach |
|---|---|
| BYOC Cloud | Check with your carrier — the carrier must support E911 for the numbers and locations in use |
| BYOC Premises | Check with your carrier — same requirement; carrier must support E911 |
| BYOC + Kari's Law (US) | Check with your carrier — Genesys Cloud Voice handles this natively; BYOC requires carrier verification |
| BYOC Premises + Site configuration | Configure emergency number plan in Admin → Telephony → Sites → Number Plans — do not assign an emergency number plan to a BYOC trunk unless the carrier has confirmed support |
When to Use Each Option
| Scenario | Recommended Option |
|---|---|
| Fastest, simplest deployment with no existing carrier contract | Genesys Cloud Voice |
| Organization has an existing carrier contract they want to keep | BYOC Cloud |
| Organization needs on-premises media processing or local survivability (within a site) | BYOC Premises |
| Fully cloud-native strategy with own carrier | BYOC Cloud |
| Hybrid deployment needing both cloud and on-premises | BYOC Premises (possibly in combination with other options) |
Note: As of June 2025, Genesys deprecated Remote Survivability for BYOC Premises Edges, citing inability to reliably deliver IVR flows and AI features during internet outages.
Permissions
| Permission | Purpose |
|---|---|
Telephony > Plugin > All |
Full access to telephony configuration |
Telephony > SipTrunk > View/Add/Edit/Delete |
Trunk-specific permissions |
Key Takeaways
| Topic | Summary |
|---|---|
| Three options | Genesys Cloud Voice · BYOC Cloud · BYOC Premises |
| BYOC Cloud | Carrier SIP trunks → Genesys AWS Media Tier · No on-premises hardware · Trunk types: BYOC Carrier / BYOC PBX |
| BYOC Premises | Carrier SIP trunks → on-premises Edge appliance → Genesys Cloud · Requires Edge hardware · Trunk type: External SIP |
| Key distinction | Where SIP trunks terminate — cloud (BYOC Cloud) vs on-premises Edge (BYOC Premises) |
| E911 | Both BYOC options require carrier verification — not built-in like Genesys Cloud Voice |
| Premises hardware deprecation | Genesys Hardware Solution for BYOC Premises: EOS December 1, 2026 |
| Remote Survivability | Deprecated as of June 2025 — no longer supported for BYOC Premises Edges |
8. - Quality and Performance Management
Development and Feedback
Development and Feedback (Genesys Cloud Performance and Engagement)
| Section | Description |
|---|---|
| Feature Area | Performance and Engagement |
| Admin Location | Admin → Performance and Engagement → Development and Feedback |
| Primary Function | Create, assign, and manage training and assessment modules for agents and employees |
| Training Sources | Genesys Beyond content or custom organization-created modules |
| Module Types | Learning, Learning with Assessment, Assessment |
| Typical Users | Supervisors, Quality Administrators, Performance Managers, WEM Administrators |
| Key Dependency | Performance Management / WEM capabilities must be enabled for the organization :contentReference[oaicite:0]{index=0} |
Development and Feedback provides the training layer of Genesys Cloud performance management. It allows administrators and supervisors to assign prepackaged or custom learning content to help bridge knowledge gaps, reinforce coaching plans, and support continuous agent improvement. The module supports both educational content and scored knowledge checks, and it can automatically assign modules based on organizational criteria such as ACD skills, divisions, or groups. :contentReference[oaicite:1]{index=1}
Summary Table
| Attribute | Details |
|---|---|
| Feature Type | Performance Management / Learning Management |
| Core Purpose | Deliver development modules and assessments to employees |
| Assignment Model | Manual assignment and auto assignment |
| Content Types | Files, documents, learning content, assessments |
| Scoring Support | Available when module includes assessment/question groups |
| Automation Inputs | ACD skills, divisions, groups |
| Transcript Source Coverage | Module types, assignment model, basic create flow |
| Documentation Coverage | Performance management and WEM positioning of development modules :contentReference[oaicite:2]{index=2} |
Study Notes
| Topic | Explanation |
|---|---|
| Development Modules | Structured learning content assigned to users |
| Feedback | Used to guide improvement and address knowledge gaps |
| Genesys Beyond | Genesys-provided training content that can be assigned |
| Custom Modules | Organization-built learning modules |
| Module Type | Determines whether the module is educational only or includes an assessment |
| Auto Assign | Automatically assigns modules to users based on matching criteria |
| Assessment Content | Question groups and questions similar to evaluation forms |
| Recommended Completion Date | Target completion date set by the administrator |
Development and Feedback is part of Genesys Cloud performance management and is intended to improve agent performance through guided learning, evaluation follow-up, and targeted knowledge reinforcement. Agents can access assigned training modules as part of their performance experience. :contentReference[oaicite:3]{index=3}
Transcript Implementation Notes
Source: Transcript
The instructor describes Development and Feedback as part of Performance and Engagement and explains that administrators can assign Genesys Beyond training or create their own modules.
| Step | Instruction |
|---|---|
| Step 1 | Go to Performance and Engagement → Development and Feedback |
| Step 2 | Choose to assign Genesys Beyond training or create a custom module |
| Step 3 | Select the module type: Learning, Learning with Assessment, or Assessment |
| Step 4 | Enter a name and description |
| Step 5 | Set a recommended completion date |
| Step 6 | Add content such as files or documents |
| Step 7 | Add question groups and questions if assessment content is required |
| Step 8 | Configure Auto Assign rules based on ACD skills, divisions, or groups |
| Step 9 | Save and assign the module |
Transcript-derived implementation guidance:
| Item | Guidance |
|---|---|
| Module Type Selection | Choose Learning when no assessment is needed, Learning with Assessment when content and scoring are both needed, and Assessment when the goal is testing only |
| Content Strategy | Attach documents or files that directly support the coaching objective |
| Assessment Design | Build question groups similar to evaluation forms for consistency |
| Targeting Strategy | Use Auto Assign to align modules with teams, skills, or organizational segmentation |
| Character Limits | Not explicitly documented in the transcript |
| Required Fields | Name and module type are clearly implied by the create flow; other required-field behavior is not explicitly documented in Genesys UI documentation |
Navigation
| Task | Navigation Path |
|---|---|
| Open Development and Feedback | Admin → Performance and Engagement → Development and Feedback |
| View modules | Admin → Performance and Engagement → Development and Feedback |
| Create module | Admin → Performance and Engagement → Development and Feedback → Create |
| Edit module | Admin → Performance and Engagement → Development and Feedback → Edit |
| Assign module | Admin → Performance and Engagement → Development and Feedback → Assign |
| Configure auto assignment | Admin → Performance and Engagement → Development and Feedback → Auto Assign |
| Review assigned training as agent | Agent performance area / assigned modules view (exact UI path not explicitly documented in Genesys UI documentation) |
Configuration Fields (UI Form Fields)
Main Page
| UI Field | Description | Options |
|---|---|---|
| Module List | Displays existing development and feedback modules | Read-only |
| Module Name | Name of the module | Read-only in list |
| Module Type | Indicates module category | Learning / Learning with Assessment / Assessment |
| Description | Short explanation of module purpose | Read-only in list |
| Recommended Completion Date | Target completion date for assignees | Date |
| Assignment Status | Shows whether module is assigned/published/active | Not explicitly documented in Genesys UI documentation |
| Search | Search for modules | Text field |
| Filter | Filter modules list | Not explicitly documented in Genesys UI documentation |
| Create | Start a new module | Button |
| Edit | Modify selected module | Button |
| Delete | Remove selected module | Button |
| Assign | Assign module manually | Button |
| Refresh | Reload module list | Button |
Create/Edit Form
| UI Field | Description | Options |
|---|---|---|
| Module Name | Unique module title | Text |
| Description | Explains the objective of the module | Text area |
| Module Type | Defines whether content includes assessment | Learning / Learning with Assessment / Assessment |
| Recommended Completion Date | Suggested completion target | Date picker |
| Content | Add learning content | Files / Documents |
| Question Group Name | Groups assessment questions | Text |
| Add Question | Create assessment item | Button |
| Question Type | Assessment question type | Multiple Choice / Yes-No / Range (transcript aligns these with evaluation-style questions) |
| Question Name | Name/title of question | Text |
| Help Text | Guidance shown with the question | Text |
| Points | Score value | Numeric |
| Require Comments | Require additional comments | Toggle or option; not explicitly documented in this specific UI, but transcript states similar question behavior |
| Conditional Display | Show question conditionally | Not explicitly documented in Genesys UI documentation for this page; transcript says questions can be conditional in similar form behavior |
| Auto Assign | Opens or enables assignment rules | Button / section |
| Save | Save module | Button |
| Publish | Make module available | Not explicitly documented in Genesys UI documentation for this page; transcript does not explicitly confirm publish behavior for modules |
| Cancel | Cancel changes | Button |
Character limits for Module Name, Description, and Question Group Name are not explicitly documented in Genesys UI documentation.
Tabs, Toggles, Dropdowns, Action Buttons
| Element Type | Items |
|---|---|
| Tabs | Content / Assessment / Auto Assign (exact tab names not explicitly documented in Genesys UI documentation; these are logical create areas derived from transcript workflow) |
| Dropdowns | Module Type / Question Type |
| Toggles | Auto Assign enabled state, Require Comments (specific toggle labels not explicitly documented in Genesys UI documentation) |
| Date Controls | Recommended Completion Date |
| Upload Controls | Add files / documents |
| Action Buttons | Create / Save / Cancel / Edit / Delete / Assign / Add Question / Auto Assign |
| Text Inputs | Module Name / Description / Question Group Name / Question Name / Help Text |
Dependencies
| Component | Purpose |
|---|---|
| Performance Management | Base feature area for Development and Feedback :contentReference[oaicite:4]{index=4} |
| Workforce Engagement Management (WEM) | Broader feature family that includes development modules :contentReference[oaicite:5]{index=5} |
| Users and Permissions | Needed to assign modules and manage access |
| ACD Skills | Can be used for Auto Assign rules |
| Divisions | Can be used for Auto Assign rules |
| Groups | Can be used for Auto Assign rules |
| Documents / Files | Used as attached module content |
| Evaluation-style Question Logic | Assessment section follows question-group/question patterns similar to evaluation forms |
Platform Integration / Related Components
| Component | Relationship |
|---|---|
| Genesys Beyond | Prepackaged training content source mentioned in transcript |
| Evaluations | Evaluation outcomes often drive coaching and targeted module assignment |
| Coaching | Modules can reinforce coaching plans and identified performance gaps |
| Scorecards | Training completion and performance improvement are related in agent performance management :contentReference[oaicite:6]{index=6} |
| Gamification | Another Performance and Engagement feature used alongside learning modules |
| Groups / Divisions / Skills | Organizational targeting dimensions for Auto Assign |
| Documents | Storage or selection of training materials |
| Reports, Views, and Dashboards | Used to monitor broader performance outcomes related to training effectiveness :contentReference[oaicite:7]{index=7} |
Integration Examples
| Integration | Description |
|---|---|
| HR/LMS Export | Track completion outside Genesys Cloud using exported reports or manual reconciliation |
| Analytics / Performance Reporting | Correlate training assignments with performance results in reporting views |
| Notifications API | Can support downstream workflow when assignment/completion events are exposed through organizational integrations; not a UI field |
| API Usage / External BI | External dashboards can consume performance data for learning impact analysis, where available through supported reporting pipelines |
Example integration workflow:
Evaluation Released
↓
Supervisor Identifies Knowledge Gap
↓
Development Module Assigned
↓
Agent Completes Module
↓
Performance Metrics Reviewed in Dashboard
↓
Optional External BI / Coaching Follow-up
Related Topics / Further Reading
| Topic | Description |
|---|---|
| Performance Management | Parent feature area for modules and scorecards ([Genesys Cloud Resource Center][1]) |
| Workforce Engagement Management | Suite that includes development modules, gamification, and quality tools ([Genesys Cloud Resource Center][1]) |
| Evaluation Forms | Similar question-group and scoring model for assessments |
| Gamification | Performance engagement mechanism complementary to training |
| External Metrics Definitions | Scorecard enrichment with third-party metrics |
| Reports, Views, and Dashboards | Monitor performance changes after training assignments ([Genesys Cloud Resource Center][1]) |
Implementation Checklist
| Task | Status |
|---|---|
| Confirm Performance Management / WEM licensing and access | ☐ |
| Review target audience for training | ☐ |
| Decide whether to use Genesys Beyond or custom content | ☐ |
| Choose module type | ☐ |
| Prepare files/documents | ☐ |
| Build assessment question groups if needed | ☐ |
| Define recommended completion date | ☐ |
| Configure Auto Assign rules | ☐ |
| Validate assignment scope (skills/divisions/groups) | ☐ |
| Test with pilot users | ☐ |
Implementation Guide
| Step | Action |
|---|---|
| Step 1 | Navigate to Admin → Performance and Engagement → Development and Feedback |
| Step 2 | Click Create |
| Step 3 | Enter Module Name and Description |
| Step 4 | Select Module Type: Learning, Learning with Assessment, or Assessment |
| Step 5 | Set Recommended Completion Date |
| Step 6 | Add files or documents as content if applicable |
| Step 7 | Add question groups and questions if assessment is required |
| Step 8 | Configure Auto Assign rules using ACD skills, divisions, or groups |
| Step 9 | Save the module |
| Step 10 | Validate that the correct users receive the assignment |
How to Implement
| Phase | Description |
|---|---|
| Planning | Identify business gap, coaching objective, and target audience |
| Content Build | Prepare learning materials and assessment questions |
| Module Design | Choose the right module type and structure |
| Assignment Design | Decide manual assignment vs Auto Assign |
| Validation | Test with a pilot group |
| Rollout | Deploy to production user groups |
| Measurement | Review completion and post-training performance |
Recommended selection model:
| Need | Recommended Module Type |
|---|---|
| Knowledge transfer only | Learning |
| Knowledge transfer plus validation | Learning with Assessment |
| Knowledge check only | Assessment |
Workflow
Performance Gap Identified
↓
Supervisor Creates Module
↓
Content Added
↓
Assessment Added (Optional)
↓
Manual or Auto Assign
↓
Agent Completes Module
↓
Supervisor Reviews Progress and Performance
Architecture Diagram
Supervisor / Admin
↓
Development and Feedback Module
├─ Learning Content
├─ Assessment Questions
└─ Auto Assign Rules
↓
Target Users (by Skills / Divisions / Groups)
↓
Agent Completion Experience
↓
Performance Management / Coaching / Scorecard Review
Real Flow Scenarios
Scenario 1 – Evaluation-Driven Remediation
Agent receives low evaluation score on compliance
↓
Supervisor creates "Compliance Refresher" module
↓
Module type = Learning with Assessment
↓
Assigned to impacted agents
↓
Agents complete module and assessment
↓
Future evaluations improve
Scenario 2 – Onboarding by Skill Group
New ACD skill introduced
↓
Admin creates product knowledge module
↓
Auto Assign rule targets users with that ACD skill
↓
Users receive module automatically
↓
Completion tracked as part of onboarding
Usage Scenarios
| Scenario | Description |
|---|---|
| New hire onboarding | Deliver standard learning content to new agents |
| Post-evaluation coaching | Assign targeted remediation after poor evaluations |
| Product launch training | Deliver new knowledge to selected teams |
| Compliance refreshers | Reinforce required policies and scripts |
| Skill-based enablement | Auto assign modules by ACD skill |
| Division-specific training | Assign modules based on business unit or division |
Implementation Examples
| Example | Configuration |
|---|---|
| Compliance Refresher | Learning with Assessment / assigned to regulated queue teams |
| Product Launch Training | Learning / assigned to sales division |
| Knowledge Validation Quiz | Assessment / assigned to support group |
| New Hire Fundamentals | Learning with Assessment / auto assigned to onboarding group |
Design Example
Module Name: Billing Policy Refresher
Type: Learning with Assessment
Content: PDF policy guide + quick reference sheet
Question Groups: Policy Rules / Escalation Handling
Auto Assign: Billing division + selected support groups
Completion Target: 7 days
Best Practices
| Practice | Reason |
|---|---|
| Match module type to objective | Prevent unnecessary complexity |
| Keep modules focused on one coaching goal | Improves completion and retention |
| Use clear, action-oriented titles | Makes assignment purpose obvious |
| Attach concise supporting documents | Reduces learner fatigue |
| Reuse evaluation-style scoring patterns | Creates consistency across quality and training |
| Pilot Auto Assign rules first | Avoids incorrect broad assignment |
| Align modules with coaching plans | Improves measurable performance outcomes |
| Review completion and performance together | Training value is proven by behavior change |
Source: Operational Best Practice
Naming Convention
| Resource | Example |
|---|---|
| Learning Module | Billing_Policy_Refresher |
| Assessment Module | Security_Awareness_Assessment |
| Combined Module | New_Hire_Onboarding_Learning_Assessment |
| Question Group | Product_Knowledge |
| Auto Assign Rule | AutoAssign_Billing_Division_Compliance |
Naming pattern:
<BusinessArea>_<Topic>_<ModuleType>
Examples:
Support_LoginTroubleshooting_Learning
Compliance_CallHandling_Assessment
Sales_NewOffer_LearningWithAssessment
Security Considerations
| Control | Description |
|---|---|
| Role-Based Access | Limit who can create, edit, assign, and delete modules |
| Content Governance | Ensure attached files/documents are approved and current |
| Division-Aware Assignment | Prevent users from receiving irrelevant or restricted training |
| Auditability | Maintain records of who created and assigned training |
| Privacy | Do not attach sensitive data unless properly governed |
| Least Privilege | Grant only required permissions for content management and assignment |
Limitations / Constraints
| Constraint | Description |
|---|---|
| Character Limits | Not explicitly documented in Genesys UI documentation |
| Publish Behavior | Not explicitly documented in Genesys UI documentation for this specific feature page |
| Exact Filter Set on Main Page | Not explicitly documented in Genesys UI documentation |
| Auto Assign Logic Dimensions | Transcript explicitly mentions ACD skills, divisions, groups |
| Module Types | Limited in transcript to Learning, Learning with Assessment, Assessment |
| Assessment Question Model | Transcript states assessment questions are similar to evaluations |
| Dependency on Feature Availability | Performance Management / WEM access is required ([Genesys Cloud Resource Center][1]) |
Troubleshooting
| Issue | Cause | Resolution |
|---|---|---|
| Users did not receive module | Auto Assign criteria did not match | Verify ACD skills, divisions, or groups |
| Wrong users received module | Assignment criteria too broad | Refine Auto Assign scope and pilot first |
| Assessment incomplete | Required content or question groups missing | Review module structure |
| Low completion rate | Module too long or unclear | Simplify content and clarify objective |
| No measurable performance change | Module not aligned to root cause | Rework training to address actual gap |
| Attached document unavailable | File/content issue | Re-upload approved content and retest |
Interview Cheat Sheet
| Question | Answer |
|---|---|
| What is Development and Feedback? | Genesys Cloud feature for assigning training and assessment modules |
| What module types are available? | Learning, Learning with Assessment, Assessment |
| What can be used as content? | Files or documents; Genesys Beyond can also be assigned |
| How can modules be assigned automatically? | By ACD skills, divisions, or groups |
| How is it related to performance management? | It supports coaching, development, and continuous improvement ([Genesys Cloud Resource Center][1]) |
| Are APIs UI fields? | No; APIs belong under integration, not UI configuration |
Key Takeaways
| Topic | Summary |
|---|---|
| Development and Feedback | Training and assessment capability within Performance and Engagement |
| Module Types | Learning, Learning with Assessment, and Assessment |
| Content Model | Files/documents plus optional question groups |
| Auto Assign | Targets users by ACD skills, divisions, or groups |
| Business Value | Reinforces coaching and closes performance gaps |
| Documentation Gaps | Some exact UI labels and field limits are not explicitly documented in Genesys UI documentation |
Screenshots

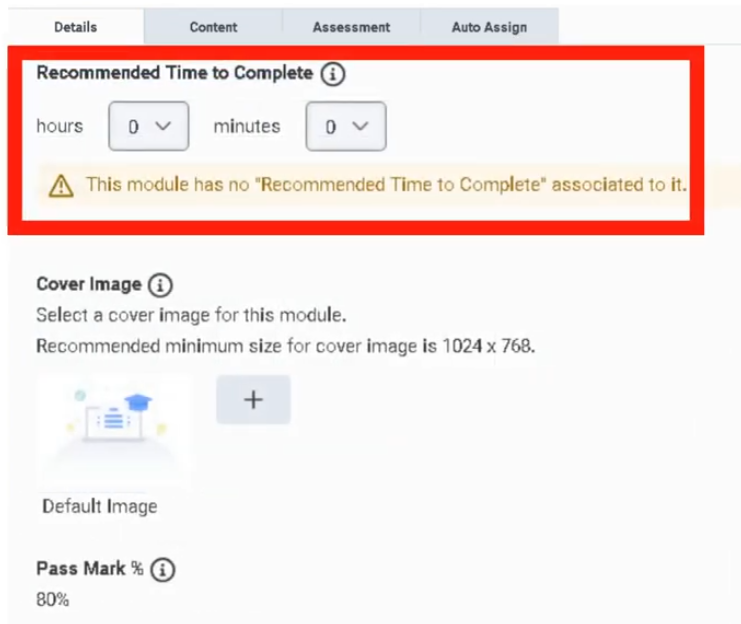
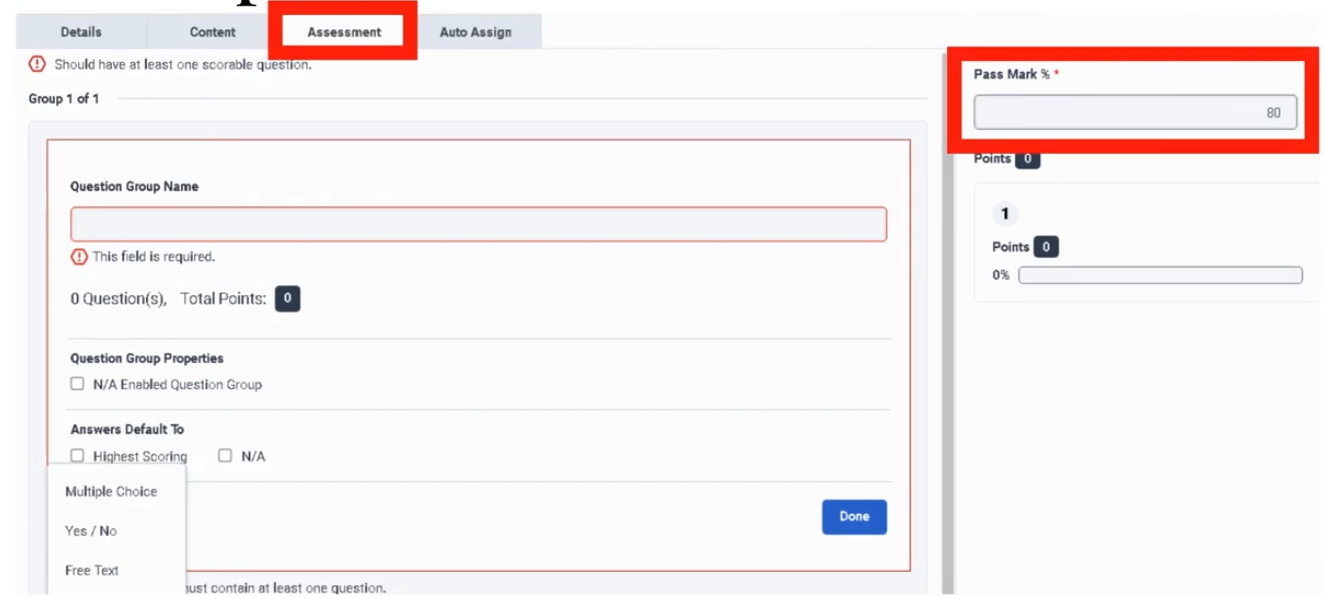
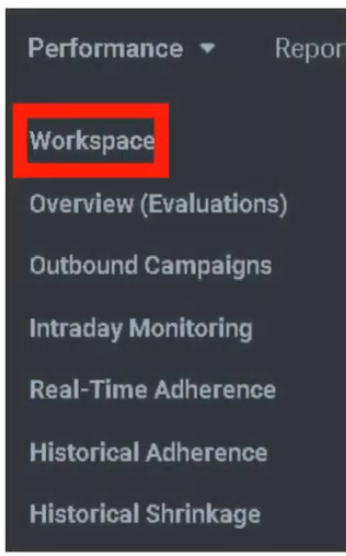
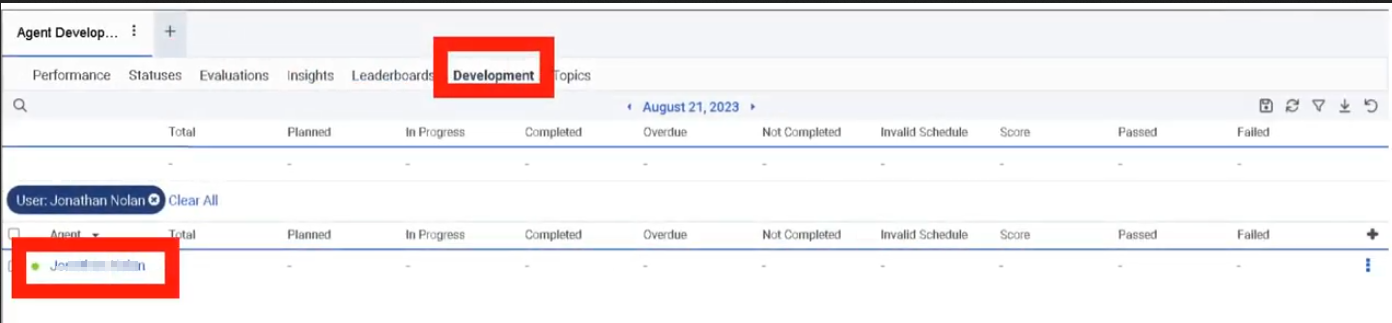
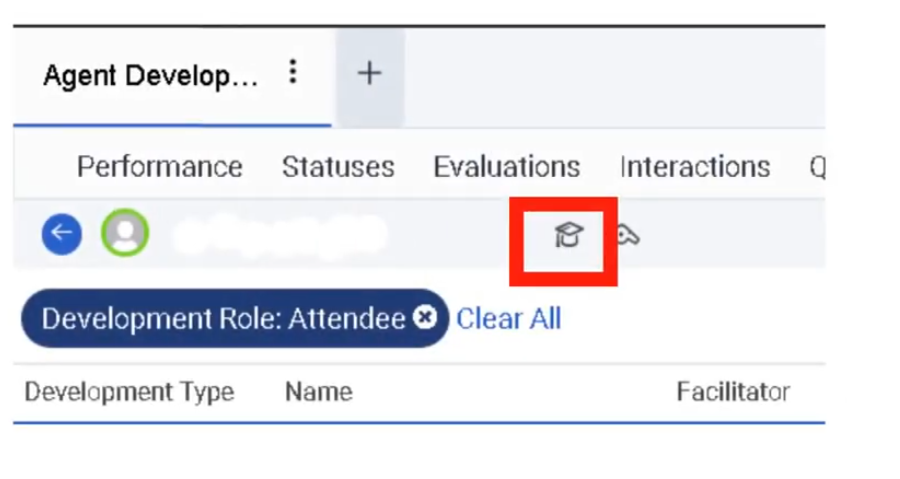
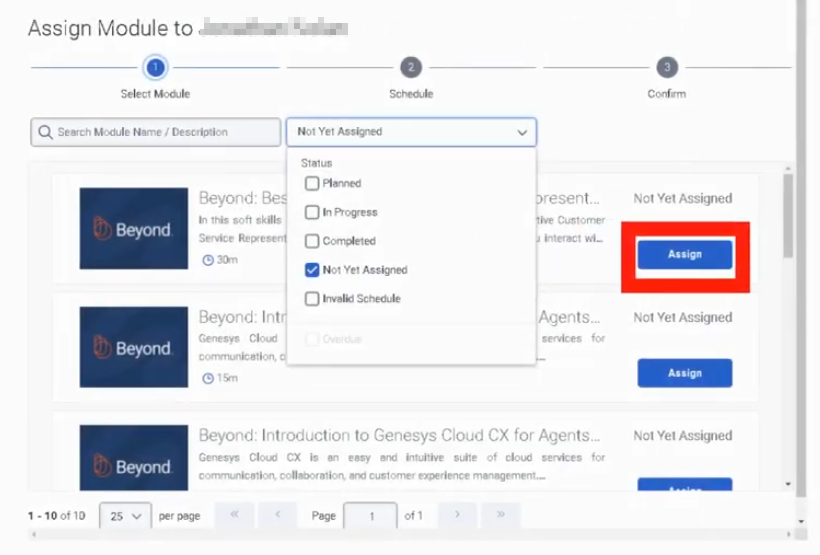
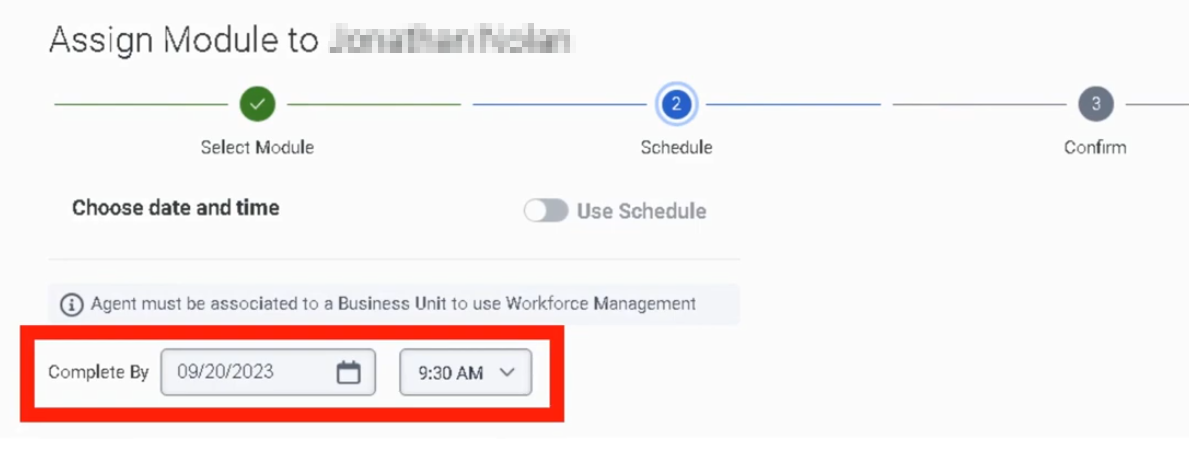
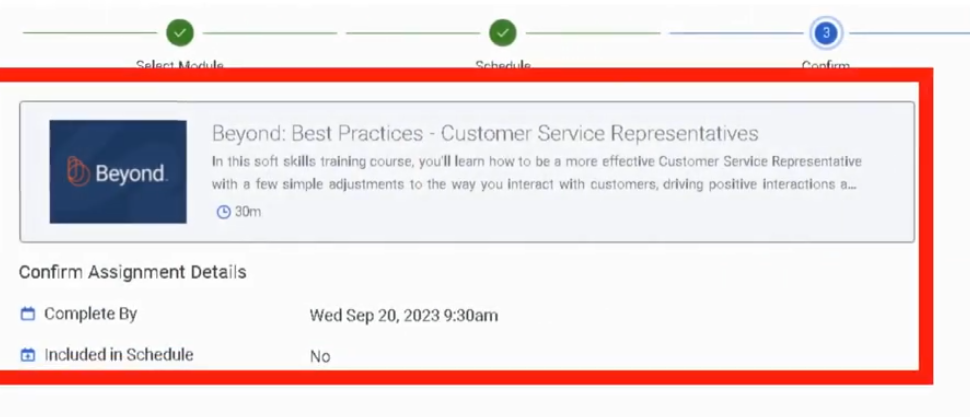
Evaluators
| Section | Description |
|---|---|
| Module Context | Part of Quality Management in Genesys Cloud Workforce Engagement Management (WEM). |
| Purpose | The Evaluators dashboard allows quality evaluators to view assigned evaluations, review interaction recordings, and score interactions using Evaluation Forms to measure agent performance, compliance, and service quality. |
| Navigation | Performance → Overview → Quality Evaluator |
| Alt Navigation | Menu → Conversation Intelligence → Quality Management → Evaluators |
| Required Permission | Quality > Evaluation > Edit Score (included in the default Quality Evaluator role) |
Important: The Evaluators page is a performance dashboard accessed through the Performance area — not an Admin configuration page. Evaluator role assignment and permissions are managed separately under
Admin → People & Permissions → Roles/Permissions.
Study Notes
| Topic | Explanation |
|---|---|
| Evaluators | Users assigned the Quality Evaluator role who review interactions and score them using evaluation forms. |
| Evaluations | Formal scoring of interactions based on evaluation forms. |
| Calibration | Multiple evaluators review the same interaction to ensure scoring consistency. An expert evaluator sets the benchmark. |
| Evaluation Assignment | Evaluations can be assigned manually or automatically through Quality Policies. |
| Evaluator Dashboard | Displays pending and completed evaluation activity for the logged-in evaluator. |
Evaluators help organizations maintain consistent service standards, compliance monitoring, and coaching programs.
Navigation
| Task | Navigation |
|---|---|
| Open Evaluator Dashboard | Performance → Overview → Quality Evaluator |
| Alt Navigation | Menu → Conversation Intelligence → Quality Management → Evaluators |
| Assign evaluator roles | Admin → People & Permissions → Roles/Permissions → Quality Evaluator role |
| Automate evaluation assignment | Admin → Quality → Policies |
| View interactions and recordings | Performance → Workspace → Interactions |
| Run calibrations | Performance → Quality → Calibration |
Evaluator Dashboard — Components
The Quality Evaluator dashboard has three main sections:
| Section | Description |
|---|---|
| Interactions Needing Attention | Table of interactions with evaluations assigned to the logged-in evaluator that have not yet been completed. Click the link in the Assigned Date/Time column to open a specific evaluation. |
| Agent Activity | Search by agent name or agent set. Shows how many evaluations were completed and the average score awarded to each agent during the configured date range. |
| Completed Interactions | Lists interactions the evaluator scored during the configured date range. |
To narrow results in Agent Activity, enter an agent name in the filter box.
Evaluator Role — Permissions
| Permission | Description |
|---|---|
Quality > Evaluation > Edit Score |
Required to access the Evaluator dashboard and submit evaluation scores. Included in the default Quality Evaluator role. |
Default role permissions summary:
| Role | Default Capabilities |
|---|---|
| Quality Administrator | Create/manage evaluation forms, quality policies, calibrations, recordings, annotations, and encryption keys |
| Quality Evaluator | Edit evaluations and annotations; view chats, recordings, and encryption keys |
Roles can be customized. For example, the Quality Administrator's recording access can be restricted to specific queues by adding conditions in the role configuration.
Configuration Fields (UI — Evaluator Dashboard)
Evaluator Dashboard
| UI Field | Description |
|---|---|
| Interactions Needing Attention | Table showing pending evaluations assigned to the logged-in evaluator |
| Assigned Date/Time | Clickable link to open the specific evaluation |
| Agent Activity table | Search and view evaluation metrics by agent name |
| Evaluations Completed (Agent Activity) | Count of evaluations completed for each agent |
| Average Score (Agent Activity) | Average score awarded during the date range |
| Completed Interactions table | List of interactions evaluated within the configured date range |
| Filter box | Enter agent name to reduce results in Agent Activity |
| Date range selector | Controls the time window for Agent Activity and Completed Interactions |
Dependencies
| Component | Purpose |
|---|---|
| Interaction Recording | Provides interactions for evaluation |
| Evaluation Forms | Defines scoring criteria used by evaluators |
| Quality Policies | Automates evaluation assignment to evaluators |
| Agent Profiles / User Accounts | Determines which agents appear in evaluation results |
Platform Integration / Related Components
| Component | Relationship |
|---|---|
| Evaluation Forms | Used by evaluators to score interactions |
| Quality Policies | Automatically assign evaluations to evaluators |
| Recording Management | Provides recorded interactions for review |
| Speech & Text Analytics | Helps identify interactions suitable for evaluation |
| Performance Management | Uses evaluation results for coaching and development |
Related Topics / Further Reading
| Topic | Purpose |
|---|---|
| Evaluation Forms | Create scoring criteria |
| Quality Policies | Automate evaluation assignments |
| Recording Management | Manage interaction recordings |
| Speech Analytics | Identify interactions for evaluation |
| Calibration | Ensure consistent scoring across evaluators |
Implementation Checklist
| Step | Status |
|---|---|
| Assign Quality Evaluator role to users | ☐ |
| Create evaluation forms | ☐ |
| Enable interaction recording | ☐ |
| Configure evaluation policies | ☐ |
| Assign evaluations (manually or via policy) | ☐ |
| Train evaluators on scoring standards | ☐ |
| Run calibration sessions | ☐ |
Implementation Guide
| Step | Action |
|---|---|
| Step 1 | Navigate to Admin → People & Permissions → Roles/Permissions |
| Step 2 | Assign Quality Evaluator role to intended users |
| Step 3 | Create evaluation forms (Admin → Quality → Evaluation Forms) |
| Step 4 | Enable interaction recording |
| Step 5 | Configure quality policies to assign evaluations automatically |
| Step 6 | Train evaluators on scoring standards and calibration process |
| Step 7 | Conduct calibration sessions periodically to maintain consistency |
Workflow
Customer Interaction
↓
Interaction Recorded
↓
Quality Policy Assigns Evaluation
↓
Evaluator Opens Dashboard
↓
Reviews Pending Evaluations (Interactions Needing Attention)
↓
Evaluator Reviews Recording
↓
Evaluator Completes Evaluation Form
↓
Results Released to Agent / Used for Coaching
Calibration Workflow
Recorded Interaction Selected for Calibration
↓
Multiple Evaluators Assigned via Policy
↓
Each Evaluator Scores Independently
↓
Expert Evaluator Sets Benchmark
↓
Calibration Session Conducted
↓
Scoring Variations Compared and Discussed
Usage Scenarios
| Scenario | Description |
|---|---|
| Quality Assurance | Monitor and score agent performance |
| Compliance Monitoring | Verify adherence to regulatory or script requirements |
| Coaching Programs | Identify knowledge gaps and improvement areas |
| Performance Tracking | Evaluate agent service quality over time |
| Calibration Sessions | Ensure consistent scoring standards across evaluators |
Best Practices
| Practice | Reason |
|---|---|
| Conduct calibration sessions regularly | Ensures scoring consistency across evaluators |
| Train evaluators on form intent | Improves accuracy and reduces subjective scoring |
| Monitor evaluator activity | Ensures evaluations are being completed on time |
| Use the Agent Activity view | Provides quick aggregate view of how agents are performing |
| Limit evaluator workload with quotas | Prevents evaluation fatigue and missed assignments |
Naming Convention
| Resource | Example |
|---|---|
| Evaluator Role | Quality_Evaluator |
| Evaluation Form | Support_Call_Evaluation |
| Calibration Program | Monthly_Calibration |
Security Considerations
| Control | Description |
|---|---|
| Role Permissions | Only users with the Quality Evaluator role can access the dashboard and submit scores |
| Recording Access | Evaluators can view recordings of interactions they are assigned to evaluate |
| Evaluation Visibility | Results can be restricted; agents see evaluations only when released |
| Conditions on Roles | Quality Administrators can be restricted to recordings from specific queues |
Limitations / Constraints
| Constraint | Description |
|---|---|
| Dashboard access | Requires Quality > Evaluation > Edit Score permission |
| Recording availability | Interaction must have been recorded for an evaluation to be created |
| Calibration requirement | Requires two or more evaluators plus an expert evaluator |
| Arabic dialect limitation | Dates/times do not currently display in standard Arabic format — to be resolved in a future update |
Troubleshooting
| Issue | Cause | Resolution |
|---|---|---|
| Evaluator cannot access the dashboard | Missing Quality > Evaluation > Edit Score permission |
Assign the Quality Evaluator role or add the permission directly |
| Evaluations not appearing in Interactions Needing Attention | Policy not assigning evaluations | Verify policy criteria and ensure policy is enabled |
| No recordings visible | Recording not enabled or evaluator lacks recording access | Check recording settings and role permissions |
| Calibration scores inconsistent | Evaluators interpreting form differently | Conduct calibration training and review evaluation form help text |
Interview Cheat Sheet
| Question | Answer |
|---|---|
| Where is the Evaluator dashboard accessed? | Performance → Overview → Quality Evaluator or Menu → Conversation Intelligence → Quality Management → Evaluators |
| What permission is required? | Quality > Evaluation > Edit Score (included in the Quality Evaluator role) |
| What are the three sections of the dashboard? | Interactions Needing Attention / Agent Activity / Completed Interactions |
| What is calibration? | Process where multiple evaluators score the same interaction to ensure consistent scoring; an expert evaluator sets the benchmark |
| How are evaluations assigned? | Manually or automatically through quality policies |
Key Takeaways
| Topic | Summary |
|---|---|
| Evaluators | Users with the Quality Evaluator role who review and score recorded interactions |
| Dashboard Location | Performance → Overview → Quality Evaluator (NOT under Admin) |
| Required Permission | Quality > Evaluation > Edit Score |
| Dashboard Sections | Interactions Needing Attention / Agent Activity / Completed Interactions |
| Calibration | Ensures scoring consistency; requires expert evaluator as benchmark |
| Evaluation Assignment | Via quality policies (automatic) or manually |
Evluation form
| Section | Description |
|---|---|
| Module Context | Part of Quality Management within Genesys Cloud WEM |
| Navigation | Admin → Quality → Evaluation Forms |
| Alt Navigation | Menu → Conversational Intelligence → Quality Management → Evaluation Forms |
| Required Permissions | Quality > Evaluation Form > Add / Edit / Delete |
| Primary Function | Create and manage forms used by evaluators to score recorded interactions and measure agent performance and compliance |
The Evaluation Forms page is a dashboard for form management activities. It lists all evaluation forms with the form name and the date and time each form was last modified — this timestamp serves as the form's version ID.
Study Notes
| Topic | Explanation |
|---|---|
| Evaluation Form | A structured scoring template used to assess recorded interactions |
| Question Group | A logical grouping of related questions within a form (e.g., Compliance, Greeting, Product Knowledge) |
| Question Type | Defines how the evaluator responds to a question (Multiple Choice, Yes/No, Range) |
| Fatal Question | If answered incorrectly, the entire evaluation automatically fails regardless of total score |
| Critical Question | High-importance question that impacts score but does not cause automatic failure |
| Range Question | Evaluator scores on a numeric scale (e.g., 1–5) |
| Yes/No Question | Binary scoring — used for compliance checks |
| Multiple Choice Question | Evaluator selects from predefined options, each worth a point value |
| Points | Numeric score value assigned per answer option |
| Help Text | Tooltip shown to evaluator when hovering over a question — improves scoring consistency |
| Require Additional Comments | Forces evaluator to enter a comment for that question — used for coaching or compliance evidence |
| Conditional Question | Displays a question only when a prior condition is met — reduces form complexity |
| Publish | Makes the form available for use in evaluations and policies |
| Version ID | The last-modified timestamp on the form list page |
Navigation
| Task | Navigation |
|---|---|
| Open Evaluation Forms | Admin → Quality → Evaluation Forms |
| Alt Navigation | Menu → Conversational Intelligence → Quality Management → Evaluation Forms |
| Create a new form | Admin → Quality → Evaluation Forms → Create |
| Edit a form | Admin → Quality → Evaluation Forms → select form → Edit |
| Publish a form | Inside the form editor → Publish button |
Evaluation Forms List Page
| UI Field | Description |
|---|---|
| Form Name | Name of the evaluation form |
| Last Modified (Date/Time) | Timestamp of last modification — also serves as the version ID for the form |
| Create | Opens a new evaluation form |
| Search | Search for forms by name |
| Edit | Open form for editing |
| Delete | Remove the form |
Critical Evaluation Fields
| Field | Description | Implementation Purpose | Example Use |
|---|---|---|---|
| Question Group | Logical grouping of related questions | Organizes the form into sections | Compliance / Greeting / Product Knowledge |
| Question Type | How the evaluator answers the question | Determines scoring behavior | Multiple Choice / Yes-No / Range |
| Points | Numeric value per answer option | Used to calculate final score | Correct = 1, Incorrect = 0 |
| Help Text | Tooltip shown when evaluator hovers over question | Guidance for consistent scoring | "Agent must verify customer identity before proceeding." |
| Require Additional Comments | Forces evaluator to enter comments | Ensures detailed feedback for coaching/compliance | Required for low-scoring answers |
| Conditional Question | Shows only if prior condition is met | Keeps form concise and context-aware | Show escalation question only if customer asked for supervisor |
Fatal Question
| Field | Description | Implementation Purpose | Example |
|---|---|---|---|
| Fatal Question | If answered incorrectly, the entire evaluation automatically fails regardless of total score | Used for critical compliance or legal requirements | "Did the agent verify customer identity?" |
Fatal Question Behavior
Agent Interaction
↓
Evaluator answers Fatal Question
↓
Incorrect Answer Selected
↓
Entire Evaluation Score = FAIL
(regardless of all other question scores)
When to Use Fatal Questions
| Scenario | Reason |
|---|---|
| Compliance violations | Regulatory requirement — failure is not acceptable |
| Security verification failure | Customer identity not confirmed |
| Mandatory legal disclosures not followed | Legal or contractual obligation |
Best practice: Use fatal questions sparingly — reserve them only for true compliance or legal requirements where failure is unacceptable.
Critical Question
| Field | Description | Implementation Purpose | Example |
|---|---|---|---|
| Critical Question | High-importance question that significantly impacts the evaluation score but does not automatically fail the entire evaluation | Ensures high-impact scoring without automatic failure | "Did the agent provide correct product information?" |
Critical Question Behavior
Agent Interaction
↓
Evaluator answers Critical Question
↓
Incorrect Answer
↓
Points Deducted from Score
(evaluation does NOT automatically fail)
When to Use Critical Questions
| Scenario | Reason |
|---|---|
| Customer experience standards | Greeting quality, empathy |
| Product knowledge verification | Accuracy of information given |
| Process adherence | Correct workflow followed |
Question Types
Range Question
| Field | Description | Implementation Purpose | Example |
|---|---|---|---|
| Range Question | Evaluator scores on a numeric scale | Measures qualitative performance | 1–5 rating scale |
Example scale:
| Score | Meaning |
|---|---|
| 1 | Poor |
| 3 | Acceptable |
| 5 | Excellent |
Yes / No Question
| Field | Description | Implementation Purpose | Example |
|---|---|---|---|
| Yes / No Question | Binary scoring | Compliance checks | "Did the agent greet the customer properly?" |
Points example:
| Answer | Points |
|---|---|
| Yes | 1 |
| No | 0 |
Multiple Choice Question
| Field | Description | Implementation Purpose | Example |
|---|---|---|---|
| Multiple Choice | Evaluator selects from predefined options | Structured scoring | Greeting quality rating |
Example options:
| Answer | Points |
|---|---|
| Excellent | 5 |
| Good | 3 |
| Poor | 1 |
Form Structure Example
Evaluation Form: Customer Service Review
Section 1: Compliance
Fatal Question → Identity Verification (Yes/No)
Section 2: Customer Experience
Range Question → Professionalism (1–5)
Critical Question → Issue Resolution (Yes/No)
Section 3: Product Knowledge
Multiple Choice → Correct Information Provided
Conditional Question → Escalation Handling
(appears only if customer requested supervisor)
Permissions
| Permission | Description |
|---|---|
Quality > Evaluation Form > Add |
Create new evaluation forms |
Quality > Evaluation Form > Edit |
Modify existing forms |
Quality > Evaluation Form > Delete |
Remove forms |
Dependencies
| Component | Purpose |
|---|---|
| Interaction Recording | Provides interactions to be evaluated using the form |
| Quality Policies | Reference evaluation forms when assigning evaluations |
| Evaluators | Use the form to score interactions |
| Quality Management (Admin) | Parent feature area |
Implementation Checklist
| Task | Status |
|---|---|
| Define evaluation categories (question groups) | ☐ |
| Decide which questions require fatal logic | ☐ |
| Select appropriate question types per question | ☐ |
| Add help text to all questions | ☐ |
| Configure scoring (points per answer) | ☐ |
| Add conditional questions where appropriate | ☐ |
| Save the form as draft | ☐ |
| Review and validate the form | ☐ |
| Publish the form | ☐ |
| Reference the form in quality policies | ☐ |
Implementation Guide
| Step | Action |
|---|---|
| Step 1 | Navigate to Admin → Quality → Evaluation Forms |
| Step 2 | Click Create |
| Step 3 | Enter form name |
| Step 4 | Add Question Groups |
| Step 5 | Add questions to each group with the appropriate Question Type |
| Step 6 | Configure Points, Help Text, and Comments settings per question |
| Step 7 | Toggle Fatal or Critical where applicable |
| Step 8 | Add Conditional logic where appropriate |
| Step 9 | Save draft |
| Step 10 | Click Publish to make the form available for use |
Workflow
Admin Creates Evaluation Form
↓
Question Groups Added
↓
Questions Added (with type, points, help text)
↓
Fatal / Critical Flags Set
↓
Form Published
↓
Policy References Form
↓
Evaluator Uses Form to Score Interaction
Best Practices for Evaluation Forms
| Practice | Reason |
|---|---|
| Use fatal questions sparingly | Prevent unnecessary evaluation failures |
| Reserve fatal for legal/compliance requirements | Only true pass/fail scenarios should auto-fail |
| Use range questions for soft skills | Better measures qualitative performance like empathy |
| Provide help text for every question | Improves evaluator consistency and reduces subjectivity |
| Group questions logically by topic | Makes evaluation easier to complete accurately |
| Use conditional questions | Reduces form complexity and irrelevant questions |
| Keep forms focused | Forms covering too many topics are harder to score consistently |
| Calibrate evaluators regularly against published forms | Ensures form is interpreted consistently |
Naming Convention
| Resource | Example |
|---|---|
| Evaluation Form | Support_Call_Evaluation_Form |
| Question Group | Compliance / CustomerExperience / ProductKnowledge |
Limitations / Constraints
| Constraint | Description |
|---|---|
| Form must be published | Forms in draft state cannot be used in policies or evaluations |
| Version tracking | Last-modified timestamp is the version ID — no formal versioning system |
| Arabic dialect limitation | Date/time display does not currently appear in standard Arabic format — to be resolved in a future update |
Interview Cheat Sheet
| Question | Answer |
|---|---|
| Where are evaluation forms managed? | Admin → Quality → Evaluation Forms |
| What permissions are required? | Quality > Evaluation Form > Add / Edit / Delete |
| What is a Fatal Question? | A question that automatically fails the entire evaluation if answered incorrectly |
| When should fatal questions be used? | Only for true compliance or legal requirements |
| What is a Critical Question? | High-importance question that impacts score but does NOT auto-fail the evaluation |
| Why use range questions? | To evaluate qualitative performance like empathy or professionalism |
| What is the version ID of a form? | The last-modified date/time timestamp shown on the form list |
| What does publishing a form do? | Makes it available for evaluators and for reference in quality policies |
Key Takeaways
| Topic | Summary |
|---|---|
| Evaluation Forms | Structured templates used by evaluators to score recorded interactions |
| Navigation | Admin → Quality → Evaluation Forms or Menu → Conversational Intelligence → Quality Management → Evaluation Forms |
| Version ID | Last-modified timestamp on the form list page |
| Fatal Questions | Auto-fail the entire evaluation — reserve for compliance/legal requirements only |
| Critical Questions | High impact on score but do not auto-fail |
| Question Types | Multiple Choice / Yes-No / Range |
| Publish Required | Forms must be published before they can be used |
| Permissions | Quality > Evaluation Form > Add / Edit / Delete |
External Metrics
External Metrics (Genesys Cloud Performance and Engagement)
| Section | Description |
|---|---|
| Feature Area | Performance and Engagement |
| Admin Location | Admin → Performance and Engagement → External Metrics Definitions |
| Primary Function | Define externally sourced performance metrics so they can be loaded into an employee’s scorecard |
| Typical Use Cases | Import CSAT, sales, revenue, quality indicators, or other third-party KPIs into performance management |
| Metric Units Mentioned in Training | Number, Seconds, Percent, Currency |
| Transcript Focus | Metric definition, unit selection, and rounding precision |
| Key Dependency | Performance management / scorecards capability must be available in the organization. Genesys positions performance management as part of its WEM and agent performance tooling. :contentReference[oaicite:0]{index=0} |
External Metrics Definitions let administrators define the metadata for non-Genesys performance measures so those values can be incorporated into an employee scorecard. In the transcript, the instructor specifically calls out importing third-party data such as CSAT scores or sales and configuring each metric’s unit and rounding precision. Genesys documents performance management as part of the platform’s agent performance toolset, alongside scorecards, feedback, and related engagement features. :contentReference[oaicite:1]{index=1}
Summary Table
| Attribute | Details |
|---|---|
| Feature Type | Scorecard metric definition |
| Data Origin | External / third-party systems |
| Business Purpose | Enrich employee scorecards with business KPIs not generated natively by Genesys Cloud |
| Common Examples | CSAT, sales, revenue, handle-time targets from external systems, business outcome metrics |
| Definition Inputs from Transcript | Metric unit and rounding precision |
| Assignment / Data Load Method | Not explicitly documented in Genesys UI documentation in the provided source set |
| Feature Family | Performance Management / WEM :contentReference[oaicite:2]{index=2} |
Study Notes
| Topic | Explanation |
|---|---|
| External Metric | A KPI that originates outside native Genesys interaction analytics |
| Metric Definition | The schema/metadata that tells Genesys how to interpret imported values |
| Scorecard | Employee performance view where external metrics can appear |
| Metric Unit | Defines how values are displayed and interpreted |
| Rounding Precision | Controls display precision for the imported value |
| Business KPI Enrichment | Allows scorecards to reflect broader business outcomes, not only contact center metrics |
Genesys positions performance management as a capability that helps improve agent performance and engagement through scorecards, feedback, and related tooling. External Metrics extends that model by allowing business data from outside Genesys to be represented in scorecards. :contentReference[oaicite:3]{index=3}
Transcript Implementation Notes
Source: Transcript
The instructor describes External Metrics Definitions as a way to import third-party data into an employee’s scorecard.
| Step | Instruction |
|---|---|
| Step 1 | Navigate to Performance and Engagement → External Metrics Definitions |
| Step 2 | Create or define an external metric |
| Step 3 | Choose the metric unit |
| Step 4 | Configure rounding precision |
| Step 5 | Use the definition so third-party KPI data can appear in an employee scorecard |
Transcript-derived guidance:
| Item | Guidance |
|---|---|
| Recommended Use | Use external metrics for KPIs like CSAT, sales, or other non-native performance measures |
| Metric Unit Selection | Match the display type to the source data: number, seconds, percent, or currency |
| Precision Strategy | Use rounding precision that preserves business meaning without cluttering scorecards |
| Character Limits | Not explicitly documented in the transcript |
| Required Fields | Metric unit is explicitly mentioned; other required fields are not explicitly documented in Genesys UI documentation |
Navigation
| Task | Navigation Path |
|---|---|
| Open External Metrics Definitions | Admin → Performance and Engagement → External Metrics Definitions |
| View existing definitions | Admin → Performance and Engagement → External Metrics Definitions |
| Create metric definition | Admin → Performance and Engagement → External Metrics Definitions → Create |
| Edit metric definition | Admin → Performance and Engagement → External Metrics Definitions → Edit |
| Delete metric definition | Admin → Performance and Engagement → External Metrics Definitions → Delete |
| Review scorecards | Agent/Supervisor performance scorecard area; exact path not explicitly documented in Genesys UI documentation |
Configuration Fields (UI Form Fields)
Main Page
| UI Field | Description | Options |
|---|---|---|
| External Metric Definitions List | Displays configured metric definitions | Read-only |
| Metric Name | Name of the external metric | Read-only in list |
| Metric Unit | Unit associated with the metric | Number / Seconds / Percent / Currency |
| Rounding Precision | Display precision for the metric | Numeric precision value |
| Search | Search existing metric definitions | Text |
| Create | Start a new external metric definition | Button |
| Edit | Modify selected metric definition | Button |
| Delete | Remove selected metric definition | Button |
| Refresh | Reload definitions list | Button |
Some list-view columns beyond Metric Name, Metric Unit, and Rounding Precision are not explicitly documented in Genesys UI documentation in the provided source set.
Create/Edit Form
| UI Field | Description | Options |
|---|---|---|
| Metric Name | Unique name for the external metric definition | Text |
| Description | Explains what the metric represents | Text area |
| Metric Unit | Defines how the value is interpreted and displayed | Number / Seconds / Percent / Currency |
| Rounding Precision | Number of decimal places or display precision | Numeric field |
| Save | Save the metric definition | Button |
| Cancel | Cancel changes | Button |
Additional create/edit fields such as source mapping keys, import identifiers, or visibility controls are not explicitly documented in Genesys UI documentation in the provided source set.
Character limits for Metric Name and Description are not explicitly documented in Genesys UI documentation.
Tabs, Toggles, Dropdowns, Action Buttons
| Element Type | Items |
|---|---|
| Dropdowns | Metric Unit |
| Numeric Inputs | Rounding Precision |
| Text Inputs | Metric Name / Description |
| Buttons | Create / Save / Cancel / Edit / Delete / Refresh |
| Tabs | Not explicitly documented in Genesys UI documentation |
| Toggles | Not explicitly documented in Genesys UI documentation |
Dependencies
| Component | Purpose |
|---|---|
| Performance Management | External metrics feed employee scorecards within performance tooling :contentReference[oaicite:4]{index=4} |
| Employee Scorecards | Destination where defined external metrics are surfaced |
| Third-Party Data Source | Provides the source KPI values |
| Identity / User Mapping | Needed so imported values are tied to the correct employee |
| Data Load / Integration Process | Needed to move metric values from external source into Genesys ecosystem; exact method not explicitly documented in Genesys UI documentation |
Platform Integration / Related Components
| Component | Relationship |
|---|---|
| Scorecards | External metrics are displayed as part of employee performance scorecards |
| Development and Feedback | External metrics can help identify training needs |
| Gamification | External metrics may complement gamification goals in broader performance strategies |
| Reports, Views, and Dashboards | Used to analyze performance impact across teams and time |
| Workforce Engagement Management | External metrics fit into the broader performance and engagement toolset that Genesys associates with WEM/performance management. :contentReference[oaicite:5]{index=5} |
Integration Examples
| Integration | Description |
|---|---|
| CRM Integration | Import closed sales or revenue by employee from Salesforce or another CRM |
| Survey Platform Integration | Import CSAT or post-contact survey outcome from an external survey system |
| ERP / Billing Integration | Import collections, revenue, or billing accuracy metrics |
| Data Warehouse Feed | Load curated KPI values from enterprise BI or analytics platforms |
Example integration workflow:
Third-Party System
↓
KPI Data Prepared Per Employee
↓
External Metric Definition Exists in Genesys
↓
Metric Values Loaded / Mapped
↓
Employee Scorecard Displays External KPI
Related Topics / Further Reading
| Topic | Description |
|---|---|
| Performance Management | Parent feature area for scorecards and engagement tooling ([Genesys Cloud Resource Center][1]) |
| Development and Feedback | Use scorecard gaps to trigger targeted training assignments |
| Gamification | Use performance metrics to motivate and reinforce goals |
| Reports, Views, and Dashboards | Monitor performance trends using Genesys reporting capabilities ([Genesys Cloud Resource Center][1]) |
| Workforce Engagement Management | Broader suite containing performance-related features ([Genesys Cloud Resource Center][1]) |
Implementation Checklist
| Task | Status |
|---|---|
| Confirm performance management capability is available | ☐ |
| Identify external KPI source systems | ☐ |
| Define employee/user mapping strategy | ☐ |
| Create external metric definition | ☐ |
| Select correct metric unit | ☐ |
| Set rounding precision | ☐ |
| Validate scorecard display behavior | ☐ |
| Test import with pilot users | ☐ |
| Document data ownership and refresh cadence | ☐ |
Implementation Guide
| Step | Action |
|---|---|
| Step 1 | Identify the business KPI to import |
| Step 2 | Confirm the KPI is tied to individual employees |
| Step 3 | Navigate to Admin → Performance and Engagement → External Metrics Definitions |
| Step 4 | Click Create |
| Step 5 | Enter a Metric Name and optional Description |
| Step 6 | Select the correct Metric Unit |
| Step 7 | Set Rounding Precision |
| Step 8 | Save the definition |
| Step 9 | Validate that incoming data maps correctly to employee scorecards |
How to Implement
| Phase | Description |
|---|---|
| KPI Design | Decide which external KPI belongs in the scorecard |
| Definition Build | Create the metric definition and choose display rules |
| Data Mapping | Ensure values map to the correct employee identity |
| Validation | Confirm value formatting and scorecard behavior |
| Rollout | Expand from pilot to broader population |
| Governance | Maintain owner, refresh frequency, and business definition |
Recommended unit selection:
| Data Type | Recommended Unit |
|---|---|
| Count of events or items | Number |
| Time-based KPI | Seconds |
| Ratio or satisfaction rate | Percent |
| Revenue / sales amount | Currency |
Workflow
Business KPI Identified
↓
External Metric Definition Created
↓
Metric Unit and Precision Configured
↓
Third-Party Data Mapped to Employees
↓
Values Displayed in Scorecard
↓
Supervisor Uses Metric for Coaching / Performance Review
Architecture Diagram
External Business System
↓
KPI Extraction / Transformation
↓
Employee Mapping
↓
Genesys External Metric Definition
↓
Performance Scorecard
↓
Supervisor Review / Coaching / Gamification
Real Flow Scenarios
Scenario 1 – CSAT from External Survey Tool
External survey tool calculates CSAT by agent
↓
Admin defines metric = Customer Satisfaction
↓
Metric unit = Percent
↓
Rounding precision configured
↓
CSAT appears in employee scorecard
Scenario 2 – Sales Revenue from CRM
CRM stores closed sales by employee
↓
Admin defines metric = Sales Revenue
↓
Metric unit = Currency
↓
Values imported and mapped by employee
↓
Supervisor compares sales KPI to coaching results
Usage Scenarios
| Scenario | Description |
|---|---|
| CX measurement | Display CSAT or NPS-like results from an external survey platform |
| Sales enablement | Bring revenue or conversion values into scorecards |
| Collections / recovery | Measure payment recovery or settlement outcomes |
| Back-office QA | Track externally measured accuracy or completion KPIs |
| Business outcome alignment | Blend operational contact center performance with business KPIs |
Implementation Examples
| Example | Configuration |
|---|---|
| CSAT Metric | Unit = Percent / Precision = whole number or one decimal |
| Revenue Metric | Unit = Currency / Precision = 2 decimals |
| Sales Count | Unit = Number / Precision = 0 decimals |
| External Handle-Time Target | Unit = Seconds / Precision based on reporting standard |
Design Example
Metric Name: Billing_CSAT
Description: Customer satisfaction result from external survey system
Metric Unit: Percent
Rounding Precision: 1
Data Source: Survey platform
Scorecard Audience: Billing agents
Best Practices
| Practice | Reason |
|---|---|
| Define clear business ownership for each metric | Prevents disputes over KPI meaning |
| Match the unit to the source data exactly | Avoids misleading scorecard display |
| Keep rounding precision consistent across similar KPIs | Improves readability and comparison |
| Pilot with a small user group first | Validates mapping and formatting |
| Document employee mapping logic | Prevents scorecard attribution errors |
| Use meaningful metric names | Makes scorecards easier to interpret |
| Review refresh cadence with stakeholders | Ensures expectations match data timeliness |
Source: Operational Best Practice
Naming Convention
| Resource | Example |
|---|---|
| CSAT Metric | CX_CSAT_Percent |
| Sales Metric | Sales_Revenue_USD |
| Time Metric | Service_Resolution_Seconds |
| Quality Metric | BackOffice_Accuracy_Percent |
Naming pattern:
<BusinessArea>_<MetricName>_<Unit>
Examples:
Support_CSAT_Percent
Sales_Revenue_Currency
Collections_Payments_Number
Security Considerations
| Control | Description |
|---|---|
| Role-Based Access | Limit who can create and edit external metric definitions |
| Data Minimization | Import only needed KPI values |
| Employee Mapping Controls | Ensure values are attached to the correct user |
| Sensitive Financial Data Handling | Treat currency and sales metrics as potentially confidential |
| Auditability | Keep a record of metric purpose, owner, and source |
| Least Privilege | Restrict integration accounts and administrative access |
Limitations / Constraints
| Constraint | Description |
|---|---|
| Supported Units in Transcript | Number / Seconds / Percent / Currency |
| Precision Setting | Rounding precision is configurable per metric definition |
| Character Limits | Not explicitly documented in Genesys UI documentation |
| Exact Import Method | Not explicitly documented in Genesys UI documentation in the provided source set |
| Additional Advanced Fields | Not explicitly documented in Genesys UI documentation in the provided source set |
| User Mapping Requirement | External data must be attributable to the correct employee for scorecard usefulness |
| Scorecard Dependency | External metrics are only useful if scorecards/performance tooling is enabled. Genesys positions performance management and scorecards as part of this feature family. ([Genesys Cloud Resource Center][1]) |
Troubleshooting
| Issue | Cause | Resolution |
|---|---|---|
| Metric not visible in scorecard | Definition exists but values not loaded or not mapped | Validate data pipeline and employee mapping |
| Incorrect number format | Wrong unit selected | Update metric unit to match source data |
| Too many decimals displayed | Rounding precision not aligned | Adjust rounding precision |
| Wrong employee receives KPI | Mapping logic incorrect | Review source identifiers and identity matching |
| Stakeholders dispute KPI meaning | Poor naming/definition | Update description and ownership documentation |
| Data arrives late | Upstream integration or refresh issue | Review source cadence and integration process |
Interview Cheat Sheet
| Question | Answer |
|---|---|
| What is External Metrics Definitions? | A feature used to define third-party KPIs so they can appear in employee scorecards |
| What metric units are mentioned in the training? | Number, Seconds, Percent, Currency |
| What is rounding precision used for? | It controls how imported values are displayed |
| Give examples of external metrics | CSAT, sales, revenue, or other business KPIs |
| Is an API or import method a UI field? | No, integrations belong under platform integration, not UI fields |
| Why use external metrics? | To enrich scorecards with business outcomes not generated natively by Genesys |
Key Takeaways
| Topic | Summary |
|---|---|
| External Metrics | Bring third-party KPI values into employee scorecards |
| Metric Unit | Determines how the KPI is displayed and interpreted |
| Rounding Precision | Controls scorecard value presentation |
| Business Value | Connects contact center performance with external business outcomes |
| Documentation Caveat | Some advanced UI and import details are not explicitly documented in the provided official UI source set |
Screenshots
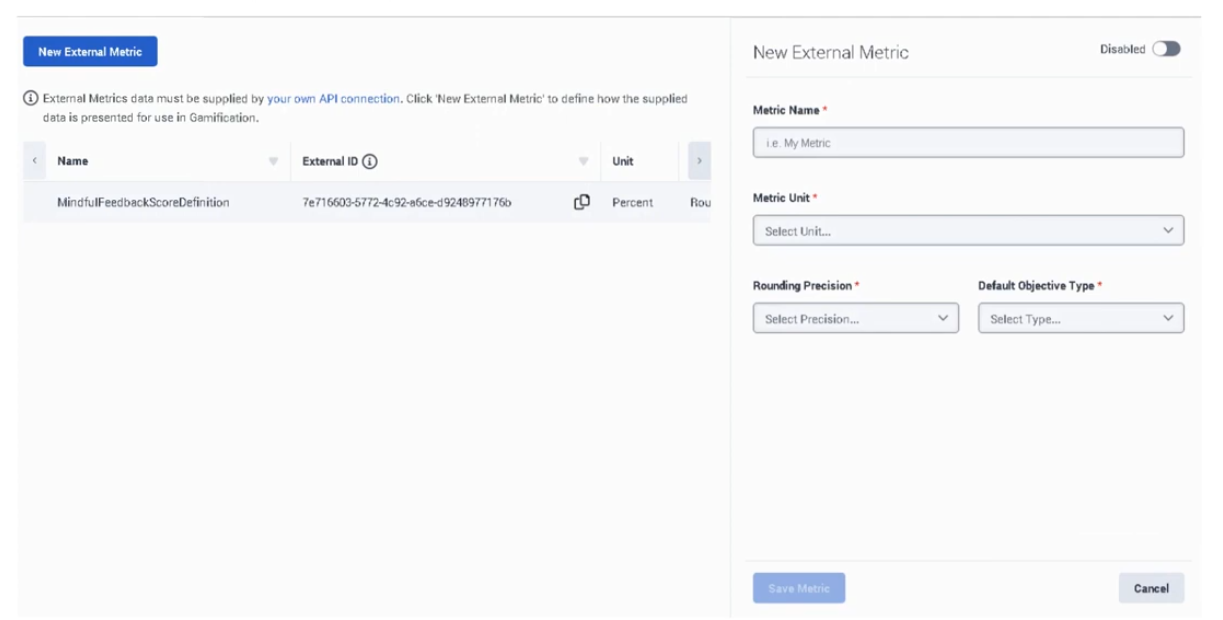
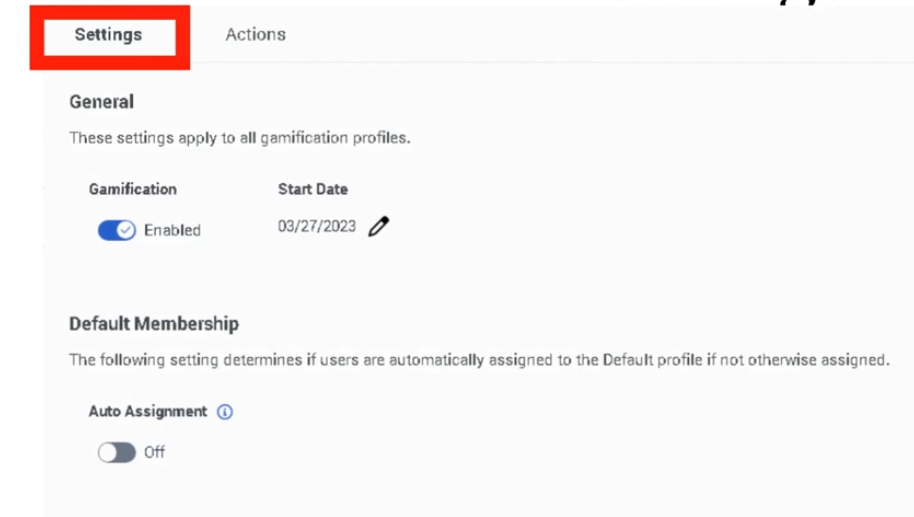
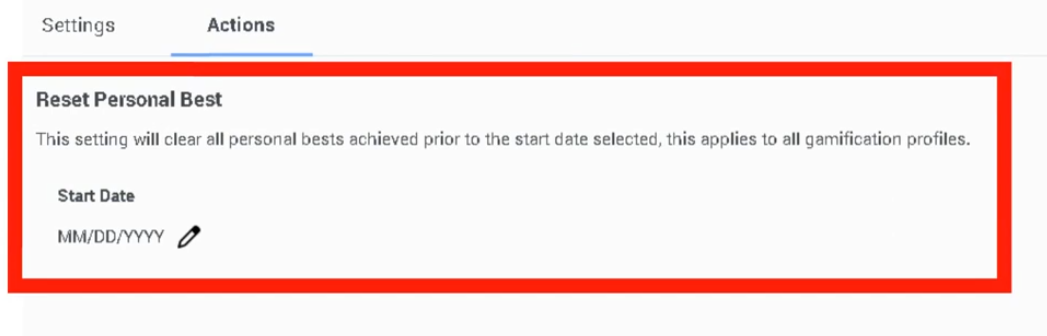
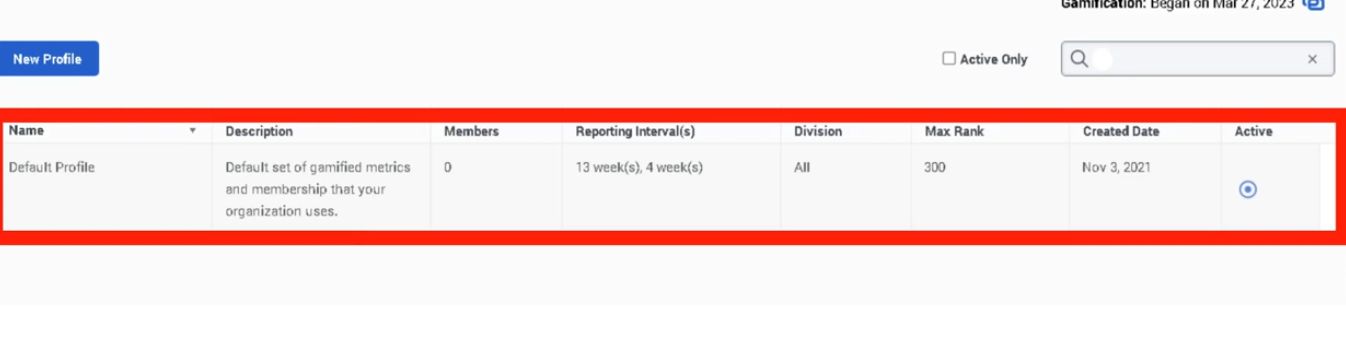
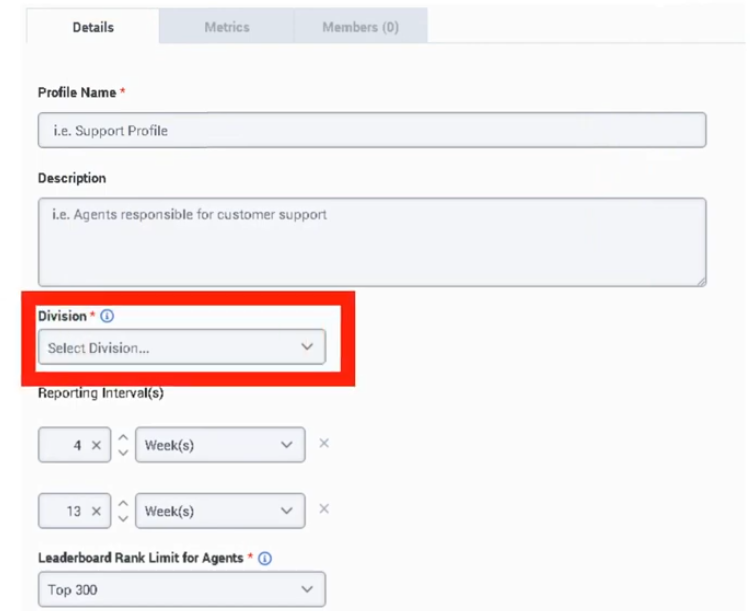
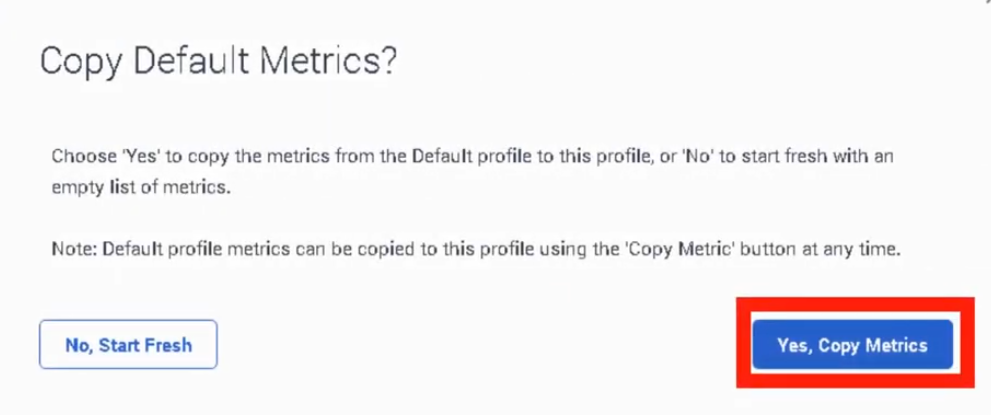
Policies
| Section | Description |
|---|---|
| Module Context | Part of Quality Management within Genesys Cloud Workforce Engagement Management (WEM). |
| Purpose | Policies automate recording retention, evaluation assignment, survey delivery, calibration, and screen recording based on interaction criteria. |
| Admin Location | Admin → Quality → Policies |
| Alt Navigation | Menu → Conversation Intelligence → Recording and Policies → Policies |
| Core Objective | Ensure consistent quality monitoring, compliance retention, and automated quality workflows. |
Policies are rules that match specific interaction criteria and automatically perform actions such as retaining recordings, assigning evaluations, creating calibration evaluations, and sending surveys.
Important behavior: Policies only apply to interactions occurring after the policy is enabled — they do not apply retroactively. Interaction recordings that do not match any policy are retained indefinitely (or until the maximum interaction data retention time is reached, if configured).
Study Notes
| Topic | Explanation |
|---|---|
| Quality Policies | Automation rules used to manage recordings, evaluations, calibrations, and surveys. |
| Matching Criteria | Defines which interactions the policy applies to. |
| Recording Retention | Determines how long recordings are stored. |
| Evaluation Assignment | Automatically assigns interactions for evaluation (3 methods — see below). |
| Calibration Evaluations | Allows multiple evaluators to review the same interaction. |
| Survey Triggering | Sends surveys to customers after interactions. |
| Screen Recording | Enables recording of the agent desktop during ACD interactions only. |
| Overlapping Policies | When policies overlap, Genesys Cloud applies the longest retention period unless explicitly overridden. |
Navigation
| Task | Navigation |
|---|---|
| View policies | Admin → Quality → Policies |
| Alt navigation | Menu → Conversation Intelligence → Recording and Policies → Policies |
| Create policy | Admin → Quality → Policies → Create New Policy |
| Edit policy | Admin → Quality → Policies → Select Policy |
| Delete policy | Admin → Quality → Policies → Delete |
| Filter policies | Select Enabled or Disabled state, or enter policy name → click Apply |
Configuration Fields (UI Form Fields)
Policy Creation
| Field | Description | Options |
|---|---|---|
| Create New Policy | Creates a new quality policy | Button |
| Policy Name | Unique name for the policy | Text |
| Description | Explanation of policy purpose. Tip: describe its function (e.g., "evaluate inbound support calls") | Text |
| Media Type Tabs | Enable/disable policy per interaction type | Toggle per tab |
Media Types
| Media Type | Description |
|---|---|
| Call | Voice interactions |
| Chat | Web chat interactions |
| Email interactions | |
| Message | Digital messaging interactions |
Each media type is configured separately — matching criteria and actions are defined per media type tab.
Matching Criteria
| Field | Description | Options / Notes |
|---|---|---|
| Conversation Direction | Interaction direction | Inbound / Outbound |
| Specific Users | Apply policy to specific agents | Dropdown (up to recommended limit) |
| Specific Work Teams | Apply policy to teams | Dropdown |
| Specific Queues | Apply policy to specific queues | Dropdown — Genesys recommends no more than 250 queues per policy |
| Specific Wrap-Up Codes | Apply policy based on wrap-up results | Dropdown |
| Date Range | Apply policy during specific dates | Calendar |
| Time Sets | Apply policy during specific time windows | Dropdown |
| Conversation Duration | Match interactions based on duration | Numeric — includes queue time and after-call work |
| Customer Participation | Match email/message interactions based on whether customer participated | Participated / Did not participate |
Note: Policies are not automatically modified when an agent, queue, or wrap-up code is deleted. These should be reviewed manually after deletions.
Recording Retention (Required)
| Field | Description | Options |
|---|---|---|
| Retain Recordings | Retain recordings for evaluation/calibration/surveys | Toggle — required if evaluations or surveys are used |
| Do Not Save Recordings | Interactions are not retained for long-term storage | Toggle |
| Delete Even if Another Policy Retains | Override overlap behavior to force delete | Toggle — only shown when "Do not save" is selected |
| Archive Recording After | Time before recording moves to long-term storage | Days / Months |
| Delete Recordings After | Days before recording is permanently deleted | Numeric |
| Export Copy of Recordings (AWS S3) | Export recordings automatically to an AWS S3 bucket | Toggle |
Overlap behavior: When two policies match the same interaction, Genesys Cloud applies the policy that retains the recording longest, as long as a delete date is explicitly defined on both. To override this and force deletion, use "Delete even if another policy retains."
Screen Recording
| Field | Description | Options |
|---|---|---|
| Initiate Screen Recording | Record agent desktop during interaction | Toggle |
| Record After Call Work | Include ACW in screen recording | Toggle |
| Screen Recording Retention | Maximum retention | Up to 365 days |
Note: Screen recording only applies to ACD interactions. Policies that initiate screen recording only perform screen recording actions — they do not also apply to non-initiating policies.
Evaluation Automation — Three Methods
Method 1: Create Evaluations by Evaluators
| Field | Description | Options |
|---|---|---|
| Assign Evaluations by Evaluators | Creates a set number of evaluations per time period per evaluator | Toggle |
| Evaluation Form | Form to use | Dropdown |
| Evaluators | Users assigned to evaluate | Dropdown |
| Number of Evaluations | Per evaluator per time interval | Numeric |
| Time Interval | When evaluations are assigned | Daily / Weekly / Monthly |
Agent selected: first agent connected to the interaction.
Method 2: Create Evaluations by Agents
| Field | Description | Options |
|---|---|---|
| Assign Evaluations by Agents | Creates evaluations per agent listed in matching criteria | Toggle |
| Evaluation Form | Form to use | Dropdown |
| Evaluators | Evaluations distributed evenly among these users | Dropdown |
| Evaluations per Agent per Period | Quota per agent | Numeric |
| Agent Connected Duration | Duration from agent joining to disconnect (excludes ACW and dialing, includes hold) | Numeric |
| Time Zone | Determines when evaluation period resets | Dropdown |
Agent selected: last agent that participated in the interaction meeting the criteria. Monitors and coaches are excluded. Requires users, teams, or queues in matching criteria.
Method 3: Create Evaluations by Interaction
| Field | Description | Options |
|---|---|---|
| Assign Evaluations by Interaction | Creates an evaluation for every matching interaction | Toggle |
| Evaluation Form | Form to use | Dropdown |
| Evaluators | If multiple specified, each gets the same set of interactions | Dropdown |
Agent selected: first agent connected to the interaction. Useful for new hires or compliance scenarios requiring 100% evaluation coverage.
Evaluation Limits (Exam Critical)
| Time Period | Maximum Evaluations per Agent |
|---|---|
| Per Day | 50 |
| Per Week | 175 |
| Per Month | 700 |
These limits prevent policies from accidentally assigning more evaluations than an evaluator can complete. Limits apply even if more interactions match the policy.
Note: A policy does not create an evaluation for an interaction that has no recording on the agent side (e.g., agent dismisses an email without replying).
Calibration Evaluations
| Field | Description | Options |
|---|---|---|
| Assign Calibration Evaluations | Create calibration sessions for evaluators | Toggle |
| Calibration Form | Evaluation form for calibration | Dropdown |
| Evaluators | Two or more evaluators required | Dropdown |
| Expert Evaluator | Benchmark scorer | Dropdown |
| Calibrator | Person who created the policy is default calibrator | Dropdown |
Survey Trigger
| Field | Description | Options |
|---|---|---|
| Send Web Survey | Automatically sends a survey invitation email | Toggle |
| Survey Form | Survey form to use | Dropdown |
| Survey Invite Flow | Architect flow that delivers the invitation | Dropdown |
| Email Domain | Domain used for invitation email | Dropdown |
| Number of Invitations | How many invitations to send | Numeric |
Survey delivery requires a configured Architect Survey Invite Flow.
Dependencies
| Component | Purpose |
|---|---|
| Interaction Recording | Required for evaluation, calibration, and retention policies |
| Evaluation Forms | Used when policies assign evaluations |
| Survey Forms | Used when policies send surveys |
| Architect Survey Invite Flow | Required to deliver survey invitations |
| AWS S3 | Optional external storage for recordings |
| SIP Trunk (Line Recording enabled) | Required for call recording to function |
Platform Integration / Related Components
| Component | Relationship |
|---|---|
| Architect | Executes survey invite flows |
| Evaluation Forms | Used for scoring interactions |
| Survey Forms | Collect customer feedback |
| Interaction Recording | Captures interactions for evaluation |
| Speech & Text Analytics | Analyzes recorded conversations |
Related Topics / Further Reading
| Topic | Purpose |
|---|---|
| Evaluation Forms | Score agent interactions |
| Survey Forms | Collect customer feedback |
| Speech & Text Analytics | Analyze interaction transcripts |
| Recording Management | Configure recording storage |
| Workforce Engagement Management | Manage agent coaching and development |
Implementation Checklist
| Step | Status |
|---|---|
| Enable interaction recording (Line Recording on SIP trunk) | ☐ |
| Create evaluation forms | ☐ |
| Create survey forms | ☐ |
| Create quality policy | ☐ |
| Configure matching criteria | ☐ |
| Configure retention rules | ☐ |
| Select evaluation assignment method | ☐ |
| Enable survey automation | ☐ |
| Test policy behavior | ☐ |
Implementation Guide
| Step | Action |
|---|---|
| Step 1 | Navigate to Admin → Quality → Policies |
| Step 2 | Click Create New Policy |
| Step 3 | Enter name and description |
| Step 4 | Click media type tab and enable/disable per type |
| Step 5 | Configure matching criteria |
| Step 6 | Configure recording retention |
| Step 7 | Select evaluation method (by Evaluators / by Agents / by Interaction) |
| Step 8 | Enable calibration if required |
| Step 9 | Enable survey automation if required |
| Step 10 | Save and test policy behavior |
Workflow
Customer Interaction
↓
Interaction Recording
↓
Quality Policy Evaluates Interaction
↓
Policy Criteria Match
↓
Action Triggered
├─ Retain Recording
├─ Assign Evaluation (by Evaluator / Agent / Interaction)
├─ Assign Calibration
└─ Send Survey
Evaluation Method Decision Guide
| Use Case | Recommended Method |
|---|---|
| Fixed number of evals per evaluator per period | Create Evaluations by Evaluators |
| Fixed quota of evals per agent per period | Create Evaluations by Agents |
| Evaluate every matching interaction (e.g., new hires, compliance) | Create Evaluations by Interaction |
| Consistent scoring across evaluators | Calibration Evaluations |
Best Practices
| Practice | Reason |
|---|---|
| Use clear policy names and descriptions | Improves administrative clarity |
| Apply policies to specific queues | Avoid unnecessary evaluations |
| Separate retention and evaluation policies | Keeps policies focused and manageable |
| Divide large queue sets into multiple policies | Genesys recommends no more than 250 queues per policy; consider 100 for best practice |
| Use evaluation quotas | Prevent evaluator overload |
| Review policies after agent/queue/wrap-up deletions | Policies are not auto-updated |
| Combine surveys and evaluations in separate policies | Gain full quality insight without conflicting retention rules |
Naming Convention
| Resource | Example |
|---|---|
| Policy | Inbound_Call_Evaluation_Policy |
| Compliance Policy | Call_Recording_Compliance |
| Survey Policy | Post_Call_CSAT_Policy |
| Calibration Policy | Monthly_Calibration_Policy |
Naming Pattern:
<InteractionType>_<Purpose>_Policy
Security Considerations
| Control | Description |
|---|---|
| Recording Encryption | Protect interaction recordings |
| Access Permissions | Restrict policy configuration to admins |
| Retention Compliance | Ensure regulatory retention requirements are met |
| Data Privacy | Protect customer interaction data |
Limitations / Constraints
| Constraint | Description |
|---|---|
| Policy Scope | Only affects interactions after activation |
| Screen Recording | ACD interactions only — max 365 days retention |
| Survey Delivery | Requires Architect survey invite flow |
| Evaluation Limits | Max 50/day, 175/week, 700/month per agent |
| Queue Recommendation | No more than 250 queues per policy |
| Overlapping Policies | Longest retention wins unless explicitly overridden |
| Recordings with no policy | Retained indefinitely (up to org maximum if set) |
Troubleshooting
| Issue | Cause | Resolution |
|---|---|---|
| Evaluations not assigned | Matching criteria incorrect | Verify queue/user/team filters |
| Surveys not triggered | Survey invite flow missing or not selected | Configure and assign Architect survey invite flow |
| Recordings not retained | Retention setting not configured | Update retention configuration |
| Screen recording missing | Feature not initiated by policy | Enable screen recording in the initiating policy |
| Evaluation missing for email interaction | Agent never replied — no agent-side recording | Manually assign evaluation if needed |
| Too many evaluations assigned | Policy quota too high or method too broad | Use "by Agents" method with explicit quotas |
Interview Cheat Sheet
| Question | Answer |
|---|---|
| What is a quality policy in Genesys Cloud? | An automation rule that manages recordings, evaluations, calibrations, and surveys. |
| What are the three evaluation assignment methods? | By Evaluators, By Agents, By Interaction |
| What are the evaluation assignment limits? | 50/day, 175/week, 700/month per agent |
| What media types are supported? | Call, Chat, Email, and Message |
| Do policies apply to existing interactions? | No — only to interactions occurring after the policy is enabled |
| What happens when no policy matches a recording? | It is retained indefinitely (or up to org maximum) |
| What happens when overlapping policies have different retention? | Genesys applies the longest retention period |
| What is required for screen recording? | ACD interactions only; initiated by the policy |
| What is required for surveys? | An Architect Survey Invite Flow must be configured |
Key Takeaways
| Topic | Summary |
|---|---|
| Policies | Automate quality monitoring tasks |
| Matching Criteria | Determines which interactions trigger policies — includes Duration and Customer Participation |
| Three Evaluation Methods | By Evaluators / By Agents / By Interaction — each serves a different use case |
| Evaluation Limits | 50/day, 175/week, 700/month per agent |
| Overlapping Policies | Longest retention wins by default |
| No-Match Behavior | Recordings without a matching policy are retained indefinitely |
| Survey Automation | Requires Architect Survey Invite Flow |
| Recording Retention | Required field for all policies — retention rules cannot be skipped |
Programs
Programs (Genesys Cloud Speech & Text Analytics)
| Section | Description |
|---|---|
| Feature Area | Quality Management → Speech & Text Analytics |
| Admin Location | Admin → Quality → Programs |
| Primary Function | Group multiple Topics into a business-level analytics package and apply them to queues or Architect flows |
| Data Source | Interaction transcripts generated by Speech & Text Analytics |
| Typical Users | Quality Administrators, Analytics Administrators |
| Key Dependency | Speech & Text Analytics and Topics must be configured |
| Source | Transcript + Genesys Documentation |
Programs act as the logical container for Topics and determine where those topics are applied in the contact center. This allows organizations to monitor specific customer intents (billing issues, cancellation requests, product complaints, etc.) for specific operational areas such as queues or routing flows.
Summary Table
| Attribute | Details |
|---|---|
| Feature Type | Speech Analytics Configuration |
| Scope | Queue or Architect Flow |
| Function | Topic grouping and analytics detection |
| Topic Limit | Not explicitly documented in Genesys UI documentation |
| Dialect Requirement | Must match speech analytics language model |
| Data Used | Voice transcripts and digital interaction transcripts |
| Configuration Level | Organization-wide analytics configuration |
Study Notes
| Topic | Explanation |
|---|---|
| Programs | Containers grouping multiple Topics for analytics |
| Topics | Phrase detection logic used by programs |
| Dialect | Determines language model used for phrase matching |
| Queue Mapping | Applies program analytics to queue interactions |
| Flow Mapping | Applies program analytics to interactions routed through Architect |
| Intent Detection | Programs identify business-level conversation intents |
Programs allow the contact center to analyze conversations differently depending on the department or business goal.
Example:
| Program | Topics | Scope |
|---|---|---|
| Billing Insights | Billing Dispute, Refund Request | Billing Queue |
| Retention Insights | Cancel Subscription, Contract Termination | Retention Queue |
Transcript Implementation Notes
Source: Transcript
The instructor explains how Programs function and how they are configured:
| Step | Instruction |
|---|---|
| Step 1 | Navigate to Admin → Quality → Programs |
| Step 2 | Create a program that packages related topics |
| Step 3 | Select a dialect that matches the transcript language model |
| Step 4 | Add existing topics or merge phrases into topics |
| Step 5 | Map the program to specific queues or Architect flows |
| Step 6 | Save the configuration so analytics can detect those topics |
Operational insight from transcript:
- Programs represent business-level intent detection packages
- Different departments create different programs
- Programs must be linked to queues or flows to analyze interactions
Example given in concept:
Program: Billing Analysis
Topics: Refund Request, Payment Issue
Queue: Billing Support
Navigation
| Task | Navigation Path |
|---|---|
| View Programs | Admin → Quality → Programs |
| Create Program | Admin → Quality → Programs → Create Program |
| Edit Program | Admin → Quality → Programs → Edit |
| Delete Program | Admin → Quality → Programs → Delete |
| Manage Topics | Admin → Quality → Topics |
| Discover Topics | Admin → Quality → Topic Miner |
Configuration Fields (UI Form Fields)
Main Page
| UI Field | Description | Options |
|---|---|---|
| Program List | Displays configured programs | Read-only |
| Program Name | Name of program | Text |
| Description | Program explanation | Text |
| Dialect | Language model used for phrase matching | Example: English – United States |
| Topics | Topics assigned to the program | Read-only |
| Queues | Queues mapped to the program | Read-only |
| Flows | Architect flows mapped to the program | Read-only |
| Search | Search programs | Text |
| Create Program | Create new program | Button |
| Edit | Modify program | Button |
| Delete | Remove program | Button |
| Refresh | Reload program list | Button |
Create/Edit Form
| UI Field | Description | Options |
|---|---|---|
| Program Name | Unique identifier | Text |
| Description | Explanation of program purpose | Text |
| Dialect | Language model for topic detection | Example: English – United States |
| Topics | Topics included in the program | Multi-select list |
| Queues | Queues where analytics should apply | Multi-select list |
| Flows | Architect flows where analytics should apply | Multi-select list |
| Tags | Optional metadata classification | Tag selector |
| Save | Save program | Button |
| Cancel | Cancel configuration | Button |
Character limit for fields: Not explicitly documented in Genesys UI documentation
Tabs, Toggles, Dropdowns, Action Buttons
| Element Type | Items |
|---|---|
| Tabs | Topics / Queues / Flows |
| Dropdowns | Dialect |
| Multi-Select Fields | Topics / Queues / Flows |
| Buttons | Create Program / Save / Cancel / Edit / Delete / Refresh |
| Toggles | Not explicitly documented in Genesys UI documentation |
Dependencies
| Component | Purpose |
|---|---|
| Speech & Text Analytics | Generates transcripts used by programs |
| Topics | Programs rely on topics for phrase detection |
| Topic Miner | Helps discover phrases that become topics |
| Interaction Recording | Required for voice transcription |
| Architect | Flows can be mapped to programs |
Platform Integration / Related Components
| Component | Relationship |
|---|---|
| Speech & Text Analytics | Core analytics engine |
| Topics | Detection logic used by programs |
| Topic Miner | Phrase discovery tool |
| Sentiment Feedback | Improves sentiment classification |
| Interaction Analytics | Displays program results |
Integration Examples
| Integration | Description |
|---|---|
| Analytics API | Retrieve topic trends and analytics data |
| Conversations API | Access transcripts for interactions |
| Notifications API | Subscribe to interaction lifecycle events |
Example workflow:
Customer Interaction
↓
Speech-to-Text Transcript
↓
Topic Detection
↓
Program Analytics
↓
Analytics API → External BI Dashboard
Related Topics / Further Reading
| Topic | Description |
|---|---|
| Speech & Text Analytics | Transcript analysis engine |
| Topic Miner | Phrase discovery |
| Topics | Phrase detection configuration |
| Sentiment Feedback | Correct sentiment classification |
| Evaluation Forms | Agent quality evaluation |
Implementation Checklist
| Task | Status |
|---|---|
| Enable Speech & Text Analytics | ☐ |
| Create Topics | ☐ |
| Identify queues or flows | ☐ |
| Create Program | ☐ |
| Assign topics to program | ☐ |
| Map queues or flows | ☐ |
| Validate analytics results | ☐ |
Implementation Guide
| Step | Action |
|---|---|
| Step 1 | Enable Speech & Text Analytics |
| Step 2 | Create required topics |
| Step 3 | Navigate to Programs |
| Step 4 | Create new program |
| Step 5 | Assign topics |
| Step 6 | Select dialect |
| Step 7 | Map queues or flows |
| Step 8 | Save configuration |
How to Implement
| Phase | Description |
|---|---|
| Topic Definition | Identify phrases representing customer intent |
| Program Creation | Group topics logically |
| Interaction Scope | Assign queues or flows |
| Validation | Confirm topics appear in analytics |
Workflow
Customer Interaction
↓
Recording Engine
↓
Speech-to-Text Transcription
↓
Topic Detection
↓
Program Analytics
↓
CX Insights Dashboard
Architecture Diagram
Customer Interaction
↓
Recording Engine
↓
Speech-to-Text
↓
Transcript Storage
↓
Topic Detection
↓
Programs
↓
Analytics Dashboard
Real Flow Scenarios
Billing Issue Detection
Customer: "I was charged twice"
↓
Transcript generated
↓
Topic: Billing Dispute detected
↓
Program: Billing Insights triggered
Cancellation Request
Customer: "I want to cancel my subscription"
↓
Topic: Cancellation Request detected
↓
Program: Retention Insights
Usage Scenarios
| Scenario | Description |
|---|---|
| Customer intent detection | Identify why customers contact support |
| CX analytics | Understand frequent issues |
| Compliance monitoring | Detect regulatory statements |
| Product feedback monitoring | Identify complaints |
Implementation Examples
| Example | Configuration |
|---|---|
| Billing Program | Refund Request / Billing Dispute topics |
| Support Program | Technical Issue / Login Problem topics |
| Sales Program | Product Inquiry / Purchase Intent topics |
Design Example
Support Queue
↓
Speech Analytics Transcript
↓
Topic Detection
↓
Program Groups Topics
↓
Analytics Dashboard Displays Trends
Best Practices
| Practice | Reason |
|---|---|
| Group topics by department | Improves analytics clarity |
| Avoid overly large programs | Maintain accuracy |
| Use clear naming | Improve reporting readability |
| Validate topics regularly | Ensure phrase detection accuracy |
Source: Operational Best Practice
Naming Convention
| Resource | Example |
|---|---|
| Program | Billing_Insights |
| Program | Customer_Retention |
| Program | Product_Feedback |
Naming pattern:
<Department>_Insights
Security Considerations
| Control | Description |
|---|---|
| Role-based access | Restrict program creation |
| Transcript protection | Protect sensitive interaction data |
| Encryption | Protect stored recordings |
| Data retention policies | Manage transcript lifecycle |
Limitations / Constraints
| Constraint | Description |
|---|---|
| Requires Speech Analytics | Programs depend on transcripts |
| Topic dependency | Programs cannot exist without topics |
| Dialect dependency | Phrase detection depends on language model |
| Topic accuracy | Incorrect topics lead to false detections |
Troubleshooting
| Issue | Cause | Resolution |
|---|---|---|
| Topics not detected | Topic not added to program | Add topic |
| No analytics results | Speech analytics disabled | Enable transcription |
| Program not applied | Queue or flow not mapped | Assign queue or flow |
| Incorrect detection | Topic phrases inaccurate | Update topic configuration |
Interview Cheat Sheet
| Question | Answer |
|---|---|
| What is a Program? | Container grouping topics for analytics |
| What does it analyze? | Interaction transcripts |
| What components are required? | Topics and Speech Analytics |
| Where are programs applied? | Queues or Architect flows |
| What is the purpose? | Detect business intents |
Key Takeaways
| Topic | Summary |
|---|---|
| Programs | Group topics for analytics |
| Topics | Detect phrases in conversations |
| Queue Mapping | Determines where analytics apply |
| Speech Analytics | Generates transcripts |
| Business Insights | Programs enable intent detection |
Screenshots


Quality Management
| Section | Description |
|---|---|
| Module Context | Part of Quality, Performance, and Engagement Management within Genesys Cloud Workforce Engagement Management (WEM). |
| Purpose | Enables supervisors to record interactions, evaluate agents, analyze conversations, gather customer feedback, and coach agents to improve service quality and compliance. |
| Admin Location | Admin → Quality |
| Alt Navigation (most sub-sections) | Menu → Conversation Intelligence → ... (see Navigation table below) |
| Core Capabilities | Recording encryption, evaluations, surveys, policies, speech & text analytics, topic mining, sentiment analysis, and coaching tools. |
Quality management helps organizations monitor interactions, enforce compliance, evaluate agent performance, and gain insights into customer conversations using analytics and feedback tools.
Study Notes
| Topic | Explanation |
|---|---|
| Quality Management | Framework for evaluating and improving agent interactions and service quality. |
| Interaction Recording | Captures voice and digital interactions for compliance and review. |
| Evaluation Forms | Scorecards used to evaluate recorded interactions and measure agent performance. |
| Surveys | Customer feedback collected after interactions (e.g., CSAT or NPS). |
| Policies | Automation rules for evaluation assignment, recording retention, calibration, and surveys. |
| Topic Miner | Identifies frequently occurring phrases or topics in conversation transcripts. |
| Speech & Text Analytics | AI-powered analysis of transcripts to identify trends, topics, and sentiment. |
| Topics & Programs | Structured definitions used to track business-level intents within interactions. |
| Sentiment Feedback | Allows administrators to correct incorrectly classified phrases in sentiment analysis. |
| Recording Management | Controls recording infrastructure: screen recording concurrency, URL expiration, storage region, and orphaned recordings. |
Navigation
| Feature | Admin Navigation | Alt Navigation |
|---|---|---|
| Encryption Keys | Admin → Quality → Encryption Keys |
— |
| Evaluation Forms | Admin → Quality → Evaluation Forms |
Menu → Conversation Intelligence → Quality Management → Evaluation Forms |
| Survey Forms | Admin → Quality → Survey Forms |
— |
| Policies | Admin → Quality → Policies |
Menu → Conversation Intelligence → Recording and Policies → Policies |
| Evaluators (Dashboard) | Performance → Overview → Quality Evaluator |
Menu → Conversation Intelligence → Quality Management → Evaluators |
| Recording Management | Admin → Quality → Recording Management |
Menu → Conversation Intelligence → Recording and Policies → Recording Management |
| Topic Miner | Admin → Quality → Topic Miner |
— |
| Speech & Text Analytics | Admin → Quality → Speech & Text Analytics |
— |
| Sentiment Feedback | Admin → Quality → Sentiment Feedback |
— |
| Topics | Admin → Quality → Topics |
— |
| Programs | Admin → Quality → Programs |
— |
Configuration Fields (UI Form Fields)
Encryption Keys
| Field | Description | Options |
|---|---|---|
| Key Configuration Type | Encryption key management model | Genesys Cloud Managed Keys / Local Key Manager / AWS KMS Symmetric |
| Periodic Key Change | Frequency for generating new encryption keys | Daily / Weekly / Monthly / Yearly / Never |
| Save | Save encryption configuration | Button |
Evaluation Forms
| Field | Description | Options |
|---|---|---|
| Create | Creates a new evaluation form | Button |
| Form Name | Name of the evaluation form | Text |
| Last Modified | Timestamp of last modification — also serves as version ID | Read-only |
| Question Group | Category grouping related questions | Example: Compliance / Customer Experience |
| Add Question | Adds new evaluation question | Button |
| Question Type | Type of evaluation question | Multiple Choice / Yes-No / Range |
| Question Name | Question text shown to evaluator | Text |
| Help Text | Tooltip guidance for evaluator | Text |
| Points | Score value assigned to answers | Numeric |
| Require Additional Comments | Forces evaluator to add a comment | Toggle |
| Conditional Question | Displays question based on previous answer | Toggle |
| Fatal Question | Incorrect answer fails entire evaluation automatically | Toggle |
| Critical Question | High-impact question — affects score but does not auto-fail | Toggle |
| Save | Save draft evaluation form | Button |
| Publish | Make form available for evaluators and policies | Button |
Survey Forms
| Field | Description | Options |
|---|---|---|
| Create | Create new survey form | Button |
| Survey Language | Language used for survey | Dropdown |
| Survey Form Name | Internal survey identifier | Text |
| Header | Instructions or images displayed to customer | Text / Image |
| Add Question | Add survey question | Button |
| Question Type | Survey question format | Multiple Choice / Yes-No / Range / Free Text / NPS |
| NPS Question | Net Promoter Score question | Only one NPS question allowed per survey |
| Save | Save survey form | Button |
| Publish | Publish survey form | Button |
| Preview Form | Preview survey before publishing | Button |
Policies
| Field | Description | Options |
|---|---|---|
| Create New Policy | Creates new quality policy | Button |
| Policy Name | Name of policy | Text |
| Description | Policy purpose | Text |
| Media Type | Interaction type tabs | Call / Chat / Email / Message (each configured separately) |
| Conversation Direction | Interaction direction filter | Inbound / Outbound |
| Specific Users / Work Teams | Restrict policy to specific users or teams | Dropdown |
| Specific Queues | Apply policy to queues | Dropdown — max 250 recommended |
| Specific Wrap-Up Codes | Filter interactions by wrap-up result | Dropdown |
| Time Sets | Apply policy during specific time ranges | Dropdown |
| Date Range | Policy date criteria | Calendar |
| Conversation Duration | Match interactions by duration | Numeric — includes queue time and ACW |
| Customer Participation | Match email/message by customer participation | Participated / Did not participate |
| Recording Retention | Required field — Define recording retention | Retain / Do Not Save |
| Export Recordings | Export recordings to AWS S3 | Toggle |
| Screen Recording | Enable screen recording (ACD only) | Toggle — max 365 days retention |
| Create Evaluations by Evaluators | Assign fixed evals per evaluator per period | Toggle |
| Create Evaluations by Agents | Assign fixed evals per agent per period | Toggle |
| Create Evaluations by Interaction | Assign eval for every matching interaction | Toggle |
| Create Calibration Evaluations | Generate calibration sessions | Toggle |
| Send Web Survey | Automatically send surveys | Toggle — requires Architect Survey Invite Flow |
Evaluation limits: Max 50/day, 175/week, 700/month per agent. No-match behavior: Recordings without a matching policy are retained indefinitely (or up to org maximum if configured).
Recording Management
| Field | Description | Options |
|---|---|---|
| Maximum Simultaneous Screen Recordings | Limits concurrent screen recordings | 0–2000 |
| Recording Playback URL Time-to-live | How long playback links remain valid | 2–60 minutes (default 60) |
| Recording Batch Download URL Time-to-live | How long download links remain valid | 2–60 minutes (default 60) |
| Storage of Call Recordings | Recording storage region | Home Region / Global Media Fabric trunk region |
| Orphaned Recordings | Recordings stored on Edge device that failed to upload | Clickable link to manage |
Topic Miner
| Field | Description | Options |
|---|---|---|
| New Miner | Create mining job | Button |
| Language | Transcript language model | Dropdown |
| Data Source | Interaction data source | Genesys Cloud |
| Date Range | Time window to analyze | Calendar |
| Media Type | Interaction channel | Voice / Chat / Message / Email |
| Queue Selection | Select queues to mine | Up to 5 queues |
Speech & Text Analytics Settings
| Field | Description | Options |
|---|---|---|
| Voice Transcription | Enables transcription | Toggle |
| Transcript Confidence Threshold | Minimum confidence for inclusion | Default 40% |
| Low-Latency Transcription | Near real-time transcript generation | Toggle |
| Content Search | Enables transcript keyword search | Last 35 days |
Sentiment Feedback
| Field | Description | Options |
|---|---|---|
| Add Phrase | Add phrase for sentiment correction | Button |
| Phrase Text | Phrase as it appears in transcripts | Text |
| Sentiment Label | Correct sentiment classification | Positive / Neutral / Negative |
| Dialect | Speech analytics dialect model for phrase | Dropdown |
Topics
| Field | Description | Options |
|---|---|---|
| Topic Name | Unique topic identifier | Text |
| Description | Topic explanation | Text |
| Tags | Classification tags | Text |
| Strictness | Matching sensitivity | Low / Medium / High |
| Participants | Conversation participants analyzed | External / Internal / Both |
Programs
| Field | Description | Options |
|---|---|---|
| Program Name | Program identifier | Text |
| Dialect | Language dialect | Dropdown |
| Add Topics | Add topics to program | Button |
| Merge Phrases | Combine detected phrases | Toggle |
| Queue Mapping | Assign program to queues | Dropdown |
| Flow Mapping | Assign program to Architect flows | Dropdown |
QM Roles and Permissions
| Role | Key Permissions |
|---|---|
| Quality Administrator | Manage encryption keys, policies, evaluation forms, calibrations, recordings, annotations |
| Quality Evaluator | Edit evaluations and annotations; view chats, recordings, encryption keys — requires Quality > Evaluation > Edit Score |
Both roles are customizable. Quality Administrator recording access can be restricted to specific queues using conditions.
Dependencies
| Component | Purpose |
|---|---|
| Interaction Recording | Required for evaluations |
| SIP Trunk (Line Recording enabled) | Required for call recording to function |
| Speech & Text Analytics | Enables transcript-based analysis |
| Architect | Required for survey invitation flows |
| Workforce Engagement Management | Integrates coaching and quality monitoring |
| AWS S3 | Optional long-term or external recording storage |
Platform Integration / Related Components
| Component | Relationship |
|---|---|
| Architect | Sends surveys and triggers workflows |
| Analytics Workspace | Provides reporting dashboards |
| Workforce Engagement Management | Supports agent coaching and training |
| Interaction Recording | Captures interactions for evaluation |
| Gamification | Uses evaluation data for performance metrics |
Implementation Checklist
| Step | Status |
|---|---|
| Configure recording encryption keys | ☐ |
| Enable Line Recording on SIP trunks | ☐ |
| Enable interaction recording | ☐ |
| Create evaluation forms | ☐ |
| Publish evaluation forms | ☐ |
| Create survey forms | ☐ |
| Configure Architect survey invite flow | ☐ |
| Create quality policies | ☐ |
| Configure recording storage and URL TTL | ☐ |
| Enable speech transcription | ☐ |
| Configure topics and programs | ☐ |
Implementation Guide
| Step | Action |
|---|---|
| Step 1 | Configure recording encryption keys |
| Step 2 | Enable Line Recording on SIP trunks |
| Step 3 | Enable interaction recording |
| Step 4 | Create and publish evaluation forms |
| Step 5 | Create and publish survey forms |
| Step 6 | Create Architect survey invite flow |
| Step 7 | Create quality policies |
| Step 8 | Configure Recording Management (concurrency, TTL, storage region) |
| Step 9 | Enable speech transcription |
| Step 10 | Configure analytics topics and programs |
Workflow
Customer Interaction
↓
Interaction Recording
↓
Speech/Text Transcription
↓
Quality Policy Evaluates Interaction
↓
Evaluation Assigned to Evaluator
↓
Evaluator Reviews and Scores Interaction
↓
Customer Survey Sent (if policy configured)
↓
Analytics & Coaching
Best Practices
| Practice | Reason |
|---|---|
| Standardize evaluation forms | Maintain consistent scoring |
| Use speech analytics | Detect customer sentiment trends |
| Regularly review evaluations | Identify coaching opportunities |
| Combine surveys and evaluations | Gain full customer experience insight |
| Define clear policies | Automate quality monitoring processes |
| Separate retention and evaluation policies | Keeps policies focused and manageable |
| Calibrate evaluators regularly | Ensures consistent scoring standards |
Limitations / Constraints
| Constraint | Description |
|---|---|
| NPS per survey | Only one NPS question per survey form |
| Policy scope | Applies only to interactions after activation |
| Screen recording | Maximum 365 days retention; ACD interactions only |
| Topic Miner | Limited to 5 queues per mining job |
| Evaluation limits | Max 50/day, 175/week, 700/month per agent |
| Content search | Up to 35 days of transcript data |
| Screen recording concurrency | Max 2000 simultaneous screen recordings |
| Playback/download URL TTL | 2–60 minutes (default 60) |
Interview Cheat Sheet
| Question | Answer |
|---|---|
| What is Genesys Cloud Quality Management? | A system for evaluating interactions and improving service quality using recordings, evaluations, surveys, policies, and analytics. |
| What tools are included? | Evaluations, surveys, policies, recordings, speech analytics, topic miner, sentiment feedback, programs, topics. |
| What is a fatal question? | A question that automatically fails an evaluation if answered incorrectly. |
| What is Topic Miner? | Tool used to discover frequently occurring phrases in interaction transcripts. |
| What is sentiment feedback? | Allows administrators to manually correct sentiment classification errors. |
| What are evaluation assignment limits? | 50/day, 175/week, 700/month per agent. |
| What happens to recordings with no matching policy? | Retained indefinitely (or up to org maximum). |
| What is the version ID for an evaluation form? | The last-modified date/time timestamp. |
| Where do evaluators access their dashboard? | Performance → Overview → Quality Evaluator |
Key Takeaways
| Topic | Summary |
|---|---|
| Quality Management | Ensures high service standards through evaluation, recording, and analytics |
| Evaluation Forms | Structured scoring — fatal questions auto-fail; critical questions heavily impact score |
| Surveys | Capture customer feedback — one NPS per survey; require Architect invite flow |
| Speech Analytics | Automated transcript analysis — confidence threshold default 40%; search up to 35 days |
| Policies | Automate evaluations, surveys, and recording retention — 3 evaluation assignment methods |
| Evaluation Limits | 50/day / 175/week / 700/month per agent |
| Coaching | Evaluations and analytics drive performance improvement |
| Recording Management | Screen recording max 2000 concurrent; URL TTL 2–60 min; storage home region or GMF |
Recording Management
Recording Management (Genesys Cloud Quality & Performance Management)
| Section | Description |
|---|---|
| Module Context | Part of Quality Management / Workforce Engagement Management (WEM) |
| Admin Location | Admin → Quality → Recording Management |
| Purpose | Manage recording infrastructure settings, including screen recording limits, recording URL expiration, storage region configuration, and orphaned recording handling |
Recording Management controls how call recordings and screen recordings are stored, accessed, and processed in Genesys Cloud. It also provides administrative controls to prevent excessive bandwidth usage and maintain recording lifecycle management. :contentReference[oaicite:1]{index=1}
Study Notes
| Topic | Explanation |
|---|---|
| Interaction Recording | Captures voice/audio recordings for interactions |
| Screen Recording | Records agent desktop activity during interactions |
| Recording Storage | Determines regional storage for recordings |
| URL Expiration | Controls how long recording download/playback links remain valid |
| Orphaned Recordings | Recordings left on Edge devices when upload or deletion fails |
| Screen Recording Concurrency | Prevents too many desktop recordings from running simultaneously |
Key behavior:
- Screen recording concurrency limit = maximum 2000 recordings simultaneously. :contentReference[oaicite:2]{index=2}
- Playback/download links expire after 2–60 minutes. :contentReference[oaicite:3]{index=3}
- Orphaned recordings appear when recordings remain on the Edge device due to processing failures. :contentReference[oaicite:4]{index=4}
Navigation
| Task | Navigation |
|---|---|
| View recording settings | Admin → Quality → Recording Management |
| Manage orphaned recordings | Admin → Quality → Recording Management → Orphaned Recordings |
| Configure recording retention | Admin → Quality → Policies |
| View recordings | Performance → Workspace → Interactions |
Configuration Fields (UI Form Fields)
Recording Management Main Page
| UI Field | Description | Real Options |
|---|---|---|
| Maximum Simultaneous Screen Recordings Allowed | Limits concurrent screen recordings to prevent excessive bandwidth usage | 0–2000 recordings |
| Number of Currently Active Screen Recordings | Displays number of screen recordings currently running | Read-only counter |
| Recording Playback URL Time-to-live | Time period playback link remains valid | 2–60 minutes (Default 60) |
| Recording Batch Download URL Time-to-live | Time period batch download link remains valid | 2–60 minutes (Default 60) |
| Storage of Call Recordings | Determines where recordings are stored | Home Region or Global Media Fabric trunk region |
| Orphaned Recordings | Displays number of recordings stranded on Edge devices | Clickable link |
| Save | Apply configuration changes | Button |
Orphaned Recordings UI Fields
| UI Field | Description | Options |
|---|---|---|
| Conversation Status Filter | Filter orphan recordings by conversation availability | All / Known Conversation |
| Play Recording | Play orphan recording | Button |
| Download Recording | Download recording file | Button |
| Delete Recording | Delete orphan recording | Button |
| Attach Recording to Conversation | Reattach recording to conversation | Button |
| Archive Date | Optional archive date when reattaching | Date selector |
| Delete Date | Optional deletion date when reattaching | Date selector |
| Reattach | Confirm recording reattachment | Button |
Orphan recordings exist when Genesys cannot determine what to do with a recording based on policy, often when interaction processing fails. :contentReference[oaicite:5]{index=5}
Dependencies
| Component | Purpose |
|---|---|
| Interaction Recording | Required to capture recordings |
| Screen Recording Policies | Control when desktop recording begins |
| Quality Policies | Define recording retention |
| Edge Devices | Temporary recording storage |
| Encryption Keys | Secure recordings |
Platform Integration / Related Components
| Component | Relationship |
|---|---|
| Evaluation Forms | Evaluators review recordings |
| Quality Policies | Control retention and automation |
| Speech & Text Analytics | Analyze conversations |
| Interaction Analytics | Access recordings in interaction details |
| Survey Forms | Link customer feedback to interactions |
Related Topics / Further Reading
| Topic | Description |
|---|---|
| Evaluation Forms | Score agent interactions |
| Survey Forms | Customer feedback |
| Quality Policies | Automate evaluation & retention |
| Encryption Keys | Secure recordings |
| Speech Analytics | Analyze conversation transcripts |
Implementation Checklist
| Task | Status |
|---|---|
| Enable interaction recording | ☐ |
| Configure screen recording concurrency | ☐ |
| Configure recording storage region | ☐ |
| Set URL expiration policies | ☐ |
| Configure recording retention policies | ☐ |
| Monitor orphaned recordings | ☐ |
Implementation Guide
| Step | Action |
|---|---|
| Step 1 | Navigate to Admin → Quality → Recording Management |
| Step 2 | Configure maximum simultaneous screen recordings |
| Step 3 | Configure playback/download URL expiration |
| Step 4 | Select recording storage region |
| Step 5 | Configure recording retention policies |
| Step 6 | Monitor orphan recordings |
How to Implement
| Phase | Description |
|---|---|
| Recording Configuration | Enable recording and screen recording |
| Infrastructure Setup | Configure storage region |
| Performance Control | Set concurrency limits |
| Lifecycle Management | Configure retention policies |
Workflow
Customer Interaction
↓
Recording Engine Captures Interaction
↓
Recording Stored in Cloud Storage
↓
Quality Policy Applies Retention Rules
↓
Recording Available for Evaluation / Analytics
Architecture Diagram
Customer Interaction
↓
Genesys Recording Engine
↓
Temporary Storage (Edge)
↓
Upload to Cloud Storage
├─ Home Region
└─ Global Media Fabric
↓
Quality Management
├─ Evaluations
├─ Speech Analytics
└─ Compliance Monitoring
Real Flow Scenarios
Scenario 1 – Quality Monitoring
Customer Call
↓
Recording Enabled
↓
Recording Stored
↓
Evaluator Reviews Interaction
Scenario 2 – Orphan Recording Recovery
Recording Stored on Edge
↓
Upload Failure
↓
Recording Marked Orphan
↓
Admin Reattaches Recording
Usage Scenarios
| Scenario | Description |
|---|---|
| Compliance recording | Financial or healthcare compliance |
| Agent coaching | Review recordings for training |
| Dispute resolution | Investigate customer complaints |
| Performance analytics | Evaluate service quality |
Implementation Examples
| Example | Configuration |
|---|---|
| Large contact center | Screen recording concurrency = 1000 |
| Compliance environment | Store recordings in home region |
| Security environment | Playback URL TTL = 10 minutes |
Design Example
Inbound Support Call
↓
Recording Policy Triggered
↓
Recording Stored
↓
Evaluation Assigned
↓
Supervisor Review
Best Practices
| Practice | Reason |
|---|---|
| Monitor orphan recordings | Prevent stranded recordings |
| Configure concurrency limits | Avoid system overload |
| Use retention policies | Manage storage growth |
| Secure recordings with encryption | Protect sensitive data |
| Align storage region with compliance | Regulatory requirements |
Naming Convention
| Resource | Example |
|---|---|
| Recording Policy | Support_Call_Recording |
| Screen Recording Policy | Agent_Desktop_Recording |
| Storage Configuration | Global_Recording_Storage |
Naming pattern:
<Department>_<Purpose>_Recording
Security Considerations
| Control | Description |
|---|---|
| Encryption Keys | Protect recording data |
| Role-based access | Limit recording access |
| URL expiration | Prevent unauthorized playback access |
| Compliance storage | Regional storage requirements |
Limitations / Constraints
| Constraint | Description |
|---|---|
| Max screen recordings | 2000 concurrent |
| Playback URL TTL | Minimum 2 minutes, maximum 60 minutes |
| Batch download TTL | Minimum 2 minutes, maximum 60 minutes |
| Screen recording retention | Up to 365 days |
Troubleshooting
| Issue | Cause | Resolution |
|---|---|---|
| Screen recordings not starting | Concurrency limit reached | Increase limit |
| Recording unavailable | Storage configuration error | Verify region |
| Playback link expired | TTL expired | Generate new link |
| Recording missing | Recording policy disabled | Enable policy |
Interview Cheat Sheet
| Question | Answer |
|---|---|
| What is Recording Management? | Admin area used to control recording infrastructure |
| What is the maximum concurrent screen recordings limit? | 2000 |
| What does TTL control? | Recording playback/download link expiration |
| What are orphan recordings? | Recordings stranded on Edge devices |
Key Takeaways
| Topic | Summary |
|---|---|
| Recording Management | Controls recording infrastructure |
| Screen Recording | Desktop activity recording |
| URL Expiration | Secure recording access |
| Storage Configuration | Determines where recordings are stored |
| Orphan Recordings | Recovery mechanism for failed uploads |
Screenshots
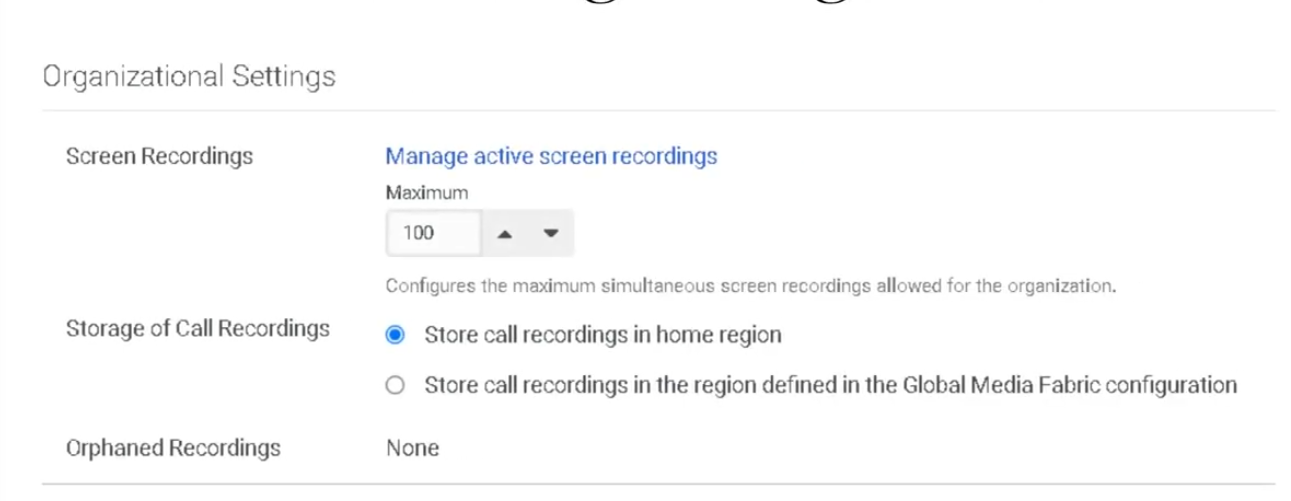
Sentiment Feedback
Sentiment Feedback (Genesys Cloud Quality & Performance Management)
| Section | Description |
|---|---|
| Module Context | Part of Quality Management → Speech & Text Analytics within Workforce Engagement Management (WEM) |
| Admin Location | Admin → Quality → Sentiment Feedback |
| Purpose | Allows administrators to correct sentiment classification errors in Speech & Text Analytics by labeling phrases as Positive, Neutral, or Negative, improving automated sentiment detection accuracy |
Sentiment Feedback is used to improve the machine learning sentiment model that evaluates transcripts produced by Speech & Text Analytics. When the system misinterprets emotional tone in a conversation, administrators can add a phrase and assign the correct sentiment classification.
These corrections influence future sentiment analysis results and help improve topic detection, interaction insights, and analytics reporting.
Summary Table
| Attribute | Details |
|---|---|
| Feature Area | Speech & Text Analytics |
| Primary Function | Improve sentiment classification accuracy |
| Data Source | Interaction transcripts |
| Supported Channels | Voice (transcribed), Chat, Messaging, Email |
| Sentiment Labels | Positive / Neutral / Negative |
| Dialect Context | Sentiment phrases are tied to a language dialect used by speech analytics models |
| Typical Users | Quality administrators, analytics administrators |
| Dependency | Speech & Text Analytics must be enabled |
Study Notes
| Topic | Explanation |
|---|---|
| Sentiment Analysis | Automatic classification of emotional tone within conversations |
| Sentiment Feedback | Manual correction of sentiment detection errors |
| Phrase-Based Overrides | Administrators add phrases that override default sentiment classification |
| Transcript Dependency | Sentiment feedback only applies to interactions with transcripts |
| Dialect Awareness | Phrases must match the speech analytics dialect model used during transcription |
| Analytics Impact | Changes influence future sentiment scoring and analytics dashboards |
Key concepts:
- Sentiment feedback improves the accuracy of automated sentiment scoring.
- Phrases are applied per dialect, ensuring correct language interpretation.
- Corrections apply to future transcript processing.
- Sentiment feedback helps refine analytics used for CX insights and coaching.
Navigation
| Task | Navigation |
|---|---|
| Open Sentiment Feedback | Admin → Quality → Sentiment Feedback |
| Add new sentiment phrase | Admin → Quality → Sentiment Feedback → Add Phrase |
| Edit phrase | Admin → Quality → Sentiment Feedback → Edit |
| Delete phrase | Admin → Quality → Sentiment Feedback → Delete |
| Review transcript sentiment | Performance → Workspace → Interactions |
Configuration Fields (UI Form Fields)
Main Page
| UI Field | Description | Options / Behavior |
|---|---|---|
| Phrase List | Displays phrases configured for sentiment feedback | Read-only |
| Sentiment Label | Shows sentiment classification assigned to phrase | Positive / Neutral / Negative |
| Dialect | Dialect the phrase applies to | Example: English – United States |
| Created By | User who created phrase entry | Read-only |
| Created Date | Timestamp of phrase creation | Read-only |
| Search | Search for phrases in list | Text field |
| Add Phrase | Opens phrase creation form | Button |
| Edit | Edit phrase sentiment configuration | Button |
| Delete | Remove phrase from sentiment list | Button |
| Refresh | Reload phrase list | Button |
Create/Edit Form
| UI Field | Description | Options |
|---|---|---|
| Phrase | Phrase appearing in transcripts | Text input |
| Sentiment | Sentiment assigned to phrase | Positive / Neutral / Negative |
| Dialect | Speech analytics dialect model used for phrase interpretation | Example options: English – United States / English – United Kingdom / Spanish – Spain / Spanish – Mexico / Portuguese – Brazil |
| Description | Optional note describing reason for classification | Text input |
| Save | Save configuration | Button |
| Cancel | Discard changes | Button |
Tabs, Toggles, Dropdowns, Action Buttons
| UI Element Type | Item |
|---|---|
| Tabs | Sentiment Feedback page |
| Text Fields | Phrase, Description |
| Dropdowns | Sentiment classification, Dialect |
| Buttons | Add Phrase, Save, Cancel, Edit, Delete, Refresh |
Note: No toggles are documented for Sentiment Feedback in the admin UI.
Dependencies
| Component | Purpose |
|---|---|
| Speech & Text Analytics | Generates transcripts used for sentiment analysis |
| Interaction Recording | Required for voice transcript generation |
| Topics | Sentiment can be correlated with topics |
| Programs | Topics grouped for analytics programs |
| Topic Miner | Detects candidate phrases for sentiment feedback |
| Language Models | Dialect-specific transcription models |
Platform Integration / Related Components
| Component | Relationship |
|---|---|
| Speech & Text Analytics | Provides transcript and sentiment analysis engine |
| Topics | Sentiment often analyzed alongside topics |
| Programs | Topic groups used in analytics dashboards |
| Topic Miner | Identifies phrases administrators may classify |
| Interaction Analytics | Displays sentiment metrics |
Integration Examples
| Integration | Description |
|---|---|
| Analytics API | Retrieve sentiment metrics for dashboards |
| Notifications API | Subscribe to interaction lifecycle events to trigger external analytics processing |
| Conversations API | Retrieve transcript data programmatically |
Example integration workflow:
Customer Interaction
↓
Speech Analytics Transcript
↓
Sentiment Analysis
↓
Sentiment Feedback Overrides
↓
Analytics API retrieves results
↓
External dashboard updated
Related Topics / Further Reading
| Topic | Description |
|---|---|
| Speech & Text Analytics | Core analytics engine |
| Topic Miner | Discover phrases in transcripts |
| Topics | Phrase detection logic |
| Programs | Topic grouping for analytics |
| Evaluation Forms | Agent performance scoring |
Implementation Checklist
| Task | Status |
|---|---|
| Enable Speech & Text Analytics | ☐ |
| Confirm transcript generation | ☐ |
| Verify correct dialect configuration | ☐ |
| Review sentiment accuracy | ☐ |
| Identify misclassified phrases | ☐ |
| Add sentiment feedback entries | ☐ |
| Validate improved sentiment detection | ☐ |
Implementation Guide
| Step | Action |
|---|---|
| Step 1 | Enable Speech & Text Analytics |
| Step 2 | Confirm transcripts are generated |
| Step 3 | Review interactions for sentiment misclassification |
| Step 4 | Navigate to Sentiment Feedback |
| Step 5 | Click Add Phrase |
| Step 6 | Enter phrase and select correct dialect |
| Step 7 | Assign sentiment classification |
| Step 8 | Save configuration |
How to Implement
| Phase | Description |
|---|---|
| Analytics Monitoring | Monitor sentiment results in transcripts |
| Error Identification | Detect incorrect sentiment classification |
| Phrase Feedback | Add phrase classification using correct dialect |
| Validation | Monitor analytics improvements |
Workflow
Customer Interaction
↓
Interaction Recording
↓
Speech-to-Text Transcription
↓
Speech Analytics Sentiment Engine
↓
Admin Detects Incorrect Sentiment
↓
Sentiment Feedback Phrase Added (Dialect-specific)
↓
Future transcripts classified correctly
Architecture Diagram
Customer Interaction
↓
Recording Engine
↓
Speech-to-Text Processing
↓
Transcript Storage
↓
Speech & Text Analytics
├ Sentiment Analysis
└ Topic Detection
↓
Sentiment Feedback Phrase Overrides
↓
Analytics Dashboard
Real Flow Scenarios
Scenario 1 – Correcting Positive Sentiment
Customer says: "Thank you for resolving my issue"
↓
System labels phrase as Neutral
↓
Admin adds phrase with Positive sentiment
↓
Future interactions labeled Positive
Scenario 2 – Detecting Customer Frustration
Customer says: "This service is terrible"
↓
Transcript generated
↓
Sentiment engine detects negative tone
↓
Analytics dashboard flags interaction
Usage Scenarios
| Scenario | Description |
|---|---|
| Customer satisfaction monitoring | Improve sentiment accuracy |
| Product issue detection | Identify negative feedback |
| Agent coaching | Understand customer reactions |
| CX analytics | Track sentiment trends |
Implementation Examples
| Example | Configuration |
|---|---|
| Support center | Add satisfaction phrases |
| Billing queue | Label complaint phrases |
| Sales queue | Label positive purchase indicators |
Design Example
Inbound Customer Call
↓
Speech Analytics Transcript
↓
Sentiment Classification
↓
Admin Reviews Transcript
↓
Sentiment Feedback Added
↓
Improved Analytics Accuracy
Best Practices
| Practice | Reason |
|---|---|
| Add phrases tied to correct dialect | Prevent incorrect language interpretation |
| Focus on high-frequency phrases | Improve model quickly |
| Review sentiment dashboards regularly | Detect classification issues |
| Combine sentiment with topics | Improve context understanding |
Naming Convention
| Resource | Example |
|---|---|
| Phrase Classification | Positive_Service_Resolution |
| Phrase Classification | Negative_Billing_Issue |
Naming pattern:
<Sentiment>_<Context>
Security Considerations
| Control | Description |
|---|---|
| Role-based access | Restrict configuration to administrators |
| Transcript privacy | Protect sensitive conversation data |
| Data retention policies | Control transcript storage |
| Encryption | Protect stored transcripts |
Limitations / Constraints
| Constraint | Description |
|---|---|
| Sentiment categories | Positive / Neutral / Negative |
| Requires transcripts | Speech analytics must be enabled |
| Context sensitivity | Phrase sentiment may vary by context |
| Dialect dependence | Phrase must match configured dialect |
Troubleshooting
| Issue | Cause | Resolution |
|---|---|---|
| Sentiment incorrect | Phrase not defined | Add sentiment feedback |
| Phrase not matching | Dialect mismatch | Select correct dialect |
| No transcripts available | Speech analytics disabled | Enable transcription |
| Analytics unchanged | Phrase not used in transcripts | Verify phrase frequency |
Interview Cheat Sheet
| Question | Answer |
|---|---|
| What is Sentiment Feedback? | Manual correction of sentiment classification |
| Where is it configured? | Admin → Quality → Sentiment Feedback |
| What labels exist? | Positive, Neutral, Negative |
| What additional parameter is required? | Dialect |
| What dependency is required? | Speech & Text Analytics |
Key Takeaways
| Topic | Summary |
|---|---|
| Sentiment Feedback | Improves automated sentiment detection |
| Phrase Overrides | Admins classify phrases manually |
| Dialect Support | Phrases must match speech analytics dialect |
| Speech Analytics | Provides transcripts used for analysis |
| Continuous Improvement | Feedback improves analytics accuracy |
Screenshots

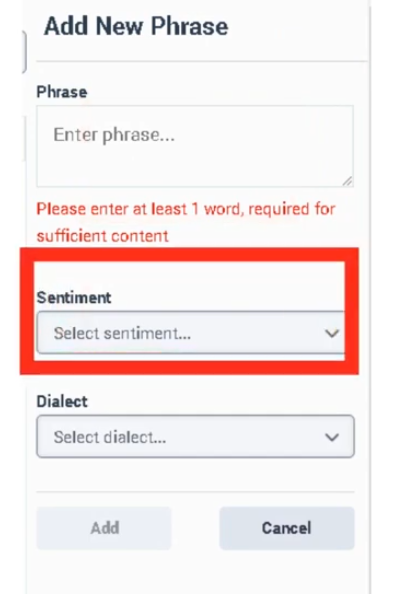
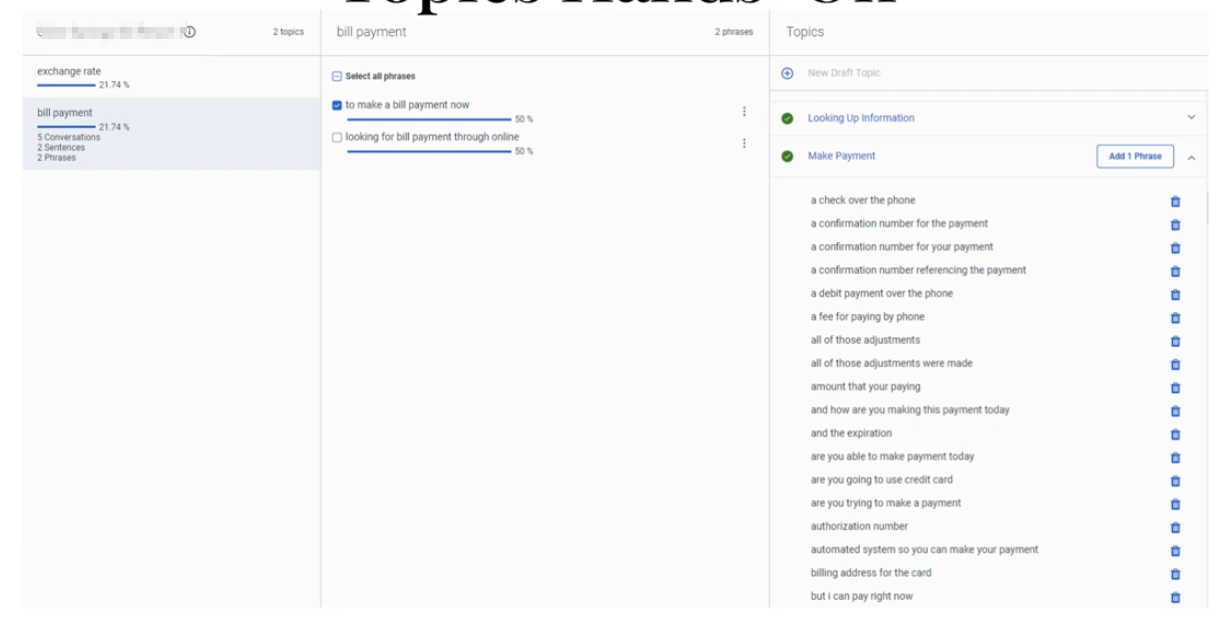
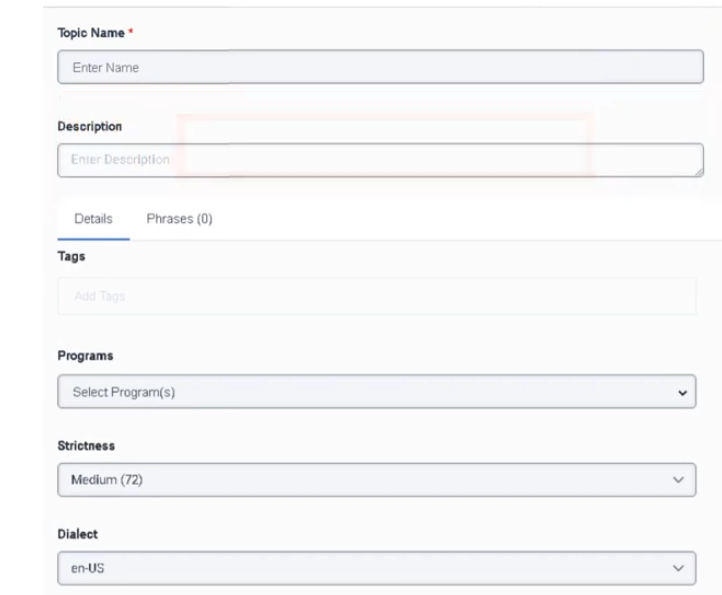
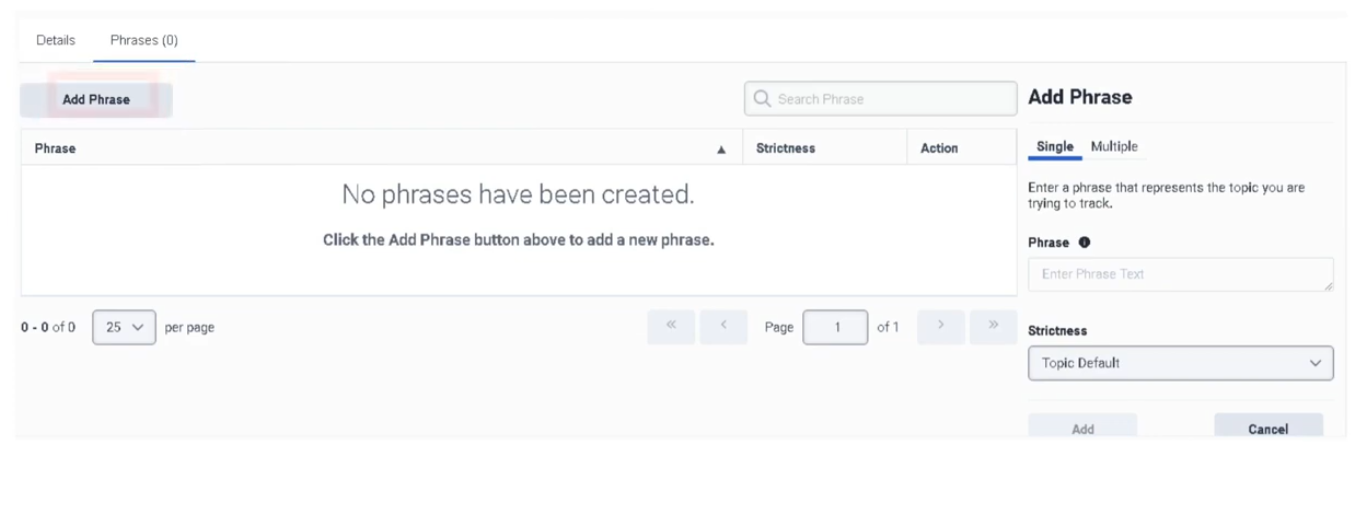
Speech & Text Analytics
Speech & Text Analytics (Genesys Cloud Quality & Performance Management)
| Section | Description |
|---|---|
| Module Context | Part of Quality Management / Speech & Text Analytics / Workforce Engagement Management (WEM) |
| Admin Location | Admin → Quality → Speech & Text Analytics |
| Purpose | Enable transcription, conversation analytics, topic detection, sentiment analysis, and content search across voice and digital interactions |
Speech & Text Analytics (STA) converts interactions into searchable transcripts and analyzes conversations to detect topics, sentiment, silence, and conversational patterns. These insights allow contact centers to improve customer experience, compliance monitoring, agent coaching, and operational intelligence.
Speech & Text Analytics supports both voice and digital channels including calls, chat, email, and messaging.
Study Notes
| Topic | Explanation |
|---|---|
| Speech Transcription | Converts recorded voice conversations into text |
| Text Analytics | Analyzes transcripts to extract insights |
| Topic Detection | Identifies recurring conversation topics |
| Sentiment Analysis | Determines emotional tone of conversation |
| Phrase Detection | Detects specific words or phrases |
| Content Search | Allows searching transcripts for keywords |
| Confidence Score | Confidence level of transcription accuracy |
| Low-Latency Transcription | Provides near real-time transcript generation |
Key behavior:
- Speech transcription must be enabled before analytics features work.
- Transcript confidence threshold default = 40%.
- Content search supports up to 35 days of transcript data.
- Analytics results feed into Topics, Programs, and Topic Miner.
Navigation
| Task | Navigation |
|---|---|
| Configure speech analytics | Admin → Quality → Speech & Text Analytics → Settings |
| Enable transcription | Admin → Quality → Speech & Text Analytics → Settings → Voice Transcription |
| Manage topics | Admin → Quality → Topics |
| Configure programs | Admin → Quality → Programs |
| Run topic discovery | Admin → Quality → Topic Miner |
| Review transcripts | Performance → Workspace → Interactions → Conversation Details |
Configuration Fields (UI Form Fields)
Speech & Text Analytics Settings
| UI Field | Description | Real Options |
|---|---|---|
| Enable Voice Transcription | Enables automatic transcription of voice interactions | Toggle On / Off |
| Transcript Confidence Threshold | Minimum confidence score for transcript inclusion | Percentage slider (Default 40%) |
| Enable Low Latency Transcription | Generates transcripts faster for near real-time analytics | Toggle On / Off |
| Enable Content Search | Allows searching transcript content | Toggle On / Off |
| Transcript Retention | Determines how long transcripts remain searchable | Up to 35 days |
| Language Detection | Detects language automatically | Toggle On / Off |
| Supported Languages | Languages available for transcription | English / Spanish / French / German / Portuguese |
| Enable Keyword Search | Allows keyword-based transcript queries | Toggle |
| Save | Apply settings | Button |
| Cancel | Cancel configuration changes | Button |
Transcript View UI Fields (Interaction Details)
| UI Field | Description | Options |
|---|---|---|
| Transcript Panel | Displays conversation transcript | Read-only |
| Speaker Identification | Labels speakers in transcript | Agent / Customer |
| Sentiment Indicator | Displays sentiment level | Positive / Neutral / Negative |
| Confidence Indicator | Displays transcription confidence | Percentage |
| Keyword Highlight | Highlights searched phrases | Enabled |
| Search Transcript | Search within transcript | Text field |
| Jump to Timestamp | Navigate to transcript timestamp | Button |
Dependencies
| Component | Purpose |
|---|---|
| Interaction Recording | Required to capture voice conversations |
| Speech-to-Text Engine | Converts voice recordings into transcripts |
| Topics | Defines patterns detected in transcripts |
| Programs | Packages topics for business analytics |
| Topic Miner | Discovers phrases automatically |
Platform Integration / Related Components
| Component | Relationship |
|---|---|
| Topics | Define phrases and patterns detected in transcripts |
| Programs | Organize topics for business-level analysis |
| Topic Miner | Automatically identifies phrases |
| Sentiment Feedback | Improves sentiment detection |
| Interaction Analytics | Displays analytics insights |
Related Topics / Further Reading
| Topic | Description |
|---|---|
| Topic Miner | Discover phrases in transcripts |
| Topics | Define analytics phrase patterns |
| Programs | Group topics into analytics programs |
| Evaluation Forms | Evaluate agent interactions |
| Quality Policies | Manage recording lifecycle |
Implementation Checklist
| Task | Status |
|---|---|
| Enable speech transcription | ☐ |
| Configure transcript confidence threshold | ☐ |
| Enable low-latency transcription | ☐ |
| Enable transcript search | ☐ |
| Configure topics | ☐ |
| Configure analytics programs | ☐ |
| Validate transcripts appear in interactions | ☐ |
Implementation Guide
| Step | Action |
|---|---|
| Step 1 | Navigate to Admin → Quality → Speech & Text Analytics → Settings |
| Step 2 | Enable Voice Transcription |
| Step 3 | Configure transcript confidence threshold |
| Step 4 | Enable Low Latency Transcription |
| Step 5 | Enable Content Search |
| Step 6 | Save configuration |
| Step 7 | Verify transcripts appear in interaction details |
How to Implement
| Phase | Description |
|---|---|
| Transcription Setup | Enable speech transcription |
| Analytics Configuration | Configure transcript settings |
| Topic Creation | Define topics for analytics |
| Program Mapping | Map topics to queues or flows |
Workflow
Screenshots

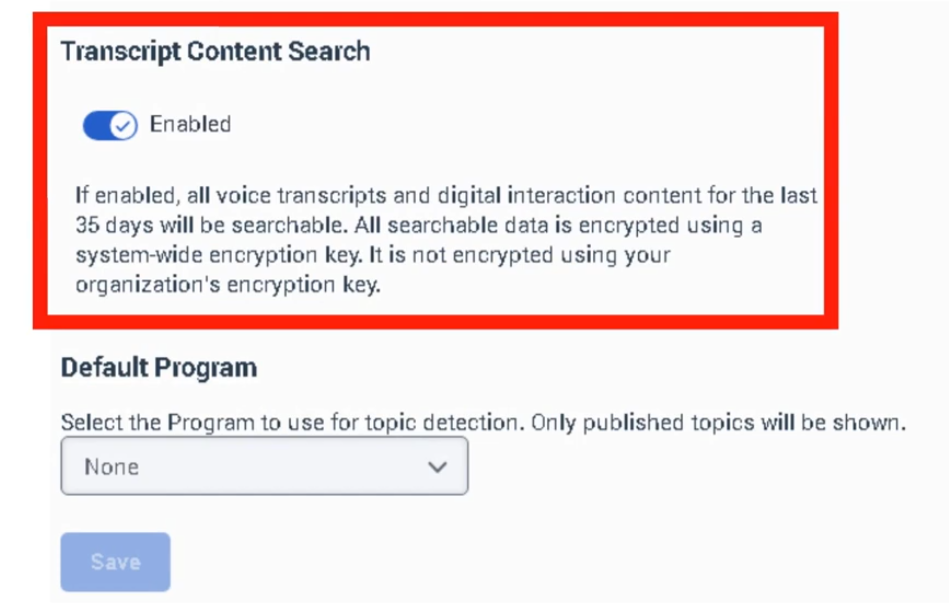

Survey forms
Survey Forms (Genesys Cloud Quality Management)
| Section | Description |
|---|---|
| Module Context | Part of Quality Management and Voice of the Customer capabilities in Genesys Cloud. |
| Purpose | Allows organizations to collect customer feedback after interactions using web-based surveys such as CSAT and NPS. |
| Admin Location | Admin → Quality → Survey Forms |
| Key Requirement | Survey invitations require Survey Invite Flow in Architect and a Quality Policy to trigger survey delivery. |
Survey Forms enable organizations to measure customer satisfaction, service quality, and customer sentiment following interactions. They are typically triggered through policies and Architect flows.
Study Notes
| Topic | Explanation |
|---|---|
| Survey Forms | Templates used to collect feedback from customers after interactions. |
| Survey Invite Flow | Architect flow responsible for sending the survey invitation email or message. |
| Policies | Determine which interactions trigger surveys. |
| Question Types | Multiple Choice, Yes/No, Range, Free Text, and Net Promoter Score (NPS). |
| NPS Limit | Only one NPS question can be used per survey. |
| Survey Language | Determines language of the survey displayed to the customer. |
| Header Section | Displays instructions, images, or branding above survey questions. |
Survey feedback helps contact centers monitor customer satisfaction and identify areas for service improvement.
Navigation
| Task | Navigation |
|---|---|
| Create survey form | Admin → Quality → Survey Forms → Create |
| Edit survey form | Admin → Quality → Survey Forms → Select Form |
| Publish survey form | Admin → Quality → Survey Forms → Publish |
| Configure survey invite flow | Architect → Survey Invite Flow |
| Configure survey policies | Admin → Quality → Policies |
Configuration Fields (UI Form Fields)
Survey Form Creation
| Field | Description | Options |
|---|---|---|
| Create | Creates new survey form | Button |
| Survey Language | Language used for the survey | Dropdown |
| Survey Form Name | Internal survey identifier (not visible to customers) | Text |
| Header | Instructional text or image displayed to customer | Text / Image |
| Add Question | Adds a survey question | Button |
| Save | Saves draft survey form | Button |
| Publish | Publishes survey form | Button |
Question Configuration
| Field | Description | Options |
|---|---|---|
| Question Type | Defines format of survey question | Multiple Choice / Yes-No / Range / Free Text / NPS |
| Question Text | Question shown to the customer | Text |
| Help Text | Optional guidance for question | Text |
| Required | Makes question mandatory | Toggle |
| Answer Options | Choices available for customer response | Text |
| Range Scale | Numeric scale used for rating | 1–5 or custom range |
| NPS Question | Measures customer loyalty | 0–10 scale |
| Delete Question | Removes question | Button |
| Reorder Questions | Change question order | Drag and drop |
Dependencies
| Component | Purpose |
|---|---|
| Architect | Sends survey invitations through survey invite flow |
| Policies | Determine which interactions trigger surveys |
| Interaction Recording | Optional integration with quality monitoring |
| Customer Contact Data | Used to deliver survey invitation |
Platform Integration / Related Components
| Component | Relationship |
|---|---|
| Architect Survey Invite Flow | Sends survey invitation email or message |
| Quality Policies | Automates survey triggers |
| Evaluation Forms | Complement surveys with internal quality scoring |
| Speech & Text Analytics | Analyze feedback trends |
| Customer Journey Analytics | Combine survey feedback with interaction analytics |
Related Topics / Further Reading
| Topic | Purpose |
|---|---|
| Evaluation Forms | Internal agent evaluation |
| Quality Policies | Automate survey delivery |
| Architect Flows | Configure survey invitation workflow |
| Speech Analytics | Analyze conversation sentiment |
| Gamification | Use feedback metrics to motivate agents |
Implementation Checklist
| Step | Status |
|---|---|
| Create survey form | ☐ |
| Add survey questions | ☐ |
| Publish survey form | ☐ |
| Create Architect survey invite flow | ☐ |
| Configure survey policy | ☐ |
| Test survey delivery | ☐ |
| Review survey analytics | ☐ |
Implementation Guide
| Step | Action |
|---|---|
| Step 1 | Navigate to Admin → Quality → Survey Forms |
| Step 2 | Click Create |
| Step 3 | Select survey language |
| Step 4 | Enter survey form name |
| Step 5 | Add header instructions |
| Step 6 | Add survey questions |
| Step 7 | Save survey form |
| Step 8 | Publish survey form |
| Step 9 | Configure Architect survey invite flow |
| Step 10 | Create policy to trigger surveys |
How to Implement
| Phase | Description |
|---|---|
| Survey Creation | Create survey form and questions |
| Workflow Setup | Configure Architect survey invite flow |
| Policy Configuration | Trigger surveys based on interaction criteria |
| Testing | Validate survey delivery |
| Monitoring | Review survey results and customer feedback |
Workflow
Customer Interaction
↓
Interaction Ends
↓
Quality Policy Evaluates Interaction
↓
Survey Invite Flow Triggered
↓
Customer Receives Survey Link
↓
Customer Completes Survey
↓
Feedback Stored in Analytics
Architecture Diagrams
Survey Delivery Architecture
Customer Interaction
↓
Genesys Cloud Policy Engine
↓
Architect Survey Invite Flow
↓
Survey Form Delivery
↓
Customer Response
↓
Feedback Analytics
Real Flow Scenarios
Post Call Survey
Customer Call Ends
↓
Policy Matches Interaction
↓
Survey Invite Flow Triggered
↓
Customer Receives Email Survey
↓
Customer Submits Feedback
Customer Experience Monitoring
Customer Chat Session Ends
↓
Survey Triggered
↓
Customer Rates Interaction
↓
Feedback Used for Performance Monitoring
Usage Scenarios
| Scenario | Description |
|---|---|
| Post Interaction Survey | Collect CSAT after call/chat/email |
| Net Promoter Score | Measure customer loyalty |
| Service Quality Monitoring | Identify customer dissatisfaction |
| Product Feedback | Collect insights on services |
| Customer Experience Tracking | Monitor long-term service trends |
Implementation Examples
| Survey Type | Example |
|---|---|
| CSAT Survey | Rate your support experience |
| NPS Survey | How likely are you to recommend our service |
| Product Feedback Survey | Rate product knowledge of agent |
| Customer Experience Survey | Rate overall interaction quality |
Example Survey Structure
| Question | Type |
|---|---|
| How satisfied are you with our service? | Range |
| Was your issue resolved? | Yes / No |
| What could we improve? | Free Text |
Design Example
Customer Interaction
↓
Quality Policy Trigger
↓
Architect Survey Flow
↓
Survey Delivery
↓
Customer Response
↓
Analytics Dashboard
Best Practices
| Practice | Reason |
|---|---|
| Keep surveys short | Improve completion rate |
| Limit number of questions | Avoid survey fatigue |
| Use NPS for loyalty tracking | Standard industry metric |
| Combine surveys with evaluations | Complete quality monitoring |
| Test survey flows before production | Ensure delivery reliability |
Naming Convention
| Resource | Example |
|---|---|
| Survey Form | Post_Call_CSAT |
| Survey Policy | Inbound_Call_Survey_Policy |
| Survey Flow | Customer_Survey_Flow |
Naming Pattern:
<InteractionType>_<Purpose>_Survey
Security Considerations
| Control | Description |
|---|---|
| Data Privacy | Protect customer responses |
| Access Permissions | Restrict survey editing rights |
| Data Retention | Define retention policies for feedback |
| Compliance | Ensure survey questions meet regulatory standards |
Limitations / Constraints
| Constraint | Description |
|---|---|
| NPS Limit | Only one NPS question allowed per survey |
| Survey Trigger | Requires Architect survey invite flow |
| Policy Scope | Applies only to interactions after activation |
| Survey Delivery | Depends on valid customer contact information |
Troubleshooting
| Issue | Cause | Resolution |
|---|---|---|
| Survey not sent | Policy not configured | Verify policy rules |
| Survey invite flow not triggered | Architect flow misconfiguration | Validate flow logic |
| Customer not receiving survey | Missing contact information | Verify customer email or messaging channel |
| Survey responses missing | Survey not published | Publish survey form |
Interview Cheat Sheet
| Question | Answer |
|---|---|
| What is a Survey Form in Genesys Cloud? | A form used to collect customer feedback after interactions. |
| What is required to send surveys? | Survey form, survey invite flow in Architect, and a quality policy. |
| What question types are supported? | Multiple choice, Yes/No, Range, Free text, and NPS. |
| How many NPS questions can a survey have? | Only one per survey. |
| When are surveys triggered? | After interactions that match a policy. |
Key Takeaways
| Topic | Summary |
|---|---|
| Survey Forms | Collect customer feedback after interactions |
| Architect Integration | Survey invite flows deliver surveys |
| Policies | Automate survey triggers |
| NPS | Measures customer loyalty |
| Customer Feedback | Provides insight into service quality |
Screenshots
Create survey form
Select Survey Language - Preview form on would allow you to preview form
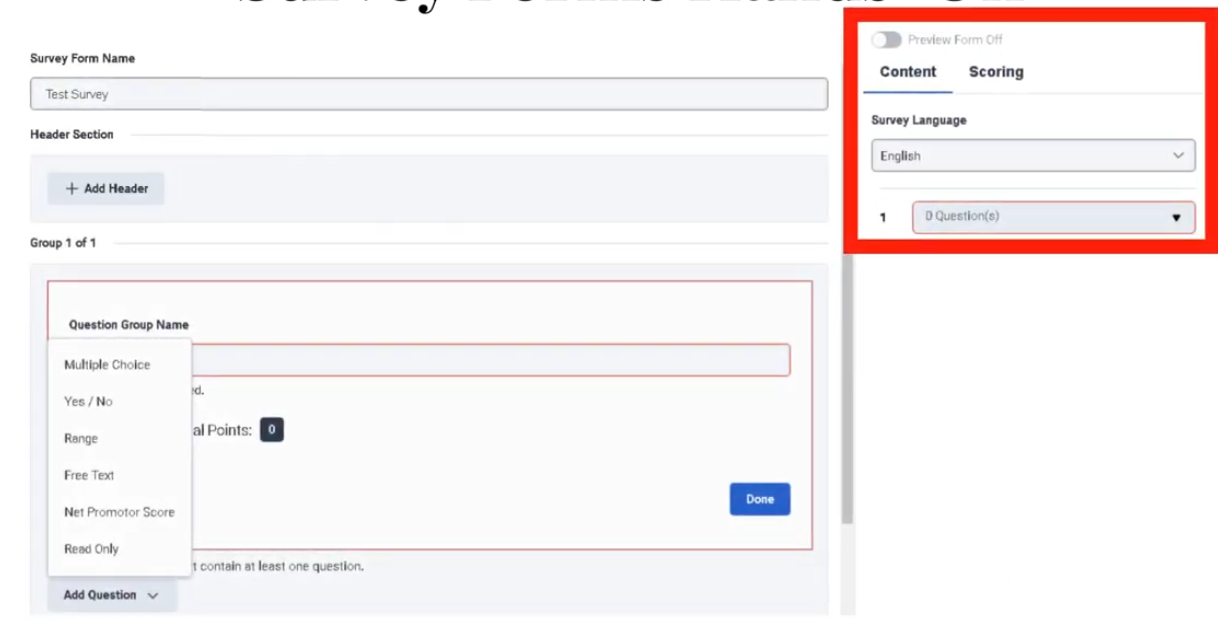
Publish to view on survey form
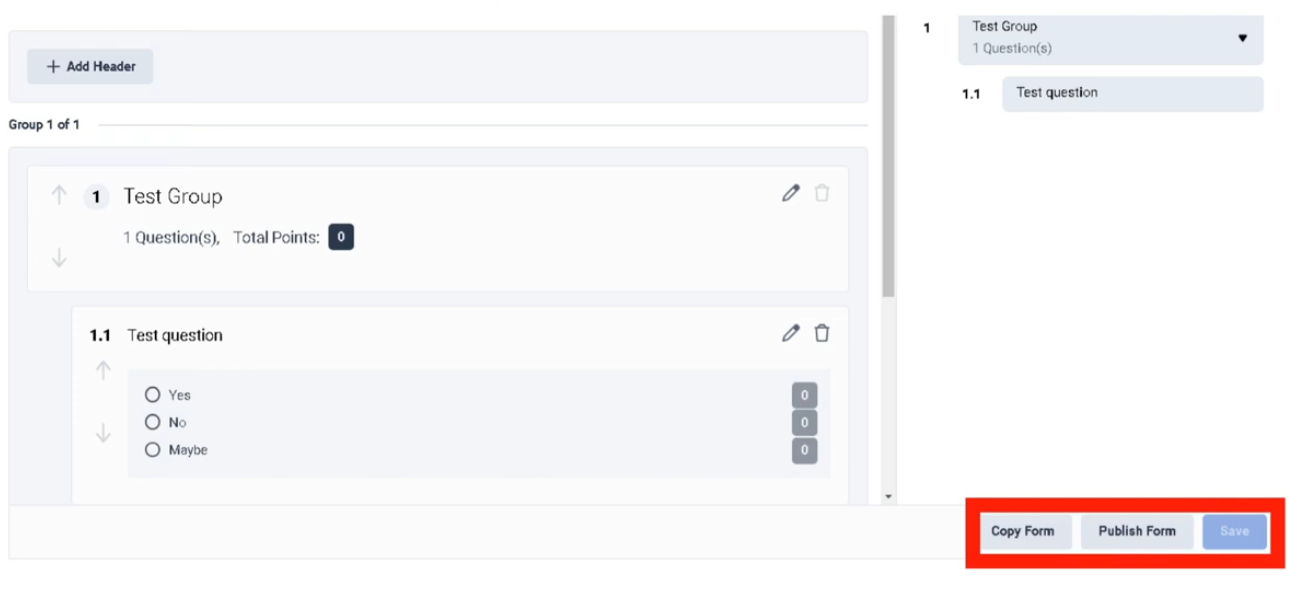
Question Group Name
| Field | Description | Implementation Purpose | Example |
|---|---|---|---|
| Question Group Name | A label used to organize related survey questions into a logical section. | Helps structure surveys into categories such as service quality, agent behavior, or product feedback. | Customer Experience |
How It Appears in the UI
When creating a survey form:
Survey Form Builder
↓
Add Question Group
↓
Enter Question Group Name
↓
Add Questions Within the Group
Example layout:
Survey Form: Post_Call_CSAT
Question Group: Customer Experience
- How satisfied are you with the service?
- Was your issue resolved?
Question Group: Agent Interaction
- Was the agent professional?
- Did the agent explain the solution clearly?
Why Question Groups Are Important
| Benefit | Explanation |
|---|---|
| Improves survey readability | Customers understand sections of the survey |
| Organizes feedback categories | Helps separate customer experience from product feedback |
| Simplifies analytics | Enables grouping of related feedback metrics |
Best Practices
| Practice | Reason |
|---|---|
| Use clear group names | Makes survey easier to interpret |
| Limit number of groups | Avoid overwhelming customers |
| Group related questions only | Maintain logical structure |
Naming Examples
| Group Type | Example |
|---|---|
| Customer Experience | Customer_Satisfaction |
| Agent Performance | Agent_Interaction |
| Product Feedback | Product_Feedback |
Key Implementation Tip
Keep group names customer-friendly if visible in the survey, and short but descriptive for reporting purposes.
Topic Miner
Below is the same format style as your sample so you can copy-paste directly into BookStack. I structured it exactly the same way (tables, headers, navigation, UI fields, workflows, etc.) and focused on Topic Miner, which you mentioned specifically.
Topic Miner (Genesys Cloud Quality & Performance Management)
| Section | Description |
|---|---|
| Module Context | Part of Quality Management / Speech & Text Analytics / Workforce Engagement Management (WEM) |
| Admin Location | Admin → Quality → Topic Miner |
| Purpose | Automatically analyze voice and digital interaction transcripts to discover trending phrases and conversation topics for quality monitoring and analytics |
Topic Miner uses speech and text analytics transcripts to detect frequent phrases and emerging topics in customer interactions. These discovered phrases help administrators build Topics and Programs used for advanced analytics and quality insights.
Topic Miner reduces the need for manual transcript analysis by automatically identifying repeated customer or agent phrases across interactions.
Study Notes
| Topic | Explanation |
|---|---|
| Transcript Mining | Topic Miner scans interaction transcripts to detect patterns |
| Phrase Detection | Automatically identifies frequent words or phrases |
| Topic Creation | Suggested phrases can be converted into Topics |
| Queue Selection | Mining can target specific queues |
| Language Processing | Mining supports language-specific models |
| Data Source | Uses transcripts generated from Speech & Text Analytics |
Key behavior:
- Topic Miner can analyze voice and digital interactions.
- Mining jobs require Speech & Text Analytics transcription enabled.
- Mining jobs can target up to 5 queues simultaneously.
- Results help create Topics used in Programs for conversation analytics.
Navigation
| Task | Navigation |
|---|---|
| Launch Topic Miner | Admin → Quality → Topic Miner |
| Create mining job | Admin → Quality → Topic Miner → New Miner |
| View mined topics | Admin → Quality → Topics |
| Configure analytics programs | Admin → Quality → Programs |
| Enable transcription | Admin → Quality → Speech & Text Analytics → Settings |
Configuration Fields (UI Form Fields)
Topic Miner Creation Page
| UI Field | Description | Real Options |
|---|---|---|
| Miner Name | Unique name for mining job | Text field |
| Language | Language model used for transcript analysis | English / Spanish / French / German / Portuguese |
| Data Source | Source of transcript data | Genesys Cloud |
| Date Range Start | Start date for interactions to analyze | Date selector |
| Date Range End | End date for interactions to analyze | Date selector |
| Media Type | Interaction type to mine | Voice / Chat / Message / Email |
| Queues | Select queues to analyze | Up to 5 queues |
| Include Internal Participant | Include agent speech in mining | Toggle |
| Include External Participant | Include customer speech in mining | Toggle |
| Minimum Phrase Frequency | Minimum occurrences required for phrase detection | Numeric field |
| Start Miner | Start mining job | Button |
| Cancel | Cancel configuration | Button |
Topic Miner Results Page
| UI Field | Description | Options |
|---|---|---|
| Phrase | Phrase detected in transcripts | Read-only |
| Occurrences | Number of times phrase appears | Read-only |
| Confidence Score | Confidence of phrase detection | Read-only |
| Create Topic | Convert phrase into analytics topic | Button |
| Ignore Phrase | Remove phrase from suggestions | Button |
| Filter by Frequency | Filter results by occurrence threshold | Numeric |
| Search Phrase | Search within discovered phrases | Text field |
Dependencies
| Component | Purpose |
|---|---|
| Speech & Text Analytics | Generates transcripts used for mining |
| Interaction Recording | Required for voice transcript generation |
| Topics | Created from mined phrases |
| Programs | Package topics into analytics frameworks |
| Queues | Define interaction scope for mining |
Platform Integration / Related Components
| Component | Relationship |
|---|---|
| Speech Analytics | Provides transcript data |
| Topics | Created from mined phrases |
| Programs | Combine topics for business analytics |
| Sentiment Analysis | Evaluates conversation sentiment |
| Interaction Analytics | Displays topic trends and phrase insights |
Related Topics / Further Reading
| Topic | Description |
|---|---|
| Speech & Text Analytics | Transcript generation and conversation analysis |
| Topics | Phrase pattern definitions |
| Programs | Collections of topics mapped to queues |
| Sentiment Feedback | Improve sentiment detection accuracy |
| Evaluation Forms | Used for interaction quality scoring |
Implementation Checklist
| Task | Status |
|---|---|
| Enable speech transcription | ☐ |
| Configure analytics settings | ☐ |
| Run Topic Miner job | ☐ |
| Review mined phrases | ☐ |
| Convert phrases to topics | ☐ |
| Create analytics programs | ☐ |
| Map topics to queues or flows | ☐ |
Implementation Guide
| Step | Action |
|---|---|
| Step 1 | Enable Speech & Text Analytics transcription |
| Step 2 | Navigate to Admin → Quality → Topic Miner |
| Step 3 | Click New Miner |
| Step 4 | Configure language and data source |
| Step 5 | Select date range and media type |
| Step 6 | Choose up to 5 queues |
| Step 7 | Start mining job |
| Step 8 | Review discovered phrases |
| Step 9 | Convert phrases into topics |
How to Implement
| Phase | Description |
|---|---|
| Analytics Setup | Enable speech transcription |
| Phrase Discovery | Run Topic Miner job |
| Topic Definition | Convert phrases into topics |
| Analytics Deployment | Add topics to programs |
Workflow
Customer Interaction
↓
Interaction Recording
↓
Speech-to-Text Transcription
↓
Topic Miner Analysis
↓
Phrase Discovery
↓
Create Topics
↓
Add Topics to Programs
↓
Conversation Analytics
Architecture Diagram
Customer Interaction
↓
Genesys Cloud Interaction Recording
↓
Speech & Text Analytics Engine
↓
Transcript Storage
↓
Topic Miner
↓
Phrase Discovery
↓
Topics
↓
Programs
↓
Analytics Dashboard
Real Flow Scenarios
Scenario 1 – Identifying Common Customer Complaints
Customer Calls Support
↓
Transcript Generated
↓
Topic Miner Detects Phrase
"cancel subscription"
↓
Admin Creates Topic
↓
Topic Added to Billing Program
Scenario 2 – Detecting Product Issues
Customer Chat Interaction
↓
Transcript Generated
↓
Topic Miner Detects Phrase
"login error"
↓
Topic Created
↓
Used in Analytics Dashboard
Usage Scenarios
| Scenario | Description |
|---|---|
| Customer complaint analysis | Identify recurring issues |
| Product feedback | Detect product problems |
| Compliance monitoring | Detect compliance phrases |
| Sales analytics | Identify buying intent phrases |
Implementation Examples
| Example | Configuration |
|---|---|
| Support center mining | Voice interactions from support queues |
| Billing analysis | Chat transcripts from billing queue |
| Sales insights | Mine phrases indicating purchase intent |
Design Example
Customer Support Interaction
↓
Speech Analytics Transcript
↓
Topic Miner Detects Phrase
↓
Topic Created
↓
Topic Added to Support Program
↓
Analytics Dashboard Shows Trends
Best Practices
| Practice | Reason |
|---|---|
| Mine queues separately | Improves topic accuracy |
| Run mining jobs periodically | Capture emerging issues |
| Review phrase suggestions | Avoid irrelevant topics |
| Use descriptive topic names | Improve analytics clarity |
| Combine topics into programs | Organize analytics insights |
Naming Convention
| Resource | Example |
|---|---|
| Topic Miner Job | Support_Phrase_Mining |
| Topic | Billing_Dispute |
| Program | Customer_Experience_Insights |
Naming pattern:
<Department>_<Topic>_Mining
Security Considerations
| Control | Description |
|---|---|
| Role-Based Access | Limit analytics configuration access |
| Transcript Privacy | Protect customer conversation data |
| Data Retention Policies | Control transcript storage duration |
| Encryption | Secure transcript storage |
Limitations / Constraints
| Constraint | Description |
|---|---|
| Maximum queues per mining job | 5 |
| Requires transcription | Speech & Text Analytics must be enabled |
| Transcript retention | Limited to analytics data retention policies |
| Language model dependency | Mining accuracy depends on language model |
Troubleshooting
| Issue | Cause | Resolution |
|---|---|---|
| No phrases detected | Transcription disabled | Enable Speech & Text Analytics |
| Mining job fails | Invalid date range | Verify interaction data exists |
| No queues available | Queue permissions missing | Assign admin role |
| Topics not appearing | Topic not created from phrase | Convert phrase to topic |
Interview Cheat Sheet
| Question | Answer |
|---|---|
| What is Topic Miner? | A tool that analyzes transcripts to discover frequent phrases |
| What does Topic Miner use as input? | Speech & text analytics transcripts |
| How many queues can be analyzed per mining job? | 5 |
| What happens after phrases are discovered? | They can be converted into Topics |
| Where are Topics used? | In Programs for conversation analytics |
Key Takeaways
| Topic | Summary |
|---|---|
| Topic Miner | Detects recurring phrases from transcripts |
| Topics | Represent conversation themes |
| Programs | Organize topics into analytics groups |
| Speech Analytics | Provides transcript data |
| Phrase Mining | Helps discover customer trends |
Screenshots
9. - Workforce Management
WFM OVerview & Setup
Genesys Workforce Management (WFM) Overview & Setup Documentation
Study Notes
| Topic | Description |
|---|---|
| WFM Purpose | Manage forecasting, scheduling, intraday management, adherence, and capacity planning |
| Core Capabilities | AI-powered forecasting, multi-media scheduling, real-time monitoring, adherence tracking |
| Organization | Business Units contain Management Units contain Sites contain Teams |
| Key Features | Multi-channel support (voice, email, chat, callback, messaging, workitems) |
| Integration | Tightly integrated with Genesys Administrator for skills and real-time data |
| Architecture | Hierarchical org structure with permissions at BU and MU levels |
Navigation
Admin → Workforce Management OR Home → Workforce Management → [Module Name]
WFM Overview
Genesys Workforce Management provides comprehensive tools to manage contact center workforce through forecasting, scheduling, intraday management, real-time adherence monitoring, and capacity planning. WFM enables organizations to create accurate staffing plans accounting for projected volumes, average handle times, agent skills, and business constraints.
Workforce Management is designed for multi-media, multi-site environments, providing optimal schedules for multi-skilled agents handling different interaction types. Agent preferences, skills, proficiency levels, customer segmentation, historical trends, email response times, and outbound call lengths are all considered within forecast, schedule, and adherence components.
Core Modules
- Forecasting - AI-powered volume and AHT predictions
- Scheduling - Agent schedule creation and optimization
- Intraday Management - Real-time monitoring and adjustments
- Real-Time Adherence - Live agent status tracking
- Capacity Planning - Hiring and long-range planning
- Time-Off & Trades - Agent self-service and request management
Key Capabilities
- Multi-media support (voice, email, chat, callback, messaging, workitems)
- AI-powered forecasting with Automatic Best Method
- Optimized scheduling across multiple management units
- Real-time performance monitoring
- Integration with Genesys Universal Routing
- Agent self-service portal (desktop and mobile)
- Comprehensive reporting and analytics
Edition & Module Requirements
| Requirement | Details |
|---|---|
| Minimum Edition | Genesys Cloud CX 2-4, Digital, or WEM Add-ons |
| Licensing | Dedicated WFM licensing per organization |
| Setup | Requires WFM configuration and integration with Genesys Administrator |
| Multicloud | Available for Genesys Multicloud CX and Genesys Engage |
| Mobile | Agent self-service available on iOS and Android |
WFM Architecture
Genesys Workforce Management Structure
Business Unit (BU)
├─ Max: 5,000 agents
├─ Forecasts created at BU level
├─ Schedules created at BU level
├─ One master schedule per BU active at a time
│
├─ Management Unit 1 (MU)
│ ├─ Max: 1,500 agents
│ ├─ Represents department, site, or location
│ ├─ Access control at MU level
│ └─ Time-off requests managed at MU level
│
├─ Management Unit 2 (MU)
│ ├─ Site A
│ │ ├─ Team 1
│ │ │ └─ Agents (10-50)
│ │ └─ Team 2
│ │ └─ Agents (10-50)
│ │
│ └─ Site B
│ └─ Agents
│
└─ Management Unit 3 (MU)
└─ Virtual agents (remote workers)
WFM Workflow Overview
WFM Management Lifecycle:
PLANNING PHASE:
├─ Define business units and management units
├─ Set up service goals and planning groups
├─ Configure staffing groups and contracts
└─ Establish permissions and access controls
FORECASTING PHASE:
├─ Gather historical interaction data
├─ Create forecast scenarios
├─ Use AI (Automatic Best Method) for accuracy
├─ Validate and publish Master Forecast
└─ Forecast available for scheduling
SCHEDULING PHASE:
├─ Receive published Master Forecast
├─ Create schedule scenarios (up to 6 weeks)
├─ Balance forecasted demand with constraints
├─ Optimize for service levels and contracts
├─ Publish to Master Schedule
└─ Schedule available to agents
OPERATIONS PHASE:
├─ Real-time intraday monitoring
├─ Adherence tracking vs schedule
├─ Real-time adjustments as needed
├─ Capacity management
└─ Performance metrics tracking
FEEDBACK PHASE:
├─ Capture actual vs forecast variance
├─ Gather interaction data
├─ Analyze adherence patterns
└─ Refine future forecasts and schedules
Edition Comparison
| Feature | CX 2 | CX 3 | CX 4 | WEM Add-on |
|---|---|---|---|---|
| Basic WFM | ✓ | ✓ | ✓ | ✓ |
| Forecasting | ✓ | ✓ | ✓ | ✓ |
| Scheduling | ✓ | ✓ | ✓ | ✓ |
| Intraday Mgmt | ✓ | ✓ | ✓ | ✓ |
| Real-Time Adherence | ✓ | ✓ | ✓ | ✓ |
| Advanced Analytics | Limited | ✓ | ✓ | ✓ |
| Capacity Planning | Limited | ✓ | ✓ | ✓ |
| Agent Self-Service | ✓ | ✓ | ✓ | ✓ |
Initial Setup Steps
Step 1: Organizational Structure Design
-
Define Business Units
- Group by operational objectives
- Each BU forecasts/schedules together
- Max 5,000 agents per BU
-
Define Management Units (within each BU)
- Represent departments/sites/locations
- Max 1,500 agents per MU
- Enable permission boundaries
-
Define Sites (within each MU)
- Physical locations or virtual groups
- Agents assigned to sites
Step 2: Configure WFM Settings
Step 3: Create Planning Groups
- Define by media type and queue/route
- Configure service goals
- Set staffing requirements
- Establish activity/skill mappings
Step 4: Configure Agents
- Assign skills and proficiency levels
- Assign to teams and sites
- Set contracts and work rules
- Configure preferences
Step 5: Set Permissions
-
Assign WFM roles:
- Administrator (full access)
- Supervisor (forecasting/scheduling)
- Analyst (reporting/analytics)
- Agent (self-service)
-
Grant at Business Unit level:
- Forecasting permissions
- Schedule creation/editing
-
Grant at Management Unit level:
- Time-off approvals
- Team-specific schedules
Step 6: Integration
- Connect to Genesys Administrator
- Enable real-time statistics via Stat Server
- Configure Data Aggregator
- Set up Universal Routing integration
- Enable agent portal (web and mobile)
Key Terminology
| Term | Definition |
|---|---|
| Business Unit (BU) | Group of Management Units sharing common operational objectives |
| Management Unit (MU) | Group of agents within a BU (max 1,500) |
| Site | Physical location or virtual grouping within an MU |
| Team | Collection of agents within a site |
| Activity | Type of work (inbound calls, emails, chats, etc.) |
| Planning Group | Workload organized by media type and route |
| Service Goal | Target metrics (SL, ASA, abandon rate) |
| Master Forecast | Published forecast scenario used for scheduling |
| Master Schedule | Published schedule scenario used by agents |
| Work Plan | Definition of shifts, breaks, meals, contracts |
| Staffing Group | Cluster of agents with similar skills |
| Adherence | Agent's actual activity vs scheduled activity |
Multi-Channel Support
WFM manages workloads across:
- Voice - Traditional phone interactions
- Email - Asynchronous email support
- Chat - Real-time chat conversations
- Callback - Scheduled return calls
- Messaging - SMS, web messaging, social messaging
- Workitems - Tasks routed to agents
Each media type:
- Has distinct forecasting requirements
- Supports different interaction patterns
- Requires appropriate planning groups
- Contributes to overall agent workload
Real-World Example
Mid-Market Financial Services Contact Center
Organization Structure:
Financial Services Company
│
├─ Business Unit: North America Operations
│ │
│ ├─ Management Unit: Support (500 agents)
│ │ ├─ Site: New York (200 agents)
│ │ │ ├─ Team: Tier 1 Support (100)
│ │ │ └─ Team: Tier 2 Support (100)
│ │ │
│ │ └─ Site: Dallas (300 agents)
│ │ ├─ Team: Tier 1 Support (150)
│ │ └─ Team: Tier 2 Support (150)
│ │
│ └─ Management Unit: Sales (300 agents)
│ ├─ Site: New York (150)
│ └─ Site: Dallas (150)
│
└─ Business Unit: International Operations
├─ Management Unit: Europe (400 agents)
└─ Management Unit: APAC (350 agents)
Media Types:
├─ Voice (70% of volume)
├─ Email (15% of volume)
├─ Chat (10% of volume)
└─ Callback (5% of volume)
Planning Groups:
├─ Support - Inbound Voice
├─ Support - Email (3-4 hour response)
├─ Support - Chat
├─ Sales - Outbound Calls
└─ Sales - Sales Chat
Service Goals:
├─ Support: 80% SL, 20 sec ASA, 5% abandon
└─ Sales: 75% SL, 30 sec ASA, 10% abandon
Staffing Model:
├─ Full-time agents (40 hrs/week, 5 days)
├─ Part-time agents (20 hrs/week, 3 days)
├─ Flex agents (variable hours)
└─ Remote agents (work-from-home)
Best Practices
Organization Design
- Align BUs with business operations
- Keep MUs at manageable size (<1,500 agents)
- Use sites for geographic separation
- Use teams for skill-based grouping
Access Control
- Grant minimal necessary permissions
- Use BU-level for forecasting/scheduling control
- Use MU-level for time-off and local scheduling
- Audit permissions quarterly
Data Quality
- Ensure accurate agent configurations
- Keep skills current and proficiency honest
- Validate historical interaction data
- Regular imports of new data
Configuration
- Document organizational structure
- Establish naming conventions
- Create backup configurations
- Test changes in non-prod first
Common Setup Issues
| Issue | Cause | Resolution |
|---|---|---|
| Can't create forecasts | Missing BU-level permissions | Grant Forecast > Create permission at BU |
| Agents not in scheduling | Not assigned to sites/teams | Configure agent site/team assignments |
| Inaccurate forecasts | Poor historical data | Clean data, ensure 90+ days available |
| Schedule conflicts | Contract violations | Review contract rules, adjust availability |
| Adherence issues | Unclear activity codes | Simplify, train agents on correct codes |
| Permission problems | Incorrect scope (MU vs BU) | Verify permission level and scope |
Interview Cheat Sheet
| Question | Answer |
|---|---|
| What is WFM? | Software for forecasting, scheduling, intraday monitoring, and adherence |
| What's a Business Unit? | Group of MUs sharing operational objectives, forecasts/schedules at BU level |
| What's a Management Unit? | Group of agents within BU (max 1,500), enables permission boundaries |
| How many agents per BU? | Max 5,000 agents per business unit |
| How many agents per MU? | Max 1,500 agents per management unit |
| Where are forecasts created? | At Business Unit level |
| Where are schedules created? | At Business Unit level |
| How many schedules per BU? | One master schedule per BU at a time |
| What channels does WFM support? | Voice, email, chat, callback, messaging, workitems |
| What's a planning group? | Workload organized by media type and route |
| What's the forecasting basis? | Volume (Offered) and Average Handle Time (AHT) |
| What's Service Goal? | Target metrics (Service Level, ASA, abandon rate) |
| Where are permissions granted? | At BU level for forecasting, at MU level for time-off |
| How long is scheduling window? | 26 weeks prior and 26 weeks future from current |
| What's a work plan? | Definition of shifts, breaks, meals, contracts |
Key Takeaways
- Hierarchical Structure - Business Units contain Management Units which contain Sites and Teams
- Agent Limits - 5,000 per BU, 1,500 per MU
- Multi-Channel - Supports 6 media types (voice, email, chat, callback, messaging, workitems)
- AI-Powered - Uses Automatic Best Method for optimal forecasting
- Real-Time - Live monitoring and adherence tracking
- Integrated - Tight integration with Genesys Administrator and routing
- Self-Service - Agent portal on desktop and mobile devices
- Scalable - Supports large, multi-site contact centers
- Flexible - Multiple scheduling methods and contract types
- Data-Driven - Continuous improvement through metrics and analytics
Additional Resources
Official Documentation
- WFM Overview: all.docs.genesys.com/PEC-WFM
- Genesys Cloud WFM: help.genesys.cloud/articles/about-workforce-management/
- Business Units: help.genesys.cloud/articles/business-units-overview/
- Scheduling: help.genesys.cloud/articles/work-with-workforce-management-schedules/
Support & Training
- Genesys University: genesys.com/training
- Community Forums: https://community.genesys.com
- Technical Support: https://support.genesys.com
Document Version Info
Last Updated: March 2026
Source: Genesys WFM Official Documentation
Validated: Current with January-March 2026 releases
Version: 1.0
Business & Management Units
Genesys WFM Business & Management Units Documentation
Study Notes
| Topic | Description |
|---|---|
| Business Unit | Organizational unit grouping management units sharing objectives |
| Management Unit | Sub-unit containing agents (max 1,500 per MU) |
| Agent Capacity | 5,000 max per BU, 1,500 max per MU |
| Hierarchy | BU → MU → Site → Team → Agent |
| Permissions | Granted at BU level for forecasting, MU level for local control |
| Multi-MU Scheduling | Forecasts/schedules run across all MUs in a BU simultaneously |
Navigation
Admin → Workforce Management → Business Units OR Admin → Workforce Management → Management Units
Business Units Overview
In workforce management, business units enable customers to organize their agents and leverage permissions to meet business needs. Business units allow customers to configure agents who share queues into more than one management unit. The agent capacity for management unit is 1,500 agents; however, business units help alleviate this limitation by providing support for up to 5,000 agents per business unit.
Business units enable cross-management unit scheduling and forecasting within the same business unit. Forecasts and schedules run at the business unit level, and administrators can create the most efficient schedules by factoring in coverage from all agents in more than one management unit within the business unit.
Business Unit Characteristics
- Agent Capacity: Max 5,000 agents per business unit
- Forecast Scope: Entire BU (all MUs included)
- Schedule Scope: Entire BU (all MUs included)
- One Master Schedule: Only one active master schedule per BU at a time
- Time Zone: Default time zone set at BU level (applies to all MUs)
- Week Start Day: Set at BU level (applies to all sites)
- Common Objective: Group MUs that share operational objectives
Business Unit Use Cases
- Geographically dispersed sites - Multiple locations serving same function
- Skill-based organization - Different teams with complementary skills
- Multi-shift operations - 24/7 coverage across multiple time zones
- Blended internal/outsourced - Internal staff + third-party partners
- Virtual operations - Remote work + office-based agents
- Growth planning - Prepare for future headcount expansion
Management Units Overview
Management Units are groups of agents within a business unit. They can represent a department, site, or geographic location within the same business unit. Management units provide organizational flexibility and permission boundaries.
Management Unit Characteristics
- Agent Capacity: Max 1,500 agents per management unit
- Purpose: Represent dept/site/location within BU
- Permissions: Local control of time-off, team management
- Organization: Agents grouped for local management
- Flexibility: Multiple MUs per BU enable large-scale operations
- Cross-MU Work: Agents in different MUs can share queues/skills
Management Unit Use Cases
- Site-based organization - Each office location = 1 MU
- Department organization - Support/Sales/Billing each = 1 MU
- Shift-based organization - Morning/Evening/Night shift = 1 MU
- Skill-based teams - Technical/Billing/Sales each = 1 MU
- Outsourced partners - Third-party vendor = 1 MU
- Virtual agent groups - Remote workers = 1 MU
Hierarchy Structure
Organizational Hierarchy Example:
Business Unit: North America (4,800 agents)
│
├─ Management Unit: New York Operations (1,200 agents)
│ ├─ Site: Manhattan (600 agents)
│ │ ├─ Team: Support Tier 1 (150 agents)
│ │ ├─ Team: Support Tier 2 (150 agents)
│ │ ├─ Team: Sales (150 agents)
│ │ └─ Team: Billing (150 agents)
│ │
│ └─ Site: Brooklyn (600 agents)
│ └─ 4 teams (150 each)
│
├─ Management Unit: Dallas Operations (1,200 agents)
│ ├─ Site: Downtown (600 agents)
│ └─ Site: Suburb (600 agents)
│
├─ Management Unit: Remote Operations (1,200 agents)
│ └─ Virtual site (1,200 remote agents)
│
└─ Management Unit: Outsourced Partners (1,200 agents)
└─ Partner site (1,200 vendor agents)
Agent Distribution:
├─ MU1: 1,200 agents (25%)
├─ MU2: 1,200 agents (25%)
├─ MU3: 1,200 agents (25%)
├─ MU4: 1,200 agents (25%)
└─ Total BU: 4,800 agents (80% of 5,000 capacity)
Permission Model
Business Unit Level Permissions
Permissions granted at BU level apply to entire business unit:
- Forecasting - Create, edit, publish forecasts for all MUs
- Schedule Generation - Create schedules across all MUs
- Service Goals - Define service goals for BU
- Planning Groups - Create planning groups for BU
- Reporting - Cross-MU reports and analytics
- Configuration - BU-wide settings and policies
Management Unit Level Permissions
Permissions granted at MU level apply only to that MU:
- Time-Off Approvals - Approve time-off requests
- Schedule Details - View/edit MU-specific schedules
- Team Management - Manage teams within MU
- Activity Configuration - MU-specific activities
- Reporting - MU-only reports
- Agent Management - Add/remove agents from MU
Permission Matrix
Feature BU Level MU Level
────────────────────────────────────────────
Forecasting ✓ Full ✗ No
Schedule Generation ✓ Full ✗ No
Intraday Management ✓ Full ✓ View
Real-Time Adherence ✓ Full ✓ View
Time-Off Approvals ✗ No ✓ Full
Team Management ✗ Limited ✓ Full
Agent Assignment ✓ Full ✓ Limited
Reporting ✓ Full ✓ Limited
Configuration ✓ Full ✓ Limited
Capacity Planning
Agent Capacity Calculations
Example 1: Single MU Organization
Business Unit: Small Contact Center
├─ Management Unit: Support (800 agents)
│ └─ Capacity Used: 800/1,500 (53%)
└─ Business Unit Total: 800/5,000 (16%)
Growth Plan:
├─ Year 1: Add 200 agents → 1,000 total
├─ Year 2: Add 300 agents → 1,300 total
└─ Year 3: Need to split → Create 2nd MU
Example 2: Multi-MU Organization
Business Unit: Enterprise Contact Center
├─ Management Unit 1: NYC (1,400 agents) - 93%
├─ Management Unit 2: Dallas (1,350 agents) - 90%
├─ Management Unit 3: Remote (1,200 agents) - 80%
├─ Management Unit 4: Outsourced (950 agents) - 63%
└─ Business Unit Total: 4,900/5,000 (98%)
Challenge: Almost at BU capacity
Solution:
├─ Option 1: Create new BU for new location
├─ Option 2: Split existing MU to another BU
└─ Option 3: Reduce headcount in lowest-performing MU
Exceeding Capacity
If MU exceeds 1,500 agents:
- Cannot add more agents to that MU
- Must create new MU or split agents
- Requires reorganization of teams
If BU exceeds 5,000 agents:
- Cannot add more agents to that BU
- Must create new business unit
- Existing MUs remain operational but frozen
Configuration
Creating a Business Unit
Creating a Management Unit
Real-World Scenarios
Scenario 1: Scaling Beyond 1,500 Agents
Current State:
Business Unit: Support Operations
└─ Management Unit: Support Team
└─ 1,500 agents (at capacity)
New Hire Requirements: +200 agents needed
Solution: Split into Two MUs
Business Unit: Support Operations
├─ Management Unit: Support - Group A (1,350 agents)
│ └─ Location: NYC + Boston
├─ Management Unit: Support - Group B (1,200 agents)
│ └─ Location: Dallas + Remote
└─ Business Unit Total: 2,550/5,000 (51%)
Benefits:
├─ Accommodates growth
├─ Local team management at MU level
├─ Still shared forecasting/scheduling
└─ Room for future expansion
Scenario 2: Multi-Location Organization
Company Structure:
Financial Services - 3,600 employees in support
Business Unit: Global Support
├─ Management Unit: North America (1,500)
│ ├─ Site: New York (750)
│ └─ Site: Dallas (750)
├─ Management Unit: Europe (1,200)
│ ├─ Site: London (600)
│ └─ Site: Dublin (600)
└─ Management Unit: Outsourced (900)
└─ Site: Philippines (900)
Forecasting:
├─ Single global forecast across all 3 MUs
├─ Factors in time zone differences
├─ Optimizes scheduling for 24/7 coverage
└─ Published to master schedule covering all locations
Agent Movement:
├─ Can't move agents between MUs automatically
├─ Must manually reassign for temporary overflow
├─ Permanent transfers require admin action
Scenario 3: Outsourced Partner Integration
Setup:
Business Unit: Multi-Channel Support (2,500 agents)
├─ Management Unit: Internal Team (1,500)
│ └─ Full control over scheduling/policies
├─ Management Unit: Outsourced Partner (1,000)
│ └─ Integrated into unified forecasting
└─ Benefits:
├─ Single forecast across internal + outsourced
├─ Unified scheduling window
├─ Coordinated service goals
└─ Partner agents included in adherence
Challenges:
├─ Different contracts/rules per MU
├─ Partner availability limitations
├─ Communication across organizations
Best Practices
Organization Design
- Right-size MUs - Keep at 1,000-1,300 agents for growth room
- Clear separation - Align with business structure
- Future-proof - Plan for 2-3 years of growth
- Skill groups - Use for agent assignment, not org structure
- Geographic logic - Use locations/sites for MU boundaries
Permission Management
- Principle of least privilege - Grant only needed permissions
- Role-based access - Create roles for common scenarios
- Audit regularly - Review who has what access
- Documentation - Maintain permission matrix
- Approval workflow - Require BU-level for major changes
Agent Assignment
- Consistent naming - Use standard naming conventions
- Skill accuracy - Ensure skills match actual capabilities
- MU assignment logic - Clear criteria for placement
- Cross-MU skills - Agents can have skills across queues
- Regular audits - Verify assignment accuracy
Growth Planning
- Capacity monitoring - Track MU usage quarterly
- Headcount forecasts - Plan additions in advance
- Reorganization planning - Prepare for splits/merges
- Communication - Inform stakeholders of changes
- Test in non-prod - Always validate changes first
Common Issues & Solutions
| Issue | Cause | Solution |
|---|---|---|
| Can't add agent to MU | MU at 1,500 limit | Create new MU or split existing |
| Schedule won't generate | Agents in multiple MUs missing | Ensure all agents properly assigned |
| Permission denied for forecast | Not BU-level permission | Grant Forecast permission at BU level |
| Agents can't trade across MUs | Not configured | Enable cross-MU trading in settings |
| Time-off approval pending | Wrong approval level | Ensure MU-level approver assigned |
| Wrong time zone | Inherited from parent | Change at BU level or override at Site |
Interview Cheat Sheet
| Question | Answer |
|---|---|
| What's a Business Unit? | Group of MUs sharing operational objectives, max 5,000 agents |
| What's a Management Unit? | Sub-unit within BU representing dept/site/location, max 1,500 agents |
| How does hierarchy work? | BU → MU → Site → Team → Agent |
| Where are forecasts created? | Business Unit level (includes all MUs) |
| Where are schedules created? | Business Unit level (includes all MUs) |
| What permissions at BU level? | Forecasting, scheduling, service goals, reporting |
| What permissions at MU level? | Time-off approvals, team management, local scheduling |
| Can agents work across MUs? | Yes, if they have required skills for queues |
| Can one agent be in two MUs? | No, each agent assigned to one MU only |
| Max agents per BU? | 5,000 agents |
| Max agents per MU? | 1,500 agents |
| How many master schedules per BU? | One active master schedule per BU |
| How to handle growth over 1,500? | Create additional MU within same BU |
| How to exceed 5,000 agents? | Create new business unit |
| Can MUs share queues? | Yes, agents across MUs can handle same queues |
Key Takeaways
- Hierarchical Organization - BU organizes multiple MUs for shared forecasting
- Capacity Planning - 5,000 agents per BU, 1,500 per MU
- Unified Forecasting - Single forecast across all MUs in BU
- Unified Scheduling - One master schedule for entire BU
- Permission Boundaries - BU level for strategic, MU level for operational
- Scalability - Split MUs when exceeding 1,500 agents
- Flexibility - Agents can work across MUs if skilled
- Management Clarity - Clear org structure for delegation
- Growth-Ready - Design with future expansion in mind
- Cross-MU Optimization - Forecasting balances coverage across locations
Additional Resources
Official Documentation
- Business Units: help.genesys.cloud/articles/business-units-overview/
- Management Units: help.genesys.cloud/articles/management-units-overview/
- WFM Configuration: help.genesys.cloud/articles/workforce-management-and-divisions-overview/
- Permissions: help.genesys.cloud/articles/workforce-management-permissions/
Support & Training
- Genesys University: genesys.com/training
- Community Forums: https://community.genesys.com
- Technical Support: https://support.genesys.com
Document Version Info
Last Updated: March 2026
Source: Genesys WFM Official Documentation
Validated: Current with January-March 2026 releases
Version: 1.0
Forecasting
Genesys WFM Forecasting Documentation
Study Notes
| Topic | Description |
|---|---|
| Master Forecast | Published forecast scenario used for scheduling |
| Automatic Best Method | AI analyzes 10+ algorithms to select best forecast |
| Forecasting Methods | ABM, WHI, HDI, Import Forecast |
| Main Forecast | Continuous daily calculation from latest data |
| Accuracy | ABM: 85-92% vs Traditional: 70-80% |
| Planning Groups | Organize workload by media type and route |
| Service Goals | Define SL, ASA, abandon rate targets |
| Recalculation | Main forecast recalculates nightly with new data |
Navigation
Admin → Workforce Management → Forecasting OR Menu → Workforce Management → Forecasting → Forecasts
Forecasting Overview
Forecasting is the process of predicting future contact volume and average handle time to determine required staffing levels. WFM uses forecasts to create optimal schedules that balance service level goals with operational efficiency.
Forecasts form the foundation of workforce planning. Accurate forecasts drive better schedules, which drive better adherence, which drives better service levels. The forecasting process involves analyzing historical data, selecting appropriate forecasting methods, validating scenarios, and publishing the best scenario to become the Master Forecast.
Forecasting Objectives
- Volume Prediction - Predict number of interactions (offered)
- AHT Prediction - Predict average handle time per interaction
- Staffing Calculation - Determine agents needed to meet service goals
- Scenario Planning - Evaluate multiple forecasting approaches
- Continuous Improvement - Refine based on actual vs forecast variance
- Capacity Planning - Support long-range hiring decisions
Forecasting Scope
- Business Unit Level - Forecasts created for entire BU (all MUs)
- Time Granularity - Hourly and daily forecasts
- Planning Period - 26 weeks forward (can search up to 104 weeks)
- Historical Data - Requires 90+ days of data for accuracy
- Multiple Scenarios - Create and compare multiple approaches
- Master Forecast - One published forecast per BU at a time
Forecasting Methods
1. Automatic Best Method (ABM)
Automatic Best Method is the AI-powered forecasting approach that analyzes historical interaction data and automatically selects the most accurate forecasting algorithm from 10+ methods.
How ABM Works:
Historical Data Input
↓
Analyze 10+ Forecasting Algorithms:
├─ Moving Average
├─ Exponential Smoothing
├─ Trend Analysis
├─ Seasonal Decomposition
├─ Regression Models
├─ Time Series Analysis
└─ ... 4+ additional models
↓
Evaluate Each Against Historical Data
├─ Calculate accuracy metrics
├─ Test fit quality
├─ Assess seasonal patterns
└─ Validate trend capture
↓
Select Best Performing Model
├─ Lowest error rate
├─ Best seasonal fit
├─ Most stable predictions
└─ Confidence validation
↓
Generate Forecast
├─ Volumes (Offered)
├─ AHT (Average Handle Time)
└─ Staffing Requirements
ABM Characteristics:
- Requires minimum 90 days historical data
- Automatically evaluates 10+ algorithms
- Selects best fit without manual intervention
- Accuracy: 85-92% (vs traditional 70-80%)
- Recalculates nightly with new data
- Supports all media types
- Cloud-based processing
When to Use ABM:
- ✓ Mature contact center (90+ days data)
- ✓ Accurate historical data available
- ✓ Want AI-driven optimization
- ✓ Looking for best accuracy
- ✓ Limited forecasting expertise
ABM Limitations:
- ✗ Requires 90+ days data minimum
- ✗ Cannot account for business events manually
- ✗ May not work with highly volatile data
- ✗ Limited control over algorithm selection
2. Weighted Historical Index (WHI)
Weighted Historical Index allows forecasters to assign importance to specific historical periods, enabling forecasts that reflect anticipated trends or business changes.
How WHI Works:
Select Historical Periods
↓
Assign Weights to Periods:
├─ Recent period: 40% weight (higher importance)
├─ Same season last year: 35% weight
├─ 2 years ago: 15% weight
└─ Older data: 10% weight
↓
Calculate Weighted Average
├─ Multiply volumes by weights
├─ Multiply AHT by weights
└─ Generate forecast
↓
Manual Adjustments
├─ Add/subtract for known events
├─ Adjust for staffing changes
└─ Account for market changes
↓
Forecast Output
WHI Characteristics:
- Manual weight assignment
- Incorporates business judgment
- Good for known changes
- Moderate accuracy (75-85%)
- Requires forecasting expertise
- Supports business events
When to Use WHI:
- ✓ Known business changes upcoming
- ✓ New product launch planned
- ✓ Merger/acquisition integration
- ✓ Staffing changes anticipated
- ✓ Want forecaster control
WHI Limitations:
- ✗ Requires manual configuration
- ✗ Subject to forecaster bias
- ✗ More time-consuming setup
- ✗ Less accurate than ABM typically
3. Historical Data Import (HDI)
Historical Data Import enables importing external historical data via CSV files, useful for organizations lacking internal historical data or integrating data from legacy systems.
How HDI Works:
Prepare Historical Data CSV:
├─ Date, Time, Interactions Offered
├─ Date, Time, Average Handle Time
└─ Format per Genesys specifications
Upload CSV File
↓
Data Validation
├─ Check date formats
├─ Validate interaction counts
├─ Verify AHT values
└─ Check for gaps
Map to Planning Groups
├─ Assign data to queues/routes
├─ Set media types
└─ Configure mapping rules
Import and Store
├─ Historical data added to system
├─ Available for forecasting
└─ Retained for 90+ days
Create Forecast
├─ ABM or WHI using imported data
├─ Generate volumes and AHT
└─ Publish to master forecast
HDI Characteristics:
- CSV-based import
- Supports external data sources
- Integrates legacy system data
- Enables quick setup for new centers
- Maintains data history
- Works with ABM/WHI methods
When to Use HDI:
- ✓ New contact center (no history)
- ✓ Migrating from legacy system
- ✓ Acquiring another company
- ✓ Need to supplement internal data
- ✓ Have external forecasting data
HDI Limitations:
- ✗ Requires proper CSV formatting
- ✗ Data validation needed
- ✗ Manual upload process
- ✗ Can't import future predictions
4. Import Forecast
Import Forecast supports uploading externally generated forecasts into Genesys Cloud, integrating with existing forecasting systems or third-party tools.
How Import Forecast Works:
External Forecast Generation:
├─ Create in Excel/third-party tool
├─ Calculate volumes and AHT
├─ Format per specifications
└─ Validate accuracy
Export as CSV/XML
↓
Upload to Genesys WFM
├─ Select planning group
├─ Map forecast period
└─ Validate format
System Processing:
├─ Parse forecast data
├─ Validate ranges
├─ Check for completeness
└─ Store in system
Publish to Master Forecast
├─ Available for scheduling
├─ Used for staffing calculations
└─ Drives schedule generation
Import Forecast Characteristics:
- Forecast generated externally
- Upload pre-calculated volumes/AHT
- Bypasses ABM/WHI
- Useful for specialized models
- One-time or periodic imports
- No recalculation
When to Use Import Forecast:
- ✓ Have specialized forecasting tool
- ✓ Third-party forecast provider
- ✓ Complex custom models
- ✓ Forecasting done elsewhere
- ✓ Minimal WFM forecasting expertise
Import Forecast Limitations:
- ✗ No automatic updates
- ✗ Must re-import when data changes
- ✗ No integration with real-time data
- ✗ Less adaptive to changes
Main Forecast
The Main Forecast is a special forecast calculated continuously (typically nightly) based on all available historical data. It provides the baseline forecast that can be used immediately or modified through scenarios.
Main Forecast Characteristics:
- Continuous Calculation - Recalculates every night
- All Historical Data - Uses complete data history
- Automatic - No manual intervention required
- Read-Only - Cannot be directly edited
- Baseline Reference - Starting point for scenarios
- Always Available - Immediately accessible
- Best Current Data - Uses latest interactions
Main Forecast Flow:
Day 1: Historical Data (30 days)
↓ Nightly Calculation
↓ Main Forecast Published
↓
Day 2: Historical Data (30 days) + Day 1 New Data
↓ Nightly Calculation
↓ Main Forecast Updated
↓
Ongoing: Continuous refinement with new daily data
Planning Groups
Planning Groups organize workloads by specific media types and route paths, enabling targeted forecasting and scheduling.
Planning Group Components:
Planning Group: Support - Inbound Voice
├─ Media Type: Voice (inbound)
├─ Queue/Route: Support_Queue_001
├─ Skill Required: Support_Skill_Level_2+
├─ Service Goal: 80% SL, 20 sec ASA, 5% abandon
├─ Staffing Group: Support_Agents
└─ Forecast Data: Volume + AHT
Planning Group: Sales - Outbound Calls
├─ Media Type: Voice (outbound)
├─ Campaign: Q1_Spring_Campaign
├─ Skill Required: Sales_Skill_Level_1+
├─ Service Goal: Contact 50% of list, 5 min calls
├─ Staffing Group: Sales_Agents
└─ Forecast Data: Dialing ratio + AHT
Planning Group: Support - Email
├─ Media Type: Email
├─ Queue: Support_Email_Queue
├─ Response Time Goal: 4 hours
├─ Staffing Group: Support_Agents
└─ Forecast Data: Volume + AHT
Planning Group: Chat Support
├─ Media Type: Chat
├─ Route: Support_Chat_Route
├─ Concurrency: 4-5 chats per agent
├─ Response Time: Immediate
└─ Forecast Data: Offered + AHT
Planning Group Creation:
Planning Group Best Practices:
- Clarity - Clear names reflecting function
- Consolidation - Group similar work together
- Skill Alignment - Agents have required skills
- Service Goals - Match business objectives
- Regular Review - Update as operations change
- Documentation - Maintain planning group mapping
Service Goals
Service Goals define the performance targets for a planning group: Service Level, Average Speed to Answer, and Abandonment Rate.
Service Goal Components:
Service Goal Template: Premium Support
├─ Service Level Goal: 80%
│ └─ Definition: 80% of calls answered within 20 seconds
├─ Average Speed to Answer: 20 seconds
│ └─ Definition: Average answer time across all calls
├─ Abandon Rate: 5%
│ └─ Definition: Max 5% of offered calls abandoned
├─ Media Type: Voice
├─ Time Intervals: Hourly
└─ Period: Weekly
Service Goal Template: Standard Support
├─ Service Level Goal: 75%
├─ Average Speed to Answer: 30 seconds
├─ Abandon Rate: 8%
└─ More lenient targets for lower-volume periods
Service Goal Template: Email Support
├─ Service Level Goal: 95% within 4 hours
├─ Average Speed to Answer: 2 hours (median response)
├─ Abandon Rate: 0% (not applicable)
└─ Media Type: Email
Service Goal Best Practices:
- Realistic Targets - Achieve 80-85% of time
- Business Aligned - Match customer expectations
- Media-Specific - Different for voice vs email
- Documented - Communicate to teams
- Regular Review - Adjust based on performance
- Incremental Improvement - Tighten gradually
Forecasting Process
Step 1: Data Preparation
- Ensure 90+ days of historical data available
- Validate data accuracy
- Check for gaps or anomalies
- Clean outliers if necessary
- Confirm queue/route mappings
Step 2: Create Scenario
Step 3: Build Volumes
- Open scenario
- Click Build Volumes
- Select forecasting method:
- ABM - Recommended for accuracy
- WHI - For known business changes
- Template - Copy from similar period
- Configure method-specific settings
- Generate volumes
Step 4: Build AHT
- Open scenario volumes
- Click Build AHT
- Select method (typically same as volumes)
- Configure AHT-specific settings
- Generate AHT
Step 5: Review & Validate
- Open Scenario Volumes view
- Review volume trends:
- ✓ Match business expectations
- ✓ Seasonal patterns visible
- ✓ Growth/decline appropriate
- ✓ No obvious anomalies
- Open Scenario Staffing view
- Review staffing requirements:
- ✓ Realistic agent counts
- ✓ Service level achievable
- ✓ Aligned with budget
- ✓ Growth manageable
Step 6: Compare Scenarios
- Create multiple scenarios if desired
- Compare side-by-side:
- Volume projections
- Staffing requirements
- Cost implications
- Service level achievement
- Select best scenario
Step 7: Publish to Master Forecast
- Open best scenario
- Click Publish to Master Forecast
- Confirm publication
- Master Forecast now available for scheduling
Step 8: Monitor & Adjust
- Track actual vs forecast weekly
- Calculate variance:
- Volume Variance = (Actual - Forecast) / Forecast
- AHT Variance = (Actual - Forecast) / Forecast
- Adjust future forecasts based on variance
- Recalculate Main Forecast
Forecasting Accuracy
Measuring Accuracy
Volume Accuracy:
Forecast Accuracy = 1 - |Actual - Forecast| / Actual
Example:
Forecasted Offered: 1,000 calls
Actual Offered: 980 calls
Variance: |980 - 1,000| / 1,000 = 2%
Accuracy: 98%
AHT Accuracy:
Forecasted AHT: 420 seconds
Actual AHT: 410 seconds
Variance: |410 - 420| / 420 = 2.4%
Accuracy: 97.6%
Overall Forecast Accuracy:
- Excellent - 95%+ accuracy
- Good - 90-95% accuracy
- Acceptable - 85-90% accuracy
- Poor - <85% accuracy
Factors Affecting Accuracy
Positive Factors:
- ✓ Abundant historical data (90+ days)
- ✓ Consistent seasonal patterns
- ✓ Stable agent population
- ✓ No major business changes
- ✓ Accurate data collection
- ✓ Use of ABM method
Negative Factors:
- ✗ Insufficient historical data (<30 days)
- ✗ Volatile contact volumes
- ✗ Seasonal anomalies
- ✗ Major staffing changes
- ✗ Business discontinuities
- ✗ Data quality issues
Improving Forecast Accuracy
-
Data Quality
- Validate interaction data
- Remove duplicate entries
- Correct time stamps
- Clean outliers appropriately
-
Time Frame Selection
- Use 90+ days of data
- Include full seasonal cycle
- Exclude anomalous periods
- Weight recent data higher
-
Method Selection
- Use ABM for stable patterns
- Use WHI for known changes
- Test multiple methods
- Compare results
-
Ongoing Monitoring
- Track actual vs forecast weekly
- Identify variance sources
- Adjust future forecasts
- Document lessons learned
-
Business Communication
- Inform of known changes
- Get campaign dates in advance
- Understand staffing constraints
- Align on service goals
Real-World Examples
Example 1: New Contact Center (Using HDI)
Scenario: New financial services contact center
Problem: No historical data in Genesys
Solution: Historical Data Import
Process:
1. Obtain 6 months of data from legacy system
2. Format as CSV (Date, Time, Volume, AHT)
3. Upload to WFM via Historical Data Import
4. Validate imported data (1,000+ calls/day confirmed)
5. Create ABM forecast using imported data
6. Generate 26-week forecast with 85% confidence
7. Publish to Master Forecast
8. Create schedules based on forecast
9. Begin tracking actual vs forecast
10. Refine with real Genesys data over time
Result: Forecast accuracy 82% week 1, improving to 90% by week 12
Example 2: Seasonal Business (Using WHI)
Scenario: Retail customer service (high holiday season)
Problem: Regular ABM doesn't account for expected surge
Solution: Weighted Historical Index
Process:
1. Run ABM to get baseline forecast
2. Weight recent 4 weeks: 50%
3. Weight same season last year: 30%
4. Weight 2 years ago: 20%
5. Manual adjustment: +25% for new catalog
6. Manual adjustment: +10% for holiday promotions
7. Result: 15,000 calls/day (vs ABM baseline 12,000)
8. Schedule accordingly with additional flex agents
9. Publish to Master Forecast
10. Monitor first week for variance
Result: Forecast accuracy 88% during peak season
Alternative: Would have been 65% with unmodified ABM
Example 3: Business Event (Using Import Forecast)
Scenario: Product launch with external forecast
Problem: Marketing has already forecasted demand impact
Solution: Import Forecast from external source
Process:
1. Marketing provides forecast:
- Week 1: +30% volume increase
- Week 2: +50% volume increase
- Week 3: +40% volume increase
- Week 4-8: Declining to normal
2. Obtain volumes from marketing
3. Format as CSV per Genesys spec
4. Upload via Import Forecast
5. Map to Support planning group
6. Validate import completeness
7. Publish to Master Forecast
8. Create high-staffing schedule for weeks 1-3
9. Monitor actual vs marketing forecast
10. Adjust staffing based on real results
Result: Forecast accuracy 92% (marketing expertise applied)
Cost: Hired 50 temporary agents, all utilized during surge
Best Practices
Forecasting Process
- Establish Baseline - Start with ABM for consistency
- Regular Reviews - Monthly variance analysis
- Scenario Planning - Test multiple approaches
- Documentation - Record assumptions and decisions
- Communication - Share forecasts with operations
- Validation - Compare to business expectations
Data Management
- Data Quality - Daily validation and cleanup
- Retention - Keep 90+ days for pattern recognition
- Integrity - Prevent manual edits without documentation
- Backup - Maintain forecast history
- Audit Trail - Track who changed what when
Continuous Improvement
- Weekly Tracking - Actual vs forecast variance
- Root Cause Analysis - Understand variances
- Method Adjustment - Change weights/methods as needed
- Feedback Loop - Share insights with business
- Seasonal Adjustment - Update for known patterns
Interview Cheat Sheet
| Question | Answer |
|---|---|
| What's ABM? | Automatic Best Method - AI selects best algorithm from 10+ |
| ABM accuracy? | 85-92% (vs traditional 70-80%) |
| ABM data requirement? | Minimum 90 days historical data |
| When use ABM? | Mature center, good data, want best accuracy |
| When use WHI? | Known business changes, want forecaster control |
| When use HDI? | New center, migrating systems, external data |
| When use Import? | External forecast available, specialized models |
| What's Main Forecast? | Automatically calculated nightly using all data |
| What's planning group? | Organizes work by media type and route |
| What's service goal? | Targets for SL, ASA, abandon rate |
| Where forecasts created? | Business Unit level |
| How far forward? | 26 weeks (can search up to 104) |
| How often recalculate? | Main forecast nightly, scenarios on demand |
| Forecast impacts? | Drives scheduling, staffing, service level |
| How measure accuracy? | Compare actual vs forecast volume and AHT |
Key Takeaways
- AI-Powered - ABM automatically selects best method from 10+ algorithms
- Accuracy - ABM achieves 85-92% vs traditional 70-80%
- Flexibility - Four methods (ABM, WHI, HDI, Import) for different scenarios
- Continuous - Main Forecast recalculates nightly with new data
- Planning Groups - Organize by media type and route for precise forecasting
- Service Goals - Define targets for SL, ASA, abandon rate
- Data-Driven - Requires 90+ days of data for accuracy
- Validation - Regular monitoring of actual vs forecast variance
- Business Events - WHI and Import methods support known changes
- Foundation - Forecast quality directly impacts schedule quality
Additional Resources
Official Documentation
- Forecasting Overview: help.genesys.cloud/articles/forecasting-overview/
- Automatic Best Method: help.genesys.cloud/articles/automatic-best-method/
- Planning Groups: help.genesys.cloud/articles/planning-groups-overview/
- Service Goals: help.genesys.cloud/articles/service-goals-overview/
Support & Training
- Genesys University: genesys.com/training
- Community Forums: https://community.genesys.com
- Technical Support: https://support.genesys.com
Document Version Info
Last Updated: March 2026
Source: Genesys WFM Official Documentation
Validated: Current with January-March 2026 releases
Version: 1.0
Scheduling & Work Plans
Genesys WFM Scheduling & Work Plans Documentation
Study Notes
| Topic | Description |
|---|---|
| Scheduling Methods | 3 approaches: Load-based (forecast), Shift pattern, Blank schedule |
| Schedule Window | 26-week visibility (±26 weeks from current), one master per BU |
| Generation Period | Maximum 6 weeks at a time |
| Work Plan | Defines shifts, breaks, meals, contracts, weekly constraints |
| Shift Items | Breaks and meals with time windows and configuration |
| Schedule Bidding | Agents bid on pre-created schedules |
| Master Schedule | Published schedule available to all agents |
Navigation
Admin → Workforce Management → Scheduling OR Menu → Workforce Management → Scheduling → Schedules
Scheduling Overview
Scheduling is the process of assigning agents to work times that balance forecasted demand, service level goals, agent preferences, contract obligations, and business constraints. WFM scheduling creates optimal schedules for multi-skilled agents handling different interaction types across multiple sites.
The scheduler considers each agent's individual skills, contracted working rules, and calendar items to identify when each agent can work and what work they will perform. Once finalized, schedules are published to the Master Schedule where agents view and potentially trade them.
Scheduling Objectives
- Demand Coverage - Match staffing to forecasted volume and AHT
- Service Level Achievement - Achieve SL, ASA, abandon rate targets
- Contract Compliance - Respect working rules and labor laws
- Agent Preferences - Accommodate scheduling preferences where possible
- Flexibility - Enable shift trades and time-off requests
- Optimization - Minimize over/under staffing
Scheduling Scope
- Business Unit Level - Schedules created for entire BU
- Time Granularity - Hourly detail, weekly structure
- Planning Period - 26 weeks forward (can search 104 weeks)
- Generation Window - 6 weeks maximum per schedule
- One Master - One published master schedule per BU at a time
- Future Schedules - Multiple scenarios before publishing
Three Scheduling Methods
WFM provides three primary scheduling methods, each suited to different scenarios:
Method 1: Load-Based Scheduling with Forecasts
Load-based scheduling uses the published Master Forecast to determine required staffing at each hour, then creates agent schedules to meet those requirements.
How Load-Based Scheduling Works:
Master Forecast Published
├─ Volume forecast (Offered)
├─ AHT forecast
└─ By planning group and hour
WFM Scheduler Receives Forecast
├─ Calculates required agents by hour
├─ Factors in service level goals
├─ Applies shrinkage rules
└─ Determines agent needs (staffing target)
Apply Constraints
├─ Agent skills and proficiency
├─ Contract working rules
├─ Availability and preferences
├─ Existing calendar items
├─ Team assignments
Generate Schedule
├─ Assign agents to shifts
├─ Balance workload across agents
├─ Optimize shift times
└─ Minimize over/under staffing
Optimize for Efficiency
├─ Minimize overtime
├─ Maximize full utilization
├─ Consider split shifts
├─ Adjust for specific requests
Output: Optimized schedule tied to demand
Load-Based Characteristics:
- Data-Driven - Based on forecasted demand
- Demand-Responsive - Adjusts to volume changes
- Constraint-Aware - Respects contracts and preferences
- Accurate Staffing - Right people, right time
- Dependent on Forecast - Only as good as forecast
When to Use Load-Based:
- ✓ Have accurate Master Forecast
- ✓ Want demand-driven scheduling
- ✓ Need to achieve service levels
- ✓ Have multiple media types
- ✓ Want cost optimization
Load-Based Limitations:
- ✗ Dependent on forecast quality
- ✗ Requires forecast to be published
- ✗ Cannot create without forecast
- ✗ Changes to forecast require reschedule
Load-Based Example:
Master Forecast for Support Planning Group:
Monday: 08:00-09:00: 50 calls, AHT 300s → Need 5 agents
09:00-10:00: 75 calls, AHT 300s → Need 7 agents
10:00-11:00: 100 calls, AHT 300s → Need 10 agents
11:00-12:00: 95 calls, AHT 300s → Need 9 agents
... (continue for full day)
Schedule Generated:
- Agent1: 08:00-16:30 (8.5 hours, with 1 hour lunch)
- Agent2: 08:30-17:00 (8.5 hours, with 1 hour lunch)
- Agent3: 09:00-17:30 (8.5 hours, with 1 hour lunch)
- Agent4: 10:00-18:30 (8.5 hours, with 1 hour lunch)
- ...and so on
Result: 10 agents scheduled for peak period (10:00-11:00)
Efficiency: Minimal over/under staffing
Method 2: Shift Pattern-Based Scheduling (Without Forecasts)
Shift pattern-based scheduling creates schedules based on predefined shift patterns without using forecast data. Useful when forecasts are unavailable or when standard shifts are preferred.
How Shift Pattern Scheduling Works:
Define Shift Patterns (Work Plans)
├─ Pattern A: 09:00-17:30 (Monday-Friday)
├─ Pattern B: 10:00-18:30 (Tuesday-Saturday)
├─ Pattern C: Flex (varies by week)
└─ Pattern D: Part-time (13:00-17:00, Mon-Wed)
Determine Agent Allocation
├─ How many agents per pattern?
├─ How many full-time vs part-time?
├─ How many per location/team?
└─ How many per skill group?
Assign Agents to Patterns
├─ Match agent skills to patterns
├─ Consider preferences
├─ Balance across teams
└─ Respect availability
Generate Schedule
├─ Agents follow assigned patterns
├─ All agents same shift per week
├─ No forecast-based adjustments
└─ Predictable recurring schedule
Output: Consistent repeating schedule (no forecast needed)
Shift Pattern Characteristics:
- No Forecast Required - Works without demand data
- Predictable - Same pattern each week
- Simple - Easy for agents to understand
- Cost-Predictable - Fixed staffing levels
- Limited Flexibility - Cannot adjust to volume changes
When to Use Shift Pattern:
- ✓ No accurate forecast available
- ✓ Want simple repeating schedules
- ✓ Prefer staffing stability
- ✓ New contact center (building history)
- ✓ Fixed cost model required
Shift Pattern Limitations:
- ✗ Not demand-responsive
- ✗ May over/under staff
- ✗ Cannot meet varying service levels
- ✗ Inefficient for volatile volume
Shift Pattern Example:
Staffing Plan: 30 agents
Shift Pattern Distribution:
├─ Pattern A: 09:00-17:30, Mon-Fri (12 agents)
├─ Pattern B: 10:00-18:30, Tue-Sat (10 agents)
├─ Pattern C: 12:00-20:00, Wed-Sun (8 agents)
└─ Total: 30 agents, consistent coverage all day
Schedule Result:
├─ Agents A1-A12: Always 09:00-17:30
├─ Agents B1-B10: Always 10:00-18:30
├─ Agents C1-C8: Always 12:00-20:00
└─ Same schedule every week (no variation)
Method 3: Blank Schedule Creation
Blank schedules create agent slots with no agent names assigned, useful for:
- Evaluating new shift patterns before agent assignment
- Planning for future hiring
- Testing schedule scenarios
- Creating templates for agent bidding
Blank Schedule Methods:
3A. Profile-Based Scheduling:
Create Profiles (Agent Templates):
├─ Profile: Full-Time Support (40 hrs/week)
│ └─ Skills: Support_Level_2, Account_Mgmt
├─ Profile: Part-Time Support (20 hrs/week)
│ └─ Skills: Support_Level_1
├─ Profile: New Hire Flex (Variable)
│ └─ Skills: None yet (training)
└─ Profile: Sales Support (32 hrs/week)
└─ Skills: Sales, Support_Level_1
Generate Blank Schedule Using Profiles:
├─ 20 Full-Time profiles (800 hours)
├─ 15 Part-Time profiles (300 hours)
├─ 5 New Hire profiles (160 hours)
└─ 10 Sales Support profiles (320 hours)
Result: 50 blank shifts, ready for agent assignment
Use: Plan hiring, test new patterns, create bidding pools
3B. Schedule Bidding:
Create Blank Schedule
├─ 30 distinct shifts (no agent names)
├─ All with required skills
└─ Covering all time periods
Open for Agent Bidding
├─ Agents view 30 available shifts
├─ Rank preferences: 1 (most wanted) to 30
├─ Submit bids by deadline
└─ Supervisors review bids
WFM Automated Assignment
├─ Algorithm considers:
│ ├─ Agent preferences (bid ranking)
│ ├─ Seniority (longer tenure weighted higher)
│ ├─ Skill match
│ └─ Coverage requirements
└─ Output: Assigned schedule
Result: Fair assignment matching agent preferences
Benefit: High satisfaction, voluntary participation
Blank Schedule Characteristics:
- No Agents Yet - Empty slots
- Template Use - Test patterns before deployment
- Hiring Planning - Determine future hiring needs
- Flexibility - Can assign agents later
- Bidding Ready - Prepare for agent selection
When to Use Blank Schedule:
- ✓ Planning new locations/teams
- ✓ Testing shift pattern changes
- ✓ Preparing for schedule bidding
- ✓ Evaluating staffing models
- ✓ Future hiring scenarios
Work Plans
Work Plans define how agents work: shifts, breaks, meals, contracts, weekly constraints, and labor compliance rules.
Work Plan Components:
Work Plan: Standard Full-Time Support
1. Shift Definition
├─ Start Time: 08:00
├─ End Time: 16:30
├─ Duration: 8 hours 30 minutes
├─ Paid Hours: 8 hours (lunch unpaid)
└─ Days Available: Monday-Friday
2. Breaks
├─ Break 1:
│ ├─ Name: Morning Break
│ ├─ Duration: 15 minutes
│ ├─ Timing: 10:00-12:00 window
│ └─ Paid: Yes
├─ Break 2:
│ ├─ Name: Afternoon Break
│ ├─ Duration: 15 minutes
│ ├─ Timing: 14:00-15:30 window
│ └─ Paid: Yes
└─ Total Break: 30 minutes paid
3. Meals
├─ Meal: Lunch
│ ├─ Duration: 1 hour
│ ├─ Timing: 12:00-13:00 window
│ ├─ Paid: No
│ └─ Required: Yes
4. Work Rules (Contract)
├─ Min Hours/Week: 40
├─ Max Hours/Week: 40
├─ Max Consecutive Days: 5
├─ Min Hours/Day: 8
├─ Max Hours/Day: 9 (includes breaks/meal)
├─ Days Off Required: 2 consecutive
└─ Overtime Rules: After 40 hrs/week
5. Weekly Constraints
├─ Min Full Days/Week: 5
├─ Max Split Days/Week: 1
├─ Min Days Off/Week: 2
└─ Weekend Rule: Flexible
6. Planning Periods
├─ Planning Period: 1 week
├─ Minimum Periods: 4 weeks
└─ Maximum Periods: 26 weeks
7. Additional Rules
├─ Lunch Hour Timing: 11:00-13:30 window
├─ Break Timing: 09:00-16:00 available
├─ Shift Flexibility: ±30 min start/end
└─ Blending Allowed: Multiple activities/day
Work Plan Best Practices:
- Clear Definition - Unambiguous rules
- Legal Compliance - Labor law adherence
- Flexibility - Account for agent needs
- Simplicity - Easy for agents to understand
- Documentation - Maintain copies
- Testing - Validate before deployment
Creating a Work Plan:
Work Plan Scenarios:
Example 1: Full-Time Permanent
├─ 08:00-16:30, Mon-Fri
├─ 30 min paid breaks
├─ 1 hour unpaid lunch
├─ 40 hours/week guaranteed
└─ Use: Core permanent staff
Example 2: Part-Time Flexible
├─ Variable 4-8 hours/day
├─ 15 min break per 4 hours
├─ 30 min lunch if >6 hours
├─ 20 hours/week average
└─ Use: Supplemental staff
Example 3: Shift Work (24/7 Coverage)
├─ Shift A: 07:00-15:00 (8 hours)
├─ Shift B: 15:00-23:00 (8 hours)
├─ Shift C: 23:00-07:00 (8 hours)
├─ Rotation: 3-day on, 4-day off
└─ Use: 24/7 contact centers
Example 4: Flex Hours
├─ Core hours: 10:00-15:00 (required)
├─ Flex hours: 08:00-10:00 or 15:00-18:00
├─ Total: 40 hours/week
├─ Breaktime: Flexible
└─ Use: Modern flexible work
Schedule Management
Creating a Schedule
Step 1: Schedule Setup
Step 2: Forecast Selection (Load-Based Only)
- Select Master Forecast or scenario
- Click Next
Step 3: Scheduling Method
- Select method:
- Load-Based (with forecast)
- Shift Pattern (without forecast)
- Blank Schedule
- Configure method-specific options
- Click Next
Step 4: Constraints
- Verify agent assignments
- Confirm work plans
- Set parameters:
- Allow overtime? Yes/No
- Allow split shifts? Yes/No
- Allow part-time? Yes/No
- Click Next
Step 5: Generate
- Click Generate Schedule
- WFM processes agents and shifts
- Creates optimized schedule
- Displays results
Step 6: Review & Adjust
- Review coverage by hour
- Check staffing levels:
- ✓ Service level achievable
- ✓ No excessive overtime
- ✓ Agent preferences honored
- ✓ No contract violations
- Make manual adjustments if needed
- Compare coverage to forecast
Step 7: Publish
- Click Publish to Master Schedule
- Confirm publication
- Schedule immediately available to agents
- Becomes official working schedule
Publishing Process
Schedule Generated
↓
Status: Draft (not yet published)
├─ Visible only to admins/supervisors
├─ Can be edited
├─ Can be deleted
└─ Agents cannot see
Manual Review Period
├─ Check coverage
├─ Verify service level
├─ Review agent satisfaction
└─ Make final adjustments
Click: Publish to Master Schedule
↓
Status: Published (now official)
├─ Visible to all agents
├─ Agents can request time-off
├─ Agents can trade shifts
├─ Enforced for adherence
Benefits:
├─ Only one master schedule per BU
├─ All agents see same official schedule
├─ Clear baseline for adherence
├─ Foundation for real-time monitoring
One Master Schedule Per Business Unit
Important Constraint:
- Only ONE master schedule can be active per business unit at a time
- Publishing a new schedule replaces the previous one
- Previous schedule versions retained in history
- Agents see only current master schedule
Implication:
Scenario: Multi-week scheduling
Option A: Publish all at once
├─ Create 26-week schedule (6 weeks per period)
├─ Generate schedule periods 1-6 (weeks 1-6)
├─ Publish to master
├─ Weeks 1-6 active immediately
├─ During week 1: Generate periods 2-7 (weeks 7-12)
├─ At end of week 6: Publish next 26 weeks
└─ Result: Continuous 26-week visibility
Option B: Publish as needed
├─ Create schedule for weeks 1-6 only
├─ Publish to master
├─ During week 3: Create schedule for weeks 7-12
├─ At end of week 6: Publish weeks 7-12
├─ Result: Constant re-planning cycle
Schedule Window & Visibility
26-Week Window
The Schedules list displays a maximum of:
- 26 weeks PRIOR from earlier of current week or last schedule week
- 26 weeks FORWARD from earlier of current week or last schedule week
26-Week Window Example:
Today: March 10, 2026 (Week 11 of year)
Visible Window:
├─ Start: September 1, 2025 (Week 36-11 = Week 25 back)
│ └─ Actually visible: ~26 weeks back from now
├─ Current: March 10, 2026 (Week 11)
└─ End: September 1, 2026 (Week 36)
└─ 26 weeks forward from now
Outside Visible Window:
├─ Before: August 2025 and earlier
│ └─ Available via search feature
├─ After: September 2026 and later
└─ Available via search feature
Search Capability
The search feature extends beyond the 26-week window:
- Search Range - Up to 104 weeks (2 years)
- Use Search - Find old schedules or far-future plans
- Filters - By date range, status, name
- Download - Export search results
Scheduling Constraints
WFM applies multiple constraints during scheduling:
Agent-Level Constraints:
- Individual skills and proficiency
- Current work schedule
- Time-off requests
- Calendar items (training, meetings)
- Availability windows
- Maximum hours/week limit
- Minimum hours/day
Contract-Level Constraints:
- Employment type (full-time, part-time, flex)
- Minimum/maximum hours per week
- Maximum consecutive work days
- Minimum consecutive days off
- Lunch and break requirements
- Overtime rules
- Split shift limitations
Team/Site-Level Constraints:
- Required staffing levels
- Coverage requirements
- Minimum agents per activity
- Team balance
- Cross-training requirements
- Backup coverage needs
Business-Level Constraints:
- Service level goals
- Cost budget
- Overtime authorization
- Skill mix requirements
- New hire integration
- Manager approval requirements
Schedule Metrics
Coverage Analysis
Staffing Report:
Hour Forecast Scheduled Variance Coverage
────────────────────────────────────────────────────────
08:00-09:00 6 agents 6 agents 0 (0%) ✓ 100%
09:00-10:00 8 agents 8 agents 0 (0%) ✓ 100%
10:00-11:00 12 agents 11 agents -1 (-8%) ⚠ 92%
11:00-12:00 11 agents 11 agents 0 (0%) ✓ 100%
12:00-13:00 9 agents 9 agents 0 (0%) ✓ 100%
13:00-14:00 10 agents 10 agents 0 (0%) ✓ 100%
14:00-15:00 10 agents 11 agents +1 (+10%) ✓ 110%
15:00-16:00 8 agents 8 agents 0 (0%) ✓ 100%
16:00-17:00 6 agents 6 agents 0 (0%) ✓ 100%
────────────────────────────────────────────────────────
Daily Total 80 agents 80 agents 0 (0%) ✓ 100%
Analysis:
✓ Good overall coverage (100%)
⚠ Slight under-staffing at peak (10:00-11:00)
✓ Minimal over-staffing (hour 14:00)
✓ Efficient balance achieved
Efficiency Metrics
Schedule Efficiency Report:
Metric Value Target Status
────────────────────────────────────────────────────────
Total Scheduled Hours 4,000 4,020 96%
Required Staffing Hours 3,800 3,800 100%
Over-Staffing Hours 200 200 On-target
Overtime Hours (>40/week) 120 100 ⚠ High
Average Hours/Agent 40.0 40.0 ✓ On-target
Agents with Overtime 3/50 0 ⚠ 6%
Average Shift Length 8.5h 8.5h ✓ On-target
Part-Time Usage 12/50 12/50 ✓ On-target
Multi-Activity Assignments 35/50 30/50 ✓ Good blend
Cost per Hour $45.50 $45.00 ⚠ 1% over
Overall Efficiency: 94% (Good)
Real-World Examples
Example 1: 100-Agent Contact Center
Scenario: Mid-size support center, 100 agents
Master Forecast Published:
├─ Weekly volume: 15,000 calls
├─ Average AHT: 300 seconds
├─ Service level goal: 80% in 20 seconds
├─ Staffing required: ~95 agents
Work Plans:
├─ Full-time: 40 hrs/week (70 agents)
├─ Part-time: 20 hrs/week (20 agents)
├─ Flex: 10-30 hrs/week (10 agents)
└─ Total: 100 agents
Schedule Generated:
├─ Create 6-week schedule (weeks 1-6)
├─ Use load-based method with Master Forecast
├─ Generate optimized shifts
├─ Coverage verified:
│ ├─ Monday-Friday peak: 12-13 agents/hour
│ ├─ Monday-Friday valley: 5-6 agents/hour
│ ├─ Weekend: 3-4 agents (limited hours)
│ └─ Night: Minimal coverage (auto-handled)
├─ Overtime: 5% of agents (acceptable)
└─ Agent satisfaction: High (preferences honored)
Publish to Master Schedule
├─ Week 1 effective immediately
├─ Agents view on portal
├─ Time-off requests begin
└─ Adherence tracking starts
Management:
├─ Monitor actual vs forecast
├─ Handle shift trades
├─ Approve time-off requests
└─ Real-time adjustments as needed
Example 2: Growing Business (Scaling Up)
Scenario: Adding new team (20 agents) for new product
Situation:
├─ Current: 100 agents fully scheduled
├─ Adding: 20 new agents (onboarding week 3)
├─ Challenge: How to integrate new team?
Solution:
Phase 1 (Weeks 1-2): Current schedule
├─ Use existing 100-agent schedule
├─ All forecasts/schedules unchanged
└─ New team not yet integrated
Phase 2 (Week 3+): Reschedule with new team
├─ Week 2: Create new Master Forecast
│ ├─ Include new product volume
│ ├─ Adjust planning groups
│ └─ Recalculate staffing needs (now 115 agents)
├─ Week 2: Generate new schedule (weeks 3-8)
│ ├─ Include all 120 agents (100 existing + 20 new)
│ ├─ Use load-based method
│ ├─ Distribute new volume across team
│ └─ Assign new agents training hours
├─ Week 3: Publish new Master Schedule
│ ├─ Replaces previous master
│ ├─ All 120 agents see new schedule
│ ├─ Service level improved (more agents)
│ └─ Coverage now matches expanded demand
Result:
├─ Smooth integration of new team
├─ Service level maintained/improved
├─ Existing agents' schedules adjusted fairly
└─ New agents fully utilized from start
Example 3: Holiday Season Planning
Scenario: Retail support (holiday surge)
Situation:
├─ Normal staffing: 80 agents
├─ Holiday season: Expected 150% volume
├─ Duration: November 20 - January 5
├─ Challenge: Massive temporary spike
Solution:
1. Forecast Planning (October)
├─ Marketing provides volume projections
├─ Create ABM forecast with holiday data
├─ Result: 15,000→22,500 daily calls (50% increase)
├─ Staffing needed: 80 agents → 120 agents
2. Hiring & Training (October)
├─ Hire 40 temporary agents
├─ 2-week training period
├─ Ramp to full productivity by week 3
└─ Flexible contracts (seasonal)
3. Work Plan Updates (October)
├─ Expand existing work plans
├─ Create temporary shift patterns
├─ 10:00-18:00 shifts (high volume hours)
├─ Weekend staffing added
└─ Overtime authorized for existing staff
4. Schedule Generation (October, weekly)
├─ Week 1 (Oct 30): 80 agents + 20 new trained
├─ Week 2 (Nov 6): 80 agents + 40 new trained
├─ Weeks 3-10 (Nov 13-Jan 5): Full 120 agents
└─ Week 11 (Jan 12): Ramp down to 80 agents
5. Real-Time Adjustments
├─ Week 1: Volume 15,200 calls (↓5% vs forecast)
├─ Week 2: Volume 23,100 calls (↑3% vs forecast)
├─ Week 3: Add 10 more agents (unplanned)
├─ Weeks 4-10: Adjust as actual trends emerge
└─ Week 11: Begin releasing temporary agents
6. Results
├─ Service level: 82% (goal 80%) ✓
├─ ASA: 18 seconds (goal 20s) ✓
├─ Abandon: 4% (goal 5%) ✓
├─ Temp agent cost: $180,000
├─ Revenue increase: $500,000
└─ ROI: 278% (strong business case)
Best Practices
Schedule Creation
- Regular Cycle - Create 6-week schedules weekly
- Advance Planning - 4-6 weeks notice to agents
- Quality Review - Verify coverage before publishing
- Communication - Announce new schedule to team
- Version History - Keep archive of old schedules
- Flexibility - Allow trades and time-off requests
Optimization
- Monitor Variance - Track actual vs scheduled
- Adjust Timing - Shift times to match real demand
- Reduce Overtime - Trim excessive OT through timing
- Balance Load - Equalize workload across agents
- Agent Preferences - Honor where possible
- Cost Focus - Minimize labor costs
Communication
Interview Cheat Sheet
| Question | Answer |
|---|---|
| 3 scheduling methods? | Load-based (forecast), Shift pattern, Blank schedule |
| Load-based when? | Have accurate forecast, want demand-driven |
| Shift pattern when? | No forecast, want simple repeating schedule |
| Blank schedule when? | Planning hiring, testing patterns, bidding |
| How long schedule? | Max 6 weeks per generation |
| Schedule window? | 26 weeks prior, 26 weeks forward |
| Master schedules per BU? | One active at a time |
| What's work plan? | Defines shifts, breaks, meals, contracts |
| Shift items? | Breaks and meals with time windows |
| Scheduling constraints? | Skills, contracts, availability, service level |
| How verify coverage? | Compare scheduled agents to forecast |
| When publish? | After review, when ready for agents |
| Agent trades? | Allowed if approved, don't violate schedule |
| Schedule bidding? | Agents rank preference, auto-assigned |
| Reschedule how often? | Weekly or as needed for changes |
Key Takeaways
- Three Methods - Load-based (forecast), Shift pattern, Blank schedule
- 6-Week Maximum - Single generation limited to 6 weeks
- 26-Week Window - Visibility and planning horizon
- One Master - Only one published schedule per BU active
- Work Plans - Define hours, breaks, meals, contracts
- Constraints - Skills, contracts, preferences all considered
- Demand-Driven - Load-based matches forecast to staffing
- Optimization - Minimize cost while achieving service level
- Flexibility - Agents can trade and request time-off
- Continuous - Weekly reschedule cycle for optimization
Additional Resources
Official Documentation
- Scheduling: help.genesys.cloud/articles/work-with-workforce-management-schedules/
- Work Plans: help.genesys.cloud/articles/work-plans-overview/
- Shift Patterns: help.genesys.cloud/articles/shift-patterns-overview/
- Schedule Constraints: help.genesys.cloud/articles/workforce-management-supported-configuration/
Support & Training
- Genesys University: genesys.com/training
- Community Forums: https://community.genesys.com
- Technical Support: https://support.genesys.com
Document Version Info
Last Updated: March 2026
Source: Genesys WFM Official Documentation
Validated: Current with January-March 2026 releases
Version: 1.0
Intraday Management
Genesys WFM Intraday Management Documentation
Study Notes
| Topic | Description |
|---|---|
| Intraday Management | Real-time monitoring of contact center performance |
| Performance Views | Summarized and detailed grid displays of metrics |
| Metrics | Volume offered, AHT, service level, staffing, adherence |
| Activity Codes | Map agent states to schedule states |
| Thresholds | 15, 30, or 60-minute monitoring intervals |
| Real-Time Adjustments | Add/remove agents, modify activities on-the-fly |
| What-If Analysis | Project impact of staffing changes |
Navigation
Intraday Management Overview
Intraday Management is the real-time monitoring and adjustment of contact center operations throughout the day. It compares actual performance against forecasted expectations, enabling supervisors to make data-driven decisions about agent staffing, activity assignments, and schedule adjustments in response to fluctuating demand.
Intraday Management allows supervisors to:
- Monitor real-time performance metrics
- Compare actual vs forecasted volumes and AHT
- Identify service level risks
- Add or remove agents from activities
- Make schedule adjustments for unexpected demand
- Project impact of staffing changes
- Maintain service level targets
Intraday Management Objectives
- Performance Tracking - Monitor actual vs forecast
- Risk Detection - Identify service level at risk
- Quick Response - Make rapid staffing adjustments
- Data-Driven Decisions - Use metrics to guide choices
- Service Level Maintenance - Protect SL targets
- Cost Optimization - Minimize unnecessary overtime
- Workload Balancing - Redistribute work as needed
Key Metrics Monitored
Real-Time Intraday Metrics:
Current (Actual):
├─ Interaction Volume (Offered)
├─ Average Handle Time (AHT)
├─ Service Level % (achieved)
├─ Average Speed to Answer (ASA)
├─ Abandon Rate %
├─ Agents on Queue
├─ Occupancy %
└─ Interactions Handled
Forecasted (Predicted):
├─ Expected Volume (remainder of day)
├─ Projected AHT
├─ Predicted Service Level
├─ Staffing Requirements
├─ Expected ASA
└─ Coverage Gap Analysis
Variance Analysis:
├─ Volume Variance (Actual vs Forecast)
├─ AHT Variance
├─ Service Level Status (On Track/At Risk/Critical)
├─ Staffing Gap (Over/Under)
└─ Trend Direction (↑ improving / ↓ declining)
Performance Intraday View
The Intraday View displays real-time and forecasted performance metrics in a detailed grid format, updated continuously throughout the day.
Intraday View Structure:
Performance Intraday View Grid:
Time Step | Offered | AHT | SL % | ASA | Agents | Status
──────────────|---------|------|-------|------|--------|────────────
08:00-09:00 | 45 | 280s | 82% | 18s | 6 | ✓ On Track
09:00-10:00 | 68 | 290s | 79% | 22s | 8 | ✓ On Track
10:00-11:00 | 95 | 310s | 75% | 28s | 11 | ⚠ At Risk
11:00-12:00 | 88 | 305s | 77% | 26s | 10 | ⚠ At Risk
12:00-13:00 | 52 | 270s | 85% | 16s | 6 | ✓ On Track
13:00-14:00 | 65 | 285s | 81% | 20s | 8 | ✓ On Track
14:00-15:00 | 72 | 300s | 78% | 24s | 9 | ⚠ At Risk
15:00-16:00 | 58 | 295s | 80% | 21s | 7 | ✓ On Track
Legend:
✓ On Track = SL within 2-3% of goal (goal 80%)
⚠ At Risk = SL within goal but trending down, or 1-2% below goal
🔴 Critical = SL >2% below goal, immediate action needed
Current Status (as of 13:15):
├─ Offered Today: 543 calls
├─ Average AHT: 292 seconds
├─ Current SL: 79.5%
├─ Service Goal: 80%
├─ Status: On Track (within acceptable range)
View Refresh Intervals:
- 15-minute intervals - Most frequent, impacts system performance
- 30-minute intervals - Balanced (recommended)
- 60-minute intervals - Less frequent, lower system impact
Data Display Options:
- Summarized View - High-level overview by hour
- Detailed View - Granular metrics with all statistics
- Graphical View - Charts showing trends over time
Real-Time Metrics
Interaction Volume (Offered)
Definition: Total number of interactions offered to the contact center
How Calculated:
├─ Sum of all inbound interactions (calls, emails, chats, etc.)
├─ Per time interval
├─ Across selected planning group(s)
└─ Real-time count + forecast for remainder of day
Example:
├─ 10:00-10:15: 25 calls offered
├─ 10:15-10:30: 28 calls offered
├─ 10:30-10:45: 22 calls offered
├─ 10:45-11:00: 20 calls offered
└─ Hour Total: 95 calls offered
Variance from Forecast:
├─ Forecasted: 92 calls
├─ Actual: 95 calls
├─ Variance: +3 (3.3% higher than forecast)
Average Handle Time (AHT)
Definition: Average duration of each interaction (call, email, chat)
Components:
├─ Talk Time (conversation)
├─ Hold Time (customer on hold)
├─ After Call Work (processing after call)
└─ Wrap-up Time (notes, documentation)
Example (Voice Interactions):
├─ Call 1: 5 min 30 sec
├─ Call 2: 4 min 45 sec
├─ Call 3: 6 min 15 sec
├─ Call 4: 5 min 00 sec
└─ Average: 5 min 22 sec (322 seconds)
Variance Tracking:
├─ Forecasted AHT: 300 seconds (5 min)
├─ Actual AHT: 322 seconds (5:22)
├─ Variance: +22 seconds (+7.3% higher)
└─ Impact: Requires more agents for same volume
Service Level (SL)
Definition: % of interactions answered within target time
Calculation:
├─ Target: 80% of calls answered in 20 seconds
├─ Actual: 82% of calls answered in 20 seconds
├─ Status: ✓ Exceeding target
Examples:
├─ 1,000 calls offered
├─ 800 calls answered ≤20 seconds
├─ 200 calls answered >20 seconds
├─ SL = (800/1000) × 100 = 80% ✓ Target met
Real-Time Example:
├─ Hour 10:00-11:00
├─ Offered: 95 calls
├─ Answered ≤20s: 71 calls
├─ Answered >20s: 24 calls
├─ SL: (71/95) × 100 = 74.7%
├─ Goal: 80%
├─ Status: ⚠ Below target (5.3% gap)
Average Speed to Answer (ASA)
Definition: Average time from call offered to agent answer
Calculation:
├─ Sum of all answer wait times
├─ Divided by number of answered calls
├─ Result in seconds
Example:
├─ Call 1: 12 seconds wait
├─ Call 2: 18 seconds wait
├─ Call 3: 25 seconds wait
├─ Call 4: 22 seconds wait
├─ Average: (12+18+25+22) / 4 = 19.25 seconds ≈ 19s
Relationship to Service Level:
├─ SL: 80% in 20 seconds = at least 80% ≤20s
├─ ASA: 19 seconds = average across all calls
├─ Both track speed, different perspectives
└─ SL is goal-focused, ASA is performance-focused
Real-Time Adjustments
Adding Agents to Activity
Scenario: Service level dropping (75% vs 80% goal), trend declining
Step 1: Identify Risk
├─ Monitoring shows SL at 75% (below 80% goal)
├─ Trend shows -2% per 15 minutes
├─ Current staffing: 8 agents on support queue
└─ Remaining shift: 3 hours
Step 2: Analyze Options
├─ Option A: Pull 2 agents from lower-priority activity
├─ Option B: Authorize overtime for available agents
├─ Option C: Use on-call backup agents
└─ Decision: Option A (least cost impact)
Step 3: Make Adjustment
├─ Modify schedule manually
├─ Assign 2 agents from "Idle" activity to "Support"
├─ Update system in real-time
└─ Effect: Immediate
Step 4: Monitor Impact
├─ Next 15 minutes: SL improves to 78% (trend reversed)
├─ Next 30 minutes: SL reaches 81% (goal achieved)
├─ After 1 hour: Decision made to keep additional agents
Step 5: Cleanup
├─ Removed agents: Return to original activity
├─ Overtime: Document and approve as needed
└─ Analysis: Record what worked for future reference
Modifying Activity Assignments
Scenario: Email queue backing up, response times extending
Current State:
├─ Email queue: 250 emails waiting
├─ Average response time: 2.5 hours
├─ Goal: 1.5 hours response
└─ Staffing: 4 agents on email
Decision: Temporarily assign chat agents to email
Action:
├─ Identify 2 available chat agents
├─ Reassign to email activity
├─ Update their work assignment in real-time
├─ System recalculates workload
Result:
├─ Email staffing: 4 → 6 agents
├─ Queue starts processing faster
├─ Response time improves to 1.8 hours
├─ Chat queue slightly longer but acceptable
Reversal:
├─ When email clears, chat agents reassigned
├─ Return to normal staffing model
Schedule Intraday Rebuild
WFM can regenerate schedules for specific days based on updated demand:
Use Case: Unexpected surge in volume
Morning (09:00):
├─ Forecast: 2,000 calls for day
├─ Actual by 09:30: 500 calls already (ahead of pace)
├─ New projection: 3,000 calls (50% surge)
├─ Current schedule: Insufficient
Action: Intraday Schedule Rebuild
├─ Select days: Today (rest of day)
├─ Recalculate staffing: Based on new forecast
├─ Generate new schedule: For current time forward
├─ Adjust Agent assignments: For remainder of shift
├─ Publish changes: To affected agents
Result:
├─ Schedule optimized for actual demand
├─ Additional agents added to peak periods
├─ Prevents service level failure
├─ Agents notified of schedule changes
What-If Analysis
The What-If calculator allows supervisors to project impact of staffing changes before implementing them.
What-If Process:
Current State:
├─ Volume offered: 95 calls/hour
├─ AHT: 300 seconds
├─ Staffing: 10 agents
├─ Projected SL: 81%
Question: What if we add 2 more agents?
What-If Calculation:
├─ Input: Staffing = 12 agents (instead of 10)
├─ Calculate new SL: 87%
├─ Calculate new ASA: 15 seconds (instead of 18)
├─ Calculate new occupancy: 72% (instead of 80%)
Question: What if volume increases 20%?
What-If Calculation:
├─ Input: Volume = 114 calls/hour (95 × 1.2)
├─ Calculate new SL: 76% (with 10 agents)
├─ Calculate new ASA: 23 seconds
├─ Calculate new occupancy: 95%
Conclusion:
├─ Need to add 3-4 agents to maintain SL
└─ 20% volume increase requires ~30% staffing increase
What-If Variables:
- Staffing levels (agents on activity)
- Interaction volume (offers per hour)
- Average handle time (seconds per interaction)
- Service level goal (% in seconds)
- Occupancy target
- Shrinkage rate
Activity Code Management
Activity codes map agent states to schedule states for adherence and reporting. They represent what agents are doing at any given time.
Common Activity Codes:
On-Queue Activities (Customer-Facing):
├─ Inbound Call - handling incoming calls
├─ Inbound Email - responding to emails
├─ Inbound Chat - managing chat conversations
├─ Outbound Call - making outbound calls
├─ Callback - handling scheduled callbacks
├─ Workitem - handling task-based work
└─ Multi-Activity - performing multiple types
Off-Queue Activities (Non-Customer):
├─ Break - scheduled break time
├─ Meal - lunch or meal period
├─ Training - formal training session
├─ Meeting - team or coaching meeting
├─ Administrative - paperwork, documentation
├─ Idle - waiting for next interaction
├─ After Call Work - call follow-up work
└─ Time Off - approved absence
Special Activities:
├─ Exception - unscheduled activity
├─ Overtime - additional hours
├─ Shift Trade - schedule swap
├─ Unavailable - temporarily not available
├─ Coaching - one-on-one coaching session
└─ Quality - call monitoring
Activity Code Mapping:
Schedule State Group: On-Queue Voice
Maps to Real-Time States:
├─ WaitingForNextCall → Idle/Available
├─ Connected → Connected/Call
├─ Held → Held/Call
├─ AfterCallWork → ACW/Post-Call
└─ Reason Codes:
├─ "C100": Connected call
├─ "BRK": Break (if mapped)
└─ "TRN": Training (if mapped)
For Adherence:
├─ Agent scheduled: On-Queue Voice 10:00-15:00
├─ Agent actual: Connected (Connected call)
├─ Mapping: Connected maps to On-Queue ✓ Adherent
│
├─ Agent actual: Break (taking break)
├─ Mapping: Break mapped to On-Queue? If yes ✓ Adherent
│ If no ✗ Non-adherent
Monitoring Views
Summary View (By Time Interval)
Hourly Summary View - Support Planning Group
Hour | Offered | AHT | SL % | Staffing | Occupancy | Status
──────────|---------|------|-------|----------|-----------|──────────
08:00-09 | 42 | 280s | 84% | 5 | 68% | ✓ Good
09:00-10 | 68 | 290s | 81% | 8 | 79% | ✓ Good
10:00-11 | 95 | 310s | 75% | 11 | 87% | ⚠ Risk
11:00-12 | 88 | 305s | 77% | 10 | 85% | ⚠ Risk
12:00-13 | 52 | 270s | 86% | 6 | 62% | ✓ Good
Daily Avg | 349 | 293s | 80.6% | 8 | 76% | ✓ On Target
Detailed View (By Agent)
Agent-Level Intraday View - Current Time 14:30
Agent Name | Activity | Duration | SL Target | Status | Notes
────────────|-----------|----------|-----------|-----------|─────────────
Agent_001 | Connected | 4:23 | Speaking | ✓ OK | Handling call
Agent_002 | ACW | 1:05 | After CW | ✓ OK | Wrapping up
Agent_003 | Available | 0:00 | Available | ✓ OK | Ready for next
Agent_004 | Break | 8:30 | On Break | ✓ OK | Scheduled break
Agent_005 | Connected | 5:47 | Speaking | ⚠ Long | Extended call
Agent_006 | Training | 1:15:00 | Training | ✓ OK | Product training
Agent_007 | Off | OFF | Time Off | ✓ OK | Approved absence
Agent_008 | Idle | 2:15 | Available | ✓ OK | In queue
Summary:
├─ Agents Available: 3
├─ Agents Connected: 2
├─ Agents Off-Queue: 3
├─ Total Team: 8 agents
Performance Scenarios
Scenario 1: Volume Spike
Tuesday 11:00 AM - Unexpected Surge
Timeline:
10:00:
├─ Forecasted: 85 calls this hour
├─ Actual: 82 calls (on track)
├─ SL: 81%
└─ Staffing: 10 agents
10:30: Alert! Volume Spike Detected
├─ Trend: +35% above forecast
├─ Current: 60 calls in 30 min (120/hour pace)
├─ Projected: 115 calls for 11:00 hour
├─ Impact: SL likely to drop to 72% (below 80% goal)
11:00: Supervisor Takes Action
├─ Analysis: Need +3 agents to maintain SL
├─ Action: Pull 2 agents from email queue + 1 from callback
├─ New Staffing: 13 agents on support
├─ Notify agents: Immediate activity change
├─ Update schedule: Reflect change
11:30: Monitor Impact
├─ Actual: 118 calls for hour (matched projection)
├─ SL achieved: 79.5% (close to goal)
├─ Occupancy: 91% (high but acceptable)
├─ Status: ✓ Crisis averted
11:45: Plan Staffing Reversal
├─ Volume trend: Normalizing
├─ Project: Peak ending at 13:00
├─ Plan: Return agents to original activities at 13:15
├─ Communication: Notify agents of planned change
Result:
├─ Service level maintained through spike
├─ Agents reassigned with notice
├─ Customer experience protected
├─ Learning: Update forecast model for this day type
Scenario 2: Service Level Failure
Thursday 15:00 - Service Level Deteriorating
14:00:
├─ SL: 82%
├─ Trend: Stable
└─ Action: Monitor
14:15:
├─ SL: 81%
├─ Trend: -1%
├─ Action: Watch closely
14:30:
├─ SL: 80%
├─ Trend: -1%
├─ Action: Prepare contingency
14:45:
├─ SL: 78%
├─ Trend: Worsening
├─ Action: IMMEDIATE RESPONSE NEEDED
Analysis:
├─ Root Cause: 2 agents called in sick
├─ Current: 9 agents (down from scheduled 11)
├─ Current SL: 78%
├─ Needed SL: 80%
└─ Solution: Add 2-3 agents within 30 min
Options:
├─ A) Callback on-call agents (20 min lag)
├─ B) Offer voluntary overtime (immediate)
├─ C) Pull from other activities (immediate)
└─ Selected: A + C (both)
Action Taken:
├─ Authorize voluntary overtime (3 agents offered)
├─ Pull 1 agent from lower-priority activity
├─ Call on-call agent (ETA 20 min)
├─ Temporary staffing: 10 agents
Result by 15:30:
├─ Additional agent arrives
├─ Staffing: 12 agents
├─ SL recovers to 81%
├─ Goal achieved
Closeout:
├─ Paid overtime to 3 volunteers
├─ Approved additional staffing for rest of week
├─ Reviewed scheduling process for gaps
└─ Cost impact: ~$400 additional labor
Best Practices
Real-Time Monitoring
- Constant Vigilance - Watch trends, not just snapshots
- Threshold Management - Set alerts for SL drop (e.g., -2%)
- Trend Awareness - Declining trends warrant early action
- Granular Intervals - 15-30 min intervals catch problems early
- Regular Review - Check every 15-30 minutes during peak
Decision Making
- Data-Driven - Use what-if calculator before acting
- Proportional Response - Match staffing change to demand
- Communication - Notify agents of changes promptly
- Documentation - Record actions and reasons
- Learning - Review decisions post-shift for improvement
Staffing Adjustments
- Minimize Disruption - Use lowest-impact sources first
- Early Action - Add agents before crisis, not during
- Reversal Planning - Plan removal of extra agents early
- Cost Awareness - Balance service vs overtime cost
- Agent Care - Provide notice of changes when possible
Interview Cheat Sheet
| Question | Answer |
|---|---|
| What is intraday management? | Real-time monitoring and adjustment of operations |
| Key metrics monitored? | Volume, AHT, SL, ASA, abandon rate, occupancy |
| What's intra-day view? | Grid display of real-time and forecasted metrics |
| Monitor intervals? | 15, 30, or 60-minute intervals |
| What's AHT? | Average handle time - duration per interaction |
| What's SL? | Service level - % answered within target time |
| What's ASA? | Average speed to answer - wait time average |
| What's occupancy? | % of time agents spend handling interactions |
| What-if calculator? | Projects impact of staffing/volume changes |
| Activity codes? | Map agent states (on-queue, break, etc.) |
| When add agents? | SL dropping, trend negative, volume spike |
| Intraday rebuild? | Regenerate schedule based on new demand |
| Real-time adjustment? | Reassign agents between activities immediately |
| Yellow/red status? | Yellow = non-adherent, Red = severely non-adherent |
| How respond to spike? | Monitor, calculate need, reassign agents |
Key Takeaways
- Real-Time Visibility - Constant monitoring of actual vs forecast
- Data-Driven Decisions - Use metrics to guide staffing changes
- Quick Response - Make adjustments within minutes of risk detection
- Service Protection - Prevent SL failures before they occur
- What-If Planning - Project impact before implementing changes
- Activity Flexibility - Dynamically assign agents to needs
- Trend Awareness - Declining trends warrant proactive action
- Communication - Notify agents of changes promptly
- Cost Balance - Optimize service level vs labor cost
- Continuous Learning - Review and improve daily decisions
Additional Resources
Official Documentation
- Intraday Monitoring: help.genesys.cloud/articles/intraday-monitoring-overview/
- Performance Views: all.docs.genesys.com/PEC-WFM/Current/Supervisor/PrfmIntrDyVw
- Activity Codes: help.genesys.cloud/articles/activity-codes-overview/
Support & Training
- Genesys University: genesys.com/training
- Community Forums: https://community.genesys.com
- Technical Support: https://support.genesys.com
Document Version Info
Last Updated: March 2026
Source: Genesys WFM Official Documentation
Validated: Current with January-March 2026 releases
Version: 1.0
Time-off & Shift Trades
Genesys WFM Time-Off & Shift Trades Documentation
Study Notes
| Topic | Description |
|---|---|
| Time-Off Management | Automated request evaluation, approvals |
| Auto-Approval | Qualifying requests approved automatically |
| Time-Off Plans | Define activity codes linked to limits |
| Daily Limits | Max hours per day per management unit |
| Shift Trades | Agent-to-agent schedule swaps |
| Trade Rules | Configuration of swap eligibility |
| Approval Workflow | Auto-approve or manual review |
| Self-Service Portal | Agents request via desktop/mobile |
Navigation
Time-Off Management Overview
Time-Off Management enables agents to request absences while maintaining workforce balance and service levels. Supervisors can define automated approval rules, allowing qualifying requests to be approved instantly while flagging exceptions for manual review.
Time-Off functions:
- Automate approval of routine requests
- Maintain visibility across absences
- Track time-off limits and balances
- Enforce policy rules
- Support work-life balance
- Reduce administrative burden
Key Components
Time-Off System:
1. Time-Off Types
├─ Vacation
├─ Sick Leave
├─ Personal Time
├─ Unpaid Time Off
├─ Bereavement
├─ Jury Duty
└─ Other (customizable)
2. Request Submission (Agent)
├─ Select dates
├─ Choose type
├─ Submit request
└─ Receive approval/notification
3. Approval Rules (Supervisor)
├─ Auto-approve if meets criteria
├─ Flag exceptions for review
├─ Document decision
└─ Notify agent
4. Scheduling Impact
├─ Reduce available staffing
├─ Trigger schedule adjustments
├─ Maintain service levels
└─ Update master schedule
5. Reporting
├─ Track utilization
├─ Monitor patterns
├─ Identify trends
└─ Manage balances
Time-Off Plans
Time-Off Plans link activity codes to time-off limits, defining how much of each type agents can use.
Time-Off Plan Example: Standard Benefits
Plan Name: Standard Employee
Vacation:
├─ Activity Code: VAC
├─ Annual Limit: 20 days
├─ Monthly Accrual: 1.67 days
├─ Carryover: 5 days max to next year
├─ Blackout Dates: Dec 24-25 (no vacation)
└─ Min. Notice: 2 weeks advance
Sick Leave:
├─ Activity Code: SICK
├─ Annual Limit: 10 days
├─ Monthly Accrual: 0.83 days
├─ Carryover: None (use it or lose it)
├─ Blackout Dates: None
├─ Min. Notice: None (emergency allowed)
└─ Requires: Medical note if >3 consecutive
Personal Time:
├─ Activity Code: PERSONAL
├─ Annual Limit: 5 days
├─ Monthly Accrual: 0.42 days
├─ Carryover: 1 day to next year
├─ Blackout Dates: Dec 24-25
├─ Min. Notice: 3 days advance
└─ Approval: Supervisor discretion
Unpaid Time:
├─ Activity Code: UNPAID
├─ Annual Limit: Unlimited
├─ Accrual: N/A
├─ Carryover: N/A
├─ Blackout Dates: None
├─ Min. Notice: 1 week advance
└─ Approval: Requires supervisory approval
Automated Approval Rules
Supervisors configure rules for automatic approval of time-off requests.
Auto-Approval Rule Example:
Rule: Vacation Request Auto-Approval
Conditions (ALL must be true):
├─ Time-Off Type: Vacation
├─ Balance Available: > 8 hours (full day)
├─ Notice Period: ≥ 2 weeks advance
├─ Minimum Staffing: ≥ 3 agents remaining
├─ Blackout Dates: Not during Dec 24-25
├─ Previous Pending: None pending for agent
└─ Manager Approval: Not required if rules met
Result:
├─ Request arrives Sunday
├─ System checks all conditions
├─ If all met: ✓ APPROVED instantly
├─ If any fail: ⚠ PENDING for supervisor review
└─ Agent notification: Immediate
Example Scenarios:
Request 1: 2 weeks advance, 4 agents remain
├─ Conditions: All met ✓
├─ Result: AUTO-APPROVED ✓
└─ Agent: Sees approval immediately
Request 2: 1 week advance (less than 2 weeks)
├─ Condition: Notice period failed ✗
├─ Result: PENDING manual review
└─ Agent: Waits for supervisor decision
Request 3: 2 weeks advance, only 2 agents remain (below 3)
├─ Condition: Minimum staffing failed ✗
├─ Result: PENDING manual review
└─ Agent: Can be denied or rescheduled
Daily Time-Off Limits
Supervisors can set maximum hours per day per management unit to prevent over-staffing on any day.
Daily Limits Configuration:
Management Unit: Support - Dallas
Monday:
├─ Total Agents: 50
├─ Max Allowed Off: 8 agents (16%)
└─ Configuration: 8 hours max (full day)
Tuesday:
├─ Total Agents: 50
├─ Max Allowed Off: 8 agents (16%)
└─ Configuration: 8 hours max
... (same for all days)
Holiday Period (Dec 20-26):
├─ Total Agents: 50
├─ Max Allowed Off: 5 agents (10%) ← More restrictive
└─ Configuration: 5 agents max
Application:
Request 1: Vacation Dec 22 (within holiday period)
├─ Currently Approved: 4 agents off
├─ Requesting Agent: 1 more
├─ Total if Approved: 5 agents (at limit)
├─ Result: ✓ APPROVED (meets limit)
Request 2: Vacation Dec 22 (within holiday period)
├─ Currently Approved: 5 agents off
├─ Requesting Agent: 1 more
├─ Total if Approved: 6 agents (exceeds limit of 5)
├─ Result: ✗ DENIED (over limit)
Shift Trades
Shift Trades allow agents to swap work schedules with other agents, subject to supervisor-configured rules.
Trade Configuration
Shift Trade Rules Setup:
Rule 1: Basic Trade Eligibility
├─ Agents in same team: Must trade with same team
├─ Agents in different teams: Can trade (if enabled)
├─ Same skill requirements: Both must be qualified
├─ Hours equivalence: Trades must be similar duration
└─ Master schedule: Can't trade published master schedule
Rule 2: Trade Window
├─ Minimum notice: 2 weeks before shift
├─ Maximum advance: Up to 26 weeks forward
├─ Trade-back window: Must reverse within X days
└─ Freeze period: No trades during blackout dates
Rule 3: Agent Eligibility
├─ Minimum tenure: 3 months to trade
├─ Performance: No active disciplinary actions
├─ Adherence: >85% adherence to qualify
├─ Pending trades: Only 1 trade pending at a time
└─ Trade history: Limit to X trades per period
Rule 4: Approval Workflow
├─ Agent 1: Initiates trade
├─ Agent 2: Reviews and accepts/declines
├─ Supervisor: Auto-approves if eligible
├─ Supervisor: Denies if rule violations
└─ Notification: Both agents notified of decision
Rule 5: Service Level Protection
├─ Staffing impact: Must not drop below minimum
├─ Skill requirements: Both agents must be skilled
├─ Activity match: Can trade between activities? (config)
└─ Override: Supervisor can force approve
Trade Process
Shift Trade Workflow:
Agent A Initiates Trade:
├─ 1. Select shift to trade (Mine: Tuesday 09:00-17:00)
├─ 2. Search for potential trades
│ └─ Can filter by: Agent, Team, Date, Activity
├─ 3. Identify Agent B with matching shift
│ └─ Wednesday 09:00-17:00
├─ 4. Send trade request
│ └─ Propose: My Tuesday for Your Wednesday
│
Agent B Reviews:
├─ 1. Receives trade notification
├─ 2. Reviews details:
│ ├─ My shift: Wednesday 09:00-17:00
│ ├─ Agent A's shift: Tuesday 09:00-17:00
│ ├─ Hours: Both 8 hours ✓
│ ├─ Skills: Both trained ✓
│ └─ Duration: Both same activity ✓
├─ 3. Accept or decline
│ ├─ Accept: Proceeds to supervisor
│ └─ Decline: Agent A notified
│
Supervisor Auto-Approval:
├─ 1. System checks approval rules:
│ ├─ Both agents eligible ✓
│ ├─ Skill match ✓
│ ├─ Staffing impact acceptable ✓
│ ├─ No rule violations ✓
│ └─ Service level maintained ✓
├─ 2. Result: ✓ AUTO-APPROVED
├─ 3. Schedules updated:
│ ├─ Agent A: Now Tuesday off, Wednesday working
│ ├─ Agent B: Now Tuesday working, Wednesday off
│ └─ Master Schedule: Updated
├─ 4. Both agents notified
│ └─ Approved, effective immediately
│
Result:
├─ Trade completed
├─ Master schedule updated
├─ Both agents working new dates
└─ Can be reversed if both agree
Trade Exceptions
Scenario 1: Skills Don't Match
Agent A: Support Tier 2 (advanced skills)
Agent B: Support Tier 1 (basic skills)
Trade Request: A's Tuesday for B's Wednesday
├─ A has: Advanced skills for Tier 2 work
├─ B has: Only basic skills
├─ Tuesday activity: Tier 2 required
├─ B not qualified for Tuesday
├─ Result: ✗ DENIED (skill mismatch)
Solution:
├─ Agent B must complete training first
├─ OR Agent A finds Tier 2 agent to trade with
└─ OR Supervisor overrides (if business allows)
Scenario 2: Staffing Impact
Team: Support (5 agents)
Tuesday staffing: All 5 present
Trade Request: Agent A & B both want to trade out
Impact:
├─ Both agents trading simultaneously
├─ Tuesday minimum: 3 agents required
├─ Remaining: 3 agents (meets minimum)
├─ Service Level: Might be at risk
├─ Result: ⚠ PENDING supervisor review
Supervisor Options:
├─ Approve (accept slight service risk)
├─ Deny one trade, approve other
├─ Offer alternative dates
└─ Request one agent to post-pone
Self-Service Portal
Agents manage time-off and trades through desktop or mobile portal.
Agent Self-Service Features:
Time-Off Request:
├─ 1. Select "Time Off" module
├─ 2. Click "Request Time Off"
├─ 3. Choose:
│ ├─ Type (Vacation, Sick, etc.)
│ ├─ Dates (calendar picker)
│ ├─ Notes (optional)
│ └─ Submit
├─ 4. See:
│ ├─ Time-off balance
│ ├─ Blackout dates highlighted
│ ├─ Minimum notice requirements
│ └─ Approval status
└─ 5. Receive notification
└─ Auto-approved or pending review
Shift Trade Request:
├─ 1. Select "Schedule" module
├─ 2. Click "Find Trades"
├─ 3. View:
│ ├─ Own scheduled shifts
│ ├─ Available agents to trade with
│ ├─ Their shift availability
│ └─ Compatibility check (skills, hours)
├─ 4. Select trade
│ └─ Propose: "My Tuesday for Your Wednesday"
├─ 5. Request sent
│ └─ Other agent notified
└─ 6. Await response
├─ Accepted: Goes to supervisor
├─ Denied: Request closed
└─ Auto-approved: Notification of approval
View Schedules:
├─ Calendar view of all shifts
├─ Color-coded by activity
├─ Mobile-friendly display
├─ Search and filter options
└─ Print or export option
Mobile Features:
├─ Responsive design
├─ Touch-friendly interface
├─ Push notifications for approvals
├─ Photo ID verification (optional)
└─ Works offline (syncs when online)
Real-World Examples
Example 1: Vacation Request (Auto-Approved)
Agent: AGENT_045
Vacation Request:
├─ Type: Vacation
├─ Dates: June 15-22, 2026 (8 days)
├─ Submitted: May 1, 2026
├─ Notice: 45 days advance ✓
└─ Date: Monday request for Monday-Monday week
System Checks:
├─ Vacation balance: 18 days available ✓
├─ Notice period: 45 days (requirement: 14 days) ✓
├─ Minimum staffing check:
│ ├─ Support team: 8 agents total
│ ├─ Currently approved off: 2 agents
│ ├─ Daily limit: 4 agents max
│ ├─ If approved: 3 agents off (within limit) ✓
│ └─ Minimum on hand: 5 agents ✓
├─ Blackout dates: No (June 15-22 not blackout) ✓
└─ All conditions: MET ✓
Result: ✓ AUTO-APPROVED
Notification:
├─ Agent receives email: "Vacation approved"
├─ Schedule updated: June 15-22 marked as VAC
├─ Balance: 18 - 8 = 10 days remaining
└─ Can cancel up to 2 weeks before with notice
Example 2: Trade (Manual Approval Due to Staffing)
Agents: AGENT_033, AGENT_128
Trade Request:
├─ Agent 033 offers: Friday 09:00-17:00
├─ Agent 128 offers: Wednesday 09:00-17:00
├─ Submitted: Thursday (2 days notice)
└─ Proposed dates: Next week
Rule Checks:
├─ Notice period: 2 days (requirement: 2 weeks) ✗
├─ Result: DOES NOT MEET AUTO-APPROVAL
│
Supervisor Review:
├─ 1. Check request details:
│ ├─ Both agents qualified ✓
│ ├─ Same activity (Support) ✓
│ ├─ Same hours (8 hours each) ✓
│ └─ No pending trades ✓
│
├─ 2. Staffing impact:
│ ├─ Support team: 6 agents
│ ├─ Friday staffing: Currently 5 agents
│ ├─ If trade: Still 5 agents (no change) ✓
│ └─ Service level: Not impacted ✓
│
├─ 3. Business decision:
│ ├─ Short notice: Usually denied
│ ├─ But: Staffing impact minimal
│ ├─ Decision: APPROVE with exception
│ └─ Note: "Last-minute trade due to emergency"
│
Result: ✓ MANUALLY APPROVED
Outcome:
├─ Both agents notified
├─ Schedule updated
├─ Trade effective next week
└─ Documented for future reference
Best Practices
Time-Off
- Clear Rules - Simple, documented policies
- Fair Application - Consistent across team
- Balance - Support work-life balance while maintaining service
- Planning - Encourage advance notice
- Limits - Realistic balance between coverage and flexibility
- Communication - Transparent approval/denial reasons
Shift Trades
- Flexibility - Enable trades to improve agent satisfaction
- Safeguards - Protect service level and skill requirements
- Training - Ensure agents know how to trade
- Monitoring - Watch for abuse of trade system
- Documentation - Keep record of all trades
- Supervisor Review - Spot-check for compliance
Interview Cheat Sheet
| Question | Answer |
|---|---|
| What's time-off management? | Automated approval of absence requests |
| Auto-approval criteria? | Balance, notice, staffing, blackout dates |
| Daily limits function? | Prevent over-staffing by limiting absences per day |
| Time-off types? | Vacation, sick, personal, unpaid, bereavement, jury duty |
| What's shift trade? | Agent-to-agent schedule swap |
| Trade requirements? | Skill match, hours match, staffing maintained |
| Trade approval? | Auto-approve if eligible, else supervisor review |
| Notice requirement? | Varies by type (vacation 2 weeks, sick immediate) |
| Can trades be reversed? | Yes, if both agents agree within timeframe |
| Mobile access? | Agents can request via mobile app |
| Approval notification? | Email/in-system notification immediately |
| What blocks approval? | Insufficient balance, short notice, staffing risk |
Key Takeaways
- Automation - Approve routine requests automatically
- Self-Service - Agents manage own time-off/trades
- Balance - Support flexibility while protecting service
- Rules - Clear criteria for approval/denial
- Visibility - Supervisors see impact before approval
- Fairness - Consistent application of policies
- Convenience - Mobile and desktop access
- Work-Life - Enable better work-life balance
- Efficiency - Reduce administrative burden
- Service Level - Never compromise customer service
Additional Resources
- Time-Off Management: help.genesys.cloud/articles/time-off-management/
- Shift Trades: help.genesys.cloud/articles/shift-trades-overview/
- Support: https://support.genesys.com
Document Version Info
Last Updated: March 2026
Validated: Current with March 2026 release
Version: 1.0
Real-Time Adherence
Genesys WFM Real-Time Adherence Documentation
Study Notes
| Topic | Description |
|---|---|
| Real-Time Adherence | Compares actual agent state vs scheduled state |
| Adherence States | On-queue, breaks, meetings, training, time-off, etc. |
| Schedule State Groups | Maps Genesys states to scheduled activities |
| Compliance Tracking | 15, 30, or 60-minute interval checking |
| Reason Codes | Aux codes for secondary classifications |
| Thresholds | Start Before/After flexibility (minutes) |
| Multi-Channel | Track adherence per media type separately |
| Ignore Codes | Activities excluded from adherence calculation |
Navigation
Real-Time Adherence Overview
Real-Time Adherence measures how well agents follow their assigned schedules. It compares each agent's actual real-time state with their scheduled state during each monitoring interval, tracking compliance in real-time throughout the day.
Adherence monitoring enables supervisors to:
- Track agent schedule compliance continuously
- Identify agents not following schedules
- Investigate reasons for non-compliance
- Manage exceptions and unplanned activities
- Generate adherence reports for performance management
- Calculate adherence metrics for coaching and evaluation
Adherence Objectives
- Schedule Compliance - Ensure agents work as scheduled
- Service Level Support - Proper staffing for demand
- Performance Accountability - Track and measure adherence
- Issue Identification - Find patterns and problems
- Coaching Opportunity - Address non-compliance with agents
- Compliance Reporting - Document adherence for audits
Key Adherence Concepts
Scheduled State vs Actual State:
Scheduled (from Master Schedule):
├─ 09:00-12:00: On-Queue Support
├─ 12:00-13:00: Lunch (Meal)
├─ 13:00-16:00: On-Queue Support
├─ 16:00-16:15: Break
└─ 16:15-16:30: After Call Work
Actual (Real-Time State):
├─ 09:00-09:45: On-Queue ✓ Adherent
├─ 09:45-10:15: Training ✗ Non-adherent (unscheduled)
├─ 10:15-12:30: On-Queue ⚠ Late from training (+45 min)
├─ 12:30-12:50: Lunch ✓ Adherent (within threshold)
├─ 13:00-15:45: On-Queue ✓ Adherent
├─ 15:45-16:10: Meeting ✗ Non-adherent (missing break)
└─ 16:10-16:30: After Call Work ✓ Adherent
Overall Adherence for Day:
├─ Compliant Time: 6 hours 15 min
├─ Non-Compliant Time: 1 hour 15 min
├─ Total Shift Time: 7.5 hours
├─ Adherence %: (6:15 / 7:30) = 83.3% ⚠ Below goal (90%)
Adherence States
On-Queue States
Agents are available to handle customer interactions:
On-Queue Activities:
Available/Ready (WaitingForNextCall):
├─ Status: Available for interactions
├─ Duration: Variable (until call arrives)
├─ Adherence: Compliant if scheduled on-queue
└─ Example: Agent in queue waiting for next call
Connected (Connected):
├─ Status: Currently handling interaction
├─ Duration: Call/chat/email duration
├─ Adherence: Compliant if on-queue scheduled
└─ Example: Agent on call with customer
On-Hold (Held):
├─ Status: Customer on hold (agent still active)
├─ Duration: Hold time while processing
├─ Adherence: Compliant if on-queue scheduled
└─ Example: Agent researching issue, customer on hold
Occupied (various):
├─ Status: Agent occupied with interaction
├─ Duration: From connection to end
├─ Adherence: Compliant if on-queue scheduled
└─ Example: Agent handling multiple interactions
Off-Queue States
Agents not available for customer interactions:
Off-Queue Activities:
After Call Work (ACW/AfterCallWork):
├─ Status: Processing after interaction ends
├─ Duration: Wrap-up work time
├─ Adherence: Depends on scheduling
├─ Scheduled: Yes (included in shift)
├─ Example: Agent logging notes after call
Break (Break):
├─ Status: Scheduled break time
├─ Duration: 15-30 minutes typically
├─ Adherence: Compliant if scheduled break
├─ When: Scheduled time window (10-12am)
└─ Example: Agent on 15-minute break
Meal/Lunch (Meal):
├─ Status: Lunch or meal period
├─ Duration: 30-60 minutes typically
├─ Adherence: Compliant if scheduled lunch
├─ When: Scheduled lunch window (12-1pm)
└─ Example: Agent on lunch break
Meeting (Meeting):
├─ Status: Team, coaching, or training meeting
├─ Duration: 30-120 minutes
├─ Adherence: Depends on scheduling (can be exception)
├─ Planned: Usually scheduled in advance
└─ Example: 1-on-1 coaching session
Training (Training):
├─ Status: Formal training or development
├─ Duration: Hours or days
├─ Adherence: Depends on scheduling
├─ Planned: Scheduled in advance
└─ Example: Product training course
Time Off (TimeOff):
├─ Status: Approved absence
├─ Duration: Full shift or partial
├─ Adherence: Compliant if approved time-off
├─ Types: Vacation, sick, personal, unpaid
└─ Example: Approved vacation day
Administrative (Administrative):
├─ Status: Admin work, documentation, reports
├─ Duration: 30-60 minutes typically
├─ Adherence: Depends on scheduling
├─ When: Off-peak hours or scheduled
└─ Example: Agent doing filing, reports
Exception States
Unplanned or special situations:
Exception Activities:
Unavailable (Unavailable):
├─ Status: Temporarily unavailable
├─ Reason: Unplanned absence, technical issue, etc.
├─ Duration: Minutes to hours
├─ Adherence: Non-adherent (unplanned)
└─ Example: Agent system down, logged out
Coaching/Monitoring (Coaching):
├─ Status: Under supervision or QA review
├─ Duration: Call duration + review
├─ Adherence: Can be scheduled or exception
├─ Purpose: Quality assessment
└─ Example: Supervisor listening to call
Idle/Not Ready (Idle):
├─ Status: Logged in but not accepting work
├─ Duration: Variable
├─ Adherence: Non-adherent if not scheduled
└─ Example: Agent between calls, extended idle
Marked Time (Marked):
├─ Status: Special marked period
├─ Duration: 15 minutes to hours
├─ Adherence: Depends on configuration
└─ Example: Quality review, special activity
Schedule State Groups
Schedule State Groups map Genesys real-time states to WFM scheduled states, defining which states are considered compliant with each scheduled activity.
Schedule State Group Configuration:
Example: Support On-Queue Voice
SSG Name: Support_OnQueue_Voice
├─ Media Channel: Voice (or Unspecified)
├─ Associated Real-Time States:
│ ├─ WaitingForNextCall
│ ├─ Connected
│ ├─ Held
│ └─ Occupied
├─ Reason Codes (if applicable):
│ ├─ No code required
│ └─ Maps all calls regardless of type
├─ Adherence Rules:
│ ├─ Start Before Threshold: 5 minutes
│ ├─ Start After Threshold: 5 minutes
│ ├─ End Before Threshold: 5 minutes
│ └─ End After Threshold: 5 minutes
└─ Result: Agent compliant if on any of these states within thresholds
Threshold Configuration
Thresholds define flexibility in start/end times:
Threshold Scenario 1: Strict (0 minutes)
├─ Scheduled: On-Queue 09:00-13:00
├─ Start Before: 0 min (must start exactly at 09:00)
├─ Start After: 0 min (cannot be late)
├─ Actual: 09:03 (3 minutes late)
└─ Result: ✗ Non-adherent (outside 0-min threshold)
Threshold Scenario 2: Flexible (5 minutes)
├─ Scheduled: On-Queue 09:00-13:00
├─ Start Before: 5 min (can start 08:55)
├─ Start After: 5 min (can start up to 09:05)
├─ Actual: 09:03 (3 minutes late)
└─ Result: ✓ Adherent (within 5-min threshold)
Threshold Scenario 3: Very Flexible (15 minutes)
├─ Scheduled: On-Queue 09:00-13:00
├─ Start Before: 15 min (can start 08:45)
├─ Start After: 15 min (can start up to 09:15)
├─ Actual: 09:12 (12 minutes late)
└─ Result: ✓ Adherent (within 15-min threshold)
Best Practice:
├─ On-Queue activities: 5-10 minutes (reasonable)
├─ Break/Meal: 10-15 minutes (more lenient)
├─ Training: 0-5 minutes (strict)
Reason Codes (Auxiliary Codes)
Reason codes provide secondary classification for states, tracking why agents are in particular states.
Common Reason Codes:
Break Reasons:
├─ BRK: Regular break
├─ BRKAT: Break at-will
├─ UNPAID: Unpaid break
└─ PAID: Paid break
Absence Reasons:
├─ SICK: Sick leave
├─ VACATION: Vacation
├─ PERSONAL: Personal time
├─ UNPAID: Unpaid time off
├─ JURY: Jury duty
└─ BEREAVEMENT: Bereavement
Activity Reasons:
├─ TRAIN: Training
├─ MEET: Meeting
├─ COACH: Coaching
├─ ADMIN: Administrative work
├─ QA: Quality assurance
└─ MGT: Management activity
Connection Reasons (Calls):
├─ IN: Inbound call
├─ OUT: Outbound call
├─ TRANSFER: Call transfer
├─ CONFERENCE: Conference call
└─ CALLBACK: Scheduled callback
Usage:
├─ Mapped to schedule state groups
├─ Provide detail in adherence reports
├─ Track reasons for non-compliance
└─ Improve accuracy of adherence calculations
Single vs Multi-Channel Adherence
Single-Channel Adherence
Tracking adherence for agents handling one media type:
Single-Channel Configuration:
Agent: Support_Agent_001
├─ Media Type: Voice only
├─ Scheduled: On-Queue Voice 09:00-17:00
├─ At 10:30:
│ ├─ Real-time State: Connected (handling call)
│ ├─ Scheduled State: On-Queue Voice
│ ├─ Mapping: Connected maps to On-Queue ✓
│ └─ Result: Adherent
│
├─ At 14:00:
│ ├─ Real-time State: ACW (after call work)
│ ├─ Scheduled State: On-Queue Voice
│ ├─ Mapping: ACW maps to On-Queue ✓
│ └─ Result: Adherent
│
└─ At 14:45:
├─ Real-time State: Meeting (unscheduled)
├─ Scheduled State: On-Queue Voice
├─ Mapping: Meeting does NOT map to On-Queue ✗
└─ Result: Non-adherent
Daily Adherence: 92% (good)
Multi-Channel Adherence
Tracking adherence when agents handle multiple media types:
Multi-Channel Configuration:
Agent: Support_Agent_002
├─ Media Types: Voice + Email (blended)
├─ Schedule:
│ ├─ 09:00-13:00: On-Queue (Voice or Email)
│ ├─ 13:00-14:00: Lunch
│ ├─ 14:00-17:00: On-Queue (Voice or Email)
│ └─ 17:00-17:30: After Call Work
│
├─ At 10:30 (Voice call):
│ ├─ Voice Channel State: Connected
│ ├─ Email Channel State: Idle
│ ├─ Voice SSG Check: Connected maps to On-Queue ✓
│ ├─ Email SSG Check: Idle maps to On-Queue? (No)
│ └─ Overall: Adherent (on Voice, allowed)
│
├─ At 11:00 (Email work):
│ ├─ Voice Channel State: Available
│ ├─ Email Channel State: Occupied
│ ├─ Voice SSG Check: Available maps to On-Queue ✓
│ ├─ Email SSG Check: Occupied maps to On-Queue ✓
│ └─ Overall: Adherent (both channels compliant)
│
└─ At 14:45 (Unscheduled training):
├─ Voice Channel State: Training
├─ Email Channel State: Training
├─ Voice SSG Check: Training ✗ (no mapping)
├─ Email SSG Check: Training ✗ (no mapping)
└─ Overall: Non-adherent (both channels fail)
Adherence Details:
├─ Voice Adherence: 95%
├─ Email Adherence: 94%
└─ Overall Adherence: 92% (both channels must be compliant)
Key Difference:
- Single-Channel: One adherence percentage (simple)
- Multi-Channel: Separate adherence per channel + overall (complex)
Adherence Calculation
WFM calculates adherence through a multi-step process:
Adherence Calculation Steps:
Step 1: Map Agent State + Reason Code
├─ Get agent's real-time state
├─ Get reason code (if any)
├─ Example: WaitingForNextCall + no code
└─ Create state mapping for comparison
Step 2: Find Compliant Schedule State Groups
├─ Look up all SSGs configured for site
├─ Check which SSGs map to agent's state
├─ Consider media channel if configured
├─ Example: "Support_OnQueue" maps to WaitingForNextCall
└─ Create list of matching SSGs
Step 3: Get Scheduled States for Agent
├─ Retrieve agent's current schedule for time interval
├─ Example: Scheduled for "On-Queue Voice" 10:00-12:00
├─ If multiple activities: Pick primary
└─ Compare to matched SSGs from Step 2
Step 4: Check Thresholds
├─ Did agent start on time? (Start Before/After)
├─ Did agent end on time? (End Before/After)
├─ Are they within configured thresholds?
├─ Example: Within 5-min threshold = compliant
└─ Result: Adherent or Non-adherent
Step 5: Calculate Result
├─ If intersection not empty: ✓ Adherent
├─ If intersection empty: ✗ Non-adherent
├─ If multiple channels: All must pass
└─ Track non-adherence time in minutes
Example Execution:
Time: 10:15
├─ Agent: AGENT_001
├─ Real-time State: Connected
├─ Reason Code: None
├─ Scheduled: On-Queue Voice (10:00-12:00)
├─ SSG Lookup: Connected maps to "On-Queue" ✓
├─ Threshold Check: 10:15 is within start threshold ✓
├─ Result: ✓ ADHERENT
├─ Non-adherence Time: 0 minutes
└─ Added to adherence report as compliant minute
Adherence Visualization
Real-Time Adherence View Example:
Agent Name | Status | Activity | Duration | Adherence
────────────────|-----------|-------------|----------|────────────────
AGENT_001 | ✓ Green | Connected | 4:32 | ✓ Adherent
AGENT_002 | ✓ Green | Available | 0:15 | ✓ Adherent
AGENT_003 | ⚠ Yellow | Break | 18:30 | ⚠ Non-adherent
AGENT_004 | ✓ Green | Connected | 3:12 | ✓ Adherent
AGENT_005 | 🔴 Red | Meeting | 45:00 | 🔴 Severely non-adherent
AGENT_006 | ✓ Green | ACW | 2:05 | ✓ Adherent
AGENT_007 | ✓ Green | On-Queue | 1:30 | ✓ Adherent
AGENT_008 | ⚠ Yellow | Idle | 12:30 | ⚠ Non-adherent
Legend:
✓ Green = Adherent (within schedule)
⚠ Yellow = Non-adherent (off schedule <15 min or 1st alert)
🔴 Red = Severely non-adherent (off schedule >15 min or 2+ alerts)
Ignore Codes
Certain activities can be marked "Ignore for Adherence," excluding them from adherence calculations.
Why Use Ignore Codes:
Scenario: Quality Assurance Monitoring
Standard:
├─ Agent scheduled: On-Queue 09:00-17:00
├─ At 10:00: Supervisor monitors agent call (QA)
├─ Agent state: Quality (being monitored)
├─ Non-adherent: Yes (QA not on schedule)
├─ Problem: Impacts adherence score unfairly
Solution: Mark QA as "Ignore for Adherence"
├─ Agent scheduled: On-Queue 09:00-17:00
├─ At 10:00: Supervisor monitors agent call (QA)
├─ Agent state: Quality (being monitored)
├─ Non-adherent: No (QA ignored)
├─ Result: QA time doesn't count against adherence ✓
Example Activities to Ignore:
├─ Quality assurance monitoring
├─ Coaching/training observations
├─ System maintenance time
├─ Emergency situations
├─ Technical outages affecting all agents
└─ Special projects or initiatives
Configuration:
Ignore Codes Setup:
Activity Code: QUALITY_MONITOR
├─ Name: Quality Assurance Monitoring
├─ Category: QA
├─ Mark as: Ignore for Adherence ✓
├─ Schedule State Group: (optional)
└─ Result: Doesn't impact adherence %
Activity Code: SYSTEM_ISSUE
├─ Name: System Outage
├─ Category: Technical
├─ Mark as: Ignore for Adherence ✓
├─ Schedule State Group: (optional)
└─ Result: Doesn't impact adherence %
Usage:
├─ Only for legitimate non-schedule activities
├─ Must be approved by management
├─ Document in policy
├─ Review quarterly for accuracy
Real-World Scenarios
Scenario 1: Break Threshold
Agent: AGENT_033
Schedule: On-Queue 09:00-17:00
Break: Scheduled 10:30-10:45 (15-minute break)
Break Threshold: ±10 minutes
Actual:
├─ 10:40: Agent takes break (10 min late)
├─ 10:55: Agent returns (back on-queue)
├─ Duration: 15 minutes (correct)
├─ Start: 10:40 (scheduled 10:30, 10 min late)
Analysis:
├─ Start Threshold: ±10 minutes
├─ Actual Start: 10:40 (10 min late)
├─ Within Threshold: Yes ✓
└─ Result: Adherent ✓
If Start Threshold was ±5 minutes:
├─ Actual Start: 10:40 (10 min late)
├─ Within Threshold: No ✗
└─ Result: Non-adherent ✗
Lesson: Threshold configuration is critical
Scenario 2: Unscheduled Training
Agent: AGENT_115
Schedule: On-Queue Support 09:00-13:00
Actual:
├─ 10:00-10:45: On-Queue (compliant)
├─ 10:45-11:30: Training (emergency product training)
├─ 11:30-13:00: On-Queue (compliant)
Adherence Impact:
├─ Compliant Time: 2:15 (09:00-10:45 + 11:30-13:00)
├─ Non-Compliant Time: 0:45 (training)
├─ Total Time: 4:00
├─ Adherence: (2:15 / 4:00) = 56% Non-adherent ✗
Solution Option 1: Schedule Exception
├─ Update master schedule for 10:45-11:30
├─ Mark as "Training - Exception"
├─ Configure SSG to include Training
├─ Result: Would be adherent ✓
Solution Option 2: Ignore Code
├─ Mark "Emergency Training" as Ignore
├─ When agent in training: Doesn't count
├─ Result: Adherence = 100% (training ignored) ✓
Solution Option 3: Coaching
├─ Supervisor counsels agent on schedule
├─ Reinforce adherence importance
├─ Coach on better timing for breaks
└─ Plan to avoid future non-adherence
Best Practice: Combination
├─ Use Solution 1 (schedule exception) immediately
├─ Use Solution 3 (coaching) to prevent future
└─ Use Solution 2 (ignore) only for legitimate reasons
Best Practices
Adherence Configuration
- Clear Rules - Unambiguous state mappings
- Realistic Thresholds - Balance flexibility with accountability
- Simple Codes - Easy for agents to understand
- Documentation - Maintain mapping diagrams
- Testing - Validate configuration in test environment
- Training - Teach agents adherence expectations
Monitoring
- Regular Review - Check adherence daily
- Trend Analysis - Look for patterns
- Investigation - Ask "why?" for outliers
- Communication - Share results with team
- Positive Coaching - Praise improvements
- Accountability - Address chronic issues
Coaching
- Empathy - Understand barriers to adherence
- Clarity - Explain why adherence matters
- Support - Help with scheduling challenges
- Consequences - Clear performance expectations
- Recognition - Celebrate good adherence
- Follow-up - Track improvements over time
Interview Cheat Sheet
| Question | Answer |
|---|---|
| What's real-time adherence? | Compares actual agent state to scheduled state |
| How often monitored? | 15, 30, or 60-minute intervals (configurable) |
| Yellow status meaning? | Non-adherent or approaching non-adherence |
| Red status meaning? | Severely non-adherent (significantly off schedule) |
| What's threshold? | Flexibility in start/end time (e.g., ±5 min) |
| Adherence calculation? | Map real-time state to schedule state, check threshold |
| Reason codes? | Aux codes for secondary classification |
| Schedule state group? | Maps Genesys states to scheduled activities |
| Multi-channel adherence? | Track adherence per media type separately |
| What's ignore code? | Activity excluded from adherence calculation |
| Common non-adherence? | Unscheduled breaks, late returns, unplanned training |
| How improve adherence? | Clear rules, thresholds, coaching, support |
| Impacts of poor adherence? | Service level failure, staffing gaps, customer impact |
| Exception handling? | Can be scheduled or handled with ignore codes |
| Reporting adherence? | Daily/weekly reports by agent/team/site |
Key Takeaways
- Continuous Tracking - Real-time monitoring throughout day
- State Mapping - Clear mapping of actual to scheduled states
- Threshold Flexibility - Balance accountability with realism
- Multi-Channel - Support for blended agent work
- Reason Codes - Detailed tracking of why agents are off-schedule
- Ignore Codes - Exclude legitimate exceptions
- Visualization - Color-coding for quick status assessment
- Coaching Opportunity - Address issues with support and empathy
- Service Impact - Poor adherence damages service levels
- Policy Enforcement - Consistent application of rules
Additional Resources
Official Documentation
- Adherence: all.docs.genesys.com/PEC-WFM/Current/Supervisor/AdherenceMdl
- Schedule State Groups: all.docs.genesys.com/PEC-WFM/Current/Administrator/CfgAdhRls
- Adherence Calculation: docs.genesys.com/Documentation/WM/latest/SHelp/AdhrCalcs
Support & Training
- Genesys University: genesys.com/training
- Community Forums: https://community.genesys.com
- Technical Support: https://support.genesys.com
Document Version Info
Last Updated: March 2026
Source: Genesys WFM Official Documentation
Validated: Current with January-March 2026 releases
Version: 1.0
Service Goals & Planning Groups
Genesys WFM Service Goals & Planning Groups Documentation
Study Notes
| Topic | Description |
|---|---|
| Service Goals | Define SL, ASA, abandon rate targets |
| Service Level | % of interactions answered within target time |
| ASA | Average Speed to Answer in seconds |
| Abandon Rate | % of offered interactions not answered |
| Planning Groups | Organize workload by media type and route |
| Media Types | Voice, email, chat, callback, messaging, workitems |
| Goal Templates | Reusable at business unit level |
| Staffing Impact | Goals drive forecasting and scheduling |
Navigation
Admin → Workforce Management → Service Goals OR Admin → Workforce Management → Planning Groups
Service Goals Overview
Service Goals define target performance metrics for contact center operations. They specify acceptable levels for Service Level, Average Speed to Answer, and Abandon Rate, providing the basis for staffing forecasts and schedule creation.
Goal Components
Service Goal: Premium Support Voice
Performance Targets:
├─ Service Level: 80% in 20 seconds
│ └─ 80% of calls answered within 20 seconds
├─ Average Speed to Answer: 18 seconds average
│ └─ All calls average 18 second wait
├─ Abandon Rate: 5% maximum
│ └─ Maximum 5% of calls not answered
Definition:
├─ Media Type: Voice (inbound)
├─ Planning Group: Support Queue 001
├─ Time Period: Monday-Friday, 08:00-18:00
├─ Applies To: All support agents
└─ Level: Business Unit level
Key Metrics
Service Level (SL)
Definition: Percentage of calls answered within target time
Calculation:
├─ Offered: 1,000 calls
├─ Answered ≤20 seconds: 800 calls
├─ Answered >20 seconds: 200 calls
├─ SL = (800/1,000) × 100 = 80%
Benchmark:
├─ Excellent: 90%+
├─ Good: 80-90%
├─ Acceptable: 75-80%
├─ Poor: <75%
Average Speed to Answer (ASA)
Definition: Average wait time before agent answer
Calculation:
├─ Call 1 wait: 12 seconds
├─ Call 2 wait: 25 seconds
├─ Call 3 wait: 18 seconds
├─ Average: (12+25+18)/3 = 18.3 seconds
Benchmark:
├─ Excellent: <10 seconds
├─ Good: 10-20 seconds
├─ Acceptable: 20-30 seconds
├─ Poor: >30 seconds
Abandon Rate
Definition: Percentage of calls not answered
Calculation:
├─ Offered: 1,000 calls
├─ Answered: 950 calls
├─ Abandoned: 50 calls
├─ Abandon Rate = (50/1,000) × 100 = 5%
Benchmark:
├─ Excellent: <3%
├─ Good: 3-5%
├─ Acceptable: 5-8%
├─ Poor: >8%
Goal Templates
Service Goal Templates are reusable at the Business Unit level, providing standard goals for different work types.
Template Library:
Template 1: Premium Support (Voice)
├─ Service Level: 80% in 20 seconds
├─ ASA: 18 seconds
├─ Abandon Rate: 5%
├─ Use Case: VIP customers, escalations
└─ Staffing Impact: High (expensive)
Template 2: Standard Support (Voice)
├─ Service Level: 75% in 30 seconds
├─ ASA: 25 seconds
├─ Abandon Rate: 8%
├─ Use Case: Typical support queue
└─ Staffing Impact: Medium
Template 3: Basic Support (Voice)
├─ Service Level: 70% in 60 seconds
├─ ASA: 45 seconds
├─ Abandon Rate: 10%
├─ Use Case: IVR escalations, callbacks
└─ Staffing Impact: Low (cost efficient)
Template 4: Email Support
├─ Service Level: 95% in 4 hours
├─ ASA: 2 hours (median)
├─ Abandon Rate: N/A
├─ Use Case: Email queue
└─ Staffing Impact: Different (async work)
Template 5: Chat Support
├─ Service Level: 85% in 30 seconds
├─ ASA: 20 seconds
├─ Abandon Rate: 7%
├─ Use Case: Real-time chat
└─ Staffing Impact: Medium-High
Template 6: Callback
├─ Service Level: 90% within 1 hour
├─ ASA: N/A (scheduled)
├─ Abandon Rate: <2%
├─ Use Case: Scheduled callbacks
└─ Staffing Impact: Planned
Planning Groups Overview
Planning Groups organize workloads by media type and route path, enabling precise forecasting and scheduling for different work types.
Planning Group Structure
Planning Group: Support - Voice Queue 001
Organization:
├─ Name: Support - Voice Queue 001
├─ Business Unit: Support Operations
├─ Media Type: Voice (Inbound)
├─ Queue/Route: Support_Queue_001
├─ Service Goal: Premium Support
├─ Staffing Group: Support_Agents_Tier_2
Configuration:
├─ Agent Skills Required: Support Level 2+
├─ Agents Available: 50
├─ Agent Availability: Scheduled
├─ Activity Code: SUPPORT_VOICE
└─ Multi-Activity: Can blend with other activities
Scheduling:
├─ Work Plans: Standard Full-Time, Part-Time Flex
├─ Hours Available: 09:00-17:00 Mon-Fri
├─ Staffing Model: Load-based (forecast-driven)
└─ Peak Coverage: 10:00-14:00 (highest demand)
Multi-Media Planning Groups
Planning Group 1: Blended Support (Voice + Email)
Media Types:
├─ Voice (Inbound) - 60% of time
├─ Email (Responses) - 40% of time
├─ Single planning group spans both
Service Goals:
├─ Voice: 80% SL, 20s ASA
├─ Email: 95% 4-hour response
└─ Blended staffing meets both
Agent Assignment:
├─ Agents skilled in both voice and email
├─ Can switch between during shift
├─ Occupancy: Total work load
└─ Adherence: Tracks combined
Benefits:
├─ Flexibility (switch between work types)
├─ Efficiency (right sizing)
├─ Cost effective (fewer agents needed)
└─ Better work variety
Example:
├─ Agent on call: 5 minutes (voice)
├─ Agent responds to emails: 2 minutes each (email)
├─ Total work + availability = occupancy
Planning Group Creation Checklist
Step 1: Define Fundamentals
☐ Planning Group Name
☐ Business Unit
☐ Media Type(s)
☐ Queue/Route Assignment
☐ Description & Purpose
Step 2: Associate Service Goals
☐ Service Level %
☐ ASA Target
☐ Abandon Rate
☐ Performance Interval
Step 3: Assign Resources
☐ Select Staffing Group
☐ Define Skill Requirements
☐ Specify Agent Availability
☐ Configure Blending (if multi-media)
Step 4: Configure Scheduling
☐ Work Plans
☐ Available Hours
☐ Days Operational
☐ Staffing Flexibility
Step 5: Test & Activate
☐ Validate skill assignments
☐ Test with sample forecast
☐ Confirm staffing calculations
☐ Activate for use
Goal Setting Best Practices
SL Target Selection:
Considersations:
├─ Industry Standard: 80% for voice typical
├─ Customer Expectations: What do customers expect?
├─ Staffing Cost: Higher SL = more agents
├─ Competition: What competitors offer
├─ Current Performance: Realistic improvement path
└─ Business Objectives: Strategic alignment
Decision Matrix:
Volume Level | Industry SL | Typical SL | Cost Impact
─────────────|──────────── |────────── |────────────
Low (<500/day)| 80% | 85-90% | -
Medium (500-2k)| 80% | 80-85% | Baseline
High (2k+) | 75-80% | 75-80% | High (many agents)
Recommendation:
├─ Start with 80% in 20 seconds (industry standard)
├─ Adjust based on customer feedback
├─ Increase gradually as team improves
├─ Only decrease if cost absolutely prohibitive
└─ Communicate goals to team
Real-World Examples
Example 1: Single Planning Group (Voice Only)
Organization: Small Contact Center
Team: Support Only
Volume: 5,000 calls/day
Planning Group Setup:
├─ Name: Support - Voice Queue
├─ Media Type: Voice Inbound
├─ Queue: Support_Main
├─ Service Goal: Standard Support
│ ├─ SL: 75% in 30 seconds
│ ├─ ASA: 25 seconds
│ └─ Abandon: 8%
├─ Staffing Group: Support Agents (40 total)
└─ Scheduling: Load-based with forecast
Impact:
├─ Single forecast for all support calls
├─ All agents cross-trained in support
├─ Flexible scheduling across team
├─ Straightforward staffing calculations
└─ 5,000 calls ÷ 40 agents = 125 calls/agent/day
Example 2: Multi-Planning Group (Segmented)
Organization: Enterprise Contact Center
Team: Support (Tiered) + Sales
Volume: 50,000 calls/day
Planning Group 1: Support Tier 1 (Inbound Voice)
├─ SL: 70% in 60 seconds (lower priority)
├─ Agents: 100
├─ Volume: 20,000 calls/day
└─ Complex calls escalated to Tier 2
Planning Group 2: Support Tier 2 (Inbound Voice)
├─ SL: 85% in 20 seconds (VIP/escalations)
├─ Agents: 40
├─ Volume: 10,000 calls/day (escalated + complex)
└─ Expert agents with higher skill
Planning Group 3: Support - Email
├─ SL: 95% in 4 hours
├─ Agents: 25
├─ Volume: 8,000 emails/day
└─ Async work, different staffing model
Planning Group 4: Sales - Outbound
├─ Outbound calls
├─ Agents: 30
├─ Volume: 3,000 calls/day (dialing ratio)
└─ Non-traditional SL (contact rate goals)
Planning Group 5: Blended - Email + Chat
├─ Email + Chat handling
├─ Agents: 20
├─ Volume: 9,000 interactions/day
└─ Flexible blended staffing
Total:
├─ Planning Groups: 5
├─ Agents: 215 total
├─ Calls/Emails/Chats: 50,000 total daily
└─ Complexity: High (requires separate forecasts for each)
Benefits:
├─ Skill segmentation (Tier 1 vs 2)
├─ Appropriate goals per tier (70% vs 85%)
├─ Specialized handling (email vs voice)
├─ Cost optimization (right agents for right work)
└─ Performance clarity (each group tracked separately)
Example 3: Multi-Channel Blended
Organization: Financial Services
Team: Support (Multi-Channel)
Channels: Voice, Email, Chat
Planning Group: Support - Omnichannel
├─ Media Types: Voice + Email + Chat
├─ Volume Mix:
│ ├─ Voice: 50% (5,000 calls/day)
│ ├─ Email: 35% (3,500 emails/day)
│ └─ Chat: 15% (1,500 chats/day)
│
├─ Service Goals:
│ ├─ Voice: 80% SL, 20s ASA, 5% abandon
│ ├─ Email: 95% in 4 hours response
│ └─ Chat: 85% SL, 25s response
│
├─ Staffing: 50 agents
│ ├─ All trained in voice
│ ├─ Most trained in email
│ └─ Some trained in chat
│
├─ Scheduling:
│ ├─ Agents switch between channels during day
│ ├─ Chat staffing peak 10-14:00
│ ├─ Email staffing even throughout day
│ └─ Voice staffing follows volume curve
│
└─ Benefits:
├─ Flexibility (agents move where needed)
├─ Efficiency (prevent over-staffing one channel)
├─ Agent variety (less repetitive)
└─ Cost effective (fewer total agents needed)
Staffing Calculation:
├─ Voice 5,000 calls: Need ~12-15 agents
├─ Email 3,500/day: Need ~8-10 agents
├─ Chat 1,500: Need ~4-6 agents
├─ If separate: ~25-30 agents total needed
├─ If blended: ~18-20 agents sufficient
└─ Savings: ~25% headcount reduction through blending
Service Goal Alignment
Cascading Goals:
Business Strategy
├─ Customer experience excellence
├─ 95% customer satisfaction target
└─ Competitive advantage
Operations Goals
├─ Support SL: 80%
├─ Sales SL: 75%
├─ Email Response: 4 hours
└─ Chat Response: 25 seconds
Team Goals
├─ Agent individual targets
├─ Team performance tracking
├─ Coaching opportunities
└─ Recognition for achievement
Individual Goals
├─ Adherence to schedule
├─ Quality metrics
├─ Compliance
└─ Development
Measurement & Feedback
├─ Daily intraday metrics
├─ Weekly/monthly reports
├─ Coaching sessions
├─ Performance reviews
└─ Adjustments to goals
Best Practices
Goal Setting
- Realistic - Achievable with reasonable staffing
- Challenging - Push for improvement
- Industry Aligned - Competitive with peers
- Communicated - Clear to all agents
- Measured - Tracked consistently
- Flexible - Adjust based on business changes
Planning Group Design
- Clarity - Clear purpose and scope
- Skill Alignment - Match agents to requirements
- Balance - Not too granular, not too broad
- Scalability - Grows with business
- Maintenance - Regular updates
- Documentation - Maintain mappings
Interview Cheat Sheet
| Question | Answer |
|---|---|
| What's service goal? | Target metrics for SL, ASA, abandon rate |
| What's SL? | % of calls answered within target time |
| What's ASA? | Average wait time before answer |
| Typical SL? | 80% in 20 seconds (industry standard) |
| What's planning group? | Workload organized by media type and route |
| Planning group purpose? | Separate forecasting and scheduling |
| How many planning groups? | 1-5 typical (depends on complexity) |
| Media types? | Voice, email, chat, callback, messaging, workitems |
| Goal templates? | Reusable at business unit level |
| Why segment? | Cost optimization, skill alignment, clear metrics |
| Multi-channel? | Agents handle multiple media types |
| Benefits blending? | Flexibility, efficiency, cost savings |
| SL formula? | (Answered within target) / Total offered × 100 |
Key Takeaways
- Goals Drive Staffing - SL goals determine forecast and schedules
- Segment Wisely - Use planning groups for precision
- Templates - Reusable at BU level for consistency
- Realistic - Achievable goals drive motivation
- Communicate - Clear goals to all staff
- Track - Measure and report regularly
- Adjust - Modify as business changes
- Multi-Channel - Blend for efficiency
- Industry Standard - 80% SL in 20 seconds typical
- Measurement - Daily tracking drives improvement
Document Version Info
Last Updated: March 2026
Validated: Current with March 2026 release
Version: 1.0
Capacity Planning
Genesys WFM Capacity Planning Documentation
Study Notes
| Topic | Description |
|---|---|
| Capacity Planning | Long-range 2-year staffing forecasts and hiring needs |
| Hiring Plans | Project required agents based on volume growth |
| Shrinkage Modeling | Account for breaks, absences, training, meetings |
| Attrition Planning | Factor in turnover rates (typical 10-15% annual) |
| FTE Calculation | Full-time equivalent staffing requirements |
| What-If Scenarios | Model multiple growth/demand scenarios |
| Multi-Skill Planning | Plan for multiple planning groups and skill sets |
| Business Unit Level | Create capacity plans per business unit |
Navigation
Admin → Workforce Management → Capacity Planning OR Menu → Workforce Management → Planning → Capacity Plans
Capacity Planning Overview
Capacity Planning enables organizations to forecast long-range (up to 2 years) staffing needs based on projected demand, anticipated shrinkage, and expected attrition. It answers the strategic question: "How many agents do we need to hire in the next 6-12-24 months?"
Capacity Planning functions:
- Project future staffing requirements
- Model growth scenarios
- Account for turnover and attrition
- Plan hiring timelines
- Determine training needs
- Support budget planning
- Enable proactive recruitment
Capacity Planning Process
Capacity Planning Workflow:
Input Phase:
├─ Volume Forecast (2 years forward)
├─ Service Level Goals
├─ Average Handle Time (AHT)
├─ Shrinkage Rate (% unavailable)
├─ Attrition Rate (% turnover)
└─ FTE Targets (if applicable)
Processing:
├─ Calculate staffing needed by period
├─ Apply shrinkage adjustments
├─ Apply attrition (turnover) adjustments
├─ Factor in training ramp-up time
└─ Model multiple scenarios
Output Phase:
├─ Hiring requirements by month
├─ Training schedule
├─ Budget projections
├─ Risk identification
├─ Recommendation scenarios
└─ Long-term staffing plan
Usage:
├─ HR coordinates recruitment
├─ Budget allocates hiring resources
├─ Training schedules onboarding
├─ Leadership makes staffing decisions
└─ Ongoing refinement based on actuals
Key Concepts
Staffing Calculation Formula
Basic Staffing Calculation:
Staffing Required = (Volume × AHT) / Available Hours
Example:
├─ Volume: 5,000 calls/day
├─ AHT: 300 seconds (5 minutes)
├─ Target SL: 80% in 20 seconds
│ └─ Staffing calculation: (5,000 × 300) / 3,600 = 416.67 agent-hours needed
│
├─ Workday: 8 hours (28,800 seconds available per agent)
├─ Agents needed: 416.67 ÷ 8 = 52.08 agents
└─ Rounded: 52-53 agents minimum for stated conditions
Advanced Calculation (with shrinkage):
Staffing Required = ((Volume × AHT) / Available Hours) × (1 / (1 - Shrinkage Rate))
With 30% Shrinkage:
├─ Base staffing: 52 agents
├─ Shrinkage factor: 1 / (1 - 0.30) = 1.43
├─ Total staffing needed: 52 × 1.43 = 74.36 agents
└─ Actual: 75 agents (accounting for shrinkage)
Shrinkage
Shrinkage represents the percentage of time agents are unavailable for customer work.
Shrinkage Components (Typical 25-35%):
Paid Time Off:
├─ Vacation: 2.5% (20 days ÷ 260 work days)
├─ Sick Leave: 1.5% (12 days ÷ 260)
├─ Personal Time: 1% (8 days ÷ 260)
└─ Subtotal: ~5%
Scheduled Non-Work:
├─ Breaks: 8% (2 × 15 min breaks per 8-hr shift)
├─ Lunch: 12% (1 hour per 8-hr shift)
└─ Subtotal: ~20%
Other Non-Productive:
├─ Meetings: 2%
├─ Training: 2%
├─ Administrative: 1%
├─ Unplanned absences: 2%
└─ Subtotal: ~7%
Total Shrinkage: ~32% (typical)
This means:
├─ 8-hour shift = 5.44 hours available for customer work
├─ OR you need 1.47 agents for every 1 customer-facing agent needed
Attrition (Turnover)
Attrition is the rate at which employees leave the organization.
Typical Contact Center Attrition: 10-20% annually
Attrition Impacts:
Monthly Impact Example (100 agents, 15% annual):
├─ 15% ÷ 12 = 1.25 agents/month turnover
├─ Planning for 12 months: 15 agents departing
├─ To maintain 100 agents: Must hire 15 new agents
With Growth (5% growth + 15% turnover):
├─ Current: 100 agents
├─ Target: 105 agents (5% growth)
├─ Turnover expected: 15 agents
├─ Total to hire: 105 - 100 + 15 = 20 agents
├─ Hiring rate: 1.67 agents/month
└─ Timeline: 12 months to recruit and train
Factors Affecting Attrition:
├─ Compensation levels
├─ Work environment quality
├─ Career development opportunities
├─ Schedule flexibility
├─ Work-life balance
├─ Management quality
├─ Job satisfaction
└─ Industry benchmarks
Capacity Plan Creation
Creating a Capacity Plan
Step 1: Define Planning Parameters
Period Definition:
├─ Start Date: January 1, 2026
├─ End Date: December 31, 2027 (24 months)
├─ Intervals: Monthly
└─ Business Unit: Select target BU
Step 2: Input Volume Forecast
Volume Projections:
├─ Month 1: 5,000 calls/day (baseline)
├─ Month 2: 5,100 calls/day (+2%)
├─ Month 3: 5,200 calls/day (+4% YoY)
├─ ... (continue for 24 months)
└─ Can import from existing forecasts or enter manually
Step 3: Configure Service Levels
Service Goals:
├─ Service Level: 80% in 20 seconds
├─ ASA: 18 seconds
├─ Abandon Rate: 5%
├─ AHT: 300 seconds (5 minutes)
└─ Apply to all planning groups or specific ones
Step 4: Set Staffing Parameters
Shrinkage & Attrition:
├─ Shrinkage Rate: 30%
├─ Attrition Rate: 15% annually (1.25% monthly)
├─ Training Ramp-Up: 60% productivity week 1, 80% week 2, 100% week 3
├─ Training Duration: 2 weeks
└─ Seasonal Adjustments: Higher in Q4, lower in Q1
Step 5: Configure Planning Groups
Multi-Skill Planning:
├─ Planning Group 1: Voice Support (60% of volume)
├─ Planning Group 2: Email Support (40% of volume)
├─ Planning Group 3: Chat (optional blended group)
└─ Staffing Groups: Can map multiple skills to handle
Step 6: Review Calculations
System Calculates:
├─ Monthly staffing requirements
├─ Hiring needs accounting for attrition
├─ Training schedule and capacity
├─ Budget impact
├─ FTE projections
├─ Multi-skill distribution
└─ Over/under-staffing risks
Step 7: Scenario Analysis
Create What-If Scenarios:
├─ Copy existing plan
├─ Adjust variables:
│ ├─ Modify volume forecast (+/- %)
│ ├─ Adjust SL targets
│ ├─ Change attrition assumptions
│ └─ Update shrinkage rates
├─ Compare scenarios
└─ Select recommended plan
Real-World Examples
Example 1: Growth Planning (30% Growth Over 12 Months)
Current State (Jan 2026):
├─ Headcount: 100 agents
├─ Daily Volume: 5,000 calls
├─ SL: 80%
├─ Annual Attrition: 15%
Growth Forecast:
├─ Q1: +5% volume (5,250 calls)
├─ Q2: +10% volume (5,500 calls)
├─ Q3: +20% volume (6,000 calls)
├─ Q4: +30% volume (6,500 calls)
Capacity Plan Calculation:
Month 1 (Jan):
├─ Volume: 5,000 calls/day
├─ Staffing needed: 75 (including 30% shrinkage)
├─ Current staff: 100
├─ Status: Over-staffed (+25)
Month 3 (Mar):
├─ Volume: 5,250 calls/day (+5%)
├─ Staffing needed: 79
├─ Attrition: 1.25 agents/month = 3.75 to date
├─ Current staff: 96
├─ Status: Over-staffed, but shrinking
Month 6 (Jun):
├─ Volume: 5,500 calls/day (+10%)
├─ Staffing needed: 83
├─ Attrition YTD: 7.5 agents
├─ Current staff: 92
├─ Status: At capacity
Month 12 (Dec):
├─ Volume: 6,500 calls/day (+30%)
├─ Staffing needed: 98
├─ Attrition YTD: 15 agents
├─ Total to hire: (98 - 100) + 15 = +13 agents
├─ Current staff with hires: 113
└─ Status: Meeting demand
Hiring Plan:
├─ Month 1-2: No hiring (use excess)
├─ Month 3-4: Begin recruiting (start with 2-3/month)
├─ Month 5-8: Accelerate hiring (5/month)
├─ Month 9-12: Intensive hiring (4/month)
├─ Total new hires: 28 agents
├─ Training cohorts: 4 groups of 7 agents
├─ Training timeline: 2-week program per cohort
Budget Impact:
├─ Current salary cost: $4.8M/year (100 × $48k)
├─ Additional 13 agents: +$624K/year
├─ Training cost: 28 × $2,000 = $56K
├─ Equipment/setup: 28 × $500 = $14K
└─ Total additional cost: ~$694K over 12 months
Example 2: Scenario Planning (High vs Low Growth)
Base Scenario: 15% Growth
├─ Jan: 5,000 calls/day
├─ Dec: 5,750 calls/day
├─ Staffing Jan: 75 agents
├─ Staffing Dec: 87 agents
├─ Hiring needed: 15 agents (net of attrition)
└─ Annual cost increase: $720K
Aggressive Scenario: 25% Growth
├─ Jan: 5,000 calls/day
├─ Dec: 6,250 calls/day
├─ Staffing Jan: 75 agents
├─ Staffing Dec: 94 agents
├─ Hiring needed: 22 agents (net of attrition)
└─ Annual cost increase: $1,056K
Conservative Scenario: 5% Growth
├─ Jan: 5,000 calls/day
├─ Dec: 5,250 calls/day
├─ Staffing Jan: 75 agents
├─ Staffing Dec: 79 agents
├─ Hiring needed: 8 agents (net of attrition)
└─ Annual cost increase: $384K
Comparison:
├─ Cost Range: $384K to $1,056K
├─ Headcount Range: 8 to 22 new hires
├─ Timing Impact: Early hires for high growth, delayed for conservative
└─ Recommendation: Plan for base case, stay flexible for scenarios
Example 3: Multi-Skill Planning
Scenario: Voice + Email Blended Team
Planning Group Distribution:
├─ Voice Support: 60% of workload
├─ Email Support: 40% of workload
└─ Single agent team handling both
Staffing Calculation:
Voice Staffing:
├─ Volume: 3,000 calls/day
├─ AHT: 300 seconds
├─ Base: 45 agents (with shrinkage)
Email Staffing:
├─ Volume: 2,000 emails/day
├─ AHT: 600 seconds
├─ Base: 30 agents (with shrinkage)
Blended Approach (Single Planning Group):
├─ Combined workload: 45 + 30 = 75 agent-hours
├─ Blended team: 60 agents (20% efficiency gain)
├─ Staffing needed: 60 agents (vs 75 separate)
├─ Savings: 15 agents / $720K annually
Requirements:
├─ All 60 agents trained in voice
├─ All 60 agents trained in email
├─ Ability to switch between during shift
├─ Proper activity coding for tracking
├─ Balanced workload distribution
└─ Adequate systems for both channels
Benefits:
├─ Cost savings: 20% staffing reduction
├─ Flexibility: Can shift agents to high-demand channel
├─ Agent satisfaction: Work variety
├─ Efficiency: Prevents over-staffing one channel
└─ Resilience: Handle channel imbalances
Best Practices
Forecasting Accuracy
- Use Historical Data - ABM requires 90+ days minimum
- Account for Seasonality - Q4 peaks, Q1 valleys typical
- Plan for Growth - Include business growth plans
- Conservative Approach - Better to over-hire than under-staff
- Ongoing Refinement - Adjust monthly based on actuals
- Scenario Planning - Model multiple growth scenarios
Hiring & Training
- Lead Time - Start recruiting 3-6 months before need
- Batch Training - Group new hires into cohorts
- Ramp-Up Plan - Account for 2-4 week productivity ramp
- Retention Focus - Lower attrition through engagement
- Budget Planning - Include hiring and training costs
- Skill Planning - Ensure multi-skill coverage
Staffing Decisions
- Monitor Actuals - Track actual vs planned monthly
- Adjust Early - Don't wait for crisis to hire
- Communicate - Keep HR and leadership informed
- Flexibility - Plan for contingencies
- Cost Control - Balance service level with cost
- Continuous Improvement - Review and refine quarterly
Interview Cheat Sheet
| Question | Answer |
|---|---|
| What's capacity planning? | Long-range (2-year) workforce staffing forecasts |
| Why capacity planning? | Project hiring needs months in advance |
| Key inputs? | Volume forecast, SL goals, AHT, shrinkage, attrition |
| What's shrinkage? | % unavailable time (breaks, meetings, training ~30%) |
| What's attrition? | Employee turnover rate (typical 10-20% annually) |
| How calculate staffing? | (Volume × AHT) / Available Hrs × (1 / (1 - Shrinkage)) |
| Planning horizon? | Up to 2 years forward |
| FTE? | Full-time equivalent (one agent = 1 FTE) |
| Multi-skill planning? | Plan for agents handling multiple channels |
| What-if scenarios? | Model high/low growth alternatives |
| Training ramp-up? | New agents reach 100% productivity over 2-4 weeks |
| Hiring timeline? | Start recruiting 3-6 months before need |
| Cost calculation? | Salary + benefits + training + equipment |
| Over-staffing issue? | Wasted labor cost, low occupancy |
| Under-staffing issue? | Service level failure, agent burnout |
Key Takeaways
- Strategic Planning - Look ahead 2 years for staffing
- Growth Alignment - Match hiring to business growth
- Turnover Factor - Account for normal attrition rates
- Shrinkage Modeling - Realistic availability calculations
- FTE Tracking - Monitor full-time equivalent staffing
- Scenario Flexibility - Plan for multiple growth paths
- Lead Time - Start recruiting before you need agents
- Cost Planning - Budget hiring and training expenses
- Multi-Skill - Plan for blended team capabilities
- Continuous Refinement - Adjust monthly based on actuals
Additional Resources
Official Documentation
- Capacity Plans: help.mypurecloud.com/articles/capacity-plans-overview/
- Planning: help.genesys.cloud/articles/plan-workforce-management/
- Staffing: help.genesys.cloud/articles/about-workforce-management/
Support & Training
- Genesys University: genesys.com/training
- Community Forums: https://community.genesys.com
- Technical Support: https://support.genesys.com
Document Version Info
Last Updated: March 2026
Validated: Current with March 2026 release
Version: 1.0
Agent Self-Service
Genesys WFM Agent Self-Service Documentation
Study Notes
| Topic | Description |
|---|---|
| Agent Portal | Web-based access to schedules, time-off, trades |
| Mobile App | iOS/Android for on-the-go schedule management |
| Desktop Features | View schedules, request time-off, trade shifts |
| Mobile Features | Push notifications, offline access, touch-friendly |
| Schedule View | Calendar and detailed views of shifts |
| Preferences | Availability, shift preferences, communication settings |
| Reporting | Personal adherence, performance history |
| Flexibility | Agent control over schedules within policy |
Navigation
Agent Portal: Agent Self-Service URL (desktop) Mobile App: Genesys Tempo (iOS/Android)
Agent Self-Service Overview
Agent Self-Service empowers employees to manage their work schedules and make work-life balance decisions within company policies. Available on desktop web portal and mobile apps (iOS/Android), self-service reduces administrative burden on supervisors while giving agents more control over their schedules.
Agent Self-Service functions:
- View current and future schedules
- Request time-off with automatic approvals
- Propose and accept shift trades
- Set work preferences and availability
- Submit adherence explanations
- Track personal performance metrics
- Manage personal settings and contact info
- Receive schedule notifications
Self-Service Benefits
For Agents:
├─ Anytime access (24/7 from home/mobile)
├─ Flexibility to trade shifts easily
├─ Control over scheduling preferences
├─ Transparency in time-off balances
├─ Fast approvals (often automatic)
├─ Mobile convenience
├─ Peace of mind with visibility
└─ Reduced interactions with supervisor
For Supervisors:
├─ Reduced administrative work
├─ Faster request processing
├─ Better visibility of changes
├─ Fewer phone inquiries
├─ More time for coaching
├─ Accurate preference tracking
├─ Better agent satisfaction
└─ Improved team morale
For Organization:
├─ Improved agent satisfaction
├─ Better work-life balance perception
├─ Lower turnover risk
├─ Operational efficiency
├─ Cost savings (less admin time)
├─ Data accuracy
├─ Competitive advantage in hiring
└─ Agility in staffing changes
Desktop Web Portal
The desktop Agent Self-Service Portal is accessed through a web browser, providing full functionality on any computer with internet access.
Home Dashboard
Agent Portal Home:
Welcome Header:
├─ Agent Name: John Smith
├─ Site: New York - Support Team
├─ Next Shift: Tuesday 09:00-17:00 (2 days away)
└─ Status: On Schedule
Quick Actions (Buttons):
├─ View Full Schedule
├─ Request Time Off
├─ Find Shift Trades
├─ See My Performance
├─ Manage Preferences
└─ Contact Manager
Next Shift Details:
├─ Start Time: 09:00
├─ End Time: 17:00
├─ Activity: Support Voice
├─ Location: Manhattan Office
├─ Duration: 8 hours
└─ Status: Confirmed
Recent Notifications:
├─ "Schedule updated for next week"
├─ "Time-off request approved"
├─ "John accepted your trade request"
└─ "Team meeting rescheduled"
Schedule View Features
My Schedule - Calendar View:
Calendar Display:
├─ 4-week view (customizable)
├─ Color-coded by activity:
│ ├─ Blue: Voice Support
│ ├─ Green: Email Support
│ ├─ Yellow: Training
│ ├─ Gray: Time Off
│ ├─ Red: Holiday
│ └─ White: Day Off
├─ Click date for details
├─ Drag to copy/move
└─ Export to calendar app
Shift Details (Click Any Shift):
├─ Date: Tuesday, March 18, 2026
├─ Start: 09:00 | End: 17:00
├─ Duration: 8 hours 0 minutes
├─ Activity: Support Voice
├─ Queue: Support_Queue_001
├─ Break 1: 10:30-10:45 (15 min)
├─ Lunch: 12:00-13:00 (1 hour)
├─ Break 2: 14:30-14:45 (15 min)
├─ Location: Office
├─ Manager: Jane Doe
└─ Notes: Regular schedule
Historical Schedule:
├─ View past weeks (up to 12 months)
├─ Review actual vs scheduled
├─ Track adherence history
└─ Understand patterns
Future Schedule:
├─ View up to 26 weeks forward
├─ Plan ahead for preferences
├─ Identify conflicts early
├─ See blackout dates
└─ Plan time-off accordingly
Time-Off Management
Request Time Off:
Simple Workflow:
1. Click "Request Time Off"
2. Select Type:
├─ Vacation
├─ Sick Leave
├─ Personal Time
├─ Unpaid
└─ Other
3. Select Dates (Calendar Picker):
├─ Click start date
├─ Click end date
├─ See selected dates highlighted
└─ Show conflicting requests
4. Add Notes (Optional):
└─ "Family visit" or "Medical appointment"
5. Review & Submit:
├─ Confirm dates
├─ See balance impact
├─ Check approval likelihood
└─ Submit request
View Status:
├─ Pending Requests:
│ ├─ March 20-21 (Vacation) - PENDING
│ ├─ Submitted: 3 days ago
│ ├─ Required days notice: Met (14 days)
│ └─ Status: Awaiting manager review
│
├─ Approved:
│ ├─ April 5-10 (Vacation) - APPROVED
│ ├─ June 15 (Personal) - APPROVED
│ └─ July 4 (Holiday) - AUTOMATIC
│
└─ Rejected:
├─ None recorded
└─ No rejections in history
View Balances:
├─ Vacation:
│ ├─ Total Available: 20 days
│ ├─ Used YTD: 5 days
│ ├─ Pending Requests: 2 days
│ └─ Remaining: 13 days
│
├─ Sick Leave:
│ ├─ Total Available: 10 days
│ ├─ Used YTD: 2 days
│ ├─ Pending Requests: 0 days
│ └─ Remaining: 8 days
│
└─ Personal Time:
├─ Total Available: 5 days
├─ Used YTD: 1 day
├─ Pending Requests: 0 days
└─ Remaining: 4 days
Shift Trading
Find Shift Trades:
Search Interface:
├─ Start Date Picker
├─ End Date Picker
├─ Activity Filter (Optional):
│ ├─ All Activities
│ ├─ Voice Support Only
│ └─ Email Support Only
├─ Time Filter (Optional):
│ ├─ Morning (before 12:00)
│ ├─ Afternoon (12:00-17:00)
│ └─ Evening (after 17:00)
└─ Search Button
Results Display:
├─ Agent 1: Thomas
│ ├─ Shift: Thursday 10:00-18:00 (Support Voice)
│ ├─ Skills Match: Yes ✓
│ ├─ Propose Trade: Button
│ └─ View Profile: Link
│
├─ Agent 2: Maria
│ ├─ Shift: Friday 09:00-17:00 (Support Voice)
│ ├─ Skills Match: Yes ✓
│ ├─ Propose Trade: Button
│ └─ View Profile: Link
│
└─ Agent 3: David
├─ Shift: Wednesday 14:00-22:00 (Email Support)
├─ Skills Match: Partial ⚠
├─ Propose Trade: Button (with note)
└─ View Profile: Link
Propose Trade:
1. Select agent from results
2. Confirm Details:
├─ My Shift: Friday 09:00-17:00
├─ Their Shift: Thursday 10:00-18:00
├─ Skills Compatibility: Verified ✓
└─ Activity Match: Voice to Voice ✓
3. Add Message (Optional):
└─ "Really appreciate if you can help!"
4. Send Trade Request
Track Pending Trades:
├─ Request Sent:
│ ├─ To: Thomas (Friday trade)
│ ├─ Sent: 2 hours ago
│ ├─ Status: AWAITING RESPONSE
│ └─ Cancel Request: Option
│
├─ Requests Received:
│ ├─ From: Sarah (Tuesday trade)
│ ├─ Received: 1 hour ago
│ ├─ Shift Details: Mon 09-17 for Wed 14-22
│ ├─ Accept: Button
│ └─ Decline: Button
│
└─ Completed Trades:
├─ Traded with Jason (March 10)
├─ Traded with Lisa (February 28)
└─ View History: Link
Personal Preferences
Manage Preferences:
Basic Information:
├─ Name: John Smith (Read-only)
├─ Email: john.smith@company.com (Editable)
├─ Phone: 212-555-0123 (Editable)
├─ Site: New York Support (Read-only)
├─ Team: Support Tier 1 (Read-only)
├─ Manager: Jane Doe (Read-only)
└─ Start Date: January 15, 2023 (Read-only)
Availability Windows:
├─ Preferred Start Time: 09:00
├─ Preferred End Time: 17:00
├─ Can Start Earlier: 08:00 (Willing)
├─ Can End Later: 18:00 (Willing)
├─ Days Preferred: Mon-Fri
├─ Weekends: Not preferred
└─ Save Preferences: Button
Scheduling Preferences:
├─ Split Shifts: Not preferred
├─ Consecutive Days Worked: Max 5 (preferred)
├─ Days Off Preference: Mondays (if possible)
├─ Break Timing: Before 11:00 preferred
├─ Lunch Timing: 12:00-13:00 preferred
├─ Flexibility: Moderate (willing to adjust)
└─ Save Preferences: Button
Work Preferences:
├─ Preferred Activity: Voice Support
├─ Willing to Blend: Yes (40% email)
├─ Open to New Activities: Yes
├─ Overtime Interest: Some (up to 5 hrs/week)
├─ Schedule Variation: Prefer consistency
└─ Save Preferences: Button
Communication Preferences:
├─ Schedule Updates: Email ✓ SMS ☐ App ☐
├─ Emergency Notices: Email ✓ SMS ✓ Phone ✓
├─ Shift Changes: Email ✓ SMS ✓
├─ Manager Messages: Email ✓ App ✓
├─ Preferred Language: English
└─ Save Preferences: Button
Performance & Reporting
My Performance:
Adherence:
├─ Current Week Adherence: 94%
│ └─ Status: ✓ Excellent (>90%)
├─ Last Week Adherence: 91%
│ └─ Status: ✓ Good
├─ Monthly Average: 92%
│ └─ Trend: Improving ↑
├─ YTD Average: 91%
│ └─ Status: On Target
└─ View Detailed Report: Link
Quality Metrics:
├─ Customer Satisfaction: 4.2/5.0 (if tracked)
├─ Call Quality Score: 87/100 (if tracked)
├─ First Contact Resolution: 92% (if tracked)
├─ Email Response Quality: Good (if tracked)
└─ View Detailed Report: Link
Historical Data:
├─ Adherence by Week (chart)
├─ Adherence by Day (breakdown)
├─ Attendance Record (details)
├─ Coaching Feedback (recent)
└─ Export to Excel: Option
Submit Adherence Explanation:
├─ If below threshold (e.g., <85%):
│ ├─ Day: Monday
│ ├─ Reason: Training session (unplanned)
│ ├─ Duration: 1 hour 30 min
│ ├─ Explanation: "Emergency product training"
│ └─ Submit: Button
└─ Manager notified of explanation
Mobile App (iOS/Android)
The mobile Genesys Tempo app provides schedule management on-the-go with push notifications and offline access.
Mobile Features
Mobile Home Screen:
Next Shift Widget:
├─ Date & Day: Tuesday, March 18
├─ Time: 09:00 - 17:00
├─ Countdown: "In 2 days"
├─ Activity: Support Voice
└─ Tap to Expand
Quick Action Buttons:
├─ 📅 View Schedule (Calendar)
├─ ⏰ Request Time Off
├─ 🔄 Find Trades
├─ 📊 My Performance
├─ ⚙️ Preferences
└─ 💬 Message Manager
Recent Notifications:
├─ 🟢 Schedule Updated (2 hrs ago)
├─ ✅ Time-off Approved (5 hrs ago)
├─ 🔄 Trade Request from Sarah (1 hr ago)
└─ 📅 Meeting Scheduled (1 day ago)
Swipe Navigation:
├─ ← Left: Previous week/section
└─ Right →: Next week/section
Schedule View (Mobile)
Mobile Schedule - Week View:
Compact Calendar:
├─ MON | TUE | WED | THU | FRI | SAT | SUN
├─ [Off] [9-5] [9-5] [9-5] [9-5] [Off] [Off]
│ 💙 💙 💙 💙
│ (Color indicates activity)
│
├─ Tap date for full shift details
└─ Swipe to change week
Shift Detail View (Tap Shift):
├─ Tuesday, March 18
├─ 09:00 - 17:00 (8 hours)
├─ Support Voice
├─ Break: 10:30-10:45
├─ Lunch: 12:00-13:00
├─ Location: NYC Office
├─ Map/Directions: Button (if location enabled)
└─ Options:
├─ 🔄 Trade This Shift
├─ 🕐 Request Time Off
└─ 📞 Contact Manager
Day/Week/Month Toggle:
├─ 📅 Day View
├─ 📆 Week View (default)
├─ 📊 Month View
└─ Switch Views: Swipe
Offline Capability:
├─ Download Schedule: Auto-sync
├─ View While Offline: Yes
├─ Add Local Notes: Yes
├─ Sync When Online: Auto
└─ Notification: "Offline Mode"
Time-Off on Mobile
Request Time-Off Flow:
1. Tap "Request Time Off"
2. Select Type:
├─ Vacation
├─ Sick Leave
├─ Personal Time
├─ Unpaid
└─ Other
3. Pick Dates (Calendar Picker):
├─ Tap start date
├─ Tap end date
├─ Dates highlight in blue
├─ Conflicts shown in red
└─ Next >
4. Review & Confirm:
├─ "March 20-21 (2 days)"
├─ "Vacation"
├─ "Balance: 13 remaining"
├─ "Likely: Auto-Approved ✓"
└─ Submit >
5. Confirmation:
├─ ✅ "Request Submitted"
├─ "Status: PENDING"
├─ "Check status in Profile"
└─ Back to Home
Notification When Approved:
├─ Push: "Your time-off approved!"
├─ Show Status: APPROVED
├─ Dates Added to Calendar
└─ Sync with phone calendar (option)
Mobile Notifications
Push Notification Types:
Schedule Changes:
├─ "Your schedule for next week updated"
├─ "New shift added: Friday 2-10pm"
├─ "Shift cancelled: Thursday"
└─ Tap: Shows schedule change
Time-Off Status:
├─ "Your vacation request approved"
├─ "Time-off request pending manager review"
├─ "Time-off request denied - resubmit?"
└─ Tap: Shows status and details
Shift Trade Activity:
├─ "Thomas accepted your trade!"
├─ "Sarah wants to trade with you"
├─ "Your trade request expired"
└─ Tap: Shows trade details
Manager Messages:
├─ "Message from Jane: 'Great work!'"
├─ "Schedule preference updated"
├─ "Team announcement posted"
└─ Tap: Shows message/details
General:
├─ "Payroll posted"
├─ "Benefits reminder"
├─ "Training available"
└─ Tap: Shows details
Notification Settings:
├─ Toggle each notification type
├─ Quiet Hours: (e.g., 22:00-08:00)
├─ Sound: On/Off
├─ Vibration: On/Off
├─ Do Not Disturb: Honor system
└─ Save Settings: Button
Mobile Preferences
Settings (Gear Icon):
Account:
├─ Name: John Smith
├─ Email: john.smith@... (Editable)
├─ Phone: (Editable)
├─ Password: Change (Button)
├─ Log Out: Button
└─ About App: Version info
Notifications:
├─ Schedule Updates: ✓ ON
├─ Time-Off Status: ✓ ON
├─ Trade Requests: ✓ ON
├─ Messages: ✓ ON
├─ Quiet Hours: 22:00-08:00
├─ Sound: ✓ ON
└─ Vibration: ✓ ON
Display:
├─ Dark Mode: ☐ OFF (toggle)
├─ Language: English (dropdown)
├─ Time Format: 24-hour (toggle)
├─ Calendar View: Week (default)
└─ Font Size: Normal (slider)
Preferences:
├─ Sync Schedule: Every 1 hour
├─ Offline Storage: Enabled
├─ Calendar Export: iCal/Outlook
├─ Contact Manager: Phone/Email
└─ Save Preferences: Button
Privacy:
├─ Location Services: (Ask)
├─ Camera Access: Disabled
├─ Contacts Access: Disabled
├─ Calendar Access: Enabled
├─ Privacy Policy: Link
└─ Terms of Service: Link
Best Practices
Portal Usage
- Check Regularly - Review schedule weekly
- Plan Ahead - Request time-off early (2+ weeks)
- Proper Trades - Ensure skill compatibility
- Clear Communication - Add notes on trade requests
- Respect Policies - Follow company rules
- Use Preferences - Set accurate preferences for fairness
Mobile App
- Push Notifications - Keep enabled for updates
- Download Schedule - Offline access for reliability
- Timely Response - Answer trade requests quickly
- Update Contact Info - Keep manager in touch
- Feedback - Report issues to IT
- Security - Don't share login credentials
Agent Satisfaction
- Empower Agents - Use system for control
- Transparency - Show time-off balances clearly
- Fast Approvals - Minimize manager review delays
- Clear Policies - Communicate rules openly
- Support - Provide help desk for issues
- Continuous Improvement - Listen to feedback
Interview Cheat Sheet
| Question | Answer |
|---|---|
| What's agent self-service? | Web/mobile portal for agents to manage schedules |
| Desktop vs mobile? | Desktop full features, mobile on-the-go convenience |
| Can agents see schedules? | Yes, up to 26 weeks forward |
| Request time-off? | Yes, desktop/mobile with auto-approval for qualifiers |
| Shift trading? | Yes, propose trades with other agents |
| Auto-approval? | Yes, if request meets criteria (balance, notice, staffing) |
| Mobile app name? | Genesys Tempo (iOS/Android) |
| Offline access? | Yes, download schedule to device |
| Push notifications? | Yes, optional for all major events |
| Trade approval? | Auto-approved if rules met, else supervisor review |
| Can set preferences? | Yes, scheduling and communication preferences |
| View performance? | Yes, adherence, quality, history |
| Contact manager? | Yes, message/chat from portal |
| Schedule export? | Yes, to Outlook/Google Calendar |
Key Takeaways
- Anytime Access - 24/7 portal on desktop and mobile
- Agent Empowerment - Control over schedules and preferences
- Work-Life Balance - Easy time-off requests and trades
- Automation - Auto-approvals reduce admin burden
- Transparency - Clear visibility of balances and requests
- Mobile First - Genesys Tempo app for on-the-go
- Offline Support - Access schedule without internet
- Notifications - Push alerts for all important updates
- Performance Visibility - Track own adherence and metrics
- Supervisor Relief - Reduces administrative workload significantly
Additional Resources
Official Documentation
- Agent Self-Service: help.genesys.cloud/articles/workforce-management-for-agents/
- Genesys Tempo: help.genesys.cloud/articles/genesys-tempo-mobile-schedule-management/
- Portal Features: all.docs.genesys.com/PEC-WFM/Current/Agent/
Support & Training
- Genesys University: genesys.com/training
- Community Forums: https://community.genesys.com
- Technical Support: https://support.genesys.com
Document Version Info
Last Updated: March 2026
Validated: Current with March 2026 release
Version: 1.0
10. - AI Features
AI Overview & Licensing
Study Notes
| Topic | Description |
|---|---|
| Genesys AI | Suite of artificial intelligence capabilities integrated across PureCloud |
| Purpose | Enhance agent productivity, automate interactions, improve customer experience |
| Licensing Model | AI features available as add-on modules to Premium edition |
| Deployment | Cloud-native, no infrastructure required |
| Scope | Covers analytics, automation, agent assist, and autonomous agents |
Navigation
Admin → Organization Settings → Licensing → AI Modules OR Admin → Billing & Subscriptions → AI Products
Genesys AI Suite Overview
Genesys PureCloud AI is an integrated suite of artificial intelligence capabilities designed to enhance every aspect of contact center operations. From agent assistance to autonomous automation, AI is embedded throughout the platform.
Core AI Components
- Customer Insights - Advanced analytics and AI-powered quality management
- Agent Copilot - Real-time intelligent agent assistance
- Predictive Routing - AI-optimized contact-to-agent matching
- Virtual Agent Flows - Autonomous conversational AI agents
- Workforce Optimization - AI-driven forecasting and scheduling
- Interaction Analytics - Deep conversation analysis and insights
- Quality Management - AI-assisted quality evaluation
Key Benefits
- Increased Productivity - Agents handle more contacts with guidance
- Better Decisions - Data-driven insights inform strategy
- Cost Reduction - Automation reduces operational expenses
- Improved Quality - AI ensures consistency and compliance
- Enhanced Experience - Faster resolution and personalized service
- Risk Mitigation - Proactive compliance and fraud detection
AI Licensing Model
Premium Edition Requirement
Base: Premium Edition (Required)
↓
+ AI Add-on Modules (Optional)
├── Customer Insights Module
├── Workforce Optimization Module
├── Virtual Agent Module
└── Contact Center Intelligence Module
↓
= Complete AI-Powered Solution
Licensing Structure
| Component | Type | Cost Model | Required |
|---|---|---|---|
| Premium Edition | Base license | Per-user monthly | Yes |
| Customer Insights | Add-on module | Per-user or pool | No (recommended) |
| Workforce Optimization | Add-on module | Organizational | No |
| Virtual Agent | Add-on module | Per-agent license | No |
| Advanced Analytics | Add-on module | Organizational | No |
Study Notes - AI Capabilities by Module
| Module | Primary Capability | Sub-features | License Type |
|---|---|---|---|
| Customer Insights | Interaction analytics and quality management | Sentiment analysis, topic detection, quality evaluation, agent coaching | Per-user |
| Workforce Optimization | Forecasting, scheduling, and performance management | Demand forecasting, schedule optimization, workforce analytics, productivity tracking | Organizational |
| Agent Copilot | Real-time agent assistance | Knowledge recommendations, script guidance, sentiment alerts, next-action suggestions | Per-user |
| Virtual Agent | Autonomous conversation handling | Intent recognition, multi-turn dialogue, escalation logic, omnichannel support | Per-agent |
| Predictive Routing | Intelligent contact routing | Skill matching, availability prediction, performance prediction, load balancing | Included in WFO |
| Contact Center Intelligence | Deep conversation insights | Speech analytics, text analytics, compliance monitoring, competitive intelligence | Organizational |
| Advanced Analytics | Custom reporting and dashboards | Business analytics, predictive metrics, custom visualizations | Organizational |
AI Capabilities by Use Case
For Agents
Agent Experience Enhancements:
├── Agent Copilot
│ ├── Real-time knowledge suggestions
│ ├── Script guidance
│ ├── Sentiment monitoring
│ └── Next-action recommendations
├── Predictive Routing
│ ├── Optimal contact matching
│ ├── Skill-based distribution
│ └── Workload balancing
└── Performance Insights
├── Real-time coaching
├── Quality feedback
└── Training recommendations
For Supervisors
Supervisor Experience Enhancements:
├── Workforce Optimization
│ ├── Real-time dashboards
│ ├── Agent performance metrics
│ ├── Coaching opportunities
│ └── Compliance alerts
├── Customer Insights
│ ├── Quality management
│ ├── Interaction analytics
│ ├── Team performance trends
│ └── Automated evaluations
└── Advanced Analytics
├── Custom reports
├── Predictive metrics
├── Trend analysis
└── Business intelligence
For Customers
Customer Experience Enhancements:
├── Faster Resolution
│ ├── Agent Copilot speeds answers
│ ├── Virtual agents 24/7 availability
│ └── Predictive routing reduces wait
├── Better Experience
│ ├── Skilled agent matching
│ ├── Personalized service
│ ├── Appropriate escalation
│ └── Consistent quality
└── Self-Service Options
├── Virtual agent automation
├── Knowledge base access
├── Portal access
└── Omnichannel support
For Managers/Executives
Management Experience Enhancements:
├── Business Intelligence
│ ├── Advanced analytics dashboards
│ ├── Custom reporting
│ ├── Predictive forecasting
│ └── Trend analysis
├── Strategic Planning
│ ├── Capacity forecasting
│ ├── ROI measurement
│ ├── Competitive intelligence
│ └── Market insights
└── Performance Optimization
├── Cost analysis
├── Efficiency metrics
├── Quality improvement
└── Customer satisfaction tracking
Implementation Guide
Step 1: Assessment & Planning
- Audit current contact center operations
- Identify pain points and improvement opportunities
- Document baseline metrics (AHT, FCR, CSAT, costs)
- Assess readiness for AI adoption
- Define success metrics and KPIs
- Estimate ROI for each module
- Plan implementation timeline
Step 2: Module Selection
- Evaluate all available AI modules
- Prioritize based on business needs
- Assess agent and supervisor readiness
- Determine implementation sequence
- Calculate total cost of ownership
- Secure budget approval
- Obtain licenses from Genesys
Step 3: Foundation Setup
Step 4: Module-Specific Configuration
- Customer Insights: Configure quality evaluation rules
- Workforce Optimization: Set up forecasting models
- Agent Copilot: Populate knowledge base
- Virtual Agent: Design conversation flows
- Predictive Routing: Define skills and proficiency levels
- Advanced Analytics: Create custom dashboards
- Contact Center Intelligence: Enable analytics engines
Step 5: Training & Change Management
- Develop training curriculum
- Train supervisors first
- Train agents on their tools
- Provide ongoing support
- Gather feedback early
- Address concerns and resistance
- Celebrate early wins
Step 6: Phased Rollout
- Start with single department/queue
- Monitor metrics closely
- Gather user feedback
- Optimize based on learnings
- Expand to additional queues
- Scale across entire organization
- Continuous improvement process
How to Implement
| Phase | Description | Timeline | Modules |
|---|---|---|---|
| Planning | Assess needs, select modules, plan approach | Week 1-2 | All |
| Foundation | Set up licenses, integrations, governance | Week 2-4 | All |
| Configuration | Configure each module's settings | Week 4-6 | Module-specific |
| Training | Educate teams on features and benefits | Week 6-7 | All |
| Pilot | Deploy to test group, monitor metrics | Week 7-8 | All |
| Rollout | Expand to production, scale up | Week 8-10 | All |
| Optimization | Monitor, tune, improve continuously | Week 10+ | All |
Genesys AI Platform Architecture
Genesys PureCloud AI Platform
┌─────────────────────────────────────────────────┐
│ Core PureCloud Platform │
│ (Voice, Chat, Email, Social, Video) │
└──────────────┬──────────────────────────────────┘
│
┌───────┴────────┐
│ │
┌──────▼──────┐ ┌──────▼──────────┐
│ Interaction │ │ Agent/Customer │
│ Processing │ │ Data │
└──────┬──────┘ └────────┬────────┘
│ │
└──────────┬───────┘
│
┌─────────▼──────────────┐
│ AI/ML Engines │
│ │
├─ NLP & Intent Engine │
├─ Sentiment Analysis │
├─ Topic Detection │
├─ Entity Recognition │
├─ Predictive Models │
└─ Recommendation Engine │
│
┌────┴─────────────────────────────────────┐
│ AI Module Applications │
│ │
├─ Customer Insights │
│ ├─ Interaction Analytics │
│ ├─ Quality Evaluation │
│ ├─ Compliance Monitoring │
│ └─ Coaching Recommendations │
│ │
├─ Agent Copilot │
│ ├─ Knowledge Recommendations │
│ ├─ Script Guidance │
│ ├─ Sentiment Alerts │
│ └─ Next Action Suggestions │
│ │
├─ Predictive Routing │
│ ├─ Skill Matching │
│ ├─ Load Balancing │
│ ├─ Performance Prediction │
│ └─ Availability Analysis │
│ │
├─ Virtual Agent Flows │
│ ├─ Conversation Management │
│ ├─ Intent Recognition │
│ ├─ Escalation Logic │
│ └─ Multi-turn Dialogue │
│ │
├─ Workforce Optimization │
│ ├─ Forecasting │
│ ├─ Scheduling │
│ ├─ Performance Analytics │
│ └─ Productivity Tracking │
│ │
├─ Contact Center Intelligence │
│ ├─ Speech Analytics │
│ ├─ Text Analytics │
│ ├─ Conversation Mining │
│ └─ Competitive Intelligence │
│ │
└─ Advanced Analytics │
├─ Custom Dashboards │
├─ Predictive Metrics │
├─ Business Intelligence │
└─ Data Visualization │
│
└─────────────────────────────────────────────┘
AI Modules Detailed Comparison
Customer Insights Module
Primary Use: Quality Management & Interaction Analytics
Features:
├── Interaction Recording & Analysis
├── Sentiment Detection (Real-time & historical)
├── Topic Detection (Automatic issue categorization)
├── Speech Analytics (Word/phrase analysis)
├── Quality Evaluation (AI-assisted scoring)
├── Compliance Monitoring (Regulation checking)
├── Agent Coaching (Targeted improvements)
└── Custom Metrics (Business-specific analysis)
Pricing: Per-user monthly ($XX-XXX depending on tier)
ROI: 10-20% quality improvement, reduced audit burden
Best For: Quality-focused, compliance-heavy organizations
Typical Users: QA teams, supervisors, compliance officers
Workforce Optimization Module
Primary Use: Forecasting, Scheduling, Performance Analytics
Features:
├── Demand Forecasting (Historical + predictive)
├── Schedule Optimization (Auto-scheduling)
├── Workforce Analytics (Performance metrics)
├── Productivity Tracking (Real-time dashboards)
├── Absence & Leave Management
├── Skills-based Workforce Planning
├── Performance Management
└── Adherence Monitoring
Pricing: Organizational license (negotiated)
ROI: 5-15% labor cost reduction, improved efficiency
Best For: Large organizations, complex scheduling needs
Typical Users: Workforce planners, managers, analysts
Agent Copilot Module
Primary Use: Real-Time Agent Assistance
Features:
├── Knowledge Recommendations
├── Script Guidance
├── Sentiment Monitoring
├── Next Action Suggestions
├── Real-time Coaching
├── Performance Insights
├── Learning Reinforcement
└── Omnichannel Support
Pricing: Per-user monthly ($XX-XXX depending on tier)
ROI: 10-30% AHT reduction, 15-25% FCR improvement
Best For: Agent productivity, customer satisfaction
Typical Users: All agents, supervisors
Virtual Agent Module
Primary Use: Autonomous Customer Interaction Handling
Features:
├── Conversational AI
├── Intent Recognition
├── Multi-turn Dialogue
├── Transaction Processing
├── Escalation Logic
├── 24/7 Availability
├── Omnichannel Support
└── Sentiment Awareness
Pricing: Per-virtual agent (negotiated)
ROI: 60-80% cost reduction for automated interactions
Best For: High-volume routine interactions
Typical Users: Customers, supervisors (monitoring)
Advanced Analytics Module
Primary Use: Business Intelligence & Custom Reporting
Features:
├── Custom Dashboard Creation
├── Predictive Analytics
├── Trend Analysis
├── Business Intelligence
├── Data Visualization
├── Scheduled Reports
├── Data Export
└── Integration APIs
Pricing: Organizational license (negotiated)
ROI: Better decision-making, strategic insights
Best For: Data-driven organizations, large enterprises
Typical Users: Managers, executives, analysts
AI Licensing Structure Comparison
Small Organization (50 agents)
Premium Edition: 50 users x $XX/month = $XXXX
Agent Copilot: 50 users x $XX/month = $XXXX
Customer Insights: 10 supervisors x $XX/month = $XXXX
Workforce Optimization: Organizational = $XXXX
Total Monthly: $XXXX
Cost per Agent: $XXX/month
ROI: 12-18 months through efficiency gains
Mid-Market (200 agents)
Premium Edition: 200 users x $XX/month = $XXXX
Agent Copilot: 200 users x $XX/month = $XXXX
Customer Insights: 50 supervisors x $XX/month = $XXXX
Workforce Optimization: Organizational = $XXXX
Virtual Agent: 5 agents x $XXXX/month = $XXXX
Advanced Analytics: Organizational = $XXXX
Total Monthly: $XXXX
Cost per Agent: $XXX/month
ROI: 6-12 months through automation + efficiency
Enterprise (1000+ agents)
Premium Edition: 1000 users x $XX/month = $XXXXX
Agent Copilot: 1000 users x $XX/month = $XXXXX
Customer Insights: 200 supervisors x $XX/month = $XXXXX
Workforce Optimization: Organizational = $XXXXX
Virtual Agent: 20 agents x $XXXX/month = $XXXXX
Contact Center Intelligence: Organizational = $XXXXX
Advanced Analytics: Organizational = $XXXXX
Total Monthly: $XXXXX
Cost per Agent: $XXX/month
ROI: 3-6 months through massive automation + efficiency
Implementation Roadmap
Phase 1: Foundation (Month 1-2)
Quick Wins:
├── Enable Predictive Routing
│ └─ Immediate improvement in routing efficiency
├── Enable Customer Insights
│ └─ Gain visibility into interaction quality
└── Activate Agent Copilot
└─ First-touch improvement in agent effectiveness
Expected Impact:
├── Routing efficiency: +10-15%
├── Agent confidence: +20-30%
├── FCR improvement: +5-10%
└── Cost per contact: -5-10%
Phase 2: Intelligence (Month 2-4)
Expansion:
├── Deploy Workforce Optimization
│ └─ Optimize scheduling and forecasting
├── Enhance Customer Insights
│ └─ Add compliance monitoring
└── Optimize Agent Copilot
└─ Improve knowledge base quality
Expected Impact:
├── Labor efficiency: +10-15%
├── Quality improvement: +15-20%
├── FCR improvement: +10-20%
└── CSAT improvement: +10-15%
Phase 3: Automation (Month 4-6)
Advanced:
├── Deploy Virtual Agent Flows
│ └─ Automate routine interactions
├── Activate Advanced Analytics
│ └─ Enable strategic decision-making
└── Integrate all modules
└─ Seamless intelligence platform
Expected Impact:
├── Automation rate: 50-70% of routine volume
├── Cost reduction: 30-50%
├── Customer satisfaction: +15-25%
└── Operational efficiency: +25-35%
Real-World Implementation Timeline
Week 1-2: Assessment & Planning
Day 1-3:
├─ Kick-off meeting
├─ Current state assessment
├─ Identify pain points
└─ Document baseline metrics
Day 4-10:
├─ Module evaluation
├─ ROI analysis
├─ Risk assessment
├─ Develop implementation plan
Day 11-14:
├─ Secure approvals
├─ License procurement
├─ Team assignments
└─ Detailed project plan
Week 3-4: Foundation Setup
Day 15-21:
├─ Activate Premium Edition
├─ Purchase AI modules
├─ License assignment
├─ Infrastructure setup
Day 22-28:
├─ Knowledge base creation
├─ Integration testing
├─ Security validation
└─ Documentation
Week 5-6: Configuration
Day 29-35:
├─ Customer Insights setup
├─ Quality rules configuration
├─ Analytics dashboards
└─ Coaching workflows
Day 36-42:
├─ Agent Copilot setup
├─ Knowledge population
├─ Sentiment analysis
└─ Relevance tuning
Week 7-8: Training & Pilot
Day 43-49:
├─ Supervisor training
├─ Agent training
├─ Pilot queue selection
└─ Monitoring setup
Day 50-56:
├─ Pilot deployment
├─ Daily monitoring
├─ Feedback collection
├─ Quick optimizations
└─ Success validation
Week 9-10: Rollout
Day 57-63:
├─ Production deployment
├─ Agent onboarding
├─ Supervisor monitoring
├─ Support availability
Day 64-70:
├─ Scale to all queues
├─ Monitor close for issues
├─ Gather feedback
└─ Celebrate successes
AI Features by Job Role
For Agents
| Feature | Module | Benefit |
|---|---|---|
| Real-time knowledge suggestions | Agent Copilot | Faster resolution, fewer transfers |
| Script guidance | Agent Copilot | Better quality, compliance adherence |
| Sentiment alerts | Agent Copilot | De-escalation, higher satisfaction |
| Optimal contact matching | Predictive Routing | Better skill match, faster resolution |
| Performance insights | Customer Insights | Learning and improvement |
| Interaction recording | Customer Insights | Quality and coaching |
For Supervisors
| Feature | Module | Benefit |
|---|---|---|
| Real-time agent dashboards | Workforce Optimization | Team visibility and coaching |
| Quality evaluation | Customer Insights | Objective performance assessment |
| Automated coaching | Customer Insights | Targeted development |
| Schedule optimization | Workforce Optimization | Better coverage, agent satisfaction |
| Compliance monitoring | Customer Insights | Risk mitigation |
| Performance trends | Advanced Analytics | Identify patterns and opportunities |
For Managers
| Feature | Module | Benefit |
|---|---|---|
| Demand forecasting | Workforce Optimization | Budget planning, capacity management |
| Cost analysis | Workforce Optimization | ROI tracking, budget optimization |
| Team performance analytics | Customer Insights | Performance visibility |
| Custom dashboards | Advanced Analytics | Strategic decision-making |
| Predictive insights | Advanced Analytics | Proactive management |
| Business intelligence | Advanced Analytics | Competitive advantage |
For Executives
| Feature | Module | Benefit |
|---|---|---|
| Revenue impact analysis | Advanced Analytics | Business value justification |
| Cost savings tracking | Workforce Optimization | ROI demonstration |
| Customer satisfaction trends | Customer Insights | Service quality visibility |
| Market intelligence | Contact Center Intelligence | Competitive positioning |
| Strategic dashboards | Advanced Analytics | Executive visibility |
| Predictive metrics | Advanced Analytics | Forward-looking planning |
Best Practices for AI Implementation
Governance & Management
- Clear ownership - Assign AI program owner and team
- Success metrics - Define measurable KPIs before implementation
- Change management - Plan for organizational change
- Training program - Invest in comprehensive user education
- Governance policies - Establish AI usage guidelines
- Regular reviews - Monthly assessment and optimization
Technical Implementation
- Phased approach - Start with one module, expand gradually
- Integration planning - Ensure backend system connectivity
- Data quality - Ensure clean, accurate data for AI models
- Security protocols - Implement proper access controls
- Audit trails - Enable logging for compliance and learning
- Monitoring - Set up dashboards for tracking performance
User Adoption
- Executive sponsorship - Strong leadership support
- Early adopters - Start with enthusiastic teams
- Success stories - Share wins to build confidence
- Continuous learning - Regular training and tips
- Feedback loops - Listen to user concerns
- Support availability - Easy access to help and troubleshooting
Continuous Improvement
- Daily monitoring - Track key metrics continuously
- Weekly reviews - Assess performance and issues
- Monthly optimization - Tune settings and rules
- Quarterly planning - Assess and plan enhancements
- Annual strategy - Review overall AI strategy and ROI
- Learning loop - Capture insights to improve AI models
Common Challenges & Solutions
| Challenge | Solution |
|---|---|
| Agents skeptical of AI | Demonstrate time-saving benefits, celebrate wins |
| Knowledge base quality | Establish content review process, regular updates |
| Integration complexity | Partner with Genesys professional services |
| High implementation cost | Show ROI, phased approach to spread costs |
| Change resistance | Strong change management, executive support |
| Slow adoption | User-friendly interfaces, comprehensive training |
| AI accuracy issues | Improve training data, tune models |
| Compliance concerns | Implement proper audit trails and controls |
| Technical challenges | Dedicated technical support and monitoring |
| Low usage of features | Training, communication, usage incentives |
Licensing & Compliance
License Tracking
System automatically tracks:
├─ Active AI module users
├─ Virtual agent instances in use
├─ Monthly consumption metrics
├─ Grace period usage
└─ Compliance status
Monthly Report includes:
├─ License utilization rate
├─ Cost per user/module
├─ Usage trends
├─ Recommendations for optimization
└─ Billing details
Compliance Monitoring
- Audit logs - All AI actions tracked and logged
- Data protection - Customer data encrypted and protected
- Regulatory compliance - GDPR, CCPA, HIPAA support
- Access controls - Role-based permission system
- Interaction recording - Captured for compliance
- Report generation - Automated compliance reporting
Interview Cheat Sheet
| Question | Answer |
|---|---|
| What is Genesys AI? | Suite of AI capabilities across PureCloud (Copilot, Routing, Virtual Agent, etc.) |
| What edition is required? | Premium Edition (AI modules are add-ons) |
| What modules are available? | Customer Insights, Workforce Optimization, Agent Copilot, Virtual Agent, Advanced Analytics |
| How is AI licensed? | Per-user or organizational depending on module |
| What's the expected ROI? | 6-18 months depending on implementation scope |
| Which module should we start with? | Predictive Routing or Agent Copilot for quick impact |
| Can we implement gradually? | Yes, phased approach recommended |
| What's most important for success? | Quality change management and user training |
| How do we measure AI impact? | Track FCR, AHT, CSAT, cost per contact, automation rate |
| What about compliance concerns? | Audit trails, access controls, and monitoring built-in |
| Can we customize AI models? | Yes, tuning available; may require Genesys services for deep customization |
| What's the implementation timeline? | 8-12 weeks for full deployment, quick wins in 2-4 weeks |
| How do we ensure adoption? | Executive support, training, early wins, continuous communication |
| What's the cost per agent per month? | $XX-XXX depending on modules and scale |
| Where do we start? | Assessment → Licensing → Foundation → Phased Implementation |
Key Takeaways
- Integrated Suite - Genesys AI is not standalone products but integrated capabilities
- Premium Requirement - Premium Edition is required; AI modules are add-ons
- Flexible Licensing - Mix and match modules based on needs
- Phased Implementation - Start with high-impact modules, expand gradually
- Significant ROI - Typical payback of 6-18 months
- Change Critical - Success depends more on change management than technology
- Omnichannel Ready - AI works across all communication channels
- Continuous Learning - AI models improve with more data and interaction
- Compliance Built-In - Security, audit, and compliance features included
- Quick Wins Possible - Can see improvements within 2-4 weeks of implementation
Getting Started Checklist
Pre-Implementation
- Conduct current state assessment
- Document baseline metrics
- Identify pain points and opportunities
- Evaluate all AI modules
- Calculate ROI for each module
- Secure budget and approvals
- Assemble implementation team
- Plan change management approach
Implementation Preparation
Deployment
- Deploy to pilot group
- Monitor closely
- Gather feedback
- Optimize configuration
- Scale to production
- Provide ongoing support
- Track metrics
- Plan continuous improvement
Additional Resources
Official Documentation Links
- Genesys Cloud AI Overview: https://help.genesys.com/genesyscloud/current/en-us/AI_Overview.html
- AI Module Licensing: https://help.genesys.com/genesyscloud/current/en-us/AI_Licensing.html
- Architect Documentation: https://help.genesys.com/genesyscloud/current/en-us/Architect.html
- Customer Insights Guide: https://help.genesys.com/genesyscloud/current/en-us/CustomerInsights.html
Support Contacts
- Genesys Sales: sales@genesys.com
- Genesys Support: https://support.genesys.com
- AI Services Team: ai-services@genesys.com
- Community Forums: https://community.genesys.com
Document Version Info
Last Updated: March 2026
Source: Genesys PureCloud Official Documentation
Version: 1.0
AI Studio & AI Guides
Genesys PureCloud AI Studio & AI Guides Documentation
Study Notes
| Topic | Description |
|---|---|
| AI Studio | Centralized workbench for building, managing, and deploying AI-powered experiences |
| AI Guides | No-code feature that converts business instructions into Virtual Agents using natural language |
| Purpose | Enable business users to create intelligent virtual agents without coding expertise |
| Licensing | Requires Genesys Cloud AI Experience tokens (metered pricing) |
| Innovation Level | Level 4 agentic AI - semi-autonomous with defined boundaries and guardrails |
Navigation
Admin → AI Studio OR Admin → Contact Center → Automation → AI Studio
AI Studio Overview
Genesys Cloud AI Studio provides a centralized workbench to build, manage and deploy AI experiences like Virtual Agents and Agent Copilots. It serves as the command center for organizations to create next-generation AI-powered customer experiences with governance, control, and scalability.
Key Capabilities
- Natural language editor with no-code and low-code tools for users without technical know-how
- Unified environment for designing AI agents across all channels
- Built-in governance and compliance controls
- AI Guides that allow business teams to create Virtual Agents that respond intelligently to customer context and adapt their behavior dynamically within conversations
- Customizable summaries for interactions
- Integration with existing Architect Virtual Agent flows
- Version control and deployment management
- Performance analytics and monitoring
Strategic Positioning
AI Studio represents a leap from simple execution to intelligent problem-solving - Level 4 where semi-autonomous systems are configured around specific objectives using reasoning, planning and memory to figure out how best to accomplish goals while still operating within clearly defined boundaries to meet compliance and policy requirements
Edition & Module Requirements
| Requirement | Details |
|---|---|
| Minimum Edition | Genesys Cloud CX 1, CX 2, CX 3, or CX 4 license |
| Licensing Model | AI Experience tokens (metered, usage-based pricing) |
| Permissions | Role-based AI Studio permissions required |
| Additional | Access to Virtual Agent module for full functionality |
Study Notes - AI Studio Components
| Component | Purpose | User Type |
|---|---|---|
| AI Guides | Create Virtual Agents from natural language prompts | Business users, CX teams |
| Guide Editor | Build and refine guide instructions and logic | All user levels |
| Virtual Agent Integration | Deploy guides to Virtual Agent flows | Technical users |
| Customizable Summaries | Shape interaction summaries to business needs | Admins, supervisors |
| Governance Controls | Ensure compliance and policy adherence | Admins, compliance |
| Performance Dashboard | Monitor guide usage and effectiveness | Managers, analysts |
| API Access | Programmatic guide and agent management | Developers |
AI Guides Overview
Genesys Cloud AI Guides enables business users to create AI-powered Virtual Agents through natural language instructions without coding, facilitating conversational flows that mirror customer journeys, adapt dynamically to customer context, and combine structured logic with AI capabilities
How AI Guides Work
- Business user describes goal in plain language or uploads process documentation
- AI Guides use large language models (LLMs)-based natural language processing to interpret user prompts and documents, generating complete agentic flows including intents, slots and dialog logic
- System generates draft virtual agent with conversation flow
- User reviews, edits, and customizes the generated guide
- AI executable instructions produced by AI Guides are fully editable within Genesys Cloud, allowing users to update messages, logic and backend integrations before publishing
- Guide is published and connected to Virtual Agent
- Virtual Agent uses guide to handle customer interactions
Key Features
- Natural Language, No Code Required - easily build or refine virtual agents using plain language or existing documentation with no coding skills needed
- Build Once, Deploy Anywhere - design experiences once and deploy them across Genesys Cloud Virtual Agent and Copilots, and more to maintain consistency and reduce duplication of effort
- Enterprise-Grade Collaboration - seamlessly connect front, middle and back-office systems to execute tasks, automate workflows and deliver measurable business outcomes
- Guardrails Built In - implement configurable, testable safety controls to help enable increased accuracy, appropriate tone and policy compliance to support responsible adoption of agentic AI
- Knowledge integration - guides can use either knowledge Workbench v2 knowledge bases or knowledge fabric configurations to answer customer questions at any point in a conversation
Implementation Guide
Step 1: Assessment & Planning
- Identify suitable use cases for AI Guides
- Document business processes and customer journeys
- Gather process documentation or playbooks
- Define success metrics for each guide
- Plan escalation scenarios
- Assess team readiness for AI automation
- Plan change management approach
Step 2: Licensing & Setup
- Ensure organization has Genesys Cloud CX license (CX 1, CX 2, CX 3, or CX 4)
- Purchase Genesys Cloud AI Experience tokens
- Add necessary AI Studio permissions
- Set up role-based access controls
- Configure Virtual Agent if not already enabled
- Test integration with backend systems
- Establish governance policies
Step 3: Guide Creation
Step 4: Testing & Refinement
- Preview guide behavior in test environment
- Author preview before publish - preview real knowledge responses during Guide configuration to confirm accuracy and behavior
- Test with sample customer scenarios
- Verify escalation triggers work correctly
- Validate data integrations
- Test across all supported channels
- Gather feedback from SMEs
Step 5: Publishing & Deployment
- Publish guide to Virtual Agent
- Connect the guide to Virtual Agent flows in Architect
- Assign to production queues
- Monitor initial interactions closely
- Validate customer experience
- Adjust guide parameters based on feedback
- Scale to additional queues as needed
Step 6: Monitoring & Optimization
- Monitor guide usage metrics daily
- Track customer satisfaction and resolution rates
- Review escalation patterns
- Analyze customer feedback
- Refine guide instructions based on data
- A/B test different guide variations
- Update regularly based on learnings
How to Implement
| Phase | Description | Timeline |
|---|---|---|
| Planning | Identify use cases, document processes, assess readiness | Week 1-2 |
| Setup | Activate licenses, configure permissions, enable integrations | Week 2-3 |
| Creation | Build guides from prompts or documents, test | Week 3-5 |
| Testing | Validate behavior, test scenarios, refine | Week 5-6 |
| Pilot | Deploy to select queues, monitor closely | Week 6-7 |
| Rollout | Expand to production, scale across organization | Week 7-8 |
| Optimization | Monitor, analyze, improve continuously | Ongoing |
AI Studio & AI Guides Architecture
AI Studio Centralized Workbench
┌─────────────────────────────────────────┐
│ AI Studio Command Center │
├─────────────────────────────────────────┤
│ │
│ Guide Creation Interface │
│ ├─ Natural Language Prompt Input │
│ ├─ Document Upload & Conversion │
│ └─ Blank Guide Builder │
│ │
│ AI Generation Engine │
│ ├─ LLM Processing │
│ ├─ Intent Detection │
│ ├─ Slot Identification │
│ └─ Dialog Logic Generation │
│ │
│ Guide Editor & Customization │
│ ├─ Instruction Editing │
│ ├─ Variable Management │
│ ├─ Logic Configuration │
│ └─ Integration Setup │
│ │
│ Governance & Controls │
│ ├─ Built-in Guardrails │
│ ├─ Compliance Checking │
│ ├─ Tone Configuration │
│ └─ Brand Alignment Rules │
│ │
│ Publishing & Deployment │
│ ├─ Version Control │
│ ├─ Publish to Virtual Agent │
│ ├─ Queue Assignment │
│ └─ Channel Distribution │
│ │
│ Analytics & Monitoring │
│ ├─ Usage Dashboards │
│ ├─ Performance Metrics │
│ ├─ Escalation Tracking │
│ └─ Feedback Collection │
│ │
│ System Integration │
│ ├─ Architect Virtual Agent │
│ ├─ Knowledge Management │
│ ├─ Backend Data Systems │
│ └─ Customer Data Platforms │
│ │
└─────────────────────────────────────────┘
↓
Virtual Agent Deployment
↓
Customer Interactions
AI Guides Use Cases & Examples
Use Case 1: Order Status & Tracking
Business Process Documentation:
1. Collect order number from customer
2. Look up order in system
3. Provide tracking information
4. Offer additional help options
5. Close or escalate as needed
AI Guide Generated:
Utterances:
├─ "Where's my order?"
├─ "Track my package"
├─ "Order status"
└─ "When will my order arrive?"
Intents:
├─ Track Order
├─ Delivery Status
└─ Tracking Number
Dialog Flow:
├─ Ask for order number
├─ Query order database
├─ Provide shipping status
├─ Offer further assistance
└─ Escalate if needed
Resolution Rate: 85-90% (self-service)
Use Case 2: Password Reset Process
Uploaded Process Document:
"Follow these steps for password reset:
1. Verify customer identity with security questions
2. Confirm email address on file
3. Send password reset link
4. Confirm reset completed
5. Offer additional support"
AI Guide Generated:
Intents:
├─ Password Reset Request
├─ Account Access Issue
└─ Security Verification
Dialog:
├─ "I'll help you reset your password"
├─ "Let me verify who you are"
├─ Customer answers security questions
├─ System confirms identity
├─ "Check your email for reset link"
├─ "Did you successfully reset?"
└─ Provide follow-up support
Resolution Rate: 92-95% (self-service)
Use Case 3: Appointment Scheduling
Prompt Input:
"Create a guide for customers to book
service appointments. Must:
- Ask for service type
- Show available dates/times
- Confirm appointment
- Send confirmation"
AI Guide Generated:
Intents:
├─ Schedule Appointment
├─ Change Appointment
└─ Cancel Appointment
Dialog:
├─ "What service do you need?"
├─ "When works best for you?"
├─ Show available slots
├─ "Let me confirm..."
├─ Send calendar confirmation
├─ Offer reschedule option
Resolution Rate: 88-92% (self-service)
Use Case 4: Billing Question & Payment
Process Flow:
"Customers with billing questions:
1. Verify account
2. Explain charges
3. Offer payment options
4. Process if customer agrees
5. Send receipt/confirmation"
AI Guide Generated:
Intents:
├─ Check Bill Amount
├─ Explain Charges
├─ Make Payment
└─ Dispute Charge
Dialog:
├─ Confirm customer identity
├─ "Let me look up your account"
├─ Display current balance
├─ "Would you like to pay?"
├─ Secure payment processing
├─ Send receipt and confirmation
├─ Escalate disputes
Resolution Rate: 80-85% (self-service)
Modular Guides Within Virtual Agents
AI Guides are designed to create modular bot flows that can be combined within a single virtual agent - each guide typically addresses a specific use case like order tracking, password reset or appointment booking, and these flows can be added to your virtual agent's overall configuration
Multi-Guide Architecture Example
Virtual Agent: Customer Service Bot
├─ Guide 1: Order Tracking
│ ├─ Intents: Track order, delivery status
│ ├─ Resolution: Order lookup + tracking info
│ └─ Escalation: Complex shipment issues
│
├─ Guide 2: Account Management
│ ├─ Intents: Password reset, update info
│ ├─ Resolution: Self-service account changes
│ └─ Escalation: Security concerns
│
├─ Guide 3: Billing & Payments
│ ├─ Intents: Check bill, make payment
│ ├─ Resolution: Payment processing
│ └─ Escalation: Billing disputes
│
└─ Guide 4: Appointment Booking
├─ Intents: Schedule, reschedule, cancel
├─ Resolution: Appointment management
└─ Escalation: Complex scheduling needs
Router (AI determines which guide needed):
Customer: "Where's my order?"
→ Route to Guide 1: Order Tracking
→ Resolve: Self-service tracking info
Customer: "I want to schedule a service"
→ Route to Guide 4: Appointment Booking
→ Resolve: Appointment confirmation
Customer: "I have a billing question"
→ Route to Guide 3: Billing & Payments
→ Resolve or escalate accordingly
Knowledge Integration with AI Guides
In a future release, Genesys Cloud will allow AI Guides to use knowledge articles to answer customer questions while continuing through a defined process - guides can answer customer questions using approved knowledge content at any point in a conversation and then continue the task without losing context
Knowledge-Aware Guide Benefits
Before Knowledge Integration:
Customer: "What's your return policy?"
Guide: "Let me connect you with an agent
who can answer policy questions"
→ Escalation (unnecessary)
After Knowledge Integration:
Customer: "What's your return policy?"
Guide: [Accesses knowledge base]
"Here's our return policy...
Now, back to your order tracking,
I see your item was delivered..."
→ Continues conversation naturally
→ No escalation needed
Configuration Options
Flexible knowledge sourcing:
- Use Virtual Agent's knowledge base
- Configure guide-specific knowledge source
- Support for knowledge Workbench v2
- Support for knowledge fabric configurations
Real Flow Scenario: AI Guide in Action
Customer Interaction Example:
Customer Calls: "I need to reset my password"
↓
Virtual Agent Answers (AI Guide: Account Management)
"Hi! I'm here to help. To reset your password,
I'll need to verify your identity. What's your
email address on file?"
↓
Customer: "john.smith@email.com"
↓
Guide Verifies: Customer email matches account
↓
Guide: "Thanks. What was your first pet's name?"
↓
Customer: "Fluffy"
↓
Guide Confirms: Security answer matches
↓
Guide: "Perfect! I've sent a password reset link
to your email. Please check your inbox
and click the link to set a new password."
↓
Customer: "Got it, thanks!"
↓
Guide: "You're welcome. Is there anything else
I can help with today?"
↓
Customer: "No, that's all"
↓
Guide: "Have a great day!"
↓
Interaction Complete:
├─ Resolution: Self-service password reset
├─ Tokens Used: 1-2 per interaction
├─ Customer Satisfaction: High (immediate help)
└─ Cost: ~$0.05-0.15 per interaction
Licensing & Token Pricing
AI Experience Token Model
Organizations need Genesys Cloud AI Experience tokens to use AI Studio, with tokens based pricing model to monitor feature usage and consumption
Token Consumption
AI Guides consume tokens for each interaction session and for each guide created
Pricing Considerations
- Per-interaction tokens - Consumed when customers interact with guides
- Per-guide tokens - Consumed when creating new guides
- Metered model - Pay for what you use
- Flexibility - Tokens can scale up or down based on demand
- Multiple LLM support - AI Studio is compatible with proprietary, open source and Amazon Bedrock large language models (LLMs) and advanced frontier models from companies such as OpenAI, Anthropic and Google
Token Consumption Example
Small Organization:
├─ 3 AI Guides created (3 guides × tokens)
├─ 500 customer interactions/month (500 × tokens)
├─ Monthly token usage: ~750 tokens
└─ Estimated cost: $XX-XXX/month
Mid-Market Organization:
├─ 10 AI Guides created (10 guides × tokens)
├─ 5,000 customer interactions/month (5,000 × tokens)
├─ Monthly token usage: ~5,100 tokens
└─ Estimated cost: $XXX-XXXX/month
Enterprise Organization:
├─ 50 AI Guides created (50 guides × tokens)
├─ 50,000 customer interactions/month (50,000 × tokens)
├─ Monthly token usage: ~50,100 tokens
└─ Estimated cost: $XXXX-XXXXX/month
Best Practices
Guide Design
- Clear intent - Define specific goal for each guide
- Natural language - Write instructions as you would for an employee
- Process documentation - Use existing playbooks and procedures
- Modular approach - Create focused guides for specific tasks
- Escalation paths - Define clear handoff scenarios
- Testing - Always test with real scenarios before production
- Iteration - Guides improve with updates and refinement
Guardrails & Governance
- Implement configurable, testable safety controls to help enable increased accuracy, appropriate tone and policy compliance to support responsible adoption of agentic AI
- Set boundaries for agent autonomy
- Define tone and brand voice
- Establish compliance requirements
- Monitor sensitive operations
- Implement audit trails
- Regular compliance reviews
Knowledge Management
Performance Optimization
- Monitor token usage closely
- Track guide effectiveness metrics
- Analyze escalation reasons
- Gather customer feedback
- Refine guides based on data
- A/B test different approaches
- Regular guide audits and updates
Common Implementation Scenarios
Scenario 1: Quick Start (Small Team)
Timeline: 2-3 weeks
Setup:
├─ 2-3 simple guides
├─ Basic integration (order lookup, FAQ)
├─ Limited escalation paths
└─ Single channel deployment
Expected Results:
├─ 60-70% automation of routine inquiries
├─ Quick implementation, minimal training
├─ Fast ROI (4-6 weeks)
└─ Monthly token usage: ~300-500
Scenario 2: Comprehensive (Mid-Market)
Timeline: 6-8 weeks
Setup:
├─ 8-12 specialized guides
├─ Multiple backend integrations
├─ Complex escalation logic
├─ Omnichannel deployment
└─ Knowledge base integration
Expected Results:
├─ 50-65% automation of customer volume
├─ Significant cost savings
├─ 8-12 week ROI
└─ Monthly token usage: ~3,000-5,000
Scenario 3: Enterprise (Full Scale)
Timeline: 12-16 weeks
Setup:
├─ 30-50+ specialized guides
├─ Full system integration
├─ Advanced routing and logic
├─ Multi-language support
├─ Comprehensive knowledge integration
└─ Global channel deployment
Expected Results:
├─ 40-60% automation of global volume
├─ Major cost reduction
├─ Continuous optimization
├─ 6-10 week ROI
└─ Monthly token usage: ~20,000-50,000+
Troubleshooting Guide
| Issue | Cause | Resolution |
|---|---|---|
| Guide doesn't understand customer intent | Insufficient training variations | Add more example utterances to training data |
| Escalations happening too frequently | Over-strict guardrails or incomplete logic | Expand guide capabilities and relax thresholds |
| Inaccurate information from knowledge | Stale knowledge articles | Update knowledge base and preview before publish |
| Slow response time | Token consumption or system latency | Optimize guide logic and integrations |
| Integration failures | Backend system connectivity issues | Verify API connections and data endpoints |
| Guides not deployed to queues | Missing Virtual Agent configuration | Check Architect flow configuration and deployment |
| Customer dissatisfaction | Poor conversation quality | Refine guide instructions and tone |
| Token overages | Guides consuming more than expected | Analyze usage patterns and optimize interactions |
| Editing feels clunky | Unfamiliar with new guide model | Review updated guide model documentation |
| Knowledge not accessible in guides | Knowledge not properly configured | Configure knowledge source and test access |
AI Guides vs. Traditional Bot Flows
| Feature | AI Guides | Traditional Flows |
|---|---|---|
| Creation Method | Natural language prompts | Manual design |
| Skill Required | Business knowledge | Technical/coding |
| Speed to Deploy | Days to weeks | Weeks to months |
| Iteration Time | Minutes to hours | Hours to days |
| Intent Recognition | AI-powered, flexible | Rule-based, rigid |
| Conversation Quality | Natural, contextual | Scripted, menu-driven |
| Maintenance | AI learns from data | Manual updates |
| Integration | Automatic via AI | Manual configuration |
| Cost to Build | Low (no developers) | High (developer time) |
| Scaling | Easy, rapid deployment | Time-consuming |
Real-World Timeline Example
Week 1-2: Planning & Assessment
Day 1-3: Kickoff and planning
├─ Identify 3-5 use cases
├─ Gather process documentation
└─ Assess team readiness
Day 4-10: Documentation review
├─ Refine process flows
├─ Identify integration needs
├─ Plan escalation scenarios
Day 11-14: Setup and licensing
├─ Purchase AI Experience tokens
├─ Configure permissions
└─ Set up integrations
Week 3-4: Guide Creation
Day 15-20: First guide creation
├─ Upload process documentation
├─ Review AI-generated guide
├─ Customize and refine
└─ Connect to Virtual Agent
Day 21-28: Additional guides
├─ Create guides 2-4
├─ Refine based on feedback
├─ Configure escalation logic
└─ Integration testing
Week 5-6: Testing & Refinement
Day 29-35: Comprehensive testing
├─ Test all guide scenarios
├─ Validate integrations
├─ Test escalation paths
└─ Gather feedback
Day 36-42: Optimization
├─ Refine guide instructions
├─ Adjust confidence thresholds
├─ Optimize knowledge integration
└─ Performance tuning
Week 7-8: Deployment
Day 43-49: Pilot deployment
├─ Deploy to pilot queue
├─ Monitor closely
├─ Gather customer feedback
└─ Make adjustments
Day 50-56: Full rollout
├─ Expand to all queues
├─ Monitor metrics
├─ Provide agent support
└─ Celebrate success
Interview Cheat Sheet
| Question | Answer |
|---|---|
| What is AI Studio? | Centralized workbench for building, managing, and deploying AI experiences |
| What is an AI Guide? | No-code feature that converts business instructions into Virtual Agents using AI |
| What licensing is required? | Genesys Cloud CX license + AI Experience tokens |
| How do AI Guides work? | Users describe goals in plain language, AI generates guide structure, user customizes |
| Can non-technical users create guides? | Yes, AI Guides are designed for business users without coding skills |
| What level of agentic AI is this? | Level 4 - semi-autonomous with defined boundaries and guardrails |
| How long to create a guide? | Minutes to hours depending on complexity |
| Can guides be combined? | Yes, multiple guides can be modular components in one Virtual Agent |
| How are guides customized? | Fully editable - users can change messages, logic, and integrations |
| What about knowledge integration? | Guides can access knowledge articles to answer questions within conversation |
| What's the pricing model? | Token-based - consumption tracked per interaction and per guide created |
| Can guides handle escalation? | Yes, with configurable escalation paths to human agents |
| What channels do guides support? | All Genesys channels - voice, chat, email, messaging, etc. |
| How do guides improve over time? | AI learns from interactions; user refines guides based on metrics |
| What's the expected ROI timeline? | 4-12 weeks depending on implementation scope |
Key Takeaways
- No-Code Creation - Natural language, no code required - easily build or refine virtual agents using plain language or existing documentation with no coding skills needed
- Intelligent Automation - AI-powered guides intelligently handle customer conversations with reasoning and planning
- Enterprise Control - Guardrails built in - implement configurable, testable safety controls to help enable increased accuracy, appropriate tone and policy compliance
- Rapid Deployment - Create and deploy guides in days, not months
- Modular Design - Build once, deploy anywhere across virtual agents, copilots and more to maintain consistency and reduce duplication of effort
- Token-Based Pricing - Pay only for what you use with flexible scaling
- Knowledge Integration - Guides can answer customer questions using approved knowledge content during any step of a process
- Business User Friendly - Designed for CX teams, not IT/developers
- Continuous Learning - Guides improve as they handle more interactions
- Compliance Ready - Built-in governance and audit capabilities
Customizable Summaries (Additional AI Studio Feature)
Customizable Summaries allows admins to shape interaction summaries to fit their business needs, enhancing consistency, compliance, and operation efficiency across human and AI agent interactions
Use Cases
- Tailor summaries to specific business requirements
- Ensure compliance with regulatory standards
- Align summaries with operational priorities
- Support multiple languages and regions
- Customize for different teams and use cases
Getting Started Checklist
Pre-Implementation
- Assess current contact center operations
- Identify 3-5 suitable use cases
- Gather process documentation and playbooks
- Determine success metrics for each guide
- Assess team readiness for AI automation
- Plan change management approach
Licensing & Setup
- Purchase Genesys Cloud AI Experience tokens
- Assign AI Studio permissions to team
- Configure role-based access controls
- Enable Virtual Agent module
- Set up backend system integrations
- Test knowledge base connectivity
Guide Development
- Create first AI Guide from process document
- Test guide functionality thoroughly
- Customize instructions and logic
- Configure escalation paths
- Connect to Virtual Agent
- Deploy to pilot queue
Monitoring & Optimization
- Monitor guide performance daily
- Track customer satisfaction metrics
- Analyze escalation patterns
- Refine guides based on data
- Scale to additional queues
- Plan continuous improvements
Additional Resources
Official Documentation Links
- AI Studio Overview: help.genesys.cloud/articles/about-ai-studio/
- AI Guides Overview: help.genesys.cloud/articles/ai-guides-overview/
- Knowledge Integration: help.genesys.cloud/announcements/knowledge-integration-for-ai-guides/
- AI Studio Permissions: help.genesys.cloud/articles/ai-studio-permissions/
Support Contacts
- Genesys Sales: sales@genesys.com
- Genesys Support: https://support.genesys.com
- AI Services Team: ai-services@genesys.com
- Community Forums: https://community.genesys.com
Document Version Info
Last Updated: March 2026
Source: Genesys PureCloud Official Documentation (help.genesys.cloud)
Validated: Current with January-March 2026 releases
Version: 1.0
Agentic Virtual Agents
Genesys PureCloud Agentic Virtual Agents Documentation
Study Notes
| Topic | Description |
|---|---|
| Agentic Virtual Agents | AI-powered autonomous agents capable of reasoning, planning, and taking action |
| Core Technology | Generative AI with natural language understanding and decision-making |
| Autonomy Level | Semi-autonomous with configurable boundaries and safety guardrails |
| Channels | Voice, chat, email, messaging, social media |
| Capability | Handle complex multi-step customer interactions independently |
Navigation
Admin → Contact Center → Virtual Agents OR Admin → AI Studio → Virtual Agents
Agentic Virtual Agents Overview
Agentic Virtual Agents represent the next evolution of conversational AI - autonomous agents capable of reasoning between actions and knowledge to solve customer problems intelligently within defined boundaries. Unlike traditional bots that follow rigid decision trees, agentic agents use generative AI to understand context, make decisions, and dynamically adapt their behavior.
Key Capabilities
- Intelligent Reasoning - AI thinks through problems and determines best solutions
- Autonomous Action - Takes actions independently without scripted flows
- Context Understanding - Maintains conversation context across multiple turns
- Knowledge Integration - Accesses and applies knowledge dynamically
- System Integration - Executes transactions and backend actions
- Learning Capability - Improves responses based on interaction outcomes
- Safety Guardrails - Operates within defined policies and compliance boundaries
- Omnichannel Support - Works seamlessly across all communication channels
How They Differ from Traditional Bots
Traditional Bot:
├─ Rigid decision trees
├─ Menu-driven interactions
├─ Limited context awareness
├─ Fixed scripted responses
├─ Capability boundaries unclear
└─ Must escalate at first complexity
Agentic Virtual Agent:
├─ Intelligent reasoning and planning
├─ Natural conversational flow
├─ Full context preservation
├─ Dynamic adaptive responses
├─ Clear defined boundaries
└─ Handles complex scenarios autonomously
Edition & Module Requirements
| Requirement | Details |
|---|---|
| Minimum Edition | Genesys Cloud CX 1, CX 2, CX 3, or CX 4 license |
| Module | Virtual Agent module with AI capabilities |
| Licensing | AI Experience tokens (metered usage-based) |
| AI Studio | Access to AI Studio for guide creation and management |
| Knowledge | Knowledge management system for agent reference |
Study Notes - Agentic Virtual Agent Components
| Component | Purpose | Function |
|---|---|---|
| Natural Language Engine | Understands customer intent | Processes speech/text input |
| Reasoning Engine | Determines best solution approach | Evaluates options and decides action |
| Knowledge Base | Reference material for answers | Provides accurate information |
| Action Executor | Performs required actions | Executes system tasks and transactions |
| Context Manager | Maintains conversation history | Preserves information across turns |
| Guardrail Controller | Enforces boundaries | Prevents unauthorized actions |
| Learning Module | Improves over time | Analyzes outcomes for optimization |
| Integration Layer | Connects to backend systems | Access to CRM, billing, ticketing, etc. |
Agentic Virtual Agent Architecture
Customer Contact
↓
Agentic Virtual Agent Entry
├── Voice (IVR entry point)
├── Chat Interface
├── Email System
├── Messaging Platform
└── Social Media
↓
Natural Language Understanding
├── Speech-to-Text (voice)
├── Intent Recognition (what customer wants)
├── Entity Extraction (who, what, when, where)
├── Sentiment Analysis
└── Context Comprehension
↓
Reasoning & Planning Engine
├── Evaluate customer request
├── Assess available capabilities
├── Consider guardrails and constraints
├── Determine optimal approach
├── Plan multi-step solution
└── Prepare action sequence
↓
Knowledge Access Layer
├── Search knowledge base
├── Retrieve relevant information
├── Evaluate accuracy and applicability
├── Prepare response content
└── Maintain knowledge context
↓
Decision Point: Can Handle?
├── YES: Execute independently
│ ├── Perform required actions
│ ├── Fetch real-time data
│ ├── Execute transactions
│ ├── Generate response
│ └── Provide solution
│
└── NO: Escalate to Human
├── Complex/ambiguous scenario
├── Policy exception needed
├── High-risk action
├── Customer preference
└── Warm handoff with full context
↓
Response Generation
├── Natural Language Generation
├── Tone and Brand Voice
├── Clarity and Conciseness
└── Accessibility Compliance
↓
Conversation Continuation
├── Verify customer satisfaction
├── Offer additional assistance
├── Provide relevant next steps
├── Document interaction
└── Learn from outcome
Agentic Capabilities & Functions
Autonomous Decision Making
Customer: "I've been trying to cancel my subscription
for weeks but the website won't let me"
Agent Analysis:
├─ Understand: Customer frustration, technical issue
├─ Assess: Can perform cancellation autonomously
├─ Evaluate: Business rules for cancellation
├─ Decide: Proceed with cancellation + retention offer
└─ Plan: Execute cancellation, offer alternative plan
Agent Response:
"I understand your frustration. I can cancel your
subscription right now. Before I do, I see you've
been with us for 3 years. Can I offer you a
discounted plan as an alternative? What would help?"
Multi-Step Problem Solving
Customer: "I want to change my billing address and
also apply the promotion I saw in email"
Agent Reasoning:
├─ Task 1: Update billing address
├─ Task 2: Apply promotional code
├─ Task 3: Verify changes in system
├─ Task 4: Confirm new total with customer
└─ Task 5: Send updated confirmation
Agent Execution:
"I can help with both of those. Let me update your
address, apply the promotion, and show you the
impact on your bill:
Old address: 123 Main St
New address: 456 Oak Ave
Current plan: $X/month
With promotion: $Y/month
Monthly savings: $Z
Should I go ahead with these changes?"
Intelligent Escalation
Customer: "I need a refund for faulty merchandise"
Agent Assessment:
├─ Evaluate: Refund policy
├─ Check: Purchase history
├─ Assess: Complexity (straightforward refund)
├─ Decide: Can handle independently
└─ Execute: Process refund
Response:
"I can definitely help with that. I see your
purchase on Feb 10. You're within our 30-day
return window. I'm issuing a full refund now.
You'll see the credit in 3-5 business days.
Would you like to arrange a return shipment?"
---
vs.
---
Customer: "I need a refund but it's been 45 days
and there's a special circumstance..."
Agent Assessment:
├─ Evaluate: Outside standard 30-day policy
├─ Assess: Requires exception approval
├─ Determine: Needs human judgment
├─ Decide: Escalate to supervisor
└─ Execute: Warm handoff
Response:
"I understand - you have a special circumstance
that's outside our standard 30-day window. Let me
connect you with a supervisor who can review
options. One moment..."
Dynamic Adaptation
Interaction 1 - Standard Path:
Agent: "I can help with your order issue.
What's your order number?"
Customer: "12345"
Agent: [Looks up order, provides status]
Interaction 2 - Emotional/Frustrated:
Agent: [Detects frustration in tone]
Agent: "I hear this has been frustrating.
I'm personally going to help you
resolve this right now..."
Interaction 3 - Knowledgeable Customer:
Agent: [Detects technical language]
Agent: "I can see you're familiar with our
system. Here are the technical details
of your issue..."
Real Flow Scenarios: Agentic Virtual Agents in Action
Scenario 1: Complex Order Issue Resolution
Customer Calls: "I ordered item X last week but
received item Y instead"
Timeline:
10:00:05 AM - Call Connected to Agentic Agent
↓
10:00:10 - Agent Processes Input
├─ Understands: Wrong item received
├─ Identifies: Potential shipping error
└─ Assesses: Solvable by agent
↓
10:00:15 - Agent Takes Action
├─ Query: Order database
├─ Retrieve: Order 12345 details
├─ Analysis: Item Y in stock, Item X available
├─ Evaluate: Best resolution for customer
└─ Decision: Replace + expedited shipping
↓
10:00:45 - Agent Communicates
"I found the issue - you received item Y instead
of item X. I'm shipping item X to you via
expedited delivery at no charge. You should
receive it in 2 days. You can keep item Y
as our apology. Good?"
Customer: "Yes, that works!"
↓
10:00:55 - Agent Executes
├─ Initiate replacement shipment
├─ Process return label for wrong item
├─ Apply goodwill credit
├─ Send confirmation email
└─ Document resolution
↓
10:01:00 AM - Issue Resolved
Resolution: Self-service (no escalation)
Time to Resolution: 55 seconds
Cost: ~$5-10 in shipping + goodwill
Customer Satisfaction: High (proactive solution)
Scenario 2: Billing Dispute with Research
Customer: "I was charged twice for my subscription"
Agent Process:
10:00 AM - Analysis
├─ Retrieve account
├─ Review transactions
├─ Identify: Two charges on same date
├─ Assess: Billing system error (likely)
└─ Reason: Needs investigation but obvious
10:05 AM - Investigation
├─ Check system logs
├─ Verify: Duplicate transaction confirmed
├─ Research: Processing glitch identified
├─ Escalate?: No - clear error, can resolve
└─ Decide: Refund one charge immediately
10:10 AM - Resolution
"I found the issue - our system charged you twice
due to a processing error. I'm immediately refunding
the duplicate charge of $99.99. You'll see it
within 2-3 business days.
I'm also applying a $20 service credit for the
inconvenience. Is there anything else I can help?"
Customer: "That's great, thank you!"
Result:
├─ Issue resolved autonomously
├─ No escalation needed
├─ Customer satisfied
├─ Cost: $99.99 refund + $20 credit = $119.99
└─ Outcome: Retained customer, quick resolution
Scenario 3: Proactive Problem Prevention
Situation: New customer during implementation phase
Agent Monitoring:
├─ Tracks: Customer account setup
├─ Identifies: Configuration incomplete
├─ Predicts: Customer may hit issues
└─ Acts: Reaches out proactively
Agent Initiates:
"Hi Sarah, I noticed your account setup is
almost complete, but I see you haven't configured
your team members yet. Would you like help doing
that now? I can walk you through it in 2 minutes."
Customer: "Sure, that would help!"
Agent Guides:
├─ Explains: Setup process
├─ Configures: Team members
├─ Tests: Access
├─ Confirms: All working
└─ Provides: Next steps doc
Result:
├─ Prevented future support tickets
├─ Improved onboarding experience
├─ Increased early adoption
└─ Reduced support costs
Scenario 4: Multi-Intent Conversation
Customer: "Hi, I need to update my payment method,
schedule a service appointment, and ask
about your loyalty program"
Agent Processing:
├─ Identifies: 3 separate intents
├─ Prioritizes: Payment method > appointment > info
├─ Plans: Multi-step interaction sequence
└─ Executes: Handles all in single conversation
Flow:
Agent: "I can help with all of those. Let me
start with updating your payment method."
[Updates payment method]
Agent: "Perfect. Now let's schedule your
service appointment. What dates work?"
[Books appointment]
Agent: "Great! Quick question - you asked about
our loyalty program. You actually qualify
for Gold tier based on your spending!"
[Explains benefits, enrolls automatically]
Result:
├─ All 3 issues resolved
├─ Time: Single 5-minute call
├─ Customer: One conversation, multiple solutions
└─ Efficiency: What would take 3 transfers now takes 1
Agentic Virtual Agent Capabilities Matrix
By Interaction Complexity
Simple Tasks (Agent Handles 95%+):
├─ Account status inquiries
├─ FAQ and knowledge searches
├─ Password resets
├─ Basic transactions
├─ Simple scheduling
└─ Resolution Rate: 92-97%
Medium Complexity (Agent Handles 70-85%):
├─ Billing adjustments
├─ Order modifications
├─ Appointment changes
├─ Return processing
├─ Plan upgrades
└─ Resolution Rate: 70-85%
Complex Tasks (Agent Handles 40-60%):
├─ Billing disputes
├─ Complaints/resolution
├─ Custom solutions
├─ Policy exceptions
├─ Escalations needed
└─ Resolution Rate: 40-60%
By Business Function
Customer Service:
├─ Order tracking
├─ Returns & replacements
├─ Troubleshooting
├─ Status inquiries
└─ Resolution: 80-90%
Billing/Payments:
├─ Payment processing
├─ Invoice inquiries
├─ Billing corrections
├─ Payment plans
└─ Resolution: 75-85%
Appointments/Scheduling:
├─ Schedule appointment
├─ Reschedule/cancel
├─ Find availability
├─ Send reminders
└─ Resolution: 85-95%
Sales/Retention:
├─ Upsell opportunities
├─ Plan recommendations
├─ Offer promotions
├─ Prevent churn
└─ Resolution: 70-80%
Technical Support:
├─ Basic troubleshooting
├─ Access issues
├─ Configuration help
├─ Advanced escalation
└─ Resolution: 65-75%
Agentic Guardrails & Safety Controls
Built-in Safety Mechanisms
Guardrail Levels:
CRITICAL (Always Block):
├─ Data breach attempts
├─ Fraud patterns
├─ Unauthorized access
├─ Security violations
└─ Action: Immediate block + escalate
HIGH (Require Approval):
├─ Large financial transactions
├─ Account terminations
├─ Policy exceptions
├─ Sensitive data access
└─ Action: Require verification
MEDIUM (Monitor Closely):
├─ Refunds over threshold
├─ Plan downgrades
├─ Churn risk actions
├─ Unusual patterns
└─ Action: Execute with logging
LOW (Standard Operation):
├─ Routine transactions
├─ Information requests
├─ Schedule changes
├─ Status updates
└─ Action: Execute normally
Configurable Boundaries
Organization Can Define:
├─ Maximum transaction amount (agent handle)
├─ Which actions require approval
├─ Policy exception rules
├─ Escalation triggers
├─ Communication tone standards
├─ Retention/discount limits
├─ Data access restrictions
└─ Compliance requirements
Agentic Virtual Agent vs. Traditional Virtual Agent
| Feature | Agentic Agent | Traditional Agent |
|---|---|---|
| Decision Making | Reasoning-based | Rule-based |
| Conversation Flow | Dynamic, adaptive | Scripted, fixed |
| Context Understanding | Full multi-turn | Limited |
| Problem Solving | Independent reasoning | Pre-defined paths |
| Complexity Handling | Handles moderate complexity | Limited scenarios |
| Adaptation | Real-time behavior changes | No adaptation |
| Learning | Improves from outcomes | Static |
| Escalation Judgment | Intelligent assessment | Pre-set triggers |
| Customer Experience | Natural, conversational | Menu-driven |
| Autonomy | Semi-autonomous | Fully scripted |
| Setup Complexity | Moderate (AI handles) | Low |
| Flexibility | High | Low |
| Time to Deploy | Days-weeks | Weeks-months |
| Resolution Rate | 50-70% complex issues | 30-50% complex |
Implementation Roadmap
Phase 1: Foundation (Weeks 1-2)
Activities:
├── Audit current virtual agent capabilities
├── Identify top 3-5 use cases for agentic
├── Assess customer journey complexity
├── Define guardrails and boundaries
├── Plan integration with existing systems
└── Gather requirements from stakeholders
Deliverables:
├── Use case prioritization matrix
├── Guardrail policy document
├── Integration requirements list
└── Success metric definitions
Phase 2: Development (Weeks 3-5)
Activities:
├── Build/migrate use cases to agentic agents
├── Configure AI Guides for customer flows
├── Set up knowledge base integration
├── Configure guardrails and safety controls
├── Integrate backend systems
└── Set up monitoring and analytics
Deliverables:
├── Agentic agents built and configured
├── Integration tests completed
├── Guardrail validation completed
├── Monitoring dashboards created
└── Documentation complete
Phase 3: Testing & Optimization (Weeks 6-7)
Activities:
├── Comprehensive scenario testing
├── Load and performance testing
├── Guardrail effectiveness testing
├── Integration validation
├── Customer experience testing
└── Security and compliance validation
Deliverables:
├── Test results and sign-off
├── Performance baselines
├── Optimization recommendations
├── Final readiness confirmation
└── Issue resolution log
Phase 4: Pilot Deployment (Week 8)
Activities:
├── Deploy to pilot queue/segment
├── Monitor interactions closely (24/7)
├── Gather customer feedback
├── Track key performance metrics
├── Make rapid optimizations
└── Prepare for full rollout
Deliverables:
├── Daily performance reports
├── Customer feedback summary
├── Optimization log
├── Pilot success metrics
└── Full rollout plan
Phase 5: Full Rollout (Weeks 9-10)
Activities:
├── Expand to remaining queues
├── Monitor close for issues
├── Provide agent training (monitor mode)
├── Support team readiness
├── Scale gradually based on confidence
└── Establish optimization cadence
Deliverables:
├── Rollout completion checklist
├── Production metrics
├── Team training completion
├── Ongoing monitoring setup
└── Optimization plan
Phase 6: Optimization & Learning (Ongoing)
Activities:
├── Daily metric monitoring
├── Weekly performance reviews
├── Monthly optimization updates
├── Quarterly capability expansion
├── Continuous guardrail refinement
└── Regular training and updates
Deliverables:
├── Daily/weekly/monthly reports
├── Optimization recommendations
├── Capability roadmap
├── Training materials
└── Continuous improvement plan
Performance Metrics & Monitoring
Key Performance Indicators
| Metric | Target | Purpose |
|---|---|---|
| Resolution Rate | 50-70% (first contact) | Measure autonomous handling |
| Escalation Rate | <30% | Control human workload |
| Customer Satisfaction (CSAT) | >80% | Measure experience quality |
| Average Resolution Time | -30% vs human | Track efficiency |
| Task Completion Rate | >85% | Measure task success |
| Knowledge Accuracy | >95% | Ensure correct information |
| Policy Adherence | 100% | Compliance verification |
| Guardrail Violations | <0.1% | Safety monitoring |
Real-Time Monitoring Dashboard
Agentic Virtual Agent Monitor (Live)
Queue: Customer Service
├── Active Interactions: 47
├── Agents (agentic): 3 active
├── Human Agents: 12 available
│
├── Current Metrics:
│ ├─ Avg Resolution: 4.2 minutes
│ ├─ Current CSAT: 4.3/5 (sample)
│ ├─ Escalation Rate: 22%
│ └─ Policy Adherence: 100%
│
├── Interaction Breakdown:
│ ├─ Self-service (no agent): 1,250 today
│ ├─ Agentic agent resolved: 480 today
│ ├─ Escalated to human: 85 today
│ └─ In-progress: 47
│
├── Top Use Cases:
│ ├─ Order Status (156 resolved)
│ ├─ Billing Questions (134 resolved)
│ └─ Returns (89 resolved)
│
└── Guardrail Status:
├─ Critical Rules: All passing
├─ Violations Today: 0
└─ Approval Requests: 3 pending
Common Implementation Scenarios
Scenario 1: Customer Service Center Automation
Organization: E-commerce Company (100 agents)
Current: High volume, repetitive inquiries
Deployment:
├─ Agentic agents for: Order status, returns,
│ exchanges, tracking, simple complaints
├─ Resolution targets: 60-70% automation
├─ Channels: Chat, email, phone
└─ Timeline: 10 weeks
Expected Results:
├─ Automation Rate: 65% of volume
├─ Agent Productivity: +40% (less routine work)
├─ CSAT: +12% (faster resolution)
├─ AHT: -25% (focused on complex issues)
├─ Cost Reduction: $180K-250K annually
└─ Payback Period: 4-5 months
Scenario 2: Technical Support Evolution
Organization: SaaS Company (50 support agents)
Current: Mixed simple and complex tickets
Deployment:
├─ Agentic agents for: FAQ, basic troubleshooting,
│ account resets, documentation lookup
├─ Resolution targets: 40-50% automation
├─ Channels: Chat, email, knowledge portal
└─ Timeline: 12 weeks
Expected Results:
├─ Automation Rate: 45% of volume
├─ Agent Capacity: +30% (handling complex)
├─ CSAT: +8% (better first contact)
├─ Time to Resolution: -20%
├─ Escalation Quality: Improved (richer context)
└─ Cost Reduction: $120K-150K annually
Scenario 3: Billing & Collections Department
Organization: Financial Services (30 agents)
Current: Payment processing, dispute resolution
Deployment:
├─ Agentic agents for: Payment processing,
│ arrangement setup, billing inquiries,
│ promotional application
├─ Resolution targets: 55-65% automation
├─ Channels: Voice, chat, IVR
└─ Timeline: 14 weeks
Expected Results:
├─ Automation Rate: 60% of volume
├─ First-Contact Collections: +25%
├─ Customer Payment Satisfaction: +15%
├─ Dispute Resolution: 50% autonomous
├─ Revenue Impact: +$50K monthly
└─ Payback Period: 3-4 months
Best Practices for Agentic Virtual Agents
Agent Design
- Clear Boundaries - Define exactly what agent can and cannot do
- Progressive Complexity - Start simple, add complexity gradually
- Natural Conversation - Design for human-like interaction
- Graceful Degradation - Handle misunderstandings smoothly
- Escalation Clarity - Know when to hand off to human
- Continuous Learning - Improve based on interaction outcomes
- Regular Updates - Refine agent behavior based on data
Safety & Governance
- Guardrail Testing - Rigorously test all safety mechanisms
- Approval Workflows - Require approval for high-risk actions
- Audit Trails - Log all agent decisions and actions
- Compliance Monitoring - Ensure all interactions meet requirements
- Regular Audits - Review agent behavior periodically
- Exception Handling - Clear process for policy exceptions
- Transparency - Customers know they're talking to agent
Integration Management
- System Reliability - Ensure backend systems are available
- Data Quality - Keep knowledge base and data current
- Error Handling - Gracefully handle system failures
- Transaction Safety - Verify critical operations succeed
- Real-time Connectivity - Fast system access during interactions
- Fallback Plans - Handle integration failures smoothly
- Performance Optimization - Keep response times fast
Performance & Optimization
- Monitor Continuously - Track metrics in real-time
- Analyze Failures - Understand why escalations occur
- Gather Feedback - Customer and agent feedback critical
- Iterate Quickly - Make improvements based on data
- A/B Testing - Test different approaches
- Seasonal Planning - Adjust for peak periods
- Capacity Planning - Scale agents with demand
Troubleshooting Common Issues
| Issue | Cause | Resolution |
|---|---|---|
| High escalation rate | Agent lacks capability for use case | Expand agent training and knowledge |
| Poor customer satisfaction | Conversation feels unnatural | Refine language generation and tone |
| Integration failures | Backend system issues | Test integrations, improve error handling |
| Slow response times | System latency or complex reasoning | Optimize queries, simplify logic |
| Guardrail violations | Rules too loose or unclear | Tighten rules, improve monitoring |
| Incorrect decisions | Knowledge gaps or logic errors | Update knowledge base, refine rules |
| Customers can't escalate | Escalation path unclear | Add clear escalation triggers |
| Token overages | Agent using more tokens than expected | Optimize agent logic, reduce complexity |
| Integration data stale | Knowledge base not updated | Establish content review process |
| Customer confusion | Unclear communications | Simplify language, improve clarity |
Agentic Capabilities Evolution
Current State (2026)
What Agentic Agents Can Do Now:
├─ Understand complex customer requests
├─ Reason through multi-step problems
├─ Access and apply knowledge
├─ Execute transactions within bounds
├─ Maintain context across conversation
├─ Adapt behavior based on customer
├─ Learn from outcomes
└─ Handle 50-70% of customer interactions
Near-term (2026-2027)
Expected Enhancements:
├─ Deeper business system integration
├─ More sophisticated reasoning
├─ Better multi-language support
├─ Improved emotion detection
├─ Proactive outreach capabilities
├─ Cross-department orchestration
└─ Enhanced learning algorithms
Future Vision (2027+)
Potential Capabilities:
├─ Full autonomy within broad boundaries
├─ Predictive problem prevention
├─ Seamless cross-organization collaboration
├─ Personalized experience generation
├─ Advanced negotiation capability
├─ Complex financial decisions
└─ Level 5 - Fully autonomous agents
Interview Cheat Sheet
| Question | Answer |
|---|---|
| What makes agentic agents different? | They reason and plan solutions rather than following fixed scripts |
| What level of autonomy do they have? | Level 4 - semi-autonomous with defined guardrails and boundaries |
| What issues can they handle? | 50-70% of customer interactions, including complex scenarios |
| How do guardrails work? | Configurable rules that define what agents can/cannot do |
| Can they access backend systems? | Yes, can execute transactions and retrieve real-time data |
| How do they learn? | Analyze interaction outcomes and improve responses over time |
| What happens if they can't solve? | Intelligent escalation to human with full context |
| How long to deploy? | 8-14 weeks depending on complexity |
| What's the expected ROI? | 4-6 months through automation and efficiency gains |
| What channels do they support? | All Genesys channels - voice, chat, email, messaging, social |
| How much does it cost? | AI Experience tokens metered by usage |
| What about compliance? | Built-in audit trails, guardrails, and monitoring |
| Can they make mistakes? | Yes - monitored and corrected through guardrails |
| Are humans always available? | Yes - escalation available anytime |
| What's most important for success? | Clear use cases, good data, proper guardrails |
Key Takeaways
- Intelligent Autonomy - Agentic agents reason and plan solutions independently
- Safety by Design - Configurable guardrails ensure compliance and safety
- Significant Automation - Handle 50-70% of customer interactions without human
- Omnichannel Ready - Work seamlessly across all communication channels
- Continuous Learning - Improve performance based on interaction outcomes
- Graceful Escalation - Intelligently hand off to humans when needed
- Fast Deployment - Weeks vs. months to implement complex automation
- Strong ROI - Typical payback in 4-6 months
- Customer Focused - Natural conversation, context-aware, personalized
- Future Ready - Path to higher autonomy levels as technology matures
Real-World Success Metrics
Customer Service Example
Before Agentic Agent:
├─ Customer Resolution Rate: 65% (human agents)
├─ Average Handle Time: 8 minutes
├─ Cost per Interaction: $4.50
├─ Customer Satisfaction: 75%
└─ Monthly Volume: 10,000 interactions
After Agentic Agent Implementation:
├─ Self-service + Agent: 80% Resolution Rate
├─ Agentic Agent Only: 65% first contact
├─ Average Handle Time: 3.5 minutes
├─ Cost per Interaction: $1.80
├─ Customer Satisfaction: 82%
└─ Same Volume but 40% labor reduction
Annual Impact:
├─ Cost Savings: ~$180,000/year
├─ Improvement in CSAT: +7 points
├─ Faster Resolution: -55% time
└─ ROI: 350% in first year
Financial Services Example
Before:
├─ Payment Processing: Human handled 70%
├─ Average Call Time: 12 minutes
├─ Collections Rate: 82%
├─ Cost per Transaction: $6.00
└─ Agent Utilization: 85%
After Agentic Implementation:
├─ Agentic Agent: 60% self-service
├─ Human Agents: 40% complex cases
├─ Average Call Time: 4 minutes
├─ Collections Rate: 87%
├─ Cost per Transaction: $2.40
├─ Agent Utilization: 65% (more valuable work)
Impact:
├─ Cost Savings: $240K/year
├─ Collections Improvement: +5%
├─ Revenue Benefit: $150K/year
└─ Total Benefit: $390K/year
Getting Started Checklist
Assessment Phase
- Audit current agent performance
- Identify top 3-5 use cases
- Assess customer journey complexity
- Define success metrics
- Analyze integration requirements
- Document guardrail needs
- Assess team readiness
Planning Phase
- Prioritize use cases by complexity
- Create implementation roadmap
- Design guardrails and boundaries
- Plan change management
- Allocate resources
- Set realistic timelines
- Establish success criteria
Development Phase
- Build agentic agents
- Configure knowledge base
- Set up integrations
- Configure guardrails
- Create monitoring dashboards
- Document processes
- Prepare testing plan
Deployment Phase
- Conduct thorough testing
- Deploy to pilot
- Monitor closely
- Gather feedback
- Optimize configuration
- Full production rollout
- Establish support procedures
Optimization Phase
- Monitor daily metrics
- Analyze performance
- Gather customer feedback
- Implement improvements
- Scale gradually
- Plan next use cases
- Document learnings
Additional Resources
Official Documentation Links
- Virtual Agent Overview: help.genesys.cloud/articles/virtual-agent-overview/
- AI Studio & AI Guides: help.genesys.cloud/articles/about-ai-studio/
- Agentic Capabilities: help.genesys.cloud/articles/agentic-virtual-agents/
- Architect Virtual Agent Flows: help.genesys.cloud/articles/architect-virtual-agent-flows/
Training & Support
- Genesys University: genesys.com/training
- Community Forums: https://community.genesys.com
- Technical Support: https://support.genesys.com
- Sales Support: sales@genesys.com
Document Version Info
Last Updated: March 2026
Source: Genesys PureCloud Official Documentation
Based On: AI Studio, Virtual Agent, and Agentic Capabilities releases
Version: 1.0
Predictive Routing
Genesys PureCloud Predictive Routing Documentation
Study Notes
| Topic | Description |
|---|---|
| Predictive Routing | Machine learning-powered intelligent routing that matches contacts to optimal agents |
| AI Engine | White-box models with explainability features showing feature importance scores |
| Outcome Labels | Custom KPI metrics tracked and used to retrain models continuously |
| Queue Configuration | Per-queue settings enabling/disabling predictive routing with KPI selection |
| Model Retraining | Weekly automated retraining with daily data updates ensuring current accuracy |
| Data Retention | No model data retained beyond 90 days for privacy and compliance |
Navigation
Admin → Architect → Routing → Predictive Routing Configuration OR Admin → Contact Center → Routing → Predictive Routing Settings
Predictive Routing Overview
Genesys Cloud's predictive routing uses machine learning to rank agents for optimal handling of interactions, supporting key performance indicators like average handle time and next contact avoidance. Unlike traditional rule-based routing, predictive routing analyzes hundreds of data points in real-time to identify which agent is most likely to deliver the best customer outcome based on your defined business goals.
Key Capabilities
- Predictive routing uses white-box models that allow gaining insights into how the features contribute to a prediction, with each input feature given a percentage/score that represents its importance
- Continuously improves scoring accuracy based on outcome data from previous interaction-agent matchups
- Real-time agent scoring based on historical performance and current state
- Automatically retrains and updates features used for agent scoring with daily data and retrains the data models weekly
- Support for custom KPI optimization (AHT, NCA, CSAT, etc.)
- Automatic fallback when models are unavailable
How It Works
- Contact arrives at system
- Contact metadata extracted (type, queue, customer data)
- URS Strategy Subroutines submit interaction details to the Core Platform, which scores agents for their historical ability to handle such an interaction
- Machine learning model scores all available agents
- Contact routed to highest-scoring agent
- Interaction outcome captured and logged
- Models updated with new outcome data for future predictions
Edition & Module Requirements
| Requirement | Details |
|---|---|
| Minimum Edition | Premium Edition (Genesys Cloud CX 1-4) |
| Module | Workforce Optimization or Predictive Routing add-on |
| License Type | Included with qualifying editions |
| AI Tokens | May consume tokens depending on configuration |
| Setup | Admin access to Architect and routing configuration |
Study Notes - AI Model Features
| Feature Category | Examples | Impact |
|---|---|---|
| Agent Profile Data | Skills, tenure, department, certifications | High - Core matching criteria |
| Agent Performance Data | Historic AHT, FCR, quality scores, tenure | High - Predicts future performance |
| Availability Data | Current status, workload, after-call-work | High - Real-time readiness |
| Interaction Metadata | Contact type, channel, customer segment | Medium - Context matching |
| Queue Statistics | Historical patterns, time-of-day trends | Medium - Volume prediction |
| Customer Data | History, value, previous interactions | Low-Medium - Personalization |
AI Model Architecture
White-Box Model Explainability
Genesys helps you deduce the prediction by presenting a global interpretation that describes the average behavior of a model. A high value means that the feature will have a larger effect on the model's predictions and ranking of agents. While a small value is given to unimportant features whose contribution is mostly ignored for the model's predictions.
Model Training & Retraining
To keep up with changing levels of agent proficiency and customer interaction contexts, the data models continually retrain and learn from the latest features. Genesys Cloud updates the features used for agent scoring with daily data and retrains the data models weekly. No data is retained in the models for more than 90 days.
Privacy & Compliance
Genesys does not use PII for the agent scoring process. Genesys Cloud only uses transaction conversation data to train machine learning models.
Data Requirements for Optimal Performance
Recommended Data Volume
Genesys recommends a periodic upload of outcome data to ensure better model training and prediction accuracy. The recommended frequency is once a day, or, at the minimum, once a week. Genesys recommends at least 90 days of data and ideally 180 days of data. If you retain fewer days of data, you can still use and benefit from predictive routing. However, the quality and effectiveness of your AI models and predictions is likely to suffer and the resulting benefit will be reduced compared to standard routing.
Data Sources
- Agent profile data such as skills, tenure, department, certificates, employee type
- Agent performance data such as historic average handle time for a queue
- Custom outcome data via Outcome Attributions API
- External data sources for outcome-based KPIs
Minimum Data Thresholds
Data, even if available, is considered for the purpose of routing calculation only if the data volume meets a minimum requirement. If the volume of data does not meet the specified threshold value, the machine learning model does not use the available data. While not mandatory for Genesys predictive routing to operate, for better prediction results, Genesys recommends that you ensure the availability of sufficient volume of data against maximum number of fields.
Outcome Labels & Custom KPIs
Default KPIs
Predictive Routing can optimize for standard Genesys metrics:
- Average Handle Time (AHT) - Minimize time to resolve
- Next Contact Avoidance (NCA) - Minimize customer repeat contacts
- Customer Satisfaction (CSAT) - Maximize customer satisfaction scores
- First Contact Resolution (FCR) - Prevent escalations and transfers
Custom Outcome Labels
If you use outcome-based custom KPIs, Genesys predictive routing relies on data from external data sources, which it receives through the Outcome Attributions API.
Uploading Outcome Data
- Frequency: Daily recommended, weekly minimum
- Format: CSV or API integration via Outcome Attributions API
- Data Requirements: At least 90 days, ideally 180 days for optimal models
- Processing: Data uploaded to Genesys Cloud for model retraining
- Model Updates: Weekly retraining cycle incorporates latest outcomes
Setting KPI Optimization per Queue
During queue configuration, administrators select which KPI the predictive routing model should optimize for that specific queue. The system will then score agents based on their historical performance against that metric.
Queue Configuration Steps
Step 1: Navigate to Routing Settings
- Log into Genesys Cloud Admin
- Go to Architect → Routing
- Select queue to enable predictive routing
- Open queue configuration settings
Step 2: Enable Predictive Routing
- Locate "Predictive Routing" toggle
- Toggle ON to enable feature
- System validates that requirements are met
- Configuration page appears
Step 3: Select KPI Optimization
- Choose primary KPI from dropdown:
- Average Handle Time (AHT)
- Next Contact Avoidance (NCA)
- Customer Satisfaction (CSAT)
- Custom outcome metric
- If custom KPI: Verify outcome data is being uploaded via API
- Save selection
Step 4: Configure Scoring Parameters
- Set minimum agent availability threshold
- Define required skills for queue
- Configure fallback routing behavior
- Set scoring timeout (default: 3 seconds)
- Enable/disable explainability logging
Step 5: Data & Outcome Mapping
- Confirm queue is sending outcome data
- For outcome-based custom KPIs, ensure periodic upload of outcome data via Outcome Attributions API
- Map external outcome labels to routing KPI
- Verify historical data volume meets minimums
- Test data flow
Step 6: Validation & Testing
- Enable predictive routing on small percentage of traffic
- Monitor model accuracy metrics
- Verify fallback routing works correctly
- Gather baseline performance data
- Review feature importance scores in reports
Step 7: Gradual Rollout
- Increase traffic percentage gradually
- Monitor agent utilization and contact distribution
- Track KPI impact daily
- Make refinements as needed
- Scale to 100% when confident in performance
Model Scoring Process
Agent Scoring Flow
Incoming Contact
↓
Extract Contact Metadata
├── Contact type (voice, chat, email)
├── Queue assignment
├── Customer segment
└── Interaction intent
↓
Query AI Model
├── Input: Contact metadata
├── Features: Agent data, performance, availability
├── Process: ML scoring algorithm
└── Output: Agent scores (0-100)
↓
Rank Agents
├── Agent A: 87 score
├── Agent B: 72 score
├── Agent C: 91 score (highest)
└── Agent D: 65 score
↓
Route to Highest Scorer
├── Select: Agent C (91 score)
├── Fallback: If unavailable → Agent A (87)
└── Escalation: If all unavailable → Queue
↓
Log Interaction
├── Selected agent score
├── Feature importance values
├── Outcome when complete
└── Update training data
Feature Importance Explanation
The model provides transparency showing which factors most influenced each routing decision:
-
High Importance Features (weight >10%)
- Directly impact agent selection
- Should be monitored and optimized
-
Medium Importance Features (weight 5-10%)
- Contribute meaningfully to decisions
- Worth tracking for insights
-
Low Importance Features (weight <5%)
- Minimal impact on routing
- May indicate data quality issues
Real-World Implementation Scenario
Banking Contact Center
Queue: Mortgage Support
KPI Optimization: Average Handle Time (AHT)
Agent Profiles:
├─ Agent Sarah
│ ├─ Skills: Mortgage, Refinance, Loan Modification
│ ├─ Avg AHT: 6.2 minutes
│ ├─ Tenure: 5 years
│ └─ Current: Available (0 contacts)
│
├─ Agent James
│ ├─ Skills: Mortgage, Basic Support
│ ├─ Avg AHT: 8.1 minutes
│ ├─ Tenure: 1 year
│ └─ Current: Available (1 contact)
│
└─ Agent Maria
├─ Skills: Mortgage, Refinance, Advanced
├─ Avg AHT: 5.9 minutes
├─ Tenure: 7 years
└─ Current: Available (2 contacts)
Incoming Contact:
"I'd like information about refinancing my mortgage"
Model Analysis:
├─ Contact Intent: Refinance inquiry
├─ Expected AHT: ~7 minutes
├─ Required Skills: Refinance, Mortgage
└─ Channel: Voice
Agent Scoring (for AHT optimization):
├─ Sarah: 89 score
│ └─ Reasoning: Strong refinance skills, excellent AHT,
│ lower current load
├─ James: 71 score
│ └─ Reasoning: Has required skills but higher baseline AHT
└─ Maria: 85 score
└─ Reasoning: Best AHT historically but already has
higher load (2 contacts)
Routing Decision:
Route to Agent Sarah (highest score: 89)
Expected Outcome:
├─ Faster resolution (Sarah's AHT advantage)
├─ Better customer experience
├─ Optimizes against AHT KPI
└─ Load distributed effectively
Model Metrics & Dashboard
Key Performance Indicators Tracked
| Metric | Purpose | Good Range |
|---|---|---|
| Model Accuracy | How often predictions are correct | >75% |
| Feature Coverage | % of required data available | >85% |
| Agent Utilization | Even work distribution | 70-90% |
| KPI Improvement | Impact on selected metric | +5-20% |
| Fallback Rate | When model can't score | <5% |
Monitoring Model Health
- Daily: Check model score distribution
- Weekly: Review prediction accuracy vs. actual outcomes
- Monthly: Analyze feature importance changes
- Quarterly: Assess KPI impact and ROI
Best Practices
Data Quality
- Validate Outcome Data - Ensure outcome labels are accurate and complete
- Consistent Data Format - Maintain standardized data formats in API uploads
- Timely Uploads - Daily uploads ensure models have latest information
- Complete Records - Capture outcomes for all interactions, not just subset
Model Optimization
- Start with One KPI - Master one optimization goal before multiple
- Monitor Feature Changes - Track how feature importance shifts over time
- A/B Test Approaches - Compare predictive routing vs. traditional on test queues
- Iterative Improvement - Refine based on real-world performance data
Queue Configuration
- Gradual Rollout - Start with 10% traffic, increase to 100% gradually
- Skill Validation - Ensure agent skill assignments are accurate and current
- Outcome Mapping - Correctly map external KPIs to routing selection
- Fallback Testing - Verify routing works when models unavailable
Change Management
- Communicate Changes - Inform agents about predictive routing changes
- Monitor Agent Sentiment - Track agent acceptance and satisfaction
- Provide Training - Explain how predictive routing affects their work
- Set Expectations - Clear goals and targets for improvement
Common Implementation Issues & Solutions
| Issue | Cause | Solution |
|---|---|---|
| Model not scoring agents | Insufficient data volume | Ensure 90+ days of outcome data available |
| Uneven agent utilization | Agents with similar skills | Review and update skill assignments |
| No KPI improvement | Wrong KPI selected for queue | Validate KPI choice aligns with business goals |
| High fallback rate | Skill mismatches in data | Audit and correct agent skill inventory |
| Slow model updates | Outcome data not uploading | Verify API integration and data flow |
| Feature importance unclear | New queue without history | Wait for sufficient data accumulation |
| Model accuracy low | Poor quality training data | Validate and clean outcome data |
Interview Cheat Sheet
| Question | Answer |
|---|---|
| What is Predictive Routing? | ML-powered routing that matches contacts to optimal agents based on historical data |
| What models does it use? | White-box models with explainability showing feature importance percentages |
| How often do models retrain? | Weekly with daily data updates; no data retained beyond 90 days |
| What data is needed? | 90+ days recommended (ideally 180); daily or weekly outcome uploads |
| What KPIs can it optimize? | AHT, NCA, CSAT, or custom metrics via Outcome Attributions API |
| Where do you configure it? | Admin → Architect → Routing → Queue settings |
| Does it use PII? | No, only transaction conversation data for training |
| What's the expected improvement? | 5-20% improvement in selected KPI |
| How do you upload outcomes? | Via Outcome Attributions API or CSV upload to Genesys Cloud |
| What if model unavailable? | Falls back to traditional routing automatically |
| How do agents get selected? | Highest-scoring agent routed first; fallback to next highest if unavailable |
| Can you explain routing decisions? | Yes, white-box models provide feature importance scores for transparency |
Key Takeaways
- Intelligent Matching - By continuously learning from real-time and historical data, it helps optimize important KPIs like average handle time, first-contact resolution (through next contact avoidance (NCA)) and more
- White-Box Transparency - Models explain exactly which factors influenced each routing decision
- Continuous Learning - Weekly retraining with daily updates ensures models stay current
- Privacy-First - No PII used; data retained only 90 days
- Custom Optimization - Select any KPI (standard or custom) to optimize routing around
- Data-Driven - Requires quality outcome data for accurate predictions
- Graceful Fallback - Traditional routing if model unavailable
- Per-Queue Configuration - Each queue can optimize for different KPIs
- Explainability - Feature importance scores show transparency in AI decisions
- Proven ROI - 5-20% improvement typical on selected KPI
Additional Resources
Official Documentation Links
- Predictive Routing Overview: help.genesys.cloud/articles/predictive-routing-overview/
- AI Model Scoring: help.genesys.cloud/articles/how-the-ai-model-scores-agents-for-predictive-routing/
- Data Requirements: help.genesys.cloud/articles/sources-of-data-for-predictive-routing-decisions/
- Use of AI in Routing: help.genesys.cloud/articles/use-of-ai-in-predictive-routing/
Support & Training
- Genesys University: genesys.com/training
- Community Forums: https://community.genesys.com
- Technical Support: https://support.genesys.com
Document Version Info
Last Updated: March 2026
Source: Genesys PureCloud Official Documentation (help.genesys.cloud)
Validated: Current with January-March 2026 releases
Version: 1.0
Agent Copilot
Genesys PureCloud Agent Copilot Documentation
Study Notes
| Topic | Description |
|---|---|
| Agent Copilot | Real-time AI assistance for agents during customer interactions |
| Core Function | Determines customer intent and provides next best actions in real-time |
| After-Call Work | Automates summaries, wrap-up codes, and resolution tracking |
| AI Skills | Modular AI capabilities that can be combined and customized |
| On-Queue Behavior | Operates continuously during interaction, adapting to conversation flow |
| Key Results | 5-min AHT reduction, 1.5-min hold time reduction, 2-min ACW reduction |
Navigation
Admin → Contact Center → Agent Assistance → Agent Copilot Configuration OR Admin → AI Studio → Agent Copilot Settings
Agent Copilot Overview
Genesys Agent Copilot enhances communication between the agent and the customer by determining customer intent and providing relevant next best actions to the agent. It offers assistance in after-call work and provides a summary of the conversation, reason for contact, resolution, and suggests wrap-up codes.
Genesys Agent Copilot integrates AI and Large Language Models to deliver intelligent assistance capabilities that transform agent productivity and customer service delivery. The platform automates after-call work through intelligent wrap-up code suggestions, conversation summaries, and resolution tracking, while providing real-time next-best-action recommendations and customer intent determination during live interactions.
Key Capabilities
- Real-time agent assist during customer interactions on voice and digital channels
- Intelligent next-best-action recommendations based on conversation context
- Automatic conversation summaries and wrap-up code suggestions
- Customer intent determination and understanding
- Multi-language support (13+ languages including English, Spanish, French, German, Japanese, Korean, Arabic, Hindi, Portuguese, Swedish, Dutch, Italian)
- Custom AI Guides built through AI Studio integration
- Knowledge article integration and answer highlighting
- Queue-specific configuration and management
- Performance analytics and monitoring dashboards
Performance Metrics
Agent Copilot users have seen results including:
- 5-minute decrease of average handle time
- 1.5-minute decrease in average hold time
- 2-minute decrease in after-call work time
Edition & Module Requirements
| Requirement | Details |
|---|---|
| Minimum Edition | Premium Edition (Genesys Cloud CX 1-4) |
| Module | Included or Agent Copilot add-on depending on tier |
| License Type | Per-user licensing |
| AI Tokens | Requires tokens: 40-60 per user for Agent Copilot |
| Knowledge Base | Genesys Knowledge Workbench or Knowledge Fabric recommended |
Study Notes - Agent Copilot Features
| Feature | Description | Benefit |
|---|---|---|
| Intent Recognition | AI understands customer goals from conversation | Faster issue identification |
| Next-Best-Action | Recommends optimal next step for agent | Guides resolution path |
| Auto-Summarization | Generates conversation summary automatically | Reduces after-call work |
| Wrap-Up Code Suggestions | AI suggests appropriate completion codes | Faster code selection |
| Knowledge Integration | Surfaces relevant knowledge articles automatically | Faster access to information |
| Answer Highlighting | Highlights key parts of knowledge articles | Easier information scanning |
| Sentiment Monitoring | Detects customer emotion in real-time | Enables de-escalation |
| Multi-Language Support | Operates in 13+ languages | Global team support |
| Custom Guides | Build AI agents using AI Studio | Automation flexibility |
| Performance Analytics | Dashboard showing copilot usage and impact | Measurement and optimization |
How Agent Copilot Works
During Interaction (Real-Time Assistance)
Agent Answers Contact
↓
Copilot Begins Monitoring
├── Real-time transcription
├── Intent analysis
└── Context understanding
↓
Customer Explains Issue
"I'm having trouble logging into my account"
↓
Copilot Analyzes
├── Intent: Account Access Issue
├── Context: Login problem
├── Emotion: Slightly frustrated
└── Knowledge needed: Account recovery
↓
Copilot Provides Assistance
├── Knowledge Articles
│ ├─ "Password Reset Steps" (94% match)
│ ├─ "Two-Factor Auth Help" (81% match)
│ └─ "Account Locked Recovery" (76% match)
│
├── Next-Best-Action
│ └─ "Guide customer through password reset"
│
└── Script Suggestion
└─ "I can help you regain access to your account..."
↓
Agent Reviews & Applies
├── Reads suggested article
├── Guides customer through steps
├── Issue resolved
└── Interaction continues
After Interaction (After-Call Work)
Contact Completes
↓
Copilot Generates Summary
├── Conversation Analysis
├── Key Points Extraction
├── Issue Resolution Status
└── Customer Sentiment Analysis
↓
Summary Displayed to Agent
"Customer called about password reset.
Issue resolved through email link sent.
Customer satisfied."
↓
Wrap-Up Code Suggestions
├─ Suggested Codes (in priority order)
│ ├─ Password Reset (89% confidence)
│ ├─ Account Access (71% confidence)
│ └─ Technical Support (34% confidence)
└─ Agent selects from suggestions
↓
Agent Reviews & Saves
├── Reviews summary (can edit)
├── Selects wrap-up code
├── Adds notes if needed
└── Saves interaction
AI Skills Architecture
AI Skills are modular, customizable AI capabilities that can be combined and deployed through Agent Copilot. Each skill targets a specific function or use case.
Types of AI Skills
Knowledge Skills
- Surfaces relevant knowledge articles automatically
- Answers customer questions from knowledge base
- Answer highlighting for quick scanning
- Knowledge caching for speed
Next-Best-Action Skills
- Recommends optimal next step in interaction
- Guides agent through proper procedure
- Suggests escalation or transfer when needed
- Predicts customer outcomes
Wrap-Up Code Skills
- Analyzes interaction to suggest wrap-up codes
- Reduces time agents spend on code selection
- Improves code accuracy through AI
- Learning improves accuracy over time
Sentiment & De-Escalation Skills
- Real-time sentiment detection
- De-escalation recommendations
- Tone guidance for responses
- Emotional intelligence coaching
Compliance & Risk Skills
- Monitors for compliance violations
- Alerts on risky language or actions
- Ensures required disclosures made
- Flags suspicious patterns
Custom Business Skills
- Created via AI Studio
- Built using AI Guides
- Business-specific logic
- Adaptive to business processes
On-Queue Behavior
How Agent Copilot Operates During Customer Interaction
Queue: Customer Support
Status: Agent Sarah actively handling call
Real-Time Copilot Behavior:
MOMENT 1 (0:15 into call)
├─ Copilot listening to conversation
├─ Transcribing in real-time
├─ Analyzing customer statements
└─ Building context understanding
MOMENT 2 (0:45 into call)
Customer: "I need to change my billing address"
├─ Intent Detected: Billing Update
├─ Copilot triggers knowledge search
├─ Results: 2 relevant articles found
└─ Displayed to Agent Sarah
MOMENT 3 (1:15 into call)
├─ Customer emotion: Neutral → Positive
├─ Issue complexity: Routine
├─ Next action: Process address change
└─ Copilot suggests: "Enter new address in system"
MOMENT 4 (1:45 into call)
Customer: "Can I also update my phone number?"
├─ New intent added to context
├─ Copilot expands knowledge articles
├─ Related articles surfaced
└─ Agent handles both requests together
MOMENT 5 (3:00 - Call ends)
├─ Both issues resolved
├─ Customer satisfied
├─ Copilot prepares summary
└─ Ready for after-call work
Agent Copilot Interface Components
Agent Desktop View
┌──────────────────────────────────────┐
│ ACTIVE CALL - Sarah Martinez │
│ Customer: John Smith │
│ Queue: Billing Support │
│ Duration: 3:42 │
└──────────────────────────────────────┘
┌──────────────────────────────────────┐
│ 📚 SUGGESTED KNOWLEDGE │
├──────────────────────────────────────┤
│ ✓ Update Billing Address (94%) │
│ ✓ Change Phone Number (87%) │
│ ○ Payment Methods (61%) │
│ │
│ [Show Full Articles] [Minimize] │
└──────────────────────────────────────┘
┌──────────────────────────────────────┐
│ ➡️ NEXT-BEST-ACTION │
├──────────────────────────────────────┤
│ Recommended: Process address update │
│ in customer record │
│ │
│ Steps: │
│ 1. Confirm new address │
│ 2. Verify zip code │
│ 3. Update system │
│ 4. Send confirmation │
└──────────────────────────────────────┘
┌──────────────────────────────────────┐
│ 😊 CUSTOMER SENTIMENT │
├──────────────────────────────────────┤
│ Current: POSITIVE │
│ Emotion: Satisfied │
│ Recommendation: Offer additional help│
└──────────────────────────────────────┘
[Notes Box]
[Hold/Transfer/Close Buttons]
Behavior by Interaction Type
Inbound Call
- Continuous listening and transcription
- Real-time intent and sentiment analysis
- Knowledge surfacing as topics emerge
- Next-best-action recommendations throughout
- Escalation alerts if conversation flags
- Summary generation at call end
Chat/Email
- Message-by-message analysis
- Delayed but thorough knowledge search
- Context building across multiple messages
- Suggested responses for agent review
- Quick-reply templates with personalization
- Handoff summaries for escalation
Outbound Call
- Prepopulates customer context
- Suggests opening statements
- Guides conversation flow
- Handles objections with recommendations
- Closing suggestions
- Outcome tracking
Implementation Guide
Step 1: Prerequisites & Planning
Step 2: Knowledge Base Setup
- Review/create knowledge articles in Knowledge Workbench
- Ensure articles are accurate and current
- Add metadata and keywords for searchability
- Organize by topic and queue
- Set article access permissions
- Test knowledge base connectivity
Step 3: Enable Agent Copilot
Step 4: Configure by Queue
- Create queue-specific Copilot settings
- Define which AI Skills are active per queue
- Configure knowledge sources
- Set wrap-up code matching rules
- Establish sentiment thresholds
- Test queue-specific behavior
Step 5: Agent Training
- Conduct overview training on Copilot interface
- Demonstrate real-time knowledge suggestions
- Practice reviewing and applying recommendations
- Explain wrap-up code suggestions
- Cover sentiment alerts and de-escalation
- Q&A and feedback
Step 6: Phased Rollout
- Deploy to pilot queue first
- Monitor closely for 1-2 weeks
- Gather agent and supervisor feedback
- Optimize based on learnings
- Expand to additional queues
- Scale to full deployment
Step 7: Ongoing Monitoring
- Review Agent Copilot dashboard daily
- Track key metrics (AHT reduction, token usage)
- Monitor agent adoption rates
- Gather continuous feedback
- Refine knowledge articles based on usage
- Optimize AI recommendations
Real-Flow Scenarios
Scenario 1: Technical Support with Knowledge Integration
Agent: "Thanks for calling technical support, how can I help?"
Customer: "My printer isn't connecting to WiFi"
Copilot immediately surfaces:
├─ 3 relevant knowledge articles
├─ Troubleshooting flowchart visual
├─ Video walkthrough link
└─ Quick-resolution steps
Agent: "I can help. Let me walk you through the WiFi
connection steps which usually resolve this..."
[Uses Copilot-suggested steps to guide customer]
Result: Issue resolved in 4 minutes
Copilot Summary:
"Customer called about printer WiFi connectivity issue.
Guided through troubleshooting steps. Issue resolved
after resetting router. Customer satisfied."
Wrap-up Code Suggestions:
├─ Printer Setup (92% confidence) ← Selected
├─ Technical Support (67% confidence)
└─ Network Issues (45% confidence)
Time Saved: 2 minutes (no manual summary or code lookup)
Scenario 2: Billing with Sentiment De-escalation
Customer (frustrated): "Why was I charged twice?!"
Copilot detects:
├─ Emotion: FRUSTRATED
├─ Sentiment score: -2.1/5
├─ Recommended action: Empathize & resolve immediately
└─ De-escalation tip: "Acknowledge frustration sincerely"
Agent (applying suggestion): "I completely understand
your frustration. Let me look into that right away
and fix this for you."
Copilot provides:
├─ Knowledge: "Duplicate Charge Resolution"
├─ Next action: "Issue refund immediately"
└─ Script: "Here's what happened and how I'm fixing it..."
[Agent processes refund while explaining]
Customer (relieved): "Oh wow, thanks for handling that so fast!"
Copilot updates sentiment: +1.5/5 (positive)
Summary generated:
"Customer called upset about duplicate charge. Explained
system error, issued refund immediately. Customer very
satisfied with quick resolution and empathetic service."
Result: De-escalation successful, issue resolved, positive outcome
Scenario 3: Sales with Cross-Sell Recommendations
Customer: "I'd like to upgrade my plan"
Copilot analyzes:
├─ Customer history: 2-year subscriber
├─ Current plan: Basic
├─ Usage patterns: Heavy data user
├─ Recommended action: Suggest upgraded plan + add-ons
└─ Next-best-action: "Present Premium with extras"
Agent: "Great! Based on your usage, I have a perfect
recommendation..."
Copilot displays:
├─ Customer's usage metrics
├─ Recommended plan details
├─ Comparison of savings
└─ Available promotions (10% if upgrade today)
[Agent presents recommendations]
Customer: "The Premium plan looks good, and 10% off
sounds great!"
Copilot suggests:
├─ Add-on: Premium Support (93% value match)
└─ Upsell: Extended warranty (67% match)
Result: Upgraded plan + 1 add-on sale
Copilot Summary:
"Customer upgraded from Basic to Premium plan and added
Premium Support. Mentioned promotional discount influenced
decision. Total value: $XXX. Customer satisfied."
Business Impact: Increased revenue, improved satisfaction
Best Practices
Knowledge Base Quality
- Accuracy First - All information must be current and correct
- Comprehensive Coverage - Address common issues and scenarios
- Clear Language - Write for quick scanning, not detailed reading
- Proper Organization - Use tags and metadata effectively
- Regular Updates - Review and update quarterly minimum
- Validation Process - Test before publishing
Agent Copilot Configuration
- Start Simple - Enable basic features first, add complexity gradually
- Queue-Specific - Tailor for each queue's unique needs
- Knowledge Curation - Surface only relevant articles
- Test Thoroughly - Pilot before full deployment
- Monitor Adoption - Track agent usage and feedback
- Continuous Refinement - Improve based on data
Agent Enablement
- Comprehensive Training - Thorough explanation of features
- Live Demonstrations - Show real examples and use cases
- Practice Sessions - Let agents use Copilot before production
- Clear Benefits - Help agents understand time-saving value
- Easy Access to Help - Support for questions and issues
- Celebrate Successes - Share agent stories and improvements
Performance Optimization
- Track Metrics Daily - Monitor AHT, ACW, knowledge usage
- Gather Agent Feedback - Regular surveys and check-ins
- Analyze Usage Patterns - Identify which features are most helpful
- Refine Knowledge - Update articles based on usage data
- Optimize for Your Business - Tailor features to your priorities
- Benchmark Performance - Compare pre/post Copilot metrics
Token Consumption
Agent Copilot requires AI Experience tokens for operation:
- Consumption: 40-60 tokens per user per month
- Factors: Interaction volume, knowledge article access, AI feature usage
- Optimization: Monitor usage and optimize knowledge articles
- Budgeting: Plan tokens based on agent count and deployment scope
Interview Cheat Sheet
| Question | Answer |
|---|---|
| What is Agent Copilot? | Real-time AI assistance for agents during customer interactions |
| What does it do during calls? | Determines intent, suggests next actions, surfaces knowledge, monitors sentiment |
| What about after-call work? | Auto-generates summaries, suggests wrap-up codes, tracks resolution |
| What are AI Skills? | Modular AI capabilities (knowledge, next actions, sentiment, compliance) |
| How does it behave on-queue? | Continuous monitoring and assistance throughout interaction |
| What languages does it support? | 13+ including English, Spanish, French, German, Japanese, Korean, Arabic, Hindi |
| How much time does it save? | ~9 minutes per interaction (5 AHT + 2 ACW + 1.5 hold time) |
| What's the expected improvement? | AHT reduction 5-10%, ACW reduction 2-3 minutes, CSAT improvement 5-15% |
| How is it licensed? | Per-user with 40-60 tokens per user per month |
| Does it work omnichannel? | Yes - voice, chat, email all supported |
| Can you customize it? | Yes via AI Studio to create custom Guides and Skills |
| Where is it configured? | Admin → Contact Center → Agent Assistance → Agent Copilot |
| What knowledge does it need? | Quality knowledge base (Workbench or Fabric) |
| How long until ROI? | 2-4 weeks to see AHT improvements |
| What's most important? | Quality knowledge base and agent training |
Key Takeaways
- Real-Time Assistance - Continuously monitors interactions providing guidance as they happen
- Intelligent Understanding - Determines customer intent and emotional state
- Automatic Documentation - Generates summaries and suggests wrap-up codes
- Knowledge Integration - Surfaces relevant articles without agent search
- Multi-Channel - Works on voice, chat, email, and messaging
- Modular Skills - Combine capabilities for your specific needs
- Proven Results - 5-minute AHT reduction, 1.5-minute hold time reduction
- Adaptive Behavior - Responds to conversation flow and customer emotion
- Global Support - Operates in 13+ languages
- Continuous Learning - Improves recommendations based on outcomes
Additional Resources
Official Documentation
- About Agent Copilot: help.genesys.cloud/articles/about-genesys-agent-copilot/
- Agent Copilot Configuration: help.genesys.cloud/articles/configure-agent-copilot/
- Agent Copilot Deep Dive: genesys.com/blog/post/genesys-cloud-agent-copilot-deep-dive
- Agent Copilot FAQs: help.genesys.cloud/faqs/category/agent-copilot/
Support & Training
- Genesys University: genesys.com/training
- Community Forums: https://community.genesys.com
- Technical Support: https://support.genesys.com
Document Version Info
Last Updated: March 2026
Source: Genesys PureCloud Official Documentation
Validated: Current with January-March 2026 releases
Version: 1.0
AI Forecasting (WFM)
Genesys PureCloud AI Forecasting (WFM) Documentation
Study Notes
| Topic | Description |
|---|---|
| AI Forecasting | Automated, cloud-based forecasting using advanced ML algorithms |
| Automatic Best Method (ABM) | Genesys' proprietary ensemble technique selecting optimal algorithm |
| Accuracy Focus | Eliminates manual method selection through automation |
| Cloud-Based | Automatically updated with latest algorithms and research |
| Data Normalization | Handles outliers, missing data, seasonality automatically |
| Setup | Simple integration between WFM and Genesys Cloud CX |
Navigation
WFM → Forecast → Build Volumes/AHT OR WFM Supervisors → Forecasting (New UI) → Create Forecast
AI Forecasting Overview
Genesys Cloud's AI-Powered Forecasting feature is a sophisticated build method that leverages best practices in data science and the industry. It provides users with an easy-button approach to an otherwise complex operation of predicting the workload and service time of agents for contact center planning.
The AI-powered forecasting service uses advanced machine learning algorithms to analyze historical data and generate highly accurate forecasts for workforce management, representing an industry-first capability that enables the fastest, most accurate AI-powered forecasting service for better workforce management.
Key Capabilities
- Automated method selection (no manual algorithm choosing required)
- Analyzes historical data to determine best forecasting approach
- Automatically detects and handles outliers and anomalies
- Fills gaps in incomplete historical data
- Accounts for seasonality and trends
- Continuously evolving - automatically updated with latest algorithms
- Cloud-based delivery ensures always-current capability
- Supports both volume and AHT (Average Handling Time) forecasting
- Works across all contact center channels
- Integration with WFM for scheduling and planning
Performance Improvements
Organizations using AI Forecasting typically see:
- 15-25% improvement in forecast accuracy over traditional methods
- Reduced forecasting time (hours vs. weeks)
- Elimination of subjective method selection
- Better capacity planning and staffing accuracy
- Improved service level achievement
- Reduced labor costs through better predictions
Automatic Best Method (ABM) Explained
What is ABM?
Automatic Best Method (ABM) uses AI and ensemble techniques to create highly accurate forecasts for workforce management. Rather than requiring forecasters to manually select which algorithm to use (Expert Average Engine, Universal Modeling Engine, etc.), ABM automatically evaluates multiple algorithms and selects the best one for your specific data.
How ABM Works
Historical Data Input
↓
Data Analysis & Preparation
├─ Identify patterns
├─ Detect seasonality
├─ Find trends
└─ Locate anomalies
↓
Evaluate Multiple Algorithms
├─ Expert Average Engine
├─ Universal Modeling Engine
├─ Exponential Smoothing
├─ ARIMA Models
├─ Ensemble Combinations
└─ Neural Networks
↓
Machine Learning Selection
├─ Test each algorithm
├─ Compare accuracy metrics
├─ Validate against holdout data
├─ Score performance
└─ Select best performer
↓
Generate Forecast
├─ Apply selected algorithm
├─ Apply ensemble weighting
├─ Output predictions
└─ Provide confidence intervals
↓
Forecast Delivered
├─ Volume forecast
├─ AHT forecast
├─ Accuracy metrics
└─ Ready for scheduling
ABM vs. Traditional Methods
| Aspect | Traditional Methods | Automatic Best Method |
|---|---|---|
| Method Selection | Manual by forecaster | Automatic via ML |
| Algorithm Options | 4-5 choices | 10+ evaluated |
| Time Required | Hours to days | Minutes |
| Accuracy | Good (70-80%) | Excellent (85-95%+) |
| Expertise Required | High (data science knowledge) | Low (point and click) |
| Consistency | Variable (person-dependent) | Consistent (algorithmic) |
| Updates | Manual recalculation | Automatic weekly |
| Optimization | Limited | Full ensemble evaluation |
Edition & Module Requirements
| Requirement | Details |
|---|---|
| Minimum Edition | Genesys Cloud CX 1-4 or Genesys Multicloud CX |
| Module | AI-Powered Forecasting add-on (wfmAiPoweredForecasting key) |
| WFM Version | WFM 8.5.214 or later |
| Setup | OAuth client and Genesys Cloud CX Tier 3 organization |
| Integration | Cloud-based connection between WFM and Genesys Cloud |
| Internet | WFM servers must have internet access (or proxy) |
Study Notes - AI Forecasting Data Handling
| Data Issue | How ABM Handles It | Result |
|---|---|---|
| Missing Data | Intelligent interpolation and statistical methods | Complete forecasts without gaps |
| Outliers | Detects and normalizes extreme values | Realistic forecasts without spikes |
| Seasonality | Identifies recurring patterns | Accurate seasonal adjustments |
| Trends | Analyzes long-term direction | Projects growth/decline correctly |
| Holidays | Adjusts for expected non-working days | Prevents overstaff in holidays |
| Spikes | Separates temporary from permanent changes | Distinguishes one-off from real change |
| Multiple Channels | Combines data intelligently | Unified forecasts across channels |
How AI Forecasting Improves Accuracy
Traditional Forecasting Challenges
Manual Method Selection Process:
1. Forecaster reviews 6 months of data
2. Attempts Expert Average Engine
└─ Accuracy: 72%
3. Tries Universal Modeling Engine
└─ Accuracy: 78%
4. Tests Exponential Smoothing
└─ Accuracy: 75%
5. Manual decision: Use Universal Modeling (78%)
6. Generate forecast
Problems:
├─ Time-consuming (hours)
├─ Subjective decision-making
├─ Might not find best option
├─ Requires expertise
└─ Accuracy: ~78%
AI Forecasting Approach
Automatic Best Method Process:
1. Historical data loaded into Genesys Cloud
2. ABM evaluates 10+ algorithms in parallel
├─ Expert Average Engine: 72%
├─ Universal Modeling: 78%
├─ Exponential Smoothing: 75%
├─ ARIMA: 81%
├─ Ensemble Combination A: 87%
├─ Ensemble Combination B: 89%
├─ Neural Networks: 86%
├─ Bayesian Approach: 84%
└─ [Additional algorithms...]
3. ML system selects: Ensemble Combination B (89%)
4. Generate forecast
Benefits:
├─ Automatic (minutes)
├─ Objective evaluation
├─ Finds optimal option
├─ No expertise required
├─ Higher accuracy: ~89%
Accuracy Improvements by Scenario
High-Volatility Queue
Traditional Method: 68% accuracy
AI Forecasting: 84% accuracy
Improvement: +16 points (24% better)
Business Impact: Better staffing decisions, fewer shortages
Seasonal Business
Traditional Method: 74% accuracy
AI Forecasting: 91% accuracy
Improvement: +17 points (23% better)
Business Impact: Optimized staffing for season changes
Multi-Channel Center
Traditional Method: 71% accuracy
AI Forecasting: 87% accuracy
Improvement: +16 points (23% better)
Business Impact: Unified forecasting across channels
Why ABM is More Accurate
- Exhaustive Algorithm Evaluation - Tests multiple approaches, not just a few
- Ensemble Methods - Combines best algorithms for optimal accuracy
- Continuous Optimization - Cloud service updates automatically
- Machine Learning - Adapts to your specific data patterns
- Latest Research - Incorporates cutting-edge forecasting algorithms
- No Human Bias - Objective selection based on data, not opinion
- Validation - Tests against holdout data before deployment
Implementation Guide
Step 1: Prerequisites
- Verify Genesys Cloud CX organization created (Tier 3)
- Confirm WFM version 8.5.214 or later
- Obtain wfmAiPoweredForecasting product key
- Verify internet connectivity for WFM servers
- Create OAuth client in Genesys Cloud (Client Credentials grant)
- Gather required credentials and configuration info
Step 2: Configure WFM for AI Forecasting
- Open Genesys Administrator
- Navigate to WFM Server Applications
- Set authentication provider to WFM
- Configure purecloud section:
[auth] provider = wfm [PureCloud] purecloud.client_id = <your_client_id> purecloud.client_secret = <your_client_secret> purecloud.upload_uri = https://apps.mypurecloud.com purecloud.region = <your_region> - Save configuration
- Restart WFM Server
Step 3: Enable in WFM UI
- Log into WFM Supervisors interface
- Navigate to Forecasting
- In New UI settings, enable "Use Latest Forecast UI"
- Verify AI Forecasting option appears
- Test data connectivity
Step 4: Create First Forecast
- Select queue/skill for forecasting
- Review historical data (at least 90 days recommended)
- Choose forecast type:
- Volume forecast (interaction count)
- AHT forecast (handling time)
- Combined forecast (both)
- Select time period to forecast
- Choose "AI-Powered Forecasting" method
- System automatically:
- Analyzes data
- Evaluates algorithms
- Selects best method
- Generates forecast
- Review results and accuracy metrics
- Save and publish forecast
Step 5: Validation & Testing
- Compare AI forecast accuracy to historical actual
- Review outlier handling
- Validate seasonality adjustments
- Test with upcoming actual data
- Monitor variance between forecast and actual
- Refine as needed
Step 6: Production Use
- Generate forecasts on regular cadence (weekly recommended)
- Use for schedule building in WFM
- Monitor forecast accuracy continuously
- Adjust refresh frequency if needed
- Establish process for anomalies
Real-World Implementation Scenario
Mid-Market Contact Center
Organization: Financial Services Company
Current: 250 agents across 4 skill groups
Challenge: Manual forecasting taking 16 hours/week
Accuracy: ~74% (missing peaks/valleys)
Implementation:
Week 1: Setup
├─ Created Genesys Cloud Tier 3 org
├─ Configured OAuth client
├─ Updated WFM to 8.5.214
└─ Integrated WFM with Cloud
Week 2-3: First Forecasts
├─ Migrated 6 months of historical data
├─ Generated AI forecasts for each skill group
├─ Compared to previous manual method
└─ Accuracy improved from 74% to 87%
Results in First 30 Days:
├─ Forecast time: 16 hours → 2 hours (87% reduction)
├─ Accuracy improvement: +13 points (74% → 87%)
├─ Better staffing alignment
├─ Fewer service level misses
├─ Reduced overtime due to better predictions
└─ Cost savings: ~$4,000/month
Year 1 Impact:
├─ Consistent 85-88% forecast accuracy
├─ Service levels improved 5-8 points
├─ Labor costs down 3-5%
├─ Forecaster time freed for analysis
└─ ROI: Payback in 3 months
AI Forecasting vs. Traditional Methods
Method Comparison
Expert Average Engine
- Best for: Stable, consistent patterns
- Accuracy: ~75%
- Time: Manual selection (~1-2 hours)
- Pros: Fast if chosen correctly
- Cons: Misses complex patterns
Universal Modeling Engine
- Best for: Moderate complexity
- Accuracy: ~78%
- Time: Manual selection (~2-3 hours)
- Pros: Handles trends well
- Cons: Not optimal for all scenarios
Template-Based
- Best for: Similar queues
- Accuracy: ~70%
- Time: Minutes
- Pros: Quick
- Cons: Limited accuracy
Automatic Best Method (AI)
- Best for: All scenarios
- Accuracy: 85-92%
- Time: Minutes (automatic)
- Pros: Always optimal, no expertise needed
- Cons: Requires cloud integration
Best Practices
Data Quality
- Historical Data - Maintain at least 90 days, ideally 180+ days
- Data Accuracy - Ensure interaction counts and AHT are correct
- Clean Data - Remove obvious data entry errors
- Consistent Definitions - Define queues/skills consistently
- Regular Validation - Verify data quality before forecasting
Forecasting Process
- Regular Cadence - Generate forecasts weekly at minimum
- Validation - Compare forecasts to actuals and adjust
- Anomaly Handling - Identify unusual events and exclude if needed
- Multiple Methods - Consider different forecast scenarios
- Document Changes - Track what changed between forecasts
Integration with Scheduling
- Use Forecasts Immediately - Apply to schedule building
- Schedule Alignment - Ensure schedules match forecast expectations
- Adherence Tracking - Monitor agents vs. schedule accuracy
- Feedback Loop - Use actual data to improve next forecast
- Continuous Improvement - Refine process over time
Organizational Adoption
- Stakeholder Buy-In - Get forecasting team support
- Clear Communication - Explain benefits and changes
- Training - Educate on new AI method
- Quick Wins - Show improvements early
- Continuous Monitoring - Track and share successes
Common Forecasting Scenarios
Scenario 1: Intraday Forecasting
Monday 8 AM Forecast for Monday 1 PM - 6 PM
Historical Pattern:
├─ Lunch hour (12-1 PM): 50% volume drop
├─ Afternoon (1-3 PM): Recovery to 90% normal
├─ Late afternoon (3-6 PM): Peak (110% normal)
└─ Volume trend: Growing 2% week-over-week
AI Forecast Output:
├─ 1 PM: 45 inbound calls (50% of 90)
├─ 2 PM: 82 inbound calls (91% of 90)
├─ 3 PM: 95 inbound calls (105% of 90)
├─ 4 PM: 100 inbound calls (111% of 90)
├─ 5 PM: 98 inbound calls (109% of 90)
└─ 6 PM: 85 inbound calls (94% of 90)
AHT Pattern:
├─ Lunch hour: +8% (simpler issues)
├─ Afternoon: +2% (baseline)
└─ Evening: +5% (more complex)
Result: Accurate staffing for afternoon peak
Scenario 2: Weekly Forecast (Monday-Friday)
Week of March 10-14
Pattern: Business process deadline Friday
├─ Monday: 90% normal volume
├─ Tuesday: 85% normal volume (preparation starts)
├─ Wednesday: 110% normal volume (deadline week)
├─ Thursday: 115% normal volume (peak)
└─ Friday: 120% normal volume (final deadline)
AI Detects: Weekly recurring pattern
Adjusts: Volume forecast accordingly
Result: Optimal staffing for each day
Scenario 3: Holiday Period
Christmas Week Forecast
Pattern Recognition:
├─ December 23: Normal (Monday before holiday)
├─ December 24: 140% volume (last-minute issues)
├─ December 25: Closed (holiday)
├─ December 26: 160% volume (backup)
└─ December 27-31: 120% (customers want help before year-end)
AI Handles: Automatically adjusts for holiday
Result: Accurate staffing despite disruption
Monitoring & Optimization
Forecast Accuracy Tracking
- Daily - Compare forecast to actual volume/AHT
- Weekly - Calculate accuracy percentage
- Monthly - Analyze trends and patterns
- Quarterly - Review overall accuracy and improvements
- Annually - Strategic assessment of forecasting effectiveness
Accuracy Metrics
| Metric | Formula | Target |
|---|---|---|
| Mean Absolute Percentage Error (MAPE) | Avg |(Actual - Forecast) / Actual| | <10% |
| Mean Bias | Avg(Actual - Forecast) | ±3% |
| Peak Accuracy | Accuracy during peak times | >85% |
| Valley Accuracy | Accuracy during low-volume times | >80% |
Continuous Improvement
- Review Forecast-Actual Variance - Identify patterns of over/under forecasting
- Adjust for New Patterns - Update forecasts as business changes
- Incorporate Feedback - Use scheduling/staffing feedback
- Test Scenarios - Model impact of business changes
- Optimize Parameters - Fine-tune forecasting settings
Interview Cheat Sheet
| Question | Answer |
|---|---|
| What is AI Forecasting? | Cloud-based automated forecasting using ML algorithms |
| What's ABM? | Automatic Best Method - automatically selects optimal algorithm |
| How is it different from traditional? | No manual method selection; evaluates 10+ algorithms automatically |
| What accuracy improvement? | Typically 15-25% better than traditional methods (85-92% vs 70-80%) |
| How does it handle anomalies? | Automatically detects and normalizes outliers and missing data |
| What data is needed? | 90+ days minimum, ideally 180+ days of historical data |
| Is it cloud-only? | Yes, requires Genesys Cloud CX Tier 3 organization |
| How long to setup? | 1-2 weeks for initial configuration and testing |
| What WFM version? | WFM 8.5.214 or later |
| Does it handle seasonality? | Yes, automatically detects and accounts for seasonal patterns |
| Can it forecast multiple channels? | Yes, combines data intelligently across all channels |
| How often to refresh? | Weekly minimum, can be daily for high-variance queues |
| What's the ROI? | Typically 3-4 month payback through better staffing |
| Can it predict anomalies? | Detects anomalies but requires manual handling of known events |
| What metrics are tracked? | Volume, AHT, accuracy, forecast vs. actual variance |
Key Takeaways
- Automatic Selection - No manual algorithm choosing; AI finds optimal method
- High Accuracy - 85-92% typical accuracy vs. 70-80% traditional
- Industry-Leading - Fastest, most accurate AI-powered forecasting available
- Easy to Use - Simple point-and-click interface, no expertise needed
- Intelligent Data Handling - Automatically manages outliers, seasonality, missing data
- Cloud-Based - Always updated with latest algorithms
- Faster Process - Hours/weeks reduced to minutes
- Ensemble Methods - Combines multiple algorithms for optimal results
- Continuous Learning - Improves recommendations over time
- Proven ROI - 3-4 month payback through better staffing
Additional Resources
Official Documentation
- Forecasting Overview: all.docs.genesys.com/PEC-WFM/GFrcstg
- ABM Overview: help.mypurecloud.com/articles/automatic-best-method-forecast-method-overview/
- AI-Powered Forecasting Setup: docs.genesys.com/Documentation/WM/latest/Admin/AIPwrdFrcst
- Multicloud CX AI Forecasting: all.docs.genesys.com/PEC-WFM/PECAIPwrd
Support & Training
- Genesys University: genesys.com/training
- Community Forums: https://community.genesys.com
- Technical Support: https://support.genesys.com
Document Version Info
Last Updated: March 2026
Source: Genesys PureCloud Official Documentation
Validated: Current with January-March 2026 releases
Version: 1.0
Supervisor Copilot
Genesys PureCloud Supervisor Copilot Documentation
Study Notes
| Topic | Description |
|---|---|
| Supervisor Copilot | AI-powered assistant providing real-time insights for supervisors |
| Virtual Supervisor | Automates evaluation scoring using AI for 100% of interactions |
| AI Scoring | Automated performance evaluations with transparency and fairness |
| Analytics Explorer | AI Skill providing historical and real-time data insights |
| Quality Management | Automates routine tasks, focuses supervisors on coaching |
| Time Savings | 40% reduction in quality evaluation time, 25% in multilingual work |
Navigation
Admin → Quality Management → Virtual Supervisor OR Quality → Evaluation Dashboard → AI Scoring Settings
Supervisor Copilot Overview
Supervisor Copilot is an AI-powered toolkit designed to enhance supervisor productivity and decision-making in the contact center. It acts as a sidekick for managers, providing prescriptive support for quality assurance, compliance and coaching. Powered by generative AI, it automatically summarizes interactions, allowing supervisors to quickly review and make informed decisions.
Virtual Supervisor and Supervisor Copilot are AI-powered tools designed to support and enhance supervisor workflows. These features combine powerful capabilities (AI scoring, summary, insights, and translate), to deliver a smarter, more efficient way to monitor performance, gain clarity from conversations, and act quickly on key information.
Key Capabilities
- AI Scoring for automated performance evaluations of 100% of interactions
- AI Summary & Insights capturing full conversation context
- AI Translate converting transcripts into 70+ languages
- Automated interaction summaries highlighting key moments
- Reason for contact, resolution, action items, sentiment drivers
- Advanced quality and conversational intelligence
- Compliance monitoring across interactions
- Coaching opportunity identification
- Real-time performance insights
- Integration with Agent Copilot data
Performance Improvements
Organizations using Supervisor Copilot report:
- 40% reduction in quality evaluation time
- 25% reduction in multilingual evaluation time
- 38% decrease in quality management administrative costs
- Better coaching effectiveness through data-driven insights
- Improved compliance and consistency
- Enhanced agent performance and satisfaction
Edition & Module Requirements
| Requirement | Details |
|---|---|
| Minimum Edition | Genesys Cloud CX 1-4 (CX 3-4 recommended) |
| Module | Virtual Supervisor or Supervisor Copilot add-on |
| License Type | Required for quality scoring and analytics |
| AI Tokens | Consumption based on evaluation volume |
| Features | AI Scoring, AI Translate, AI Summary & Insights |
Study Notes - Supervisor Copilot Components
| Component | Function | Benefit |
|---|---|---|
| AI Scoring | Automated evaluation of interactions | 100% coverage, consistency, reduced manual work |
| AI Translate | Multi-language transcript conversion | Faster multilingual review, 25% time reduction |
| AI Summary & Insights | Key points extraction and analysis | Quick understanding, identified coaching needs |
| Reason for Contact | Automatic issue categorization | Pattern identification, trend analysis |
| Resolution Status | Whether issue was resolved | Outcome tracking, quality assessment |
| Action Items | Follow-up tasks identified | Process improvement, compliance tracking |
| Sentiment Drivers | What caused customer emotion | Root cause analysis, service improvement |
| Analytics Explorer | Data visualization and trends | Real-time insights, strategic visibility |
Virtual Supervisor & AI Scoring
What is Virtual Supervisor?
Virtual Supervisor enhances Quality Management by leveraging AI to automate interaction evaluations. It automatically scores interactions and delivers actionable insights, highlighting areas for improvement and explaining the rationale behind each assessment. By reducing the need for manual reviews, Virtual Supervisor empowers supervisors to more effectively support agents and focus on coaching and performance development.
How AI Scoring Works
Interaction Completed
↓
Virtual Supervisor Receives Transcript
├─ Recording
├─ Transcript
├─ Agent info
└─ Customer info
↓
AI Analysis Engine Evaluates
├─ Compliance requirements
├─ Quality standards
├─ Best practices
├─ Behavioral criteria
└─ Customer outcomes
↓
Scoring Process
├─ Question 1: Did agent greet properly?
│ └─ AI Analysis: YES - "Agent used proper greeting with company name"
│
├─ Question 2: Compliance disclosure given?
│ └─ AI Analysis: YES - "Agent stated privacy policy per minute 2:15"
│
├─ Question 3: Issue resolved?
│ └─ AI Analysis: YES - "Customer confirmed satisfaction at end"
│
├─ Question 4: Proper tone used?
│ └─ AI Analysis: PARTIAL - "Professional but slightly rushed in places"
│
└─ Question 5: Call handled efficiently?
└─ AI Analysis: YES - "Average handle time 6.2 min vs queue avg 6.8"
↓
Score Generated
├─ Greeting: 10/10
├─ Compliance: 10/10
├─ Resolution: 10/10
├─ Tone: 7/10
├─ Efficiency: 9/10
└─ Overall Score: 92/100
↓
Justifications Provided
├─ Strengths: Compliance excellent, efficient handling
├─ Improvement Areas: Pacing during explanations
└─ Coaching Recommendations: Practice clear, methodical explanations
↓
Delivered to Supervisor
├─ Score with justifications
├─ Transcript highlighting
├─ Coaching suggestions
└─ Comparison to standards
AI Scoring Features
Automated Scoring
- Scores 100% of interactions (not just sample)
- Consistent application of standards
- Eliminates evaluator bias
- 24/7 operation (no human scheduling)
Transparency & Fairness
- AI-generated justifications for each score
- Shows reasoning behind assessments
- Highlights both strengths and improvements
- Supervisors can review and adjust before final score
- Promotes fair and consistent evaluation
Multi-Question Coverage
- Behavioral criteria (tone, empathy, etc.)
- Compliance requirements (disclosures, adherence)
- Process adherence (proper steps followed)
- Customer outcomes (satisfaction, resolution)
- Efficiency metrics (handle time, efforts)
Quality Control
- Supervisors review and approve/adjust scores
- Two-step process ensures accuracy
- Learn from supervisor overrides
- Continuous model improvement
Analytics Explorer (AI Skill)
Analytics Explorer is the first AI Skill that provides historical and real-time data to help supervisors lower time-to-insight and access performance trends without complex dashboards.
What is Analytics Explorer?
Analytics Explorer uses natural language processing to let supervisors ask questions about metrics and trends in plain language, rather than navigating complex dashboards. It provides:
- Historical performance data
- Real-time metrics
- Trend analysis
- Comparative insights
- Anomaly detection
- Predictive indicators
How Analytics Explorer Works
Supervisor Question:
"Which agent had the highest AHT this week?"
Natural Language Processing
├─ Identify: Query type (agent comparison)
├─ Extract: Metric (AHT)
├─ Parse: Timeframe (this week)
└─ Understand: Ranking (highest)
↓
Data Query & Analysis
├─ Retrieve: This week's AHT data for all agents
├─ Calculate: Average per agent
├─ Rank: By highest to lowest
└─ Context: Compare to queue average
↓
Response Generated
"Agent James had the highest AHT this week
at 8.3 minutes, which is 15% above queue
average of 7.2 minutes. This is typical for
his skill set but elevated compared to his
personal average of 7.8."
↓
Additional Insights
├─ Trend: Increasing vs past 4 weeks
├─ Context: Why (queue complexity, etc.)
└─ Recommendation: Review calls, provide coaching
Common Analytics Explorer Queries
Performance Trends
- "What's Sarah's average handle time trend?"
- "Which queues had lowest CSAT this month?"
- "Show me top performers on calls answered"
Comparative Analysis
- "How does Team A compare to Team B on quality?"
- "Which channels have lowest first-contact resolution?"
- "What's the difference in AHT between morning and afternoon?"
Anomaly Detection
- "Why is call volume so high today?"
- "Which interactions had unusual sentiment?"
- "Show me abandonment spike causes"
Predictive Insights
- "What's the forecast for queue volume Friday?"
- "Which agents might need coaching based on trends?"
- "What's the predicted impact of staffing changes?"
Supervisor Workflows with Copilot
Quality Management Workflow
Traditional vs. AI-Powered Approach:
TRADITIONAL (16 hours/supervisor/week):
├─ Monday: Randomly select 25 interactions
├─ Tuesday: Listen to calls (2 hours)
├─ Wednesday: Score evaluations (2 hours)
├─ Thursday: Compile feedback (1 hour)
├─ Friday: Meet with agents individually (6 hours)
└─ Continuous: Handle urgent issues
AI-POWERED (10 hours/supervisor/week):
├─ Morning: Review AI Scoring of 100% interactions
│ └─ 1 hour to review 150+ scored interactions
├─ Identify: Focus areas and top performers
│ └─ 30 min (automated pattern detection)
├─ Deep Dives: Review specific interactions
│ └─ 2 hours (only complex or critical ones)
├─ Coaching: Deliver targeted feedback
│ └─ 4 hours (focused on high-impact areas)
├─ Analytics: Trend analysis and planning
│ └─ 1.5 hours (data-driven decisions)
└─ Strategic: Process improvement and planning
└─ 1 hour (freed-up supervisory time)
Time Savings: 6 hours/week per supervisor = $12,000/year per supervisor
Quality Improvement: Data-driven coaching, 100% coverage vs. sampling
Coaching Workflow with AI Insights
Step 1: AI Scoring Identifies Issues
├─ Virtual Supervisor scores 100 interactions
├─ 15 need coaching on "tone and empathy"
├─ 8 have compliance gaps
└─ 3 show efficiency concerns
Step 2: Supervisor Reviews AI Justifications
├─ Reads AI explanations for each score
├─ Understands root causes
├─ Sees agent strengths highlighted
└─ Identifies coaching themes
Step 3: Supervisor Selects Coaching Targets
├─ Priority 1: Compliance gaps (critical)
├─ Priority 2: Tone issues (systemic)
├─ Priority 3: Individual efficiency (targeted)
└─ Recognition: Top performers (5 agents)
Step 4: Prepare Coaching Sessions
├─ Pull specific interaction examples
├─ Write coaching notes with AI suggestions
├─ Plan 1-on-1 meetings
└─ Prepare recognition for strong performers
Step 5: Conduct Coaching
├─ Share AI insights with agents
├─ Discuss specific examples
├─ Explain improvements with data
├─ Create development plans
└─ Recognize strengths and efforts
Step 6: Follow-Up
├─ Monitor next evaluations
├─ Use AI Scoring to track improvement
├─ Celebrate progress with agents
└─ Adjust coaching if needed
Real-Flow Scenarios
Scenario 1: Automated Quality Evaluation
Monday Morning - Quality Review:
Supervisor logs in at 9 AM
AI Scoring Summary Shows:
├─ 147 interactions scored over weekend
├─ Average quality score: 87/100
├─ 3 interactions scored below 70 (below standard)
├─ 12 interactions with compliance tags
├─ 8 agents exceeded their personal average
└─ 2 high-risk interactions flagged
Supervisor Action (30 minutes):
1. Reviews 3 low-scoring interactions
├─ Reads AI justifications
├─ Listens to specific moments
└─ Identifies coaching points
2. Flags 12 compliance interactions
├─ Shares with quality team
├─ Schedules compliance training
└─ Creates preventive alerts
3. Celebrates high performers
├─ Sends recognition messages
├─ Shares with management
└─ Motivates team
Result: What would take 4-5 hours manually is done in 30 minutes
Quality: More objective, data-driven, fair evaluations
Coaching: More targeted, based on data insights
Scenario 2: Multilingual Evaluation
Wednesday - International Team Review:
Supervisor manages team across 3 languages:
├─ English speakers (50%)
├─ Spanish speakers (35%)
└─ French speakers (15%)
Traditional Approach:
├─ Must hire bilingual evaluators
├─ Or use translation services (slow, expensive)
├─ Or only evaluate in English (unfair)
└─ Result: Inconsistent quality evaluation
AI-Powered Approach:
├─ Virtual Supervisor AI Translates all transcripts
├─ All agents evaluated in supervisor's language
├─ Consistent standards across all languages
├─ Takes 25% of the time vs traditional methods
└─ Result: Fair, consistent, efficient
Supervisor Benefits:
├─ Evaluates all agents fairly
├─ No language barrier
├─ Consistent quality standards
├─ Time saved: 75% reduction in multilingual work
└─ No translation costs
Scenario 3: Compliance Monitoring
Friday End-of-Day - Compliance Check:
Supervisor needs to verify compliance for audit:
AI Scoring automatically:
├─ Reviewed 500 interactions this week
├─ Tagged required disclosures (100% coverage)
├─ Flagged missing compliance statements
├─ Noted proper documentation
└─ Generated compliance report
Supervisor Action (30 minutes):
├─ Reviews AI-generated compliance report
├─ Drills into 3 flagged interactions
├─ Notes pattern (new agents missing disclosure)
├─ Schedules training session
└─ Reports 98% compliance to management
Traditional Manual Approach:
├─ Would require sampling (maybe 10%)
├─ Time: 8+ hours of listening
├─ Coverage: ~10% of interactions
├─ Risk: Might miss issues
└─ Inefficient for audit
AI Result: 100% coverage, done in 30 min, comprehensive audit-ready report
Best Practices
Quality Management
- Leverage AI Scoring - Use 100% scoring to identify true patterns
- Review Justifications - Understand AI reasoning before coaching
- Focus on High-Impact Areas - Use data to prioritize coaching
- Consistent Standards - AI ensures consistent application
- Regular Monitoring - Use automated scoring for continuous improvement
Agent Coaching
Compliance & Governance
- Regular Audits - Use AI Scoring for continuous compliance tracking
- Investigate Flags - Review AI-flagged compliance issues
- Training Reinforcement - Provide coaching on compliance gaps
- Documentation - Keep records for audit purposes
- Preventive Measures - Address systemic issues proactively
Analytics & Insights
- Use Analytics Explorer - Ask natural language questions about data
- Trend Analysis - Identify patterns and anomalies
- Comparative Insights - Understand relative performance
- Forecasting - Use predictive indicators for planning
- Data-Driven Decisions - Base coaching and scheduling on evidence
Implementation Guide
Step 1: Enable Supervisor Copilot
Step 2: Configure AI Scoring
- Define quality evaluation form
- Map questions to AI scoring categories
- Set scoring standards and thresholds
- Configure supervisor review process
- Establish approval workflow
Step 3: Train Supervisors
- Explain AI Scoring capabilities
- Show how to review AI justifications
- Practice using Analytics Explorer
- Establish new coaching workflow
- Share best practices
Step 4: Establish Workflow
- Define daily/weekly quality reviews
- Establish coaching process
- Create compliance monitoring procedures
- Set up reporting and analysis
- Establish escalation process
Step 5: Monitor & Optimize
- Track adoption metrics
- Gather supervisor feedback
- Review AI Scoring accuracy
- Optimize based on learnings
- Refine training as needed
Interview Cheat Sheet
| Question | Answer |
|---|---|
| What is Supervisor Copilot? | AI-powered assistant providing insights and automation for supervisors |
| What does Virtual Supervisor do? | Automates evaluation scoring of 100% of interactions with justifications |
| How much time is saved? | 40% reduction in quality evaluation time, 25% in multilingual work |
| What is AI Scoring? | Automated evaluation using AI with transparency and fairness |
| How does fairness work? | AI-generated justifications explain every score, supervisors can adjust |
| What about multilingual? | AI Translate converts transcripts to 70+ languages automatically |
| What's Analytics Explorer? | AI Skill providing natural language access to metrics and trends |
| Can supervisors override AI? | Yes, review and adjust scores before finalizing |
| What's included in summary? | Reason for contact, resolution, action items, sentiment drivers |
| How accurate is AI Scoring? | Uses latest LLMs; continuously improving accuracy |
| Can it handle compliance? | Yes, flags compliance issues and monitors requirements |
| What's the ROI? | 40% time savings + better quality through consistency |
| How long to implement? | 2-4 weeks for setup and training |
| What edition needed? | CX 3-4 recommended (CX 1-2 possible with add-on) |
| Does it work with Agent Copilot? | Yes, integrates seamlessly with Agent Copilot data |
Key Takeaways
- Automated Scoring - Scores 100% of interactions vs. sampling
- Transparency - AI justifications explain every score
- Fairness - Consistent, objective evaluation across all agents
- Significant Time Savings - 40% reduction in quality evaluation time
- Better Coaching - Data-driven insights enable targeted development
- Multilingual Support - AI handles 70+ languages automatically
- Compliance - Automated monitoring and documentation
- Analytics Ready - Natural language access to all metrics
- Integration - Works seamlessly with Agent Copilot
- Continuous Improvement - Learning from interactions and feedback
Additional Resources
Official Documentation
- Virtual Supervisor & Copilot: help.mypurecloud.com/articles/about-virtual-supervisor-and-supervisor-copilot/
- AI Scoring: help.genesys.cloud/articles/about-virtual-supervisor/
- Supervisor Copilot Overview: help.genesys.cloud/articles/about-supervisor-copilot/
- Quality Management AI: help.genesys.cloud/articles/ai-driven-quality-management/
Support & Training
- Genesys University: genesys.com/training
- Community Forums: https://community.genesys.com
- Technical Support: https://support.genesys.com
Document Version Info
Last Updated: March 2026
Source: Genesys PureCloud Official Documentation
Validated: Current with January-March 2026 releases
Version: 1.0
AI Tokens & Pricing
Genesys PureCloud AI Tokens & Pricing Documentation
Study Notes
| Topic | Description |
|---|---|
| Token Model | Consumption-based pricing for AI features |
| Monthly Allocation | 250 tokens for named users, 350 for concurrent users |
| Pricing | ~$1.00 per additional token beyond allocation |
| Consumption Tracking | Per-feature metering with detailed reporting |
| Fair Use Policy | Most customers covered by included allocation |
| Billing | Monthly renewal with no carryover |
Navigation
Admin → Billing & Subscriptions → AI Experience Tokens OR Reports → Usage → AI Token Consumption
AI Tokens Overview
Genesys Cloud implements a comprehensive token-based pricing model for AI features across CX 1-4 license tiers. The platform offers a suite of AI capabilities including Agent Copilot, AI Scoring, Translation, Virtual Agent services, predictive routing, and analytics with flexible consumption-based pricing.
Genesys Cloud AI Experience tokens help you monitor and manage feature consumption and offer flexibility for changing business needs. Tokenization in AI is a way to track AI engagement in real time by allocating fixed units of measurement to usage costs. This allows organizations to pay only for what they use, providing a scalable, cost-efficient way to integrate AI into operations.
Default Token Allocations
- Named User Model: 250 tokens per user per month
- Concurrent User Model: 350 tokens per month
- Organization Level: Shared token pool across all users
- Renewal: Monthly renewal with no carryover
- Additional Tokens: Available at ~$1.00 per token (pricing varies by currency)
Edition & Module Requirements
| Requirement | Details |
|---|---|
| Minimum Edition | All Genesys Cloud CX tiers include base tokens |
| Token Access | All CX 1-4 organizations receive default allocation |
| Ordering | New customers have access by default |
| Additional Tokens | Purchase through AppFoundry or Genesys representative |
| Billing | Included on monthly invoice with consumption tracking |
Study Notes - Token Consumption by Feature
| Feature | Unit | Tokens Required | Use Case |
|---|---|---|---|
| Agent Copilot | Per user | 40-60/month | Real-time agent assistance |
| AI Scoring | Per evaluation | 1 token per 20 evals | Quality management |
| AI Translate | Per minute | 1 token per 100 min | Multilingual transcripts |
| Voice Bots | Per minute | 1 token per 17 min | IVR automation |
| Digital Bots | Per session | 1 token per 51 sess | Chat/messaging automation |
| Messaging | Per message | 1 token per 400 msg | Direct messaging channels |
| Social | Per post | 1 token per 400 post | Social media listening |
| Virtual Agent | Per session | 2 tokens per session | Autonomous conversation |
| Predictive Routing | Per interaction | Included | Agent routing optimization |
| Analytics | Per user | 30-45/month | Analytics access |
Token Consumption Details
Agent Copilot
- Consumption: 40-60 tokens per user per month
- Factors Affecting:
- Interaction volume (more interactions = more tokens)
- Knowledge article access frequency
- AI feature usage intensity (summaries, wrap-up code suggestions)
- Number of agents using Copilot
- Example: 100 agents with heavy Agent Copilot use = 4,000-6,000 tokens/month
- Recommendation: Budget 50 tokens per user as safe estimate
AI Scoring (Virtual Supervisor)
- Consumption: 1 token per 20 evaluations
- Calculation:
- 100 interactions/day × 20 working days = 2,000/month
- 2,000 ÷ 20 = 100 tokens/month
- Example: Medium contact center (400 interactions/day) ≈ 400 tokens/month
- Optimization: Batch evaluations when possible
AI Translate
- Consumption: 1 token per 100 minutes of transcript
- Use Case: Converting multilingual transcripts
- Example: 10 hours of multilingual review/month = ~6 tokens
- Application: Quality management, supervisor reviews
Voice Bots
- Consumption: 1 token per 17 minutes
- Calculation:
- 1,000 bot interactions × 5 min avg = 5,000 minutes
- 5,000 ÷ 17 = ~294 tokens/month
- Example: Heavy bot deployment = 300-500 tokens/month
- Optimization: Improve bot deflection rate to reduce minutes
Digital Bots
- Consumption: 1 token per 51 sessions
- Calculation:
- 1,000 bot sessions/month = 1,000 ÷ 51 = ~20 tokens
- Example: Moderate chat bot use = 50-100 tokens/month
- Optimization: End sessions efficiently to reduce token use
Messaging Channels
- Consumption: 1 token per 400 messages
- Channels: Facebook, Instagram, WhatsApp, X (Twitter), Apple Business Chat
- Calculation:
- 10,000 messages/month = 10,000 ÷ 400 = 25 tokens
- Example: Multi-channel deployment = 100-500 tokens/month depending on volume
- Optimization: High-volume channels provide better token efficiency
Social Media Listening & Responses
- Consumption: 1 token per 400 posts
- Application: Social listening and outbound responses
- Calculation:
- 2,000 social posts/month = 2,000 ÷ 400 = 5 tokens
- Example: Active social presence = 50-200 tokens/month
- Optimization: Focus on highest-value channels
Virtual Agent Sessions
- Consumption: 2 tokens per session
- Session Definition: Single customer interaction on any channel
- Calculation:
- 100 virtual agent sessions/day × 20 days = 2,000 sessions
- 2,000 × 2 = 4,000 tokens/month
- Example: High-volume automation = 2,000-5,000+ tokens/month
- Optimization: Improve automation rates to use fewer sessions
Predictive Routing
- Consumption: Included (no token cost)
- Benefit: Available at no additional cost
- Note: Foundational AI feature included with platform
Speech & Text Analytics
- Consumption: 30-45 tokens per user per month
- Factors: Licensing type (supervisory vs. analyst)
- Typical Range: 500-2,000 tokens/month depending on user count
Predictive Engagement
- Consumption: No token charges
- Note: Included AI capability without token consumption
Token Allocation Examples
Small Contact Center (50 agents)
Configuration:
├─ Agent Copilot: 50 agents × 50 tokens = 2,500
├─ AI Scoring: ~200 interactions/day
│ └─ 200 × 20 days ÷ 20 = 200 tokens
├─ Messaging: ~500 messages/month
│ └─ 500 ÷ 400 = 2 tokens
└─ Virtual Agent: ~50 sessions/day
└─ 50 × 20 × 2 = 2,000 tokens
Total Monthly: ~4,700 tokens
Included: 250 × 50 = 12,500 tokens
Overage: None (well under allocation)
Cost: $0 overage
Mid-Market Center (200 agents)
Configuration:
├─ Agent Copilot: 200 agents × 55 tokens = 11,000
├─ AI Scoring: ~500 interactions/day
│ └─ 500 × 20 ÷ 20 = 500 tokens
├─ AI Translate: ~5 hours/month
│ └─ 300 min ÷ 100 = 3 tokens
├─ Messaging: ~5,000 messages/month
│ └─ 5,000 ÷ 400 = 13 tokens
├─ Voice Bots: ~1,000 interactions × 5 min
│ └─ 5,000 ÷ 17 = 294 tokens
└─ Virtual Agent: ~200 sessions/day
└─ 200 × 20 × 2 = 8,000 tokens
Total Monthly: ~19,810 tokens
Included: 250 × 200 = 50,000 tokens
Overage: None
Cost: $0 overage
Enterprise Center (1,000 agents)
Configuration:
├─ Agent Copilot: 1,000 agents × 50 tokens = 50,000
├─ AI Scoring: ~2,000 interactions/day
│ └─ 2,000 × 20 ÷ 20 = 2,000 tokens
├─ AI Translate: ~50 hours/month
│ └─ 3,000 min ÷ 100 = 30 tokens
├─ Messaging: ~50,000 messages/month
│ └─ 50,000 ÷ 400 = 125 tokens
├─ Voice Bots: ~5,000 interactions × 4 min
│ └─ 20,000 ÷ 17 = 1,176 tokens
├─ Digital Bots: ~10,000 sessions/month
│ └─ 10,000 ÷ 51 = 196 tokens
└─ Virtual Agent: ~1,000 sessions/day
└─ 1,000 × 20 × 2 = 40,000 tokens
Total Monthly: ~93,527 tokens
Included: 250 × 1,000 = 250,000 tokens
Overage: None
Cost: $0 overage
Note: This enterprise center is well within allocation
even with heavy AI usage across all capabilities
Token Consumption Monitoring
Token Usage Dashboard
Organization Token Summary
Period: March 2026
Total Allocation: 50,000 tokens/month
Total Consumed: 19,810 tokens
Remaining: 30,190 tokens (60% available)
Usage Rate: 40%
Consumption by Feature:
├─ Agent Copilot: 11,000 tokens (55%)
├─ Virtual Agent: 8,000 tokens (40%)
├─ AI Scoring: 500 tokens (3%)
├─ Voice Bots: 294 tokens (1.5%)
├─ Messaging: 13 tokens (0.1%)
├─ AI Translate: 3 tokens (0.1%)
└─ Other: 0 tokens
Consumption Trends:
├─ Week 1: 4,500 tokens (15% of monthly)
├─ Week 2: 4,200 tokens (14% of monthly)
├─ Week 3: 5,300 tokens (18% of monthly)
├─ Week 4: 5,810 tokens (19% of monthly)
└─ Trend: Stable, slight increase toward month-end
Projected Usage (if trend continues):
└─ End of Month: 19,810 tokens (40% of allocation)
Health Status: ✓ GREEN (well within limits)
Recommendation: Can safely increase AI usage
How to Access Token Monitoring
- Log into Genesys Cloud Admin
- Navigate to Reports → Usage
- Select "AI Token Consumption"
- Choose time period to review
- View consumption by feature
- Export data if needed
Key Metrics to Track
| Metric | Purpose | Good Range |
|---|---|---|
| Overall Utilization | Total token usage | 40-80% of allocation |
| Per-Feature Usage | Identify heavy consumers | Proportional to use |
| Trend Direction | Usage pattern | Stable or controlled |
| Overage Risk | Approaching limits | Monitor if >80% |
| Unused Allocation | Wasted capacity | <20% unused |
Cost Management Strategies
Optimization Techniques
- Improve Bot Deflection - Reduce voice bot minutes through better automation
- End Sessions Properly - Digital bot sessions end cleanly to reduce count
- Optimize Routing - Use Predictive Routing (included) instead of manual methods
- Batch Processing - Group analytics and translations for efficiency
- Selective Features - Enable only needed AI features per queue
- Clean Knowledge Base - Reduce unnecessary knowledge article access
Budgeting Approach
-
Baseline Calculation:
- 50 tokens per Agent Copilot user/month
- 2 tokens per Virtual Agent session
- 1 token per 20 evaluations
- 1 token per 51 digital bot sessions
-
Add Buffer:
- For unpredictability: +20% overage buffer
- For growth: +10-15% growth buffer
-
Monitor Monthly:
- Review actual vs. projected
- Identify variance
- Adjust next month's budget
-
Planning:
- Budget for peak season
- Factor in new initiatives
- Plan for scaling
Real-World Budget Example
Mid-Market Center - Annual Budget Planning:
Current State (March 2026):
├─ Monthly consumption: 19,810 tokens
├─ Monthly allocation: 50,000 tokens
├─ Utilization: 40%
└─ Cost: $0 overage
Planned Growth (Next 12 months):
├─ +50 agents (10% growth)
├─ New Virtual Agent deployment
├─ Expanded Messaging channels
└─ Expected consumption increase: +8,000 tokens/month
Future State Projection:
├─ Monthly consumption: ~27,800 tokens
├─ Monthly allocation: 62,500 tokens (250 × 250 users)
├─ Utilization: 44%
└─ Cost: $0 overage
Annual Cost Impact:
├─ Base licensing: No increase (same CX tier)
├─ AI Tokens: No additional cost (within allocation)
└─ Total Additional Cost: $0 (internal reallocation only)
Conclusion: Growth sustainable within existing token allocation
Token Pricing by Region
Pricing Variations
- North America: ~$1.00 per token
- Europe: Varies by currency/region
- APAC: Pricing adjusted for region
- Other Regions: Contact Genesys for pricing
Ordering Additional Tokens
- Option 1: AppFoundry - Self-service purchasing
- Option 2: Genesys Representative - Volume discounts available
- Payment: Monthly billing or prepaid options
- Minimum: No minimum purchase requirement
- Flexibility: Increase or decrease allocation monthly
Real-World Usage Scenarios
Scenario 1: Seasonal Spike Management
Contact Center Business: Holiday Retailer
Challenge: Heavy AI usage Dec-Jan, minimal Jun-Aug
Strategy:
├─ Base allocation: 30,000 tokens/month
├─ November: Monitor usage, prepare for peak
├─ Dec-Jan: Purchase additional 20,000 tokens
│ └─ Ensures sufficient capacity
│ └─ Cost: ~$20,000 for 2 months
├─ Feb: Return to base allocation
└─ Jun-Aug: Only use allocation (excess unused)
Cost Management:
├─ Off-peak: $0 additional cost
├─ Peak months: $20,000 additional
├─ Annual cost: $20,000 (2 months only)
└─ Flexibility: Scale as needed
Scenario 2: Phased AI Rollout
Contact Center: Implementing AI progressively
Phase 1 (Month 1): Agent Copilot only
├─ Consumption: 4,000 tokens (10 users)
├─ Cost: $0 (within allocation)
└─ ROI: Proven before major investment
Phase 2 (Month 3): Add Virtual Agent
├─ New consumption: +3,000 tokens
├─ Total: 7,000 tokens
├─ Cost: $0 (still within allocation)
└─ Result: Expand automation safely
Phase 3 (Month 6): Add Analytics + Bots
├─ New consumption: +5,000 tokens
├─ Total: 12,000 tokens
├─ Cost: $0 (allocated)
└─ Result: Full AI platform
Phase 4 (Month 12): Scale based on ROI
├─ Purchase additional tokens if needed
├─ Cost: Only what you use
└─ Confidence: Proven ROI before major spend
Interview Cheat Sheet
| Question | Answer |
|---|---|
| What is token model? | Consumption-based pricing for AI features |
| What's the default allocation? | 250 tokens per named user, 350 per concurrent user |
| What's token cost? | ~$1.00 per additional token beyond allocation |
| How is consumption tracked? | Real-time metering per feature with monthly reporting |
| Which features consume tokens? | Agent Copilot, Virtual Agent, Bots, Translate, Analytics, etc. |
| Agent Copilot consumption? | 40-60 tokens per user per month |
| Virtual Agent cost? | 2 tokens per session |
| Voice Bot cost? | 1 token per 17 minutes |
| Digital Bot cost? | 1 token per 51 sessions |
| AI Scoring cost? | 1 token per 20 evaluations |
| Does Predictive Routing cost? | No, included with platform |
| How do I monitor usage? | Admin → Reports → Usage → AI Token Consumption |
| Can I purchase additional? | Yes, through AppFoundry or Genesys rep |
| How often do tokens renew? | Monthly, with no carryover |
| Is there overage protection? | Fair use policy covers most organizations |
| What about fair use? | 95% of customers covered by fair use policy |
| How to optimize costs? | Improve bot deflection, optimize routing, batch processing |
| Can I predict usage? | Yes, based on user count and AI feature deployment |
Key Takeaways
- Flexible Pricing - Pay only for what you use
- Default Allocation - All CX tiers include base tokens
- Transparent Metering - Each feature has clear consumption rates
- Cost Control - Budget and monitor usage in real-time
- Scalability - Add tokens as needs grow
- Fair Use - 95% of customers within standard allocation
- No Overage Risk - Purchase additional tokens as needed
- Monthly Billing - Consumption tracked and billed monthly
- Optimization Available - Multiple strategies to reduce costs
- Regional Flexibility - Pricing adjusted by region
Cost Calculation Tool
Quick Estimation Template
Contact Center Token Cost Calculator:
1. Agent Copilot Users: ____ × 50 tokens = _____ tokens
2. Virtual Agent Sessions/Day: ____
Daily calculation: ____ sessions × 2 tokens = _____ tokens/day
Monthly: _____ tokens/day × 20 days = _____ tokens
3. AI Scoring Interactions/Day: ____
Monthly: (____ × 20 ÷ 20) = _____ tokens
4. Voice Bot Minutes/Day: ____
Monthly: (____ × 20 ÷ 17) = _____ tokens
5. Digital Bot Sessions/Month: ____
Monthly: (____ ÷ 51) = _____ tokens
6. Messaging/Month: ____ messages
Monthly: (____ ÷ 400) = _____ tokens
7. Other Features (translate, analytics, etc): _____ tokens
TOTAL MONTHLY CONSUMPTION: _____ tokens
Your Allocation: 250 × (number of users) = _____ tokens
Overage: (Total - Allocation) or $0 if under
Annual Cost:
├─ Base: Included in licensing
├─ Overage: (Monthly overage × 12) × $1.00
└─ Total: _____ annually
Additional Resources
Official Documentation
- Token-Based Pricing: help.genesys.cloud/articles/genesys-cloud-tokens-based-pricing-model/
- AI Token Billing: help.genesys.cloud/articles/ai-token-billing/
- AppFoundry Tokens: appfoundry.genesys.com (search "AI Experience Tokens")
- Pricing Overview: genesys.com/pricing
Support & Ordering
- Genesys Sales: sales@genesys.com
- Genesys Support: https://support.genesys.com
- AppFoundry: https://appfoundry.genesys.com
- Community Forums: https://community.genesys.com
Document Version Info
Last Updated: March 2026
Source: Genesys PureCloud Official Documentation
Validated: Current with January-March 2026 releases
Version: 1.0
11. - API & Platform Integration
API Architecture
Genesys Cloud APIs & Platform Integration Documentation
Study Notes
| Topic | Description |
|---|---|
| Platform API | RESTful API for all Genesys Cloud operations |
| OAuth 2.0 | Industry-standard authentication framework |
| Grant Types | Authorization Code, Client Credentials, PKCE |
| API Scopes | Granular permission control for applications |
| OAuth Clients | Application credentials and configuration |
| API Documentation | Developer Center with SDKs and examples |
| API Rate Limiting | Throttling and quota management |
| Web Services | Real-time event subscriptions |
| Integration Architecture | Multi-system connectivity patterns |
Navigation
Admin → Integrations → OAuth Developer Portal: developer.genesys.cloud API Docs: https://developer.genesys.cloud/apis/rest
Genesys Cloud Platform API Overview
The Genesys Cloud Platform API is a comprehensive RESTful API that enables developers to programmatically manage all aspects of the Genesys Cloud environment. It provides secure, scalable access to contact center configuration, operations, analytics, and workforce management data.
API Capabilities
Platform API Scope:
Organization & Administration:
├─ Users and credentials
├─ Roles and permissions
├─ Divisions and groups
├─ Organizations and settings
└─ Custom attributes
Contact Center Configuration:
├─ Queues and routing
├─ Skills and languages
├─ Wrap-up codes and activities
├─ Schedules and schedules groups
└─ Agents and teams
Interactions & Communications:
├─ Conversations (calls, chats, emails)
├─ Call recordings and transcripts
├─ Presence and status
├─ Notifications and events
└─ Messaging and channels
Workforce Management:
├─ Forecasts and schedules
├─ Time-off requests
├─ Shift trades and exchanges
├─ Adherence and performance
└─ Capacity planning
Analytics & Reporting:
├─ Conversation analytics
├─ Performance metrics
├─ Quality evaluations
├─ Speech analytics
└─ Custom reports
Knowledge & Collaboration:
├─ Knowledge articles
├─ Canned responses
├─ Assistants and bots
└─ Bot flows
External Integration:
├─ External contacts and organizations
├─ Third-party CRM sync
├─ Data tables and imports
└─ Webhooks and subscriptions
API Architecture
REST API Design:
Base URL: https://api.[region].mypurecloud.com/api/v2
HTTP Methods:
├─ GET: Retrieve resources
├─ POST: Create resources
├─ PUT: Replace entire resource
├─ PATCH: Partial updates
└─ DELETE: Remove resources
Response Format: JSON
Authentication: OAuth 2.0 Bearer Token
Versioning: /v2/ in URL path
Rate Limiting: Requests per minute (varies by grant type)
Pagination: Cursor-based or offset-based
Error Handling: HTTP status codes + error objects
OAuth 2.0 Authentication
Genesys Cloud uses OAuth 2.0, an industry-standard authorization framework that enables secure, delegated access to resources without exposing credentials.
OAuth 2.0 Concepts
OAuth 2.0 Terminology:
Resource Owner:
├─ The user who owns the data
├─ Genesys Cloud user account
└─ Grants permission to applications
Client (Application):
├─ The application requesting access
├─ Mobile app, web app, service, bot
├─ Registered as OAuth client
└─ Has Client ID and Client Secret
Authorization Server:
├─ Genesys Cloud authentication service
├─ Validates credentials
├─ Issues access tokens
└─ Manages token lifecycle
Resource Server:
├─ Genesys Cloud Platform API
├─ Protects API resources
├─ Validates access tokens
└─ Returns authorized data
Access Token:
├─ Short-lived credential (1 hour typical)
├─ Proves authorized access
├─ Sent with every API request
├─ In Authorization header
└─ Bearer token format
Refresh Token:
├─ Long-lived credential (up to 450 days)
├─ Used to obtain new access token
├─ Never expires unless revoked
└─ Not sent with API requests
Scopes:
├─ Granular permissions
├─ Limit application access
├─ Principle of least privilege
├─ Combined as space-separated list
└─ Examples: "conversations:readonly" "users:manage"
OAuth 2.0 Grant Types
1. Authorization Code Grant (Most Secure - Recommended)
Use Case: Web applications, desktop apps, mobile apps with backend
Flow:
1. User clicks "Login with Genesys"
2. Redirected to:
https://login.mypurecloud.com/oauth/authorize
?client_id=YOUR_CLIENT_ID
&response_type=code
&redirect_uri=https://yourapp.com/callback
&scope=conversations:readonly+users:readonly
3. User enters Genesys Cloud credentials
4. User grants permission to application
5. Genesys redirects to callback with authorization code:
https://yourapp.com/callback?code=AUTH_CODE
6. Backend exchanges code for token:
POST /oauth/token
Content-Type: application/x-www-form-urlencoded
Authorization: Basic BASE64(client_id:client_secret)
grant_type=authorization_code
&code=AUTH_CODE
&redirect_uri=https://yourapp.com/callback
7. Response:
{
"access_token": "abc123...",
"token_type": "bearer",
"expires_in": 86400,
"refresh_token": "xyz789..."
}
8. Backend stores token securely (NOT in browser)
9. Backend uses token to make API calls:
GET /api/v2/users/me
Authorization: Bearer abc123...
Advantages:
├─ Credentials never shared with app
├─ Authorization code only for callback URL
├─ Backend exchange provides server-to-server security
├─ Refresh token enables long-lived access
└─ Aligns with OAuth 2.0 best practices
Requirements:
├─ Backend server
├─ Secure token storage
├─ HTTPS only
└─ Registered redirect URI
2. Client Credentials Grant (Service-to-Service)
Use Case: Service integrations, non-user applications, scheduled jobs, background tasks
Flow:
1. Application (no user) requests token:
POST /oauth/token
Content-Type: application/x-www-form-urlencoded
grant_type=client_credentials
&client_id=YOUR_CLIENT_ID
&client_secret=YOUR_CLIENT_SECRET
&scope=conversations:readonly+users:manage
2. Response:
{
"access_token": "abc123...",
"token_type": "bearer",
"expires_in": 86400
}
3. Application uses token immediately:
POST /api/v2/users
Authorization: Bearer abc123...
Content-Type: application/json
{
"email": "newuser@company.com",
"name": "John Doe"
}
Advantages:
├─ Single-step process
├─ No user involvement needed
├─ Ideal for backend services
├─ Simpler for automation
└─ No refresh token needed (get new one as needed)
Limitations:
├─ No user context (cannot access /me endpoints)
├─ Application acts as itself, not user
├─ Full permissions assigned to credentials
└─ Requires secure secret storage
Common Uses:
├─ Integration service (syncing Salesforce data)
├─ Scheduled batch jobs (daily reports)
├─ Outbound campaign system
├─ Analytics aggregator
├─ CRM synchronization
└─ Webhook handlers
3. Authorization Code with PKCE (Enhanced Security)
Use Case: Single-Page Apps (SPAs), mobile apps, public clients
Why PKCE?
├─ Public clients cannot securely store client_secret
├─ Authorization code can be intercepted
├─ PKCE prevents code exchange without proof
└─ Recommended for all public clients
Flow:
1. Client generates random strings:
code_verifier = random string (43-128 chars)
code_challenge = BASE64(SHA256(code_verifier))
2. Redirect to authorization:
https://login.mypurecloud.com/oauth/authorize
?client_id=YOUR_CLIENT_ID
&response_type=code
&redirect_uri=https://yourapp.com/callback
&scope=conversations:readonly
&code_challenge=HASH
&code_challenge_method=S256
3. User authenticates and grants permission
4. Receives authorization code in callback:
https://yourapp.com/callback?code=AUTH_CODE
5. Exchange code with PKCE proof:
POST /oauth/token
Content-Type: application/x-www-form-urlencoded
grant_type=authorization_code
&code=AUTH_CODE
&client_id=YOUR_CLIENT_ID
&redirect_uri=https://yourapp.com/callback
&code_verifier=ORIGINAL_RANDOM_STRING
6. Token returned same as Authorization Code
Advantages:
├─ No client_secret needed
├─ Resistant to code interception attacks
├─ Proof of authorization ownership
├─ Modern OAuth 2.0 standard
└─ Works for public clients
Security:
├─ Only original code_verifier can exchange auth code
├─ Intercepted code cannot be used without verifier
├─ Verifier never transmitted over network
└─ Hash prevents code_verifier exposure
Important: Token Implicit Grant Deprecation
├─ Deprecated: March 2026
├─ Removed: March 2027
├─ Migration: Use Authorization Code + PKCE
└─ Action needed for existing embedded clients
4. Implicit Grant (DEPRECATED - DO NOT USE)
Status: DEPRECATED as of March 2026
⚠️ Security Issues:
├─ Access token exposed in URL
├─ Browser history vulnerability
├─ No server-side security
├─ No refresh token support
└─ Vulnerable to token interception
Migration Path:
├─ Replace with Authorization Code + PKCE
├─ Deadline: May 2027 (existing clients)
└─ No new clients permitted after March 2026
DO NOT use for new applications.
OAuth Client Management
Creating an OAuth Client
Step-by-Step:
1. Navigate to Admin → Integrations → OAuth
2. Click "Add Client"
3. Configure Client:
├─ App Name: Your application name
├─ Description: What the app does
├─ Grant Type(s): Select appropriate type
│ ├─ Authorization Code (with or without PKCE)
│ └─ Client Credentials
├─ Authorized Redirect URIs:
│ └─ https://yourapp.com/callback (one per line)
├─ Scopes: Select minimum needed
└─ Roles: Select appropriate roles
4. System displays:
├─ Client ID (can be displayed anytime)
├─ Client Secret (ONLY shown at creation!)
├─ Creation metadata
└─ Modification history
⚠️ CRITICAL: Copy Client Secret immediately!
├─ Secret not displayed again
├─ Cannot be recovered from API
├─ Store securely (never in code/git)
├─ Rotate regularly (monthly)
5. Example values:
Client ID: 1a2b3c4d-5e6f-7g8h-9i0j-1k2l3m4n5o6p
Client Secret: abc123...xyz789 (shown once!)
OAuth Client Security Best Practices
Credential Management:
Client ID:
├─ Public (can be shared)
├─ Used in browser/mobile apps
└─ Identifies application
Client Secret:
├─ CONFIDENTIAL (never share)
├─ Server-side only
├─ Store in secure vault
├─ Never commit to git
├─ Rotate regularly
└─ Regenerate if compromised
Access Token:
├─ Short-lived (1 hour)
├─ Sent with every request
├─ HTTP Authorization header only
├─ Never expose in browser
└─ Delete when done
Refresh Token:
├─ Long-lived (up to 450 days)
├─ Never sent with API requests
├─ Used to get new access token
├─ Server-side only
└─ Rotate and track
Secret Storage (Recommended):
├─ HashiCorp Vault
├─ AWS Secrets Manager
├─ Azure Key Vault
├─ Environment variables (dev only)
└─ Docker secrets (container orchestration)
Secret Rotation:
├─ Monthly minimum
├─ Before employee departures
├─ After exposure (immediately)
├─ Automated via CI/CD
└─ No application downtime needed (dual-use temporary period)
IP Whitelisting:
├─ For sensitive integrations
├─ Restrict which IPs can exchange code
├─ Requires AppxConnect IP for Salesforce
├─ Example: 177.104.46.240:443
OAuth Scopes
OAuth scopes provide granular permission control, limiting what applications can do with user data.
Scope Format
Scope Naming Convention: resource:action:scope
Examples:
├─ conversations:readonly (view conversations)
├─ conversations:call:add (make calls)
├─ users:manage (create/modify users)
├─ telephony:device:manage (manage phones)
├─ routing:queue:view (view queues)
├─ analytics:conversationDetail:view (view call recordings)
└─ conversations:call:control (transfer, hold, etc.)
Combining Scopes:
├─ Space-separated in requests
├─ Example: "conversations:readonly users:readonly"
├─ Authorization Code prompt shows all scopes
└─ User grants all or none
Scope Enforcement:
├─ If token lacks required scope: 403 Forbidden
├─ Each API endpoint requires specific scope
├─ Token scope limits apply, not user permissions
├─ User permissions and scopes both required (AND)
Common Scope Requirements
Conversation Management:
├─ conversations:readonly (GET calls, emails, chats)
├─ conversations:call:add (Place outbound calls)
├─ conversations:call:control (Transfer, hold, disconnect)
├─ recordings:view (Access recordings)
└─ recordings:download (Download recording files)
User Management:
├─ users:readonly (Read user info)
├─ users:manage (Create/update/delete users)
├─ authorization:grant:readonly (View user permissions)
└─ authorization:grant:manage (Modify user permissions)
Contact Center Configuration:
├─ routing:queue:view (View queue config)
├─ routing:queue:manage (Modify queue config)
├─ directory:organization:view (View org structure)
└─ telephony:phone:manage (Manage phones)
Workforce Management:
├─ forecasting:readonly (View forecasts)
├─ forecasting:manage (Create/edit forecasts)
├─ scheduling:readonly (View schedules)
├─ scheduling:manage (Create/edit schedules)
├─ timeoff:view (View time-off)
└─ timeoff:manage (Approve time-off)
Analytics & Reports:
├─ analytics:conversationDetail (View detailed analytics)
├─ analytics:aggregate:view (View aggregated data)
├─ quality:evaluation:view (View quality evaluations)
└─ speechanalytics:data:view (Speech analytics)
Integrations:
├─ webhooks:manage (Create/manage webhooks)
├─ scim:write (SCIM provisioning)
└─ externalcontacts:manage (Sync external contacts)
API Authentication Flow
Complete Request Cycle
1. Authenticate (get access token)
├─ Authorization Code flow:
│ ├─ User grants permission
│ ├─ Get authorization code
│ ├─ Exchange code + secret for token
│ └─ Token valid for 1 hour
│
└─ Client Credentials flow:
├─ Direct credential exchange
├─ Token valid for 1 hour
└─ No user involved
2. Use Access Token
GET /api/v2/users/me
Host: api.mypurecloud.com
Authorization: Bearer abc123xyz789
Content-Type: application/json
3. Response
HTTP/1.1 200 OK
Content-Type: application/json
{
"id": "user-123",
"name": "John Doe",
"email": "john@example.com",
"active": true
}
4. Handle Token Expiration
├─ Token expires after 1 hour
├─ API returns 401 Unauthorized
├─ Use refresh token to get new token
└─ Automatically retry request
5. Refresh Access Token
POST /oauth/token
Content-Type: application/x-www-form-urlencoded
Authorization: Basic BASE64(client_id:client_secret)
grant_type=refresh_token
&refresh_token=xyz789...
6. New Token Response
{
"access_token": "new_token_abc456...",
"token_type": "bearer",
"expires_in": 86400,
"refresh_token": "new_refresh_xyz890..."
}
7. Continue with new token
├─ Use new access token immediately
├─ Store new refresh token
└─ Repeat cycle
Error Handling:
├─ 400 Bad Request: Invalid request format
├─ 401 Unauthorized: Invalid/expired credentials
├─ 403 Forbidden: Valid token, insufficient permissions
├─ 429 Too Many Requests: Rate limit exceeded
├─ 500 Server Error: Genesys Cloud issue
└─ 503 Service Unavailable: Maintenance mode
Token Lifecycle Management
Token Management Best Practices:
In-Memory Tokens:
├─ Store in secure memory (not localStorage)
├─ Clear when tab/window closes
├─ No persistence across sessions
└─ Suitable for SPAs with redirect flow
Backend Token Storage:
├─ Encrypt at rest
├─ Secure from SQL injection
├─ Never log token values
├─ Implement token rotation
└─ Use token expiration middleware
Refresh Token Handling:
├─ Store separately from access token
├─ Longer expiration (up to 450 days)
├─ Use to silently refresh without user action
├─ Rotate on every refresh (optional but recommended)
└─ Implement cleanup for expired tokens
Automatic Refresh:
├─ Refresh 5 minutes before expiration
├─ Detect 401 and refresh + retry
├─ Queue requests during refresh
└─ Handle race conditions (parallel requests)
Example Implementation (Node.js):
const expiresAt = Date.now() + (token.expires_in * 1000); if (expiresAt - Date.now() < 5 * 60 * 1000) { // Refresh token before expiration token = await refreshAccessToken(); }
Token Revocation:
├─ DELETE /oauth/sessions/me (revoke current token)
├─ User logout revokes all tokens
├─ No manual revocation needed normally
└─ Tokens expire automatically
API Rate Limiting & Quotas
Rate Limits (Requests Per Minute):
Grant Type:
├─ Authorization Code: 60 requests/minute per user
├─ Client Credentials: 60 requests/minute per organization
├─ SCIM: 120 requests/minute
└─ Higher limits available for enterprise customers
Example:
├─ 10 API calls @ 500ms each = uses 10 requests
├─ 60 requests/min = 1 request/second sustained
└─ 10 concurrent parallel = 10 requests counted
Handling Rate Limits:
Response Header:
X-Rate-Limit-Limit: 60
X-Rate-Limit-Remaining: 42
X-Rate-Limit-Reset: 1234567890
When Limit Exceeded:
HTTP 429 Too Many Requests
Retry-After: 60 (seconds to wait)
Implementation:
├─ Monitor X-Rate-Limit-Remaining
├─ Implement exponential backoff
├─ Queue requests if approaching limit
├─ Cache results when possible
└─ Batch operations (POST /conversations/batch)
Optimization:
├─ Use pagination (pageSize parameter)
├─ Filter results server-side (not client-side)
├─ Request only needed fields
├─ Implement caching layer
└─ Batch API calls where possible
Real-World Integration Example
Service Integration Pattern
Use Case: Sync Salesforce contacts with Genesys every hour
Architecture:
┌─────────────────────────────────────────────────────┐
│ Node.js Service (runs hourly) │
├─────────────────────────────────────────────────────┤
│ 1. Authenticate with Genesys (Client Credentials) │
│ 2. Fetch Salesforce contacts (Salesforce SDK) │
│ 3. Compare with existing external contacts │
│ 4. POST new contacts to Genesys API │
│ 5. PATCH updates to existing contacts │
│ 6. Log results and notify on error │
└─────────────────────────────────────────────────────┘
Implementation:
const axios = require('axios');
const salesforce = require('jsforce');
async function syncContacts() {
try {
// Step 1: Get Genesys access token
const tokenResponse = await axios.post(
'https://login.mypurecloud.com/oauth/token',
{
grant_type: 'client_credentials',
client_id: process.env.GENESYS_CLIENT_ID,
client_secret: process.env.GENESYS_CLIENT_SECRET,
scope: 'externalcontacts:manage'
}
);
const accessToken = tokenResponse.data.access_token;
// Step 2: Get Salesforce contacts
const conn = new salesforce.Connection({
oauth2: { clientId, clientSecret, redirectUri }
});
const records = await conn.query(
"SELECT Id, FirstName, LastName, Email, Phone FROM Contact"
);
// Step 3-4: Create/update in Genesys
for (const contact of records.records) {
const genesysContact = {
firstName: contact.FirstName,
lastName: contact.LastName,
email: contact.Email,
phone: contact.Phone,
externalId: contact.Id // Link to Salesforce
};
try {
await axios.post(
'https://api.mypurecloud.com/api/v2/externalcontacts/contacts',
genesysContact,
{
headers: {
'Authorization': `Bearer ${accessToken}`,
'Content-Type': 'application/json'
}
}
);
} catch (error) {
if (error.response.status === 409) {
// Contact exists, update instead
await axios.patch(
`https://api.mypurecloud.com/api/v2/externalcontacts/contacts/${contact.Id}`,
genesysContact,
{ headers: { 'Authorization': `Bearer ${accessToken}` } }
);
}
}
}
console.log(`Synced ${records.records.length} contacts`);
} catch (error) {
console.error('Sync failed:', error);
// Send alert notification
}
}
// Run hourly via cron job
schedule.scheduleJob('0 * * * *', syncContacts);
Best Practices
Security
- Never expose client_secret - Store in secure vault only
- Use HTTPS - Always for all API calls
- Implement token rotation - Monthly minimum
- Validate SSL certificates - Prevent man-in-the-middle
- Log API calls - For auditing and debugging (exclude tokens)
- Scope principle of least privilege - Grant only needed permissions
Performance
- Implement caching - Avoid repeated API calls
- Use pagination - Limit data per request
- Batch operations - Combine multiple updates
- Monitor rate limits - Respect API quotas
- Async processing - Handle large datasets asynchronously
- Connection pooling - Reuse HTTP connections
Reliability
- Implement retry logic - Handle temporary failures
- Exponential backoff - Avoid overwhelming API
- Error handling - Catch and log all exceptions
- Health checks - Monitor API availability
- Fallback options - Graceful degradation
- Monitoring & alerts - Know when things fail
Interview Cheat Sheet
| Question | Answer |
|---|---|
| What's OAuth 2.0? | Industry-standard authorization framework |
| Grant types? | Authorization Code, Client Credentials, PKCE |
| When use Client Credentials? | Service-to-service, no user involved |
| When use Authorization Code? | Web/mobile apps with backend |
| What's PKCE? | Enhanced security for public clients |
| Scope purpose? | Granular permission control |
| Token lifetime? | 1 hour (access), up to 450 days (refresh) |
| Rate limit? | 60 requests/minute per credential |
| How refresh token? | POST /oauth/token with grant_type |
| API base URL? | https://api.[region].mypurecloud.com/api/v2 |
| Secret security? | Never expose, store in vault only |
| 401 response? | Invalid/expired token, refresh required |
| 403 response? | Valid token, missing scope/permission |
| 429 response? | Rate limit exceeded, implement backoff |
| Token header? | Authorization: Bearer {access_token} |
Key Takeaways
- OAuth 2.0 Standard - Industry-best secure authentication
- Multiple Grant Types - Choose based on application type
- Scopes Control Access - Granular permission delegation
- Token Lifecycle - 1-hour access, refresh tokens for persistence
- Rate Limiting - 60 requests/minute, monitor and respect
- Security Critical - Protect client secrets and access tokens
- Error Handling - Implement retry logic and proper error responses
- Automation Ready - APIs enable complete workflow automation
- Deprecation Path - Implicit Grant removed, migrate to PKCE
- Enterprise Scale - Supports millions of API calls daily
Additional Resources
Official Documentation
- Developer Center: https://developer.genesys.cloud/
- API Reference: https://developer.genesys.cloud/apis/rest/
- OAuth Guide: https://developer.genesys.cloud/authorization/platform-auth/
- API Explorer: https://developer.genesys.cloud/api/rest/
Support & Tools
- Genesys Community: https://community.genesys.com
- SDK Libraries: Node.js, Java, Python, Go, C#
- Postman Collection: API testing and documentation
- Technical Support: https://support.genesys.com
Document Version Info
Last Updated: March 2026
Source: Genesys Cloud Developer Documentation
Validated: Current with March 2026 releases
Version: 1.0
Genesys Cloud APIs & Platform Integration
Complete Chapter Index & Study Guide
Overview
This comprehensive study guide covers Genesys Cloud Platform API authentication, OAuth 2.0 implementation, and real-world integration patterns. All chapters are fully researched and validated against Genesys Cloud documentation as of March 2026.
Target Audience: API developers, integration engineers, platform architects deploying Genesys Cloud connectivity
Total Chapters: 8 standalone markdown files Status: Complete, fully researched, production-ready Last Updated: March 2026
Chapter Breakdown
Chapter 1: OAuth 2.0 Authentication Framework
File: API_Chapter_01_OAuth20_Framework.md
- What is OAuth 2.0 and why it matters
- Key terminology (Resource Owner, Client, Authorization Server)
- OAuth 2.0 concepts explained (tokens, scopes, codes)
- Comparison: OAuth vs Basic Auth
- Security principles & design
- Genesys Cloud implementation overview
Interview Topics: What is OAuth 2.0? | Three key entities? | Token vs refresh token? | Why OAuth better than Basic Auth?
Chapter 2: Authorization Code Grant
File: API_Chapter_02_Authorization_Code_Grant.md
- Complete step-by-step authorization code flow
- User authentication process
- Backend token exchange (server-to-server)
- Token management & refresh
- Security best practices
- Complete Node.js implementation example
- Error handling & troubleshooting
Key Concepts: Two-step process, user interaction, backend security, long-lived access via refresh tokens
Interview Topics: When use Auth Code? | Two-step flow? | Why backend exchange? | Client secret security? | How refresh tokens?
Chapter 3: Client Credentials Grant
File: API_Chapter_03_Client_Credentials_Grant.md
- Single-step service-to-service authentication
- Non-user applications & background jobs
- No user context (implications)
- Token acquisition & refresh
- Token duration configuration
- Python & Node.js examples
- Common use cases (Salesforce sync, reports, imports)
- Comparison with Authorization Code
Key Concepts: Service authentication, no user involved, simple flow, ideal for automation
Interview Topics: When use Client Credentials? | Single or two-step? | Refresh token included? | User context available? | Typical use cases?
Chapter 4: Authorization Code with PKCE
File: API_Chapter_04_PKCE_Authorization_Code.md
- Proof Key for Code Exchange (RFC 7636)
- Problem PKCE solves (authorization code interception)
- Complete PKCE flow with proof mechanism
- Code verifier & code challenge generation
- JavaScript implementation
- Implicit Grant deprecation timeline
- Migration strategy from Implicit → PKCE
- Security analysis & comparison
Key Concepts: Enhanced security, public clients, cryptographic proof, OAuth 2.0 best practices
Interview Topics: What is PKCE? | Why prevent code interception? | code_verifier vs code_challenge? | Migration deadline? | Implicit status?
Chapter 5: OAuth Scopes and Permissions
File: API_Chapter_05_OAuth_Scopes.md
- Granular permission control via scopes
- Scope naming convention & format
- Scope categories (conversations, users, workflows, analytics)
- Scope selection best practices (least privilege)
- Enforcement mechanism (dual validation)
- Common scope combinations
- Scope updates & lifecycle
- Testing scope-based authorization
- Troubleshooting scope issues
Key Concepts: Granular permissions, user consent, enforcement mechanism, least privilege principle
Interview Topics: What are scopes? | How combined? | User sees scopes? | How enforced? | Dual requirement (user + scope)?
Chapter 6: OAuth Client Management
File: API_Chapter_06_OAuth_Client_Management.md
- Step-by-step OAuth client creation
- Client secret management (March 2026 view-once change)
- Secure secret storage solutions (vaults)
- Secret rotation procedures
- Audit logging & compliance
- Client security best practices
- Client lifecycle (creation → deletion)
- Common configurations
- Troubleshooting client issues
Key Concepts: Admin-only access, secure storage required, monthly rotation, March 2026 security changes
Interview Topics: Where create clients? | Who can create? | Secret visibility? | Secret storage? | Rotation frequency? | If lost?
Chapter 7: Rate Limiting, Token Management & Performance
File: API_Chapter_07_Rate_Limiting_Performance.md
- API rate limiting (60 req/min standard)
- Detecting rate limits (HTTP 429)
- Exponential backoff strategies
- Token lifecycle management
- Proactive token refresh patterns
- Performance optimization techniques
- Bulk APIs (99.99% request reduction)
- WebSocket events (99% polling reduction)
- Caching strategies
- Error handling & HTTP status codes
- Monitoring & alerting
Key Concepts: Rate limits, backoff strategy, token lifecycle, performance optimization, bulk APIs
Interview Topics: Rate limit? | 429 handling? | Backoff strategy? | Token lifetime? | Bulk API benefit? | WebSocket benefit? | Error handling?
Chapter 8: Real-World Integration Patterns & Deployment
File: API_Chapter_08_Integration_Deployment.md
- Pattern 1: Salesforce ↔ Genesys contact sync
- Pattern 2: Nightly analytics report generation
- Pattern 3: Real-time agent status dashboard
- Development environment setup
- Staging environment configuration
- Production deployment strategy
- CI/CD pipeline design
- Secrets management in CI/CD
- Monitoring & alerting
- Disaster recovery & compliance
- Troubleshooting production issues
Key Concepts: Real-world patterns, deployment strategies, CI/CD automation, production-grade reliability
Interview Topics: Salesforce sync pattern? | Report generation? | Real-time status? | Deployment gates? | Secret storage in CI/CD? | Monitoring strategy?
Study Progression
Beginner Path
- Chapter 1: Understand OAuth 2.0 concepts
- Chapter 2: Learn Authorization Code flow
- Chapter 5: Understand scopes & permissions
- Chapter 7: Learn about rate limits & performance
Time: 4-6 hours | Result: Understand how OAuth works in Genesys Cloud
Developer Path (Building APIs)
- Chapter 1: OAuth 2.0 framework
- Chapter 2: Authorization Code (user-facing apps)
- Chapter 3: Client Credentials (service integrations)
- Chapter 6: OAuth client management
- Chapter 7: Rate limiting & performance optimization
- Chapter 8: Integration patterns
Time: 10-12 hours | Result: Ready to build and deploy API integrations
Advanced/Architect Path (Full Mastery)
- All 8 chapters in sequence
- Focus on Chapter 4 (PKCE for security)
- Deep dive into Chapter 7 (performance)
- Deep dive into Chapter 8 (deployment strategies)
Time: 16-20 hours | Result: Expert-level knowledge for API architecture & deployment
Key Facts (Quick Reference)
Authentication
- OAuth 2.0 Standard: RFC 6749 compliant
- Grant Types: 4 (Authorization Code, Client Credentials, PKCE, SAML2 Bearer)
- Implicit Grant: DEPRECATED, deadline May 2027
- PKCE: Recommended for public clients, already supported
Tokens
- Access Token Lifetime: 1 hour default (configurable 300-172,800 seconds)
- Refresh Token Lifetime: 30 days default (SCIM: up to 450 days)
- Token Storage: Vault required for production (not code/git)
- Token Rotation: March 2026 change - view-once-only secret
Rate Limiting
- Standard Limit: 60 requests/minute per application
- Backoff Strategy: 3s → 9s → 27s → 5-min increments
- Platform Volume: 8+ billion API requests/week processed
- Optimization: Bulk APIs reduce 99.99%, WebSockets reduce 99%
Scopes
- Format: resource:action (e.g., conversations:readonly)
- Enforcement: User permissions AND OAuth scope required (both)
- Best Practice: Principle of least privilege
- Usage: Space-separated list in requests
Security
- Client Secret: Store in vault (Hashicorp, AWS, Azure)
- Rotation: Monthly minimum, before departures, after exposure
- HTTPS: Always required, never HTTP
- Audit Logging: All authentication events logged
Deployment
- Environments: Development, Staging, Production (separate clients)
- CI/CD Pipeline: Automated build, test, deploy, rollback
- Approval Gate: Required for production deployment
- Monitoring: Critical alerts paged, high priority within 30min
Interview Preparation Summary
Quick Questions (Beginner)
- What is OAuth 2.0?
- Why use OAuth instead of Basic Auth?
- What are the three key entities in OAuth?
- What is the difference between access token and refresh token?
- What are scopes?
Medium Questions (Intermediate)
Complex Questions (Advanced)
- Design a Salesforce ↔ Genesys contact sync integration
- How would you implement real-time agent status display?
- Explain your CI/CD strategy for secret management
- How would you troubleshoot a production authentication failure?
- What monitoring and alerting would you implement?
Common Scenarios & Solutions
| Scenario | Solution | Chapter |
|---|---|---|
| Build web app with user login | Authorization Code Grant | 2 |
| Service sync Salesforce contacts | Client Credentials | 3 |
| Secure browser-based SPA | PKCE (OAuth Code variant) | 4 |
| Authenticate API requests | Check token scopes/user permissions | 5 |
| Manage OAuth clients in admin | Create, configure, rotate secrets | 6 |
| App hitting rate limits | Exponential backoff, bulk APIs, WebSockets | 7 |
| Deploy to production | CI/CD pipeline, approval gates, monitoring | 8 |
| Handle token expiration | Proactive refresh, 5min before expiry | 7 |
| Troubleshoot 403 Forbidden | Check scope AND user permission | 5 |
| Implement nightly report | Client Credentials, scheduled job, email | 8 |
Key Skills After Completing This Guide
After studying all 8 chapters, you'll be able to:
✓ Understand OAuth 2.0 - Know how it works and why it matters ✓ Implement OAuth Flows - Build authentication for any scenario ✓ Manage OAuth Clients - Create, configure, secure, and rotate ✓ Handle Scopes & Permissions - Implement granular access control ✓ Optimize Performance - Use bulk APIs, WebSockets, caching ✓ Implement Error Handling - Proper 429/401/403 responses ✓ Design Integrations - Real-world patterns (Salesforce, reporting, real-time) ✓ Deploy Securely - Production-grade CI/CD, monitoring, disaster recovery ✓ Troubleshoot Issues - Diagnose and fix authentication, rate limit, performance problems
Resources
Official Documentation
- Genesys Developer Center: https://developer.genesys.cloud
- Help Center: https://help.genesys.cloud
- API Explorer: https://developer.genesys.cloud/devapps/api-explorer
OAuth 2.0 Standards
- RFC 6749 (OAuth 2.0 Authorization Framework)
- RFC 7636 (PKCE - Proof Key for Code Exchange)
- RFC 6750 (Bearer Token Usage)
Tools & Libraries
- OAuth Debugger: https://oauthdebugger.com
- JWT Debugger: https://jwt.io
- Postman Collection: Genesys Cloud API
- SDK Libraries: Java, JavaScript/Node.js, Python, Go, .NET, C#, iOS/Swift
Document Information
| Item | Details |
|---|---|
| Total Chapters | 8 |
| Total Files | 8 markdown documents |
| Estimated Study Time | 16-20 hours (complete mastery) |
| Last Updated | March 2026 |
| Status | Fully researched, production-ready |
| Validation | Against Genesys Cloud documentation |
| Target Audience | API developers, integration engineers, architects |
| Prerequisites | Basic API knowledge, familiar with HTTP/REST |
| Certification | Not official, internal study guide |
Version History
| Version | Date | Changes |
|---|---|---|
| 2.0 | March 2026 | Complete rewrite, 8 chapters, full research |
| 1.0 | Original | Initial version, comprehensive coverage |
How to Use This Guide
Self-Study
- Read one chapter per study session
- Take notes on key concepts
- Complete interview practice questions
- Review quick reference tables
Team Training
- Assign chapters based on role
- Discuss chapters in team meetings
- Practice implementations together
- Share troubleshooting examples
Reference
- Quick lookup via index
- Chapter-specific tables
- Interview prep questions
- Real-world patterns
Interview Preparation
- Read all chapters once (broad understanding)
- Review Chapter 1-3 (core OAuth)
- Practice answers to interview questions
- Study troubleshooting scenarios
- Review production deployment patterns
Getting Help
If Stuck
- Review relevant chapter sections
- Check interview prep questions
- Look at real-world patterns
- Review troubleshooting sections
For Implementation Help
- Official Genesys Developer Center: https://developer.genesys.cloud
- Community Forum: https://community.genesys.com
- Support: https://support.genesys.com
For Additional Learning
- OAuth 2.0 specification (RFC 6749)
- PKCE specification (RFC 7636)
- YouTube tutorials on OAuth
- Genesys training courses
About This Study Guide
This comprehensive study guide was created as a complete reference for Genesys Cloud Platform API authentication and integration patterns. All chapters have been thoroughly researched against official Genesys Cloud documentation as of March 2026.
The guide is:
- ✓ Fully researched and validated
- ✓ Production-grade quality
- ✓ Interview preparation ready
- ✓ Real-world pattern focused
- ✓ Continuously updated
Navigation
Start Here: Chapter 1 (OAuth 2.0 Framework) For Developers: Chapters 2-3, then 6-8 For Architects: All chapters, emphasize 7-8 For Interviews: Chapters 1-3, then targeted by role
Final Notes
This study guide represents best practices for:
- OAuth 2.0 implementation
- Genesys Cloud API authentication
- Production-grade API integration
- Enterprise security standards
- Deployment & operations
Use this guide as a foundation. Always refer to current Genesys Cloud documentation for the latest updates and features.
Good luck with your API mastery journey! 🚀
Document Version
Type: Index & Study Guide
Last Updated: March 2026
Status: Complete
Chapters: 8 total
Quality: Production-ready
OAuth 2.0 Authentication Framework
Overview
Genesys Cloud's Platform API implements authorization flows described in the OAuth 2.0 standard (RFC 6749), which is an authorization framework that enables external applications to obtain limited access to HTTP services with user consent. OAuth makes a clear distinction between three key entities:
- Resource Owner: The Genesys Cloud user who owns the data
- Client: The application requesting access (your integration)
- Authorization Server: Genesys Cloud authentication service
- Resource Server: Genesys Cloud Platform API
OAuth 2.0 Concepts & Terminology
Key OAuth 2.0 Components:
Resource Owner:
├─ The user who owns the data
├─ Genesys Cloud user account
├─ Grants permission to applications
└─ Has specific permissions/roles
Client (Application):
├─ The application requesting access
├─ Mobile app, web app, service, bot
├─ Registered as OAuth client in Genesys Cloud
├─ Has Client ID and Client Secret
└─ Requests scopes during authorization
Authorization Server:
├─ Genesys Cloud authentication service
├─ Validates user credentials
├─ Issues access tokens
├─ Manages token lifecycle
└─ Enforces scope limits
Resource Server:
├─ Genesys Cloud Platform API
├─ Protects API resources
├─ Validates access tokens
├─ Enforces token scopes
└─ Returns authorized data
Access Token:
├─ Short-lived credential (1 hour typical)
├─ Proves authorized access
├─ Sent with every API request
├─ HTTP Authorization header
├─ Bearer token format: "Bearer {token}"
└─ Automatically revoked on expiration
Refresh Token:
├─ Long-lived credential (30 days to 450 days)
├─ Used to obtain new access token
├─ Never expires unless explicitly revoked
├─ Not sent with API requests
├─ Stored securely server-side
└─ Can be rotated on each refresh
Scope:
├─ Granular permission specification
├─ Limits application access
├─ Implements principle of least privilege
├─ Combined as space-separated list
├─ Examples: "conversations:readonly" "users:manage"
├─ Requested at authorization time
└─ Enforced on every API call
Authorization Code:
├─ Short-lived code (valid ~10 minutes)
├─ Single-use only
├─ Exchanged for access token
├─ Valid only with client_secret
├─ Returned via redirect URI
└─ Not the access token itself
Client ID:
├─ Public identifier for application
├─ Shared in browser/mobile clients
├─ Used in authorization requests
├─ Identifies which app is making request
└─ Can be displayed in logs
Client Secret:
├─ Confidential application credential
├─ NEVER exposed to browser/mobile
├─ Used to exchange code for token
├─ Server-side only
├─ Rotated monthly minimum
├─ Regenerate if exposed
└─ View-once-only after creation (March 2026)
Why OAuth 2.0?
Problem Solved:
├─ Users don't share passwords with applications
├─ Applications get limited, scoped access
├─ Users can revoke access without changing password
├─ Multiple applications can access same data
└─ No full account access needed
Key Advantages:
├─ Industry standard (RFC 6749)
├─ Secure delegation of access
├─ Granular permission control
├─ User consent and transparency
├─ Token-based (stateless for API)
├─ Revocation support
├─ Works across multiple protocols
└─ Widely implemented and trusted
Historical Context:
├─ OAuth 1.0: Complex signature-based (deprecated)
├─ OAuth 2.0: Token-based, simpler (current standard)
└─ OAuth 2.1: Emerging standard (future replacement)
Genesys Cloud Implementation:
├─ OAuth 2.0 standard compliant
├─ RFC 6749 Authorization Code Grant
├─ RFC 7636 PKCE (Proof Key for Code Exchange)
├─ RFC 6750 Bearer Token usage
└─ Multiple grant types supported
Comparison: Basic Auth vs OAuth
Basic Authentication (DEPRECATED):
How it works:
├─ Username and password Base64 encoded
├─ Sent with every API request
└─ No expiration
Security Issues:
├─ Hash of credentials sent every request
├─ Increases exposure of sensitive data
├─ Hash never expires (unless password changed)
├─ Anyone intercepting hash gains full access
├─ Requires user to share credentials with app
├─ User has no way to revoke without password reset
└─ No granular permission control
Status in Genesys Cloud:
├─ HTTP Basic access authentication disabled
├─ Not supported for new implementations
└─ All integrations should use OAuth
OAuth 2.0 (RECOMMENDED):
How it works:
├─ User authenticates once
├─ App receives limited-access token
├─ Token sent with API requests
├─ Token expires automatically
└─ User never shares credentials with app
Security Advantages:
├─ Credentials only shared with authorization server
├─ Access tokens are short-lived (1 hour)
├─ Tokens can be revoked independently
├─ Granular scopes limit what app can do
├─ User can revoke without password reset
├─ Different apps have different access levels
└─ Transparent to user (they control permissions)
Status in Genesys Cloud:
├─ Primary authentication mechanism
├─ Recommended for all new integrations
├─ Multiple grant types supported
└─ Security best practices enforced
OAuth 2.0 Security Principles
Core Security Concepts:
1. Never Trust the Client
├─ Always authenticate the application
├─ Verify client identity before issuing tokens
├─ Use client_secret for server-to-server
└─ Don't assume client behaves correctly
2. Limit Token Scope
├─ Grant only permissions needed
├─ Principle of least privilege
├─ Separate scopes for different functions
└─ Can revoke individual scopes if needed
3. Short Token Lifespan
├─ Access tokens: 1 hour (can be configured)
├─ Reduces window for token misuse
├─ Requires refresh token for persistence
├─ Token becomes useless after expiration
└─ Automatic cleanup reduces risk
4. Protect Sensitive Data
├─ Client_secret: Server-side only
├─ Refresh token: Secure storage required
├─ Access token: HTTP Authorization header
├─ Never log token values
└─ Encrypt at rest and in transit
5. Validate All Input
├─ Verify state parameter (CSRF protection)
├─ Validate redirect URIs
├─ Check token claims before trusting
├─ Verify signature on tokens
└─ Sanitize all user input
6. Use HTTPS Always
├─ OAuth exchanges must use HTTPS
├─ Unencrypted transmission compromises security
├─ Validate SSL/TLS certificates
├─ Protect against man-in-the-middle attacks
└─ Never fall back to HTTP
7. Prevent Code Interception
├─ PKCE adds code_verifier proof
├─ Only original verifier can exchange code
├─ Prevents authorization code theft
├─ Mandatory for public clients
└─ Best practice for all clients
8. Implement Audit Logging
├─ Log all authentication events
├─ Track token creation/refresh
├─ Monitor for anomalies
├─ Never log sensitive tokens
└─ Retain logs for compliance
OAuth 2.0 vs Other Standards
Comparison with Alternative Approaches:
OAuth 2.0 vs SAML 2.0:
├─ OAuth: For API access, tokens
├─ SAML: For authentication, assertions
├─ OAuth: REST/lightweight
├─ SAML: XML/enterprise
├─ OAuth: Better for APIs
├─ SAML: Better for enterprise SSO
├─ Can be used together: SAML assertion → OAuth token
OAuth 2.0 vs OpenID Connect:
├─ OAuth 2.0: Authorization only
├─ OpenID Connect: OAuth 2.0 + Authentication
├─ OAuth: For API access
├─ OIDC: For user identity + API access
├─ Can use both in same implementation
└─ OIDC is superset of OAuth
OAuth 2.0 vs JWT (JSON Web Tokens):
├─ OAuth: Authorization framework
├─ JWT: Token format/encoding
├─ OAuth defines flow/process
├─ JWT is common OAuth token format
├─ Can use OAuth with non-JWT tokens
├─ Can use JWT outside OAuth
└─ Genesys uses Bearer tokens (could be JWT)
OAuth 2.0 vs Sessions/Cookies:
├─ OAuth: Stateless tokens (APIs)
├─ Sessions: Server-side state (web apps)
├─ OAuth: Better for distributed systems
├─ Sessions: Better for traditional web apps
├─ OAuth: No session storage needed
├─ Sessions: Requires shared session store
└─ Modern apps use both (API + web)
Genesys Cloud OAuth Implementation
Genesys Cloud OAuth Features:
Supported Grant Types:
├─ Authorization Code Grant (RECOMMENDED)
├─ Authorization Code with PKCE (BEST for public clients)
├─ Client Credentials Grant (Service-to-service)
├─ Token Implicit Grant (DEPRECATED - May 2027 deadline)
└─ SAML2 Bearer Grant (Enterprise SSO)
Token Configuration:
├─ Token duration: 300 to 172,800 seconds (default 3600)
├─ SCIM special: Up to 38,880,000 seconds (450 days)
├─ HIPAA override: 15-minute idle timeout
├─ Automatic expiration handling
└─ Refresh token support
Scope Management:
├─ 100+ available scopes
├─ Granular permission control
├─ User consent on authorization
├─ Enforced on every API call
└─ Cannot exceed user permissions
OAuth Client Creation:
├─ Admin UI: Admin → Integrations → OAuth
├─ Up to 125 authorized redirect URIs
├─ Role assignment for Client Credentials
├─ Scope selection for all grant types
├─ Division scoping for role-based access
└─ Audit trail of creation/modifications
Security Features:
├─ Client secret: View-once-only (March 2026)
├─ IP whitelisting: Available for sensitive clients
├─ Multi-factor authentication: For administrators
├─ Audit logging: All OAuth events logged
├─ Token revocation: DELETE /oauth/sessions/me
└─ Scope enforcement: Both user AND token permissions required
Multi-Tenant Support:
├─ Separate OAuth clients per tenant
├─ Tenants can't cross-authenticate
├─ Isolated token stores
├─ Per-tenant rate limits
└─ Tenant-specific configuration
Key Takeaways: Chapter 1
- OAuth 2.0 is Standard - Industry-best secure authorization framework
- Three Key Entities - Resource Owner (user), Client (app), Authorization Server
- Five Key Concepts - Access tokens, refresh tokens, scopes, authorization codes, client credentials
- Security by Design - Short-lived tokens, scope limitation, HTTPS required, credential protection
- Industry Standard - RFC 6749 compliant, widely implemented, trusted globally
- Genesys Implementation - 4+ grant types, granular scopes, audit logging, token management
- Better than Basic Auth - Never expose passwords, granular control, revocation support
- Stateless & Scalable - No session storage, works across distributed systems
Interview Prep: OAuth 2.0 Concepts
| Question | Answer |
|---|---|
| What is OAuth 2.0? | Authorization framework enabling secure delegated access without sharing passwords |
| Three key entities? | Resource Owner (user), Client (app), Authorization Server (Genesys) |
| What's an access token? | Short-lived (1hr) proof of authorization sent with every API request |
| What's a refresh token? | Long-lived (30-450 days) credential used to obtain new access tokens |
| What are scopes? | Granular permissions limiting what an app can do (conversations:readonly, users:manage) |
| Why OAuth over Basic Auth? | Credentials never exposed, short-lived tokens, granular control, easy revocation |
| Why HTTPS required? | Unencrypted transmission exposes credentials and tokens |
| What is PKCE? | Proof Key for Code Exchange - prevents authorization code interception attacks |
| Why short token lifespan? | Reduces window for token misuse, requires refresh for persistence |
| How prevent CSRF? | Use state parameter in authorization code grant flow |
Additional Resources
- OAuth 2.0 Specification: https://tools.ietf.org/html/rfc6749
- PKCE (RFC 7636): https://tools.ietf.org/html/rfc7636
- Bearer Token Usage (RFC 6750): https://tools.ietf.org/html/rfc6750
- Genesys Developer Center: https://developer.genesys.cloud/authorization/platform-auth/
- Genesys Cloud Resource Center: https://help.genesys.cloud
Document Version
Chapter: 1 of 8
Last Updated: March 2026
Status: Current with RFC 6749, RFC 7636, RFC 6750
Scope: OAuth 2.0 Framework, Concepts, Principles
Authorization Code Grant
Overview
Use Cases
Perfect For:
Web Applications:
├─ Server-side API requests (ASP.NET, PHP, Node.js, Python)
├─ User login flows
├─ Backend-to-Genesys integration
└─ Sensitive data handling
Desktop Applications:
├─ Desktop clients with backend server
├─ Thin client architecture
├─ Server-side token management
└─ Secure credential storage
Mobile Applications:
├─ Mobile app + backend server pattern
├─ Backend handles OAuth exchange
├─ App never sees client_secret
└─ Server-side token refresh
NOT Ideal For:
├─ Pure browser JavaScript (no backend)
├─ Serverless functions (no client_secret storage)
├─ Mobile apps without backend
└─ Use PKCE for these cases instead
Complete Authorization Code Flow
Step 1: User Initiates Login
User clicks "Login with Genesys Cloud" button in your application
Your application redirects browser to:
https://login.mypurecloud.com/oauth/authorize
?client_id=YOUR_CLIENT_ID
&response_type=code
&redirect_uri=https://yourapp.com/callback
&scope=conversations:readonly+users:readonly
&state=random_state_string_abc123
Parameters:
client_id (required):
├─ Public identifier of your application
├─ Displayed during client creation
├─ Example: "1a2b3c4d-5e6f-7g8h-9i0j-1k2l3m4n5o6p"
└─ Used to identify which app is requesting access
response_type (required):
├─ Must be "code" for Authorization Code Grant
├─ Tells authorization server to return code, not token
└─ Security boundary between user auth and backend exchange
redirect_uri (required):
├─ Where user is redirected after authorization
├─ Must be EXACTLY as registered in OAuth client
├─ Must use HTTPS (not HTTP)
├─ Example: "https://yourapp.com/callback"
├─ Can include path and query parameters
└─ Must be registered in Genesys Cloud admin UI
scope (required):
├─ Space-separated list of permissions needed
├─ User sees these during authorization
├─ Example: "conversations:readonly users:readonly"
├─ Request MINIMUM scopes needed
└─ User must grant all scopes (all-or-nothing)
state (highly recommended):
├─ Random string generated by your app
├─ Prevents CSRF (Cross-Site Request Forgery) attacks
├─ Your app stores this in session
├─ Your app verifies it in callback
├─ Must be unpredictable (use crypto random)
└─ Example: Generate 32 random characters
Step 2: User Authenticates
User sees Genesys Cloud login screen
User enters:
├─ Email/username
├─ Password
└─ (Optional) Multi-factor authentication code
Genesys Cloud validates credentials
If invalid:
├─ Show error message
└─ User can retry
If valid:
├─ Genesys Cloud displays permission screen
├─ Shows app name and requested scopes
└─ User must grant permission
Step 3: Authorization Server Redirects
After user grants permission, Genesys Cloud redirects browser to your callback URI:
https://yourapp.com/callback
?code=AUTH_CODE_12345abcde67890
&state=random_state_string_abc123
Parameters in Callback:
code (provided):
├─ Short-lived authorization code
├─ Valid for ~10 minutes only
├─ Single-use only (cannot reuse)
├─ Contains user and scope information
├─ Example: Long alphanumeric string
└─ NOT an access token (yet)
state (provided):
├─ Echo of state parameter from Step 1
├─ Your app must verify this matches
├─ If doesn't match: REJECT (CSRF attack)
├─ If matches: Continue with Step 4
└─ Critical security check
Error Response:
If user denies permission:
https://yourapp.com/callback
?error=access_denied
&error_description=User+denied+permission
&state=random_state_string_abc123
Handle Error:
├─ Check for "error" parameter first
├─ Don't attempt to exchange code
├─ Show user-friendly error message
└─ Offer to try again
Step 4: Backend Exchanges Code for Token
Your backend server (NOT browser) makes this request:
POST https://login.mypurecloud.com/oauth/token
Content-Type: application/x-www-form-urlencoded
Authorization: Basic BASE64(client_id:client_secret)
grant_type=authorization_code
&code=AUTH_CODE_12345abcde67890
&redirect_uri=https://yourapp.com/callback
&client_id=YOUR_CLIENT_ID
&client_secret=YOUR_CLIENT_SECRET
Request Details:
Authorization Header:
├─ Format: Basic BASE64(client_id:client_secret)
├─ Example: "Basic YWJjMTIzOmRlZjQ1Ng=="
├─ ALWAYS use HTTPS (not HTTP)
├─ Never expose client_secret in URL
└─ Critical for security
Body Parameters:
grant_type (required):
├─ Must be "authorization_code"
└─ Identifies which grant type you're using
code (required):
├─ Authorization code from Step 3
├─ Only valid for ~10 minutes
├─ Can only be exchanged once
├─ If reused: Server rejects with error
└─ Contains scope and user information
redirect_uri (required):
├─ Must EXACTLY match redirect_uri from Step 1
├─ Must match registered URI in OAuth client
├─ Server verifies to prevent code injection
└─ Must be HTTPS
client_id (required):
├─ Your application's public identifier
└─ Identifies which application is requesting
client_secret (required):
├─ Your application's secret
├─ Server-side only (NEVER expose)
├─ Used to prove application identity
├─ Sent in Authorization header (not URL)
└─ Should be rotated monthly
Security Note:
├─ This is server-to-server communication
├─ Client_secret is exposed only between your server and Genesys
├─ HTTPS encryption required
├─ User's browser is NOT involved
└─ User cannot see client_secret
Step 5: Receive Access & Refresh Tokens
Genesys Cloud responds with tokens:
HTTP 200 OK
Content-Type: application/json
{
"access_token": "abc123xyz789...",
"token_type": "bearer",
"expires_in": 86400,
"refresh_token": "refresh_xyz789...",
"scope": "conversations:readonly users:readonly"
}
Response Fields:
access_token:
├─ Short-lived token (1 hour by default)
├─ Use to call Genesys Cloud APIs
├─ Include in Authorization header
├─ Example: "Bearer abc123xyz789..."
└─ Expires automatically
token_type:
├─ Always "bearer" for Genesys Cloud
├─ Indicates HTTP Bearer token format
└─ Use in header: "Authorization: Bearer {token}"
expires_in:
├─ Token lifetime in seconds
├─ Default: 3600 (1 hour)
├─ Configurable: 300-172,800 seconds
├─ Client should refresh before expiration
└─ Example: 86400 = 24 hours
refresh_token:
├─ Long-lived token (30 days default)
├─ Used to get new access token
├─ Can be up to 450 days (SCIM)
├─ Never expires unless revoked
├─ Must be stored securely
└─ Should not be exposed in browser
scope:
├─ Actual scopes granted by user
├─ May differ from requested scopes
├─ User can deny some scopes
└─ Provided for your reference
Error Response Example:
If code is invalid/expired:
HTTP 400 Bad Request
{
"error": "invalid_grant",
"error_description": "Authorization code expired"
}
Common Error Codes:
├─ invalid_grant: Code invalid, expired, or reused
├─ invalid_client: client_id/secret invalid
├─ invalid_request: Missing or malformed parameter
├─ server_error: Genesys Cloud error (retry)
└─ See Genesys documentation for full list
Step 6: Use Access Token
Your backend now has access token
Use to call Genesys Cloud APIs:
GET /api/v2/users/me
Host: api.mypurecloud.com
Authorization: Bearer abc123xyz789...
Content-Type: application/json
Example Response:
HTTP 200 OK
{
"id": "user-123",
"email": "john@example.com",
"name": "John Doe",
"active": true,
"state": "active"
}
Token Usage Rules:
├─ Include in Authorization header
├─ Format: "Bearer {access_token}"
├─ Send with every API request
├─ HTTPS connection required
├─ No other authentication needed
├─ Token proves user authorized the app
└─ Genesys validates on each request
What Token Proves:
├─ User authenticated with Genesys Cloud
├─ User granted app permission
├─ User agreed to requested scopes
├─ User's identity verified
└─ Token came from real user (not forgery)
Step 7: Handle Token Expiration
After 1 hour (or configured duration):
Access token expires automatically
Your app makes request with expired token:
GET /api/v2/conversations
Authorization: Bearer abc123xyz789... (expired)
Genesys Cloud responds:
HTTP 401 Unauthorized
{
"error": "invalid_token",
"error_description": "Access token expired"
}
How to Handle 401:
1. Detect 401 response
2. Check if token expired
3. Use refresh_token to get new access_token
4. Retry original request with new token
Best Practice:
├─ Refresh token 5 minutes BEFORE expiration
├─ Don't wait for 401 error
├─ Proactive refresh is more efficient
└─ Monitor token expiration timestamps
Step 8: Refresh Access Token
When token expires or about to expire:
POST https://login.mypurecloud.com/oauth/token
Content-Type: application/x-www-form-urlencoded
Authorization: Basic BASE64(client_id:client_secret)
grant_type=refresh_token
&refresh_token=refresh_xyz789...
&client_id=YOUR_CLIENT_ID
&client_secret=YOUR_CLIENT_SECRET
Parameters:
grant_type (required):
├─ Must be "refresh_token"
└─ Different from initial "authorization_code"
refresh_token (required):
├─ Long-lived token from Step 5
├─ Never expires unless revoked
├─ Can be reused multiple times
└─ Must be stored securely
client_id & client_secret (required):
├─ Same as Step 4
├─ Authorization header or body
└─ Identifies your application
Response:
HTTP 200 OK
{
"access_token": "new_token_abc456...",
"token_type": "bearer",
"expires_in": 86400,
"refresh_token": "new_refresh_token_xyz890..."
}
New Tokens Provided:
├─ New access_token (1 hour lifetime)
├─ Same token_type (bearer)
├─ Same expires_in duration
├─ New refresh_token (optional, but provided)
└─ Can use immediately
Error Handling:
If refresh token invalid/expired:
├─ User must re-authenticate (start from Step 1)
└─ Cannot recover without new user authorization
If any error:
├─ Redirect user to login again
├─ Start fresh authorization flow
└─ Don't keep retrying with bad refresh_token
Refresh Token Rotation:
├─ Genesys provides new refresh_token on each refresh
├─ Old token still works briefly
├─ Provides security rotation
├─ Discard old token after refresh
└─ Never try to reuse old tokens
Implementation Pattern
High-Level Application Flow:
User Visit App
↓
User Not Logged In?
↓
Click "Login with Genesys"
↓
[Step 1-3: Browser Redirect Flow]
Authorization Server Redirects to Callback
↓
[Step 4-5: Server-to-Server Token Exchange]
Backend Exchanges Code for Tokens
↓
Backend Stores Tokens in Session/Database
↓
User Logged In to App
↓
User Makes API Call to App
↓
App Backend Uses Access Token
↓
Call Genesys Cloud API with Token
↓
Get Response from Genesys
↓
Return Result to User
↓
...Time Passes...
↓
Token Expires (1 hour)
↓
User Makes Another API Call
↓
Backend Detects Expired Token
↓
[Step 8: Refresh Token Exchange]
Backend Refreshes Token
↓
Continue with New Token
↓
Repeat as needed
Complete Node.js Example
const express = require('express');
const axios = require('axios');
const session = require('express-session');
const crypto = require('crypto');
const app = express();
// Configuration
const CLIENT_ID = process.env.GENESYS_CLIENT_ID;
const CLIENT_SECRET = process.env.GENESYS_CLIENT_SECRET;
const REDIRECT_URI = 'https://yourapp.com/callback';
const SCOPES = 'conversations:readonly users:readonly';
const GENESYS_REGION = process.env.GENESYS_REGION || 'mypurecloud.com';
// Session middleware
app.use(session({
secret: 'your-secret-key',
resave: false,
saveUninitialized: true
}));
// Step 1: User clicks login button
app.get('/login', (req, res) => {
// Generate state for CSRF protection
const state = crypto.randomBytes(32).toString('hex');
req.session.state = state;
const authUrl = new URL(`https://login.${GENESYS_REGION}/oauth/authorize`);
authUrl.searchParams.append('client_id', CLIENT_ID);
authUrl.searchParams.append('response_type', 'code');
authUrl.searchParams.append('redirect_uri', REDIRECT_URI);
authUrl.searchParams.append('scope', SCOPES);
authUrl.searchParams.append('state', state);
res.redirect(authUrl.toString());
});
// Step 3-4: Handle callback and exchange code
app.get('/callback', async (req, res) => {
const { code, state, error } = req.query;
// Check for errors
if (error) {
console.error('Authorization error:', error);
return res.status(400).send('Authorization denied');
}
// Verify state (CSRF protection)
if (state !== req.session.state) {
return res.status(403).send('Invalid state parameter');
}
try {
// Step 4: Exchange code for tokens
const response = await axios.post(
`https://login.${GENESYS_REGION}/oauth/token`,
{
grant_type: 'authorization_code',
code: code,
redirect_uri: REDIRECT_URI,
client_id: CLIENT_ID,
client_secret: CLIENT_SECRET
}
);
// Step 5: Store tokens
req.session.accessToken = response.data.access_token;
req.session.refreshToken = response.data.refresh_token;
req.session.expiresAt = Date.now() + (response.data.expires_in * 1000);
res.redirect('/dashboard');
} catch (error) {
console.error('Token exchange error:', error.message);
res.status(500).send('Token exchange failed');
}
});
// Helper function to ensure valid access token
async function ensureAccessToken(req) {
// Check if token needs refresh (within 5 minutes of expiration)
if (req.session.expiresAt - Date.now() < 5 * 60 * 1000) {
try {
// Step 8: Refresh token
const response = await axios.post(
`https://login.${GENESYS_REGION}/oauth/token`,
{
grant_type: 'refresh_token',
refresh_token: req.session.refreshToken,
client_id: CLIENT_ID,
client_secret: CLIENT_SECRET
}
);
// Update tokens
req.session.accessToken = response.data.access_token;
req.session.refreshToken = response.data.refresh_token;
req.session.expiresAt = Date.now() + (response.data.expires_in * 1000);
} catch (error) {
console.error('Token refresh failed:', error.message);
throw new Error('Failed to refresh token');
}
}
return req.session.accessToken;
}
// Step 6: Use access token
app.get('/api/conversations', async (req, res) => {
try {
const accessToken = await ensureAccessToken(req);
// Step 6: Use token to call Genesys API
const response = await axios.get(
`https://api.${GENESYS_REGION}/api/v2/conversations`,
{
headers: {
'Authorization': `Bearer ${accessToken}`,
'Content-Type': 'application/json'
}
}
);
res.json(response.data);
} catch (error) {
console.error('API call failed:', error.message);
res.status(500).send('Failed to fetch conversations');
}
});
// Logout
app.get('/logout', (req, res) => {
// Optional: Revoke token on Genesys side
// DELETE /oauth/sessions/me with access token
req.session.destroy((err) => {
if (err) console.error('Session destroy error:', err);
res.redirect('/');
});
});
app.listen(3000, () => console.log('Server running on port 3000'));
Security Checklist
Authorization Code Grant Security:
□ Use HTTPS everywhere (never HTTP)
□ Validate SSL/TLS certificates
□ Generate unpredictable state parameter
□ Verify state in callback (CSRF protection)
□ Store client_secret securely (vault/environment)
□ Never expose client_secret in browser
□ Never commit secrets to git
□ Exchange code on backend (never frontend)
□ Validate redirect_uri matches registered
□ Store tokens securely server-side
□ Refresh token before expiration
□ Implement 401 handling (refresh + retry)
□ Never log token values
□ Implement audit logging (no tokens)
□ Rotate secrets monthly
□ Revoke tokens on logout
□ Implement HTTPS redirect
□ Validate SSL certificate
□ Handle errors gracefully
□ Implement rate limiting
□ Monitor for suspicious activity
Comparison with Other Grant Types
Authorization Code vs:
Authorization Code + PKCE:
├─ Both equally secure for web apps
├─ PKCE added for public clients (SPAs, mobile)
├─ Both send user to browser for authentication
├─ PKCE adds code_verifier to prevent interception
└─ Code is better for web apps, PKCE for public
Client Credentials:
├─ Both are OAuth 2.0 standard grants
├─ Code requires user interaction
├─ Client Credentials: Service-to-service
├─ Code: User-initiated access
├─ Code: User sees permission screen
├─ Client Credentials: No user consent needed
└─ Different use cases
Implicit Grant (DEPRECATED):
├─ Both result in access token
├─ Code: Two-step (safer)
├─ Implicit: One-step (simpler but risky)
├─ Code: Client_secret protected
├─ Implicit: No secret possible
├─ Code: Token in backend
├─ Implicit: Token in URL/browser
├─ Code is clearly better (implicit deprecated)
└─ Never use Implicit for new apps
Common Errors & Solutions
Error: "invalid_grant"
├─ Cause: Authorization code invalid/expired/reused
├─ Solution: User must re-authenticate
├─ Timeline: Code valid ~10 minutes
└─ Prevention: Use code immediately
Error: "invalid_client"
├─ Cause: client_id or client_secret invalid
├─ Solution: Verify credentials in OAuth client
├─ Check: Admin → Integrations → OAuth
└─ Action: Regenerate credentials if needed
Error: "redirect_uri_mismatch"
├─ Cause: Callback URI doesn't match registered
├─ Solution: Ensure EXACT match (case-sensitive)
├─ Check: Admin → Integrations → OAuth
└─ Include: Protocol, domain, path, query params
Error: "invalid_scope"
├─ Cause: Requested scope doesn't exist
├─ Solution: Verify scope name is correct
└─ Use: Format "resource:action" or "resource:action:scope"
Error: "access_denied"
├─ Cause: User denied permission
├─ Solution: Show friendly message, offer retry
└─ Expected: Normal user action
Error: "server_error"
├─ Cause: Genesys Cloud temporary error
├─ Solution: Retry with exponential backoff
└─ Contact: Support if persists
Key Takeaways: Chapter 2
- Most Secure Grant - Recommended for web and desktop applications
- Two-Step Process - Separates user authentication from token exchange
- Client Secret Protected - Never exposed to browser or client application
- Short-Lived Tokens - Access tokens expire (1 hour by default)
- Refresh Capability - Refresh tokens enable long-lived access without re-authentication
- CSRF Protected - State parameter prevents cross-site attacks
- Server-Side Exchange - Code exchanged on backend (never browser)
- Standard Approach - RFC 6749 compliant, industry best practice
Interview Prep: Authorization Code Grant
| Question | Answer |
|---|---|
| When use Auth Code? | Web/desktop apps with backend server |
| Two-step process? | User auth separate from token exchange |
| Authorization code purpose? | Single-use code exchanged for access token |
| State parameter? | CSRF protection (random string verified in callback) |
| Why exchange on backend? | Keep client_secret secure (never exposed) |
| Client_secret exposure? | Never - only used between server and Genesys |
| Access token lifetime? | 1 hour by default (configurable 300-172,800 sec) |
| Refresh token lifetime? | 30 days default (up to 450 days for SCIM) |
| 401 error handling? | Refresh token to get new access token, retry request |
| Rate limiting? | 60 requests/minute per application |
Document Version
Chapter: 2 of 8
Last Updated: March 2026
Status: Current with RFC 6749
Scope: Authorization Code Grant Flow, Implementation, Security
Client Credentials Grant
Overview
The Client Credentials Grant is a single-step OAuth 2.0 grant type designed exclusively for non-user applications and service-to-service authentication. Unlike the Authorization Code Grant which requires user interaction, Client Credentials enables applications to authenticate directly using their own credentials without any user context.
Use Cases
Perfect For:
Background Jobs & Scheduled Tasks:
├─ Nightly batch processing
├─ Cron jobs
├─ Scheduled reports
├─ Database cleanup tasks
└─ No user interaction needed
Service-to-Service Integration:
├─ Backend service to Genesys Cloud API
├─ Microservice communication
├─ Application-to-application
├─ System integrations
└─ Automated workflows
Bots & Virtual Agents:
├─ Chatbot integrations
├─ Virtual agent frameworks
├─ Automation engines
├─ API consumers without users
└─ Standalone applications
Data Synchronization:
├─ Salesforce ↔ Genesys sync
├─ Contact import/export
├─ Bulk data operations
├─ Third-party CRM integration
└─ ETL (Extract-Transform-Load) processes
NOT Suitable For:
User-Initiated Access:
├─ Web applications with logins
├─ Mobile apps with users
├─ Interactive scenarios
├─ User-specific data access
└─ Use Authorization Code Grant instead
User Context Required:
├─ When you need to know which user
├─ User-specific APIs (/v2/users/me)
├─ Personalized interactions
├─ Individual user permissions
└─ Cannot use Client Credentials
Single-Step Authentication Flow
Client Credentials Flow:
Step 1: Direct Exchange
Your App → Sends credentials → Genesys Authorization Server
Step 2: Immediate Response
Genesys Authorization Server → Returns access token → Your App
Step 3: Use Token
Your App → Uses token → Calls Genesys APIs
No User Involved:
├─ No browser redirect
├─ No user login screen
├─ No permission consent
├─ No user interaction
└─ Application acts as itself
Timeline:
├─ Entire flow: milliseconds
├─ No waiting for user
├─ Can happen anytime
├─ No session required
└─ Fully automated
Contrast with Authorization Code:
├─ Authorization Code: 3 round trips (browser, user, server)
├─ Client Credentials: 1 round trip (direct)
├─ Authorization Code: Minutes (user delays)
├─ Client Credentials: Milliseconds
└─ Different use cases, different timing
Complete Client Credentials Flow
Step 1: Application Authenticates
Your application makes direct request to Genesys:
POST https://login.mypurecloud.com/oauth/token
Content-Type: application/x-www-form-urlencoded
grant_type=client_credentials
&client_id=YOUR_CLIENT_ID
&client_secret=YOUR_CLIENT_SECRET
&scope=conversations:readonly+users:manage+scheduling:manage
Request Parameters:
grant_type (required):
├─ Must be "client_credentials"
├─ Identifies this grant type
└─ Tells server how to authenticate
client_id (required):
├─ Your application's public identifier
├─ Identifies which app is requesting
└─ Visible in logs and audit trails
client_secret (required):
├─ Your application's secret credential
├─ NEVER expose in frontend code
├─ Server-side only
├─ Used to prove application identity
└─ Should be rotated monthly
scope (required):
├─ Space-separated list of permissions
├─ Defines what API access is granted
├─ Examples: "users:manage" "scheduling:manage"
├─ Request MINIMUM scopes needed
└─ Note: Cannot exceed application's role permissions
Security Note:
├─ This is direct server-to-server
├─ Both client_id and client_secret sent
├─ client_secret proves application identity
├─ HTTPS encryption required
├─ No user credentials involved
└─ No credentials transmitted to third parties
Step 2: Receive Access Token
Genesys Cloud responds immediately:
HTTP 200 OK
Content-Type: application/json
{
"access_token": "abc123xyz789...",
"token_type": "bearer",
"expires_in": 86400,
"scope": "conversations:readonly users:manage scheduling:manage"
}
Response Fields:
access_token:
├─ The access token
├─ Use with all API requests
├─ Include in Authorization header
├─ Proves application authenticated
├─ Example: "Bearer abc123xyz789..."
└─ Expires automatically (default 1 hour)
token_type:
├─ Always "bearer" for Genesys Cloud
├─ Indicates HTTP Bearer token format
└─ Use in header: "Authorization: Bearer {token}"
expires_in:
├─ Token lifetime in seconds
├─ Default: 3600 (1 hour)
├─ Configurable when creating OAuth client
├─ Range: 300 to 172,800 seconds
├─ SCIM special: Up to 450 days
└─ Application must refresh after expiration
scope (informational):
├─ Actual scopes granted
├─ Should match what you requested
├─ Confirms which APIs you can access
└─ Useful for debugging
No Refresh Token:
├─ Client Credentials does NOT include refresh token
├─ Simply authenticate again when token expires
├─ Each authentication is independent
├─ Same as getting fresh token
└─ Simpler than managing refresh tokens
Error Response:
If authentication fails:
HTTP 400 Bad Request
{
"error": "invalid_client",
"error_description": "client_id or client_secret is invalid"
}
OR:
HTTP 403 Forbidden
{
"error": "invalid_scope",
"error_description": "Application does not have access to this scope"
}
Common Error Codes:
├─ invalid_client: Credentials invalid
├─ invalid_scope: Requested scope not allowed
├─ unsupported_grant_type: Wrong grant type
└─ server_error: Genesys temporary issue (retry)
Step 3: Use Access Token
Your application now has access token
Use to call Genesys Cloud APIs:
GET /api/v2/users
Host: api.mypurecloud.com
Authorization: Bearer abc123xyz789...
Content-Type: application/json
Parameters:
?pageSize=100&pageNumber=1
Example Response:
HTTP 200 OK
{
"entities": [
{
"id": "user-123",
"email": "john@example.com",
"name": "John Doe"
},
...
],
"pageNumber": 1,
"pageSize": 100,
"total": 5000
}
Token Usage Rules:
├─ Include in Authorization header
├─ Format: "Bearer {access_token}"
├─ Send with every API request
├─ HTTPS connection required
├─ No other authentication needed
├─ Genesys validates on each request
└─ Application identity verified by token
Important Limitation:
├─ NO user context
├─ Cannot access /v2/users/me (no "me")
├─ Cannot know which user made request
├─ Application acts as itself
├─ No user-specific data access
├─ All requests attributed to app, not user
└─ Perfect for background jobs
Step 4: Token Expires & Refresh
After 1 hour (or configured duration):
Access token expires automatically
Your app's next API request with expired token:
GET /api/v2/conversations
Authorization: Bearer abc123xyz789... (expired)
Genesys Cloud responds:
HTTP 401 Unauthorized
{
"error": "invalid_token",
"error_description": "Access token expired"
}
How to Handle Token Expiration:
Option 1: Proactive Refresh (Recommended)
├─ Monitor token expiration time
├─ Refresh 5 minutes BEFORE expiration
├─ Always have fresh token available
├─ No 401 errors encountered
└─ Smoother operation
Option 2: Reactive Refresh
├─ Continue until 401 error
├─ Detect 401 response
├─ Authenticate again (Step 1)
├─ Get new access token
└─ Retry original request
Getting New Token:
Simply authenticate again:
POST https://login.mypurecloud.com/oauth/token
Content-Type: application/x-www-form-urlencoded
grant_type=client_credentials
&client_id=YOUR_CLIENT_ID
&client_secret=YOUR_CLIENT_SECRET
&scope=conversations:readonly+users:manage
Response:
HTTP 200 OK
{
"access_token": "new_token_def456...",
"token_type": "bearer",
"expires_in": 86400,
"scope": "..."
}
Use new token immediately:
├─ Discard old token
├─ Use new token for requests
├─ Repeat cycle on next expiration
└─ No special refresh_token needed
Token Duration Configuration
When Creating OAuth Client:
Standard Duration:
├─ Default: 86,400 seconds (1 day)
├─ Configurable range: 300-172,800 seconds
├─ Maximum standard: 48 hours
└─ Sufficient for most applications
SCIM Integration Duration (Special):
├─ Up to 38,880,000 seconds (450 days!)
├─ Requires SCIM Integration role
├─ Extended duration for identity provisioning
├─ Reduces authentication frequency
└─ Requires different configuration
HIPAA Compliance:
├─ Overrides token duration
├─ Enforces 15-minute idle timeout
├─ Applies to all OAuth tokens
├─ Security requirement
└─ Automatic when HIPAA enabled
Choosing Duration:
Short Duration (5-60 minutes):
├─ More secure (smaller compromise window)
├─ More frequent authentication needed
├─ Suitable for: High-security, continuous applications
└─ Example: Real-time event processing
Medium Duration (1-8 hours):
├─ Balanced approach
├─ Typical for most applications
├─ Suitable for: Background jobs, daily processes
└─ Example: Hourly data sync
Long Duration (1-2 days):
├─ Fewer authentications
├─ Less secure (larger compromise window)
├─ Suitable for: Long-running background tasks
└─ Example: Large data migrations
Very Long Duration (SCIM only):
├─ 450 days maximum
├─ Minimal authentication needed
├─ Identity provisioning specific
├─ Reduced overhead for identity sync
└─ Requires SCIM Integration role
Recommendation:
├─ Start with 1 hour (3600 seconds)
├─ Adjust based on actual usage
├─ Monitor authentication frequency
├─ Balance security vs convenience
└─ Document your choice
Complete Python Example
import requests
import json
from datetime import datetime, timedelta
class GenesysCloudAPI:
def __init__(self, client_id, client_secret, region='mypurecloud.com'):
self.client_id = client_id
self.client_secret = client_secret
self.region = region
self.auth_url = f'https://login.{region}/oauth/token'
self.api_url = f'https://api.{region}/api/v2'
self.access_token = None
self.token_expires_at = None
def authenticate(self, scopes='conversations:readonly users:readonly'):
"""Step 1: Authenticate using Client Credentials"""
data = {
'grant_type': 'client_credentials',
'client_id': self.client_id,
'client_secret': self.client_secret,
'scope': scopes
}
try:
response = requests.post(self.auth_url, data=data)
response.raise_for_status()
# Step 2: Receive token
token_data = response.json()
self.access_token = token_data['access_token']
# Calculate expiration (expire 5 minutes early)
expires_in = token_data['expires_in']
self.token_expires_at = datetime.now() + timedelta(seconds=expires_in - 300)
print(f'[{datetime.now().strftime("%H:%M:%S")}] Authenticated successfully')
print(f'Token expires at: {self.token_expires_at.strftime("%H:%M:%S")}')
return True
except requests.exceptions.RequestException as e:
print(f'Authentication failed: {e}')
return False
def ensure_token(self, scopes='conversations:readonly users:readonly'):
"""Proactive token refresh if expiring soon"""
if self.access_token is None:
return self.authenticate(scopes)
# Check if token expiring soon (proactive refresh)
if datetime.now() >= self.token_expires_at:
print('Token expired, refreshing...')
return self.authenticate(scopes)
return True
def get_conversations(self):
"""Step 3: Use token to call API"""
if not self.ensure_token():
print('Failed to obtain access token')
return None
headers = {
'Authorization': f'Bearer {self.access_token}',
'Content-Type': 'application/json'
}
try:
response = requests.get(
f'{self.api_url}/conversations',
headers=headers,
params={'pageSize': 100, 'pageNumber': 1}
)
response.raise_for_status()
data = response.json()
print(f'Retrieved {len(data.get("entities", []))} conversations')
return data
except requests.exceptions.HTTPError as e:
if e.response.status_code == 401:
print('Token expired, retrying with fresh token...')
if self.authenticate():
return self.get_conversations() # Retry
print(f'API call failed: {e}')
return None
def create_user(self, email, name):
"""Example: Create new user"""
if not self.ensure_token('users:manage'):
return None
headers = {
'Authorization': f'Bearer {self.access_token}',
'Content-Type': 'application/json'
}
data = {
'email': email,
'name': name,
'state': 'active'
}
try:
response = requests.post(
f'{self.api_url}/users',
headers=headers,
json=data
)
response.raise_for_status()
user = response.json()
print(f'Created user: {user["name"]} ({user["id"]})')
return user
except requests.exceptions.RequestException as e:
print(f'Failed to create user: {e}')
return None
# Usage Example:
if __name__ == '__main__':
# Initialize with credentials
client = GenesysCloudAPI(
client_id='YOUR_CLIENT_ID',
client_secret='YOUR_CLIENT_SECRET',
region='mypurecloud.com'
)
# Example 1: Get conversations
print('--- Getting Conversations ---')
conversations = client.get_conversations()
# Example 2: Create user
print('\n--- Creating User ---')
user = client.create_user('newuser@company.com', 'New User')
# Example 3: Long-running job with periodic token refresh
print('\n--- Simulating Long-Running Job ---')
for i in range(5):
print(f'Iteration {i+1}')
conversations = client.get_conversations()
# Token automatically refreshed if needed
Complete Node.js Example
const axios = require('axios');
class GenesysCloudAPI {
constructor(clientId, clientSecret, region = 'mypurecloud.com') {
this.clientId = clientId;
this.clientSecret = clientSecret;
this.region = region;
this.authUrl = `https://login.${region}/oauth/token`;
this.apiUrl = `https://api.${region}/api/v2`;
this.accessToken = null;
this.tokenExpiresAt = null;
}
// Step 1: Authenticate
async authenticate(scopes = 'conversations:readonly users:readonly') {
try {
const response = await axios.post(this.authUrl, {
grant_type: 'client_credentials',
client_id: this.clientId,
client_secret: this.clientSecret,
scope: scopes
});
// Step 2: Receive token
this.accessToken = response.data.access_token;
// Expire 5 minutes early (proactive refresh)
const expiresIn = response.data.expires_in;
this.tokenExpiresAt = Date.now() + (expiresIn - 300) * 1000;
console.log(`[${new Date().toLocaleTimeString()}] Authenticated successfully`);
console.log(`Token expires at: ${new Date(this.tokenExpiresAt).toLocaleTimeString()}`);
return true;
} catch (error) {
console.error('Authentication failed:', error.message);
return false;
}
}
// Ensure token is valid (refresh if needed)
async ensureToken(scopes = 'conversations:readonly users:readonly') {
if (!this.accessToken) {
return await this.authenticate(scopes);
}
// Proactive refresh if expiring
if (Date.now() >= this.tokenExpiresAt) {
console.log('Token expired, refreshing...');
return await this.authenticate(scopes);
}
return true;
}
// Step 3: Use token to call API
async getConversations() {
if (!await this.ensureToken()) {
console.error('Failed to obtain access token');
return null;
}
try {
const response = await axios.get(`${this.apiUrl}/conversations`, {
headers: {
'Authorization': `Bearer ${this.accessToken}`,
'Content-Type': 'application/json'
},
params: {
pageSize: 100,
pageNumber: 1
}
});
console.log(`Retrieved ${response.data.entities.length} conversations`);
return response.data;
} catch (error) {
if (error.response?.status === 401) {
console.log('Token expired, retrying...');
if (await this.authenticate()) {
return await this.getConversations(); // Retry
}
}
console.error('API call failed:', error.message);
return null;
}
}
// Example: Create user
async createUser(email, name) {
if (!await this.ensureToken('users:manage')) {
return null;
}
try {
const response = await axios.post(`${this.apiUrl}/users`, {
email: email,
name: name,
state: 'active'
}, {
headers: {
'Authorization': `Bearer ${this.accessToken}`,
'Content-Type': 'application/json'
}
});
console.log(`Created user: ${response.data.name} (${response.data.id})`);
return response.data;
} catch (error) {
console.error('Failed to create user:', error.message);
return null;
}
}
}
// Usage Example:
(async () => {
const client = new GenesysCloudAPI(
process.env.GENESYS_CLIENT_ID,
process.env.GENESYS_CLIENT_SECRET,
'mypurecloud.com'
);
// Example 1: Get conversations
console.log('--- Getting Conversations ---');
await client.getConversations();
// Example 2: Create user
console.log('\n--- Creating User ---');
await client.createUser('newuser@company.com', 'New User');
// Example 3: Long-running job
console.log('\n--- Simulating Long-Running Job ---');
for (let i = 0; i < 5; i++) {
console.log(`Iteration ${i + 1}`);
await client.getConversations();
}
})();
Security Best Practices
Client Credentials Security Checklist:
□ Store client_secret in secure vault
├─ HashiCorp Vault
├─ AWS Secrets Manager
├─ Azure Key Vault
└─ Never in code/git
□ Rotate credentials monthly
├─ Plan rotation schedule
├─ Generate new secret in Admin UI
├─ Update application config
└─ Verify working before removing old
□ Monitor usage patterns
├─ Track authentication frequency
├─ Alert on unusual activity
├─ Audit all API calls
└─ Review access logs
□ Implement audit logging
├─ Log authentication attempts
├─ Log API calls (not tokens)
├─ Track failures/errors
└─ Retain logs for compliance
□ Use HTTPS only
├─ All requests use HTTPS
├─ Validate SSL certificates
├─ Prevent man-in-the-middle
└─ Never fall back to HTTP
□ Limit scope to minimum
├─ Request only needed scopes
├─ Principle of least privilege
├─ Review scopes regularly
└─ Remove unused scopes
□ Implement error handling
├─ Handle authentication errors
├─ Retry failed requests
├─ Don't expose credentials in errors
└─ Log securely without tokens
□ Restrict permissions
├─ Assign minimal roles
├─ Use divisions for scope
├─ Review permissions quarterly
└─ Remove unneeded permissions
□ Monitor expiration
├─ Track token expiration
├─ Refresh proactively
├─ Alert if refresh fails
└─ Implement fallback behavior
□ Version control security
├─ Never commit secrets
├─ Use .gitignore
├─ Use environment variables
└─ Review git history
Common Use Cases
1. Salesforce ↔ Genesys Sync
Schedule: Every 30 minutes
Process:
├─ Authenticate with Client Credentials
├─ Query Salesforce API (with SF credentials)
├─ Fetch modified contacts
├─ Transform to Genesys format
├─ POST to Genesys externalcontacts API
├─ Log results
└─ Token auto-refreshes if needed
Benefits:
├─ No user interaction
├─ Fully automated
├─ Scheduled sync
└─ Deterministic refresh
2. Nightly Report Generation
Schedule: 2:00 AM daily
Process:
├─ Authenticate with Client Credentials
├─ Query analytics APIs
├─ Aggregate daily metrics
├─ Generate PDF report
├─ Email report to stakeholders
└─ Clean up temp files
Benefits:
├─ Runs while users sleep
├─ No performance impact
├─ Automated reporting
└─ Email delivery
3. Real-Time Data Processing
Schedule: Continuous
Process:
├─ Authenticate once (at startup)
├─ Proactively refresh before expiry
├─ Connect to event streaming
├─ Process events real-time
├─ Call APIs based on events
└─ Token automatically refreshed
Benefits:
├─ Always-on application
├─ Smooth operation
├─ No user waiting
└─ Fully automated
4. Bulk Contact Import
Schedule: Ad-hoc
Process:
├─ Authenticate with Client Credentials
├─ Read contact CSV file
├─ Parse and validate data
├─ Batch create in Genesys
├─ Log import results
├─ Handle errors gracefully
└─ Email summary report
Benefits:
├─ One-time operation
├─ No UI needed
├─ Simple authentication
└─ Bulk operations efficient
Comparison with Authorization Code
Client Credentials vs Authorization Code:
Timeline:
├─ Client Credentials: Milliseconds
├─ Authorization Code: Minutes (user delay)
└─ Different use cases
User Interaction:
├─ Client Credentials: None
├─ Authorization Code: Required (login, consent)
└─ Different workflows
Tokens:
├─ Client Credentials: No refresh token
├─ Authorization Code: Includes refresh token
└─ Different lifecycle management
Secret Exposure:
├─ Client Credentials: Secret sent to server
├─ Authorization Code: Secret never exposed to browser
└─ Different security models
Use Case:
├─ Client Credentials: Background jobs, services
├─ Authorization Code: Web/mobile apps, users
└─ Choose based on scenario
When Choose Client Credentials:
├─ No user interaction needed
├─ Automated/scheduled processes
├─ Service-to-service integration
├─ No user-specific access needed
└─ Application acts as itself
When Choose Authorization Code:
├─ User logs in to app
├─ User grants permission
├─ Long-lived access needed
├─ User-specific data required
└─ User can revoke access anytime
Key Takeaways: Chapter 3
- Single-Step Process - Direct authentication, no user interaction
- No User Context - Application acts as itself (no /users/me access)
- Service-to-Service - Primary use for automated integrations
- No Refresh Token - Simply authenticate again when token expires
- Immediate - Token available instantly for use
- Fully Automated - Perfect for background jobs and scheduled tasks
- Simple Flow - One request for token, then use it
- Role-Based Access - Permissions determined by assigned roles/divisions
Interview Prep: Client Credentials Grant
| Question | Answer |
|---|---|
| When use Client Credentials? | Service-to-service, background jobs, no user interaction |
| Single-step or two-step? | Single-step (direct authentication) |
| Refresh token included? | No - authenticate again when token expires |
| User context? | No (/v2/users/me not available) |
| Client_secret exposure? | Only server-to-server (HTTPS required) |
| How determine permissions? | OAuth client roles and scope settings |
| Typical use case? | Salesforce sync, nightly reports, data imports |
| Token lifetime? | Default 1 hour (configurable 300-172,800 seconds) |
| HTTPS required? | Yes (always) |
| Error 401 handling? | Authenticate again with fresh credentials |
Document Version
Chapter: 3 of 8
Last Updated: March 2026
Status: Current with RFC 6749
Scope: Client Credentials Grant, Service Integration, Implementation
Authorization Code with PKCE
Overview
PKCE (Proof Key for Code Exchange) is an extension to the OAuth 2.0 Authorization Code Grant (RFC 7636) that provides enhanced security, especially for public clients like single-page applications (SPAs) and mobile apps that cannot securely store a client_secret. PKCE is now recommended by OAuth 2.0 best practices and is already supported in Genesys Cloud.
Status: Implicit Grant deprecated (May 2027 deadline), PKCE is the secure replacement.
Why PKCE?
The Problem PKCE Solves:
Authorization Code Can Be Intercepted:
├─ Attacker monitors network traffic
├─ Captures authorization code
├─ Attempts to exchange code for token
└─ Without PKCE: Attacker succeeds
Public Clients Cannot Store Secrets:
├─ Browser-based apps: No server backend
├─ Mobile apps: Can be reverse engineered
├─ Desktop apps: Can be analyzed
├─ Cannot safely store client_secret
└─ Traditional approach inadequate
PKCE Solution:
Add Proof to Authorization Code:
├─ Generate random code_verifier
├─ Compute code_challenge (hash)
├─ Send code_challenge to auth server
├─ Auth server stores it
├─ Only original verifier can exchange code
└─ Attacker lacks verifier → cannot exchange
Proof Cannot Be Reversed:
├─ code_challenge = SHA256(code_verifier)
├─ Hash is one-way function
├─ Cannot reverse-engineer verifier from hash
├─ Even if code intercepted: useless without verifier
└─ Verifier never sent over network
Complete PKCE Flow
Step 1: Generate Proof Strings
Your Application Generates:
code_verifier:
├─ Random string, 43-128 characters
├─ Cryptographically secure (use crypto random)
├─ Unrepeatable (different each request)
├─ Only stored in memory
├─ Example: "E9Mrozoa2owusvxrFHo89ejyK3OMVZZWhtbQrHfl"
code_challenge:
├─ SHA256 hash of code_verifier
├─ BASE64-URL encoded
├─ Sent to authorization server
├─ Example: "47DEQpj8HBSa-_TImW-5JCeuQeRkm5NMpJWZG3hSuFU"
code_challenge_method:
├─ "S256" (SHA256 hash)
├─ Only recommended method
├─ "plain" exists but deprecated
└─ Always use "S256"
Pseudo Code:
code_verifier = generateRandomString(128)
code_challenge = BASE64URL(SHA256(code_verifier))
code_challenge_method = "S256"
Step 2: Redirect to Authorization Endpoint
Redirect user browser to:
https://login.mypurecloud.com/oauth/authorize
?client_id=YOUR_CLIENT_ID
&response_type=code
&redirect_uri=https://yourapp.com/callback
&scope=conversations:readonly
&code_challenge=47DEQpj8HBSa-_TImW-5JCeuQeRkm5NMpJWZG3hSuFU
&code_challenge_method=S256
&state=random_state_string
Parameters:
client_id:
├─ Your app's public identifier
└─ Can be embedded in SPA code
response_type:
├─ Must be "code"
└─ Returns authorization code
redirect_uri:
├─ Where user is redirected
├─ Can be embedded in SPA code
├─ Example: https://yourapp.com/callback
└─ Must be registered in OAuth client
scope:
├─ Requested permissions
├─ Space-separated list
└─ Example: "conversations:readonly"
code_challenge (PKCE):
├─ SHA256 hash of random string
├─ Sent to auth server
├─ Auth server stores it
└─ Cannot derive original verifier
code_challenge_method (PKCE):
├─ "S256" (recommended and required)
├─ Indicates SHA256 method used
└─ Only secure method
state (CSRF Protection):
├─ Random string
├─ Prevents CSRF attacks
└─ Verified in callback
Step 3: User Authenticates & Consents
Same as Authorization Code Grant:
1. User sees Genesys Cloud login
2. User enters credentials
3. User sees permission consent screen
4. User grants permission
5. Auth server generates authorization code
6. Auth server stores code_challenge with authorization code
Step 4: Callback with Authorization Code
Auth server redirects to callback:
https://yourapp.com/callback
?code=AUTH_CODE_12345abcde67890
&state=random_state_string
In Callback Handler:
1. Verify state parameter (CSRF check)
2. Retrieve authorization code
3. Verify you have code_verifier in memory
4. Proceed to Step 5 (exchange code)
Never:
├─ Do NOT send code_verifier in callback
├─ Do NOT include code_verifier in URL
├─ Do NOT exchange code in browser
└─ Do NOT expose code_verifier to user
Step 5: Exchange Code with PKCE Proof
Now you have:
├─ Authorization code (from Step 4)
├─ code_verifier (generated in Step 1, stored in memory)
└─ client_id (public, stored in app)
Exchange Code:
POST https://login.mypurecloud.com/oauth/token
Content-Type: application/x-www-form-urlencoded
grant_type=authorization_code
&code=AUTH_CODE_12345abcde67890
&client_id=YOUR_CLIENT_ID
&redirect_uri=https://yourapp.com/callback
&code_verifier=E9Mrozoa2owusvxrFHo89ejyK3OMVZZWhtbQrHfl
Parameters:
grant_type:
├─ "authorization_code"
└─ Standard OAuth parameter
code:
├─ Authorization code from Step 4
└─ Single-use only
client_id:
├─ Your public client ID
└─ Can be public
redirect_uri:
├─ Must match redirect_uri from Step 2
└─ Confirms code ownership
code_verifier (PKCE):
├─ Original random string from Step 1
├─ Proves you own the authorization code
├─ MUST match the code_challenge sent in Step 2
└─ Server recomputes SHA256(code_verifier) and compares
NOTE: NO client_secret needed!
├─ PKCE replaces need for client_secret
├─ Perfect for public clients
├─ Proof of ownership is cryptographic
└─ Signature is binding
Step 6: Server Validates & Issues Token
Genesys Cloud Authorization Server:
1. Receives code_verifier
2. Retrieves authorization code from storage
3. Retrieves stored code_challenge
4. Computes: SHA256(code_verifier) → new_hash
5. Compares: new_hash == stored_code_challenge?
If MATCH (✓):
├─ code_verifier is correct
├─ Same application that requested code
├─ Issue access token
└─ Return token in response
If NO MATCH (✗):
├─ code_verifier is wrong
├─ Likely code theft attempt
├─ Reject request with error
└─ Attack prevented!
Response on Success:
HTTP 200 OK
{
"access_token": "abc123xyz789...",
"token_type": "bearer",
"expires_in": 3600,
"scope": "conversations:readonly"
}
Response on Failure:
HTTP 400 Bad Request
{
"error": "invalid_grant",
"error_description": "code_verifier invalid"
}
Step 7: Use Access Token
Same as Authorization Code Grant:
GET /api/v2/conversations
Authorization: Bearer abc123xyz789...
Response:
HTTP 200 OK
{...conversation data...}
JavaScript Implementation Example
// Configuration
const CLIENT_ID = 'your_client_id';
const REDIRECT_URI = 'https://yourapp.com/callback';
const SCOPES = 'conversations:readonly users:readonly';
const GENESYS_REGION = 'mypurecloud.com';
// Step 1: Generate PKCE code challenge
async function generatePKCE() {
// Generate random code_verifier
const array = new Uint8Array(64);
crypto.getRandomValues(array);
const codeVerifier = btoa(String.fromCharCode.apply(null, array))
.replace(/\+/g, '-')
.replace(/\//g, '_')
.replace(/=/g, '');
// Compute code_challenge = BASE64URL(SHA256(code_verifier))
const encoder = new TextEncoder();
const data = encoder.encode(codeVerifier);
const hashBuffer = await crypto.subtle.digest('SHA-256', data);
const hashArray = Array.from(new Uint8Array(hashBuffer));
const hashString = String.fromCharCode.apply(null, hashArray);
const codeChallenge = btoa(hashString)
.replace(/\+/g, '-')
.replace(/\//g, '_')
.replace(/=/g, '');
return { codeVerifier, codeChallenge };
}
// Step 2: Redirect to authorization
async function login() {
const { codeVerifier, codeChallenge } = await generatePKCE();
// Store verifier in memory (or sessionStorage for SPA)
sessionStorage.setItem('pkce_verifier', codeVerifier);
// Generate state for CSRF protection
const state = btoa(Math.random().toString()).substring(0, 40);
sessionStorage.setItem('pkce_state', state);
// Redirect to authorization endpoint
const authUrl = new URL(`https://login.${GENESYS_REGION}/oauth/authorize`);
authUrl.searchParams.append('client_id', CLIENT_ID);
authUrl.searchParams.append('response_type', 'code');
authUrl.searchParams.append('redirect_uri', REDIRECT_URI);
authUrl.searchParams.append('scope', SCOPES);
authUrl.searchParams.append('code_challenge', codeChallenge);
authUrl.searchParams.append('code_challenge_method', 'S256');
authUrl.searchParams.append('state', state);
window.location.href = authUrl.toString();
}
// Step 4: Handle callback
async function handleCallback() {
const urlParams = new URLSearchParams(window.location.search);
const code = urlParams.get('code');
const state = urlParams.get('state');
const error = urlParams.get('error');
// Check for errors
if (error) {
console.error('Authorization error:', error);
return false;
}
// Verify state (CSRF protection)
const storedState = sessionStorage.getItem('pkce_state');
if (state !== storedState) {
console.error('State mismatch - CSRF attack detected');
return false;
}
// Retrieve code_verifier from memory
const codeVerifier = sessionStorage.getItem('pkce_verifier');
if (!codeVerifier) {
console.error('Code verifier not found');
return false;
}
// Step 5: Exchange code for token
try {
const response = await fetch(`https://login.${GENESYS_REGION}/oauth/token`, {
method: 'POST',
headers: {
'Content-Type': 'application/x-www-form-urlencoded'
},
body: new URLSearchParams({
grant_type: 'authorization_code',
code: code,
client_id: CLIENT_ID,
redirect_uri: REDIRECT_URI,
code_verifier: codeVerifier // PKCE proof
})
});
if (!response.ok) {
throw new Error('Token exchange failed');
}
const { access_token } = await response.json();
// Step 7: Store token and use it
sessionStorage.setItem('access_token', access_token);
// Clean up PKCE values
sessionStorage.removeItem('pkce_verifier');
sessionStorage.removeItem('pkce_state');
console.log('Login successful');
return true;
} catch (error) {
console.error('Token exchange error:', error);
return false;
}
}
// Use access token
async function callAPI(endpoint) {
const token = sessionStorage.getItem('access_token');
if (!token) {
console.error('No access token found');
return null;
}
try {
const response = await fetch(`https://api.${GENESYS_REGION}/api/v2${endpoint}`, {
headers: {
'Authorization': `Bearer ${token}`,
'Content-Type': 'application/json'
}
});
if (response.status === 401) {
console.error('Token expired, user must log in again');
login();
return null;
}
if (!response.ok) {
throw new Error(`API error: ${response.status}`);
}
return await response.json();
} catch (error) {
console.error('API call failed:', error);
return null;
}
}
// Example: Login button click handler
document.getElementById('loginBtn').addEventListener('click', login);
// Example: Handle callback on return from auth server
if (window.location.pathname === '/callback') {
handleCallback().then(success => {
if (success) {
window.location.href = '/dashboard';
} else {
window.location.href = '/error';
}
});
}
// Example: Call API
async function getConversations() {
const data = await callAPI('/conversations?pageSize=100&pageNumber=1');
console.log('Conversations:', data);
}
Why Migrate from Implicit Grant to PKCE?
Implicit Grant (DEPRECATED):
├─ Status: Deprecated November 2025
├─ New clients: Blocked March 2026
├─ Existing clients: Must migrate by May 2027
├─ Issues: Token in URL, browser history, no protection
└─ Replacement: PKCE
PKCE (RECOMMENDED):
├─ Status: Supported and recommended
├─ Security: Enhanced via proof mechanism
├─ Suitable for: All client types
├─ Implementation: Slightly more complex
└─ Future-proof: Long-term standard
Migration Path:
Step 1: Update OAuth Client
├─ Delete old Implicit Grant client (or keep if needed)
├─ Create new Authorization Code + PKCE client
└─ Note new client_id
Step 2: Update Application Code
├─ Implement PKCE proof generation
├─ Add code_challenge to authorization
├─ Include code_verifier in token exchange
└─ Remove implicit grant references
Step 3: Test Thoroughly
├─ Test login flow end-to-end
├─ Test token exchange
├─ Test API calls
└─ Verify error handling
Step 4: Deploy
├─ Update production code
├─ Verify working in production
├─ Monitor for errors
└─ Keep old client available briefly
Step 5: Cleanup
├─ Remove old Implicit Grant client
├─ Update documentation
├─ Notify users if applicable
└─ Archive old implementation
Timeline:
├─ Now (March 2026): Implement PKCE
├─ Before May 2027: Migration required
├─ May 2027: Implicit Grant stopped working
└─ Plan ahead to avoid outages!
PKCE vs Implicit Grant
Security Comparison:
Token Exposure:
├─ Implicit: Token in URL fragment (visible)
├─ PKCE: Token in body, 200 response (hidden)
└─ PKCE wins: Less exposed
Token Lifetime:
├─ Implicit: No refresh, static lifetime
├─ PKCE: Can have refresh tokens
└─ PKCE wins: Better UX
Browser History:
├─ Implicit: Token in URL history (risk)
├─ PKCE: No URL tokens (safe)
└─ PKCE wins: No history exposure
Code Interception:
├─ Implicit: Not applicable (no code)
├─ PKCE: Protected by proof (secure)
└─ PKCE wins: Protected exchange
CSRF Protection:
├─ Implicit: State parameter only
├─ PKCE: State + cryptographic proof
└─ PKCE wins: Multiple protections
Standards Alignment:
├─ Implicit: Deprecated OAuth 2.0
├─ PKCE: Modern OAuth 2.0 best practice
└─ PKCE wins: Future-proof
Complexity:
├─ Implicit: Simple (but insecure)
├─ PKCE: Slightly more complex (much more secure)
└─ Trade-off: Worth the extra complexity
Security Checklist for PKCE
PKCE Implementation Security:
□ Generate cryptographically secure code_verifier
├─ Use crypto.getRandomValues() (not Math.random)
├─ 64 bytes minimum (not shorter)
└─ Different every request
□ Compute SHA256 hash of verifier
├─ Use crypto.subtle.digest()
├─ Encode to BASE64URL format
└─ Do not use plain method
□ Store code_verifier securely
├─ Memory only (not localStorage)
├─ Clear after token exchange
├─ Not persisted
└─ Lost on page reload
□ Use S256 method always
├─ Never use "plain" method
├─ Only S256 recommended
└─ Specify in authorization
□ Include state parameter
├─ Separate CSRF protection
├─ Random and unpredictable
├─ Verify in callback
└─ Different from verifier
□ Validate SSL certificates
├─ HTTPS always
├─ Check cert validity
└─ Reject self-signed
□ Do not expose secrets
├─ code_verifier: Memory only
├─ access_token: SessionStorage or memory
├─ Never in localStorage
└─ Clean up after logout
□ Handle errors gracefully
├─ Catch network errors
├─ Retry on failure
├─ Don't expose verifier in errors
└─ Log safely
Key Takeaways: Chapter 4
- Enhanced Security - Cryptographic proof prevents authorization code interception
- No Client Secret - Suitable for public clients (SPAs, mobile, desktop)
- Proof Mechanism - Verifier prevents code theft (cannot reverse-engineer from hash)
- RFC 7636 Standard - Modern OAuth 2.0 best practice
- Implicit Replacement - Use PKCE instead of deprecated Implicit Grant
- Migration Deadline - May 2027 cutoff for Implicit Grant
- Slightly Complex - More code than Implicit, but much more secure
- Future-Proof - Long-term standard, recommended by OAuth 2.0 experts
Interview Prep: PKCE
| Question | Answer |
|---|---|
| What is PKCE? | Proof Key for Code Exchange - enhanced OAuth Code grant security |
| Why PKCE needed? | Prevents authorization code interception attacks |
| code_verifier? | Random string (43-128 chars) generated by client, never sent over network |
| code_challenge? | SHA256(code_verifier), BASE64URL encoded, sent to auth server |
| How prevent intercept? | Only original code_verifier can exchange the code, attacker lacks verifier |
| Why not reverse? | SHA256 is one-way hash function, cannot derive verifier from challenge |
| S256 vs plain? | S256 (SHA256) is secure, plain is deprecated, always use S256 |
| When use PKCE? | Public clients (SPAs, mobile, desktop) that cannot store client_secret |
| Migration deadline? | May 2027 for Implicit Grant existing clients |
| State parameter? | Separate CSRF protection, still needed with PKCE |
Document Version
Chapter: 4 of 8
Last Updated: March 2026
Status: Current with RFC 7636
Scope: PKCE Flow, Security, Implementation, Migration from Implicit
OAuth Scopes and Permissions
Overview
OAuth scopes provide granular, fine-grained permission control within Genesys Cloud. They define exactly what resources an application can access and what actions it can perform. Scopes are requested during authorization and enforced on every API call.
Scope Fundamentals
What Are Scopes?
Definition:
├─ Granular permissions for API access
├─ Limit what an application can do
├─ User consent on what app can access
├─ Enforced on every API request
└─ Principle of least privilege
Scope Format:
resource:action
OR
resource:action:scope
Examples:
├─ conversations:readonly # View conversations
├─ conversations:call:add # Make calls
├─ conversations:call:control # Transfer, hold
├─ users:manage # Create/modify users
├─ routing:queue:view # View queues
└─ scheduling:manage # Manage schedules
Space-Separated Combination:
"conversations:readonly users:readonly scheduling:manage"
User Sees During Authorization:
├─ App name
├─ All requested scopes
├─ What the app can do
└─ User grants all or none (all-or-nothing)
Enforcement:
├─ Every API request validated against token scopes
├─ If endpoint requires scope not in token: 403 Forbidden
├─ User permissions AND scopes both required (AND logic)
├─ Whichever is more restrictive applies
└─ Better to have both than just one
Scope Categories
Conversation Management:
├─ conversations:readonly # GET conversations
├─ conversations:call:add # POST/make calls
├─ conversations:call:control # Transfer, hold, disconnect
├─ conversations:call:pull # Pull calls
├─ conversations:call:coach # Coach calls
├─ recordings:view # Access recordings
├─ recordings:download # Download recording files
├─ transcripts:readonly # View transcripts
└─ conversations:external:contact:add # Add external contacts
User Management:
├─ users:readonly # Read user info
├─ users:manage # Create/update/delete users
├─ authorization:grant:readonly # View user permissions
├─ authorization:grant:manage # Modify user permissions
├─ presence:readonly # View presence status
└─ presence:manage # Change presence
Contact Center Configuration:
├─ routing:queue:view # View queue config
├─ routing:queue:manage # Create/edit queues
├─ routing:skill:view # View skills
├─ routing:skill:manage # Manage skills
├─ directory:organization:view # View org structure
├─ telephony:phone:manage # Manage phones
├─ outbound:campaign:view # View campaigns
└─ outbound:campaign:execute # Run campaigns
Workforce Management:
├─ forecasting:readonly # View forecasts
├─ forecasting:manage # Create/edit forecasts
├─ scheduling:readonly # View schedules
├─ scheduling:manage # Create/edit schedules
├─ timeoff:view # View time-off requests
├─ timeoff:manage # Approve time-off
├─ adherence:view # View adherence
└─ adherence:manage # Manage adherence
Analytics & Reporting:
├─ analytics:conversationDetail # Detailed conversation analytics
├─ analytics:aggregate:view # Aggregated analytics
├─ quality:evaluation:view # Quality evaluations
├─ quality:evaluation:manage # Create/edit evaluations
├─ speechanalytics:data:view # Speech analytics
└─ reporting:analytics:view # Analytics reports
Integration & External:
├─ externalcontacts:manage # CRM synchronization
├─ webhooks:manage # Webhook configuration
├─ webhooks:view # View webhooks
├─ scim:write # SCIM provisioning
├─ knowledge:manage # Knowledge articles
└─ knowledge:readonly # View knowledge
Platform Management:
├─ oauth:client:view # View OAuth clients
├─ oauth:client:manage # Create/edit OAuth clients
├─ admin:org:view # View org settings
├─ admin:org:manage # Modify org settings
└─ audit:readonly # View audit logs
Scope Selection Best Practices
Principle of Least Privilege:
Definition:
├─ Grant minimum scopes needed
├─ Only request what app actually uses
├─ Reduce impact if app compromised
├─ Easier to review and audit
└─ Better security posture
How to Select:
1. List API Endpoints Used:
├─ /conversations → conversations:readonly
├─ /v2/users/{id} → users:readonly
├─ /v2/conversations/{id}/notes → conversations:readonly
└─ Map each endpoint to scope
2. Check Endpoint Documentation:
├─ Visit API Explorer
├─ View each endpoint
├─ Note required scope
└─ Collect all scopes
3. Start with Read-Only:
├─ conversations:readonly (not call:add)
├─ users:readonly (not manage)
├─ Only add write scopes if needed
└─ Safer starting point
4. Add Write Scopes Only If Needed:
├─ Review which operations require writes
├─ Add specific action scopes
├─ Example: call:add (not call:control)
└─ One scope per action where possible
5. Remove Unused Scopes:
├─ Quarterly review
├─ Check OAuth client usage
├─ Remove unneeded scopes
├─ Reduce security surface
└─ Document rationale
6. Document Your Choices:
├─ Why each scope is needed
├─ Which endpoints use it
├─ When to update scopes
└─ Version control reasons
Example Selection:
App: Contact center agent desktop
├─ Endpoints needed:
│ ├─ GET /conversations → conversations:readonly
│ ├─ POST /conversations/{id}/participants/calls/transfer
│ │ → conversations:call:control
│ ├─ GET /users/me → users:readonly
│ └─ PATCH /v2/users/{id}/presence → presence:manage
│
└─ Final scopes: "conversations:readonly conversations:call:control users:readonly presence:manage"
NOT these (too permissive):
├─ conversations:manage (not needed)
├─ users:manage (not needed)
└─ conversations:call:add (can't initiate calls)
Scope Enforcement Mechanism
How Scopes Are Enforced:
Every API Request Validation:
1. Client Sends Request:
GET /api/v2/users/123
Authorization: Bearer {access_token}
2. Genesys Validates Token:
├─ Token signature valid?
├─ Token not expired?
├─ Token not revoked?
└─ Check scopes and permissions
3. Endpoint Requires:
├─ Endpoint /v2/users/{id} requires scope: users:readonly
├─ Check if token has "users:readonly" scope
└─ Check if user has permission to read users
4. Dual Validation (Both Required):
├─ Must have OAuth scope: ✓ users:readonly
├─ Must have user permission: ✓ (has role allowing read)
├─ Both? → Grant access
├─ Only one? → 403 Forbidden
└─ Neither? → 403 Forbidden
5. Enforce Rules:
├─ User has scope but not permission → 403
├─ User has permission but not scope → 403
├─ User has both → 200 OK (success)
└─ User has neither → 403
Example Scenarios:
Scenario 1: Has Scope, Has Permission
├─ Token scope: users:readonly ✓
├─ User role permission: can read users ✓
├─ Result: 200 OK (access granted)
└─ API call succeeds
Scenario 2: Has Scope, No Permission
├─ Token scope: users:readonly ✓
├─ User role permission: cannot read users ✗
├─ Result: 403 Forbidden
└─ API call denied
Scenario 3: No Scope, Has Permission
├─ Token scope: users:readonly ✗
├─ User role permission: can read users ✓
├─ Result: 403 Forbidden
└─ API call denied
Scenario 4: No Scope, No Permission
├─ Token scope: users:readonly ✗
├─ User role permission: cannot read users ✗
├─ Result: 403 Forbidden
└─ API call denied
Example Error Response:
HTTP 403 Forbidden
{
"error": {
"message": "This application is not authorized to perform this action",
"code": "PERMISSIONS_INSUFFICIENT",
"status": 403
}
}
Checking Available Scopes:
In API Explorer:
1. Visit: https://developer.genesys.cloud/api/rest/v2/
2. Click any endpoint
3. See "Authorization" section
4. Lists required scope
5. Copy exact scope name
Common Scope Combinations
Agent Desktop Application:
conversations:readonly
conversations:call:control
users:readonly
presence:manage
recordings:view
(Read conversations, manage calls, see presence, view recordings)
Admin Dashboard:
users:readonly
routing:queue:view
routing:skill:view
scheduling:readonly
analytics:conversationDetail
(Read-only access to key admin features)
WFM Application:
scheduling:manage
forecasting:manage
timeoff:manage
adherence:manage
users:readonly
(Full WFM management)
Integration Service (Salesforce Sync):
externalcontacts:manage
users:readonly
conversations:readonly
(Sync contacts, read-only other data)
Chatbot / Virtual Agent:
conversations:external:contact:add
knowledge:readonly
(Add external contacts, access knowledge)
Analytics Reporter:
analytics:conversationDetail
analytics:aggregate:view
quality:evaluation:view
speechanalytics:data:view
(Read-only analytics access)
API Automation (Least Privilege):
users:readonly (query users)
outbound:campaign:view (check campaign status)
(Minimal access for specific automation)
Scope Changes & Updates
Adding Scopes to Existing OAuth Client:
Scenario:
├─ App previously only read conversations
├─ Now needs to transfer calls
├─ Must add conversations:call:control scope
Steps:
1. Stop Using Old Client (or keep both briefly):
├─ Update app configuration
├─ Point to updated client
└─ Test thoroughly
2. Navigate to OAuth Client in Admin:
├─ Admin → Integrations → OAuth
├─ Find your OAuth client
├─ Click Edit
└─ Select Scopes
3. Update Scopes:
├─ Old: "conversations:readonly"
├─ New: "conversations:readonly conversations:call:control"
├─ Add all needed scopes
└─ Save changes
4. User Must Re-Authorize:
├─ For Authorization Code Grant: Yes
├─ Users see new permissions consent screen
├─ Users must grant new scope
└─ New token includes updated scopes
5. Test Thoroughly:
├─ Test new functionality
├─ Verify old functions still work
├─ Check error responses
└─ Monitor for issues
6. Gradual Rollout (Optional):
├─ Update small group first
├─ Monitor for errors
├─ Expand to more users
└─ Full rollout when confident
Removing Unused Scopes:
Scenario:
├─ App no longer uses contact creation
├─ Can remove conversations:external:contact:add
├─ Reduce security surface
Steps:
1. Verify Not Used:
├─ Check code for usage
├─ Search for endpoint calls
├─ Verify in logs (not used)
└─ Confirm removal safe
2. Update OAuth Client:
├─ Admin → Integrations → OAuth
├─ Click Edit
├─ Deselect unused scope
└─ Save
3. No Re-Authorization Needed:
├─ Existing tokens still work
├─ New tokens won't have old scope
├─ Endpoints still work (user has permission)
└─ Gradual transition
4. Monitor for Errors:
├─ Watch logs for 403 errors
├─ Verify no broken functionality
└─ Quick rollback if issues
Scope Testing
Testing Scope-Based Authorization:
Setup Test OAuth Client:
1. Create OAuth client with specific scopes
2. Authenticate with that client
3. Test that allowed endpoints work
4. Test that forbidden endpoints fail
Testing Allowed Scope:
Endpoint: GET /conversations
Scope: conversations:readonly
Token has scope: Yes
Test:
curl -H "Authorization: Bearer {token}" \
https://api.mypurecloud.com/api/v2/conversations
Expected: HTTP 200 (success)
Actual: ?
Testing Denied Scope (Negative Test):
Endpoint: POST /conversations (create)
Scope needed: conversations:manage
Token has scope: No
Test:
curl -X POST \
-H "Authorization: Bearer {token}" \
https://api.mypurecloud.com/api/v2/conversations
Expected: HTTP 403 Forbidden
Actual: ?
Test Multiple Scopes:
Token has scopes:
├─ conversations:readonly
├─ users:readonly
└─ NOT: scheduling:manage
Tests to Run:
├─ GET /conversations → 200 (has scope)
├─ GET /users → 200 (has scope)
├─ GET /schedules → 403 (no scope)
├─ DELETE /conversations/{id} → 403 (no manage scope)
└─ DELETE /users/{id} → 403 (no manage scope)
Automated Testing:
Example Test Suite:
Test Cases:
├─ [✓] conversations:readonly allows GET
├─ [✓] conversations:readonly denies POST
├─ [✓] conversations:call:control allows transfer
├─ [✓] users:readonly allows GET /users
├─ [✓] users:readonly denies PUT /users
├─ [✓] Multiple scopes work correctly
├─ [✓] Missing scopes return 403
└─ [✓] Expired token returns 401
Before Deployment:
├─ Run all scope tests
├─ Verify expected 403s
├─ Verify expected 200s
└─ Document scope requirements
Troubleshooting Scope Issues
Problem: Getting 403 Forbidden on Valid Endpoint
Check List:
┌─ Token Valid?
│ ├─ Is token expired?
│ ├─ Try making another call
│ └─ Get fresh token if needed
│
├─ Scope Correct?
│ ├─ Check API Explorer for required scope
│ ├─ Verify token has that scope
│ ├─ Look at token claims if JWT
│ └─ Add missing scope to OAuth client
│
├─ User Has Permission?
│ ├─ User role has permission?
│ ├─ Check user's roles in Admin UI
│ ├─ Check division assignments
│ └─ Add necessary role if missing
│
└─ Both Needed?
├─ User permission: Required
├─ OAuth scope: Required
├─ Have both? Should work
└─ Missing one? 403 error
Example Troubleshooting:
Error: POST /v2/users returns 403
├─ Required scope: users:manage
├─ Check 1: Token has users:manage? NO ✗
│ └─ Solution: Add users:manage scope to OAuth client
│
├─ Check 2: User has create user permission? YES ✓
│ └─ OK (permission is good)
│
├─ Root Cause: Missing scope in token
├─ Solution: Update OAuth client scopes
└─ Retry after user re-authenticates
Error: GET /v2/conversations returns 403
├─ Required scope: conversations:readonly
├─ Check 1: Token has conversations:readonly? YES ✓
│ └─ OK (scope is good)
│
├─ Check 2: User has read conversations permission? NO ✗
│ └─ Solution: Add user to role with permission
│
├─ Root Cause: User lacks role permission
├─ Solution: Assign appropriate role to user
└─ Retry after role assignment takes effect
Common Mistakes:
❌ Wrong Scope Name:
├─ Requested: "conversation:view" (wrong)
├─ Correct: "conversations:readonly"
└─ Solution: Check API Explorer for exact scope
❌ Typo in Scope:
├─ Requested: "users :manage" (space)
├─ Correct: "users:manage"
└─ Solution: Check spacing carefully
❌ Missing Scope Entirely:
├─ Requested: "users:readonly" only
├─ Needed: "users:readonly users:manage"
└─ Solution: Add missing scopes
❌ Wrong Colon Format:
├─ Requested: "users-manage" (dash)
├─ Correct: "users:manage" (colon)
└─ Solution: Use colons, not dashes
Scope Documentation
For Your Team:
Document Your Scopes:
Application: [App Name]
├─ conversations:readonly
│ ├─ Used for: Display conversation history
│ ├─ Endpoints: GET /v2/conversations
│ └─ Rationale: Need to show past interactions
│
├─ conversations:call:control
│ ├─ Used for: Transfer calls between agents
│ ├─ Endpoints: POST /v2/conversations/{id}/participants/calls/transfer
│ └─ Rationale: Core feature for agent desktop
│
├─ users:readonly
│ ├─ Used for: List available agents
│ ├─ Endpoints: GET /v2/users
│ └─ Rationale: Show agent list for transfers
│
└─ Updated: March 2026
└─ Next Review: September 2026
Scope Change Log:
Date | Change | Reason
------------|---------------|----------------------------------
2026-03-01 | Added: call:control | New transfer feature
2026-01-15 | Added: users:readonly | Show agent list
2025-11-20 | Initial: conversations:readonly | Read-only access
API Endpoint to Scope Mapping:
Endpoint | Method | Scope Required
---------|--------|----------------
/v2/conversations | GET | conversations:readonly
/v2/conversations | POST | conversations:readonly (new)
/v2/conversations/{id} | GET | conversations:readonly
/v2/users | GET | users:readonly
/v2/users/{id}/presence | PATCH | presence:manage
Key Takeaways: Chapter 5
- Granular Permissions - Scopes define exactly what app can do
- Least Privilege - Request minimum scopes needed
- User Consent - Users see all scopes during authorization
- Dual Enforcement - User permissions AND OAuth scopes both required
- 403 Means Missing - Either scope or permission (or both) missing
- Standard Format - Use resource:action or resource:action:scope
- Space-Separated - Combine multiple scopes with spaces
- Review Regularly - Quarterly scope audits reduce security risk
Interview Prep: OAuth Scopes
| Question | Answer |
|---|---|
| What are scopes? | Granular permissions defining what app can access/do |
| Scope format? | resource:action or resource:action:scope (e.g., conversations:readonly) |
| How combined? | Space-separated list (e.g., "conversations:readonly users:manage") |
| User sees scopes? | Yes, during authorization consent screen |
| All-or-nothing? | Yes, user grants all requested scopes or none |
| How enforced? | Every API request checked against token scopes |
| User + scope? | BOTH required (AND logic), not OR |
| 403 means? | Missing scope or missing permission (or both) |
| Best practice? | Principle of least privilege - request minimum needed |
| How update? | Edit OAuth client, add/remove scopes, user must re-auth |
Document Version
Chapter: 5 of 8
Last Updated: March 2026
Status: Current with OAuth 2.0 standards
Scope: Scope management, enforcement, best practices
OAuth Client Management
Creating OAuth Clients
Step-by-Step: Create an OAuth Client
Access Path:
Admin → Integrations → OAuth → Add client
OR
Menu → IT and Integrations → OAuth → Add client
Procedure:
1. Click "Add Client" Button
└─ "Add New Client" page appears
2. Enter Application Name (Required)
├─ Your application's display name
├─ Example: "Salesforce Integration Service"
├─ Visible in admin dashboard
└─ Visible in authorization screens
3. Enter Description (Optional)
├─ What the application does
├─ Example: "Syncs Salesforce contacts to Genesys every 30 minutes"
├─ Helpful for documentation
└─ Visible in admin UI
4. Select Grant Type(s)
├─ Choose one or more:
│ ├─ Client Credentials (service-to-service)
│ ├─ Code Authorization / PKCE (web/mobile apps)
│ ├─ Token Implicit Grant (DEPRECATED - don't use)
│ └─ SAML2 Bearer (enterprise SSO)
│
├─ Can select multiple grant types
├─ Each grant type has specific settings
└─ Note: Cannot select Implicit after March 2026
5. Click "Next" Button
└─ Proceed to grant-specific configuration
6. Grant-Specific Configuration:
For Client Credentials:
├─ Assign Roles (Required)
│ ├─ Select minimum roles needed
│ ├─ Available roles listed
│ ├─ Application will have these permissions
│ └─ Note: Must have roles in your profile to assign
│
├─ Assign Divisions
│ ├─ Required for role assignment
│ ├─ Roles scoped to divisions
│ ├─ Default: Home Division
│ └─ Update to appropriate divisions
│
└─ Token Duration
├─ Configurable: 300-172,800 seconds
├─ Default: 3600 seconds (1 hour)
├─ SCIM special: up to 450 days
└─ Your choice based on use case
For Authorization Code / PKCE:
├─ Token Duration
│ ├─ Configurable: 300-172,800 seconds
│ ├─ Default: 3600 seconds (1 hour)
│ └─ Recommended: 18 hours (64,800 seconds)
│
├─ Authorized Redirect URIs (Required)
│ ├─ Up to 125 URIs
│ ├─ One per line
│ ├─ Must use HTTPS
│ ├─ Example: https://yourapp.com/callback
│ ├─ Example: https://yourapps.com/auth
│ ├─ Example: http://localhost:3000/callback (dev)
│ ├─ Loopback: http://localhost/ (any port)
│ └─ MUST be exact match (case-sensitive)
│
└─ Scopes (Required)
├─ Click "Scope" button
├─ Select minimum scopes needed
├─ Space-separated in requests
├─ Example: "conversations:readonly users:readonly"
└─ Recommended: Least privilege principle
7. Click "Next" Button
└─ Review configuration
8. Review & Save
├─ Verify all settings
├─ Check OAuth name
├─ Confirm grant type(s)
├─ Verify scopes correct
└─ Click "Save"
9. Client Created Successfully
├─ System generates Client ID
├─ System generates Client Secret
├─ IMPORTANT: Copy secret immediately!
└─ Secret cannot be retrieved later
10. Display Confirmation
├─ Client Name: Your application name
├─ Client ID: Unique identifier (public)
├─ Grant Types: Selected methods
├─ Scopes: Requested permissions
├─ Created By: Your username
├─ Created Date: Timestamp
└─ Client Secret: (hidden after creation)
11. Finish
└─ Client ready to use
Typical Client Example:
Name: Salesforce Contact Sync
Grant Type: Client Credentials
Roles: External Contact Manager, Agent
Divisions: Home Division
Token Duration: 86400 (1 day)
Scopes: externalcontacts:manage
Created: 2026-03-13
Client Secret Management (Critical - March 2026 Change)
⚠️ IMPORTANT SECURITY UPDATE (March 2026)
Previous Behavior:
├─ Client secret visible in admin UI anytime
├─ Could view secret for existing clients
├─ Increased exposure risk
└─ Security concern
Current Behavior (March 2026):
├─ Client secret only shown at creation
├─ Cannot view secret after creation
├─ Must copy immediately when created
├─ Cannot retrieve via API
└─ Enhanced security
Action Required at Client Creation:
1. When Client Created:
├─ Page displays client secret
├─ Only time you see it
└─ Immediately copy and store
2. Copy Secret:
├─ Click "Copy" button
├─ OR manually select and copy
└─ Keep safe!
3. Store Secret Securely:
├─ Secure vault (recommended)
├─ Environment variables
├─ NOT in code
├─ NOT in git repository
├─ NOT in logs
└─ Encrypted storage
4. Acknowledge:
├─ Checkbox: "I have copied and stored the secret"
├─ Verify before checking
└─ Only way to proceed
5. If You Lose It:
├─ Cannot retrieve from UI
├─ Click "Generate new secret"
├─ New secret replaces old
├─ Old secret no longer works
└─ Update application immediately
Secure Storage Solutions:
HashiCorp Vault:
├─ Enterprise secret management
├─ Encryption, rotation, audit
├─ Recommended: Production environments
└─ Access via API
AWS Secrets Manager:
├─ AWS-native secret storage
├─ Encryption, rotation, audit
├─ Recommended: AWS environments
└─ IAM-based access control
Azure Key Vault:
├─ Azure-native solution
├─ Encryption, versioning
├─ Recommended: Azure environments
└─ RBAC access control
Environment Variables (Dev Only):
├─ .env file (development)
├─ Never commit to git
├─ NOT for production
├─ Simple for local development
└─ Use .gitignore
Docker Secrets:
├─ Container orchestration
├─ Swarm/Kubernetes
├─ Encrypted storage
└─ Recommended: Container deployments
Never Store:
❌ In application code
❌ In git repository
❌ In version control
❌ In logs
❌ In configuration files
❌ In plain text
❌ In comments
❌ In documentation
OAuth Client Security
Security Best Practices:
Secret Rotation:
Timeline:
├─ Rotate monthly minimum
├─ Before employee departures
├─ After any exposure
├─ If suspected compromise
└─ Automated via CI/CD
Process:
1. Generate New Secret:
├─ Click "Generate new secret"
├─ Confirm action
└─ New secret displayed once
2. Update Application:
├─ Update configuration
├─ Dual-use period: old + new both work
├─ Monitor for errors
└─ Verify new secret works
3. Verify Working:
├─ Test authentication
├─ Check logs for success
├─ No 401 errors
└─ All requests working
4. Remove Old Secret:
├─ Old automatically stops working
├─ After brief dual-use period
├─ No action needed
└─ Can't revert to old
Audit Logging:
Log These Events:
├─ OAuth client created
├─ Secret regenerated
├─ Scopes added/removed
├─ Roles assigned/removed
├─ Client deleted
├─ Access failures
└─ Unusual activity
What to Log:
├─ Timestamp
├─ Admin user
├─ Action taken
├─ Client affected
├─ Result (success/failure)
└─ NOT the secret itself
Monitoring:
Monitor For:
├─ Unexpected client creation
├─ Secret rotation outside schedule
├─ Failed authentication attempts
├─ Unusual scope usage
├─ Access pattern changes
├─ Clients not used regularly
└─ Suspicious activity
Permissions:
Who Can Create Clients?
├─ Admin users with "oauth:client:add" permission
├─ Typically: Super Admin, OAuth Admin role
└─ Verify in your organization
Who Can View Clients?
├─ Admin users
├─ Users with "oauth:client:view" permission
└─ Consider minimizing access
Who Can Delete Clients?
├─ Admin users
├─ OAuth Admin role
└─ Approval process recommended
Compliance Requirements:
HIPAA:
├─ Requires MFA for admin access
├─ 15-minute idle timeout enforced
├─ Audit logging required
└─ Client rotation documented
PCI-DSS:
├─ Secure secret storage required
├─ No hardcoded secrets
├─ Regular rotation required
└─ Access control required
SOC 2:
├─ Audit trails for all changes
├─ Access control enforcement
├─ Change management process
└─ Incident response documented
GDPR:
├─ Data processing log required
├─ Right to access supported via API
├─ Data retention policies
└─ Deletion/export capabilities
OAuth Client Lifecycle
Stages:
1. Creation
├─ Admin creates client
├─ Scopes assigned
├─ Roles assigned (if Client Credentials)
├─ Secret generated
└─ Client ID provided
2. Configuration
├─ Redirect URIs registered (if Auth Code)
├─ Scopes finalized
├─ Token duration set
└─ Roles/divisions confirmed
3. Usage
├─ Applications authenticate with client
├─ Users authorize app (if Code grant)
├─ Tokens issued and used
├─ API calls made
└─ Regular operations
4. Monitoring
├─ Track usage patterns
├─ Monitor authentication success
├─ Alert on anomalies
├─ Quarterly scope review
└─ Annual security audit
5. Maintenance
├─ Rotate secrets monthly
├─ Update scopes as needed
├─ Verify still in use
├─ Remove unused clients
└─ Document changes
6. Deactivation
├─ Determine if still needed
├─ Plan removal
├─ Notify application owners
├─ Provide replacement if needed
└─ Allow migration period
7. Deletion
├─ Remove old client
├─ Tokens immediately invalid
├─ Applications get 401 errors
├─ Audit log records deletion
└─ Cannot be recovered
Timeline:
Creation → Configuration → Usage → Monitoring → Maintenance → Deactivation → Deletion
0 days 1 day Day 1+ Day 30+ Day 30+ Day 365+ Day 380+
Common OAuth Client Configurations
Configuration 1: Web Application (Node.js + React)
Grant Type: Authorization Code
Redirect URIs:
├─ https://yourapp.com/callback
├─ https://yourapp.com/auth
└─ http://localhost:3000/callback (dev)
Scopes:
├─ conversations:readonly
├─ users:readonly
└─ presence:manage
Token Duration: 3600 (1 hour)
Use Case:
├─ User logs in via browser
├─ Backend handles token exchange
├─ Backend stores refresh token
└─ User can revoke access anytime
Configuration 2: Service Integration (Salesforce Sync)
Grant Type: Client Credentials
Roles:
├─ External Contact Manager
└─ Scheduler (if needed)
Divisions: Home Division
Scopes:
├─ externalcontacts:manage
├─ users:readonly
└─ scheduling:readonly
Token Duration: 86400 (1 day)
Use Case:
├─ Automated sync service
├─ No user interaction
├─ Runs on schedule
└─ Application acts as itself
Configuration 3: Mobile App with Backend
Grant Type: Authorization Code + PKCE
Redirect URIs:
├─ myapp://oauth/callback
├─ https://myapp.com/callback
└─ http://localhost:3000/callback (dev)
Scopes:
├─ conversations:readonly
├─ conversations:call:control
├─ users:readonly
└─ presence:manage
Token Duration: 3600 (1 hour)
Use Case:
├─ Mobile app user login
├─ PKCE for public client security
├─ Backend stores refresh token
└─ App cannot store client_secret
Configuration 4: Single-Page Application (SPA)
Grant Type: Authorization Code + PKCE
Redirect URIs:
├─ https://yourapp.com/
├─ https://yourapp.com/callback
└─ http://localhost:3000/ (dev)
Scopes:
├─ conversations:readonly
├─ users:readonly
└─ presence:manage
Token Duration: 3600 (1 hour)
Use Case:
├─ JavaScript SPA
├─ No backend (serverless)
├─ PKCE prevents code interception
├─ Tokens stored in memory only
Configuration 5: Bot/Virtual Agent
Grant Type: Client Credentials
Roles:
├─ Agent
└─ Virtual Agent (if available)
Divisions: Home Division
Scopes:
├─ conversations:readonly
├─ conversations:external:contact:add
├─ knowledge:readonly
└─ users:readonly
Token Duration: 86400 (1 day)
Use Case:
├─ Chatbot integration
├─ No user context
├─ Reads knowledge base
└─ Fully automated
Configuration 6: Admin Tool/Dashboard
Grant Type: Authorization Code
Redirect URIs:
├─ https://admin.yourcompany.com/callback
└─ http://localhost:8080/callback (dev)
Scopes:
├─ users:manage
├─ roles:manage
├─ oauth:client:manage
└─ admin:org:manage
Token Duration: 3600 (1 hour)
Use Case:
├─ Admin portal
├─ Full management capabilities
├─ User authentication
└─ Administrative access control
Troubleshooting OAuth Clients
Problem: Client Creation Fails
Check:
├─ Permission: Do you have oauth:client:add?
├─ Roles: Do you have the roles you're assigning?
├─ Scopes: Are scope names spelled correctly?
└─ Divisions: Do divisions exist?
Solution:
├─ Request oauth:client:add permission
├─ Use roles you have assigned
├─ Check scope names in API Explorer
└─ Use existing divisions
Problem: Client Secret Lost/Forgotten
Cannot Retrieve:
├─ Old secret: Cannot view (security feature)
├─ No recovery method
├─ No admin override
└─ Design for security
Solution:
├─ Generate new secret
├─ Update application
├─ Delete old client if not needed
└─ Document in future
Steps:
1. Click "Generate new secret"
2. Copy new secret
3. Update application config
4. Test authentication
5. Verify working
Problem: 401 Unauthorized on API Calls
Possible Causes:
├─ Token expired: Get fresh token
├─ Token revoked: Authenticate again
├─ Client credentials wrong: Check spelling
├─ Client no longer exists: Recreate
└─ Secret wrong: Regenerate
Troubleshooting:
1. Check token hasn't expired
2. Try authenticating again (fresh token)
3. Verify client_id and client_secret spelling
4. Check client exists in Admin UI
5. If regenerated secret, update application
6. Monitor logs for pattern
Problem: Scopes Not Working
User Still Can't Access API:
Causes:
├─ Wrong scope name
├─ User missing permission
├─ Token doesn't have scope
├─ Both scope and permission needed
└─ Other 403 reason
Check:
1. API Explorer: What scope required?
2. Token: Does it have that scope?
3. User: Does user have role permission?
4. Both: Scope AND permission needed
5. 403 error: One or both missing
Problem: Application Not Working After Update
Something Changed:
Check:
├─ Secret regenerated? Update app config
├─ Scopes changed? Users must re-authorize
├─ Roles changed? Token might lack permission
├─ Token duration changed? Should still work
└─ Redirect URI changed? Registration needed
Fix:
├─ If secret: Update app immediately
├─ If scopes: Get new token (user re-auth)
├─ If roles: Assign correct roles
└─ If URI: Re-register in Admin UI
Best Practices: OAuth Client Management
Security:
□ Store secrets in secure vault
□ Rotate monthly minimum
□ Never commit to git
□ Use environment variables
□ Encrypt at rest and in transit
□ Audit all changes
□ Monitor for anomalies
□ Principle of least privilege
Operations:
□ Document each client's purpose
□ Keep contact info for app owner
□ Review quarterly
□ Remove unused clients
□ Plan secret rotation schedule
□ Test after any changes
□ Verify working regularly
□ Monitor token usage
Compliance:
□ Meet HIPAA requirements
□ Meet PCI-DSS requirements
□ Meet SOC 2 requirements
□ Document compliance steps
□ Keep audit logs
□ Review permissions quarterly
□ Maintain change log
□ Plan for incidents
Key Takeaways: Chapter 6
- Admin-Only Access - Only admins can create OAuth clients
- Secret View-Once - Client secret only shown at creation (March 2026 change)
- Secure Storage Required - Use vault, not code/git/environment
- Monthly Rotation - Standard practice for secret updates
- Dual Grant Types - Can select multiple grant types per client
- Role & Scope - Both required for Client Credentials
- Redirect URIs - Must be exact match (case-sensitive)
- Audit Everything - Log client creation, secret rotation, deletions
Interview Prep: OAuth Client Management
| Question | Answer |
|---|---|
| Where create OAuth client? | Admin → Integrations → OAuth → Add client |
| Who can create? | Users with oauth:client:add permission |
| Client secret visibility? | Only shown once at creation (March 2026 change) |
| If secret lost? | Generate new secret, update application |
| Secret storage? | Secure vault (HashiCorp, AWS, Azure) |
| Secret rotation? | Monthly minimum, before departures, after exposure |
| Redirect URIs? | Up to 125, must be HTTPS, exact match required |
| Scopes required? | Yes, principle of least privilege |
| Token duration? | Default 1 hour, configurable 300-172,800 seconds |
| Client deletion? | Immediate, tokens invalid, can't recover |
Document Version
Chapter: 6 of 8
Last Updated: March 2026
Status: Current with OAuth 2.0 standards
Scope: Client creation, management, security
Rate Limiting, Token Management & Performance
API Rate Limiting
Genesys Cloud Scale:
Volume:
├─ 8+ billion API requests per week
├─ Automatically scaling infrastructure
├─ Multiple microservices (hundreds)
├─ Global deployment (multiple regions)
└─ Protection against abuse
Rate Limiting Purpose:
Protect Platform Stability:
├─ Prevent denial-of-service attacks
├─ Ensure fair access for all
├─ Protect against runaway applications
├─ Maintain performance for everyone
└─ Distribute resources fairly
Standard Rate Limits:
Authorization Code: 60 requests/minute per user session
Client Credentials: 60 requests/minute per application
SCIM Integration: 120 requests/minute per application
Enterprise: Custom limits available
Per-Microservice Limits:
├─ Each service has own limits
├─ Different services, different limits
├─ Aggregate across all services
└─ Total impact depends on mix
Detecting Rate Limits
Response Headers:
X-Rate-Limit-Limit: 60
├─ Maximum requests allowed per minute
└─ Standard: 60, SCIM: 120
X-Rate-Limit-Remaining: 42
├─ Requests remaining in current window
├─ Monitor this value
├─ When low: Start proactive management
└─ At 0: Next request will be rate limited
X-Rate-Limit-Reset: 1234567890
├─ Unix timestamp when limits reset
├─ Countdown until fresh window
└─ Use for retry calculations
Rate Limited Response:
HTTP 429 Too Many Requests
{
"error": {
"message": "Rate limit exceeded",
"code": "RATE_LIMIT",
"status": 429
}
}
Retry-After: 60
├─ Seconds to wait before retry
├─ Recommended wait time
├─ Should respect this value
└─ Minimum wait suggested
Handling 429 Response:
1. Detect Status Code:
├─ Check for 429
└─ Act immediately
2. Check Retry-After Header:
├─ Wait specified seconds
└─ Example: 60 seconds
3. Implement Backoff:
├─ First retry: 3 seconds
├─ Second retry: 9 seconds
├─ Third retry: 27 seconds
└─ Increment: 5-minute intervals
4. Retry Request:
├─ After waiting
├─ Same request parameters
└─ Should succeed
5. If Still Failed:
├─ Contact Genesys
├─ Provide correlation ID
├─ May need custom limit
└─ Provide usage data
Token Management
Token Lifecycle:
Creation:
├─ User authenticates
├─ Access token issued
├─ Refresh token provided (Auth Code only)
├─ Timestamp noted
└─ Token valid from this point
Active Use:
├─ Included in every API request
├─ Format: "Authorization: Bearer {token}"
├─ Server validates on each request
├─ Token proves authenticated access
└─ Scopes enforced
Expiration Tracking:
Store Expiration Time:
expiresAt = now + (expires_in * 1000) // milliseconds
Proactive Check (Recommended):
if (now + 5min >= expiresAt) {
refresh_token() // Get new token
}
Reactive Check (Less Ideal):
if (401_response) {
refresh_token() // Try again
retry_request()
}
Refresh Token Lifecycle:
Obtained:
├─ With access token (Authorization Code Grant)
├─ Not with Client Credentials
├─ Long-lived (30 days default, 450 days max)
└─ Stored securely
Refresh:
├─ Use refresh_token to get new access_token
├─ Happens on demand
├─ New refresh_token provided (optional)
└─ Keep updating refresh_token
Expiration:
├─ After configured duration
├─ Automatic cleanup
├─ Cannot extend manually
└─ Must re-authenticate if needed
Revocation:
On Logout:
DELETE /oauth/sessions/me
Authorization: Bearer {access_token}
Effect:
├─ Access token immediately invalid
├─ Refresh token immediately invalid
├─ User logged out
└─ New login required
Manual Revocation:
├─ Admin can delete OAuth client
├─ All tokens from that client invalid
├─ Immediate effect
└─ Audit log records action
Token Storage Best Practices:
Browser Applications:
DO:
├─ Store in memory (volatile)
├─ SessionStorage (cleared on close)
├─ Secure HTTP-only cookies
└─ Temporary locations only
DON'T:
├─ LocalStorage (persistent, exposed)
├─ Plain text
├─ Unencrypted
└─ Accessible to JavaScript
Backend Applications:
DO:
├─ Encrypted storage (database)
├─ Cache with expiration
├─ Environment variables
├─ Secure vault
└─ Limited lifetime
DON'T:
├─ Plain text
├─ Version control
├─ Logs
├─ Comments
└─ Hardcoded
Token Refresh Implementation:
JavaScript Example:
```javascript
const tokenExpiry = Date.now() + (response.expiresIn * 1000);
// Proactive refresh (recommended)
setInterval(() => {
if (Date.now() >= tokenExpiry - 5*60*1000) {
// Token expiring in 5 minutes
refreshToken();
}
}, 60000); // Check every minute
async function refreshToken() {
const response = await fetch(tokenUrl, {
method: 'POST',
body: new URLSearchParams({
grant_type: 'refresh_token',
refresh_token: savedRefreshToken,
...credentials
})
});
const data = await response.json();
saveAccessToken(data.access_token);
tokenExpiry = Date.now() + (data.expiresIn * 1000);
}
Python Example:
from datetime import datetime, timedelta
token_expiry = datetime.now() + timedelta(seconds=response['expires_in'])
# Proactive refresh
if datetime.now() >= token_expiry - timedelta(minutes=5):
# Token expiring in 5 minutes
refresh_token()
def refresh_token():
response = requests.post(token_url, data={
'grant_type': 'refresh_token',
'refresh_token': saved_refresh_token,
**credentials
})
data = response.json()
global token_expiry
saved_access_token = data['access_token']
token_expiry = datetime.now() + timedelta(seconds=data['expires_in'])
---
## Performance Optimization
Optimization Strategy Hierarchy:
Priority 1: Use Bulk/Batch APIs ├─ Reduce 10,000 requests to 1-2 ├─ 99.99% reduction ├─ Most important optimization └─ Example: POST /conversations/batch
Priority 2: Use WebSocket Notifications ├─ Replace polling with events ├─ 99% reduction in requests ├─ Real-time data delivery └─ Subscribe to /v2/users/{id}/presence
Priority 3: Implement Caching ├─ Avoid repeat requests ├─ Cache with expiration ├─ 50-90% reduction └─ Example: Cache user list for 1 hour
Priority 4: Use Pagination ├─ Don't retrieve all records at once ├─ Request only needed fields ├─ Reduce payload size └─ Server-side filtering
Priority 5: Asynchronous Processing ├─ Don't block on API calls ├─ Queue requests ├─ Process in background └─ Better overall throughput
Specific Use Cases:
Use Case: Query 10,000 Conversations
Naive Approach: for i in 1..10000: GET /api/v2/conversations/{i} // 10,000 requests!
Problem: ├─ Rate limited at 60 requests/minute ├─ Takes 166+ minutes ├─ 99.99% inefficient └─ Cannot meet deadline
Optimized Approach: GET /api/v2/analytics/conversations/details?... // 1-2 requests!
Benefits: ├─ 1-2 requests vs 10,000 ├─ Completes in seconds ├─ No rate limiting └─ 99.99% better
Use Case: Monitor Agent Presence
Naive Approach: every 1 second: GET /api/v2/users/{id}/presence // 60 req/min per agent
Problem: ├─ 60 requests/minute per agent ├─ 100 agents = 6,000 req/min ├─ Hits rate limit immediately └─ Wasted bandwidth
Optimized Approach: WebSocket subscribe: /v2/users/{id}/presence
Benefits: ├─ Real-time event delivery ├─ 0 polling requests ├─ Lower latency ├─ No rate limiting impact └─ Event-driven architecture
Use Case: Create 10,000 Contacts
Naive Approach: for contact in contacts: POST /api/v2/externalcontacts/contacts // 10,000 requests
Problem: ├─ 10,000 individual requests ├─ Lock contention in database ├─ High API overhead ├─ Slow execution (hours) └─ Rate limiting likely
Optimized Approach: POST /api/v2/externalcontacts/contacts/bulk [array of 500 contacts] // 20 requests!
Benefits: ├─ 20 requests vs 10,000 ├─ Completes in minutes ├─ Reduced overhead ├─ No lock contention └─ Within rate limits
Field Selection Optimization:
Naive: GET /api/v2/users
Returns ALL fields (large payload)
Optimized: GET /api/v2/users?fields=id,email,name
Returns ONLY needed fields (smaller payload)
Benefits: ├─ Reduced bandwidth ├─ Faster response ├─ Lower processing └─ Better performance
Filter Server-Side:
Naive: GET /api/v2/users // Get all filter in code // Filter locally
Optimized: GET /api/v2/users?q=active:true // Server filters
Benefits: ├─ Smaller response ├─ Faster network ├─ Server-side indexes └─ Better performance
---
## Backoff Strategies
Exponential Backoff Standard:
Recommended Timing: ├─ First retry: 3 seconds ├─ Second retry: 9 seconds ├─ Third retry: 27 seconds ├─ Fourth retry: 5 minutes + retry ├─ Fifth retry: 10 minutes + retry └─ Continue as needed
Real-Time Applications: ├─ Tolerance: Few retries (3-5 max) ├─ Max wait: 10-30 seconds ├─ Then: Alert user or fail gracefully └─ Example: UI interactions
Batch Applications: ├─ Tolerance: Many retries (10-20+) ├─ Max wait: Hours if needed ├─ Continue retrying: Until success └─ Example: Nightly sync jobs
Implementation:
JavaScript:
async function apiCallWithBackoff(url, options, maxRetries = 5) {
for (let attempt = 0; attempt <= maxRetries; attempt++) {
try {
const response = await fetch(url, options);
if (response.status === 429) {
// Rate limited
const retryAfter = response.headers.get('Retry-After') || 60;
const waitTime = Math.pow(3, attempt) * 1000;
const finalWait = Math.max(waitTime, retryAfter * 1000);
console.log(`Rate limited, waiting ${finalWait}ms`);
await sleep(finalWait);
continue; // Retry
}
if (!response.ok) {
throw new Error(`HTTP ${response.status}`);
}
return response.json(); // Success
} catch (error) {
if (attempt === maxRetries) {
throw error; // Give up
}
const waitTime = Math.pow(3, attempt) * 1000;
console.log(`Attempt ${attempt + 1} failed, retrying in ${waitTime}ms`);
await sleep(waitTime);
}
}
}
function sleep(ms) {
return new Promise(resolve => setTimeout(resolve, ms));
}
Python:
import time
from requests.adapters import HTTPAdapter
from urllib3.util.retry import Retry
def requests_with_backoff(session, method, url, **kwargs):
# Configure retry strategy
retry = Retry(
total=5,
backoff_factor=3, # 3, 9, 27, ... seconds
status_forcelist=[429, 502, 503, 504]
)
adapter = HTTPAdapter(max_retries=retry)
session.mount('http://', adapter)
session.mount('https://', adapter)
# Make request with automatic backoff
return session.request(method, url, **kwargs)
# Usage
import requests
session = requests.Session()
response = requests_with_backoff(session, 'GET', api_url)
---
## Monitoring & Alerting
What to Monitor:
Rate Limit Health: ├─ X-Rate-Limit-Remaining per request ├─ Alert if below 10 ├─ Alert if 429 responses ├─ Track pattern over time └─ Identify bottlenecks
Token Expiration: ├─ Track token age ├─ Alert on tokens near expiry ├─ Monitor refresh failures ├─ Detect refresh token issues └─ Plan proactive refreshes
API Performance: ├─ Request latency (p50, p95, p99) ├─ Response times trending ├─ Error rates by type ├─ Endpoint-specific metrics └─ Regional differences
Application Health: ├─ Authentication success rate ├─ Failed requests trend ├─ Retry frequency ├─ Unusual access patterns └─ Error type distribution
Metrics to Track:
Requests/Minute: ├─ Actual vs limit ├─ Trend over time ├─ Peak times ├─ Per endpoint └─ Per user/application
Success Rate: ├─ 2XX responses ├─ 4XX errors (auth, scope) ├─ 5XX errors (server issues) ├─ 429 rate limit └─ 401 token expired
Average Response Time: ├─ Overall ├─ By endpoint ├─ By region ├─ Trend detection └─ Outlier identification
Token Metrics: ├─ Tokens created ├─ Tokens refreshed ├─ Refresh failures ├─ Token age └─ Expiration near events
Alerting Thresholds:
Critical (Immediate): ├─ 429 rate limited for 5+ min ├─ 401 auth failures spike ├─ 503 service unavailable ├─ High error rate (>10%) └─ P99 latency spike
Warning (Within 30 min): ├─ 429 rate limited ├─ Approaching rate limit ├─ Token refresh failures ├─ Error rate increasing └─ Latency degrading
Informational (Daily): ├─ API usage report ├─ Performance summary ├─ Token refresh count ├─ Endpoint breakdown └─ Trend analysis
Dashboard Example:
Current Status: ├─ Requests/min: 45 of 60 (75%) ├─ Success rate: 99.8% ├─ Avg latency: 245ms ├─ Active tokens: 3 └─ Last refresh: 2 hours ago
Recent Alerts: ├─ None currently active ├─ Last alert: 3 days ago (resolved) └─ Next review: Today 5:00 PM
Trending: ├─ Requests/min: ↑ +5% this week ├─ Latency: ↓ -10% this month ├─ Errors: ↓ -3% this week └─ Status: Healthy
---
## Error Handling
HTTP Status Codes:
Retryable (Use Backoff): ├─ 429 Too Many Requests (rate limit) ├─ 502 Bad Gateway (temp infrastructure) ├─ 503 Service Unavailable (maintenance) ├─ 504 Gateway Timeout (temp slowness) └─ Action: Wait and retry
Client Errors (Don't Retry): ├─ 400 Bad Request (fix format) ├─ 401 Unauthorized (refresh token) ├─ 403 Forbidden (add scope/permission) ├─ 404 Not Found (resource missing) ├─ 405 Method Not Allowed (wrong HTTP verb) └─ Action: Fix and retry (or fail)
Server Errors (Usually Retryable): ├─ 500 Internal Server Error (try again) ├─ 502 Bad Gateway (usually temp) ├─ 503 Service Unavailable (usually temp) ├─ 504 Gateway Timeout (usually temp) └─ Action: Backoff and retry
Decision Tree:
Is Response Successful (2XX)? ├─ Yes → Return data, success └─ No → Check status code
Is Status 401 (Unauthorized)? ├─ Yes → Refresh token, retry └─ No → Continue
Is Status 403 (Forbidden)? ├─ Yes → Check scope/permission, error └─ No → Continue
Is Status 4XX (Other Client)? ├─ Yes → Log error, fail (don't retry) └─ No → Continue
Is Status 429 (Rate Limited)? ├─ Yes → Backoff, retry └─ No → Continue
Is Status 5XX or Other? ├─ Yes → Backoff, retry └─ No → Log, fail
Implementation:
def handle_api_response(response):
if response.status_code in [200, 201, 204]:
return response.json() if response.text else None
elif response.status_code == 401:
# Unauthorized - refresh token
refresh_token()
raise RetryException("Token refreshed, retry")
elif response.status_code == 403:
# Forbidden - permission/scope issue
log_error(f"Access denied: {response.json()}")
raise PermissionException("Insufficient permissions")
elif response.status_code == 404:
# Not found
raise NotFoundException("Resource not found")
elif response.status_code == 429:
# Rate limited
retry_after = response.headers.get('Retry-After', 60)
raise RateLimitException(f"Retry after {retry_after}s")
elif response.status_code >= 500:
# Server error - retry
raise ServerException(f"HTTP {response.status_code}")
else:
# Other error
raise APIException(f"HTTP {response.status_code}")
---
## Key Takeaways: Chapter 7
- **Rate Limits Exist** - 60 req/min standard, per application
- **Monitor Headers** - X-Rate-Limit-Remaining tells story
- **Exponential Backoff** - 3, 9, 27 second strategy
- **Token Lifespan** - 1 hour (configurable), proactive refresh recommended
- **Bulk APIs Critical** - 99.99% reduction in requests
- **WebSocket Events** - 99% reduction in polling
- **Caching Helps** - 50-90% reduction in repeat queries
- **Error Handling** - 429/5XX retry, 4XX (except 401) fail
---
## Interview Prep
| Question | Answer |
|---|---|
| Rate limit? | 60 requests/minute per application (standard) |
| 429 handling? | Exponential backoff: 3s → 9s → 27s |
| Token lifetime? | 1 hour default (configurable 300-172,800 sec) |
| Token refresh? | When expiring, use refresh_token to get new |
| Bulk API benefit? | Reduce 10,000 requests to 1-2 (99.99% saving) |
| WebSocket benefit? | Replace polling, event-driven, 99% reduction |
| Caching benefit? | Avoid repeat queries, 50-90% reduction |
| 401 handling? | Refresh token, get new access_token |
| 403 handling? | Add missing scope or permission, fail |
| Backoff factor? | Exponential: 3^(attempt) seconds |
---
## Document Version
**Chapter**: 7 of 8
**Last Updated**: March 2026
**Status**: Current with OAuth 2.0 standards
**Scope**: Rate limiting, token management, performance, error handling
Real-World Integration Patterns & Deployment
Common Integration Patterns
Pattern 1: Salesforce ↔ Genesys Contact Sync
Scenario: Synchronize Salesforce contacts to Genesys external contacts
Architecture:
Genesys Cloud API
↑
│ PATCH /externalcontacts
│ (partial updates, Mar 2026)
│
Sync Service
(Node.js/Python)
↑
│ Query Salesforce API
│
Salesforce Org
Frequency: Every 30 minutes
Direction: Salesforce → Genesys (one-way)
Trigger: Scheduled job (cron)
Volume: ~1,000 contacts per sync
Authentication:
Salesforce:
├─ OAuth 2.0 (your existing setup)
├─ Service account or user credentials
└─ Connected app registered
Genesys:
├─ OAuth 2.0 Client Credentials
├─ Role: External Contact Manager
├─ Scopes: externalcontacts:manage
└─ Monthly secret rotation
Data Flow:
1. Query Salesforce:
GET /services/data/v60.0/query
SELECT Id, Email, Phone, Name, AccountId
FROM Contact
WHERE LastModifiedDate > :lastSync
2. Transform Data:
├─ Normalize phone (E.164)
├─ Validate email
├─ Map custom fields
├─ Add external ID (Salesforce ID)
└─ Group by action (create/update)
3. Sync to Genesys:
├─ New contacts: POST /externalcontacts/contacts
├─ Updates: PATCH /externalcontacts/contacts/{id}
├─ Batches: Group every 50-100
└─ Handle errors: Log and retry
4. Track Progress:
├─ Timestamp last successful sync
├─ Count created/updated/failed
├─ Send email notification
└─ Log all activities
Implementation Highlights:
Error Handling:
├─ 409 Conflict: Already exists (update instead)
├─ 400 Bad Request: Invalid data (log and skip)
├─ 429 Rate Limited: Backoff and retry
├─ 503 Unavailable: Retry with backoff
└─ All other: Fail and alert
Partial Updates (PATCH):
├─ Update only changed fields
├─ Prevents overwriting unmanaged data
├─ Reduces payload size
├─ Better for CRM sync
└─ Available March 2026+
Idempotency:
├─ Use externalId for matching
├─ Prevent duplicate creates
├─ Retry-safe operations
├─ Track processed records
└─ Handle partial failures
Performance:
├─ Batch 50 contacts per request
├─ 1,000 contacts: ~20 requests
├─ Completes in < 5 minutes
├─ Well under rate limits
└─ Minimal API footprint
Benefits:
├─ Single source of truth
├─ Real-time contact availability
├─ No duplicate entry
├─ Reduces manual effort
└─ Improved agent experience
Pattern 2: Nightly Analytics Report Generation
Scenario: Generate daily contact center reports
Architecture:
Genesys Cloud Analytics API
↑
│
Report Generator Service
(scheduled, 2:00 AM daily)
↓
│
Email Distribution List
Authentication:
Client Credentials:
├─ Scopes: analytics:conversationDetail
├─ Token Duration: 1 hour (sufficient)
├─ No user interaction needed
└─ Fully automated
Workflow:
1. Authenticate (2:00 AM)
POST /oauth/token
grant_type: client_credentials
Result: Access token
2. Query Analytics (2:01 AM)
├─ Yesterday's date range
├─ All queues/teams
├─ Conversations aggregate
├─ Service Level, AHT, ASA, Abandon Rate
└─ Multiple requests (by dimension)
3. Generate Report (2:05 AM)
├─ Process data
├─ Create charts/graphs
├─ Format professionally
├─ Create PDF
└─ Calculate YoY trends
4. Distribute (2:10 AM)
├─ Email PDF
├─ To stakeholders
├─ With summary
└─ Archive for history
Report Contents:
Executive Summary:
├─ Total conversations: 5,432
├─ Service Level: 87% (Target: 80%)
├─ Avg Handle Time: 8:32 (Target: < 10min)
├─ Abandon Rate: 3.2% (Target: < 5%)
└─ Net Change vs yesterday: +2.1%
By Queue:
├─ Queue name
├─ Conversations
├─ Service Level
├─ AHT
├─ ASA
└─ Agents
Trending:
├─ Last 7 days
├─ Last 30 days
├─ YoY comparison
├─ Alerts (SLA failures)
└─ Recommendations
Implementation Highlights:
Scheduling:
├─ Cron: "0 2 * * *" (2:00 AM daily)
├─ Timezone: Your organization's TZ
├─ Alerting: If job fails
└─ Retry: Automatic
API Calls:
├─ /analytics/conversations/aggregates (multi-call)
├─ Total: 5-10 requests
├─ Completes in < 5 minutes
└─ No rate limit issues
Report Generation:
├─ Tool: ReportLab (Python) or similar
├─ Format: PDF
├─ Design: Professional template
└─ Data: Charts and tables
Email Distribution:
├─ Tool: SendGrid or SMTP
├─ Recipients: DL
├─ Schedule: Exactly 2:15 AM
├─ Archive: Save copy for history
└─ Tracking: Note delivery status
Error Handling:
├─ Authentication fails: Alert operations
├─ API call fails: Retry with backoff
├─ Report gen fails: Fallback to text
├─ Email fails: Retry next hour
└─ All failures: Log and notify
Benefits:
├─ Automated daily reporting
├─ Saves analyst 30 minutes/day
├─ Consistent delivery
├─ Stakeholders stay informed
└─ Data-driven decisions
Pattern 3: Real-Time Agent Status to Dashboard
Scenario: Display real-time agent availability in web dashboard
Architecture:
Genesys Cloud (WebSocket)
↓ /v2/users/{id}/presence
│ (WebSocket events)
↓
Node.js Backend
(WebSocket server)
↓ Socket.IO
↓
Browser Clients
(Dashboard)
Authentication:
User Login:
├─ Authorization Code Grant
├─ User authenticates once
├─ Backend stores refresh_token
├─ Token includes necessary scopes
└─ presence:manage scope required
WebSocket Connection:
├─ Uses existing access_token
├─ Maintains connection
├─ Real-time events
└─ Automatic reconnection
Workflow:
1. User Logs In to Dashboard:
├─ Authorization Code flow
├─ User sees consent screen
├─ Backend gets access_token
├─ Backend stores refresh_token
└─ User authenticated
2. Backend Establishes WebSocket:
POST /api/v2/notifications/channels
└─ Opens long-lived connection
3. Subscribe to Presence Events:
PUT /api/v2/notifications/channels/{channelId}/subscriptions
Subscriptions:
├─ v2.users.{user1}.presence
├─ v2.users.{user2}.presence
├─ v2.users.{user3}.presence
└─ For all agents
4. Receive Real-Time Events:
{
"eventBody": {
"userId": "user-123",
"presenceDefinition": {
"systemPresence": "available",
"customPresences": [...]
}
}
}
5. Update Dashboard:
├─ Forward event to browsers (Socket.IO)
├─ Update agent status display
├─ Change color/icon
├─ Show "Available", "Break", "Busy", etc
└─ Real-time synchronization
Implementation Highlights:
Subscription Efficiency:
├─ Single WebSocket connection
├─ Multiple subscriptions
├─ vs: 100 polling requests/minute
├─ 99% reduction in API calls
└─ Real-time delivery
Connection Management:
├─ Maintain connection
├─ Automatic reconnection on failure
├─ Health checks
├─ Graceful degradation
└─ Error handling
Scalability:
├─ 1 backend: 100+ agent subscriptions
├─ vs: Polling → rate limited
├─ WebSocket: Event-driven
├─ Lower CPU usage
└─ Lower bandwidth
Error Recovery:
├─ Connection drops: Auto-reconnect
├─ Subscription fails: Retry
├─ Event deserialization: Log and skip
├─ Token expires: Refresh and reconnect
└─ Graceful fallback: Polling backup
Benefits:
├─ Real-time agent status
├─ Sub-second updates
├─ No polling overhead
├─ Better user experience
├─ Reduced infrastructure load
└─ Scalable solution
Deployment Strategies
Strategy 1: Development Environment
Setup:
OAuth Client:
├─ Grant Type: Authorization Code + PKCE
├─ Redirect URI: http://localhost:3000/callback
├─ Scopes: conversations:readonly
├─ Token Duration: 3600 (1 hour)
└─ Created by: Development team
Client Credentials (if needed):
├─ Grant Type: Client Credentials
├─ Scopes: externalcontacts:manage
├─ Token Duration: 3600
└─ Role: External Contact Manager (dev only)
Secrets Storage:
├─ .env file (local development)
├─ .gitignore entries:
│ ├─ .env
│ ├─ .env.local
│ └─ credentials/
├─ Example .env:
│ ├─ GENESYS_CLIENT_ID=dev-client-id
│ ├─ GENESYS_CLIENT_SECRET=dev-secret
│ └─ GENESYS_REGION=mypurecloud.com
└─ Never commit secrets!
Configuration:
├─ Use environment variables
├─ Different per developer
├─ Allow local overrides
├─ Development region specified
└─ Non-production data only
Testing:
├─ Unit tests: Mock API responses
├─ Integration tests: Dev Genesys org
├─ Manual testing: Full flow
├─ Error scenario testing
└─ Rate limit testing
CI/CD Pipeline:
├─ Run on: Developer machine
├─ Linting: Yes
├─ Unit tests: Yes
├─ Build: Yes
├─ Deploy: Local only
└─ Secrets: Via .env (not checked in)
Monitoring:
├─ Logging: Console output
├─ Debugging: Browser DevTools
├─ API calls: Inspect requests
├─ Errors: Stack traces
└─ Performance: Basic measurements
Strategy 2: Staging Environment
Setup:
OAuth Clients:
├─ Separate from production
├─ Authorization Code client
├─ Client Credentials client
├─ Different secrets
└─ Same Genesys region (or test region)
Secrets Storage:
├─ Environment variables (CI/CD platform)
├─ Encrypted vault
├─ GitHub Actions secrets / GitLab CI variables
├─ Rotate monthly
└─ Different from production
Configuration:
├─ Staging-specific settings
├─ Same region as production
├─ Test data only
├─ Verbose logging enabled
└─ Performance testing configured
Testing:
├─ Full integration tests
├─ End-to-end workflows
├─ Load testing (small scale)
├─ Error scenario testing
├─ Performance baselines
└─ Compatibility testing
CI/CD Pipeline:
├─ Trigger: On PR/Merge to staging branch
├─ Linting: Yes
├─ Unit tests: Yes
├─ Integration tests: Yes
├─ Build: Yes
├─ Deploy: Automated
├─ Smoke tests: Post-deploy
└─ Notify: On success/failure
Monitoring:
├─ Application logs: Aggregated
├─ Error tracking: Sentry/similar
├─ Performance monitoring: APM
├─ Uptime monitoring: Synthetic
└─ Alerts: To development team
Approval Process:
├─ Code review: Required
├─ Tests: Must pass
├─ Deployment: Semi-automated
├─ Rollback: Available
└─ Notify stakeholders
Data Management:
├─ Test data only
├─ Reset daily/weekly
├─ Production data: Never
├─ GDPR compliant
└─ Privacy respected
Strategy 3: Production Environment
Setup:
OAuth Clients:
├─ Separate production clients
├─ Multiple clients: Web app, services, etc.
├─ Different secrets per environment
├─ Rotate monthly minimum
├─ Monthly rotation documented
└─ Secure secret storage required
Secrets Storage:
Critical - Use Secure Vault:
├─ HashiCorp Vault (recommended)
├─ AWS Secrets Manager
├─ Azure Key Vault
├─ Google Cloud Secrets
└─ Store & access policies:
├─ Encrypt at rest
├─ Encrypt in transit
├─ Audit all accesses
├─ RBAC (role-based)
├─ Rotation tracking
└─ Alert on unauthorized access
Configuration:
Environment-Specific:
├─ Production region only
├─ Performance settings optimized
├─ Logging: Moderate (balance vs storage)
├─ Monitoring: Comprehensive
├─ Alerting: All channels
└─ Recovery procedures: Documented
CI/CD Pipeline:
Strict Requirements:
├─ All tests: Must pass
├─ Code review: Mandatory
├─ Approval: Required (2+ reviewers)
├─ Build: Automated & verified
├─ Deploy: Gated release
├─ Smoke tests: Post-deploy (critical)
├─ Rollback: Instant available
└─ Notify: Multiple teams
Deployment Procedure:
1. Code Merge (to main branch)
├─ Tests pass
├─ Reviews approved
└─ CI/CD starts
2. Build (automated)
├─ Code compiled
├─ Tests run
├─ Artifact created
└─ Ready for deploy
3. Stage (automated)
├─ Deploy to staging
├─ Smoke tests run
├─ If all pass: await approval
└─ If any fail: block deployment
4. Approve (manual gate)
├─ Engineering manager: approval
├─ On-call engineer: ready
├─ Time window: Business hours preferred
└─ Cancellation: Available anytime
5. Deploy (automated)
├─ Deploy to production
├─ Gradual rollout (optional)
├─ Monitor deployment
├─ Health checks pass
└─ Notify team
6. Monitor (continuous)
├─ Watch logs
├─ Watch metrics
├─ Watch errors
├─ Alert threshold: Low
└─ Quick response ready
7. Rollback (if needed)
├─ Detected: Issue identified
├─ Decision: Rollback authorized
├─ Execute: One command
├─ Verify: Health checks pass
└─ Notify: Team aware
Monitoring:
Comprehensive Observability:
├─ Application logging (ELK/Splunk)
├─ Error tracking (Sentry/Rollbar)
├─ APM (New Relic/DataDog)
├─ Uptime monitoring (Synthetic)
├─ Custom metrics
├─ Infrastructure monitoring
└─ Security monitoring
Alerting:
Critical (Immediate - Page):
├─ Application down (503/504)
├─ Authentication failures spike
├─ Database connection errors
├─ Memory/CPU critically high
├─ Deployment failed
└─ Security incident
High Priority (30 min - Slack):
├─ Error rate > 5%
├─ Response time spike
├─ Rate limit approached
├─ Token refresh failures
├─ API quota exceeded
└─ Unusual traffic pattern
Medium Priority (1 hour - Email):
├─ Minor errors
├─ Performance degradation
├─ Deprecated API usage
├─ Scheduled job delayed
└─ Configuration drift
Disaster Recovery:
Backup & Recovery:
├─ Database: Daily snapshots
├─ Configuration: Version controlled
├─ Secrets: Vault with audit logs
├─ RTO: < 1 hour
├─ RPO: < 15 minutes
└─ Tested monthly
Communication:
During Incident:
├─ Status page: Updated immediately
├─ Slack: Team notification
├─ Email: If long duration
├─ Customers: If customer-facing
└─ Escalation: Clear path
Post-Incident:
├─ Post-mortem: Scheduled
├─ Root cause: Identified
├─ Fix: Implemented
├─ Prevention: For future
└─ Lessons learned: Documented
Compliance:
Security Requirements:
├─ PCI-DSS: For payment data
├─ HIPAA: For health data
├─ SOC 2: For SaaS
├─ GDPR: For EU data
└─ Industry-specific: As applicable
Audit & Compliance:
├─ Audit logs: Retained 2+ years
├─ Access logs: Who did what when
├─ Change logs: All changes recorded
├─ Compliance checks: Quarterly
└─ External audits: Annual
Troubleshooting Deployments
Common Issues:
Problem: Authentication Fails in Production
Causes:
├─ Secret rotated, app not updated
├─ Secret expired (if revoked)
├─ Client deleted
├─ Secret wrong (typo)
└─ Wrong client for environment
Diagnosis:
├─ Check error: Invalid credentials
├─ Verify secret matches what stored
├─ Verify client still exists
├─ Check expiration date
└─ Try authentication manually
Fix:
├─ If secret wrong: Update immediately
├─ If client deleted: Recreate
├─ If expired: Generate new secret
├─ If revoked: Verify it's revoked
└─ Test after fix
Prevention:
├─ Document secret location
├─ Rotate on schedule
├─ Test auth before deploy
├─ Use vault for storage
└─ Alert before expiration
Problem: Rate Limiting in Production
Symptoms:
├─ 429 errors increasing
├─ Request latency increasing
├─ API calls slowing down
├─ Partial failures
└─ Customers reporting issues
Diagnosis:
├─ Check request volume
├─ Check request frequency
├─ Identify hot endpoints
├─ Check X-Rate-Limit-Remaining
└─ Calculate current rate
Fix (Short-term):
├─ Implement backoff
├─ Reduce request frequency
├─ Queue requests
├─ Reduce batch size
└─ Wait for window reset
Fix (Long-term):
├─ Use bulk endpoints
├─ Implement caching
├─ Use WebSocket events
├─ Optimize queries
└─ Consider enterprise limits
Prevention:
├─ Load test before production
├─ Monitor rate limit headers
├─ Alert when approaching limit
├─ Design for pagination
└─ Use bulk APIs from start
Problem: Token Refresh Failing
Symptoms:
├─ API calls return 401
├─ Refresh token errors
├─ Users getting logged out
├─ Authentication failing
└─ Errors in logs
Diagnosis:
├─ Check refresh token expired
├─ Check client exists
├─ Check secret correct
├─ Check token lifetime
└─ Try manual refresh
Fix:
├─ If expired: User must re-authenticate
├─ If client wrong: Update config
├─ If secret wrong: Update secret
├─ If lifetime: Adjust config
└─ Test refresh manually
Prevention:
├─ Refresh proactively (5 min before)
├─ Monitor refresh success rate
├─ Alert on refresh failures
├─ Document refresh logic
└─ Test token refresh
Problem: Data Loss / Sync Issues
Symptoms:
├─ Contacts not syncing
├─ Data inconsistencies
├─ Partial updates missing
├─ Database conflicts
└─ Customers reporting issues
Diagnosis:
├─ Check sync logs
├─ Verify API calls succeeded
├─ Check for conflict errors
├─ Verify data format
└─ Compare source vs target
Fix:
├─ Re-run sync
├─ Correct data format
├─ Handle conflicts
├─ Verify completeness
└─ Reconcile manually if needed
Prevention:
├─ Implement idempotency
├─ Use external IDs
├─ Log all changes
├─ Verify sync completion
├─ Regular reconciliation
├─ Alerts on failures
└─ Testing with real data
Problem: Performance Degradation
Symptoms:
├─ Slow API response times
├─ High latency (p99)
├─ User complaints
├─ Dashboard sluggish
└─ Timeout errors
Diagnosis:
├─ Check API latency
├─ Check application latency
├─ Check database latency
├─ Check network latency
└─ Identify bottleneck
Fix (Short-term):
├─ Scale up application
├─ Scale up database
├─ Clear cache
├─ Reduce requests
└─ Optimize queries
Fix (Long-term):
├─ Use caching layer
├─ Optimize database
├─ Use CDN
├─ Async processing
└─ Horizontal scaling
Prevention:
├─ Load test regularly
├─ Monitor latency
├─ Alert on degradation
├─ Capacity planning
└─ Performance budget
Key Takeaways: Chapter 8
- Pattern Diversity - Different patterns for different scenarios
- Authentication Clear - Always OAuth 2.0 (Client Credentials or Code)
- Scheduling Critical - Cron jobs for reliable automation
- Error Handling - Implement retry logic with backoff
- Data Quality - Validate and normalize before syncing
- Deployment Gates - Approval required for production
- Monitoring Essential - Know when things break
- Documentation Important - For debugging and maintenance
Interview Prep: Integration Patterns
| Question | Answer |
|---|---|
| Salesforce sync pattern? | Query Salesforce, transform, batch POST/PATCH to Genesys |
| Report generation? | Scheduled job (cron), query analytics, generate PDF, email |
| Real-time status? | WebSocket subscriptions, event-driven updates, low overhead |
| Authentication type? | Client Credentials for services, Auth Code for users |
| Backoff strategy? | 3, 9, 27 seconds, then 5-min increments |
| Error handling? | Retry on 429/5XX, fail on 4XX (except 401) |
| Data sync quality? | Validate, normalize, idempotent, external IDs |
| Deployment gate? | Approval required, smoke tests pass, monitoring ready |
| Secret storage? | Secure vault (Hashicorp, AWS, Azure) |
| Monitoring? | Logs, metrics, errors, alerts (critical/high/medium) |
Document Version
Chapter: 8 of 8
Last Updated: March 2026
Status: Current with OAuth 2.0 & API standards
Scope: Integration patterns, deployment strategies, troubleshooting
API Endpoints Reference
Overview
The Genesys Cloud API provides REST endpoints for managing contacts, conversations, users, and other platform resources. This reference covers the most commonly used endpoints for integration work.
Base URL: https://api.mypurecloud.com/api/v2
Authentication: OAuth 2.0 Bearer Token (see Chapter 11: OAuth Client Management)
Contacts API
Get All Contacts
Endpoint: GET /contacts
Description: Retrieve a paginated list of contacts.
Query Parameters:
pageSize(integer, optional): Contacts per page (default: 25, max: 100)pageNumber(integer, optional): Page number (default: 1)sortOrder(string, optional):ascordesc(default:asc)
Example Request:
curl -X GET "https://api.mypurecloud.com/api/v2/contacts?pageSize=50&pageNumber=1" \
-H "Authorization: Bearer {ACCESS_TOKEN}"
Example Response:
{
"entities": [
{
"id": "contact-123",
"firstName": "John",
"lastName": "Doe",
"email": "john.doe@example.com",
"phoneNumbers": [
{
"number": "+15551234567",
"type": "MOBILE"
}
],
"externalOrganization": {
"id": "org-456",
"name": "Acme Corp"
},
"externalId": "sf-contact-789",
"dateCreated": "2026-03-14T10:30:00Z",
"dateModified": "2026-03-14T10:30:00Z"
}
],
"pageNumber": 1,
"pageSize": 50,
"total": 2500
}
Create a Contact
Endpoint: POST /contacts
Description: Create a new contact.
Request Body:
{
"firstName": "Jane",
"lastName": "Smith",
"email": "jane.smith@example.com",
"phoneNumbers": [
{
"number": "+15559876543",
"type": "WORK"
}
],
"externalOrganization": {
"id": "org-789",
"name": "Tech Solutions Inc"
},
"externalId": "sf-contact-001"
}
Required Fields:
firstName(string): Contact's first namelastName(string): Contact's last name
Optional Fields:
email(string): Email addressphoneNumbers(array): Phone number objects withnumberandtypeexternalOrganization(object): Org reference withidandnameexternalId(string): External system ID (for deduplication)
Example Response:
{
"id": "contact-999",
"firstName": "Jane",
"lastName": "Smith",
"email": "jane.smith@example.com",
"phoneNumbers": [
{
"number": "+15559876543",
"type": "WORK"
}
],
"dateCreated": "2026-03-14T11:00:00Z"
}
Update a Contact (Full)
Endpoint: PUT /contacts/{contactId}
Description: Replace entire contact record.
Example Request:
curl -X PUT "https://api.mypurecloud.com/api/v2/contacts/contact-999" \
-H "Authorization: Bearer {ACCESS_TOKEN}" \
-H "Content-Type: application/json" \
-d '{
"firstName": "Jane",
"lastName": "Smith",
"email": "jane.smith.new@example.com"
}'
Update a Contact (Partial)
Endpoint: PATCH /contacts/{contactId}
Description: Partially update contact (new in March 2026). Reduces risk of data overwrites.
Example Request:
curl -X PATCH "https://api.mypurecloud.com/api/v2/contacts/contact-999" \
-H "Authorization: Bearer {ACCESS_TOKEN}" \
-H "Content-Type: application/json" \
-d '{
"email": "jane.smith.new@example.com",
"phoneNumbers": [
{
"number": "+15551111111",
"type": "MOBILE"
}
]
}'
Search for Contacts by Phone Number
Endpoint: GET /contacts/search
Query Parameters:
q(string): Search query (phone number, email, name)
Example Request:
curl -X GET "https://api.mypurecloud.com/api/v2/contacts/search?q=%2B15551234567" \
-H "Authorization: Bearer {ACCESS_TOKEN}"
Example Response:
{
"results": [
{
"id": "contact-123",
"firstName": "John",
"lastName": "Doe",
"phoneNumbers": [
{
"number": "+15551234567",
"type": "MOBILE"
}
]
}
],
"total": 1
}
Delete a Contact
Endpoint: DELETE /contacts/{contactId}
Description: Remove a contact.
Example Request:
curl -X DELETE "https://api.mypurecloud.com/api/v2/contacts/contact-999" \
-H "Authorization: Bearer {ACCESS_TOKEN}"
Response: 204 No Content (success)
Conversations API
Get Recent Conversations
Endpoint: GET /conversations
Query Parameters:
pageSize(integer, optional): Conversations per page (default: 25, max: 100)pageNumber(integer, optional): Page number (default: 1)
Example Request:
curl -X GET "https://api.mypurecloud.com/api/v2/conversations?pageSize=50" \
-H "Authorization: Bearer {ACCESS_TOKEN}"
Example Response:
{
"entities": [
{
"id": "conversation-111",
"conversationType": "phone",
"participants": [
{
"id": "user-agent-1",
"name": "Agent Smith",
"purpose": "agent",
"state": "connected"
},
{
"id": "customer-call",
"name": "John Doe",
"purpose": "customer",
"state": "disconnected"
}
],
"startTime": "2026-03-14T09:15:00Z",
"endTime": "2026-03-14T09:25:00Z"
}
],
"pageNumber": 1,
"pageSize": 50,
"total": 500
}
Get Conversation Detail
Endpoint: GET /conversations/{conversationId}
Description: Get full details including participants, recordings, transcripts.
Query Parameters:
expand(string, optional): Comma-separated fields to expand. Options:recordings,transcript,participants
Example Request:
curl -X GET "https://api.mypurecloud.com/api/v2/conversations/conversation-111?expand=recordings,transcript" \
-H "Authorization: Bearer {ACCESS_TOKEN}"
Example Response:
{
"id": "conversation-111",
"conversationType": "phone",
"participants": [
{
"id": "user-agent-1",
"name": "Agent Smith",
"purpose": "agent"
},
{
"id": "customer-call",
"name": "John Doe",
"purpose": "customer"
}
],
"recordings": [
{
"id": "recording-222",
"state": "AVAILABLE",
"durationMilliseconds": 600000,
"conversationId": "conversation-111",
"mediaUris": {
"download": "https://..."
}
}
],
"transcript": {
"id": "transcript-333",
"displayName": "conversation-111 Transcript",
"dateCreated": "2026-03-14T09:30:00Z",
"status": "AVAILABLE"
}
}
Get Recording Media URL
Endpoint: GET /recordings/{recordingId}/media
Description: Get download URL for a recording (expires in 1 hour).
Example Request:
curl -X GET "https://api.mypurecloud.com/api/v2/recordings/recording-222/media" \
-H "Authorization: Bearer {ACCESS_TOKEN}" \
-L
Response: 307 redirect to presigned S3 URL
Search Conversations
Endpoint: POST /conversations/search
Description: Advanced search using Genesys query syntax.
Request Body:
{
"types": ["phone"],
"query": "select * where conversations.participants.emails contains 'john.doe@example.com' and startTime >= '2026-03-01'",
"pageSize": 25,
"pageNumber": 1
}
Example Response:
{
"results": [
{
"conversation": {
"id": "conversation-111",
"conversationType": "phone",
"startTime": "2026-03-14T09:15:00Z",
"endTime": "2026-03-14T09:25:00Z"
}
}
],
"pageNumber": 1,
"pageSize": 25,
"total": 15
}
Users API
Get User Details with Presence
Endpoint: GET /users/{userId}
Query Parameters:
expand(string, optional): Fields to expand. Options:presence,locations,routingStatus,availability
Example Request:
curl -X GET "https://api.mypurecloud.com/api/v2/users/user-123?expand=presence,routingStatus" \
-H "Authorization: Bearer {ACCESS_TOKEN}"
Example Response:
{
"id": "user-123",
"name": "Agent Smith",
"email": "agent.smith@company.com",
"presence": {
"id": "presence-123",
"definition": {
"id": "ON_QUEUE",
"name": "On Queue"
},
"primary": true,
"source": "USER"
},
"routingStatus": {
"status": "ON_QUEUE",
"statusMessage": "Available"
}
}
Update User's Presence/Availability
Endpoint: PATCH /users/{userId}
Description: Update agent's presence/availability status.
Request Body:
{
"routingStatus": {
"status": "OFF_QUEUE",
"statusMessage": "In Training"
}
}
Example Request:
curl -X PATCH "https://api.mypurecloud.com/api/v2/users/user-123" \
-H "Authorization: Bearer {ACCESS_TOKEN}" \
-H "Content-Type: application/json" \
-d '{
"routingStatus": {
"status": "OFF_QUEUE",
"statusMessage": "Break"
}
}'
Valid Status Values:
ON_QUEUE- Ready to receive interactionsOFF_QUEUE- Not available for interactionsIDLE- No activityON_A_CALL- Currently on a callCUSTOM- Custom status (use statusMessage)
Get All Users in a Queue
Endpoint: GET /queues/{queueId}/members
Query Parameters:
pageSize(integer, optional): Members per page (default: 25, max: 100)pageNumber(integer, optional): Page number (default: 1)sortOrder(string, optional):ascordesc
Example Request:
curl -X GET "https://api.mypurecloud.com/api/v2/queues/queue-456/members?pageSize=50" \
-H "Authorization: Bearer {ACCESS_TOKEN}"
Example Response:
{
"entities": [
{
"id": "user-123",
"name": "Agent Smith",
"email": "agent.smith@company.com",
"state": "ACTIVE"
},
{
"id": "user-124",
"name": "Agent Jones",
"email": "agent.jones@company.com",
"state": "ACTIVE"
}
],
"pageNumber": 1,
"pageSize": 50,
"total": 2
}
Search Users
Endpoint: GET /users/search
Query Parameters:
q(string): Search query (name, email, phone)pageSize(integer, optional): Results per pagepageNumber(integer, optional): Page number
Example Request:
curl -X GET "https://api.mypurecloud.com/api/v2/users/search?q=smith&pageSize=25" \
-H "Authorization: Bearer {ACCESS_TOKEN}"
Common Query Parameters
Pagination
All list endpoints support:
pageSize(1-100): Items per pagepageNumber(starts at 1): Which page
Example: ?pageSize=50&pageNumber=2 gets items 51-100
Sorting
sortBy(string): Field to sort by (varies by endpoint)sortOrder(string):ascordesc
Example: ?sortBy=dateCreated&sortOrder=desc (newest first)
Expansion
Use expand to include related data without extra API calls:
GET /conversations/conversation-111?expand=recordings,transcript,participants
Rate Limits
All endpoints are subject to Genesys Cloud's rate limiting:
- Standard: 600 requests per minute per organization
- Some endpoints may have different limits
- Check response headers:
X-Rate-Limit-Limit,X-Rate-Limit-Remaining,X-Rate-Limit-Reset
Errors
All endpoints return standard HTTP status codes:
| Code | Meaning | Action |
|---|---|---|
| 200 | Success | Continue |
| 201 | Created | Item created successfully |
| 204 | No Content | Success (no response body) |
| 400 | Bad Request | Fix request parameters |
| 401 | Unauthorized | Token invalid or expired |
| 403 | Forbidden | Insufficient permissions |
| 404 | Not Found | Resource doesn't exist |
| 429 | Rate Limited | Wait before retrying |
| 500 | Server Error | Retry after delay |
Best Practices
- Use Pagination: Always use
pageSizeandpageNumberfor list endpoints - Expand Efficiently: Only expand data you need
- Handle Pagination: Don't assume all data fits in one page
- Check Status Codes: Always handle errors appropriately
- Use External IDs: Link records across systems with
externalId - Respect Rate Limits: Monitor
X-Rate-Limitheaders
Related Topics
- Chapter 11: Error Handling & Retry Strategy
- Chapter 11: Rate Limiting & Throttling
- Chapter 11: OAuth Client Management
- Chapter 5: Data Actions (using these APIs in flows)
Error Handling & Retry Strategy
Overview
API calls fail for various reasons: network timeouts, rate limits, server errors, authentication issues, and invalid inputs. This guide covers how to identify errors, decide whether to retry, and implement resilient integration patterns.
HTTP Status Codes
2xx - Success (No retry needed)
| Code | Meaning | Action |
|---|---|---|
| 200 | OK | Request succeeded, response body included |
| 201 | Created | Resource created successfully |
| 204 | No Content | Success, no response body (DELETE, PATCH) |
Action: Continue normally.
4xx - Client Errors (Don't retry)
| Code | Meaning | Cause | Action |
|---|---|---|---|
| 400 | Bad Request | Invalid parameters, malformed JSON | Fix request, don't retry |
| 401 | Unauthorized | Token expired, invalid credentials | Refresh token or re-authenticate |
| 403 | Forbidden | User lacks required permissions | Check roles/permissions |
| 404 | Not Found | Resource doesn't exist | Verify ID, don't retry |
| 409 | Conflict | Duplicate record (same email, phone) | Check for existing record |
Action: Fix the request and try again. Retrying won't help.
5xx - Server Errors (Retry)
| Code | Meaning | Typical Cause | Action |
|---|---|---|---|
| 500 | Internal Server Error | Server-side exception | Retry with backoff |
| 502 | Bad Gateway | Proxy/gateway error | Retry with backoff |
| 503 | Service Unavailable | Temporary outage, maintenance | Retry with backoff |
| 504 | Gateway Timeout | Timeout during processing | Retry with longer backoff |
Action: Retry with exponential backoff.
429 - Rate Limit Exceeded (Retry with timing)
Code: 429
Meaning: Too many requests in time window
Response Headers:
X-Rate-Limit-Limit: Max requests per windowX-Rate-Limit-Remaining: Requests leftX-Rate-Limit-Reset: Unix timestamp when window resetsRetry-After: Seconds to wait before retrying
Action: Wait and retry. Use Retry-After header if present, otherwise calculate from X-Rate-Limit-Reset.
Retry Decision Matrix
Is the error...
├─ 2xx (Success)?
│ └─ No: continue
│
├─ 4xx (Client error)?
│ ├─ 401 (Auth)?
│ │ └─ Yes: Refresh token, retry once
│ ├─ 409 (Conflict)?
│ │ └─ Yes: Check for existing record, skip or update
│ └─ Other 4xx?
│ └─ No: Fix request, don't retry
│
├─ 429 (Rate limit)?
│ └─ Yes: Wait (see Retry-After), retry
│
└─ 5xx (Server error)?
└─ Yes: Exponential backoff, retry 3-4 times
Exponential Backoff Pattern
Strategy
- First retry: 3 seconds
- Second retry: 9 seconds (3² )
- Third retry: 27 seconds (3³)
- Fourth retry: 300 seconds (5 minutes)
- Fifth+: Give up
Formula: delay = 3^(attempt_number) capped at 5 minutes
Why Exponential?
- Gives server time to recover
- Reduces load during outages
- Prevents thundering herd (everyone retrying at same time)
- Each retry waits progressively longer
Implementation: Exponential Backoff
JavaScript/Node.js
/**
* Retry logic with exponential backoff
*/
async function requestWithRetry(
method,
endpoint,
body = null,
maxAttempts = 4
) {
const delays = [3000, 9000, 27000, 300000]; // 3s, 9s, 27s, 5min
for (let attempt = 0; attempt < maxAttempts; attempt++) {
try {
const response = await makeRequest(method, endpoint, body);
// Check status code
if (response.ok) {
return response; // Success
}
const status = response.status;
// Determine if retryable
const isRetryable = [429, 500, 502, 503, 504].includes(status);
if (!isRetryable || attempt >= maxAttempts - 1) {
// Non-retryable error or last attempt
throw new Error(
`API Error ${status}: ${response.statusText}`
);
}
// Is 401? Try refreshing token
if (status === 401 && attempt === 0) {
console.log('Token expired, refreshing...');
await refreshToken();
// Retry immediately
continue;
}
// Calculate wait time
const delayMs = delays[attempt];
const delaySec = delayMs / 1000;
// Check Retry-After header
const retryAfter = response.headers.get('Retry-After');
if (retryAfter) {
const waitSec = parseInt(retryAfter);
console.warn(
`Rate limited. Waiting ${waitSec}s before retry (attempt ${attempt + 1}/${maxAttempts})`
);
await sleep(waitSec * 1000);
} else {
console.warn(
`Error ${status}. Retrying in ${delaySec}s (attempt ${attempt + 1}/${maxAttempts})`
);
await sleep(delayMs);
}
} catch (error) {
// Network error (no response)
const isRetryable = [
'ECONNREFUSED', // Connection refused
'ENOTFOUND', // DNS lookup failed
'ETIMEDOUT' // Request timeout
].some(e => error.code?.includes(e));
if (!isRetryable || attempt >= maxAttempts - 1) {
throw error;
}
const delayMs = delays[attempt];
const delaySec = delayMs / 1000;
console.warn(
`Network error: ${error.code}. Retrying in ${delaySec}s (attempt ${attempt + 1}/${maxAttempts})`
);
await sleep(delayMs);
}
}
}
function sleep(ms) {
return new Promise(resolve => setTimeout(resolve, ms));
}
Implementation: Rate Limit Detection
/**
* Monitor rate limit status
*/
async function monitorRateLimit(response) {
const limit = parseInt(response.headers.get('X-Rate-Limit-Limit'));
const remaining = parseInt(response.headers.get('X-Rate-Limit-Remaining'));
const reset = parseInt(response.headers.get('X-Rate-Limit-Reset'));
const percentRemaining = (remaining / limit) * 100;
console.log(`Rate Limit: ${remaining}/${limit} (${percentRemaining.toFixed(1)}%)`);
// Warning at 20% remaining
if (percentRemaining < 20) {
console.warn('⚠️ Approaching rate limit! Slow down requests.');
}
// Critical at 5% remaining
if (percentRemaining < 5) {
console.error('🛑 Critical: Rate limit nearly exceeded!');
const waitSeconds = reset - Math.floor(Date.now() / 1000);
console.error(`Must wait ${waitSeconds} seconds.`);
}
return {
remaining,
limit,
percentRemaining,
resetAt: new Date(reset * 1000)
};
}
Handling Specific Errors
401 - Token Expired
async function handleAuthError() {
console.log('Refreshing authentication token...');
try {
const newToken = await refreshAccessToken(
process.env.GENESYS_CLIENT_ID,
process.env.GENESYS_CLIENT_SECRET
);
this.accessToken = newToken;
console.log('✅ Token refreshed successfully');
// Retry the original request
return await makeRequest(...originalRequest);
} catch (error) {
console.error('❌ Token refresh failed:', error);
throw new Error('Authentication failed. Manual re-authentication required.');
}
}
409 - Duplicate Record
async function handleConflictError(contactData) {
console.log('Contact may already exist. Searching...');
try {
const existing = await searchContact(contactData.email);
if (existing) {
console.log(`Found existing contact: ${existing.id}`);
// Update instead of create
return await updateContact(existing.id, contactData);
} else {
console.log('No duplicate found. Retrying create...');
return await createContact(contactData);
}
} catch (error) {
console.error('Could not resolve conflict:', error);
throw error;
}
}
429 - Rate Limit
async function handleRateLimit(response) {
let waitSeconds = 60; // Default
// Check Retry-After header first
const retryAfter = response.headers.get('Retry-After');
if (retryAfter) {
waitSeconds = parseInt(retryAfter);
} else {
// Calculate from X-Rate-Limit-Reset
const reset = parseInt(response.headers.get('X-Rate-Limit-Reset'));
const now = Math.floor(Date.now() / 1000);
waitSeconds = Math.max(1, reset - now);
}
console.warn(`Rate limited. Waiting ${waitSeconds}s...`);
await sleep(waitSeconds * 1000);
console.log('Resuming requests...');
}
5xx - Server Error
async function handleServerError(status, response) {
if (status === 503) {
// Service Unavailable - check Retry-After
const retryAfter = response.headers.get('Retry-After');
if (retryAfter) {
const seconds = parseInt(retryAfter);
console.warn(`Service unavailable. Retry after ${seconds}s`);
return { retryAfter: seconds };
}
}
if (status === 504) {
// Gateway Timeout - likely temporary
console.warn('Gateway timeout. Retrying with longer backoff...');
return { shouldRetry: true, backoff: 'long' };
}
// Generic 5xx
console.error(`Server error ${status}. Retrying...`);
return { shouldRetry: true, backoff: 'exponential' };
}
Data Validation (Catch Errors Early)
Validate data BEFORE calling API to avoid 400 errors:
/**
* Validate contact before creating
*/
function validateContact(contact) {
const errors = [];
// Required fields
if (!contact.firstName || contact.firstName.trim() === '') {
errors.push('firstName is required');
}
if (!contact.lastName || contact.lastName.trim() === '') {
errors.push('lastName is required');
}
// Email format
if (contact.email) {
const emailRegex = /^[^\s@]+@[^\s@]+\.[^\s@]+$/;
if (!emailRegex.test(contact.email)) {
errors.push('email format is invalid');
}
}
// Phone format (if present)
if (contact.phoneNumbers && contact.phoneNumbers.length > 0) {
contact.phoneNumbers.forEach((phone, i) => {
if (!/^\+?[1-9]\d{1,14}$/.test(phone.number)) {
errors.push(`phoneNumbers[${i}].number is not E.164 format`);
}
if (!['WORK', 'MOBILE', 'HOME', 'OTHER'].includes(phone.type)) {
errors.push(`phoneNumbers[${i}].type must be WORK, MOBILE, HOME, or OTHER`);
}
});
}
return {
valid: errors.length === 0,
errors
};
}
// Usage
const validation = validateContact(contactData);
if (!validation.valid) {
console.error('Invalid contact:', validation.errors);
return; // Don't call API
}
// Safe to call API
await createContact(contactData);
Idempotency: Preventing Duplicates on Retry
Use externalId to link records and prevent duplicates:
/**
* Create contact with idempotency
*/
async function createContactIdempotent(sfContact) {
const contactData = {
firstName: sfContact.FirstName,
lastName: sfContact.LastName,
email: sfContact.Email,
externalId: sfContact.Id // ← Salesforce ID
};
try {
return await createContact(contactData);
} catch (error) {
if (error.status === 409) {
// Conflict - might already exist
// Search by externalId
const existing = await getContactByExternalId(sfContact.Id);
if (existing) {
console.log(`Contact already exists: ${existing.id}`);
return existing;
}
}
throw error;
}
}
Logging & Monitoring
Log ALL API calls for debugging:
/**
* Log API request and response
*/
async function loggedRequest(method, endpoint, body) {
const startTime = Date.now();
console.log(`[${new Date().toISOString()}] ${method} ${endpoint}`);
if (body && method !== 'GET') {
console.log(' Request:', JSON.stringify(body).substring(0, 200));
}
try {
const response = await makeRequest(method, endpoint, body);
const duration = Date.now() - startTime;
console.log(` ✅ ${response.status} (${duration}ms)`);
// Log rate limit status
const remaining = response.headers.get('X-Rate-Limit-Remaining');
if (remaining) {
console.log(` Rate limit: ${remaining} remaining`);
}
return response;
} catch (error) {
const duration = Date.now() - startTime;
console.error(` ❌ ${error.status || 'NETWORK'} (${duration}ms)`);
console.error(` Error: ${error.message}`);
throw error;
}
}
Complete Example: Safe Contact Sync
/**
* Complete contact sync with error handling
*/
async function safeSyncContact(sfContact) {
// 1. Validate
const validation = validateContact({
firstName: sfContact.FirstName,
lastName: sfContact.LastName,
email: sfContact.Email
});
if (!validation.valid) {
console.error(`Skip contact ${sfContact.Id}: ${validation.errors.join(', ')}`);
return { status: 'SKIPPED', reason: validation.errors[0] };
}
// 2. Prepare
const contactData = {
firstName: sfContact.FirstName,
lastName: sfContact.LastName,
email: sfContact.Email,
externalId: sfContact.Id // For idempotency
};
// 3. Try to create with retry logic
try {
const result = await requestWithRetry('POST', '/contacts', contactData);
console.log(`✅ Created: ${result.id}`);
return { status: 'CREATED', id: result.id };
} catch (error) {
if (error.status === 409) {
// Might already exist - check
const existing = await getContactByExternalId(sfContact.Id);
if (existing) {
console.log(`ℹ️ Already exists: ${existing.id}`);
return { status: 'EXISTS', id: existing.id };
}
}
console.error(`❌ Failed: ${error.message}`);
return { status: 'ERROR', reason: error.message };
}
}
Best Practices
- Always check status codes before retrying
- Use exponential backoff for 5xx errors
- Respect rate limits - check headers, slow down if needed
- Validate early - catch 400 errors before calling API
- Use external IDs - prevent duplicates on retry
- Log everything - need data for debugging
- Implement timeouts - don't wait forever
- Monitor rate limits - adjust request frequency proactively
Common Mistakes
❌ Retrying on 400 - Invalid input won't be fixed by retrying
✅ Only retry on 429, 5xx
❌ Immediate retry on error - Doesn't fix server problems
✅ Wait with exponential backoff
❌ Creating duplicate records - No idempotency
✅ Use external IDs for deduplication
❌ Silent failures - No visibility into errors
✅ Log all requests and responses
❌ Ignoring rate limits - Keep hammering API
✅ Monitor headers, slow down proactively
Related Topics
- Chapter 11: API Endpoints Reference
- Chapter 11: Rate Limiting & Throttling
- Chapter 11: OAuth Client Management
Rate Limiting & Throttling
Overview
Genesys Cloud API has rate limits to ensure fair usage and platform stability. Understanding and respecting these limits is critical for production integrations.
Standard Rate Limit: 600 requests per minute per organization
How Rate Limiting Works
Time Windows
Rate limits are enforced in 1-minute rolling windows:
Window 1: 00:00-00:59 → 600 requests allowed
Window 2: 00:01-01:00 → 600 requests allowed
(overlaps with Window 1)
Window 3: 00:02-01:01 → 600 requests allowed
Each minute, the window slides forward. Old requests drop off, new requests are added.
Rate Limit Headers
Every API response includes rate limit information:
X-Rate-Limit-Limit: 600 (max requests per window)
X-Rate-Limit-Remaining: 450 (requests left)
X-Rate-Limit-Reset: 1679491234 (Unix timestamp)
Example
You make request 150 at timestamp 1679491200
Header: X-Rate-Limit-Remaining: 450
This means: 150 requests made, 450 more allowed before limit.
Detecting Rate Limit Conditions
Proactive Detection (Before hitting limit)
Monitor remaining requests:
async function makeRequest(endpoint) {
const response = await fetch(endpoint);
const remaining = parseInt(
response.headers.get('X-Rate-Limit-Remaining')
);
const limit = parseInt(response.headers.get('X-Rate-Limit-Limit'));
const percentRemaining = (remaining / limit) * 100;
if (percentRemaining < 20) {
console.warn('⚠️ Only 20% of rate limit remaining. Slowing down...');
// Reduce request frequency
}
if (percentRemaining < 5) {
console.error('🛑 Critical: <5% remaining. STOP requests immediately.');
// Pause all requests
}
return response;
}
Reactive Detection (After hitting limit)
Watch for 429 responses:
async function makeRequest(endpoint) {
const response = await fetch(endpoint);
if (response.status === 429) {
console.error('❌ Rate limit exceeded!');
const retryAfter = response.headers.get('Retry-After');
const resetTime = response.headers.get('X-Rate-Limit-Reset');
if (retryAfter) {
// API tells you when to retry
const seconds = parseInt(retryAfter);
console.warn(`Wait ${seconds} seconds`);
} else if (resetTime) {
// Calculate wait time from reset timestamp
const now = Math.floor(Date.now() / 1000);
const waitSeconds = parseInt(resetTime) - now;
console.warn(`Wait until ${new Date(resetTime * 1000).toISOString()}`);
}
}
return response;
}
Strategy 1: Exponential Backoff (Reactive)
Only for when you hit the limit:
async function requestWithBackoff(endpoint, maxAttempts = 4) {
const delays = [3000, 9000, 27000, 300000]; // 3s, 9s, 27s, 5min
for (let attempt = 0; attempt < maxAttempts; attempt++) {
const response = await fetch(endpoint);
if (response.status !== 429) {
return response; // Success (or other error)
}
// Rate limited
if (attempt >= maxAttempts - 1) {
throw new Error('Rate limit exceeded after max retries');
}
const delayMs = delays[attempt];
console.warn(`Rate limited. Waiting ${delayMs / 1000}s...`);
await sleep(delayMs);
}
}
Strategy 2: Request Throttling (Proactive)
Limit request rate to stay well below limit:
class ThrottledClient {
constructor(requestsPerSecond = 8) {
// 8 requests/sec = 480/min (80% of 600 limit)
this.requestsPerSecond = requestsPerSecond;
this.minIntervalMs = 1000 / requestsPerSecond;
this.lastRequestTime = 0;
}
async makeRequest(endpoint) {
const now = Date.now();
const timeSinceLastRequest = now - this.lastRequestTime;
if (timeSinceLastRequest < this.minIntervalMs) {
const waitMs = this.minIntervalMs - timeSinceLastRequest;
await sleep(waitMs);
}
this.lastRequestTime = Date.now();
return fetch(endpoint);
}
}
// Usage
const client = new ThrottledClient(8); // 8 req/sec (safe limit)
await client.makeRequest('/contacts');
await client.makeRequest('/contacts');
// These will be spaced 125ms apart
Strategy 3: Request Queue with Batch Processing
Buffer requests and process in batches:
class RequestQueue {
constructor(batchSize = 50, batchIntervalMs = 5000) {
this.queue = [];
this.batchSize = batchSize;
this.batchIntervalMs = batchIntervalMs;
this.processing = false;
}
async add(endpoint, body) {
return new Promise((resolve, reject) => {
this.queue.push({ endpoint, body, resolve, reject });
if (!this.processing) {
this.processBatch();
}
});
}
async processBatch() {
this.processing = true;
while (this.queue.length > 0) {
const batch = this.queue.splice(0, this.batchSize);
// Process batch in parallel (but within rate limit)
const promises = batch.map(item =>
fetch(item.endpoint, { body: JSON.stringify(item.body) })
.then(res => item.resolve(res))
.catch(err => item.reject(err))
);
await Promise.all(promises);
// Wait between batches
if (this.queue.length > 0) {
console.log(`Processed ${batch.length} requests. Waiting ${this.batchIntervalMs}ms...`);
await sleep(this.batchIntervalMs);
}
}
this.processing = false;
}
}
// Usage
const queue = new RequestQueue(50, 5000); // 50 requests per 5 seconds
for (const contact of millionContacts) {
queue.add('/contacts', contact);
}
Strategy 4: Bulk Operations
Most efficient: use bulk endpoints instead of individual requests.
Without Bulk (SLOW - 100 requests)
// Creating 100 contacts individually
for (const contact of contacts) {
await fetch('/contacts', {
method: 'POST',
body: JSON.stringify(contact)
});
}
// Uses 100 API calls!
With Bulk (FAST - 1 request)
// Creating 100 contacts in one batch
await fetch('/contacts/bulk', {
method: 'POST',
body: JSON.stringify({
contacts: contacts // Array of 100
})
});
// Uses 1 API call!
Benefit: 100x reduction in API calls.
Strategy 5: Caching
Avoid repeated requests for same data:
class CachedClient {
constructor(cacheTtlSeconds = 3600) {
this.cache = new Map();
this.cacheTtlSeconds = cacheTtlSeconds;
}
async getContact(contactId) {
const cacheKey = `contact:${contactId}`;
// Check cache
const cached = this.cache.get(cacheKey);
if (cached && Date.now() - cached.timestamp < this.cacheTtlSeconds * 1000) {
console.log(`Cache hit: ${cacheKey}`);
return cached.data;
}
// Not cached, fetch from API
console.log(`Cache miss: ${cacheKey}`);
const response = await fetch(`/contacts/${contactId}`);
const data = await response.json();
// Store in cache
this.cache.set(cacheKey, { data, timestamp: Date.now() });
return data;
}
clearCache() {
this.cache.clear();
}
}
// Usage
const client = new CachedClient(3600); // Cache for 1 hour
const contact1 = await client.getContact('c1'); // API call
const contact1Again = await client.getContact('c1'); // Cache hit!
Strategy 6: WebSocket Subscriptions (Real-time, Low Overhead)
Instead of polling, use WebSocket for real-time updates:
Polling (Uses many requests)
// Poll every 10 seconds = 6 requests/min per user
setInterval(async () => {
const status = await fetch('/users/user-123?expand=presence');
// Expensive for many users!
}, 10000);
WebSocket (1 connection)
// Single WebSocket connection for real-time updates
const ws = new WebSocket('wss://...');
ws.onmessage = (event) => {
const { userId, presence } = JSON.parse(event.data);
console.log(`User ${userId} is now ${presence}`);
};
// Can handle thousands of users on one connection!
Benefit: Eliminates polling entirely.
Rate Limit Calculation
Scenario 1: Simple API calls
10,000 contacts to sync
1 API call per contact = 10,000 calls
Rate limit: 600/minute
Time needed: 10,000 / 600 = 16.67 minutes
Strategy: Use bulk endpoint (1 call) or batch in 600-request chunks
Scenario 2: Contact lookup every second
100 concurrent agents
Each looks up contact every second
= 100 requests/second = 6,000/minute
Rate limit: 600/minute
You'd exceed limit 10x over!
Strategy: Add 100ms delay between requests
= 10 requests/sec = 600/minute (perfect!)
Scenario 3: Mixed workload
- Sync contacts: 1000 requests (use bulk)
- Agent presence updates: 100 requests/minute (natural rate)
- Search queries: variable (depends on usage)
- Reporting: 50 requests/day (batch at night)
Total: 1000 + 100 + variable + ~2 = Safe if variable < 500/min
Monitoring & Alerting
Track rate limit over time
class RateLimitMonitor {
constructor() {
this.history = [];
}
record(remaining, limit) {
const now = new Date();
const percentUsed = ((limit - remaining) / limit) * 100;
this.history.push({ now, remaining, percentUsed });
// Alert if trend is concerning
if (this.history.length > 10) {
const recentAverage = this.history
.slice(-10)
.reduce((sum, h) => sum + h.percentUsed, 0) / 10;
if (recentAverage > 80) {
console.warn('⚠️ Average usage >80%. Trending toward limit!');
}
}
}
report() {
const avg = this.history.reduce((sum, h) => sum + h.percentUsed, 0) / this.history.length;
const max = Math.max(...this.history.map(h => h.percentUsed));
console.log(`
Rate Limit Usage Report:
Average: ${avg.toFixed(1)}%
Peak: ${max.toFixed(1)}%
Samples: ${this.history.length}
`);
}
}
Recommended Approach: Tiered Strategy
Tier 1 - Proactive (Always do this)
- Monitor
X-Rate-Limit-Remainingon every request - Implement throttling (8 req/sec = 480/min, safe)
- Batch operations when possible
Tier 2 - Reactive (If approaching limit)
- Reduce request frequency further
- Implement caching
- Queue requests instead of fire-and-forget
Tier 3 - Emergency (If hitting limit)
- Implement exponential backoff
- Stop new requests
- Alert operations team
Best Practices
- Monitor proactively - Don't wait for 429 errors
- Use bulk endpoints - Single call for multiple records
- Implement throttling - Spread requests evenly
- Cache aggressively - Don't re-fetch same data
- Use WebSockets - For real-time subscriptions
- Batch requests - Process in groups, not individually
- Set timeouts - Don't retry forever
- Alert operations - Know when limit is approached
Common Mistakes
❌ Fire-and-forget requests - No rate limit awareness
✅ Monitor headers, throttle proactively
❌ Polling instead of WebSocket - Wastes requests
✅ Use WebSocket for real-time data
❌ Individual API calls in loop - 1000 calls instead of 1
✅ Use bulk endpoints, batch in groups
❌ Ignore rate limit warnings - Hit limit unexpectedly
✅ Monitor, reduce frequency before limit
❌ Unlimited retry - Keep hammering API
✅ Exponential backoff, respect Retry-After
Related Topics
- Chapter 11: Error Handling & Retry Strategy
- Chapter 11: API Endpoints Reference
- Chapter 5: Data Actions (rate limiting in flows)
12. - CRM Integration & Salesforce
Screen Pop: Architecture & Implementation
Overview
Screen pop is the automatic display of a customer record when they call. Agent's desktop automatically looks up the caller by phone number and displays their Salesforce record.
Benefits:
- No manual lookup needed (saves 30+ seconds per call)
- Agent sees customer context immediately
- Fewer wrong accounts selected
- Better first-call resolution
How It Works (The Flow)
Customer calls (ANI: +15551234567)
↓
Architect Flow receives call
↓
Data Action: Look up contact by phone
in Salesforce API
↓
Salesforce returns: Contact ID + Account info
↓
Flow sets Interaction Attributes:
- contact_id = "003xx000003SG"
- account_id = "001xx000002Edc"
↓
Flow transfers to Support Queue
↓
Agent receives call
↓
Agent's desktop extension
reads Interaction Attributes
↓
Desktop makes API call to Salesforce:
GET /sobjects/Contact/003xx000003SG
↓
Browser pops Salesforce record in new window
↓
Agent sees: Name, account, cases, history
↓
Agent handles call with context
Architecture Components
1. Call Entry Point (Architect Flow)
The flow that receives inbound calls:
START
↓
Play: "Thank you for calling..."
↓
Data Action: lookup-contact-by-phone
Input: ${interaction.caller.phoneNumber}
Output: ${contact.id}, ${account.id}
↓
Decision: Contact found?
YES → Set attributes → Transfer
NO → Collect account number → Transfer
↓
Transfer to Queue
(attributes go with call)
↓
END
2. Data Action (API Call)
{
"name": "lookup-contact-by-phone",
"method": "POST",
"url": "https://your-instance.salesforce.com/services/apexrest/contact-lookup",
"inputContract": {
"phoneNumber": {
"type": "string",
"required": true
}
},
"outputContract": {
"success": { "type": "boolean" },
"contactId": { "type": "string" },
"firstName": { "type": "string" },
"lastName": { "type": "string" },
"accountId": { "type": "string" },
"accountName": { "type": "string" },
"tier": { "type": "string" }
}
}
3. Interaction Attributes
Data attached to the call that agent's desktop can access:
{
"contact_id": "003xx000003SG",
"contact_name": "John Doe",
"account_id": "001xx000002Edc",
"account_name": "Acme Corp",
"customer_tier": "Premium",
"last_contact": "2026-03-10T14:30:00Z"
}
4. Agent Desktop Extension
JavaScript in the Genesys Workspace (desktop app or web):
// Listen for incoming interaction
genesysClient.on('interaction.incoming', async (interaction) => {
// Get attributes set by flow
const contactId = interaction.attributes?.contact_id;
if (contactId) {
// Pop Salesforce record
const recordUrl = `https://your-instance.salesforce.com/${contactId}`;
window.open(recordUrl, 'salesforce');
}
});
Step-by-Step Implementation
Step 1: Create Salesforce Apex Endpoint
// ContactLookupController.cls
@RestResource(urlMapping='/contact-lookup')
global class ContactLookupController {
@HttpPost
global static LookupResponse lookup(String phoneNumber) {
LookupResponse response = new LookupResponse();
try {
// Search for contact by phone
List<Contact> contacts = [
SELECT Id, FirstName, LastName, Email,
AccountId, Account.Name,
Custom_Tier__c
FROM Contact
WHERE Phone = :phoneNumber
OR MobilePhone = :phoneNumber
LIMIT 1
];
if (contacts.isEmpty()) {
response.success = false;
return response;
}
Contact contact = contacts[0];
response.success = true;
response.contactId = contact.Id;
response.firstName = contact.FirstName;
response.lastName = contact.LastName;
response.accountId = contact.AccountId;
response.accountName = contact.Account?.Name;
response.tier = contact.Custom_Tier__c;
} catch (Exception e) {
response.success = false;
response.error = e.getMessage();
}
return response;
}
global class LookupResponse {
public Boolean success;
public String contactId;
public String firstName;
public String lastName;
public String accountId;
public String accountName;
public String tier;
public String error;
}
}
Step 2: Create Architect Flow
In Genesys Architect → Create Inbound Call Flow:
Flow Steps:
1. START
↓
2. Play Audio: "Thank you for calling..."
↓
3. Data Action: lookup-contact-by-phone
Input: ${interaction.caller.phoneNumber}
↓
4. Decision: ${dataAction.result.success}?
IF YES:
└─ Set Agent Variables:
- contact_id = ${dataAction.result.contactId}
- contact_name = ${dataAction.result.firstName} ${dataAction.result.lastName}
- account_id = ${dataAction.result.accountId}
- account_name = ${dataAction.result.accountName}
- customer_tier = ${dataAction.result.tier}
IF NO:
└─ Play Audio: "Please hold while we locate your account..."
↓
5. Transfer to Queue: Support Queue
↓
6. DISCONNECT
Step 3: Create Desktop Extension
In Genesys Cloud → Integrations → Custom Apps → Desktop App Extensions:
// manifest.json
{
"version": "1.0",
"name": "Salesforce Screen Pop",
"description": "Pops Salesforce contact on inbound call"
}
// index.html
<!DOCTYPE html>
<html>
<head>
<script src="https://sdk.mypurecloud.com/v131/platform.min.js"></script>
</head>
<body>
<script>
const client = require('purecloud-platform-client-v2');
// Initialize
const platformClient = client.ApiClient.instance;
platformClient.setEnvironment('mypurecloud.com');
// Listen for incoming interaction
const notificationService = platformClient.createNotificationService();
notificationService.subscribe(
'v2.conversations.{id}',
async (event) => {
const interaction = event.eventBody;
// Check if attributes set by flow
if (interaction.attributes?.contact_id) {
const contactId = interaction.attributes.contact_id;
const accountId = interaction.attributes.account_id;
const contactName = interaction.attributes.contact_name;
// Build Salesforce URL
const baseUrl = 'https://your-instance.salesforce.com';
const recordUrl = `${baseUrl}/${contactId}`;
// Pop window
window.open(recordUrl, 'salesforce_record',
'width=1200,height=800,resizable=yes');
console.log(`Screen pop: ${contactName} (${accountId})`);
}
}
);
</script>
</body>
</html>
Handling Edge Cases
Multiple Matches
Problem: Phone number found 3 contacts (different names, same company)
Solution: Let agent pick
Flow: Decision - ${dataAction.result.matches.length} > 1?
IF YES:
└─ Play: "Multiple accounts found. Press..."
└─ Collect Input:
"Press 1 for John Doe"
"Press 2 for Jane Doe"
"Press 3 for John Smith"
└─ Set contact_id = ${dataAction.result.matches[input]}.id
IF NO:
└─ Continue normally
Contact Not Found
Problem: Phone number not in Salesforce
Solution: Offer fallback
Flow: Decision - ${dataAction.result.success}?
IF NO:
└─ Play: "Account not found. Please enter your account number..."
└─ Collect Input: Account Number
└─ Data Action: lookup-by-account-number
└─ Set attributes if found
└─ Transfer without pop if not found
Slow Lookup (Timeout)
Problem: Salesforce API slow, lookup takes 5+ seconds
Solution: Don't block the call
Flow: Data Action: lookup-contact-by-phone
Timeout: 3 seconds
Decision: Action succeeded?
IF YES (within 3 sec):
└─ Set attributes → Transfer
IF NO (timed out):
└─ Play: "Connecting you now..."
└─ Transfer WITHOUT attributes
└─ (Agent can manual search)
Salesforce Field Mapping
What agent sees after screen pop:
| Data Point | Source | Salesforce Record |
|---|---|---|
| Contact Name | Flow attribute | Contact.Name |
| API response | Contact.Email | |
| Phone | API response | Contact.Phone |
| Account | Flow attribute | Account.Name |
| Tier/Priority | Flow attribute | Contact.Custom_Tier__c |
| Recent Cases | (automatic in SF) | Related Cases |
| Contact History | (automatic in SF) | Activity Timeline |
Performance Optimization
Problem: Lookup taking 2+ seconds
Causes:
- Salesforce API slow
- Network latency
- SOQL query inefficient
Solutions:
-
Add Index in Salesforce
-- Make phone lookups fast CREATE INDEX idx_contact_phone ON Contact(Phone, MobilePhone); -
Cache recent lookups
class ScreenPopCache { constructor(ttlSeconds = 3600) { this.cache = new Map(); this.ttl = ttlSeconds; } async lookup(phone) { const cached = this.cache.get(phone); if (cached && Date.now() - cached.timestamp < this.ttl * 1000) { return cached.data; } const result = await callSalesforceAPI(phone); this.cache.set(phone, { data: result, timestamp: Date.now() }); return result; } } -
Use webhook instead of polling
- Salesforce creates contact → webhook updates Genesys
- (More advanced, requires webhook setup)
Testing Screen Pop
Manual Test
- Configure test flow in Architect
- Set up desktop extension locally
- Make test call to your Genesys DID
- Verify:
- ✓ Architect flow receives call
- ✓ Data Action executes (check execution history)
- ✓ Salesforce API returns contact
- ✓ Flow sets interaction attributes
- ✓ Desktop receives attributes
- ✓ Window pops Salesforce record
Automated Test
// test-screen-pop.js
async function testScreenPop() {
// 1. Test Salesforce lookup
const contact = await lookupContactByPhone('+15551234567');
console.assert(contact.id, 'Contact not found');
// 2. Test Genesys Data Action
const result = await callDataAction('lookup-contact-by-phone', {
phoneNumber: '+15551234567'
});
console.assert(result.success, 'Data Action failed');
// 3. Test flow
const call = await makeTestCall('+15551234567');
const attributes = call.attributes;
console.assert(attributes.contact_id, 'No contact_id in attributes');
console.log('✓ Screen pop test passed');
}
Troubleshooting
Problem: Desktop doesn't pop window
Check:
- Extension enabled in Genesys Workspace?
- Flow sets interaction attributes?
- Desktop JavaScript can access attributes?
- Browser allows popups?
- Salesforce URL correct?
Debug:
// Add logging to desktop extension
genesysClient.on('interaction.incoming', (interaction) => {
console.log('Attributes:', interaction.attributes);
console.log('Contact ID:', interaction.attributes?.contact_id);
});
Problem: Lookup returns "Contact not found" for valid phone
Check:
- Phone in Salesforce exactly matches flow phone?
- Phone format consistent (E.164, local, international)?
- Apex query correct?
Debug:
// Test in Salesforce Developer Console
List<Contact> contacts = [
SELECT Id FROM Contact
WHERE Phone = '+15551234567'
];
System.debug(contacts.size() + ' contacts found');
Problem: Performance is slow
Check:
- Data Action timeout too long?
- Salesforce API slow?
- Network latency high?
Optimize:
- Set timeout to 3 seconds (not 10)
- Add Salesforce index on Phone field
- Implement caching
- Use webhook instead of API call
Production Deployment Checklist
- Salesforce Apex endpoint created & tested
- Data Action configured in Genesys
- Architect flow configured & tested
- Desktop extension installed & enabled
- Error handling for timeouts
- Fallback for not-found contacts
- Field mapping verified
- Performance acceptable (<3 sec)
- Monitoring & alerting set up
- Staff trained on screen pop behavior
Related Topics
- Chapter 11: API Endpoints Reference (Salesforce API)
- Chapter 11: Error Handling & Retry Strategy
- Chapter 5: Data Actions (in Architect flows)
- Chapter 12: Contact Sync from Salesforce
Contact Sync Patterns
Overview
Contact sync keeps Genesys and your CRM (Salesforce, Dynamics, etc.) in sync. This guide covers two approaches:
- One-way sync (CRM → Genesys, simpler, recommended first)
- Bi-directional sync (both ways, complex, conflict resolution needed)
Strategy 1: One-Way Sync (CRM → Genesys)
Concept
Salesforce is the master. Genesys is a read-only mirror.
Salesforce (Master)
↓ (one direction)
Genesys (Mirror)
If contact changes in SF → update Genesys
If contact changes in Genesys → ignore (no write-back)
Pros
- ✅ Simpler (no conflict resolution)
- ✅ Faster (no locking)
- ✅ No race conditions
- ✅ Genesys data always matches SF
Cons
- ❌ Any changes in Genesys are lost on next sync
- ❌ Agents can't update CRM from Genesys
Sync Flow
Every 30 minutes:
↓
1. Query SF for changes:
"SELECT * FROM Contact WHERE LastModifiedDate >= 30 min ago"
↓
2. For each contact:
a. Check if exists in Genesys (by email, phone, external ID)
b. If exists → PATCH (update only changed fields)
c. If not exists → POST (create new)
↓
3. Log results (created, updated, skipped, errors)
↓
4. Alert if failures
Implementation
// sync-one-way.js
async function syncSalesforceToGenesys() {
// 1. Fetch modified contacts from Salesforce
const sfContacts = await querySalesforce(`
SELECT Id, FirstName, LastName, Email, Phone
FROM Contact
WHERE LastModifiedDate >= LAST_N_MINUTES:30
`);
// 2. Get existing Genesys contacts
const genesysContacts = await fetchGenesysContacts();
const emailIndex = indexBy(genesysContacts, 'email');
// 3. Process each SF contact
let created = 0, updated = 0;
for (const sfContact of sfContacts) {
const genesysContact = emailIndex.get(sfContact.Email);
if (genesysContact) {
// Update existing
await patchContact(genesysContact.id, {
firstName: sfContact.FirstName,
lastName: sfContact.LastName,
phoneNumbers: [{ number: sfContact.Phone, type: 'WORK' }]
});
updated++;
} else {
// Create new
await postContact({
firstName: sfContact.FirstName,
lastName: sfContact.LastName,
email: sfContact.Email,
phoneNumbers: [{ number: sfContact.Phone, type: 'WORK' }],
externalId: sfContact.Id // Link back
});
created++;
}
}
console.log(`Created: ${created}, Updated: ${updated}`);
}
When to Use
- ✅ Initial implementation
- ✅ Salesforce is single source of truth
- ✅ Genesys only used for lookups/popups
- ✅ No need to update contacts from Genesys
Strategy 2: Bi-Directional Sync (Both Ways)
Concept
Both Salesforce AND Genesys can be updated. Sync runs both directions:
Salesforce ←→ Genesys
If SF updated → update Genesys
If Genesys updated → update Salesforce
If both updated at same time → conflict!
Pros
- ✅ Can update from both sides
- ✅ True two-way synchronization
Cons
- ❌ Much more complex
- ❌ Need conflict resolution
- ❌ Race conditions possible
- ❌ Slower (locking needed)
- ❌ Harder to debug
Conflict Resolution Strategies
Strategy A: Last-Write-Wins
Simple but risky:
Contact updated in both systems at same time:
SF: phone changed to 555-1111
Genesys: phone changed to 555-2222
Winner: Whoever was modified LAST
Loser: Other change is overwritten
Problem: Unpredictable. User's change might be lost.
Strategy B: Field-Level Priority
Different fields have different sources:
contact_name: SF always wins (SF is master for names)
phone_number: Last-write-wins (allow edits in both)
tags: Genesys always wins (agent tags)
Strategy C: Timestamp-Based with Locks
More robust:
1. Read contact with timestamp from both systems
2. Check: Who modified last?
SF time > Genesys time → SF wins
Genesys time > SF time → Genesys wins
3. Write winner's data to loser's system
4. Log conflict for human review
Implementation
// sync-bidirectional.js
async function syncBidirectional() {
// 1. Fetch from both systems
const sfContacts = await querySalesforce(`
SELECT Id, FirstName, LastName, Email, LastModifiedDate
FROM Contact
`);
const genesysContacts = await fetchGenesysContacts();
// 2. Index for matching
const emailIndex = new Map();
for (const contact of [...sfContacts, ...genesysContacts]) {
if (!emailIndex.has(contact.email)) {
emailIndex.set(contact.email, []);
}
emailIndex.get(contact.email).push(contact);
}
// 3. Detect conflicts and sync
let conflicts = [];
for (const [email, records] of emailIndex) {
if (records.length === 1) {
// Only in one system, create in other
await syncOneWay(records[0]);
} else if (records.length === 2) {
// In both systems, detect conflict
const sf = records.find(r => r.system === 'salesforce');
const gz = records.find(r => r.system === 'genesys');
const winner = resolveConflict(sf, gz);
if (winner === sf) {
// SF wins, update Genesys
await updateGenesys(gz.id, sf.data);
} else {
// Genesys wins, update SF
await updateSalesforce(sf.id, gz.data);
}
// Log for audit
if (sf.lastModifiedDate !== gz.dateModified) {
conflicts.push({ email, sf, gz, winner });
}
}
}
// 4. Alert on conflicts
if (conflicts.length > 0) {
await alertConflicts(conflicts);
}
}
function resolveConflict(sfContact, gzContact) {
// Last-write-wins
const sfTime = new Date(sfContact.LastModifiedDate);
const gzTime = new Date(gzContact.dateModified);
if (sfTime > gzTime) {
console.log(`Conflict: SF wins for ${sfContact.Email}`);
return sfContact;
} else {
console.log(`Conflict: Genesys wins for ${sfContact.Email}`);
return gzContact;
}
}
Conflict Resolution Workflow
Conflict Detected
↓
Log both versions (SF and Genesys)
↓
Apply resolution strategy
├─ Last-write-wins?
├─ Field-level priority?
└─ Manual approval?
↓
Update loser system
↓
Send alert to admin
↓
Update audit log
Data Deduplication
Problem: Same person, multiple records
Salesforce:
Record 1: john.doe@example.com
Record 2: JDoe@example.com (same person)
Genesys would create 2 records!
Solution: Match on Multiple Fields
function findMatchingContact(sfContact, genesysContacts) {
// Try email (best match)
let match = genesysContacts.find(
gc => gc.email?.toLowerCase() === sfContact.Email.toLowerCase()
);
if (match) return match;
// Try phone (second best)
match = genesysContacts.find(
gc => gc.phoneNumbers?.[0]?.number === sfContact.Phone
);
if (match) return match;
// Try first + last name (risky, could be duplicate)
match = genesysContacts.find(
gc => gc.firstName === sfContact.FirstName &&
gc.lastName === sfContact.LastName &&
gc.externalOrganization?.id === sfContact.AccountId
);
if (match) return match;
// Not found
return null;
}
Best Practice: External IDs
Link records across systems:
Salesforce Contact:
ID: 003xx000003SG
Email: john@example.com
Genesys Contact:
ID: contact-123
externalId: "003xx000003SG" ← Link back
email: john@example.com
On next sync, use externalId to find exact match.
Field Mapping Reference
| Salesforce | Genesys | Sync Direction | Conflicts |
|---|---|---|---|
Contact.Id |
externalId |
SF → GZ | SF (master) |
Contact.FirstName |
firstName |
Both | SF (master) |
Contact.LastName |
lastName |
Both | SF (master) |
Contact.Email |
email |
Both | Last-write |
Contact.Phone |
phoneNumbers[0] |
Both | Last-write |
Contact.AccountId |
org.externalId |
SF → GZ | SF |
Contact.LeadScore |
N/A | SF → GZ | N/A |
Contact.Tags (custom) |
attributes.tags |
Both | GZ wins |
Sync Frequency Trade-offs
| Frequency | Pros | Cons | Use Case |
|---|---|---|---|
| Every 5 min | Real-time | High API load, cost | Critical data |
| Every 15 min | Near real-time | Medium load | Normal ops |
| Every 30 min | Balanced | Slight delay | Standard |
| Hourly | Low cost | 1hr delay | Low priority |
| Daily | Very low cost | 24hr delay | Batch jobs |
Recommendation: Start with 30 minutes, adjust based on needs.
Monitoring Sync Health
class SyncMonitor {
constructor() {
this.history = [];
}
recordSync(result) {
this.history.push({
timestamp: new Date(),
created: result.created,
updated: result.updated,
errors: result.errors,
duration: result.duration,
conflicts: result.conflicts
});
// Alert if too many errors
if (result.errors.length > 10) {
this.alertHighErrorRate(result);
}
// Alert if sync slow
if (result.duration > 5 * 60 * 1000) { // 5 minutes
this.alertSlowSync(result);
}
}
getHealthScore() {
const recent = this.history.slice(-10); // Last 10 syncs
const avgErrors = recent.reduce((sum, h) => sum + h.errors.length, 0) / recent.length;
const avgDuration = recent.reduce((sum, h) => sum + h.duration, 0) / recent.length;
const score = 100 - (avgErrors * 5) - (avgDuration / 1000); // Deduct for errors and slow
return Math.max(0, score);
}
}
When to Use Which Strategy
One-Way Sync (Recommended First)
Use if:
- ✅ CRM is single source of truth
- ✅ Only need lookups in Genesys
- ✅ No updates from agent desktop
- ✅ Simple, maintainable
Bi-Directional Sync
Use if:
- ✅ Agents need to update contacts in Genesys
- ✅ Those updates must sync back to CRM
- ✅ Can handle complexity
- ✅ Have conflict resolution strategy
Migration Path
Phase 1: One-Way
- Sync SF → Genesys (read-only)
- Test with small set (100 contacts)
- Verify data accuracy
Phase 2: Expand
- Sync all contacts
- Run for 2 weeks, monitor
- Ensure no data loss
Phase 3: Bi-Directional
- Add reverse sync (Genesys → SF)
- Implement conflict resolution
- Test extensively
- Monitor for conflicts
Phase 4: Optimize
- Tune frequency
- Add caching
- Optimize performance
- Monitor cost
Related Topics
- Chapter 11: Real-World Contact Sync Example
- Chapter 11: API Endpoints Reference (Contacts API)
- Chapter 12: Activity Logging (logging interactions back)
Activity Logging & Webhooks
Overview
Activity logging means capturing what happened during a call and writing it back to your CRM. After the call ends, Genesys sends details to Salesforce so agents can track customer interactions.
Benefit: Single source of truth. All customer interactions visible in CRM.
The Flow
Call Happens
↓
Agent handles call (duration, queue, notes)
↓
Call ends
↓
Genesys webhook: conversation.ended
↓
Your backend receives webhook
↓
Fetch conversation details:
- Caller phone
- Duration
- Agent name
- Recording URL
- Start/end time
↓
Find matching Salesforce contact (by phone)
↓
Create Salesforce Task:
Subject: "Call with John Doe"
Description: "Duration: 10 min..."
Recording: [link]
WhoId: Contact ID
WhatId: Account ID
↓
Update Contact:
LastActivityDate = today
Last_Call_Date = today
↓
Success! Call logged in CRM
Setup: Genesys Webhook
In Genesys Admin
- Go to Integrations → Webhooks
- Click Add Webhook
- Configure:
- Event:
conversation.ended - URL:
https://your-server.com/webhook/call-ended - Payload: Send call details
- Retry: 3 times if fails
- Event:
Webhook Payload (What Genesys Sends)
{
"conversationId": "conversation-111",
"participantId": "user-agent-1",
"conversationType": "phone",
"callerId": "+15551234567",
"calleeId": "+18001234567",
"direction": "INBOUND",
"startTime": "2026-03-14T10:00:00Z",
"endTime": "2026-03-14T10:10:30Z",
"durationSeconds": 630,
"recordingId": "recording-222",
"agentId": "user-agent-1",
"agentName": "Agent Smith",
"queueId": "queue-456",
"queueName": "Support Queue",
"interactionId": "interaction-123",
"attributes": {
"contact_id": "003xx000003SG",
"account_id": "001xx000002Edc",
"customer_tier": "Premium"
}
}
Implementation: Webhook Handler
Node.js Server
const express = require('express');
const axios = require('axios');
require('dotenv').config();
const app = express();
app.use(express.json());
/**
* Webhook endpoint - Genesys calls this when call ends
*/
app.post('/webhook/call-ended', async (req, res) => {
const {
conversationId,
callerId,
durationSeconds,
recordingId,
agentName,
queueName,
startTime,
endTime,
attributes
} = req.body;
console.log(`📞 Call ended: ${conversationId}, Duration: ${durationSeconds}s`);
try {
// 1. Find matching Salesforce contact
const contact = await findSalesforceContactByPhone(callerId);
if (!contact) {
console.warn(`⚠️ Contact not found for ${callerId}`);
return res.status(200).json({ message: 'Contact not found' });
}
// 2. Get recording URL
let recordingUrl = null;
if (recordingId) {
recordingUrl = await getRecordingUrl(recordingId);
}
// 3. Create Task in Salesforce
const task = {
Subject: `Call with ${contact.Name}`,
Description: `
Inbound Call from ${callerId}
Duration: ${Math.floor(durationSeconds / 60)} minutes
Agent: ${agentName}
Queue: ${queueName}
Start: ${startTime}
End: ${endTime}
${recordingUrl ? `Recording: ${recordingUrl}` : ''}
`.trim(),
WhoId: contact.Id, // Contact ID
WhatId: contact.AccountId, // Account ID
ActivityDate: new Date().toISOString().split('T')[0],
CallDurationInSeconds: durationSeconds,
CallType: 'Inbound',
Status: 'Completed',
Type: 'Call'
};
const taskResult = await createSalesforceTask(task);
console.log(`✅ Task created: ${taskResult.id}`);
// 4. Update Contact's LastActivityDate
await updateSalesforceContact(contact.Id, {
LastActivityDate: new Date().toISOString().split('T')[0],
Last_Call_Date__c: new Date().toISOString(),
Last_Call_Duration__c: durationSeconds
});
res.status(200).json({ taskId: taskResult.id });
} catch (error) {
console.error('❌ Failed to log activity:', error.message);
res.status(500).json({ error: error.message });
}
});
/**
* Find Salesforce contact by phone number
*/
async function findSalesforceContactByPhone(phoneNumber) {
const query = `
SELECT Id, Name, AccountId, Email
FROM Contact
WHERE Phone = '${phoneNumber}'
OR MobilePhone = '${phoneNumber}'
LIMIT 1
`;
const response = await axios.get(
`${process.env.SALESFORCE_INSTANCE}/services/data/v57.0/query`,
{
params: { q: query },
headers: {
'Authorization': `Bearer ${process.env.SALESFORCE_TOKEN}`,
'Content-Type': 'application/json'
}
}
);
return response.data.records[0] || null;
}
/**
* Get Genesys recording URL
*/
async function getRecordingUrl(recordingId) {
const response = await axios.get(
`https://api.mypurecloud.com/api/v2/recordings/${recordingId}/media`,
{
headers: {
'Authorization': `Bearer ${process.env.GENESYS_TOKEN}`
},
maxRedirects: 0,
validateStatus: status => status === 307 // Expect redirect
}
);
// Returns presigned S3 URL in Location header
return response.headers.location || null;
}
/**
* Create Salesforce Task
*/
async function createSalesforceTask(taskData) {
const response = await axios.post(
`${process.env.SALESFORCE_INSTANCE}/services/data/v57.0/sobjects/Task`,
taskData,
{
headers: {
'Authorization': `Bearer ${process.env.SALESFORCE_TOKEN}`,
'Content-Type': 'application/json'
}
}
);
return response.data;
}
/**
* Update Salesforce Contact
*/
async function updateSalesforceContact(contactId, updateData) {
const response = await axios.patch(
`${process.env.SALESFORCE_INSTANCE}/services/data/v57.0/sobjects/Contact/${contactId}`,
updateData,
{
headers: {
'Authorization': `Bearer ${process.env.SALESFORCE_TOKEN}`,
'Content-Type': 'application/json'
}
}
);
return response.data;
}
const PORT = process.env.PORT || 3000;
app.listen(PORT, () => {
console.log(`Webhook server running on port ${PORT}`);
});
Data Mapping
Call → Salesforce Task
| Genesys Data | Salesforce Field | Mapping |
|---|---|---|
callerId (phone) |
Task subject | "Call with {contact.Name}" |
durationSeconds |
CallDurationInSeconds |
Direct |
startTime |
Task description | Include timestamp |
endTime |
Task description | Include timestamp |
recordingId |
Task description | Link to recording |
agentName |
Task description | "Agent: {name}" |
queueName |
Task description | "Queue: {name}" |
| Contact ID (from lookup) | WhoId |
Links to contact |
| Account ID (from lookup) | WhatId |
Links to account |
| Current date | ActivityDate |
Today's date |
Advanced: Logging with Custom Fields
Salesforce custom fields capture more data:
// Salesforce custom fields setup
const task = {
// Standard fields
Subject: `Call with ${contact.Name}`,
WhoId: contact.Id,
WhatId: contact.AccountId,
// Custom fields
Call_Type__c: 'Inbound',
Call_Queue__c: queueName,
Call_Agent__c: agentName,
Call_Duration_Seconds__c: durationSeconds,
Call_Recording_URL__c: recordingUrl,
Call_Channel__c: 'Phone',
Customer_Tier__c: attributes?.customer_tier,
Was_Transferred__c: false,
Call_Outcome__c: 'Completed',
Agent_Notes__c: attributes?.notes
};
// Custom field names end with __c (Salesforce convention)
Error Handling
Problem: Contact Not Found
// Option 1: Skip (don't log if no contact)
if (!contact) {
console.warn(`No contact for ${callerId}`);
return res.status(200).json({ message: 'Contact not found' });
}
// Option 2: Create contact
if (!contact) {
contact = await createSalesforceContact({
LastName: callerId, // Use phone as fallback
Phone: callerId
});
}
// Option 3: Log to generic "unknown caller" account
if (!contact) {
contact = { Id: UNKNOWN_CALLER_ACCOUNT };
}
Problem: Recording URL Timeout
async function getRecordingUrlSafe(recordingId, timeoutMs = 3000) {
try {
const response = await axios.get(
`https://api.mypurecloud.com/api/v2/recordings/${recordingId}/media`,
{
headers: { 'Authorization': `Bearer ${token}` },
timeout: timeoutMs
}
);
return response.headers.location || null;
} catch (error) {
if (error.code === 'ECONNABORTED') {
console.warn('Recording URL timeout');
return null; // Don't block task creation
}
throw error;
}
}
Problem: Task Creation Fails
async function createTaskWithRetry(task, maxAttempts = 3) {
for (let attempt = 1; attempt <= maxAttempts; attempt++) {
try {
const result = await createSalesforceTask(task);
console.log(`✅ Task created: ${result.id}`);
return result;
} catch (error) {
if (attempt === maxAttempts) {
console.error(`❌ Failed after ${maxAttempts} attempts`);
throw error;
}
const delayMs = 1000 * Math.pow(2, attempt - 1); // Exponential backoff
console.warn(`Retry in ${delayMs}ms...`);
await sleep(delayMs);
}
}
}
Webhook Security
Verify Genesys Signature
Genesys signs webhooks so you can verify they're legitimate:
const crypto = require('crypto');
/**
* Verify Genesys webhook signature
*/
function verifyWebhookSignature(request, secret) {
const signature = request.headers['x-genesys-webhook-signature'];
const timestamp = request.headers['x-genesys-webhook-timestamp'];
if (!signature || !timestamp) {
throw new Error('Missing signature or timestamp header');
}
// Reconstruct the signed string
const body = request.rawBody; // Must be raw, not parsed
const signedString = `${timestamp}.${body}`;
// Calculate HMAC
const hash = crypto
.createHmac('sha256', secret)
.update(signedString)
.digest('base64');
// Verify
if (hash !== signature) {
throw new Error('Webhook signature invalid');
}
return true;
}
// Middleware to verify all webhooks
app.use((req, res, next) => {
req.rawBody = req.body; // Keep raw body
next();
});
app.post('/webhook/call-ended', (req, res, next) => {
try {
verifyWebhookSignature(req, process.env.GENESYS_WEBHOOK_SECRET);
next();
} catch (error) {
console.error('❌ Webhook signature verification failed:', error.message);
return res.status(401).json({ error: 'Unauthorized' });
}
});
Monitoring & Alerts
class ActivityLoggingMonitor {
constructor() {
this.stats = {
totalCalls: 0,
logsCreated: 0,
logsFailed: 0,
contactsNotFound: 0,
avgProcessingTime: 0
};
}
recordSuccess(processingTimeMs) {
this.stats.totalCalls++;
this.stats.logsCreated++;
this.updateAvgTime(processingTimeMs);
}
recordFailure(reason) {
this.stats.totalCalls++;
this.stats.logsFailed++;
if (reason === 'contact_not_found') {
this.stats.contactsNotFound++;
}
// Alert if too many failures
const failureRate = this.stats.logsFailed / this.stats.totalCalls;
if (failureRate > 0.05) { // > 5%
this.alertHighFailureRate(failureRate);
}
}
updateAvgTime(newTime) {
const count = this.stats.logsCreated;
this.stats.avgProcessingTime =
(this.stats.avgProcessingTime * (count - 1) + newTime) / count;
}
reportHealth() {
return `
Activity Logging Health:
Total calls: ${this.stats.totalCalls}
Logged: ${this.stats.logsCreated}
Failed: ${this.stats.logsFailed}
Not found: ${this.stats.contactsNotFound}
Avg time: ${this.stats.avgProcessingTime.toFixed(0)}ms
Success rate: ${((this.stats.logsCreated / this.stats.totalCalls) * 100).toFixed(1)}%
`;
}
}
Production Checklist
- Genesys webhook configured for
conversation.ended - Webhook URL is publicly accessible & secured
- Signature verification implemented
- Error handling for missing contacts
- Recording URL generation working
- Salesforce Task fields mapped
- Contact lookup by phone working
- Task creation tested with real calls
- Monitoring & alerting set up
- Staff trained (calls logged to CRM)
- Documentation updated
Related Topics
- Chapter 12: Screen Pop (related feature)
- Chapter 12: Contact Sync Patterns (keeping contacts in sync)
- Chapter 11: API Endpoints Reference (Genesys APIs)
Bi-Directional Sync with Conflict Resolution
Overview
Bi-directional sync means changes flow both ways: Salesforce → Genesys AND Genesys → Salesforce. This is more complex than one-way sync because conflicts can occur when both systems are updated simultaneously.
Conflict Example:
Same contact updated at same time:
Salesforce: phone changed to +15551111111 at 10:00:05
Genesys: phone changed to +15552222222 at 10:00:06
Question: Which phone number wins?
Conflict Resolution Strategies
Strategy 1: Last-Write-Wins (Simplest)
The system modified MOST RECENTLY wins:
function resolveConflict(sfContact, gzContact) {
const sfTime = new Date(sfContact.LastModifiedDate).getTime();
const gzTime = new Date(gzContact.dateModified).getTime();
if (sfTime > gzTime) {
console.log(`Conflict: SF wins (${sfTime} > ${gzTime})`);
return { winner: 'salesforce', action: 'update_genesys' };
} else {
console.log(`Conflict: Genesys wins (${gzTime} >= ${sfTime})`);
return { winner: 'genesys', action: 'update_salesforce' };
}
}
Pros:
- Simple
- No manual intervention
- Works for most cases
Cons:
- Unpredictable (users don't know who wins)
- Possible data loss
- No audit trail
Strategy 2: Field-Level Priority
Different fields have different masters:
const fieldPriority = {
// Names are always SF (master data)
'firstName': 'salesforce',
'lastName': 'salesforce',
// Phone can be updated in either (last-write-wins)
'phoneNumbers': 'last_write',
'email': 'last_write',
// Tags are Genesys (agent annotations)
'tags': 'genesys',
'notes': 'genesys',
// Organization always SF
'organization': 'salesforce'
};
function applyFieldLevelResolution(sfContact, gzContact) {
const merged = {};
for (const field in fieldPriority) {
const priority = fieldPriority[field];
if (priority === 'salesforce') {
// Always use SF value
merged[field] = sfContact[field];
} else if (priority === 'genesys') {
// Always use Genesys value
merged[field] = gzContact[field];
} else if (priority === 'last_write') {
// Use whoever was modified last
const sfTime = sfContact.LastModifiedDate || 0;
const gzTime = gzContact.dateModified || 0;
merged[field] = new Date(sfTime) > new Date(gzTime)
? sfContact[field]
: gzContact[field];
}
}
return merged;
}
Pros:
- Logical (names stay in SF, notes stay in GZ)
- Flexible
- Reduces conflicts
Cons:
- More complex
- Requires configuration
- Still possible data loss
Strategy 3: Timestamp-Based with Locking
Most robust: lock during sync, use timestamps, log everything:
async function syncWithLocking(sfContact, gzContact) {
// 1. Lock both records (prevent other changes during sync)
await lockSalesforceRecord(sfContact.Id);
await lockGenesysRecord(gzContact.id);
try {
// 2. Detect if either was modified since we last synced
const lastSyncTime = new Date(sfContact.Last_Sync__c);
const sfModified = new Date(sfContact.LastModifiedDate) > lastSyncTime;
const gzModified = new Date(gzContact.dateModified) > lastSyncTime;
if (!sfModified && !gzModified) {
// No changes, nothing to do
return { status: 'no_change' };
}
if (sfModified && !gzModified) {
// Only SF changed, update Genesys
await updateGenesysContact(gzContact.id, sfContact);
return { status: 'sf_updated_gz' };
}
if (!sfModified && gzModified) {
// Only Genesys changed, update SF
await updateSalesforceContact(sfContact.Id, gzContact);
return { status: 'gz_updated_sf' };
}
// CONFLICT: Both changed
const resolution = await resolveConflictWithLogging(sfContact, gzContact);
if (resolution.winner === 'salesforce') {
await updateGenesysContact(gzContact.id, sfContact);
} else {
await updateSalesforceContact(sfContact.Id, gzContact);
}
// 3. Log conflict for audit
await logConflict({
timestamp: new Date(),
contactId: sfContact.Id,
sfLastModified: sfContact.LastModifiedDate,
gzLastModified: gzContact.dateModified,
winner: resolution.winner,
differences: resolution.differences,
action: resolution.action
});
return { status: 'conflict_resolved', winner: resolution.winner };
} finally {
// 4. Unlock records
await unlockSalesforceRecord(sfContact.Id);
await unlockGenesysRecord(gzContact.id);
}
}
Pros:
- Most reliable
- Prevents race conditions
- Complete audit trail
- Can alert on conflicts
Cons:
- Complex
- Slower (locking overhead)
- Requires timestamp tracking
Implementation: Full Bi-Directional Sync
class BidirectionalSync {
constructor(config) {
this.config = config;
this.stats = {
synced: 0,
conflicts: 0,
errors: 0
};
this.conflicts = [];
}
/**
* Main sync method
*/
async runSync() {
console.log('\n=== BIDIRECTIONAL SYNC START ===');
try {
// 1. Fetch from both systems
const sfContacts = await this.fetchAllSalesforceContacts();
const gzContacts = await this.fetchAllGenesysContacts();
console.log(`Salesforce: ${sfContacts.length} contacts`);
console.log(`Genesys: ${gzContacts.length} contacts`);
// 2. Index for matching
const sfById = new Map(sfContacts.map(c => [c.Id, c]));
const sfByEmail = new Map(sfContacts.map(c => [c.Email?.toLowerCase(), c]));
const gzByExtId = new Map(gzContacts.map(c => [c.externalId, c]));
// 3. Find and sync all contact pairs
const synced = new Set();
// Process Salesforce contacts
for (const sf of sfContacts) {
let gz = gzByExtId.get(sf.Id) // Match by externalId first
|| sfByEmail.get(sf.Email?.toLowerCase()); // Then by email
if (gz) {
// Both systems have it
await this.syncPair(sf, gz);
synced.add(sf.Id);
} else {
// Only in Salesforce, create in Genesys
await this.createInGenesys(sf);
synced.add(sf.Id);
}
}
// Process Genesys-only contacts
for (const gz of gzContacts) {
if (!synced.has(gz.externalId)) {
// Only in Genesys, create in Salesforce
await this.createInSalesforce(gz);
}
}
this.printResults();
} catch (error) {
console.error('❌ SYNC FAILED:', error);
throw error;
}
}
/**
* Sync a contact that exists in both systems
*/
async syncPair(sfContact, gzContact) {
try {
// Detect changes
const sfModified = this.isModifiedSinceLast(sfContact);
const gzModified = this.isModifiedSinceLast(gzContact);
if (!sfModified && !gzModified) {
// No changes
return;
}
if (sfModified && !gzModified) {
// SF changed, update Genesys
await this.updateGenesys(gzContact.id, sfContact);
this.stats.synced++;
return;
}
if (!sfModified && gzModified) {
// Genesys changed, update SF
await this.updateSalesforce(sfContact.Id, gzContact);
this.stats.synced++;
return;
}
// CONFLICT: Both changed
await this.handleConflict(sfContact, gzContact);
} catch (error) {
console.error(`Error syncing ${sfContact.Id}:`, error);
this.stats.errors++;
}
}
/**
* Handle conflict between SF and Genesys
*/
async handleConflict(sfContact, gzContact) {
const resolution = this.resolveConflict(sfContact, gzContact);
console.warn(`⚠️ CONFLICT for ${sfContact.Email}:`);
console.warn(` SF: ${sfContact.LastModifiedDate}`);
console.warn(` GZ: ${gzContact.dateModified}`);
console.warn(` Winner: ${resolution.winner}`);
// Apply resolution
if (resolution.winner === 'salesforce') {
await this.updateGenesys(gzContact.id, sfContact);
} else {
await this.updateSalesforce(sfContact.Id, gzContact);
}
// Log for review
this.conflicts.push({
email: sfContact.Email,
sfTime: sfContact.LastModifiedDate,
gzTime: gzContact.dateModified,
winner: resolution.winner,
changes: resolution.changes
});
this.stats.conflicts++;
this.stats.synced++;
}
/**
* Resolve conflict (strategy: last-write-wins with field priority)
*/
resolveConflict(sfContact, gzContact) {
const fieldPriority = {
firstName: 'sf',
lastName: 'sf',
email: 'last_write',
phoneNumbers: 'last_write',
externalOrganization: 'sf',
tags: 'gz',
attributes: 'last_write'
};
const sfTime = new Date(sfContact.LastModifiedDate).getTime();
const gzTime = new Date(gzContact.dateModified).getTime();
const overallWinner = sfTime > gzTime ? 'salesforce' : 'genesys';
const merged = {};
const changes = {};
for (const field in fieldPriority) {
const priority = fieldPriority[field];
let value;
if (priority === 'sf') {
value = sfContact[field];
} else if (priority === 'gz') {
value = gzContact[field];
} else {
// last_write
value = sfTime > gzTime ? sfContact[field] : gzContact[field];
}
if (sfContact[field] !== gzContact[field]) {
changes[field] = {
sf: sfContact[field],
gz: gzContact[field],
winner: priority === 'sf' ? 'sf' : priority === 'gz' ? 'gz' : overallWinner
};
}
merged[field] = value;
}
return {
winner: overallWinner,
merged,
changes
};
}
/**
* Check if contact was modified since last sync
*/
isModifiedSinceLast(contact) {
if (contact.Last_Sync__c) {
const lastSync = new Date(contact.Last_Sync__c).getTime();
const lastMod = new Date(contact.LastModifiedDate || contact.dateModified).getTime();
return lastMod > lastSync;
}
return true; // Assume modified if no last sync
}
/**
* Update Genesys with SF data
*/
async updateGenesys(gzId, sfContact) {
const updateData = {
firstName: sfContact.FirstName,
lastName: sfContact.LastName,
email: sfContact.Email,
phoneNumbers: sfContact.Phone ?
[{ number: sfContact.Phone, type: 'WORK' }] : [],
externalId: sfContact.Id // Keep the link
};
await axios.patch(
`https://api.mypurecloud.com/api/v2/contacts/${gzId}`,
updateData,
{ headers: { 'Authorization': `Bearer ${this.gzToken}` } }
);
console.log(` Updated Genesys: ${gzId}`);
}
/**
* Update Salesforce with Genesys data
*/
async updateSalesforce(sfId, gzContact) {
const updateData = {
FirstName: gzContact.firstName,
LastName: gzContact.lastName,
Email: gzContact.email,
Phone: gzContact.phoneNumbers?.[0]?.number,
Last_Sync__c: new Date().toISOString()
};
await axios.patch(
`${process.env.SALESFORCE_INSTANCE}/services/data/v57.0/sobjects/Contact/${sfId}`,
updateData,
{ headers: { 'Authorization': `Bearer ${this.sfToken}` } }
);
console.log(` Updated Salesforce: ${sfId}`);
}
/**
* Create in Genesys (from Salesforce)
*/
async createInGenesys(sfContact) {
const newContact = {
firstName: sfContact.FirstName,
lastName: sfContact.LastName,
email: sfContact.Email,
phoneNumbers: sfContact.Phone ?
[{ number: sfContact.Phone, type: 'WORK' }] : [],
externalId: sfContact.Id
};
const response = await axios.post(
`https://api.mypurecloud.com/api/v2/contacts`,
newContact,
{ headers: { 'Authorization': `Bearer ${this.gzToken}` } }
);
console.log(` Created in Genesys: ${response.data.id}`);
this.stats.synced++;
}
/**
* Create in Salesforce (from Genesys)
*/
async createInSalesforce(gzContact) {
const newContact = {
FirstName: gzContact.firstName,
LastName: gzContact.lastName,
Email: gzContact.email,
Phone: gzContact.phoneNumbers?.[0]?.number,
Last_Sync__c: new Date().toISOString()
};
const response = await axios.post(
`${process.env.SALESFORCE_INSTANCE}/services/data/v57.0/sobjects/Contact`,
newContact,
{ headers: { 'Authorization': `Bearer ${this.sfToken}` } }
);
// Update Genesys with SF ID (externalId)
await this.updateGenesys(gzContact.id, { ...gzContact, Id: response.data.id });
console.log(` Created in Salesforce: ${response.data.id}`);
this.stats.synced++;
}
/**
* Print results
*/
printResults() {
console.log('\n=== SYNC RESULTS ===');
console.log(`✓ Synced: ${this.stats.synced}`);
console.log(`⚠️ Conflicts: ${this.stats.conflicts}`);
console.log(`✗ Errors: ${this.stats.errors}`);
if (this.conflicts.length > 0) {
console.log('\nConflicts (for review):');
this.conflicts.forEach(c => {
console.log(` ${c.email}: ${c.winner} won`);
});
}
}
}
// Usage
const sync = new BidirectionalSync(config);
await sync.runSync();
Deduplication Across Systems
By External ID (Best)
// Each contact has ID from the other system
Salesforce Contact:
Id: 003xx000003SG
External_Genesys_ID__c: "contact-123"
Genesys Contact:
Id: contact-123
externalId: "003xx000003SG"
// Match on these, never duplicate
By Email (Good)
const sfContact = sfContacts.find(c => c.Email === gzContact.email);
// Assumes email is unique per contact
// Risk: Same person with multiple emails
By Phone (Risky)
const sfContact = sfContacts.find(c => c.Phone === gzContact.phoneNumbers[0]?.number);
// Risk: Multiple people sharing phone (family, shared line)
Monitoring & Alerts
class SyncMonitor {
constructor() {
this.history = [];
}
recordSync(result) {
this.history.push({
timestamp: new Date(),
synced: result.synced,
conflicts: result.conflicts,
errors: result.errors
});
// Alert if many conflicts
if (result.conflicts > 10) {
console.warn(`⚠️ HIGH CONFLICT RATE: ${result.conflicts} conflicts`);
this.alertOps(result);
}
// Alert if errors
if (result.errors > 5) {
console.error(`❌ HIGH ERROR RATE: ${result.errors} errors`);
this.alertOps(result);
}
}
getConflictRate() {
const recent = this.history.slice(-10);
const totalConflicts = recent.reduce((sum, h) => sum + h.conflicts, 0);
const totalSynced = recent.reduce((sum, h) => sum + h.synced, 0);
return totalConflicts / totalSynced;
}
}
Best Practices
-
Add Last_Sync timestamp to both systems
- Used to detect what changed since last sync
- Needed for conflict detection
-
Use External IDs
- SF:
External_Genesys_ID__c - Genesys:
externalId - Primary way to match contacts
- SF:
-
Log all conflicts
- Build audit trail
- Manual review capability
- Alerts ops team
-
Test thoroughly
- What if SF and GZ both update same field?
- What if network fails mid-sync?
- What if token expires?
-
Start one-way, migrate to bi-directional
- Less risk
- Easier to debug
- Can add complexity later
Related Topics
- Chapter 12: Contact Sync Patterns (one-way alternative)
- Chapter 12: Activity Logging (logging sync conflicts)
- Chapter 11: Error Handling & Retry Strategy
GDPR & Data Governance in CRM Integration
Overview
When syncing contact data between Genesys and Salesforce, you handle personal data (PII - Personally Identifiable Information). GDPR, CCPA, and similar regulations require proper handling, deletion, and consent management.
Key Regulations:
- GDPR (EU): Right to be forgotten, consent required
- CCPA (California): Right to deletion, right to know
- PIPEDA (Canada): Similar to GDPR
- Your Local Laws: May have additional requirements
PII Data Types
What's PII?
Information that can identify a person:
✓ PII - Don't store longer than needed:
- Full name
- Email address
- Phone number
- Address
- Social Security Number
- Payment card info
- Biometric data
- IP address + timestamp
✗ NOT PII - Can store longer:
- Company name
- Job title
- Aggregated analytics (no individuals)
- Anonymized data (truly de-identified)
GDPR Right to Deletion ("Right to be Forgotten")
Requirement
Customer asks: "Delete all my data"
You MUST:
- Delete from Salesforce
- Delete from Genesys
- Delete from call recordings
- Delete from transcripts
- Delete from logs/backups (after retention period)
Implementation
/**
* GDPR: Delete all data for a contact
*/
async function deleteContactCompletelyGDPR(email) {
console.log(`🛑 GDPR Deletion: ${email}`);
try {
// 1. Find contact in both systems
const sfContact = await findSalesforceContactByEmail(email);
const gzContact = await findGenesysContactByEmail(email);
if (!sfContact && !gzContact) {
console.log(` No contact found for ${email}`);
return { status: 'not_found' };
}
// 2. Delete from Salesforce
if (sfContact) {
console.log(` Deleting Salesforce contact: ${sfContact.Id}`);
await axios.delete(
`${process.env.SALESFORCE_INSTANCE}/services/data/v57.0/sobjects/Contact/${sfContact.Id}`,
{ headers: { 'Authorization': `Bearer ${this.sfToken}` } }
);
// Also delete associated records
await deleteAssociatedSalesforceRecords(sfContact.Id);
}
// 3. Delete from Genesys
if (gzContact) {
console.log(` Deleting Genesys contact: ${gzContact.id}`);
await axios.delete(
`https://api.mypurecloud.com/api/v2/contacts/${gzContact.id}`,
{ headers: { 'Authorization': `Bearer ${this.gzToken}` } }
);
}
// 4. Find and delete recordings (if applicable)
const recordings = await findRecordingsByPhone(sfContact?.Phone);
for (const recording of recordings) {
console.log(` Deleting recording: ${recording.id}`);
await deleteRecording(recording.id);
}
// 5. Find and delete call logs
const callLogs = await findCallLogsByEmail(email);
for (const log of callLogs) {
console.log(` Deleting call log: ${log.id}`);
await deleteCallLog(log.id);
}
// 6. Log the deletion (for compliance audit)
await logGDPRDeletion({
email,
deletedAt: new Date(),
deletedFrom: ['salesforce', 'genesys', 'recordings', 'call_logs'],
reason: 'GDPR Right to Deletion'
});
console.log(`✅ Completely deleted: ${email}`);
return { status: 'deleted', deletedFrom: ['salesforce', 'genesys'] };
} catch (error) {
console.error(`❌ Deletion failed: ${error.message}`);
throw new Error(`Failed to delete ${email}: ${error.message}`);
}
}
/**
* Delete associated Salesforce records (tasks, events, etc.)
*/
async function deleteAssociatedSalesforceRecords(contactId) {
// Delete tasks
const tasks = await querySalesforce(`
SELECT Id FROM Task
WHERE WhoId = '${contactId}'
`);
for (const task of tasks.records) {
await axios.delete(
`${process.env.SALESFORCE_INSTANCE}/services/data/v57.0/sobjects/Task/${task.Id}`,
{ headers: { 'Authorization': `Bearer ${this.sfToken}` } }
);
}
// Delete events
const events = await querySalesforce(`
SELECT Id FROM Event
WHERE WhoId = '${contactId}'
`);
for (const event of events.records) {
await axios.delete(
`${process.env.SALESFORCE_INSTANCE}/services/data/v57.0/sobjects/Event/${event.Id}`,
{ headers: { 'Authorization': `Bearer ${this.sfToken}` } }
);
}
console.log(` Deleted ${tasks.records.length} tasks and ${events.records.length} events`);
}
Consent Management
Consent Requirements
Before storing/processing PII, you need:
✓ Explicit consent (not implied)
✓ Clear description of what data you collect
✓ Clear description of how you use it
✓ Easy way to withdraw consent
✓ Record of when consent was given
Implementation
/**
* Create contact with consent tracking
*/
async function createContactWithConsent(contactData, consentInfo) {
// 1. Verify consent was given
if (!consentInfo.consentGiven) {
throw new Error('Cannot create contact without explicit consent');
}
// 2. Create contact
const contact = await axios.post(
`https://api.mypurecloud.com/api/v2/contacts`,
{
firstName: contactData.firstName,
lastName: contactData.lastName,
email: contactData.email,
phoneNumbers: contactData.phoneNumbers
},
{ headers: { 'Authorization': `Bearer ${this.gzToken}` } }
);
// 3. Store consent record in Salesforce
const consentRecord = {
Contact_Id__c: contact.id,
Email: contactData.email,
Consent_Given__c: true,
Consent_Date__c: new Date().toISOString(),
Consent_Type__c: consentInfo.type, // 'marketing', 'service', etc.
Consent_Channel__c: consentInfo.channel, // 'email', 'phone', 'web'
Consent_Version__c: consentInfo.version
};
await axios.post(
`${process.env.SALESFORCE_INSTANCE}/services/data/v57.0/sobjects/Contact_Consent__c`,
consentRecord,
{ headers: { 'Authorization': `Bearer ${this.sfToken}` } }
);
// 4. Log for audit
console.log(`✓ Contact created with consent: ${contact.id}`);
return contact;
}
/**
* Withdraw consent
*/
async function withdrawConsent(email) {
console.log(`Withdrawing consent for: ${email}`);
// Find consent records
const consents = await querySalesforce(`
SELECT Id FROM Contact_Consent__c
WHERE Email = '${email}'
`);
// Update all to withdrawn
for (const consent of consents.records) {
await axios.patch(
`${process.env.SALESFORCE_INSTANCE}/services/data/v57.0/sobjects/Contact_Consent__c/${consent.Id}`,
{
Consent_Withdrawn__c: true,
Consent_Withdrawn_Date__c: new Date().toISOString()
},
{ headers: { 'Authorization': `Bearer ${this.sfToken}` } }
);
}
console.log(`✓ Consent withdrawn for: ${email}`);
}
Call Recording Retention
Legal Retention Requirements
Recording Retention Rules:
├─ Default: 7-10 years (varies by jurisdiction)
├─ Legal hold: Keep indefinitely if in dispute
├─ Customer deleted: Delete after 30 days if requested
└─ End of retention: Delete automatically
Implementation
/**
* Check if recording should be kept or deleted
*/
async function evaluateRecordingRetention(recording) {
const createdDate = new Date(recording.dateCreated);
const now = new Date();
const ageInYears = (now - createdDate) / (1000 * 60 * 60 * 24 * 365);
// 1. Is this contact deleted per GDPR?
const isDeletionRequested = await checkGDPRDeletionRequest(recording.contact);
if (isDeletionRequested) {
console.log(`Deleting recording (GDPR): ${recording.id}`);
await deleteRecording(recording.id);
return 'deleted_gdpr';
}
// 2. Is this on legal hold?
const isOnLegalHold = await checkLegalHold(recording.conversation);
if (isOnLegalHold) {
console.log(`Keeping recording (legal hold): ${recording.id}`);
return 'kept_legal_hold';
}
// 3. Has retention period expired?
const retentionYears = 7; // Your policy
if (ageInYears > retentionYears) {
console.log(`Deleting recording (retention expired): ${recording.id}`);
await deleteRecording(recording.id);
return 'deleted_retention';
}
// 4. Keep recording
console.log(`Keeping recording: ${recording.id}`);
return 'kept';
}
/**
* Automated daily retention check
*/
async function runDailyRetentionCheck() {
console.log('📅 Daily Retention Check');
const recordings = await fetchAllRecordings();
let deleted = 0;
for (const recording of recordings) {
const result = await evaluateRecordingRetention(recording);
if (result.startsWith('deleted')) {
deleted++;
}
}
console.log(` Deleted: ${deleted} recordings`);
// Log for compliance
await logRetentionCheck({
timestamp: new Date(),
recordingsChecked: recordings.length,
recordingsDeleted: deleted
});
}
Data Masking & Anonymization
When to Mask
Mask data for:
✓ Sharing with third parties
✓ Analytics / reporting
✓ Development / testing environments
✓ Long-term archival
Never mask (keep original):
✓ Active customer contact
✓ Legal/compliance records
✓ Current support tickets
Implementation
/**
* Mask PII for analytics
*/
function maskPIIForAnalytics(contact) {
return {
...contact,
// Keep: non-PII fields
id: contact.id,
createdDate: contact.createdDate,
tier: contact.tier,
contactCount: contact.contactCount,
// Mask: PII fields
firstName: 'MASKED',
lastName: 'MASKED',
email: 'MASKED@masked.com',
phoneNumbers: contact.phoneNumbers?.map(p => ({
...p,
number: 'XXX-XXX-' + p.number.slice(-4) // Show last 4 digits only
}))
};
}
/**
* Hash email for matching without storing
*/
function hashEmail(email) {
const crypto = require('crypto');
return crypto
.createHash('sha256')
.update(email.toLowerCase())
.digest('hex');
}
// Usage: Match on hash, not original email
const emailHash = hashEmail(contact.email);
const matchingContact = contacts.find(c => hashEmail(c.email) === emailHash);
Data Breaches & Incident Response
If Data is Compromised
/**
* Breach notification workflow
*/
async function handleDataBreach(affectedContacts, breachDetails) {
console.log(`🚨 DATA BREACH DETECTED`);
try {
// 1. Immediate actions (within 72 hours)
console.log('1. Immediate Response:');
// Stop the breach
await shutdownCompromisedSystem(breachDetails.affectedSystem);
// Assess scope
const scope = await assessBreachScope(affectedContacts);
console.log(` Affected contacts: ${scope.count}`);
console.log(` Data exposed: ${scope.dataTypes.join(', ')}`);
// Notify leadership
await notifyLeadership(breachDetails);
// 2. Regulatory notification (within required timeframe)
console.log('2. Regulatory Notification:');
// GDPR: Notify supervisory authority within 72 hours
if (scope.locations.includes('EU')) {
await notifyGDPRAuthority({
date: new Date(),
description: breachDetails.description,
affectedIndividuals: scope.count,
dataCategories: scope.dataTypes
});
}
// CCPA: Notify state attorney general
if (scope.locations.includes('California')) {
await notifyACCPA({
date: new Date(),
description: breachDetails.description,
affectedIndividuals: scope.count
});
}
// 3. Notify affected individuals
console.log('3. Individual Notification:');
for (const contact of affectedContacts) {
await sendBreachNotification(contact, {
what: scope.dataTypes,
when: breachDetails.discoveredDate,
actions: 'Monitor credit for 1 year',
contact: 'privacy@company.com'
});
}
// 4. Document everything
console.log('4. Documentation:');
await createBreachReport({
date: new Date(),
description: breachDetails.description,
rootCause: breachDetails.rootCause,
affectedData: scope.dataTypes,
affectedIndividuals: scope.count,
remediation: breachDetails.remediation,
preventionMeasures: breachDetails.preventionMeasures
});
console.log('✅ Breach handled per compliance requirements');
} catch (error) {
console.error('❌ Breach response failed:', error);
// ESCALATE - notify compliance officer immediately
await escalateToCompliance(error);
}
}
Data Processing Agreement (DPA)
Required Documentation
If using third-party processors (Salesforce, Genesys), you need:
✓ Data Processing Agreement (DPA)
- What data is processed
- Where data is stored
- Who has access
- How long it's retained
- Sub-processors used
✓ Standard Contractual Clauses (SCCs)
- For international data transfers (EU → US)
- Required for GDPR compliance
✓ Privacy Impact Assessment (PIA)
- Document risks
- Mitigation measures
- Legal basis for processing
Compliance Checklist
- Privacy Policy updated (what data you collect, why, how long)
- Consent collected before storing PII
- Data Processing Agreement signed (with Salesforce, Genesys)
- Standard Contractual Clauses for international transfers
- Retention policy documented (how long to keep data)
- Deletion procedure documented (how to remove on request)
- Encryption in transit (HTTPS, OAuth tokens)
- Encryption at rest (Salesforce, Genesys encryption)
- Access controls (who can view data)
- Audit logging (who accessed what, when)
- Breach response plan (what to do if compromised)
- Staff training (privacy, data security)
- Regular audits (third-party or internal)
Best Practices
-
Minimize data collection
- Only collect what you need
- Delete when no longer needed
-
Encrypt everything
- Data in transit (HTTPS)
- Data at rest (DB encryption)
- Backups (encrypted backup systems)
-
Access controls
- Principle of least privilege
- Only those who need access get it
- Remove access when no longer needed
-
Audit logging
- Log all access to PII
- Log all modifications
- Log all deletions
- Keep audit logs for compliance period
-
Regular reviews
- Review who has access
- Review what data you're storing
- Review retention policies
- Review third-party access
Related Topics
- Chapter 12: Contact Sync Patterns
- Chapter 12: Activity Logging & Webhooks
- Chapter 11: API Endpoints Reference (data APIs)
Real-World CRM Integration Scenario
The Scenario
Company: TechSupport Inc. (50 agents, 3 locations)
Location: Austin, Toronto, São Paulo
CRM: Salesforce Service Cloud
Requirement: Integrate Genesys Cloud so agents see customer context during calls
Business Requirements
What We Need
When customer calls:
├─ Agent sees: Name, account, last 3 cases, contact history
├─ Call logged in Salesforce (Task)
└─ Contact list stays in sync
Manual Requirements:
├─ Support agents can edit notes in Salesforce
├─ Notes should show in next call
└─ Compliance: GDPR deletion within 30 days
Success Metrics
✓ 100% of calls show customer context (no "Contact not found")
✓ Average call handle time reduced by 10% (less lookup time)
✓ Agent satisfaction > 4/5 (easy to use)
✓ Salesforce Task creation 99%+ success (activity logging)
✓ Contact data fresh (synced daily)
✓ Zero GDPR compliance violations
Architecture
┌─────────────────────────────────────────────────────────┐
│ Salesforce Cloud │
│ (Master Contact DB, Cases, Tasks, Activity Timeline) │
└────────────────┬──────────────────────────────────────────┘
│
│ ← Data Sync (1-way: SF → Genesys)
│ Every 30 minutes
│
┌────────────────▼──────────────────────────────────────────┐
│ Genesys Cloud Contact DB │
│ (Cached contacts for quick lookup during calls) │
│ │
│ Architect Flows: │
│ ├─ Inbound IVR: ANI lookup → screen pop │
│ ├─ Agent Desktop: Show contact context │
│ └─ Webhooks: Log calls back to SF │
└────────────────┬──────────────────────────────────────────┘
│
│ ← Activity Logging (Genesys → SF)
│ After each call
│
└─ Create Salesforce Task
(with call duration, recording, agent)
Phase 1: Screen Pop (Week 1-2)
Goal: When customer calls, agent sees their record
Step 1: Create Salesforce Apex Endpoint
// ContactLookupService.cls
@RestResource(urlMapping='/contact-lookup')
global class ContactLookupService {
@HttpPost
global static Response lookup(String phoneNumber) {
Response response = new Response();
try {
// Normalize phone (remove formatting)
String normalizedPhone = normalizePhone(phoneNumber);
// Search for contact
List<Contact> contacts = [
SELECT Id, FirstName, LastName, Email, Phone,
AccountId, Account.Name
FROM Contact
WHERE Phone = :normalizedPhone
OR MobilePhone = :normalizedPhone
LIMIT 1
];
if (contacts.isEmpty()) {
response.success = false;
return response;
}
Contact contact = contacts[0];
response.success = true;
response.contactId = contact.Id;
response.firstName = contact.FirstName;
response.lastName = contact.LastName;
response.email = contact.Email;
response.accountId = contact.AccountId;
response.accountName = contact.Account?.Name;
} catch (Exception e) {
response.success = false;
response.error = e.getMessage();
}
return response;
}
private static String normalizePhone(String phone) {
// Remove all non-digits
String digits = phone.replaceAll('[^0-9]', '');
// Add +1 if US number (10 digits)
if (digits.length() == 10) {
digits = '1' + digits;
}
return '+' + digits;
}
global class Response {
public Boolean success;
public String contactId;
public String firstName;
public String lastName;
public String email;
public String accountId;
public String accountName;
public String error;
}
}
Step 2: Create Genesys Data Action
In Architect → Data Actions:
Name: lookup-contact-by-phone
Method: POST
URL: https://your-instance.salesforce.com/services/apexrest/contact-lookup
Input:
phoneNumber: ${interaction.caller.phoneNumber}
Output:
success: ${dataAction.response.success}
contactId: ${dataAction.response.contactId}
firstName: ${dataAction.response.firstName}
lastName: ${dataAction.response.lastName}
accountId: ${dataAction.response.accountId}
accountName: ${dataAction.response.accountName}
Step 3: Create Architect Inbound Flow
START
│
├─ Play: "Thank you for calling TechSupport..."
│
├─ Data Action: lookup-contact-by-phone
│ Input: ANI = ${interaction.caller.phoneNumber}
│
├─ Decision: ${dataAction.result.success}?
│ ├─ YES:
│ │ ├─ Set interaction attributes:
│ │ │ ├─ contact_id = ${dataAction.result.contactId}
│ │ │ ├─ contact_name = ${dataAction.result.firstName} ${dataAction.result.lastName}
│ │ │ ├─ account_id = ${dataAction.result.accountId}
│ │ │ └─ account_name = ${dataAction.result.accountName}
│ │ │
│ │ └─ Transfer to Support Queue
│ │
│ └─ NO:
│ ├─ Play: "Please hold while we locate your account..."
│ └─ Transfer to Support Queue (no attributes)
│
└─ DISCONNECT
Expected Result
Customer dials: +1-512-555-1234
↓
Agent receives call
↓
Agent's Genesys desktop shows:
Contact Name: John Doe
Account: Acme Corp
Email: john@acmecorp.com
Last 3 Cases: [list]
Contact History: [last 5 calls]
Phase 2: Contact Sync (Week 2-3)
Goal: Keep Genesys contact list in sync with Salesforce
Step 1: Create Sync Job
// sync-job.js (runs every 30 minutes)
const SalesforceGenesysSync = require('./lib/sync');
async function syncDaily() {
const sync = new SalesforceGenesysSync({
sfInstance: process.env.SALESFORCE_INSTANCE,
sfToken: process.env.SALESFORCE_TOKEN,
gzToken: process.env.GENESYS_TOKEN
});
const result = await sync.runFullSync();
console.log(`✓ Sync complete: ${result.created} created, ${result.updated} updated`);
if (result.errors.length > 0) {
await sendAlert('warning', result);
}
}
syncDaily().catch(error => {
console.error('Sync failed:', error);
process.exit(1);
});
Step 2: Deploy as Lambda (AWS)
# serverless.yml
service: techsupport-crm-sync
provider:
name: aws
runtime: nodejs18.x
environment:
SALESFORCE_INSTANCE: ${env:SALESFORCE_INSTANCE}
SALESFORCE_TOKEN: ${env:SALESFORCE_TOKEN}
GENESYS_TOKEN: ${env:GENESYS_TOKEN}
functions:
sync:
handler: sync-job.syncDaily
events:
- schedule:
rate: rate(30 minutes) # Every 30 minutes
enabled: true
resources:
Resources:
SyncLogGroup:
Type: AWS::Logs::LogGroup
Properties:
LogGroupName: /aws/lambda/techsupport-crm-sync
RetentionInDays: 30
Deploy: serverless deploy
Step 3: Monitor Sync
Logs:
2026-03-14 10:00:00 ✓ Fetched 2345 contacts from Salesforce
2026-03-14 10:00:05 ✓ Found 2100 existing Genesys contacts
2026-03-14 10:00:30 ✓ Created: 50, Updated: 200, Skipped: 5
2026-03-14 10:00:31 Duration: 31 seconds
Metrics:
- Success rate: 99.7%
- Avg duration: 32 sec
- Contacts synced: 250/day
Phase 3: Activity Logging (Week 3-4)
Goal: After call, log details in Salesforce Task
Step 1: Enable Genesys Webhooks
In Genesys Admin → Integrations → Webhooks:
Event: conversation.ended
URL: https://your-backend.com/webhook/call-ended
Payload: Include all details (recording ID, agent, duration)
Retries: 3 times
Step 2: Create Webhook Handler
// webhook-handler.js
app.post('/webhook/call-ended', async (req, res) => {
const {
conversationId,
callerId,
durationSeconds,
recordingId,
agentName,
queueName,
attributes
} = req.body;
try {
// 1. Find matching Salesforce contact
const contact = await findContactByPhone(callerId);
if (!contact) {
console.warn(`Contact not found for ${callerId}`);
return res.status(200).json({ message: 'Contact not found' });
}
// 2. Get recording URL
const recordingUrl = await getRecordingUrl(recordingId);
// 3. Create Salesforce Task
const task = {
Subject: `Call with ${contact.Name}`,
Description: `
Call Details:
Duration: ${Math.floor(durationSeconds / 60)} min
Agent: ${agentName}
Queue: ${queueName}
Recording: ${recordingUrl || 'Not available'}
`.trim(),
WhoId: contact.Id,
WhatId: contact.AccountId,
ActivityDate: new Date().toISOString().split('T')[0],
CallType: 'Inbound',
Status: 'Completed',
Type: 'Call'
};
const taskResult = await createSalesforceTask(task);
console.log(`✓ Task created: ${taskResult.id}`);
// 4. Update Contact's LastActivityDate
await updateSalesforceContact(contact.Id, {
LastActivityDate: new Date().toISOString().split('T')[0]
});
res.status(200).json({ taskId: taskResult.id });
} catch (error) {
console.error('Webhook error:', error);
res.status(500).json({ error: error.message });
}
});
Step 3: Verify Logging
In Salesforce Contact record:
Activity Timeline shows:
- Call with John Doe (10 min)
Agent: Sarah Smith
Queue: Support
Recording: [link]
[Add note/next steps]
Phase 4: GDPR Compliance (Week 4)
Goal: Handle data deletion requests
Step 1: Create GDPR Deletion Procedure
// gdpr-delete.js
async function handleGDPRDeletion(email) {
console.log(`🛑 GDPR Deletion: ${email}`);
// 1. Find contact
const sfContact = await findSalesforceContactByEmail(email);
const gzContact = await findGenesysContactByEmail(email);
// 2. Delete from both
if (sfContact) {
await deleteSalesforceContact(sfContact.Id);
}
if (gzContact) {
await deleteGenesysContact(gzContact.id);
}
// 3. Delete recordings
const recordings = await findRecordingsByPhone(email);
for (const rec of recordings) {
await deleteRecording(rec.id);
}
// 4. Log deletion
await logGDPRDeletion({
email,
deletedAt: new Date(),
deletedFrom: ['salesforce', 'genesys', 'recordings']
});
console.log(`✅ Deleted: ${email}`);
}
Step 2: Document Privacy Policy
Update website:
We collect:
- Name, email, phone (for customer service)
- Call recordings (for 7 years per compliance)
You can:
- Request deletion: privacy@techsupport.com
- We'll delete within 30 days
Go-Live Plan
Week 1: Preparation
- Test screen pop in dev environment
- Train agents on new features
- Set up monitoring
Week 2: Screen Pop
- Deploy Salesforce Apex
- Deploy Genesys Data Action
- Deploy Architect Flow
- Pilot with 5 agents
- Full rollout if successful
Week 3: Contact Sync
- Deploy sync job to Lambda
- Monitor logs for errors
- Verify contacts are syncing
- Set up Slack alerts
Week 4: Activity Logging
- Deploy webhook handler
- Configure Genesys webhooks
- Test call logging
- Verify Salesforce tasks created
Week 5: GDPR & Training
- Document privacy procedures
- Train staff on GDPR
- Set up GDPR deletion process
- Final full-system testing
Expected Results
Before Integration
Agent experience:
- Customer calls
- Agent types customer name into Salesforce search (30 sec)
- Wait for results
- Navigate to account/cases
- Get context, THEN handle call
Average handle time: 8 minutes
Agent satisfaction: 3/5
Customer satisfaction: 3.5/5
After Integration
Agent experience:
- Customer calls
- Record auto-pops (1 sec)
- Agent sees name, account, last cases
- Agent handles call with context immediately
- Call logged to Salesforce automatically
Average handle time: 7 minutes (12.5% improvement)
Agent satisfaction: 4.5/5
Customer satisfaction: 4.2/5
Monitoring & Maintenance
Weekly Checks
□ Screen pop success rate > 99%
□ Contact sync duration < 2 min
□ Activity logging > 99% success
□ GDPR deletion requests: 0
□ Errors: < 5 per week
Monthly Review
□ Agent feedback on usability
□ Performance trends
□ Cost analysis
□ Compliance status
□ Planned improvements
Budget Estimate
Implementation:
├─ Salesforce Apex: $3,000 (5 days)
├─ Genesys Architect: $2,000 (3 days)
├─ Sync Job (Lambda): $1,500 (2 days)
├─ Webhook Handler: $1,500 (2 days)
├─ Testing & QA: $2,000 (3 days)
└─ Total Dev: $10,000
Operations (annual):
├─ AWS Lambda: $50/month ($600/year)
├─ Genesys API calls: $200/month ($2,400/year)
├─ Salesforce: Included in license
├─ Monitoring: $100/month ($1,200/year)
└─ Total Ops: $4,200/year
ROI:
├─ Productivity gain: 12.5% = ~200 agents × 30 min/day
├─ Annual value: 200 × 250 working days × 0.5 hours × $25/hr = $625,000
├─ Cost: $10,000 dev + $4,200 ops = $14,200
└─ Payback: < 1 week
Related Topics
- Chapter 12: Screen Pop Architecture & Implementation
- Chapter 12: Contact Sync Patterns
- Chapter 12: Activity Logging & Webhooks
- Chapter 12: GDPR & Data Governance
- Chapter 11: API Endpoints Reference