4.- Contact Center Configuration
- Call Routing & Message Routing
- Emergency Groups
- External Contacts
- Scheduling & Schedule Groups
- Queues
- ACD Skills & Languages
- Wrap-Up Codes
- Utilization
- Canned Responses & Response Assets
- Email — Domains & Routing
- Widgets — Web Chat & Web Messenger
- Analytics Settings
- Panel Manager
- Scripts
- Assistants
- Knowledge Base
- Chat & Messaging Configuration
- Outbound Dialing — Overview & Settings
- Outbound Dialing Modes
- Outbound — Contact Lists & DNC
- Outbound — Campaign Configuration
- Callbacks
- Predictive Routing
- Agent Copilot (Agent Assist)
Call Routing & Message Routing
Overview
Both Call Routing and Message Routing serve the same fundamental purpose: mapping an inbound address to an Architect flow. The difference is the channel.
| Feature | Call Routing | Message Routing |
|---|---|---|
| Channel | Voice (inbound phone calls) | Digital (SMS, web messaging, messaging apps) |
| Entry point | Inbound telephone number (DID) | Inbound messaging address or number |
| Flow type | Inbound Call Flow | Inbound Message Flow |
| Schedule support | Yes — via Schedule Groups | No — message flows handle scheduling internally |
| Emergency support | Yes — via Emergency Groups | No |
| Admin location | Admin → Routing → Call Routing | Admin → Routing → Message Routing |
Call Routing
What Is a Call Route?
A Call Route connects an inbound telephone number to an Architect inbound call flow, with optional schedule-based and emergency routing logic layered on top.
When a customer dials a number, Genesys Cloud:
- Identifies the matching call route
- Checks if an emergency group is active
- Evaluates the schedule group (open / closed / holiday)
- Executes the appropriate Architect flow
Call Route Components
| Component | Description |
|---|---|
| Route Name | Unique identifier |
| Division | Administrative ownership |
| Inbound Numbers | The DID(s) assigned to this route |
| Routing Mode | Always Open, or Schedule-Based |
| Schedule Group | Determines open/closed/holiday logic |
| Open Flow | Architect flow during open hours |
| Closed Flow | Architect flow during closed hours |
| Holiday Routing | Use Closed Flow, Route to Holiday Flow, or Bypass |
| Emergency Group | Overrides all routing when activated |
| Emergency Flow | Architect flow when emergency is active |
Routing Mode: Always Open vs. Schedule-Based
| Mode | When to Use |
|---|---|
| Always Open | 24/7 operations — one flow handles all calls regardless of time |
| Schedule-Based | Business hours operations — different flows for open, closed, and holidays |
Holiday Routing Options
| Option | Behaviour |
|---|---|
| Use Closed Flow | Holiday calls follow the same logic as after-hours |
| Route to Holiday Flow | Dedicated holiday Architect flow (custom message) |
| Bypass Holiday Routing | Holiday schedules are ignored — treats holiday as a normal day |
Creating a Call Route
- Admin → Routing → Call Routing
- Click Add
- Enter Route Name and select Division
- Assign Inbound Numbers (DIDs)
- Choose Routing Mode:
- If Always Open: select the single Call Flow
- If Schedule-Based: select Schedule Group, then assign Open Flow, Closed Flow, and Holiday options
- Optionally configure Emergency Routing:
- Enable emergency toggle
- Select Emergency Group
- Select Emergency Flow
- Click Save
Call Routing Decision Flow
Inbound call arrives on DID
↓
Call Route identified
↓
Emergency Group active?
YES → Emergency Flow
NO ↓
Always Open?
YES → Open Flow
NO ↓
Schedule Group evaluation
↓
┌──────────┬──────────┬──────────┐
│ Open │ Closed │ Holiday │
│ Flow │ Flow │ Flow │
└──────────┴──────────┴──────────┘
Prerequisites Before Creating a Call Route
- Inbound number (DID) provisioned and available in the org
- At least one published Architect inbound call flow
- Schedule Group configured (if using schedule-based routing)
- Emergency Group created (if emergency routing needed)
Call Route Example
| Setting | Value |
|---|---|
| Route Name | US_Support_Main |
| Division | Customer Support |
| Inbound Number | +1-800-555-1234 |
| Routing Mode | Schedule-Based |
| Schedule Group | US_Support_ScheduleGroup |
| Open Flow | Support_IVR_Main |
| Closed Flow | Support_AfterHours |
| Holiday Option | Route to Holiday Flow |
| Holiday Flow | Support_HolidayClosure |
| Emergency Group | US_Support_Emergency |
| Emergency Flow | Emergency_Announcement |
Message Routing
What Is Message Routing?
Message Routing maps an inbound messaging address or number to an Architect inbound message flow. When a customer sends an SMS or web message to a configured address, Genesys routes it to the associated flow for bot handling or agent queue delivery.
Message Routing Page Layout
The Message Routing page shows two columns:
| Column | Description |
|---|---|
| Inbound Message Flows | The Architect flow that will process the message |
| Inbound Address | The messaging number or address that triggers the flow |
Each routing entry links one or more addresses to one flow.
Message Routing Components
| Component | Description |
|---|---|
| Inbound Message Flow | A published Architect inbound message flow |
| Inbound Address | SMS number, web messaging address, or other digital channel address |
ℹ️ Unlike Call Routing, Message Routing has no built-in schedule group or emergency group fields. Time-based logic for messaging is handled inside the Architect message flow itself using Evaluate Schedule Group actions.
Creating a Message Route
- Admin → Routing → Message Routing
- Click + (Add)
- Click Select Flow → begin typing the flow name → select it
- Click Select Addresses → choose the inbound number(s) or address(es)
- Click Add
- Click Save
Prerequisites Before Creating a Message Route
- Messaging channel provisioned (SMS number, web messaging widget, etc.)
- Published Architect inbound message flow
Message Routing Workflow
Customer sends message
↓
Messaging channel (SMS / Web Messaging / App)
↓
Inbound address matched
↓
Message Routing entry found
↓
Architect Inbound Message Flow executes
↓
Bot / automation or agent queue
Common Message Flow Patterns
| Pattern | Flow Logic |
|---|---|
| Simple queue delivery | Send greeting → Transfer to ACD queue |
| Bot self-service | Collect intent → automated response → escalate if unresolved |
| Order status | Request order number → Data Action lookup → return status |
| Appointment scheduling | Collect date/time preference → create callback |
Message Route Example
| Setting | Value |
|---|---|
| Inbound Message Flow | Customer_Service_MessageFlow |
| Inbound Address | +1-800-555-8888 |
| Division | Customer Service |
Troubleshooting
Call Routing
| Issue | Cause | Fix |
|---|---|---|
| Calls not reaching flow | DID not assigned to route | Verify inbound number on the call route |
| Wrong flow playing | Incorrect schedule group or flow assignment | Review schedule group and flow assignments |
| Emergency routing not activating | Emergency group not activated | Go to Emergency Groups → activate |
| Calls always closed | Schedule group time zone wrong | Verify time zone on the schedule group |
| Flow not executing | Flow is unpublished in Architect | Publish the flow |
Message Routing
| Issue | Cause | Fix |
|---|---|---|
| Messages not reaching flow | Address not assigned to routing entry | Verify address assignment in message routing |
| Wrong flow triggered | Incorrect routing entry | Update the message routing entry |
| No automated response | Flow not published | Publish the Architect message flow |
| Duplicate routing | Address assigned to multiple entries | Check for conflicting routing entries |
Key Facts for Exam / Interview
| Question | Answer |
|---|---|
| Where is call routing configured? | Admin → Routing → Call Routing |
| What determines open/closed routing for voice? | Schedule Groups |
| How do you override all routing for voice calls? | Activate an Emergency Group |
| Where is message routing configured? | Admin → Routing → Message Routing |
| Does message routing have schedule group support? | No — time-based logic is built into the Architect message flow |
| What must exist before creating either route type? | A published Architect flow of the matching type |
See Also
- Scheduling & Schedule Groups — the schedule groups referenced by call routes
- Emergency Groups — the override mechanism for call routing
- Architect Overview — building the inbound call and message flows
- Prompt Management — audio messages used inside those flows
Emergency Groups
What Are Emergency Groups?
An Emergency Group is a switch that overrides all normal schedule-based call routing when activated. When an emergency group is active, inbound calls bypass the schedule group entirely and route directly to a designated emergency call flow.
Use cases: office closures, power outages, network failures, natural disasters, building evacuations, planned maintenance requiring full call redirection.
⚠️ Emergency Groups have the highest routing priority. They override Open / Closed / Holiday schedule logic. An active emergency group = all calls go to the emergency flow, regardless of time of day.
Emergency Group Components
| Component | Description |
|---|---|
| Name | Unique identifier for the group |
| Division | Administrative ownership and access scoping |
| Activation Status | On = emergency routing active; Off = normal routing |
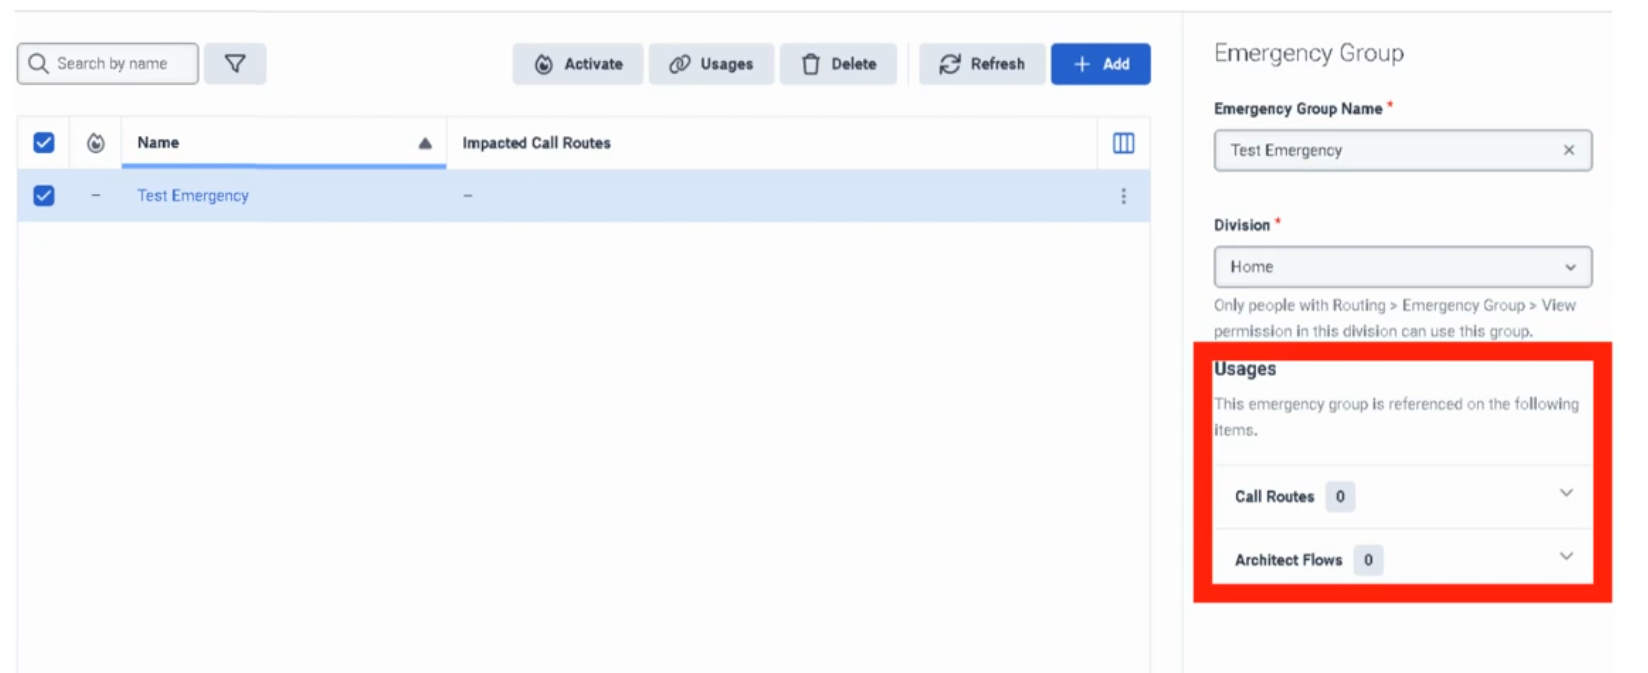
| Usages | Shows which call routes and flows reference this group — critical for impact assessment |
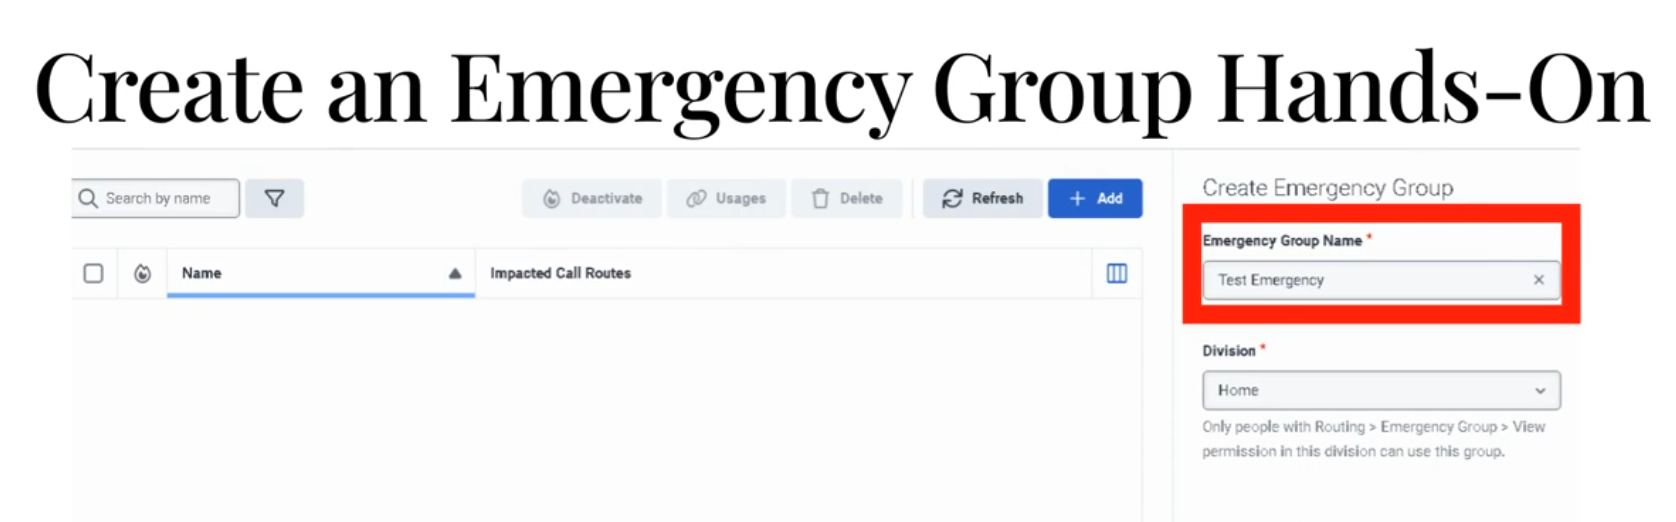
Creating an Emergency Group
- Admin → Routing → Emergency Groups
- Click Add
- Enter a unique Emergency Group Name
- Select Division
- Click Save
The group is created in a deactivated state — it has no routing impact until activated.
Connecting an Emergency Group to a Call Route
Creating the group alone does nothing. It must be assigned to a Call Route:
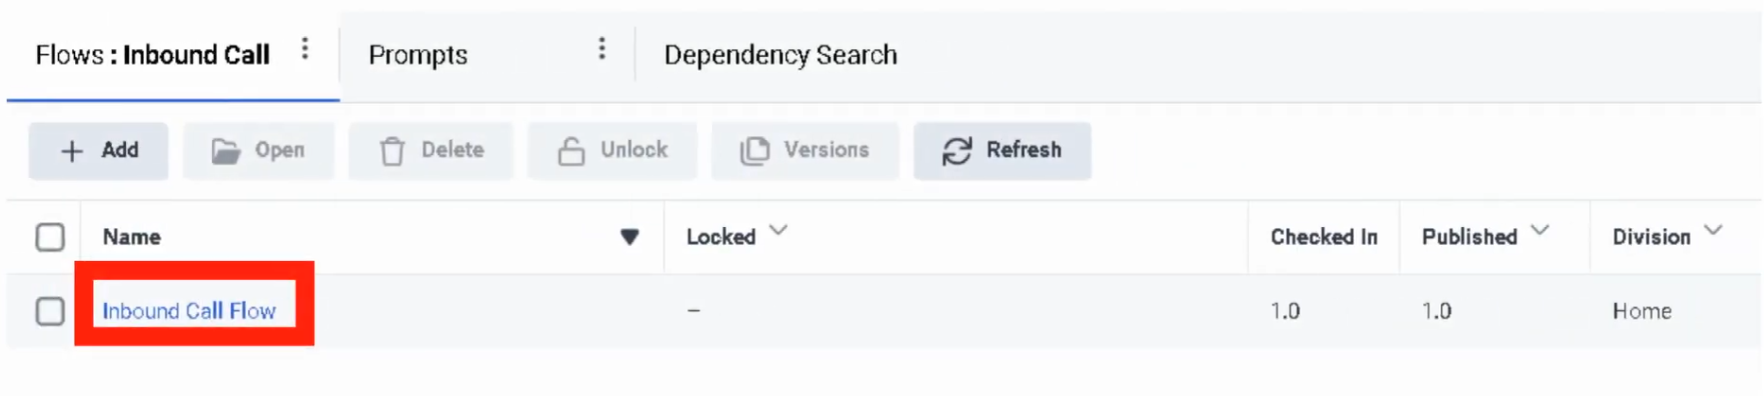
- Admin → Routing → Call Routing → open the target route
- Enable Emergency toggle
- In the Emergency Group field, select the group you created
- In the Emergency Flow field, select the published Architect flow to use during emergencies
- Click Save
Activating an Emergency Group
When an incident occurs:
- Admin → Routing → Emergency Groups
- Find the group
- Toggle Activation to On
- Calls immediately begin routing to the emergency flow
To restore normal routing:
- Return to Emergency Groups
- Toggle Activation to Off
✅ Best practice: Test activation/deactivation during a low-traffic window before a real incident occurs. Know exactly where to find this toggle under pressure.
Routing Priority Diagram
Incoming Call
↓
Call Route
↓
Emergency Group active?
↓
┌──── YES ─────────────────────┐
│ Emergency Flow executes │
│ (schedule ignored entirely) │
└──────────────────────────────┘
↓ NO
Schedule Group evaluated
↓
Open / Closed / Holiday → respective flow
Common Emergency Flow Designs
Simple Closure Announcement
Start
↓
Play Emergency Announcement
↓
Disconnect
Redirect to Backup Location
Start
↓
Play Brief Message ("We are experiencing an outage...")
↓
Transfer to backup contact center DID
Alternate Contact Information
Start
↓
Play Emergency Message
↓
Provide website / email / alternate number
↓
Disconnect
✅ Keep emergency flows simple. Complex logic is a liability during an outage. The goal is: play a clear message, offer an alternative, end the call.
The Usages Field
The Usages field on an emergency group shows every call route and Architect flow that references it. Always check this before making changes — it tells you the blast radius of any modification or activation.
Naming Convention
| Format | Example |
|---|---|
<Region>_<Dept>_Emergency |
US_Support_Emergency |
<Site>_<Function>_Emergency |
Monterrey_IVR_Emergency |
Troubleshooting
| Issue | Cause | Fix |
|---|---|---|
| Emergency routing not activating | Group not assigned to the call route | Edit call route → assign emergency group |
| Group is active but calls still follow normal schedule | Emergency flow not assigned to the route | Assign the emergency flow on the call route |
| Emergency flow errors out | Flow has unpublished changes or broken logic | Open Architect, validate, publish latest version |
| Wrong routes affected | Unexpected routes also reference the group | Check Usages field; scope the group correctly |
| Normal routing not restoring after deactivation | Underlying schedule or call route was already misconfigured | Test non-emergency routing path separately |
| Admin cannot modify group | Division permission issue | Verify division assignment and admin role permissions |
Troubleshooting Checklist
| Check | ✓ |
|---|---|
| Emergency group created | ☐ |
| Correct division selected | ☐ |
| Emergency group assigned to all relevant call routes | ☐ |
| Emergency flow is published in Architect | ☐ |
| Emergency flow assigned to call route | ☐ |
| Tested activation in non-production or low-traffic window | ☐ |
| Verified Usages field — no unexpected routes affected | ☐ |
| Confirmed normal routing works when group is deactivated | ☐ |
Key Facts for Exam / Interview
| Question | Answer |
|---|---|
| Where are emergency groups configured? | Admin → Routing → Emergency Groups |
| What does activating an emergency group do? | Overrides all schedule-based routing — all calls go to the emergency flow |
| What must be done after creating an emergency group? | Assign it to a call route AND assign an emergency flow on that route |
| How do you check what a group affects? | The Usages field on the group |
| What is the routing priority order? | Emergency Group → Schedule Group → Open/Closed/Holiday flows |
| What is the most common implementation mistake? | Creating the group but forgetting to assign it to the call route, or not assigning an emergency flow |
See Also
- Scheduling & Schedule Groups — the routing layer that emergency groups override
- Call Routing — where emergency groups are assigned to inbound numbers
- Architect Overview — building the emergency call flow that gets executed
External Contacts
What Are External Contacts?
External Contacts is the central repository for people and organizations outside your company — customers, vendors, partners, suppliers. Contact records surface in the agent workspace during live interactions, giving agents immediate context without switching systems.
There are two object types:
| Object | What It Represents |
|---|---|
| External Organization | A company or entity (e.g., "Oracle Support", "Acme Corp") |
| External Contact | An individual person, optionally linked to an External Organization |
✅ Best practice: Create the External Organization first, then create contacts linked to it. This allows you to track all individuals from the same company under one record.
Creating an External Organization
- Admin → Directory → External Contacts
- Click Add → Organization
- Fill in:
| Field | Notes |
|---|---|
| Name | Company name — required |
| Website | Company URL |
| Address | Physical address |
| Custom Fields | Org-specific fields you've configured (e.g., Account ID, SBC Serial Number) |
- Click Save
Creating an External Contact
- Admin → Directory → External Contacts
- Click Add → Contact
- Fill in:
| Field | Notes |
|---|---|
| First Name / Last Name | Required — the only mandatory fields |
| Associate Org | Link to an External Organization (search and select) |
| Work, cell, or home addresses | |
| Phone | Add one or more numbers |
| SMS Toggle | ⚠️ Click the SMS icon next to each phone number to explicitly enable or disable SMS — not enabled by default |
| Social Media | Add handles for WhatsApp, Twitter/X, Facebook, Line |
| Survey Opt-Out | Check to prevent automated post-call surveys from being sent to this contact |
| Notes | Free-text historical context not captured in standard fields |
| External System Link | A URL pointing to your own internal CRM or database record for this contact |
- Click Save
SMS Toggle — Important Detail
SMS capability on a phone number is not enabled by default. For each number on a contact record:
- Click the SMS icon next to the number
- Toggle to On to allow agents to send SMS to that number
- Toggle to Off to block SMS to that number
This must be set explicitly — there is no org-wide "enable SMS for all contacts" switch.
Survey Opt-Out
The Survey Opt-Out checkbox on a contact record:
- Prevents automated post-interaction surveys from being sent to that contact
- Applies across all survey methods configured in the org
- Should be set when a customer has explicitly requested no surveys
Custom Fields
Both External Organizations and External Contacts support custom schema fields:
- Fields are configured by admins at the schema level (not per-record)
- Examples: Account Tier, Contract ID, SBC Model, Support Level
- Appear in the contact/org record and in the agent workspace pop-up
Bulk Management
For large contact databases, manual entry is not practical. Three methods:
| Method | Best For |
|---|---|
| CSV Upload | One-time or periodic bulk imports from a spreadsheet |
| CRM Sync | Continuous sync from Salesforce or other supported CRMs — keeps contacts current automatically |
| External Contacts API | Custom integrations pushing data from internal systems (ticketing, billing, ERP, etc.) into Genesys |
Where Agents See This Data
During a live interaction, the CX Agent Workspace automatically surfaces the matching External Contact record when the caller's number matches a record in External Contacts. Agents see:
- Contact name and organization
- Phone numbers and email addresses
- Social handles
- Notes and custom fields
- Link to the external system (if configured)
This eliminates the need for agents to look up customer records manually during a call.
Division Behaviour
⚠️ External Contacts cannot be reassigned between divisions after creation. If a contact needs to move to a different division, you must delete the record and recreate it in the correct division.
Plan your division structure before bulk-importing contacts.
Quick Reference — Key Facts
| Feature | Detail |
|---|---|
| Object types | External Organization + External Contact |
| Required fields (Contact) | First Name and Last Name only |
| SMS | Must be explicitly toggled per phone number |
| Survey opt-out | Per-contact checkbox |
| Division reassignment | Not supported — delete and recreate |
| Bulk import | CSV, CRM sync (Salesforce), or API |
| Agent visibility | CX Agent Workspace during live interactions |
| Custom fields | Configurable at schema level for both Orgs and Contacts |
See Also
- Divisions & Access Control — division assignment at contact creation time
- Integration Management — CRM sync configuration (Salesforce, etc.)
- Queue & Routing Management — how interaction routing connects to contact lookup
Scheduling & Schedule Groups
Scheduling & Schedule Groups
| Section | Description |
|---|---|
| Module Context | Schedules are part of Routing and Architect decision logic in Genesys Cloud. |
| Purpose | A schedule stipulates when a flow runs based on date, time, or event. |
| Primary Use | Business hours, after-hours support, holidays, recurring events, maintenance windows, and special situations. |
| Admin Location | Admin → Routing → Scheduling |
Study Notes
| Topic | Explanation |
|---|---|
| Schedule | A time-based object that determines when routing or flow logic is active. |
| Schedule Group | Groups multiple schedules into Open, Closed, and Holiday categories for routing. |
| Architect Usage | Architect uses schedules to determine how inbound and outbound interactions should be handled. |
| Recurrence Support | Schedules can be one-time or repeating (daily, weekly, monthly, yearly, or custom iCal rule). |
| Evaluation Order | In Architect: Emergency → Holiday → Closed → Open |
| Default Branch | If no schedule matches, Closed is the default branch in Evaluate Schedule Group. |
| Time Zone | Set on the Schedule Group — most common misconfiguration is a wrong or missing time zone. |
Navigation
| Task | Navigation |
|---|---|
| View Schedules | Admin → Routing → Scheduling |
| Create Schedule | Admin → Routing → Scheduling → Add Schedule |
| View Schedule Groups | Admin → Routing → Scheduling → Schedule Groups |
| Use in Architect | Architect → Open Flow → Add Evaluate Schedule Group action |
Schedule Configuration Fields
| Field | Description | Example |
|---|---|---|
| Schedule Name | Unique name for the schedule | US_Support_BusinessHours |
| Division | Determines administrative ownership and access | Home |
| Repeating Event | Enables recurring schedule logic | Enabled |
| Start Date | Date when the schedule starts | 2026-03-01 |
| End Date | Date when the schedule ends | 2026-12-31 |
| Start Time | Time when the schedule starts | 08:00 |
| End Time | Time when the schedule ends | 18:00 |
| All Day | Enables full-day schedule instead of start/end times | Disabled |
| Repeats Every | Defines recurrence pattern | Weekly |
| Start Option | Defines when recurrence begins | On Date |
| End Option | Defines when recurrence stops | No End Date |
| iCal Rule | Advanced recurrence rule configuration | FREQ=WEEKLY;BYDAY=MO,TU,WE,TH,FR |
Schedule Types
| Schedule Type | Example |
|---|---|
| One-Time | July_4_Closure |
| Daily | After_Hours_Daily |
| Weekly | Mon_Fri_BusinessHours |
| Monthly | First_Monday_Maintenance |
| Yearly | Christmas_Holiday |
| Advanced Rule | FREQ=WEEKLY;BYDAY=MO,TU,WE,TH,FR |
Example business-hours schedule:
| Field | Value |
|---|---|
| Name | US_Support_BusinessHours |
| Repeating Event | Enabled |
| Repeats Every | Weekly |
| Days | Monday–Friday |
| Start Time | 08:00 |
| End Time | 18:00 |
| End Option | No End Date |
Schedule Group Configuration
| Component | Description |
|---|---|
| Open Schedule | Defines when the business is open |
| Closed Schedule | Defines after-hours or closure periods |
| Holiday Schedule | Defines holiday dates — overrides Open |
| Time Zone | Applied at the Schedule Group level — determines when schedules activate |
| Emergency Group | Separate object that overrides all schedule-based logic when activated |
⚠️ Most common misconfiguration: Setting the wrong time zone on the Schedule Group, causing callers to hit closed or holiday paths at unexpected times.
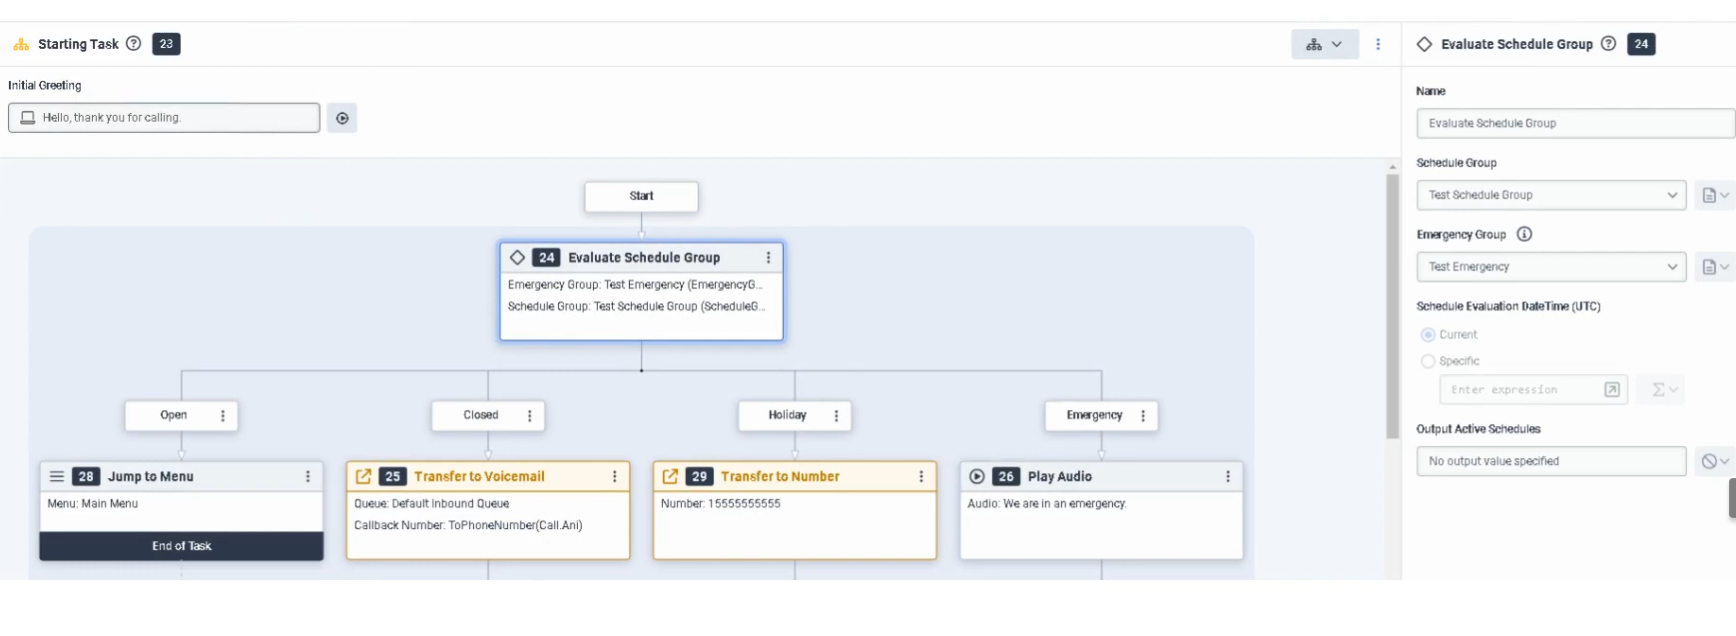
Architect Evaluation Order
Evaluate Schedule Group
↓
Emergency? (Emergency Group activated?)
↓
Holiday? (Current date/time matches a Holiday schedule?)
↓
Closed? (Current date/time outside Open schedule?)
↓
Open (Default — current date/time matches Open schedule)
If nothing matches, the Closed branch is taken by default.
Routing Architecture
Customer Interaction
↓
Call Route or Architect Flow
↓
Schedule / Schedule Group Evaluation
↓
Open / Closed / Holiday / Emergency
↓
Menu / Queue / Voicemail / External Transfer / Disconnect
Real Flow Scenarios
Scenario 1 — Business Hours Menu
Caller Enters Flow
↓
Evaluate Schedule Group
↓
Open
↓
Play Welcome Prompt → Send to Menu → Route to Agent
Scenario 2 — After-Hours Voicemail
Caller Enters Flow
↓
Evaluate Schedule Group
↓
Closed
↓
Play Closed Prompt → Route to Voicemail
Scenario 3 — Holiday Transfer
Caller Enters Flow
↓
Evaluate Schedule Group
↓
Holiday
↓
Play Holiday Prompt → Transfer to External Number
Scenario 4 — Emergency Shutdown
Caller Enters Flow
↓
Evaluate Schedule Group
↓
Emergency
↓
Play Issue Prompt → Disconnect Call
Implementation Steps
| Step | Action |
|---|---|
| Step 1 | Navigate to Admin → Routing → Scheduling |
| Step 2 | Click Add Schedule |
| Step 3 | Enter unique schedule name |
| Step 4 | Select division |
| Step 5 | Choose one-time or repeating event |
| Step 6 | Configure start date, end date, and time range (or All Day) |
| Step 7 | Configure recurrence settings if repeating |
| Step 8 | Save the schedule |
| Step 9 | Create a schedule group and assign schedules to Open / Closed / Holiday |
| Step 10 | Set the correct time zone on the schedule group |
| Step 11 | Use the schedule group in call routing or Architect |
Naming Convention
| Resource | Example |
|---|---|
| Schedule | US_Support_BusinessHours |
| Holiday Schedule | US_Support_Christmas |
| Maintenance Schedule | US_Support_MaintenanceWindow |
| Schedule Group | US_Support_Main_SG |
Recommended pattern: <Region>_<Department>_<Purpose>
Best Practices
| Practice | Reason |
|---|---|
| Use clear schedule names | Makes routing easier to understand and maintain |
| Separate business hours and holidays into distinct schedules | Improves flexibility and troubleshooting |
| Always use Schedule Groups for production routing | Simplifies open/closed/holiday branching |
| Set the correct time zone on the Schedule Group | Prevents incorrect routing behavior |
| Test all branches (Open, Closed, Holiday, Emergency) | Ensures callers hear the correct experience |
| Review holiday schedules annually | Keeps routing accurate over time |
Troubleshooting
| Issue | Cause | Resolution |
|---|---|---|
| Flow always routes Closed | Time zone mismatch or no active Open schedule | Verify schedule times and schedule group time zone |
| Holiday path never triggers | Holiday schedule not assigned to group | Add holiday schedule to schedule group |
| Emergency path does not work | Emergency group not activated or not assigned to flow | Verify emergency group setup and flow logic |
| Recurring schedule not firing | Recurrence settings incorrect | Review repeating event settings and end conditions |
| External transfer not reached | Holiday branch misconfigured | Check Architect holiday branch and external number |
| Schedule group unavailable in flow | Permission or object visibility issue | Confirm access and division permissions |
Interview Cheat Sheet
| Question | Answer |
|---|---|
| What is a schedule in Genesys Cloud? | A time-based object that determines when routing or flow logic is active |
| What can schedules be used for? | Business hours, after-hours, holidays, recurring events, and special situations |
| What is a schedule group? | A grouping of schedules into Open, Closed, and Holiday categories |
| What is the evaluation order in Architect? | Emergency → Holiday → Closed → Open |
| What happens if nothing matches? | Closed is the default path in Evaluate Schedule Group |
| What is the most common misconfiguration? | Wrong time zone set on the Schedule Group |
Queues
| Topic | Detail |
|---|---|
| Navigation | Admin → Contact Center → Queues |
| Purpose | Core ACD routing objects that hold interactions until an agent is available |
| Max Queues | 5,000 queues per organization |
| Max Members | 5,000 members per queue |
| Tabs | General, Routing, Members, Voice, Chat, Message, Email, Callback, Wrap-Up Codes |
Step 1 — Initial Queue Creation


Step 2 — General Tab
| Field | Description |
|---|---|
| After Call Work (ACW) Mode | Controls how agents transition out of ACW after each interaction |
| ACW Timeout | Maximum ACW duration in seconds — max is 900 seconds |
| Manual Assignment | Allows supervisors to manually push waiting interactions to specific agents (rarely used in high-volume environments) |
ACW Modes
| Mode | Behavior |
|---|---|
| Mandatory Timeboxed | Automatically returns agent to Available after the ACW timeout expires |
| Mandatory Discretionary | Agent stays in ACW until they manually click to finish |
| Optional | Agent can choose to enter ACW or skip it |
| Optional Timed | ACW is optional, but auto-ends after the timeout |
| None | No ACW — agent is immediately available after interaction ends |
⚠️ Mandatory Timeboxed is most common in high-volume voice environments. Mandatory Discretionary is preferred when agents need time to complete CRM updates before going available again.
Step 3 — Routing Tab
Routing Methods
| Method | Behavior |
|---|---|
| Standard | Routes to the longest-idle available agent matching skills |
| Bullseye | Starts with strict skill requirements; relaxes requirements in rings over time if no agent found |
| Predictive | Uses AI to match the best agent to the specific caller based on historical outcomes |
Evaluation Methods
| Method | Behavior |
|---|---|
| All Skills Matching | Agent must have every skill required by the interaction |
| Best Available Skills | Routes to the agent with the highest combined skill proficiency |
Scoring Methods
| Method | Formula / Behavior |
|---|---|
| Conversation Score | Score = (Minutes in Queue) + (Priority Value) — allows high-priority calls to jump ahead of older, lower-priority calls |
| Priority Score | Ranks strictly by priority value set in Architect flow; equal-priority interactions handled FIFO |

Step 4 — Members Tab
| Option | Description |
|---|---|
| Add User | Search for and add individual agents |
| Add Work Team | Add an entire Work Team to the queue |
⚠️ Generally add either individual users or a Work Team — not a mix of both for the same queue.


Step 5 — Media-Specific Tabs
Voice Tab
| Field | Description |
|---|---|
| Service Level | Target percentage of calls answered within the SLA window (e.g., 80%) |
| Service Level Target | Time goal in seconds (e.g., 20 seconds) |
| In-Queue Flow | Architect flow handling the caller's wait experience — plays hold music, EWT announcements, or offers callback |
| Calling Party Name/Number | Outbound caller ID shown to recipients when agents call on behalf of this queue |
| Alerting Timeout | Seconds a call rings at an agent's station before being routed to the next available agent |
| Default Script | Script that pops on the agent's screen when they answer |
| Whisper Prompt | Short audio clip played only to the agent just before the caller connects — helps agents pivot context across multiple queues |
| Auto-Answer | If enabled, call connects to agent automatically without requiring them to click Answer |
| Continue Voice Recording during Q-Wait | Enabled = records hold music; Disabled = recording starts only when agent and caller connect (saves storage) |

Chat Tab
| Field | Description |
|---|---|
| Service Level & Target | SLA goal — digital targets are typically slightly longer than voice (e.g., 80% within 30 seconds) |
| Alerting Timeout | Seconds chat request flashes on agent screen before rerouting to next available agent |
| Auto-Answer | Enabled = chat session connects automatically; Disabled = agent must click Answer |
| Default Script | Published script that loads for the agent — often includes Data Actions to look up customer account data |
| In-Queue Flow (Message Flow) | Architect flow managing the customer wait experience — handles welcome messages and position-in-queue announcements |

Message Tab
Covers SMS, WhatsApp, Facebook Messenger, and LINE. Messaging is asynchronous — customers may not reply immediately.
| Field | Description |
|---|---|
| Service Level & Target | SLA goal — messaging SLAs are typically more relaxed than voice (e.g., 80% within 60 seconds) |
| Alerting Timeout | Seconds the notification flashes for the agent before rerouting |
| Auto-Answer | Enabled = message thread pops open immediately; recommended for high-volume SMS/WhatsApp queues |
| In-Queue Message Flow | Architect Inbound Message Flow — acts as a digital IVR, can collect account number or reason for contact via bot |
| Default Script | Script displaying customer data such as phone number or WhatsApp display name |
| Outbound SMS Number | DID or Short Code used when an agent starts a new outbound SMS — must be provisioned in SMS Inventory |

Email Tab
| Field | Description |
|---|---|
| Service Level & Target | SLA goal — email targets are typically set in hours rather than seconds (e.g., 90% within 4 hours) |
| Alerting Timeout | Seconds email flashes on agent screen before moving to next agent |
| Auto-Answer | Enabled = email workspace opens immediately; best for high-volume ticket environments |
| Outbound Email Address | Address recipients see when an agent replies (e.g., support@company.com) |
| Email Domain | Verified domain used for outbound email — validates sender identity |
| In-Queue Email Flow | Architect Inbound Email Flow — can perform keyword routing (e.g., raise priority if subject contains "Billing") |
| Default Script | Script displaying customer history or canned response suggestions |
| Auto-Reply | Sends an immediate acknowledgement to the customer before an agent reviews the email |

Callback Tab
| Field | Description |
|---|---|
| Service Level & Target | SLA goal — callback clock typically starts when the agent's phone rings for the return call |
| Alerting Timeout | Seconds callback request flashes on agent screen before rerouting |
| Allow Agents to Take Ownership | Agents can claim a scheduled callback so it routes back specifically to them |
| Ownership Duration | How long callback remains reserved for the specific agent — 1 hour to 7 days |
| Advance Scheduling | How far in advance an agent can schedule a callback — 1 hour to 30 days |
| Auto-Answer | Enabled = system dials customer and connects agent automatically; Disabled = agent must manually click Call |

Wrap-Up Codes Tab
⚠️ Critical: If wrap-up codes are not added to the queue here, agents cannot tag their interactions even if the codes exist globally in the system.

Interview Cheat Sheet
| Question | Answer |
|---|---|
| Max queues per org? | 5,000 |
| Max members per queue? | 5,000 |
| Max ACW timeout? | 900 seconds |
| What does Bullseye routing do? | Starts with strict skills; relaxes requirements in rings over time |
| Conversation Score formula? | Minutes in Queue + Priority Value |
| When does an interaction count toward utilization? | When it starts Alerting (ringing), not when answered |
| Can you mix Users and Work Teams in a queue? | Not recommended — use one or the other |
ACD Skills & Languages
| Topic | Detail |
|---|---|
| Navigation | Admin → Contact Center → ACD Skills & Languages |
| Purpose | Define skills and languages used by the ACD routing engine to match interactions to the right agents |
| Proficiency Scale | 1 (Beginner) to 5 (Expert) |
| Skill Status | Active (default) or Inactive (retired — preserves historical reporting data) |
Creating a Skill
⚠️ Once created, a skill must be assigned to a User profile or referenced in an Architect flow before it has any effect on routing.


Creating a Language
Languages are treated separately from skills because Genesys Cloud has built-in logic to prioritize a caller's native language during routing.
Assigning Skills to Users
Individual Assignment
Bulk Assignment
In the People list: select multiple agents → More Actions → Assign Skill
Proficiency Ratings
| Rating | Meaning |
|---|---|
| 1 | Beginner / Trainee |
| 2 | Basic |
| 3 | Intermediate |
| 4 | Advanced |
| 5 | Expert / Subject Matter Expert |
Skill Expressions (Advanced Routing)
Instead of a single skill requirement, use a Skill Expression Group with AND/OR logic:
(Skill: SIP == 5) AND (Skill: Oracle_SBC >= 3)
This allows highly specific routing without requiring a separate queue for every possible skill combination. Skill Expression Groups are configured under Admin → People & Permissions → Groups.
How Routing Uses Skills
In Architect's Transfer to ACD action, you specify:
- Target queue
- Required skill(s) and minimum proficiency level
- Language requirement (if applicable)
The ACD engine then matches the interaction to an available agent who meets all requirements. With Bullseye routing, if no agent matches, the requirements are relaxed in configurable rings over time.
Interview Cheat Sheet
| Question | Answer |
|---|---|
| Where are ACD skills created? | Admin → Contact Center → ACD Skills & Languages |
| What does setting a skill to Inactive do? | Retires it from new routing logic without deleting historical data |
| What is proficiency scale? | 1 (Beginner) to 5 (Expert) |
| How do you assign skills to multiple agents at once? | People list → select agents → More Actions → Assign Skill |
| What is a Skill Expression? | AND/OR logic combining multiple skills for routing (e.g., SIP == 5 AND SBC >= 3) |
| Why are languages separate from skills? | Genesys has built-in native-language prioritization logic for languages |
Wrap-Up Codes
| Topic | Detail |
|---|---|
| Navigation | Admin → Contact Center → Wrap-Up Codes |
| Purpose | Allow agents to categorize the outcome of each interaction for reporting, analytics, and quality |
| Scope | Created globally at org level — must also be assigned to each queue individually |
Overview
Wrap-up codes are disposition tags agents apply at the end of each interaction to classify what happened (e.g., Resolved, Escalated, Follow-up Required, Technical Issue). They feed directly into:
- Historical analytics and reports
- Quality evaluations
- Workforce management data
- Contact reason tracking
Creating Wrap-Up Codes
Assigning Wrap-Up Codes to a Queue
Codes must be added to each queue individually — creating them globally is not enough.
⚠️ Critical: If wrap-up codes are not assigned to the queue, agents cannot tag their interactions — even if the codes exist in the system globally.
Best Practices
| Practice | Reason |
|---|---|
| Keep code names clear and consistent | Improves reporting accuracy and agent usability |
| Limit the number of codes per queue | Too many choices slow agents during ACW |
| Use division assignment | Restricts management to appropriate admin teams |
| Review codes periodically | Remove outdated codes to keep reporting clean |
| Align codes with business reporting needs | Ensures data collected matches what leadership tracks |
Interview Cheat Sheet
| Question | Answer |
|---|---|
| Where are wrap-up codes created? | Admin → Contact Center → Wrap-Up Codes |
| Where are they assigned for use? | In each queue's Wrap-Up Codes tab |
| What happens if codes aren't assigned to the queue? | Agents cannot tag interactions, even if codes exist globally |
| What do wrap-up codes feed into? | Analytics, historical reports, quality evaluations, WFM data |
Utilization
| Topic | Detail |
|---|---|
| Navigation | Admin → Contact Center → Utilization |
| Purpose | Controls how many simultaneous interactions an agent can handle and which channels can interrupt others |
| Levels | Organization-wide default + per-user override |
Overview
Utilization defines agent capacity — how many interaction "slots" an agent has per media type and what priority rules govern interruptions between channels. It prevents agents from being overwhelmed while ensuring high-priority interactions (like voice calls) are never missed.
Organization-Wide Configuration
| Media Type | Typical Capacity |
|---|---|
| Voice | 1 (almost always) |
| Chat | 2–3 |
| 4–5 | |
| Message | 2–3 |
| Callback | 1 |
- Configure Can be interrupted by checkboxes — defines which channels can interrupt an active interaction
- Example: If an agent is working on an Email, can a Voice call interrupt? If checked, the agent sees the incoming call alert while the email draft stays open
- Block calls when on a non-ACD call — prevents ACD queue calls from reaching an agent who is already on an internal/personal call (Busy-on-Busy logic)
- Click Save

User-Level Override
To set different utilization for a specific agent (e.g., a Lead Engineer or Super Agent):
Key Technical Rules
| Rule | Detail |
|---|---|
| Capacity | Number of simultaneous interaction slots per media type |
| Interruption | Priority override — defines if a new channel can interrupt an active one |
| Non-ACD Blocking | Busy-on-Busy for internal/direct calls vs. ACD queue calls |
| Alerting counts | An interaction counts toward utilization when it starts Alerting (ringing), not when the agent answers |
| Voice interrupt | Voice is always a "hard" interrupt — takes precedence over all digital channels |
| Transfers | Non-ACD calls (transfers or direct dials) are excluded from utilization count unless "Block calls" is checked |
Summary
| Term | Meaning |
|---|---|
| Capacity | How many slots/sessions the agent has per channel |
| Interruption | Priority override logic between channels |
| Non-ACD Blocking | Busy-on-Busy for internal extensions vs. ACD lines |
Interview Cheat Sheet
| Question | Answer |
|---|---|
| Where is utilization configured? | Admin → Contact Center → Utilization |
| What are the two configuration levels? | Organization-wide default and per-user override |
| When does an interaction count toward utilization? | When it starts Alerting (ringing), not when answered |
| What does "Block calls when on a non-ACD call" do? | Prevents queue calls from reaching agents already on internal/personal calls |
| What is the typical voice capacity? | 1 — voice is almost always a single-slot media type |
Canned Responses & Response Assets
Canned Responses
| Topic | Detail |
|---|---|
| Navigation | Admin → Contact Center → Canned Responses |
| Purpose | Pre-written answers agents can insert into Chat, Email, or Message interactions for consistency and speed |
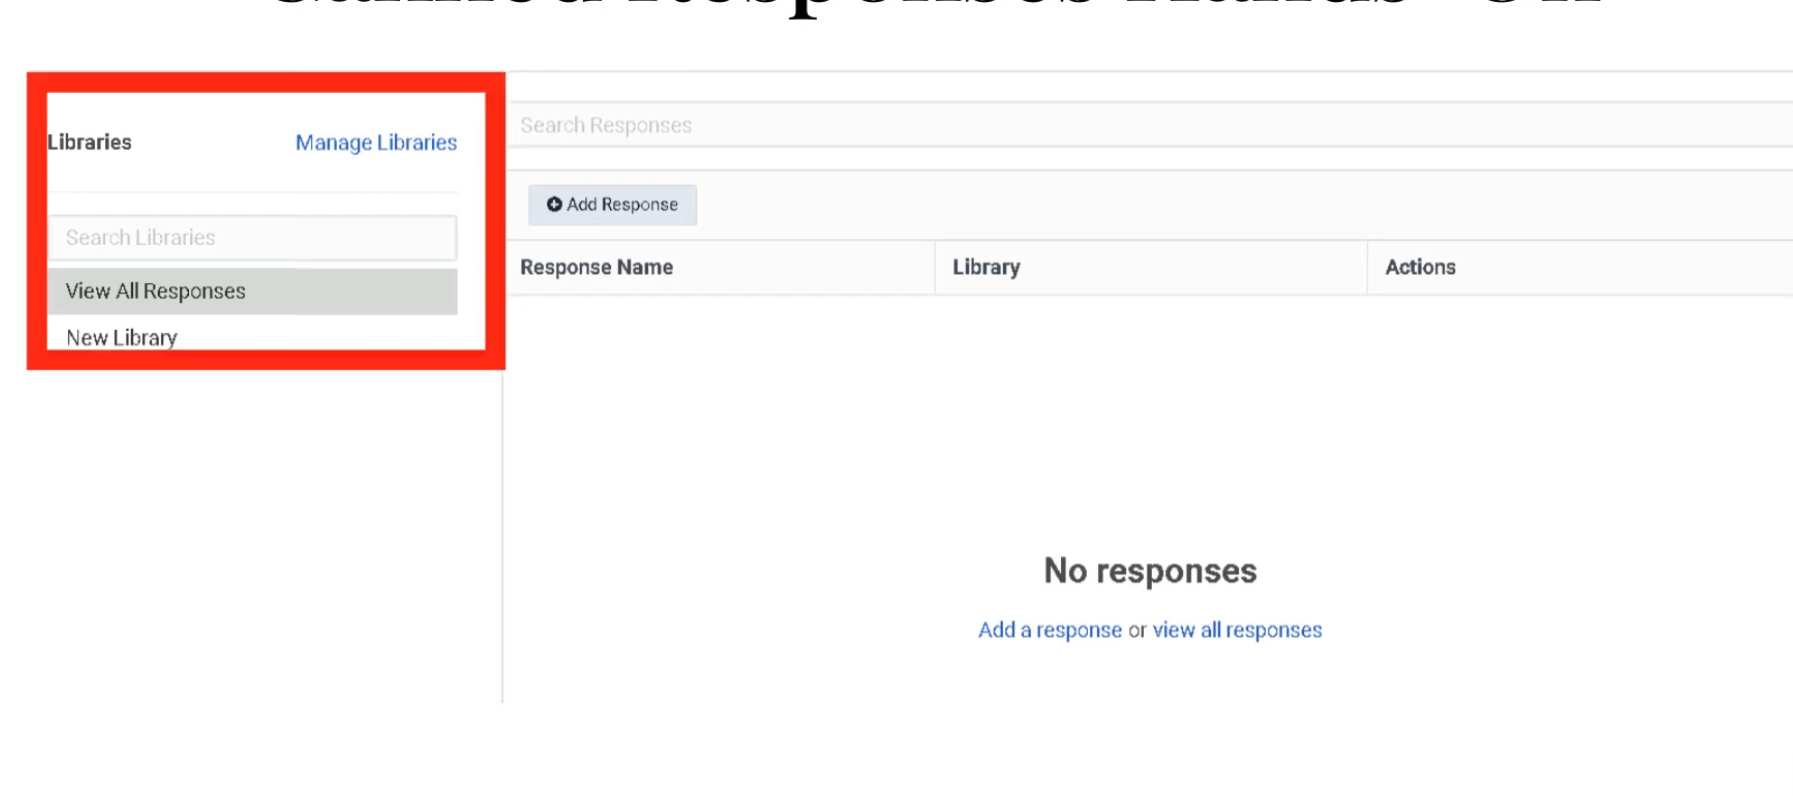
| Structure | Libraries → Responses |
| Channels | Chat, Email, Message (WhatsApp, SMS, social) |
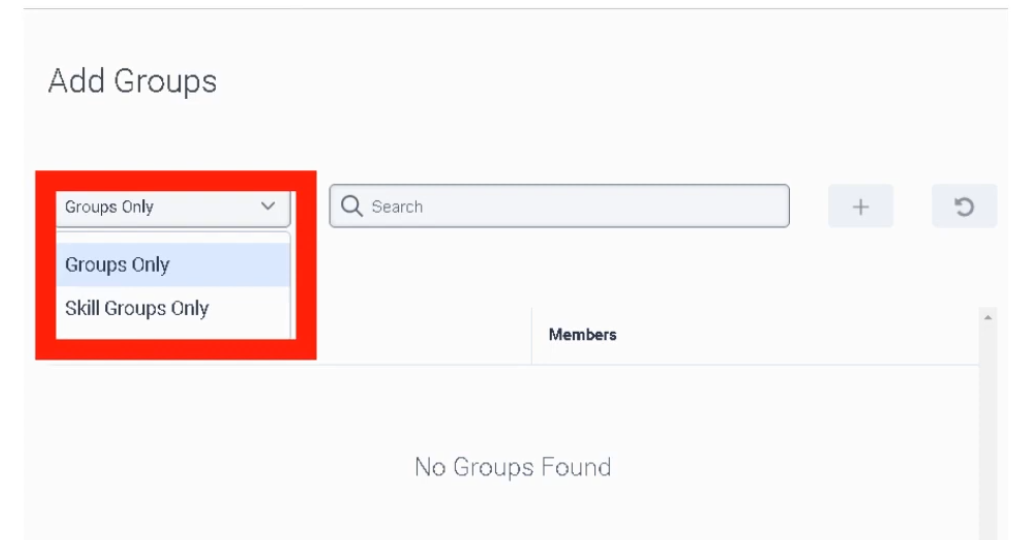
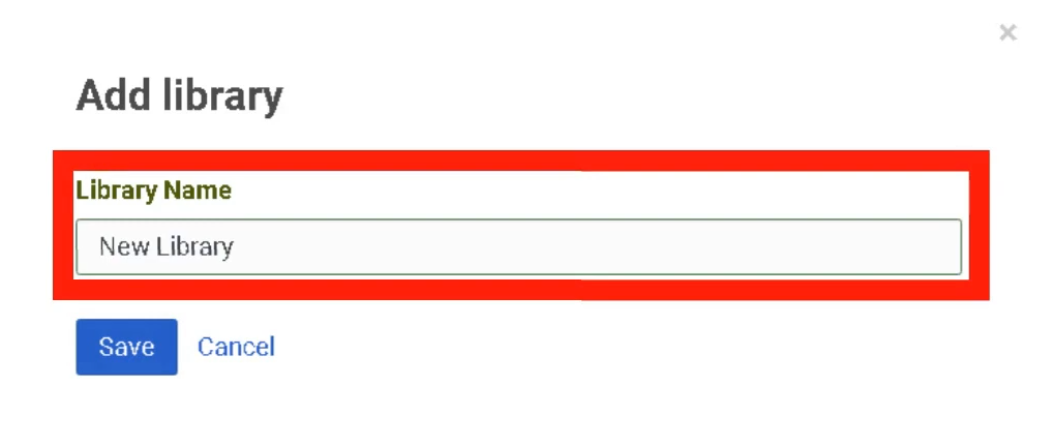
Libraries
Libraries group responses by team, department, or topic (e.g., Billing, Technical Support, General FAQ). Access is controlled at the library level — only relevant teams see specific content.
Creating a Canned Response

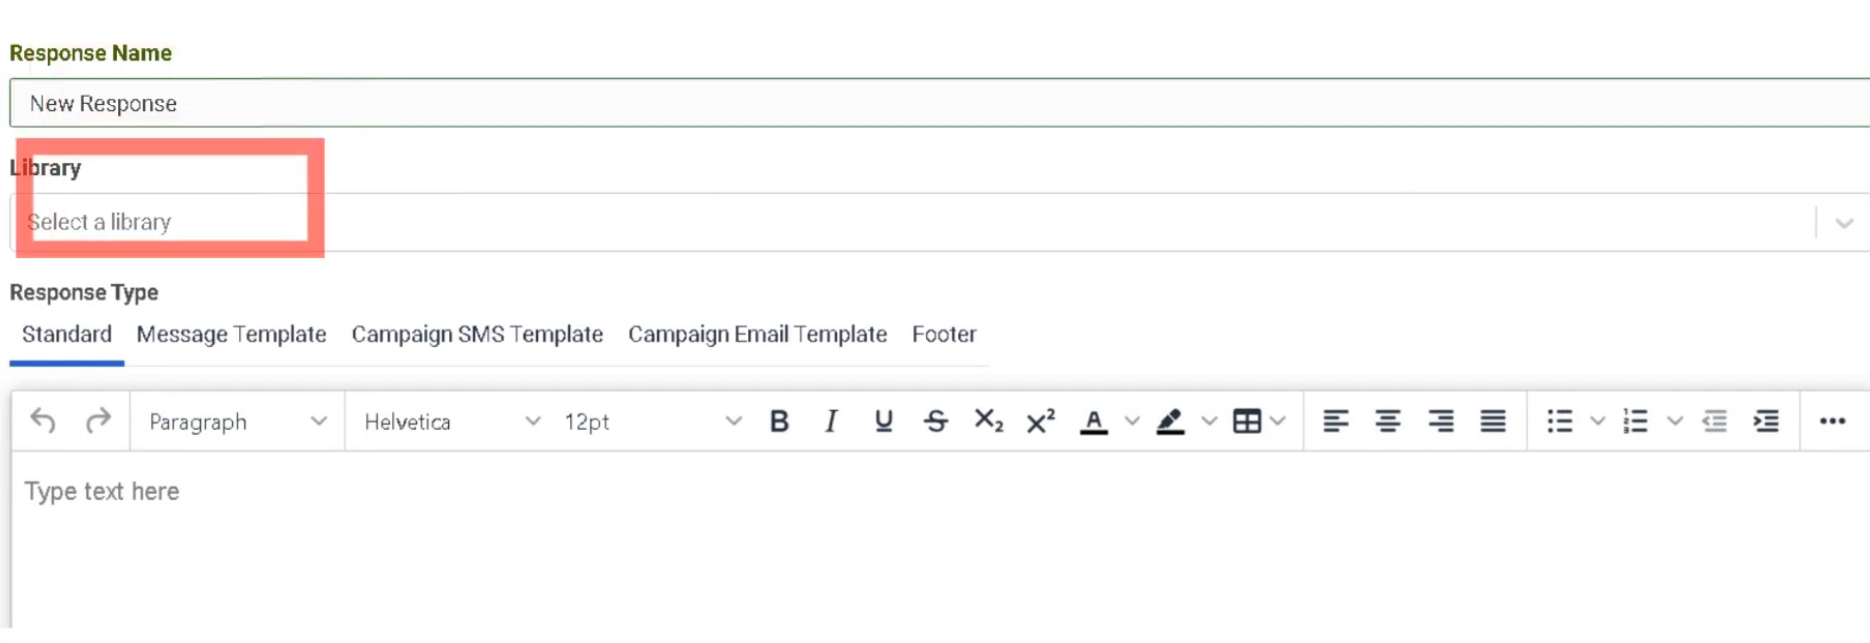
Response Types
| Type | Use Case | Constraint |
|---|---|---|
| Standard | Chat and Email replies | Can be edited or personalized by the agent before sending |
| Message Template | WhatsApp Business / proactive outbound | Requires pre-approval from Meta/WhatsApp — mandatory for messages sent 24+ hours after last customer message |
| Campaign SMS | Bulk SMS notifications | 160 characters per segment — carrier compliance required; supports variables/macros for personalization |
| Email Footer | Legal compliance / branding | Auto-appended to all outbound emails from the library — agents cannot see or remove it |
Agent Usage
| Mode | Description |
|---|---|
| Read-only | Agent reads the response to the customer — common for voice interactions |
| Insertion | Agent clicks to insert the full text directly into a chat, email, or messaging thread |
Best Practices
| Practice | Reason |
|---|---|
| Organize responses into focused libraries | Helps agents find responses quickly |
| Use clear response names | Agents search by name during live interactions |
| Keep standard responses concise | Long responses slow down chat interactions |
| Review Message Templates before WhatsApp campaigns | Meta approval can take days |
| Always configure Email Footer at library level | Prevents accidental removal of legal disclaimers |
Response Assets
| Topic | Detail |
|---|---|
| Navigation | Admin → Contact Center → Response Assets |
| Purpose | Central repository for images and documents embedded in Canned Responses |
| Supported Files | PNG, JPG (images); PDF (documents) |
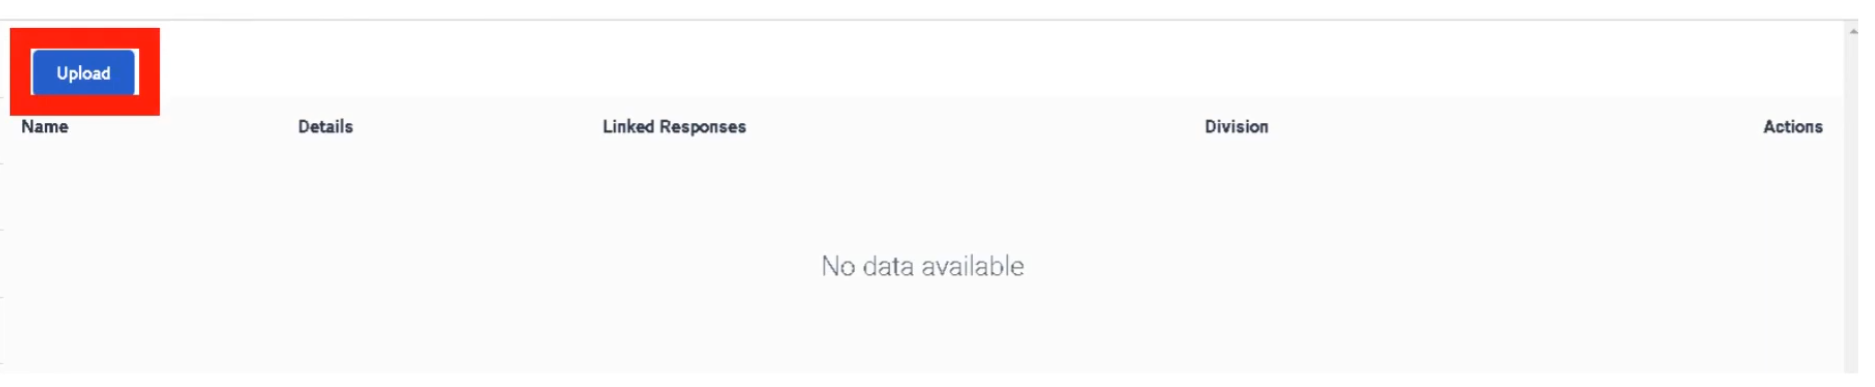
Overview
Response Assets is a central media library. Images and documents must be uploaded here before they can be embedded in a Canned Response. This ensures agents always use the most current version of a file and prevents broken image links in customer emails.
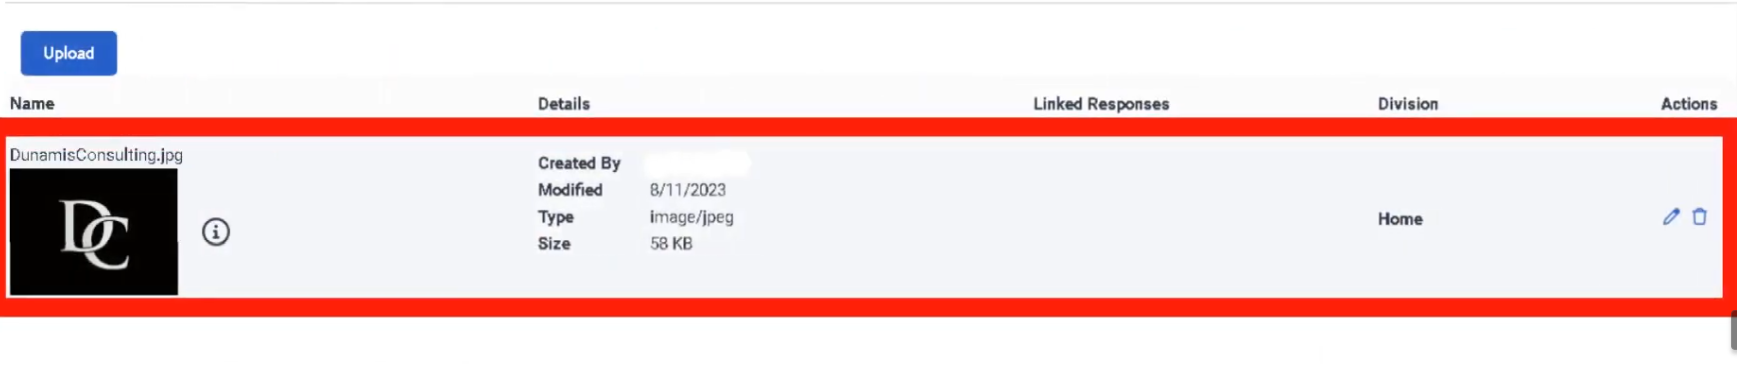
Asset Repository
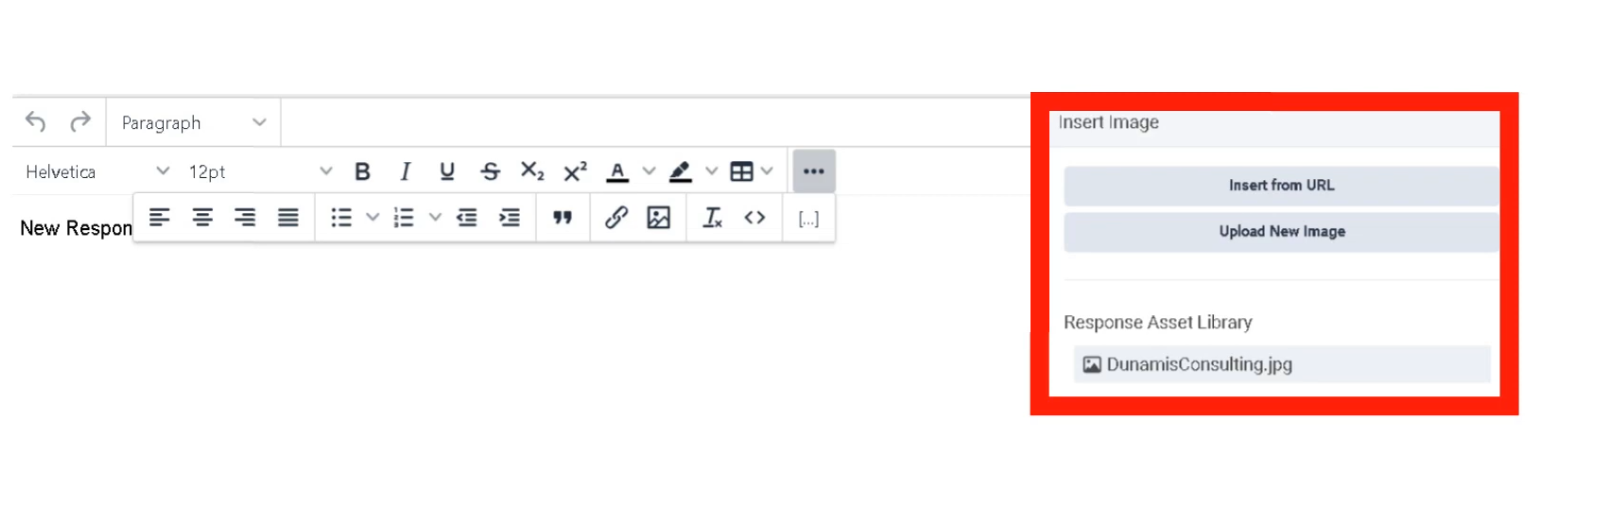
Embedding in Canned Responses
| Method | Description |
|---|---|
| Upload from Library | Select a pre-uploaded asset from the Response Asset collection — most secure and consistent |
| Insert from URL | Link to an externally hosted image — flexible but less secure |
| Upload New Image | Upload directly while editing a response — automatically populates the asset library |
Key Facts
| Feature | Detail |
|---|---|
| Centralization | Prevents broken image links in customer emails |
| Security | Internally hosted assets are scanned and verified by Genesys Cloud |
| Supported formats | PNG, JPG, PDF |
| Access | Accessible via a dedicated icon in the Canned Response editor |
Interview Cheat Sheet
| Question | Answer |
|---|---|
| What is a Canned Response library? | A named grouping of responses organized by team or topic |
| What approval does a WhatsApp Message Template require? | Pre-approval from Meta/WhatsApp |
| What is the SMS segment character limit? | 160 characters per segment |
| What does Email Footer do? | Auto-appends legal/branding content to outbound emails — agents cannot remove it |
| Where must images be uploaded before embedding in a response? | Response Assets (Admin → Contact Center → Response Assets) |
Email — Domains & Routing
| Topic | Detail |
|---|---|
| Navigation | Admin → Contact Center → Email |
| Purpose | Configure email domains, addresses, routing logic, and agent experience settings |
| Max Recipients | 50 total (To + CC + BCC combined) |
| BCC Limit | Maximum 5 hidden recipients per email |
Step 1 — Email Domains
Before receiving email, define the domain:
| Domain Type | Description |
|---|---|
| Genesys Cloud | Built-in subdomain (e.g., company.mypurecloud.com) — no DNS configuration required |
| Custom | Corporate domain (e.g., support@company.com) — requires DNS MX record or forwarding + DNS verification |
| Campaign/Agentless | Used specifically for outbound-only notifications — no inbound routing |
Custom domains require DNS verification before Genesys Cloud can send or receive on your behalf.


Step 2 — Email Address Configuration
Once the domain is defined, create specific email addresses:
| Field | Description |
|---|---|
| Email Address | The inbound address customers use (e.g., support@company.com) |
| From Name | Friendly display name shown in the customer's inbox (e.g., "Global Support Team") |
| From Email Address | Address the recipient sees when an agent replies — must be verified within your Genesys Cloud domain |
| Reply To | Optional — overrides the From address when a customer clicks reply; useful for directing replies to a specific mailbox |
| BCC Recipients | Up to 5 hidden recipients on every outbound response — agents cannot see or remove these; count toward the 50-recipient limit |
| Email History | Controls whether the prior conversation thread is included in agent replies |
| Email Actions | Enables/disables Multiple Replies or Forwards within the same thread |
Email History Options
| Option | Behavior |
|---|---|
| Always | Automatically includes the full prior thread |
| Never | Sends a clean reply without history |
| Let Agent Decide | Provides the agent a toggle to include or exclude history |
Step 3 — Routing & Handling Logic
| Routing Option | Description |
|---|---|
| Route to a Queue | Directly assigns email to an agent group — can also set ACD Skills, Language, and Priority |
| Route to a Flow | Sends email to an Architect Inbound Email Flow for automated processing or keyword-based routing |
| Do Not Route | For outbound-only addresses — no inbound routing expected |
Spam Routing
| Option | Behavior |
|---|---|
| Route Spam to a Flow | Sends flagged emails to a specific Architect flow for manual supervisor review |
| Disconnect | Automatically drops spam so it never reaches an agent |
Email Quick Reference
| Field | Constraint |
|---|---|
| Max Recipients | 50 total (To + CC + BCC) |
| BCC Limit | 5 addresses maximum |
| Priority | Added to Time in Queue in minutes for routing rank |
| Spam Handling | Disconnect or Route to Flow |
| Enqueue Flow | Architect flow handling the email while it waits in queue |

Queue Email Tab Settings
These settings are configured per queue under the Email tab of the Queue configuration:
| Field | Description |
|---|---|
| Service Level & Target | SLA goal — typically set in hours (e.g., 90% within 4 hours) |
| Alerting Timeout | Seconds email flashes on agent screen before moving to next agent |
| Auto-Answer | Enabled = email workspace opens immediately; best for high-volume environments |
| Outbound Email Address | Address recipients see when an agent replies from this queue |
| Email Domain | Verified domain used for outbound email |
| In-Queue Email Flow | Architect Inbound Email Flow — can perform keyword routing |
| Default Script | Script displaying customer history or canned response suggestions |
| Auto-Reply | Sends an immediate acknowledgement before an agent reviews the email |
Interview Cheat Sheet
| Question | Answer |
|---|---|
| What are the three domain types? | Genesys Cloud (built-in), Custom (DNS verified), Campaign/Agentless (outbound only) |
| Max total recipients per email? | 50 (To + CC + BCC combined) |
| Max BCC recipients? | 5 |
| How does Priority affect email routing? | It adds minutes to the Time in Queue for ranking |
| What are the spam routing options? | Disconnect or Route to Flow |
| What must be done before using a custom domain? | DNS verification |
Widgets — Web Chat & Web Messenger
| Topic | Detail |
|---|---|
| Navigation (Web Messenger) | Admin → Message → Messenger Configurations and Messenger Deployments |
| Navigation (Web Chat v2) | Admin → Contact Center → Widgets |
| Purpose | Provide a chat interface on websites connecting customers to Genesys Cloud agents |
| Modern Standard | Web Messenger — persistent, asynchronous |
| Legacy | Web Chat v2 — session-based |
Web Messenger (Modern Standard)
Web Messenger offers a persistent, asynchronous experience — customers can leave the website and return later with their full conversation history still intact.
| Component | Description |
|---|---|
| Messenger Configurations | Defines look and feel — color palette, logo, features (file uploads, emojis, read receipts) |
| Messenger Deployments | Links a Messenger Configuration to an Architect Inbound Message Flow — this is where routing is assigned |
| Deployment Snippet | JavaScript code pasted into the website <head> or <body> to render the chat icon |
| Deployment ID | Unique GUID identifying which configuration the website loads |
| Allowed Domains | Security whitelist — only URLs listed here can render the widget |
Web Chat v2 (Legacy)
Strictly session-based — if the customer refreshes or closes the browser tab, the chat session is lost.
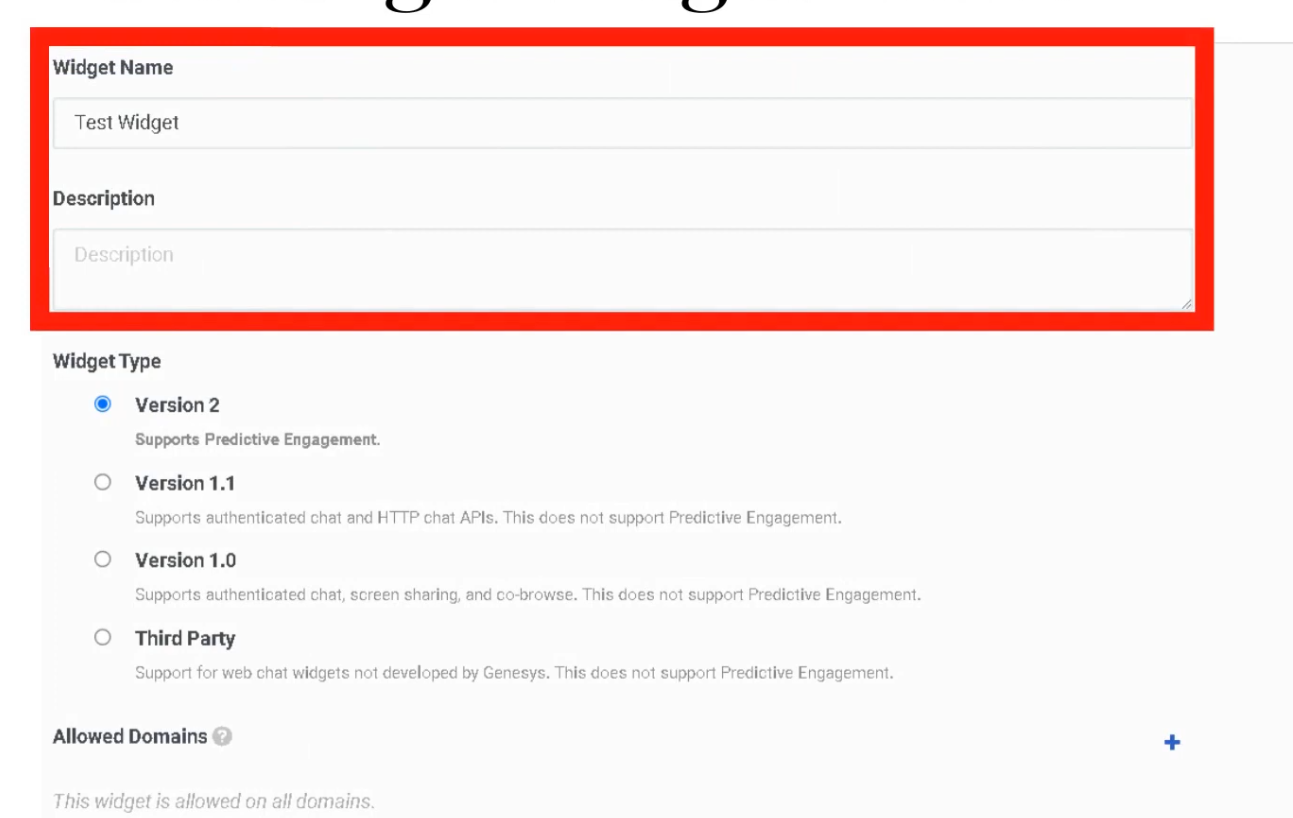
| Widget Type | Description |
|---|---|
| Standard | Simple chat window provided by Genesys |
| Third-Party | Uses Genesys as the routing engine while a completely custom UI is built by developers |
Widget Features
Both versions support the following controls:
| Feature | Description |
|---|---|
| File Uploads | Enable/disable customer ability to send images or documents |
| Typing Indicators | Shows when the agent or customer is typing |
| Read Receipts | Informs users when messages have been seen |
| Guest Chat | Allows unauthenticated chat, or require login to pull CRM data automatically |
| Pre-Chat Form | Collects Name, Email, Account Number before routing — data passed into Architect flow for intelligent routing |
Routing Logic
Widgets do not send chats directly to agents. They route to an Architect Inbound Message Flow first. The flow processes pre-chat form data and routes to the correct queue.
Customer Clicks Chat Widget
↓
Pre-Chat Form (Name, Email, Account Number)
↓
Architect Inbound Message Flow
↓
Data Evaluated / Customer Identified
↓
Transfer to Queue
↓
Agent
Deployment Steps (Web Messenger)
Connect to a chat flow:

Deployment key generated:

Technical Reference
| Component | Detail |
|---|---|
| Snippet | JavaScript placed in <head> or <body> of the website |
| Deployment ID | Unique GUID — identifies which configuration loads |
| Allowed Domains | Must whitelist all URLs where the widget appears |
| Persistence | Web Messenger supports Persistent or Clearing Conversation session modes |
Web Messenger vs. Web Chat v2
| Feature | Web Messenger | Web Chat v2 |
|---|---|---|
| Session type | Persistent / asynchronous | Session-based (lost on refresh) |
| Conversation history | Retained across sessions | Lost when session ends |
| Routing | Architect Inbound Message Flow | Architect Inbound Chat Flow |
| Status | Current standard | Legacy — still supported |
| Customization | Full branding via Messenger Config | Limited |
Interview Cheat Sheet
| Question | Answer |
|---|---|
| What is the modern widget standard? | Web Messenger — persistent and asynchronous |
| What happens to a Web Chat v2 session on page refresh? | The session is lost |
| What does the Deployment ID identify? | Which Messenger Configuration loads on the website |
| What must be configured for security? | Allowed Domains whitelist |
| Where does the widget route interactions? | To an Architect Inbound Message Flow, not directly to agents |
| What is a Pre-Chat Form used for? | Collecting customer data before routing for intelligent queue assignment |
Analytics Settings
| Topic | Detail |
|---|---|
| Navigation | Admin → Contact Center → Analytics Settings |
| Purpose | Configure abandon intervals and analytics capture settings for queue reporting |
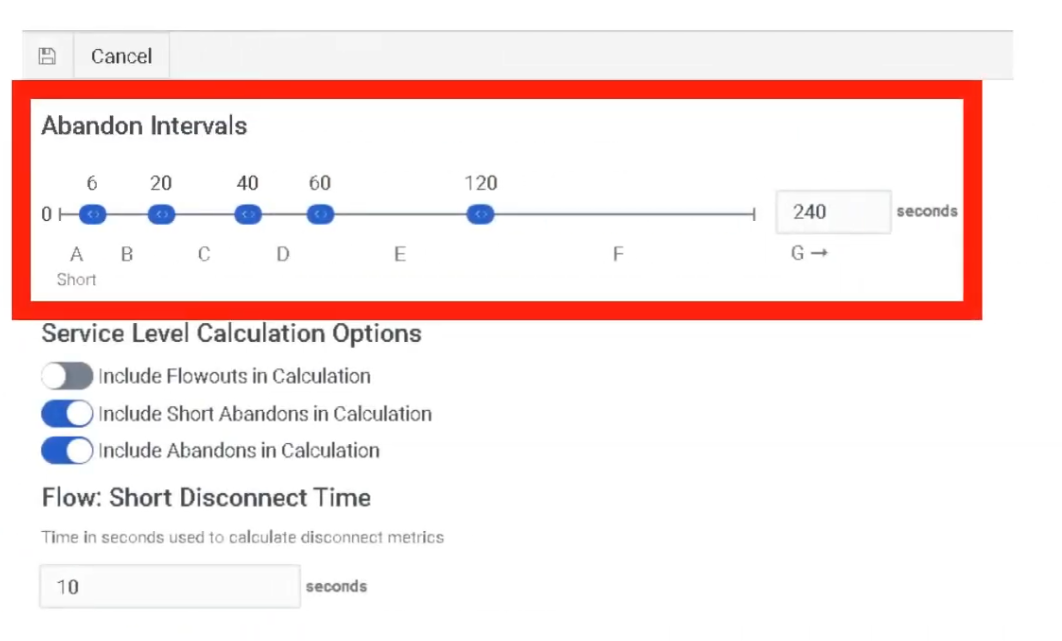
| Abandon Intervals | 7 configurable intervals (A–G) categorizing when customers disconnect from queue |
Overview
Analytics in Genesys Cloud transforms raw interaction data into actionable insights. Configuration here directly affects how abandonment is measured and reported across all queues.
Abandon Intervals
Abandon intervals measure how long customers waited in queue before disconnecting without reaching an agent. This metric helps identify queue tolerance, IVR issues, and staffing problems by grouping abandons into time ranges.
| Interval | Default Wait Range | Interpretation |
|---|---|---|
| A | 0–6 seconds | Immediate disconnects — misrouting, robocalls, misdials, IVR confusion |
| B | 6–20 seconds | Early abandons after entering queue |
| C | 20–40 seconds | Short wait abandonment |
| D | 40–60 seconds | Moderate wait abandonment |
| E | 60–120 seconds | Customers leaving after ~1–2 minutes |
| F | 120–240 seconds | Long queue wait frustration |
| G | >240 seconds | Very long wait abandonment |
⚠️ A large percentage in Interval A typically indicates misrouting, IVR confusion, or non-intentional calls — not a staffing problem.
Analytics Implementation Steps
| Step | Action |
|---|---|
| Step 1 | Set Service Level targets per queue — Admin → Contact Center → Queues |
| Step 2 | Configure Abandon Intervals — Admin → Contact Center → Analytics Settings |
| Step 3 | Ensure all queues have Wrap-Up Codes assigned so agents can tag interactions |
| Step 4 | Create Dashboards at Performance → Dashboards with relevant KPI widgets |
Real-Time Analytics
| Feature | Location |
|---|---|
| Performance Views | Performance → Workspace — pre-built views for Queues, Agents, and Interactions |
| Dashboards | Customizable screens with widgets for KPIs (Service Level, Agents On-Queue, Active Interactions, etc.) |
| Alerting Rules | Trigger email or browser notifications when metrics hit thresholds (e.g., Wait Time > 5 minutes) |
Historical Analytics
| Feature | Description |
|---|---|
| Standard Reports | Pre-packaged PDF or CSV reports (e.g., Queue Abandonment Detail, Agent Log-level Report) |
| Dynamic Views | Filter by date range, media type, wrap-up codes |
| Exporting | Manual export or scheduled delivery to S3 bucket or email address |
Core Analytics Metrics
Interaction Volume
| Metric | Description |
|---|---|
| Offered | Total interactions entering the queue |
| Answered | Interactions handled by agents |
| Flow-Outs | Interactions exiting queue through routing or IVR actions |
| Connected | Interactions successfully connected to agents |
Queue Performance
| Metric | Description |
|---|---|
| Service Level | Percentage of interactions answered within SLA target |
| ASA | Average Speed of Answer — average time before agent answers |
| Average Wait Time | Average time customers wait in queue |
| Longest Wait | Longest interaction currently waiting |
Customer Behavior
| Metric | Description |
|---|---|
| Abandoned | Interactions disconnected before reaching an agent |
| Abandon % | Abandoned ÷ Offered |
| Average Abandon Time | Average wait time before customer hangs up |
| Short Abandon | Disconnects within a configured short-time threshold |
Agent Handling
| Metric | Description |
|---|---|
| AHT | Average Handle Time = Talk Time + Hold Time + ACW |
| Talk Time | Active speaking time with customer |
| Hold Time | Time interaction placed on hold |
| ACW | After Call Work time |
| Transfers | Interactions transferred between agents or queues |
IVR / Flow Metrics
| Metric | Description |
|---|---|
| Flow Outcomes | Where customers exit an Architect flow (Success vs. Failure) |
| Containment Rate | Percentage of interactions resolved within IVR without reaching an agent |
| IVR Disconnects | Customers disconnecting during IVR navigation |
Advanced Metrics
| Metric | Description |
|---|---|
| Agent Utilization | Percentage of agent time spent handling interactions |
| Concurrency | Simultaneous digital interactions handled |
| Callback Rate | Percentage of callers choosing callback instead of waiting |
| Recontact Rate | Customers contacting support again after a recent interaction |
High Abandonment Troubleshooting
When investigating high abandonment, analyze these five together:
- ASA — Is average wait time excessive?
- Abandon Intervals — Which interval has the highest %? (Interval A = routing/IVR issue; Interval F/G = staffing issue)
- Service Level — Is the SLA target being met?
- Queue Staffing — How many agents are On-Queue vs. interactions waiting?
- Flow Outcomes — Are callers exiting the IVR before reaching the queue?
Knowledge Analytics
Knowledge Analytics measures how effectively knowledge base articles help resolve customer issues — for both agents and bots.
Search & Discovery
| Metric | Description |
|---|---|
| Knowledge Searches | Total searches performed in the knowledge base |
| Search Success Rate | Percentage of searches that returned useful articles |
| Search Failure Rate | Searches that produced no relevant results |
| Popular Search Terms | Most frequently searched keywords |
Article Usage
| Metric | Description |
|---|---|
| Article Views | Number of times a knowledge article was opened |
| Articles Shared | Articles sent to customers during interactions |
| Top Articles | Most frequently accessed articles |
| Article Feedback | Ratings or feedback from agents or customers |
Self-Service & Automation
| Metric | Description |
|---|---|
| Knowledge Match | Bot successfully finds a relevant knowledge article |
| Confidence Score | AI confidence in the article match |
| Knowledge Fallback | Bot cannot find a suitable article |
| Containment Rate | Issues resolved through self-service without an agent |

Interview Cheat Sheet
| Question | Answer |
|---|---|
| What do Abandon Intervals measure? | How long customers waited before disconnecting without reaching an agent |
| What does high % in Interval A suggest? | Misrouting, IVR confusion, or non-intentional calls — not a staffing problem |
| What is AHT? | Average Handle Time = Talk Time + Hold Time + ACW |
| What is ASA? | Average Speed of Answer — average wait time before an agent answers |
| What is Containment Rate? | Percentage of interactions resolved in IVR without reaching an agent |
| Where are Abandon Intervals configured? | Admin → Contact Center → Analytics Settings |
Panel Manager
| Topic | Detail |
|---|---|
| Navigation | Admin → Contact Center → Panel Manager |
| Purpose | Create custom UI panels embedded in the agent desktop for CRM systems, internal tools, dashboards, or web apps |
| Security Requirement | All embedded panel URLs must use HTTPS |
Overview
Panel Manager allows administrators to embed external tools directly into the Genesys Cloud agent workspace, eliminating the need for agents to switch between multiple applications during interactions.
Two Types of Panels in the Agent Desktop
| Type | Description |
|---|---|
| Interaction Panels | System panels automatically created when a customer interaction occurs (voice, chat, email, etc.) — manage the conversation itself |
| Custom Panels (Panel Manager) | Administrator-created panels embedding external tools, CRMs, dashboards, or internal applications — provide supporting context |
Custom Panel Configuration Fields
| Field | Description |
|---|---|
| Panel Name | Name displayed to agents in the desktop |
| URL | Web application URL loaded in the panel — must be HTTPS |
| Icon | Visual identifier shown in the agent interface |
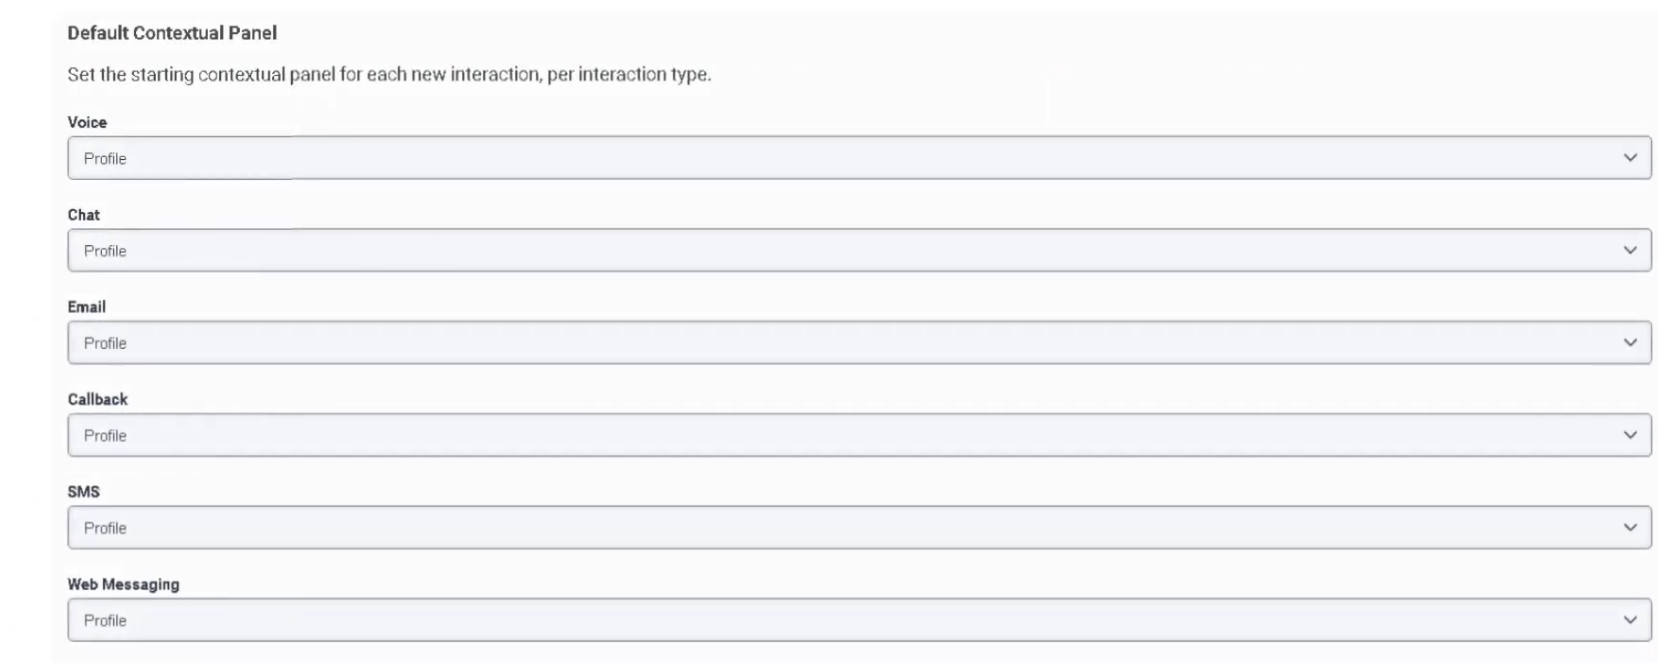
| Default State | Whether the panel loads automatically when an interaction begins |
| Role Assignment | Controls which users can see and access the panel |
| Width / Layout | Determines panel size and position in the desktop |
How to Create a Panel
Best Practices
| Practice | Reason |
|---|---|
| Use HTTPS only | Security requirement — HTTP URLs will not load |
| Keep UI lightweight | Heavy applications slow the agent desktop and increase handle time |
| Limit total panels | Too many panels reduce usability and create cognitive overload |
| Align panels with workflows | Panels should directly support what agents do during calls |
| Use role-based access | Only expose panels to the teams that need them |
Voice Interaction Panels
The following panels are available within the Voice Interaction workspace. Availability depends on enabled features, integrations, and licenses in the environment.
| Panel | Description |
|---|---|
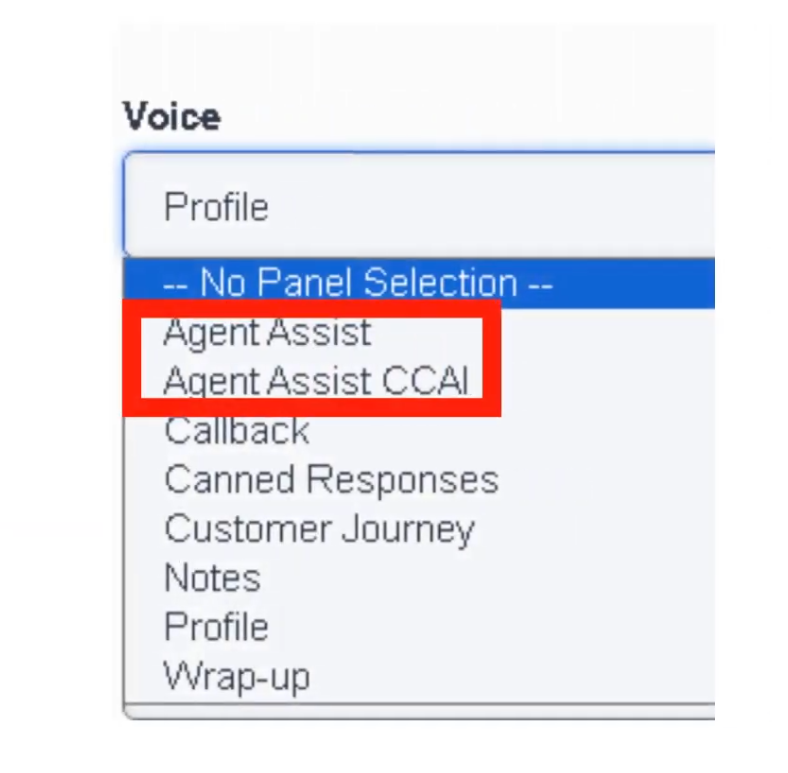
| Agent Assist | Real-time transcription, AI suggestions, knowledge article recommendations, intent detection |
| Agent Assist (CCAI) | Google Contact Center AI — speech-to-text, smart reply suggestions, knowledge recommendations |
| Callback | Displays callback interactions assigned to agent with dial controls and outcome tracking |
| Canned Responses | Insert predefined messages from response libraries during voice interactions |
| Customer Journey | Interaction timeline showing previous customer touches across all channels |
| Notes | Record interaction notes for documentation and follow-up |
| Profile | Customer identity, contact attributes, and synchronized CRM data |
| Wrap-Up | Classify interaction outcome with wrap-up codes and manage ACW |
Interaction Panels by Channel
System-created panels that appear when an interaction is active:
| Channel | Panel Features |
|---|---|
| Voice | Call controls (hold, mute, transfer, conference), dial pad, notes, wrap-up codes |
| Chat | Real-time messaging, canned responses, file sharing, typing indicators |
| Message (WhatsApp/SMS) | Asynchronous conversations, persistent thread history, attachments |
| Email composition, templates, attachments, threaded conversation history | |
| Callback | Scheduled callback details, dial controls, wrap-up codes |
| Social Messaging | Social platform messages, thread tracking, media attachments |
Interview Cheat Sheet
| Question | Answer |
|---|---|
| What is Panel Manager used for? | Embedding external tools (CRM, dashboards, internal apps) into the agent desktop |
| What URL protocol is required? | HTTPS — HTTP will not load |
| What is the difference between Interaction Panels and Custom Panels? | Interaction panels manage conversations; custom panels provide supporting tools |
| What is the Agent Assist panel? | AI-driven panel with real-time transcription, suggestions, and knowledge recommendations |
| What does the Customer Journey panel show? | Previous customer interactions across all channels |
Scripts
| Topic | Detail |
|---|---|
| Navigation | Admin → Contact Center → Scripts |
| Purpose | Guided UI forms presented to agents during interactions — collect data, enforce workflows, ensure compliance |
| Channels | Primarily voice; also supports chat and messaging workflows |
| Deployment | Must be Published before agents can use them; assign to queue or Architect flow |
Overview
Scripts are agent-facing forms that pop on the agent desktop when an interaction begins. They guide agents through structured workflows, collect customer information, enforce compliance steps, and integrate with backend systems via interaction attributes.
Script Components
| Component | Description |
|---|---|
| Labels | Static instructions or text displayed to agents |
| Text Input | Free text data entry field |
| Number Input | Numeric value field |
| Dropdown List | Selection from predefined options |
| Checkbox | Binary selection (Yes/No) |
| Buttons | Trigger actions such as form submission or navigation to next step |
| Page Sections | Organize the script layout visually |
| Data Bindings | Connect script fields to interaction attributes for use in Architect flows or reporting |
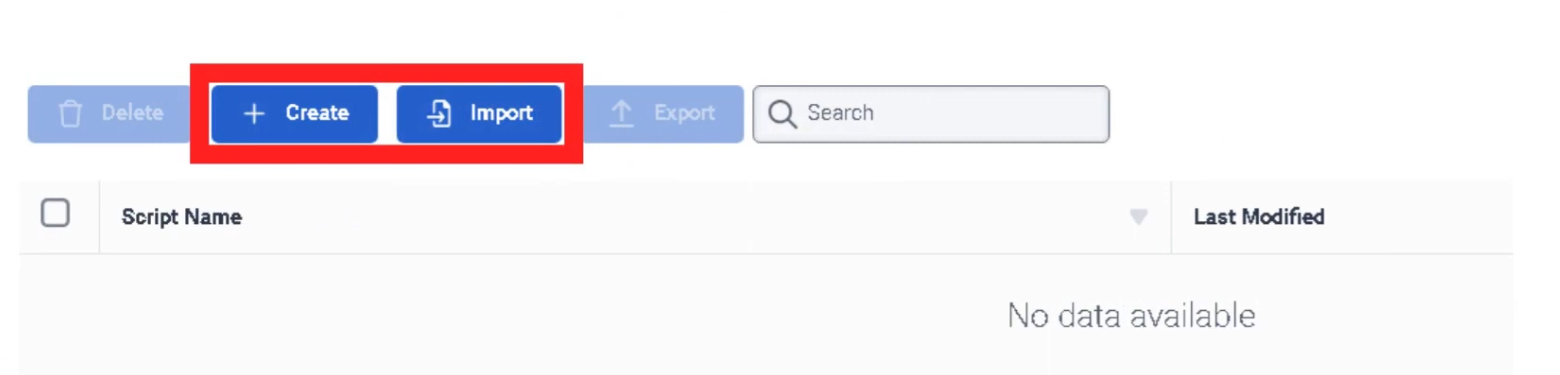
Implementation Steps
| Step | Action |
|---|---|
| 1 | Navigate to Admin → Contact Center → Scripts |
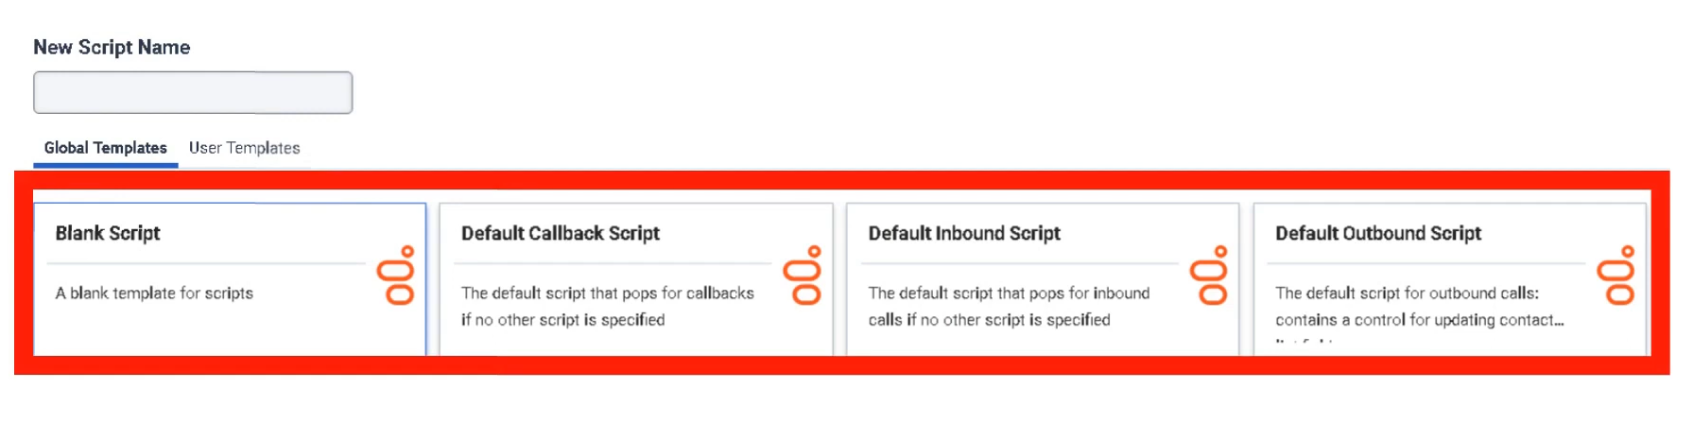
| 2 | Click Create Script |
| 3 | Define script name and interaction type (Voice, Chat, Email, etc.) |
| 4 | Design the layout using UI components |
| 5 | Bind fields to interaction attributes |
| 6 | Apply conditional display logic if needed |
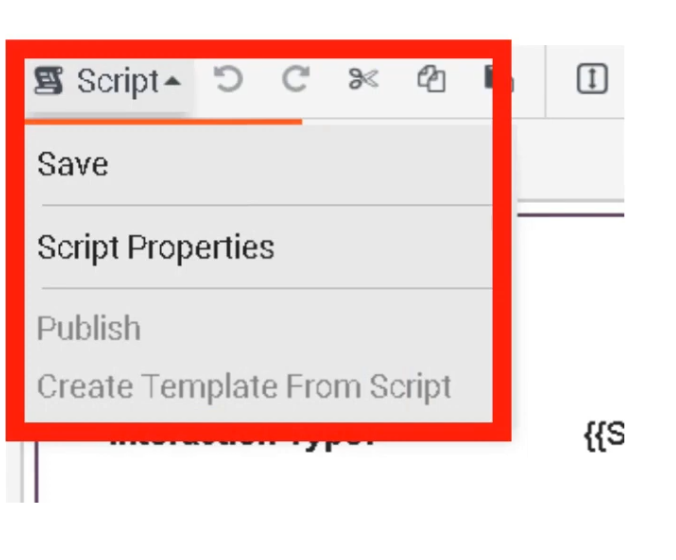
| 7 | Publish the script |
| 8 | Assign script to a queue (via queue's Default Script field) or Architect flow |
⚠️ Scripts must be Published before they can be assigned or used by agents. Unpublished scripts are not available for selection.
Conditional Logic
Scripts support conditional display — fields appear or hide based on previous selections:
| Condition | Result |
|---|---|
| Issue Type = Billing | Display billing section only |
| Issue Type = Technical | Display troubleshooting checklist |
| Issue Type = Sales | Display sales workflow and offer prompts |
Script Data Integration
| Integration | Description |
|---|---|
| Interaction Attributes | Stores collected data during the interaction — accessible in reporting and Architect |
| Architect Flows | Scripts pass captured data into flow logic for routing decisions or automations |
| CRM Systems | Data entered by agents can be pushed to external CRM systems via Data Actions |
| APIs | Scripts can trigger backend processes through integrations |
Example Agent Workflow
| Step | Agent Action |
|---|---|
| 1 | Customer call arrives |
| 2 | Script automatically opens on agent desktop |
| 3 | Agent verifies customer information |
| 4 | Agent selects issue category |
| 5 | Script dynamically displays relevant fields |
| 6 | Agent collects required information |
| 7 | Data stored in interaction attributes |
| 8 | Agent selects wrap-up code |
Best Use Scenarios
| Scenario | Benefit |
|---|---|
| Customer Verification | Ensures identity checks are completed consistently |
| Sales Calls | Guides agents through offers and upsell prompts |
| Technical Support | Provides structured troubleshooting steps |
| Compliance Workflows | Ensures required regulatory statements are delivered |
| Case Creation | Collects structured data for CRM tickets |
Best Practices
| Practice | Recommendation |
|---|---|
| Keep scripts simple | Avoid excessive fields that slow agents during live calls |
| Use conditional logic | Display only fields relevant to the current issue type |
| Integrate with CRM | Auto-populate customer data where possible |
| Reuse templates | Maintain standardized workflows across teams |
| Test before deployment | Validate with real call scenarios before publishing |
| Publish before assigning | Scripts must be published to appear in queue or flow assignment dropdowns |
Interview Cheat Sheet
| Question | Answer |
|---|---|
| What is a Script in Genesys Cloud? | A guided UI form that pops on the agent desktop during interactions |
| What must happen before a script can be used? | It must be Published |
| Where can scripts be assigned? | To a queue (Default Script field) or Architect flow |
| What are Data Bindings? | Connections between script fields and interaction attributes |
| What does conditional display do? | Shows or hides fields based on previous agent selections |
| What channels support scripts? | Primarily voice, also chat and messaging |
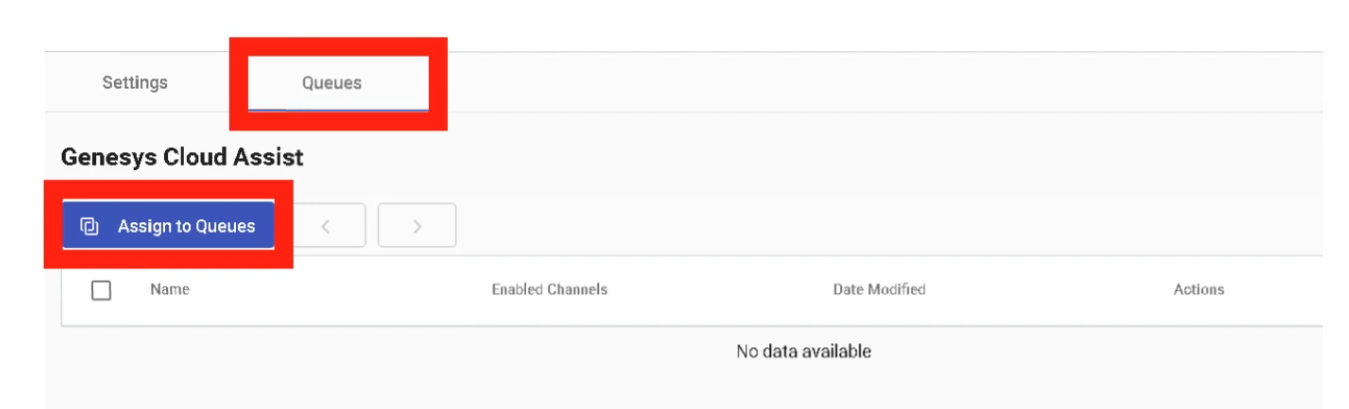
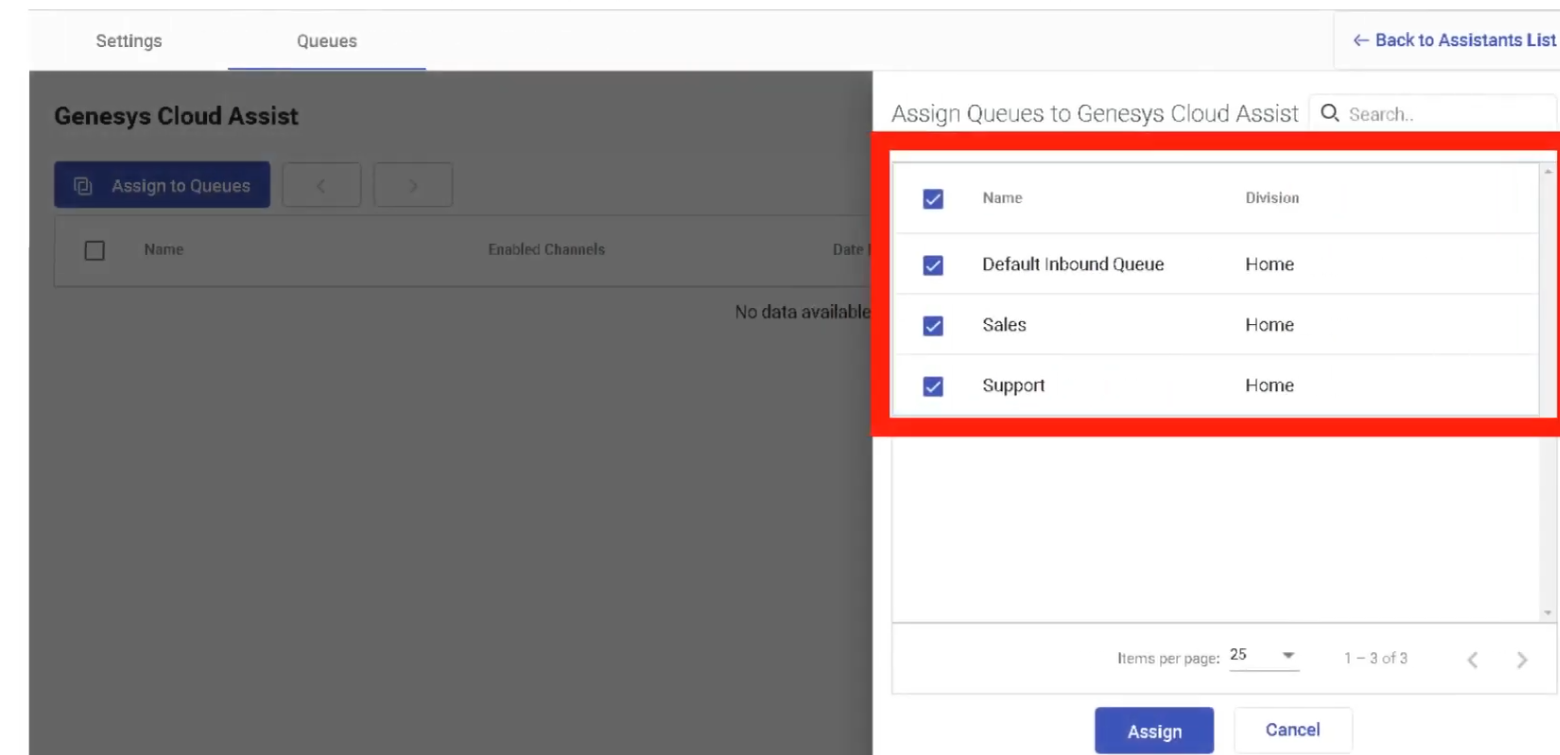
Assistants
| Topic | Detail |
|---|---|
| Navigation | Admin → Contact Center → Assistants |
| Purpose | AI-powered virtual agents (bots) using NLU to handle voice and digital interactions automatically |
| Technology | Natural Language Understanding (NLU) |
| Integration | Works with Knowledge Base and Architect flows |
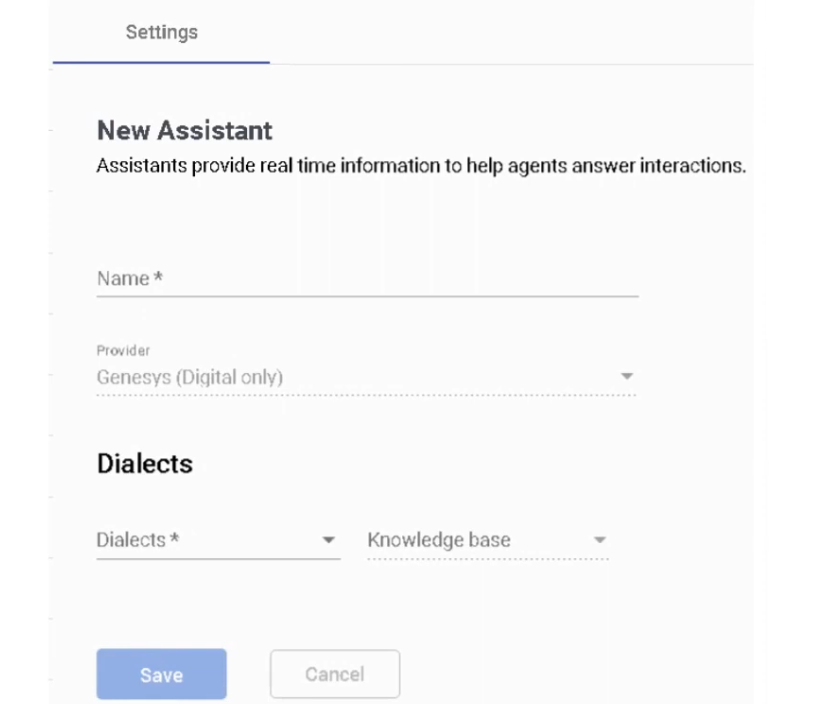
Overview
Assistants are AI-powered automation tools that enable organizations to build virtual agents capable of interacting with customers through voice and digital channels. They use Natural Language Understanding (NLU) to interpret customer requests and respond using knowledge articles, intents, and Architect flows.
Assistants are most effective for automating predictable, repetitive interactions — reducing call volume, improving self-service, and lowering operational costs.
Assistant Components
| Component | Description |
|---|---|
| Intents | The goal or purpose of the customer's request (e.g., Check_Order_Status, Reset_Password) |
| Utterances | Example phrases customers might say to express an intent — used to train the NLU model |
| Entities | Variables extracted from customer input (e.g., order number, city, product name) |
| Slots | Structured data fields collected during a conversation to fulfill an intent |
| Actions | Responses or operations the assistant performs when an intent is matched |
| Knowledge Integration | Allows the assistant to answer questions directly from knowledge base articles |
| Architect Flow Integration | Transfers conversation control to an Architect flow for advanced routing or logic |
Configuration Settings
| Option | Description |
|---|---|
| Language | NLU processing language — determines which utterance model is used |
| Confidence Threshold | Minimum confidence score required to trigger an intent — below this, fallback intent fires |
| Fallback Intent | Default action when no intent is recognized (e.g., transfer to agent) |
| Disambiguation | Prompts the customer to clarify when multiple intents closely match |
Example Assistant Flow
Customer: "I want to check my order status"
↓
Intent Detected: Order_Status
↓
Extract Entity: Order_Number
↓
Call API via Data Action / Architect Flow
↓
Return Response to Customer
↓
(If unresolved) Escalate to Human Agent
Best Use Scenarios
| Scenario | Description |
|---|---|
| Customer Self-Service | Resolve common issues without agent involvement |
| FAQ Automation | Answer frequently asked questions automatically using knowledge articles |
| Order / Account Status | Retrieve order status, balance, or appointment info via API |
| Call Routing by Intent | Identify customer intent and route to the correct queue |
| After-Hours Support | Provide automated assistance when agents are unavailable |
Integration Points
| Integration | Description |
|---|---|
| Architect Flows | Advanced routing or automation logic triggered by the assistant |
| Knowledge Base | Automated responses using knowledge articles — improves containment rate |
| Digital Channels | Chat, messaging (WhatsApp, SMS), and Web Messaging |
| Voice Channels | Voice bots for IVR interactions — speech recognition + NLU |
| Data Actions | API calls triggered by the assistant to retrieve or update external data |
Best Practices
| Practice | Recommendation |
|---|---|
| Start with high-volume intents | Automate the most frequent customer requests first for maximum impact |
| Keep intents simple | Avoid overly complex intent structures that reduce NLU accuracy |
| Use knowledge articles | Well-written articles dramatically improve bot containment rate |
| Train with real customer data | Use actual customer utterances — not hypothetical ones |
| Monitor analytics continuously | Review bot performance, confidence scores, and fallback rates regularly |
| Provide easy escalation | Always ensure customers can reach a human agent quickly when needed |
Interview Cheat Sheet
| Question | Answer |
|---|---|
| What technology do Assistants use? | Natural Language Understanding (NLU) |
| What is an Intent? | The goal or purpose of the customer's request |
| What are Utterances used for? | Training the NLU model with example customer phrases |
| What is an Entity? | A variable extracted from customer input (e.g., order number) |
| What happens when confidence is below the threshold? | The Fallback Intent fires — typically escalates to a human agent |
| What is Disambiguation? | Prompts the customer to clarify when multiple intents closely match |
Knowledge Base
| Topic | Detail |
|---|---|
| Navigation | Admin → Knowledge |
| Purpose | Create and manage AI-powered knowledge bases with Q&A articles surfaced to agents, bots, and self-service portals |
| Technology | Natural Language Understanding (NLU) + Generative AI answer generation |
| Max Knowledge Bases | 500 per organization |
| Max Articles per KB | 15,000 articles |
✅ Verified against Genesys Cloud Resource Center — March 2026
Licensing Requirements
| License | Knowledge Access |
|---|---|
| Genesys Cloud CX 1 | Not included — requires Digital Add-on II or AI Experience tokens |
| Genesys Cloud CX 1 + AI Experience tokens | Access granted without Digital Add-on II |
| Genesys Cloud CX 1 Digital Add-on II | Included |
| Genesys Cloud CX 2 / CX 2 Digital | Included |
| Genesys Cloud CX 3 / CX 3 Digital | Included |
| Genesys Cloud CX 4 | Included |
Required Permissions
| Permission | Purpose |
|---|---|
Knowledge > All |
Full knowledge base administration |
Analytics > Knowledge Aggregate > All |
View knowledge analytics |
Responses > Library > All |
Manage response libraries |
Response Assets > Asset > All |
Manage embedded media assets |
Overview — How Knowledge Base Works
The knowledge base stores question and answer (Q&A) pairs called articles. When a customer or agent asks a question, Genesys Cloud AI uses Natural Language Understanding to find the closest matching article and return the answer.
The knowledge base powers four key touchpoints:
| Touchpoint | Description |
|---|---|
| Agent Copilot | Automatically surfaces relevant articles to agents during live interactions — no manual search required |
| Virtual Agents / Bots | Architect bot flows query the knowledge base and return answers to customers during self-service |
| Knowledge Portal | Customer-facing self-service website — customers search articles, browse by category, or escalate to an agent |
| Messenger | Web Messenger deployments can query knowledge articles in bot conversations |
Step 1 — Create a Knowledge Base
⚠️ Language selection is permanent — it determines which NLU model processes the content. Create separate knowledge bases for each supported language if your contact center is multilingual.
Step 2 — Create Categories & Labels (Optional)
Categories and labels organize articles for easier management and navigation.
Categories
Categories group articles by topic and support nested hierarchies (parent → child).
Labels
Labels are color-coded tags for quick filtering and content reuse across portals.
- Click the Labels tab
- Enter a Label Name
- Select a Label Color
- Click Create Label
💡 March 2026: Knowledge portals can now be configured to return only articles matching specific labels — a single article can be reused across multiple portals with different label filters applied.
Step 3 — Create Articles
Articles are individual Q&A pairs. Each article has one primary question and one answer.
Create a New Article
Import Articles (Bulk)
- Open the knowledge base → Click Import
- Select a .json file containing Q&A pairs
- Genesys Cloud validates the file for errors
- Click Import to confirm — pairs are imported as individual FAQ articles
Step 4 — Format Articles
| Format Option | Description |
|---|---|
| Text Styling | Bold, italic, bullet lists, headings |
| Images | Upload images directly into the answer body |
| Videos | Embed video via URL |
| Rich Text | Full HTML-style formatting for structured answers |
Step 5 — Add Phrasings (Alternative Questions)
Phrasings are alternative ways customers might phrase the same question — used to train the NLU model for better matching accuracy.
- Open an article → click the Phrasings tab
- Add an alternative phrase (e.g.,
How do I change my password?,Forgot my password) - Optional: Enable Autocomplete — generates the phrase as a search prediction when customers type in the portal
- Click Save
💡 More phrasings = better NLU accuracy. Use real customer language, not formal documentation language.
Step 6 — Test Articles
- Open the knowledge base
- In the Test Articles pane, type a test question and press Enter
- The system returns the matched article with a Confidence Percentage
| Confidence Level | Meaning |
|---|---|
| High (80–100%) | Strong match — article surfaces reliably |
| Medium (50–79%) | Acceptable — consider adding more phrasings |
| Low (<50%) | Weak match — improve phrasing or content |
Step 7 — Publish Articles
- Open the article
- Click Publish to publish and continue editing
- Or Publish & Close to publish and exit
⚠️ Unpublished articles are invisible to all touchpoints — agents, bots, and the portal will not see them.
Article Touchpoint Variations
The same article can have different answer content per touchpoint — tailoring responses for agents vs. bots vs. self-service portals.
| Touchpoint | Use Case |
|---|---|
| Agent Assist / Agent Copilot | Detailed internal answer with troubleshooting steps and escalation guidance |
| Bot Flow (Dialog Engine / Digital) | Short, conversational response suitable for bot delivery |
| Knowledge Portal | Formatted customer-facing answer with images and links |
| Messenger | Concise answer for Web Messenger bot conversations |
Third-Party Knowledge Base Integration
Genesys Cloud supports connecting external knowledge systems so their content appears in Agent Copilot, Messenger, and the portal alongside native articles.
| Integration | Sync Type | Notes |
|---|---|---|
| Salesforce Knowledge | Automatic or Manual | Select channels and categories to sync |
| ServiceNow Knowledge | Automatic or Manual | Standard template articles only |
| SharePoint | Via Knowledge Fabric | Configured through Knowledge Configuration |
Adding a Third-Party Source
⚠️ The third-party integration must first be configured in
Admin → Integrationsbefore it appears as a source option here.
Knowledge Configuration (Knowledge Fabric)
Knowledge Configuration defines how knowledge is presented across Genesys touchpoints using a unified layer that can combine multiple knowledge bases and third-party sources.
| Feature | Detail |
|---|---|
| Navigation | Admin → Knowledge → Knowledge Configuration |
| Purpose | Unified knowledge source for Agent Copilot and Virtual Agents — supports generative AI answers |
| AI Answer Generation | Combines content from multiple relevant articles into a single dynamic response |
| Virtual Agent Use | From February 2026 — bots use either Knowledge Workbench V2 or Knowledge Fabric — one at a time, selected in Architect |
💡 February 2026: Bot authors can now select a Knowledge Fabric configuration in Architect and control generative answer mode and bias settings per flow. Existing rules-based bots using Workbench V2 are unaffected.
Agent Copilot & Knowledge
Agent Copilot uses the knowledge base to automatically surface articles to agents during live interactions.
| Feature | Description |
|---|---|
| Automatic Surfacing | Articles appear in the Agent Copilot panel based on conversation context |
| Answer Highlighting | Highlights the most relevant passage within a lengthy article |
| Knowledge Sharing | Agents can send articles directly to customers with one click |
| Interaction Summaries | AI-generated summaries at end of interactions using conversation + knowledge context |
| Wrap-Up Code Suggestions | Copilot suggests wrap-up codes based on the conversation |
Knowledge Portal
The Knowledge Portal is a customer-facing self-service website powered by the knowledge base.
| Feature | Description |
|---|---|
| Article Search | Customers search using natural language — NLU finds the best match |
| Category Browsing | Customers navigate by category hierarchy |
| Chatbot Access | Customers can escalate to a bot or live agent directly from the portal |
| Label Filtering | Portals can filter articles by label (March 2026 feature) |
| Customization | Configurable colors, messaging, and branding |
Knowledge Analytics
| Metric | Description |
|---|---|
| Top Articles | Most frequently accessed articles by agents and customers |
| Search Success Rate | Percentage of searches returning a useful result |
| Search Failure Rate | Searches returning no relevant result — indicates content gaps |
| Confidence Scores | AI match confidence per article returned |
| Containment Rate | Issues resolved through self-service without agent escalation |
Interview Cheat Sheet
| Question | Answer |
|---|---|
| Max knowledge bases per org? | 500 |
| Max articles per knowledge base? | 15,000 |
| What must happen before an article is live? | It must be Published |
| What is a Phrasing? | An alternative way a customer might ask the same question — trains the NLU model |
| What does Confidence Percentage mean? | How closely a query matches the article — higher = better match |
| What are the four main touchpoints for knowledge? | Agent Copilot, Virtual Agents/Bots, Knowledge Portal, Messenger |
| What is the Knowledge Portal? | A customer-facing self-service website for searching and browsing articles |
| What third-party sources can be integrated? | Salesforce Knowledge, ServiceNow Knowledge, SharePoint (via Knowledge Fabric) |
| What is Knowledge Fabric / Knowledge Configuration? | A unified knowledge layer combining multiple sources with generative AI answers for Agent Copilot and Virtual Agents |
| Can a bot use both Workbench V2 and Knowledge Fabric? | No — one at a time, selected in Architect per bot flow (February 2026) |
Chat & Messaging Configuration
| Topic | Detail |
|---|---|
| Navigation | Menu → Digital and Telephony → Message → Platform Integrations |
| Purpose | Connect third-party messaging channels (WhatsApp, Facebook, Instagram, SMS, LINE, X/Twitter, Apple Messages) to Genesys Cloud ACD routing |
| Routing Engine | All messaging interactions route through Architect Inbound Message Flows |
| Conversation Grouping | Multiple messages from the same customer within 72 hours are grouped into a single interaction |
✅ Verified against Genesys Cloud Resource Center — March 2026
Overview — ACD Messaging
Genesys Cloud ACD messaging enables agents to send and receive interactions from messaging channels like Facebook Messenger, X (Twitter) DM, LINE, WhatsApp, SMS, web messaging, and open messaging. Messages work like other interaction types — you can set alerting timeouts, service levels, use scripts, and view analytics.
Key behaviors:
- Genesys Cloud attempts to route message replies to the last handling agent.
- Messages are asynchronous but Genesys Cloud groups multiple messages into a single interaction if they occur within 72 hours — allowing the same agent to handle all messages in the conversation and see the interaction history.
- Agents complete wrap-up on each portion of a multi-message interaction.
Supported Messaging Channels
| Channel | Type | Notes |
|---|---|---|
| Web Messaging | Native Genesys | Persistent/async — configured via Messenger Deployments (see Widgets page) |
| SMS | Native | Requires provisioned DID or Short Code in SMS Inventory |
| WhatsApp Business | Third-party | Requires Meta Business Manager account + voice/SMS number ownership |
| Facebook Messenger | Third-party | Requires a Business Facebook page with Messenger enabled |
| Instagram DM | Third-party | Requires a business Instagram account |
| X (Twitter) DM | Third-party | Requires a registered X business handle |
| Apple Messages for Business | Third-party | Separate ACD setup required |
| LINE | Third-party | Supported via API/professional services |
| Open Messaging | Custom API | Connects any custom channel via outbound notification webhook |
Platform Integration Setup
All third-party messaging channels are configured from a central location:
You can create and manage integrations for the following platforms: Apple Messaging for Business, Direct Messaging, Facebook, Instagram Social Listening, WhatsApp, and X (Twitter). All integrations can be managed and updated from the centralized Messaging Platforms page.
WhatsApp Configuration
Prerequisites
- Meta Business Manager account — business must be verified with Meta
- A voice or SMS number provisioned and owned by the customer (not Genesys)
- Customer retains ownership of the number while the WhatsApp account is active
Setup Path
Key WhatsApp Rules
| Rule | Detail |
|---|---|
| 24-hour response window | Agents must reply within 24 hours of the customer's last message |
| After 24 hours | Only Message Templates (pre-approved by Meta) can be sent — free-text responses are blocked |
| Opt-in requirement | Meta requires explicit customer opt-in before outbound WhatsApp messages can be sent — captured via IVR, website, or SMS |
| Outbound throughput | Up to 18,000 messages/minute for outbound campaigns; up to 3,000 messages/minute for agentless API messages (as of February 2026) |
| Voice notes | Agents can play back, record, and download .ogg voice note files within WhatsApp conversations |
Facebook Messenger Configuration
Prerequisites
- A business Facebook page with Messenger enabled
- Facebook Business account
Setup Path
Instagram Direct Message Configuration
Prerequisites
- A business Instagram account linked to a Facebook Business page
Setup Path
X (Twitter) Direct Message Configuration
Prerequisites
- A registered X (Twitter) business handle
Setup Path
Open Messaging (Custom Channels)
Open Messaging allows connection to any custom messaging platform not natively supported by Genesys Cloud — such as Telegram, WeChat, custom apps, or proprietary enterprise messaging tools.
| Feature | Detail |
|---|---|
| Method | Outbound Notification Webhook — Genesys sends and receives messages via your middleware |
| Middleware | Customer is responsible for building and maintaining middleware between Open Messaging and the external platform |
| Routing | Full ACD routing, skills, queues, and analytics apply like any native channel |
Routing Architecture for All Messaging Channels
All messaging channels — without exception — route through Architect Inbound Message Flows before reaching an agent.
Customer sends message (WhatsApp / FB / SMS / etc.)
↓
Platform Integration receives message
↓
Architect Inbound Message Flow
├── Bot automation (optional)
├── Customer identification
├── Data collection
└── Transfer to ACD Queue
↓
Agent receives interaction
Character Limits by Channel
Message composition supports channel-specific character limits: WhatsApp and web messaging (4,000), Facebook (2,000), Instagram (1,000), SMS (160/765), and Apple Messages for Business (2,000).
| Channel | Character Limit |
|---|---|
| 4,000 | |
| Web Messaging | 4,000 |
| Facebook Messenger | 2,000 |
| Apple Messages for Business | 2,000 |
| Instagram DM | 1,000 |
| SMS (standard segment) | 160 |
| SMS (Unicode/extended) | 765 |
File Attachments by Channel
| Channel | Supported Formats | Max Size |
|---|---|---|
| JPG, PNG, GIF, PDF, voice notes (.ogg) | Platform limit | |
| Facebook Messenger | JPG, PNG, GIF | Platform limit |
| Apple Messages for Business | Multiple formats | 100 MB |
| Web Messaging | JPG, PNG, GIF | Platform limit |
Multiple file attachments are sent as individual messages — not bundled.
Agent Behavior — Messaging Interactions
| Feature | Detail |
|---|---|
| Conversation history | Agents see prior bot and agent conversation transcripts |
| Delivery status | Pending / Delivered / Failed indicators per message |
| Canned responses | Available in all messaging channels |
| Voice notes | WhatsApp only — agents can record, play back, and download |
| Data filtering | From February 2026 — outbound messages can be checked against admin-defined content filters (profanity, regex patterns) |
| Authentication indicator | Green shield shown for authenticated web messaging sessions |
Customer Responsibilities
When integrating third-party messaging channels, the customer (not Genesys) is responsible for:
| Responsibility | Detail |
|---|---|
| Platform accounts | Owning and maintaining all third-party business accounts (Meta, X, Instagram) |
| Number ownership | WhatsApp phone numbers are owned by the customer, not Genesys |
| Meta Business Verification | Required before WhatsApp can be activated |
| Terms of Service compliance | Must adhere to each platform's messaging terms and policies |
| Open Messaging middleware | Custom channel integrations require customer-built middleware |
Interview Cheat Sheet
| Question | Answer |
|---|---|
| Where are messaging platform integrations configured? | Menu → Digital and Telephony → Message → Platform Integrations |
| How long before messages from the same customer are grouped? | 72 hours |
| What happens with WhatsApp after 24 hours? | Free-text replies are blocked — only pre-approved Message Templates can be sent |
| What is the WhatsApp outbound campaign throughput limit? | 18,000 messages per minute (February 2026) |
| What is Open Messaging used for? | Connecting custom or unsupported channels via webhook + customer middleware |
| Who owns the WhatsApp phone number? | The customer — not Genesys |
| What is the SMS character limit per standard segment? | 160 characters |
| What routes all messaging interactions? | Architect Inbound Message Flows |
| What is the file attachment limit for Apple Messages for Business? | 100 MB |
Outbound Dialing — Overview & Settings
| Topic | Detail |
|---|---|
| Navigation | Admin → Outbound or Menu → Digital and Telephony → Outbound |
| Purpose | Configure and run automated outbound call and messaging campaigns to contact lists of customers |
| Dialing Modes | Preview, Progressive, Power, Predictive, Agentless, External |
| Campaign Types | Voice Campaigns, Digital Campaigns (SMS/Email/WhatsApp) |
✅ Verified against Genesys Cloud Resource Center — March 2026
Outbound Module Overview
Outbound in Genesys Cloud allows organizations to proactively reach customers through automated dialing campaigns. The system manages who to call, when to call them, how to dial, and what happens based on the result — including compliance controls like Do Not Call (DNC) lists and callable time windows.
Key Outbound Objects
| Object | Description |
|---|---|
| Contact Lists | The list of people to contact — phone numbers, names, and custom data fields |
| DNC Lists | Do Not Call lists — numbers the system will never dial |
| Campaigns | The configuration that defines dialing mode, contact list, queue, rules, and schedule |
| Attempt Controls | Limits on how many times a contact can be attempted |
| Callable Time Sets | Time windows defining when dialing is allowed (by time zone) |
| Call Analysis Response Tables | Rules for what to do when a live person, answering machine, or busy signal is detected |
| Rule Sets | Logic-based call rules and campaign rules applied during dialing |
| Campaign Sequences | Chained campaigns that run in order — start/stop the sequence instead of individual campaigns |
| Wrap-Up Code Mappings | Maps agent wrap-up codes to campaign outcomes (e.g., "Resolved" = stop calling this contact) |
Outbound Settings (Org-Level)
Admin → Outbound → Outbound Settings
These settings apply to all campaigns in the organization.
| Setting | Description | Default / Limit |
|---|---|---|
| Max Calls Per Agent | Maximum simultaneous outbound calls placed per available agent | 1.0–15.0 |
| Max Line Utilization | Percentage of Edge lines available for outbound campaigns | Configurable |
| Compliance Abandon Threshold | Seconds allowed before a queue-transferred call is classified as a Compliance Abandon | 2 seconds default |
| Calls Subject to Compliance Abandon Rate | Choose: All Calls or Calls That Reached the Queue | Configurable |
| Reschedule Time Zone Skipped Contacts | Automatically reschedules contacts skipped due to time zone restrictions | Optional |
| Max Calls Per Second (CPS) | Maximum calls dialed per second across the entire org | 15 CPS default — increase via Care case |
⚠️ Each Edge handles up to 350 lines. To increase CPS beyond 15, open a Genesys Care case with telephony model and business justification. Turnaround is typically 10 business days.
Outbound Organization Limits
| Object | Limit |
|---|---|
| Simultaneous voice campaigns running | 50 |
| Simultaneous digital campaigns running | 25 |
| Skills-based dialing campaigns | 5 |
| Max contacts per organization | 5,000,000 |
| Max contacts per contact list | 1,000,000 |
| Max DNC records per DNC list | 1,000,000 |
| Max DNC records per org | 2,000,000 |
| Max contact list columns | 50 |
| Max phone number columns per list | 10 |
| Max queue members (skills-based dialing) | 500 |
| Max queue members (agent-owned campaign) | 200 |
| Max queue members (any campaign) | 1,000 |
| Campaign priority range | 1 (lowest) to 5 (highest) |
| Preview campaign duration | 1 second to 20 minutes |
| Callback advance scheduling | Up to 30 days |
| Phone number minimum digits | 10 digits, E.164 format |
| Schedules per campaign | 1 |
| Schedule intervals per campaign | 500 |
Automatic Time Zone Mapping (ATZM)
ATZM automatically assigns a time zone to each contact record based on their phone number or postal code, ensuring calls are only placed during compliant hours.
| Setting | Default |
|---|---|
| Mapped contacts calling window | 8:00 AM – 9:00 PM local time |
| Unmapped contacts calling window | 2:00 PM – 8:00 PM EST |
| Supported countries | United States (default), Canada (opt-in) |
⚠️ ATZM from outside North America to dial North American numbers requires the Genesys Cloud org to reside in a North American AWS region. Canadian postal codes must use the format
A1A 1A1(7 characters with space after 3rd character).
Campaign Priority
When multiple campaigns share the same queue, Priority (1–5) determines proportional call distribution:
- Higher priority campaigns receive more calls per agent over time
- Equal priority campaigns share lines proportionally
- Agents participate automatically in multiple campaigns via shared queues
Access Control (Divisions)
Outbound campaigns support division-based access control — different admin teams can be restricted to manage only their own campaigns:
- Assign the Outbound Admin role to a group
- Assign a specific Division to that role
- Only campaigns in that division are visible and manageable by that group
Interview Cheat Sheet
| Question | Answer |
|---|---|
| Where are org-level outbound settings configured? | Admin → Outbound → Outbound Settings |
| What is the default CPS limit? | 15 calls per second — increase via Care case |
| What is the default compliance abandon threshold? | 2 seconds |
| What is ATZM? | Automatic Time Zone Mapping — assigns time zones to contacts to enforce compliant calling windows |
| Default calling window for mapped contacts? | 8:00 AM – 9:00 PM local time |
| Default calling window for unmapped contacts? | 2:00 PM – 8:00 PM EST |
| Max contacts per org? | 5,000,000 |
| Max contacts per contact list? | 1,000,000 |
| How many voice campaigns can run simultaneously? | 50 |
| How many digital campaigns can run simultaneously? | 25 |
Outbound Dialing Modes
| Topic | Detail |
|---|---|
| Navigation | Admin → Outbound → Campaign Management |
| Purpose | Select the dialing strategy that determines how the system places calls and connects agents |
| Default Mode | Preview |
| Number of Modes | 6 — Preview, Progressive, Power, Predictive, Agentless, External |
✅ Verified against Genesys Cloud Resource Center — March 2026
Dialing Mode Comparison
| Mode | Who Dials | Agent Required | Best For | Min Agents |
|---|---|---|---|---|
| Preview | Agent manually | Yes | High-value sales, debt collections, B2B | 1+ |
| Progressive | System — 1 call per agent | Yes | Compliance-sensitive, moderate volume | Any |
| Power | System — multiple per agent | Yes | High volume with controlled abandonment | 15+ recommended |
| Predictive | System — AI-paced | Yes | Maximum efficiency, large call centers | 15+ required |
| Agentless | System — no agent | No | Notifications, surveys, IVR delivery, reminders | None |
| External | System — routes to external | Yes | Routing to external agents or systems | Any |
Preview Mode
In Preview mode, the agent receives a contact record and manually decides when to dial.
| Feature | Detail |
|---|---|
| Agent control | Agent reviews contact info before calling |
| Timer | Optional countdown — system auto-dials when timer expires |
| Agent-owned records | Agents can own specific contacts and handle all retries |
| Efficiency | Lowest efficiency — highest quality per contact |
| Compliance | Safest mode — no risk of abandoned calls from over-dialing |
| Best use | Collections, high-value B2B sales, sensitive outreach requiring personalization |
⚠️ Preview campaigns ignore pacing options — the agent controls the pace entirely.
Progressive Mode
In Progressive mode, the system automatically dials exactly one call per available agent.
| Feature | Detail |
|---|---|
| Dialing ratio | 1 call : 1 available agent — always |
| Abandoned calls | Near-zero risk — there is always an agent ready when a contact answers |
| Call analysis | Detects live person vs. answering machine before connecting to agent |
| Efficiency | Moderate — no wasted agent time waiting for answers, but no over-dialing |
| Compliance | Excellent — guarantees agent availability; no abandoned call risk |
| Best use | Compliance-sensitive environments, smaller agent pools, regulated industries |
💡 Progressive is the recommended mode when you have fewer than 15 agents and cannot use Predictive.
Power Mode
Power mode dials multiple calls per available agent using a pacing algorithm.
| Feature | Detail |
|---|---|
| Dialing ratio | More than 1 call per agent — determined by pacing algorithm |
| Pacing | Algorithm predicts when an agent becomes available and pre-dials accordingly |
| Call analysis | Required — system drops or routes unanswered/machine calls |
| Abandoned calls | Risk exists — compliance abandon monitoring required |
| Efficiency | High — maximizes agent talk time |
| Compliance | Monitor abandon rate carefully — FTC/OFCOM limits apply |
| Best use | High-volume campaigns where efficiency is more important than zero abandons |
| Min agents recommended | 15+ |
Predictive Mode
Predictive mode uses a patented stage-based AI algorithm to forecast agent availability and pre-dial contacts accordingly.
| Feature | Detail |
|---|---|
| Dialing | System automatically places calls based on predicted agent availability |
| Algorithm | Patented pacing — adjusts dynamically based on real-time agent stats |
| Call analysis | Full detection — live person, answering machine, busy, no answer |
| Efficiency | Highest — maximizes talk time, minimizes idle time |
| Abandoned calls | Risk exists — pacing must be tuned to stay within compliance thresholds |
| Min agents required | 15 agents minimum — smaller pools make predictions inaccurate |
| Best use | Large-volume outbound operations (sales, collections, surveys) with 15+ agents |
⚠️ With fewer than 15 agents, Predictive's algorithm lacks sufficient data — use Progressive instead.
Agentless Mode
Agentless mode dials contacts and delivers pre-recorded messages, surveys, or IVR flows without connecting to a live agent.
| Feature | Detail |
|---|---|
| Agent required | No |
| Content | Recorded voice messages, IVR flows, opt-out prompts |
| Opt-out | Include "Press 9 to opt out" in the IVR flow to manage DNC compliance |
| Answering machine | System can detect and play a different message for machines vs. live answers |
| Live party | Call is transferred to an Architect Inbound Call Flow for IVR handling |
| Requires Inbound | Agentless campaigns require Inbound call routing to be implemented |
| Best use | Appointment reminders, payment notifications, fraud alerts, surveys, outage notifications |
External Calling Mode
External calling routes answered calls to an external phone number or SIP destination instead of an internal Genesys Cloud queue.
| Feature | Detail |
|---|---|
| Routing | Calls are bridged to an external system or phone number |
| Use case | Third-party agent environments, outsourced contact centers |
Call Analysis
Call Analysis (also called AMD — Answering Machine Detection) is the process of detecting what answered the call before connecting it to an agent or playing a message.
| Detection Result | Default Action |
|---|---|
| Live Person | Connect to agent or play IVR |
| Answering Machine | Disconnect, play message, or leave voicemail |
| Busy Signal | Record result, retry based on attempt control |
| No Answer | Record result, retry based on attempt control |
| Invalid Number | Mark uncallable |
Call analysis is configured in a Call Analysis Response Table, which is then assigned to a campaign.
Campaign Priority
When multiple campaigns share the same ACD queue, priority determines how lines are distributed:
| Priority | Effect |
|---|---|
| 1 | Lowest — fewest calls per agent relative to other campaigns |
| 5 | Highest — proportionally more calls per agent |
Agents participate in multiple campaigns automatically via the queues they are active in. No manual assignment per campaign is needed.
Choosing the Right Dialing Mode
| Scenario | Recommended Mode |
|---|---|
| High-value B2B sales — agent needs to personalize each call | Preview |
| Collections — compliance-sensitive, regulated | Progressive |
| High-volume sales, 15+ agents, moderate compliance risk | Power |
| Maximum efficiency, large center, 15+ agents | Predictive |
| Appointment reminders, payment alerts, fraud notifications | Agentless |
| Fewer than 15 agents, need auto-dialing | Progressive |
Interview Cheat Sheet
| Question | Answer |
|---|---|
| What is the default campaign dialing mode? | Preview |
| Which mode dials 1 call per available agent? | Progressive |
| Which mode requires minimum 15 agents? | Predictive (and recommended for Power) |
| Which mode has no agents involved? | Agentless |
| What is Call Analysis? | Detection of live person, answering machine, busy, or no answer before connecting to agent |
| What is the abandoned call risk in Progressive mode? | Near-zero — one call per agent guarantees availability |
| What happens with fewer than 15 agents in Predictive mode? | Pacing predictions become inaccurate — use Progressive instead |
| What must Agentless campaigns implement? | Inbound call routing (Architect flow) |
Outbound — Contact Lists & DNC
| Topic | Detail |
|---|---|
| Navigation | Admin → Outbound → Contact Lists and Admin → Outbound → DNC Lists |
| Purpose | Manage the lists of contacts to dial and the numbers that must never be dialed |
| Max contacts per org | 5,000,000 |
| Max contacts per list | 1,000,000 |
| Max DNC records per list | 1,000,000 |
| Max DNC records per org | 2,000,000 |
✅ Verified against Genesys Cloud Resource Center — March 2026
Contact Lists
A contact list is the "phone book" for a campaign — it contains the names, phone numbers, and custom data fields for every person the campaign will attempt to reach.
Contact List Structure
| Field | Detail |
|---|---|
| Columns | Up to 50 columns per list |
| Phone number columns | Up to 10 phone number columns per list (e.g., mobile, home, work) |
| Column header character limit | 128 characters |
| Column entry character limit | 512 characters |
| Phone number format | Minimum 10 digits, E.164 format required |
| One campaign at a time | A contact list can only be on one running campaign at a time |
Creating a Contact List
Importing Contacts
- Open the contact list
- Click Import
- Upload a CSV file — columns must match the list definition
- The system validates and imports contacts
💡 Contact lists can be generated from CRM or marketing systems and uploaded on a one-time, recurring, or trigger-based basis.
Contact List Filters
Contact list filters allow you to run a campaign against a subset of a contact list without creating a separate list:
- Filter by any column value (e.g., only contacts in a specific state or with a specific status)
- Assigned to a campaign in the Campaign Editor
- Up to 1,000 contact list filters per org
Attempt Controls
Attempt controls limit how many times a contact or phone number can be called, preventing excessive re-dialing.
| Setting | Description |
|---|---|
| Max attempts per phone number | Stop calling a specific number after N attempts |
| Max attempts per contact | Stop calling the entire contact record after N total attempts |
| Recall time | How long to wait before retrying a contact |
| Reset period | After this period, the attempt counter resets (e.g., every 24 hours) |
| Phone type-specific limits | February 2026 update — configure different attempt limits per phone type (mobile, home, work) |
💡 February 2026 update: Administrators can now set phone type-specific attempt limits, extend recall times, and adjust reset periods with greater precision.
DNC Lists (Do Not Call)
A DNC list is a data source of phone numbers that must never be dialed by any campaign. The system checks contact phone numbers against all assigned DNC lists before placing each call.
Types of DNC
| Type | Description |
|---|---|
| Internal DNC | Organization's own DNC list — uploaded and managed in Genesys Cloud |
| Campaign-specific DNC | Assigned to specific campaigns only |
| Wrap-up triggered DNC | Agent selects a wrap-up code that automatically adds a number to DNC |
| Contact-level DNC | Agent or system flags an entire contact (not just a number) as uncallable |
Creating a DNC List
Importing DNC Numbers
- Open the DNC list
- Click Import
- Upload a CSV of phone numbers
- The system validates and imports
Assigning DNC to a Campaign
DNC lists are assigned in the Campaign Editor during campaign configuration. A campaign can have multiple DNC lists assigned — all are checked before each dial attempt.
Agent-Triggered DNC
To allow agents to add numbers to DNC during a call:
- Configure a wrap-up code mapped to the DNC action
- Or include a DNC button in the agent Script
- The number is immediately flagged and will not be dialed again
Callable Time Sets
Callable time sets define when a campaign is allowed to dial for each time zone. This works alongside ATZM to ensure compliance with regulations like the Telephone Consumer Protection Act (TCPA).
| Feature | Description |
|---|---|
| Navigation | Admin → Outbound → Callable Time Sets |
| Purpose | Define allowed dialing hours by day of week and time zone |
| Integration | Assigned to a campaign — overrides or supplements ATZM defaults |
| Override | Callable times can be overridden; callable days cannot |
Contact Management During a Campaign
| Action | Description |
|---|---|
| Dynamic queueing | Contacts are re-sorted at attempt time — most current data is used |
| Filter changes honored | If a contact list filter changes during a running campaign, the campaign honors the update |
| Skip time zone contacts | Contacts outside the callable window are skipped and optionally rescheduled via ATZM |
| Mark uncallable | A wrap-up code or call rule can flag a number or entire contact as permanently uncallable |
Interview Cheat Sheet
| Question | Answer |
|---|---|
| Max contacts per org? | 5,000,000 |
| Max contacts per contact list? | 1,000,000 |
| Max DNC records per list? | 1,000,000 |
| Max DNC records per org? | 2,000,000 |
| Max phone number columns per contact list? | 10 |
| Can a contact list be on multiple running campaigns? | No — only one running campaign at a time |
| What format must phone numbers use? | E.164 format, minimum 10 digits |
| What is an Attempt Control? | Limits on how many times a contact or number can be dialed |
| What does a DNC list do? | Prevents listed numbers from being dialed by any campaign it is assigned to |
| How can agents add a number to DNC? | Via wrap-up code mapped to DNC action, or DNC button in agent script |
Outbound — Campaign Configuration
| Topic | Detail |
|---|---|
| Navigation | Admin → Outbound → Campaign Management |
| Purpose | Create and configure outbound campaigns — defines who to call, how to dial, and what rules to apply |
| Campaign Types | Voice Campaigns, Digital Campaigns (SMS, Email, WhatsApp) |
✅ Verified against Genesys Cloud Resource Center — March 2026
Campaign Editor Overview
The Campaign Editor is a step-by-step configuration wizard. The first decision is always the Dialing Mode — this determines which other settings are available.
Campaign Editor Required Resources
Before creating a campaign, ensure the following exist:
| Resource | Why It's Needed |
|---|---|
| Contact List | The list of contacts to dial |
| ACD Queue | Where answered calls route to (agent-assisted modes) |
| DNC List (optional) | Numbers to exclude |
| Callable Time Set (optional) | Allowed dialing hours |
| Call Analysis Response Table | What to do with live answer / machine / busy / no answer |
| Agent Script (optional) | Screen pop for agents when they receive the call |
| Rule Set (optional) | Logic-based conditions applied pre-call or at wrap-up |
Creating a Campaign
Core Campaign Settings
General
| Field | Description |
|---|---|
| Campaign Name | Unique name for the campaign |
| Division | Controls which admin teams can manage this campaign |
| Dialing Mode | Preview, Progressive, Power, Predictive, Agentless, External |
| Priority | 1 (lowest) to 5 (highest) — affects line distribution when sharing a queue |
Contact List & Filtering
| Field | Description |
|---|---|
| Contact List | The source list of contacts to dial |
| Contact List Filter | Optional — dial only a subset of the contact list |
| Contact Sort | Define sort order before dialing begins (up to 4 sort columns) |
| Dynamic Queueing | Re-sort contacts at attempt time — uses most current data |
Queue & Routing
| Field | Description |
|---|---|
| ACD Queue | Queue where answered calls are delivered to agents |
| Script | Script that pops on agent desktop when call connects |
| Caller ID | The number displayed to the contact being called |
| Skills-Based Routing | Optional — match agents based on ACD skills during campaign |
DNC & Compliance
| Field | Description |
|---|---|
| DNC Lists | One or more lists — all are checked before every dial attempt |
| Callable Time Set | Enforces calling hours by time zone |
| Attempt Controls | Limits re-dial attempts per contact or phone number |
| Compliance Abandon Rate | Monitor and alert on FTC/OFCOM abandon thresholds |
Call Analysis Response Table
Defines system behavior based on call detection result:
| Detection | Example Action |
|---|---|
| Live Person | Connect to queue → Agent |
| Answering Machine | Disconnect, play message, or leave voicemail |
| Busy | Schedule retry via attempt control |
| No Answer | Schedule retry via attempt control |
| Invalid Number | Mark as uncallable |
Outbound Lines Distribution
Controls how campaign lines are shared when multiple campaigns run on the same Edge group or Site:
| Option | Description |
|---|---|
| Weight | Proportional share — default weight is 10 per campaign |
| Reserved Lines | Campaign reserves a fixed number of lines (used for Agentless) |
| Equal Distribution | All campaigns share lines equally |
💡 Line weight is relative: Campaign A (weight 50) + Campaign B (weight 25) = Campaign A gets 67% of available lines, Campaign B gets 33%.
Campaign Scheduling
Each campaign can have one schedule with up to 500 intervals:
Campaigns can also be organized into Campaign Sequences — chained campaigns that run one after another, started and stopped as a group.
Wrap-Up Code Mappings
Wrap-up codes used by agents can be mapped to campaign actions — defining what happens to the contact after the call ends:
| Wrap-Up Code | Campaign Action |
|---|---|
| Resolved | Stop all future contact attempts |
| Callback Requested | Schedule a callback |
| Wrong Number | Mark phone number as uncallable |
| Do Not Call | Add to DNC list |
| Follow Up | Schedule retry with custom recall time |
Wrap-up code mappings are configured at Admin → Outbound → Wrap-Up Code Mappings.
Rule Sets
Rule sets define logic-based conditions that trigger actions before or after a call:
| Rule Type | Timing | Example |
|---|---|---|
| Pre-call Rule | Before dialing | Skip contact if account balance < $0 via Data Action lookup |
| Wrap-Up Rule | After call ends | Schedule callback if wrap-up = "Call Back Later" |
| Limit | Detail |
|---|---|
| Max data action conditions per rule set | 2 |
| Max data actions per rule set | 10 |
| API call rate from rules | 5 per second (pre-call and wrap-up) |
Digital Campaigns
In addition to voice, Genesys Cloud supports outbound digital campaigns:
| Channel | Use Case | Notes |
|---|---|---|
| Marketing, notifications, billing | Requires verified email domain | |
| SMS | Alerts, reminders, surveys | 160 characters per segment; requires SMS inventory number |
| High-volume notifications | Pre-approved Message Templates required; up to 18,000 msg/min |
Digital campaigns use the same Campaign Editor but with channel-specific settings instead of call analysis.
Campaign Monitoring (Real-Time)
| View | Location |
|---|---|
| Outbound Campaigns Dashboard | Performance → Outbound Campaigns |
| Campaign Details View | Select a campaign — shows stats, interactions, callbacks |
| Diagnostics Window | March 2026 feature — real-time diagnostics for voice campaign health (queues, agents, contact rates) |
| Refresh Rate | Interaction data refreshes every 10 seconds |
| Historical Interactions | View interactions for current day, last 7 days, or last 30 days |
Interview Cheat Sheet
| Question | Answer |
|---|---|
| Where are campaigns created? | Admin → Outbound → Campaign Management |
| What is the first decision in the Campaign Editor? | Dialing Mode |
| What does Campaign Priority control? | Proportional line distribution when multiple campaigns share the same queue |
| What is a Callable Time Set? | Defines allowed dialing hours by time zone — enforces compliance |
| What does a Call Analysis Response Table define? | System actions based on call detection result (live person, machine, busy, no answer) |
| What is the default outbound line weight per campaign? | 10 |
| How does wrap-up code mapping work? | Maps agent wrap-up codes to campaign outcomes (stop calling, add to DNC, schedule callback, etc.) |
| Can multiple DNC lists be assigned to one campaign? | Yes |
| How often does campaign interaction data refresh? | Every 10 seconds |
| What is new in March 2026 for campaign monitoring? | A dedicated diagnostics window with real-time campaign health data |
Callbacks
| Section | Description |
|---|---|
| Feature Area | Contact Center / Queue Configuration |
| Navigation (Scheduled Callbacks view) | Performance → Workspace → Contact Center → Scheduled Callbacks |
| Navigation (Queue callback settings) | Admin → Contact Center → Queues → [select queue] → Callback tab |
| Navigation (Architect Create Callback) | Available in Inbound Call, In-Queue, and Outbound Call flows via the Toolbox |
| Primary Function | Allow customers to request a return call instead of waiting on hold; reduce abandonment and improve satisfaction |
A callback is a request a caller makes to have their call returned when an agent is unavailable. Callbacks improve customer satisfaction by eliminating hold time. They also help agents who cannot complete an interaction immediately and need to follow up. Genesys Cloud supports several callback types that originate from different points in the contact center workflow.
Study Notes — Callback Types
| Callback Type | Origin | Description |
|---|---|---|
| In-Queue Callback | Architect flow (in-queue or inbound) | Customer requests a callback while waiting in queue — exits the queue and the callback object takes their position |
| Scheduled Callback | Agent-initiated during an interaction | Agent schedules a return call for a future date/time — up to 30 days in advance |
| Agent-Owned Callback | Scheduled callback with ownership | Agent takes personal ownership — callback waits for that specific agent to become available |
| Customer First Callback | Queue-level configuration | System dials the customer first, connects them to an agent only after the customer answers |
| Campaign Callback | Outbound campaign Schedule Callback action | Automatically created by outbound dialing campaign rules |
In-Queue Callback (via Architect)
The Create Callback action is added to an Inbound Call, In-Queue, or Outbound Call flow.
| Attribute | Detail |
|---|---|
| Architect Action | Create Callback (in Flow category of Toolbox) |
| Supported In | Inbound Call flows · In-Queue Call flows · Outbound Call flows |
| What happens | Callback object is placed on the specified queue; original call exits the queue |
| Queue position | Callback object takes the position in queue of the original call — same skill requirements and priority are automatically inherited |
| ANI (Caller ID) | Callback uses the queue's ANI, not the agent's ANI |
| Caller ID customization | Cannot set caller ID with Create Callback action — use a Call Data action first if you need to set caller ID or caller name |
| Script requirement | Script used by the callback must have the Callback property enabled in script settings (disabled by default) |
| Skills/priority retention | Not retained when placing a callback — skills and priority are reacquired from queue position, not the original interaction |
| In-queue flow limit | Max 30 in-queue flows per email or message interaction (prevents loop when target queue = current queue) |
Scheduled Callback (Agent-Initiated)
Agents can schedule a return call during an active voice interaction.
| Attribute | Detail |
|---|---|
| Maximum advance scheduling | 30 days |
| Default routing | Routes to the queue that received the original interaction |
| Agent can override | Agent can specify a different queue or select "Route callback to me if possible" |
| Ownership | If admin enables agent-owned callbacks, agent can select Take Ownership |
| If agent misses the callback | Immediately routes to the next available agent in queue |
| If no agent is available | Callback remains in queue until an agent becomes available |
| Edit restriction | Cannot edit an owned callback within 15 minutes of scheduled time |
Agent-Owned Callbacks
| Attribute | Detail |
|---|---|
| Definition | A callback where a specific agent takes personal ownership — waits for that agent to become available |
| Prerequisite | Admin must enable agent-owned callbacks on the queue; at least one Preferred Agent Routing rule must be set |
| Ownership duration | Admin configures the wait period — 1 hour to 30 days |
| On expiration (if Assign to Queue enabled) | Callback returns to the queue for the next available agent |
| On expiration (if Assign to Queue NOT enabled) | Callback is removed from queue and disconnected |
| Effect of preferred agent routing | Preferred agent routing does NOT affect scheduled callbacks — scheduled callbacks are unaffected |
Customer First Callback (Queue Configuration)
| Attribute | Detail |
|---|---|
| Default behavior | Agent First — system waits for agent to answer before dialing the customer |
| Customer First behavior | System dials the customer before connecting to an agent; once customer answers, interaction returns to queue |
| Configure where | Queue settings → Callback tab → select Customer First |
| Pacing Modifier | Values 1–10 — controls the rate at which Customer First callbacks are dialed based on online agent count |
| Retry attempts | Configurable — max 0–20 retries for unsuccessful callbacks; retry interval up to 24 hours |
| Voicemail recommendation | Genesys recommends not using voicemails in Customer First callback queues — voicemails also dial the customer first and the agent cannot listen before the customer connects |
| Script used | Customer First callbacks use the voice script for callbacks (callback-specific agent scripts are not supported) |
| Analytics | Agents do not receive Customer First callback-specific metrics (handle time, talk time, time to first dial/connect) — only voice metrics after connection |
| Outbound routes | As of July 2025, administrators can specify a telephony site or edge group per queue for Customer First callback outbound dialing |
Callbacks & Preferred Agent Routing
| Interaction Type | Preferred Agent Routing Behavior |
|---|---|
| Email and messaging interactions | Preferred agent routing overrides — Genesys no longer routes to last agent |
| Inbound callbacks | Preferred agent routing overrides — Genesys no longer routes to last agent |
| Scheduled callbacks | Unaffected by preferred agent routing |
Scheduled Callbacks View (Performance Dashboard)
| Attribute | Detail |
|---|---|
| Navigation | Performance → Workspace → Contact Center → Scheduled Callbacks |
| Permissions required | Analytics > Conversation Detail > View · Routing > Queue > View · Outbound > Campaign > View |
| What it shows | All callbacks scheduled by agents during interactions, and callbacks created by the Schedule Callback action |
| Agent-owned callbacks | Show the agent owner's name in the Agent Owner column |
| Non-owned callbacks | Agent Owner column is blank |
| Actions available | Cancel (single or bulk) · Reschedule · Reassign to another queue/agent (agent-owned only) |
| Export limit | Up to 10,000 conversations per 12-hour period for recent interactions; up to 1,000,000 for older data |
| View does NOT auto-refresh | Must manually refresh to see current data |
Key Limits & Rules (Exam Critical)
| Rule | Value |
|---|---|
| Maximum advance scheduling | 30 days |
| Agent-owned callback duration range | 1 hour to 30 days |
| Pacing modifier range (Customer First) | 1–10 |
| Max callback retry attempts | 0–20 |
| Retry interval maximum | 24 hours |
| Cannot edit owned callback before scheduled time | 15 minutes |
| Inactive callback auto-end | If no date specified and no updates within 14 days of creation, analytics ends the conversation (callback may still be active) |
| In-queue flow limit | 30 per email/message interaction |
| Callback uses queue ANI | Not agent ANI |
| Skills/priority retained from original call | No |
Architect Create Callback Action — Configuration Fields
| Field | Description |
|---|---|
| Name | Label for the action in the flow |
| Callee Name | Optional — name to identify the callback recipient |
| Callback Number | Required — string expression for the callback number (auto-captured from ANI data) |
| Queue | Queue where the callback request is placed |
| Script | Optional — a script with the Callback property enabled |
Note: ANI data from the call is automatically examined at runtime to capture the caller's telephone number. You cannot specify caller ID or name directly from this action — use a Call Data action first.
Callback Routing Logic (Inbound)
Caller enters Inbound Call Flow
↓
Wait time exceeds threshold (or caller selects option)
↓
Create Callback action executes
↓
Callback object placed in queue at caller's original position
(inherits skill requirements and priority)
↓
Original call disconnects
↓
Agent becomes available → Callback object routed to agent
↓
Agent manually dials customer (Agent First)
OR System dials customer first (Customer First)
↓
Outbound call placed → linked to queue for analytics
Callback Automation (Queue Settings)
Queues can be configured to automate callback handling, removing manual agent steps:
| Automation Option | Description |
|---|---|
| Auto-Answer | Callback interaction is automatically answered when routed to agent |
| Auto-Dial | Agent's outbound call is automatically placed when callback is answered |
| Auto-End Callback | Callback segment is automatically ended after the call completes |
These settings are found under
Admin → Contact Center → Queues → [queue] → Callbacktab.
Skill/Priority Preservation (January 2025 Update)
As of January 2025, administrators can optionally preserve skills and priorities from the original call for callbacks and ACD voicemails. This applies to:
- In-queue callbacks
- Scheduled callbacks
- Skilled campaign callbacks
- ACD voicemails
This is an opt-in setting and was not the default behavior prior to this update.
Best Practices
| Practice | Reason |
|---|---|
| Do not enable agent-owned callbacks without Preferred Agent Routing rules on the queue | Ownership requires at least one PAR rule to function |
| Always handle the case where a callback cannot be placed | Add alternate routing in the flow's failure path |
| Avoid internal ACD voicemails | Creates a callback segment where Agent A's utilization is consumed until the callback is resolved |
| Do not use voicemails in Customer First queues | Agent cannot listen to voicemail before customer connects |
| Set a realistic ownership period | If too long, callbacks may wait excessively for unavailable agents |
| Enable "Assign to Queue on ownership expiration" | Ensures expired owned callbacks don't just disconnect |
Key Takeaways
| Topic | Summary |
|---|---|
| In-queue callback | Uses Create Callback action in Architect; callback takes original call's queue position |
| Scheduled callback | Agent-initiated; max 30 days advance; routes to original queue by default |
| Agent-owned callback | Waits for specific agent; requires PAR rule; 1hr–30day ownership period |
| Customer First | System dials customer before connecting to agent; Pacing Modifier 1–10 |
| Skills not retained | Callbacks do not inherit skills/priority (unless optional preservation is enabled) |
| ANI | Callbacks use queue ANI, not agent ANI |
| Inactive auto-end | 14-day limit for unscheduled callbacks with no updates |
| Scheduled Callbacks view | Performance → Workspace → Contact Center → Scheduled Callbacks |
Predictive Routing
Study Notes
| Topic | Description |
|---|---|
| Predictive Routing | AI-powered routing system that optimizes agent assignment |
| Engine | Machine learning algorithms analyze skills, availability, and contact history |
| Purpose | Maximize first-contact resolution and customer satisfaction |
| Activation | Requires Premium edition and Workforce Optimization module |
| Benefit | Reduces handle time and improves customer outcomes |
Navigation
Admin → Architect → Routing → Predictive Routing OR Admin → Contact Center → Routing Configuration → Enable Predictive Routing
Predictive Routing Overview
Predictive Routing is an AI-powered contact routing system that dynamically matches incoming contacts to the most suitable available agent based on multiple factors:
Key Capabilities
- Skill-based routing - Matches agent skills to contact requirements
- Historical performance - Learns from agent interaction outcomes
- Availability prediction - Anticipates agent availability and readiness
- Real-time optimization - Adjusts routing in real-time based on system state
- Omnichannel support - Works across voice, chat, email, and messaging
How It Works
- Contact arrives at system
- Contact intent and requirements analyzed
- System evaluates all available agents
- Machine learning algorithm predicts best match
- Contact routed to optimal agent
- Interaction data captured for learning
Edition & Module Requirements
| Requirement | Details |
|---|---|
| Minimum Edition | Premium Edition required |
| Module | Workforce Optimization add-on module |
| License Type | Agent licenses with predictive routing enabled |
| Setup | Admin configuration in Architect |
Study Notes - Routing Factors
| Factor | Description | Impact |
|---|---|---|
| Agent Skills | Capabilities and certifications | High - Core matching criteria |
| Proficiency Level | Skill mastery degree | High - Affects quality |
| Availability | Agent ready state and status | High - Real-time factor |
| Handling Capacity | Available slots for new contacts | High - Prevents overload |
| Historical Performance | Past interaction outcomes | Medium - Learning factor |
| Queue Wait Time | Customer wait duration | Medium - Fairness factor |
| Contact Type | Voice, chat, email, etc. | High - Channel match |
| Language Proficiency | Supported languages | High - Communication match |
| Customer History | Previous interaction records | Medium - Context factor |
| Agent State | Idle, working, after-call work | High - Real-time factor |
Implementation Guide
Step 1: Prerequisites & Planning
- Ensure organization has Premium edition
- Purchase Workforce Optimization module
- Audit existing agent skills database
- Document required skill sets
- Review current routing rules
- Plan migration from legacy routing
Step 2: Configure Skill Definitions
Step 3: Enable Predictive Routing
- Go to Admin → Contact Center → Routing
- Select queue to enable predictive routing
- Enable "Predictive Routing" toggle
- Configure routing rules (optional overrides)
- Set skill matching parameters
- Define fallback routing behavior
Step 4: Testing & Validation
- Route test calls through system
- Monitor agent assignment accuracy
- Verify skill matching
- Check queue distribution
- Validate omnichannel routing
- Review abandonment rates
Step 5: Monitoring & Optimization
- Review routing analytics daily
- Monitor first-contact resolution rates
- Track agent utilization
- Measure customer satisfaction
- Optimize skill assignments
- Adjust thresholds as needed
How to Implement
| Phase | Description | Timeline |
|---|---|---|
| Analysis | Audit current routing and skills | Week 1-2 |
| Configuration | Set up skills, queues, and rules | Week 2-3 |
| Testing | Validate routing logic and assignments | Week 3-4 |
| Pilot | Deploy to test queue with monitoring | Week 4-6 |
| Full Rollout | Enable across all queues | Week 6-8 |
| Optimization | Monitor, tune, and improve | Ongoing |
Predictive Routing Architecture
Incoming Contact
↓
Contact Metadata Analysis
├── Contact Intent
├── Contact Type (Voice/Chat/Email)
├── Language Requirements
└── Skill Requirements
↓
Predictive Routing Engine
├── Machine Learning Models
├── Real-time Agent Analysis
├── Skill Matching Algorithm
└── Performance Prediction
↓
Agent Evaluation
├── Available Agents
├── Skill Match Score
├── Proficiency Level
├── Historical Performance
└── Queue Load Balance
↓
Optimal Agent Selection
↓
Route Contact
↓
Agent Assignment
Routing Decision Flow
Contact Arrives
↓
Extract Contact Data
├── Intent
├── Channel Type
├── Language
└── Queue Assignment
↓
Predictive Routing Engine Evaluates
├── Agent Availability Status
├── Skill Compatibility
├── Proficiency Levels
├── Current Workload
└── Historical Performance Score
↓
Machine Learning Model Predicts
├── Best Agent Match
├── Estimated Resolution Probability
└── Customer Satisfaction Likelihood
↓
Route to Optimal Agent
↓
If No Optimal Agent Available
├── Queue with Priority Calculation
├── Monitor for Next Available Match
└── Apply Fallback Routing Rules
↓
Agent Accepts Contact
Routing Rules & Overrides
Hard Rules (Always Applied)
Rule Priority: High
├── Agent Availability
├── Required Skills Present
├── Language Match
└── Queue Assignment
Rule Priority: Medium
├── Skill Proficiency Threshold
├── Agent Capacity
├── Contact Type Capability
└── Channel Configuration
Rule Priority: Low
├── Load Balancing
├── Historical Performance
└── Fairness Rotation
Skill Configuration Example
Technical Support Queue
Required Skills:
├── Product Knowledge (Level 3+)
│ ├── Software (Level 4)
│ ├── Hardware (Level 3)
│ └── Cloud Services (Level 3)
├── Troubleshooting (Level 3+)
├── Customer Service (Level 2+)
└── English Fluency (Level 3+)
Optional Skills:
├── Advanced Certifications (bonus)
├── Spanish Fluency (secondary channel)
└── VIP Customer Experience (specialized)
Bilingual Sales Queue
Required Skills:
├── Sales Techniques (Level 3+)
├── Product Knowledge (Level 3+)
├── English Fluency (Level 4+)
├── Spanish Fluency (Level 4+)
└── Customer Service (Level 3+)
Optional Skills:
├── Enterprise Sales (bonus)
├── Account Management (bonus)
└── Negotiation (specialized)
Real Flow Scenario: Predictive Routing in Action
Customer Calls Support Line
↓
System Analyzes: "Technical issue with mobile app"
↓
Route Requirements:
├── Skill: Mobile Development (Level 3+)
├── Skill: Customer Service (Level 2+)
├── Language: English
├── Channel: Voice
└── Queue: Technical Support
↓
Predictive Engine Evaluates All Available Agents:
Agent 1 (Sarah)
├── Mobile Development: Level 4 ✓
├── Customer Service: Level 4 ✓
├── Current Load: 1 contact
├── Avg Handle Time: 8 mins
├── FCR Rate: 85% ✓ (BEST MATCH)
Agent 2 (James)
├── Mobile Development: Level 2 (Below threshold)
├── Current Load: 2 contacts
├── FCR Rate: 72%
Agent 3 (Maria)
├── Mobile Development: Level 3 ✓
├── Customer Service: Level 3 ✓
├── Current Load: 3 contacts
├── FCR Rate: 78%
↓
Route to Agent Sarah (Highest Probability of Resolution)
↓
Sarah Answers Call
↓
System Logs Interaction for Future Learning
Omnichannel Predictive Routing
Voice Channels
Inbound Calls
↓
Predictive Routing
↓
Skill-based Queue
↓
Agent Answer
Digital Channels
Chat/Email/Social Arrival
↓
Predictive Routing Engine
↓
Agent Availability Check (across channels)
↓
Route to Agent with Capacity
↓
Agent Manages Omnichannel Load
Contact Blending Example
Agent Can Handle:
├── 1 Voice Call
├── 2 Chat Conversations
├── 1 Email Thread
└── 1 Social Media Message
Total Capacity: 5 Concurrent Contacts
Current Load: 3 Contacts
Available Slots: 2
Real Flow Scenario: Omnichannel Assignment
Multiple Contacts in Queue:
├── Inbound Call (Technical)
├── Chat (Billing Question)
└── Email (Complaint)
Predictive Engine Evaluates:
↓
Agent 1 Capacity: 2 slots available
├── Skills: Technical, Billing, Customer Service ✓
├── Current: 1 Call + 1 Chat
├── Assignment: Route Email (write capability available)
↓
Agent 2 Capacity: 1 slot available
├── Skills: Technical, Billing ✓
├── Current: 1 Chat
├── Assignment: Route Call (available)
↓
Queue Assignment Complete
Usage Scenarios
| Scenario | Solution | Outcome |
|---|---|---|
| High call volume with variable skill requirements | Enable predictive routing with skill-based queues | Reduced wait times, improved FCR |
| Multiple agent skill levels | Set proficiency thresholds in routing rules | Appropriate complexity matching |
| Omnichannel contact center | Use predictive routing across all channels | Optimized agent utilization |
| International operations | Configure language skills and regional routing | Better customer satisfaction |
| Seasonal staffing fluctuations | Adjust skill assignments dynamically | Maintained service quality |
| VIP customer handling | Create specialized skill for VIP interactions | Enhanced customer experience |
Predictive Routing Configuration Settings
Queue-Level Settings
Queue Configuration: Technical Support
Routing Mode: Predictive Routing ✓
Skill Matching:
├── Required Skills: Product Knowledge, Troubleshooting
├── Proficiency Threshold: Level 3+
├── Language Match: Required
└── Strict Matching: Enabled
Fallback Behavior:
├── If no perfect match: Lower proficiency threshold
├── Escalation path: Senior support queue
└── Timeout: 30 seconds to find match
Load Balancing:
├── Max contacts per agent: 3
├── Considering ACW time: Yes
└── Fair distribution: Enabled
Monitoring & Analytics Dashboard
Key Metrics to Track
| Metric | Target | Purpose |
|---|---|---|
| First Contact Resolution (FCR) | >80% | Measure routing effectiveness |
| Average Handle Time (AHT) | Baseline - 5% | Track efficiency |
| Agent Utilization | 80-90% | Optimize resource use |
| Customer Satisfaction (CSAT) | >85% | Measure outcomes |
| Skill Match Rate | >95% | Verify routing accuracy |
| Queue Abandonment | <5% | Monitor wait times |
| Call Transfer Rate | <10% | Reduce routing errors |
Real-Time Dashboard View
Predictive Routing Performance (Live)
Queue: Technical Support
├── Active Contacts: 24
├── Available Agents: 8
├── Avg Match Score: 4.2/5 ✓
├── Current AHT: 9.2 mins
└── Skill Match %: 96.4%
Top Performing Skills Today:
├── Mobile Development (8 contacts, 87% FCR)
├── Cloud Services (6 contacts, 82% FCR)
└── Hardware Support (4 contacts, 85% FCR)
Agent Performance:
├── Sarah: 4 contacts, 8.1 avg mins, 88% FCR
├── James: 3 contacts, 9.5 avg mins, 79% FCR
└── Maria: 2 contacts, 8.8 avg mins, 84% FCR
Best Practices
Skill Management
- Keep skills current - Update agent skills quarterly or after training
- Avoid over-specialization - Limit skill count to 8-10 per agent
- Balance proficiency - Mix Level 3-4 and Level 2 agents in queues
- Document requirements - Clearly define skill needs per queue
- Regular training - Invest in skill development to improve proficiency
Routing Optimization
- Start with hard rules - Use required skills and language matching first
- Monitor thresholds - Adjust proficiency requirements based on performance
- Test changes - Implement rule changes gradually
- Leverage analytics - Use data to identify routing improvements
- Continuous tuning - Predictive routing improves over time with more data
Agent Management
- Clear skill assignments - Agents must know their assigned skills
- Growth paths - Provide training to increase proficiency levels
- Regular feedback - Share routing and performance data
- Incentivize learning - Reward skill development
- Load balance fairly - Ensure equitable work distribution
Monitoring & Reporting
- Daily reviews - Check key metrics and anomalies
- Weekly analysis - Identify trends and improvement opportunities
- Monthly optimization - Adjust skills and rules as needed
- Quarterly planning - Forecast and plan for seasonal changes
- Annual strategy - Evaluate overall routing effectiveness
Common Configuration Scenarios
Scenario 1: Small Team (15 agents, 3 skill levels)
Configuration:
├── Premium Edition ✓
├── Workforce Optimization Module ✓
├── Single Queue (Support)
├── 3 Skill Categories (Level 1-4 scaling)
└── Basic Routing Rules
Expected Results:
├── 20-30% improvement in FCR
├── 10-15% reduction in AHT
└── Higher agent satisfaction
Scenario 2: Large Enterprise (200+ agents, multiple queues)
Configuration:
├── Premium Edition ✓
├── Workforce Optimization Module ✓
├── 5-8 Queues (Technical, Billing, Sales, etc.)
├── 15+ Skill Categories with proficiency levels
├── Advanced Routing Rules and Overrides
└── Omnichannel Blending
Expected Results:
├── 25-40% improvement in FCR
├── 15-25% reduction in AHT
├── Significant CSAT increase
└── Better resource utilization
Scenario 3: Multilingual Contact Center (5 languages)
Configuration:
├── Language Skills for each agent
├── Language Matching in Routing Rules
├── Regional Queue Assignment
├── Skill + Language Combination Routing
└── Overflow to general queue if no match
Expected Results:
├── Improved customer satisfaction
├── Reduced transfers
├── Better first contact resolution
└── International service quality
Troubleshooting Guide
| Issue | Cause | Resolution |
|---|---|---|
| Contacts routing to wrong skill level | Proficiency threshold too low | Increase threshold in routing rules |
| Long wait times | Predictive routing disabled for queue | Enable predictive routing in queue config |
| High transfer rates | Skill mismatch in routing | Review and update skill definitions |
| Uneven agent load | Skill imbalance among agents | Provide training to level skill distribution |
| Poor FCR rates | Insufficient skill matching | Add more skill categories to definitions |
| Agents overloaded | Capacity settings too high | Reduce max contacts per agent |
| Low agent utilization | Skill requirements too strict | Relax proficiency thresholds slightly |
| Routing delays | Too many hard rules | Simplify rules and priorities |
| Language mismatch | Language skills not configured | Add language proficiency to agent setup |
| Module not working | Feature not enabled | Verify Premium edition and module purchase |
Real-World Implementation Timeline
Week 1-2: Assessment & Planning
Day 1-2: Kick-off meeting
Day 3-5: Audit current routing and skills
Day 6-10: Design new skill structure
Day 11-14: Plan change management
Week 3-4: Configuration
Day 15-18: Create skill definitions
Day 19-22: Configure queues and rules
Day 23-25: Set up monitoring dashboard
Day 26-28: Document configuration
Week 5-6: Testing & Pilot
Day 29-32: Conduct routing tests
Day 33-36: Deploy to pilot queue
Day 37-40: Monitor pilot performance
Day 41-42: Gather feedback and optimize
Week 7-8: Full Deployment
Day 43-44: Plan rollout schedule
Day 45-52: Deploy to remaining queues
Day 53-56: Monitor and support agents
Naming Convention
Queue Naming with Routing Type
<Department>_<Function>_<RoutingType>_Queue
Examples:
Support_Technical_PredictiveRouting_QueueSales_Enterprise_PredictiveRouting_QueueBilling_Collections_PredictiveRouting_Queue
Skill Naming Convention
<Category>_<SubCategory>_<Level>
Examples:
Product_MobileApp_SkillLanguage_Spanish_FluencyService_VIP_HandlingTechnical_CloudServices_Certification
Integration with Other Systems
Workforce Management (WFM)
Predictive Routing ←→ WFM
├── Share agent availability
├── Schedule compliance
├── Forecasting data
└── Staffing adjustments
Quality Management
Predictive Routing ←→ Quality Management
├── Interaction recordings
├── Performance metrics
├── Coaching opportunities
└── Training recommendations
Customer Data Platform
Predictive Routing ←→ Customer Data
├── Customer history
├── Preferences
├── Previous resolutions
└── VIP status
Performance Benchmarks
Industry Standard Improvements
| Metric | Typical Improvement |
|---|---|
| First Contact Resolution | +15-40% |
| Average Handle Time | -10-25% |
| Customer Satisfaction | +10-25% |
| Agent Utilization | +5-15% |
| Queue Abandonment | -20-50% |
| Cost Per Contact | -10-20% |
Ramp-Up Timeline
Day 1-30: Learning phase, marginal improvement
Month 2-3: System learns patterns, 10-15% improvement
Month 4-6: Optimized configuration, 25-35% improvement
Month 6+: Mature state, 30-40% improvement
Predictive Routing vs. Traditional Routing
| Feature | Predictive Routing | Traditional Routing |
|---|---|---|
| Skill Matching | AI-optimized | Rules-based |
| Agent Selection | Predictive | Sequential |
| Learning | Continuous | None |
| Complexity | High | Low |
| Setup Time | Medium | Low |
| Optimization | Automatic | Manual |
| FCR Improvement | 25-40% | Baseline |
| Cost | Higher | Lower |
Interview Cheat Sheet
| Question | Answer |
|---|---|
| What is Predictive Routing? | AI-powered routing system that optimizes agent assignment using ML |
| What are the requirements? | Premium edition + Workforce Optimization module |
| How does it select agents? | Analyzes skills, availability, performance, and predicts best match |
| What factors does it consider? | Skills, proficiency, availability, workload, language, history |
| Can you use it with omnichannel? | Yes, works with voice, chat, email, and messaging |
| How is it different from skill-based routing? | Uses ML to predict best match vs. just checking skills |
| Where do you configure it? | Admin → Contact Center → Routing |
| What's the expected improvement? | FCR +25-40%, AHT -10-25%, CSAT +10-25% |
| How long does setup take? | 4-8 weeks depending on complexity |
| What are critical success factors? | Accurate skills data, proper proficiency levels, continuous monitoring |
| How do you monitor performance? | Daily dashboard review, weekly analytics, monthly optimization |
| What if no perfect agent match exists? | System queues contact with fallback routing rules |
| Can you override predictive routing? | Yes, hard rules take precedence (availability, required skills) |
| How does machine learning help? | Learns from past outcomes to improve future routing |
| What's the ROI timeline? | 2-3 months to see significant improvements |
Key Takeaways
- AI-Powered Optimization - Predictive routing uses machine learning to match contacts to best-fit agents
- Skill-Based Foundation - Requires well-defined skills and proficiency levels
- Omnichannel Capable - Works across voice, chat, email, and messaging channels
- Continuous Learning - System improves routing decisions over time
- Premium Feature - Requires Premium edition and Workforce Optimization module
- Significant ROI - Typical improvements: FCR +25-40%, AHT -10-25%
- Real-Time Optimization - Routes contacts dynamically based on current system state
- Fallback Rules Matter - Hard rules ensure quality even without perfect matches
- Change Management Critical - Proper implementation and monitoring are essential
- Ongoing Monitoring Required - Daily reviews and monthly tuning maximize benefits
Migration Path from Traditional Routing
Phase 1: Preparation (Weeks 1-2)
├── Audit current routing rules
├── Document all skills currently used
├── Identify skill gaps
└── Plan queue restructuring
Phase 2: Setup (Weeks 3-4)
├── Create comprehensive skill definitions
├── Assign skills and proficiency to agents
├── Configure predictive routing queues
└── Establish monitoring dashboards
Phase 3: Pilot (Weeks 5-6)
├── Enable on low-risk queue
├── Monitor closely for issues
├── Gather team feedback
└── Optimize configuration
Phase 4: Rollout (Weeks 7-8)
├── Disable traditional routing rules
├── Enable predictive on remaining queues
├── Support agents through transition
└── Celebrate early wins
Additional Resources
Official Documentation Links
- Genesys Cloud Routing Guide: https://help.genesys.com/genesyscloud/current/en-us/Routing.html
- Predictive Routing Setup: https://help.genesys.com/genesyscloud/current/en-us/PredictiveRouting.html
- Workforce Optimization: https://help.genesys.com/genesyscloud/current/en-us/WFO.html
Support Contacts
- Genesys Sales: sales@genesys.com
- Genesys Support: https://support.genesys.com
- Community Forums: https://community.genesys.com
Document Version Info
Last Updated: March 2026
Source: Genesys PureCloud Official Documentation
Version: 1.0
Agent Copilot (Agent Assist)
Study Notes
| Topic | Description |
|---|---|
| Agent Copilot | AI-powered real-time guidance system for agents |
| Also Known As | Agent Assist, Copilot Assistant |
| Purpose | Provides real-time recommendations and knowledge during customer interactions |
| Activation | Requires Premium edition and Customer Insights module |
| Benefit | Reduces handle time, improves first-contact resolution, enhances agent confidence |
Navigation
Admin → Architect → Agent Copilot OR Admin → Contact Center → Agent Assistance → Copilot Configuration
Agent Copilot Overview
Agent Copilot is an AI-powered assistant that provides real-time guidance and recommendations to agents during customer interactions. It analyzes the conversation in real-time and suggests relevant knowledge articles, scripts, and next steps to improve interaction quality and resolution.
Key Capabilities
- Real-time recommendations - Suggests actions based on conversation context
- Knowledge article suggestions - Recommends relevant articles automatically
- Script guidance - Provides talking points and recommended language
- Sentiment analysis - Monitors customer emotion and suggests de-escalation
- Next action recommendations - Predicts optimal next steps
- Agent learning - Improves over time with agent feedback
How It Works
- Agent answers contact
- Copilot monitors conversation in real-time
- AI analyzes conversation intent and context
- System searches knowledge base for relevant information
- Recommendations displayed in agent interface
- Agent reviews and applies suggestions
- Feedback loop improves future recommendations
Edition & Module Requirements
| Requirement | Details |
|---|---|
| Minimum Edition | Premium Edition required |
| Module | Customer Insights add-on module |
| License Type | Agent licenses with Copilot enabled |
| Setup | Admin configuration in Architect |
| Integration | Knowledge management system required |
Study Notes - Copilot Features
| Feature | Description | Use Case |
|---|---|---|
| Knowledge Recommendations | AI-suggested articles from knowledge base | Technical support, FAQs |
| Script Guidance | Real-time conversation scripts and talking points | Sales, compliance-heavy calls |
| Sentiment Monitoring | Real-time emotion analysis of customer | De-escalation, empathy guidance |
| Next Action Suggestions | Recommended next steps for agent | Call routing, transfer decisions |
| Agent Performance Tips | Real-time coaching during interaction | Training reinforcement |
| Historical Context | Customer interaction history suggestions | Personalization, context |
| Product Recommendations | Sales-specific recommendations | Upsell, cross-sell opportunities |
| Compliance Reminders | Real-time compliance guidance | Regulatory requirements |
Implementation Guide
Step 1: Prerequisites & Planning
- Ensure organization has Premium edition
- Purchase Customer Insights module
- Audit existing knowledge base
- Document Copilot use cases by queue
- Plan knowledge article optimization
- Review agent readiness and training needs
Step 2: Knowledge Base Configuration
Step 3: Enable Agent Copilot
- Go to Admin → Architect → Agent Copilot
- Enable "Agent Copilot" toggle
- Select knowledge base source
- Configure recommendation parameters
- Set recommendation types to display
- Choose recommendation frequency
Step 4: Customize by Queue
- Create queue-specific Copilot settings
- Configure knowledge sources per queue
- Set relevance thresholds
- Define script templates
- Establish sentiment trigger rules
- Test queue-specific configurations
Step 5: Agent Training & Rollout
- Train agents on Copilot interface
- Explain recommendation types
- Practice with sample interactions
- Gather initial feedback
- Monitor early adoption
- Provide ongoing support
Step 6: Monitoring & Optimization
- Review Copilot engagement metrics
- Monitor agent utilization of recommendations
- Track recommendation accuracy
- Gather agent feedback
- Optimize knowledge articles
- Adjust recommendation parameters
How to Implement
| Phase | Description | Timeline |
|---|---|---|
| Planning | Audit knowledge base and define use cases | Week 1-2 |
| Setup | Configure Copilot and knowledge sources | Week 2-3 |
| Content | Create/optimize knowledge articles | Week 3-5 |
| Training | Educate agents on features and usage | Week 5-6 |
| Pilot | Deploy to single queue with monitoring | Week 6-7 |
| Rollout | Enable across all queues | Week 7-8 |
| Optimization | Monitor and tune performance | Ongoing |
Agent Copilot Architecture
Incoming Contact
↓
Agent Accepts Contact
↓
Copilot Monitoring Begins
├── Real-time Conversation Analysis
├── Intent Detection
└── Context Extraction
↓
AI-Powered Recommendation Engine
├── Knowledge Base Search
├── Relevance Scoring
├── Sentiment Analysis
└── Prediction Models
↓
Recommendation Generation
├── Knowledge Articles
├── Scripts & Talking Points
├── Next Action Suggestions
├── Sentiment De-escalation Tips
└── Product/Service Recommendations
↓
Display to Agent Interface
↓
Agent Reviews Recommendations
↓
Agent Applies (or Dismisses) Suggestions
↓
Feedback Loop Updates AI Model
Real-Time Recommendation Flow
Customer Says: "I've been trying to reset my password for hours"
Copilot Analyzes:
├── Intent: Password Reset Help
├── Sentiment: Frustrated/Angry
├── Context: Technical Issue
└── Duration: Extended problem
↓
Copilot Recommendations Display:
1. KNOWLEDGE ARTICLE (High Confidence)
├── "Password Reset Troubleshooting"
├── Relevance: 94%
└── Steps: 5-7 minute resolution
2. SENTIMENT GUIDANCE (Urgent)
├── Suggest: Apologize for inconvenience
├── Tone: Empathetic
└── De-escalation: Acknowledge frustration
3. NEXT ACTION (Suggested)
├── Offer: Manual password reset
├── Escalation: If still unresolved
└── Followup: Offer premium support
4. SCRIPT SUGGESTION (Optional)
├── "I completely understand how frustrating that is..."
├── "Let me walk you through the fastest solution..."
└── "If this doesn't work, I'll reset it for you personally"
↓
Agent Applies Recommendations
↓
Customer Issue Resolved
↓
System Captures Feedback
Copilot Interface Components
Agent Desktop View:
┌─────────────────────────────────────────┐
│ Current Interaction │
│ Customer: John Smith │
│ Queue: Technical Support │
│ Duration: 3:45 │
├─────────────────────────────────────────┤
│ COPILOT RECOMMENDATIONS │
├─────────────────────────────────────────┤
│ │
│ 📚 KNOWLEDGE ARTICLES │
│ ├─ Password Reset Guide (94% match) │
│ ├─ Two-Factor Auth Setup (87% match) │
│ └─ Account Recovery (76% match) │
│ │
│ 😟 SENTIMENT ALERT │
│ ├─ Customer: FRUSTRATED │
│ └─ Suggestion: De-escalate & empathize│
│ │
│ ➡️ NEXT ACTIONS │
│ ├─ Offer manual password reset │
│ ├─ Provide security questions │
│ └─ Escalate if unsuccessful │
│ │
│ 💬 SUGGESTED SCRIPT │
│ "I understand how frustrating this is. │
│ Let me walk you through the quickest │
│ way to get this resolved..." │
│ │
│ [👍 Helpful] [👎 Not Helpful] │
└─────────────────────────────────────────┘
Real Flow Scenario: Sales Queue with Copilot
Agent: "Hi, thanks for calling. How can I help?"
Customer: "I'm interested in upgrading my plan"
Copilot Recommendations Appear:
1. KNOWLEDGE - Sales Playbook
├─ Current Plan Analysis
├─ Available Upgrades
└─ Pricing Information
2. PRODUCT RECOMMENDATIONS
├─ Upsell: Premium Plan (+40% revenue potential)
├─ Cross-sell: Support Package
└─ Offer: 2-month discount if upgrading today
3. NEXT ACTION SUGGESTIONS
├─ Qualify: Ask about usage patterns
├─ Present: Show cost-benefit analysis
└─ Close: Offer contract details
4. SCRIPT SUGGESTION
"Based on your usage, the Premium Plan
would save you money and give you these
benefits: [list]. Can I set that up?"
↓
Agent Applies Script & Recommendations
↓
Customer Upgrades (upsell successful)
↓
System Logs: Agent applied recommendation
↓
Next Sale: System learns and improves recommendations
Real Flow Scenario: Support Queue with Sentiment
Customer Calls (Angry Tone)
Agent Answers
Copilot Immediately Detects:
├─ Sentiment: NEGATIVE (85% confidence)
├─ Emotion: Frustrated/Angry
├─ Risk: Potential churn
└─ Recommended Action: De-escalate NOW
↓
Sentiment Alert in Copilot:
"Customer is frustrated.
Suggested response:
'I'm sorry you're experiencing this issue.
I'm going to personally make sure we get
this resolved for you right now.'"
↓
Copilot Provides Knowledge:
├─ Issue Resolution Articles
├─ Escalation Path (if needed)
└─ Retention Options
↓
Agent Applies De-escalation Approach
↓
Customer Sentiment Improves
↓
System Logs Improvement
↓
Issue Resolved Successfully
Omnichannel Copilot Support
Voice Interactions
Real-time Copilot assistance during calls
├── Conversation transcription
├── Intent analysis
├── Real-time knowledge suggestions
└── Sentiment monitoring
Chat Interactions
Suggested responses during chat
├── Pre-written messages
├── Quick knowledge links
├── Canned responses with personalization
└── Sentiment-based guidance
Email Interactions
Copilot assistance with draft responses
├── Knowledge recommendations
├── Tone suggestions
├── Template recommendations
└── Compliance checking
Social Media Interactions
Real-time assistance for public responses
├── Tone and brand consistency
├── Knowledge suggestions
├── De-escalation for negative sentiment
└── Escalation recommendations
Usage Scenarios
| Scenario | Solution | Outcome |
|---|---|---|
| High call volume with complex issues | Copilot suggests knowledge articles | Reduced AHT, faster resolution |
| New agents lacking experience | Real-time script and guidance | Improved FCR, faster ramp-up |
| Compliance-heavy calls | Compliance reminders and scripts | Reduced risk, better compliance |
| Frustrated customers | Sentiment analysis with de-escalation tips | Improved satisfaction, retention |
| Sales team underperforming | Upsell/cross-sell recommendations | Increased revenue per interaction |
| Quality issues with call handling | Real-time coaching suggestions | Improved quality scores |
| Agent knowledge gaps | Targeted knowledge recommendations | Improved FCR, fewer escalations |
| Multilingual support | Language-specific scripts and guidance | Consistent quality across languages |
Knowledge Base Organization for Copilot
Knowledge Base Structure:
├─ TECHNICAL SUPPORT
│ ├─ Password Reset
│ │ ├─ Steps 1-5
│ │ ├─ Common Issues
│ │ └─ When to Escalate
│ ├─ Two-Factor Auth
│ ├─ Account Recovery
│ └─ Billing Issues
│
├─ SALES
│ ├─ Plan Comparison
│ ├─ Pricing Information
│ ├─ Promotional Offers
│ ├─ Upsell Scenarios
│ └─ Contract Terms
│
├─ CUSTOMER SUCCESS
│ ├─ Onboarding Steps
│ ├─ Best Practices
│ ├─ Feature Usage
│ └─ Integration Guides
│
└─ COMPLIANCE
├─ Required Disclosures
├─ Privacy Policies
├─ Legal Requirements
└─ Prohibited Actions
Copilot Performance Metrics
Recommendation Quality
| Metric | Target | Purpose |
|---|---|---|
| Recommendation Accuracy | >85% | Agent finds recommendations helpful |
| Agent Acceptance Rate | >60% | Agents actively use suggestions |
| Relevance Score | >4/5 | Recommendations match context |
| Time to Resolution | -15% | Faster with Copilot assistance |
| Knowledge Article Match Rate | >90% | Correct article suggested |
Agent Performance
| Metric | Target | Purpose |
|---|---|---|
| First Contact Resolution | +10-25% | Copilot guidance improves outcomes |
| Average Handle Time | -10-20% | Faster resolution with suggestions |
| Customer Satisfaction | +5-15% | Better agent performance |
| Quality Score | +5-10% | Improved call quality |
| Agent Confidence | +20-30% | Subjective improvement |
Best Practices
Knowledge Base Optimization
- Keep articles current - Update quarterly or when processes change
- Write for clarity - Use simple language agents can understand quickly
- Include visuals - Screenshots and diagrams help comprehension
- Provide examples - Real scenarios help agents apply knowledge
- Tag thoroughly - Use keywords and metadata for better matching
- Test accuracy - Verify all knowledge is correct before publishing
Copilot Configuration
- Start simple - Begin with high-confidence recommendations only
- Tune relevance - Adjust thresholds based on agent feedback
- Monitor adoption - Track which recommendations agents use
- Gather feedback - Ask agents what would help them more
- Iterate quickly - Update knowledge and rules frequently
- A/B test - Try different recommendation approaches
Agent Enablement
- Provide training - Agents need to understand Copilot features
- Share success stories - Show how other agents use it effectively
- Encourage experimentation - Let agents find what works for them
- Make feedback easy - Simple thumbs up/down for recommendations
- Celebrate improvements - Recognize agents who adopt well
- Continuous learning - Regular coaching on Copilot usage
Monitoring & Optimization
- Track recommendations - See which articles agents use most
- Monitor accuracy - Ensure recommendations are helpful
- Gather sentiment - Ask agents about Copilot effectiveness
- Review metrics - Check impact on FCR, AHT, CSAT
- Optimize content - Update articles agents find unhelpful
- Plan improvements - Use data to guide enhancements
Common Implementation Scenarios
Scenario 1: Technical Support with Knowledge-Heavy Topics
Configuration:
├── Knowledge base with 200+ articles
├── Intent-based recommendation
├── Sentiment monitoring enabled
├── De-escalation scripts
└── Escalation pathways
Expected Results:
├── FCR improvement: 15-25%
├── AHT reduction: 12-18%
└── Agent confidence: +25%
Scenario 2: Sales Team with Upsell Focus
Configuration:
├── Product recommendation engine
├── Upsell/cross-sell playbooks
├── Customer history integration
├── Pricing recommendations
└── Contract template suggestions
Expected Results:
├── Revenue per call: +15-30%
├── Sales conversion: +10-20%
└── Agent productivity: +20%
Scenario 3: Multilingual Support
Configuration:
├── Knowledge base in multiple languages
├── Language-specific scripts
├── Tone guidance per language
├── Cultural sensitivity prompts
└── Translation recommendations
Expected Results:
├── FCR consistent across languages
├── Quality standardization
└── Customer satisfaction: +10-15%
Troubleshooting Guide
| Issue | Cause | Resolution |
|---|---|---|
| No recommendations appearing | Knowledge base empty or not indexed | Populate knowledge base and index |
| Irrelevant recommendations | Poor knowledge article tagging | Review and improve metadata/keywords |
| Agents ignoring recommendations | Not helpful or slow to appear | Adjust relevance thresholds and review content |
| Slow recommendation loading | Too many articles to search | Add more specific keywords and metadata |
| Sentiment detection inaccurate | Model needs more training data | Collect more interactions and retrain |
| High false positive sentiment | Threshold too sensitive | Adjust sensitivity settings lower |
| Copilot not working for all queues | Not enabled for specific queues | Enable in queue configuration |
| Knowledge articles outdated | No review process | Establish content review cycle |
| Low agent adoption | Agents don't understand value | Provide additional training |
| Module not appearing | License not purchased or enabled | Verify Premium edition and module purchase |
Agent Copilot vs. Traditional Knowledge Base
| Feature | Agent Copilot | Traditional Knowledge |
|---|---|---|
| Real-time suggestions | Yes, automatic | Manual search required |
| Context awareness | AI-powered, contextual | Search-based only |
| Sentiment analysis | Yes | No |
| Next action prediction | Yes | No |
| Script guidance | Automatic | Manual lookup |
| Learning capability | Improves over time | Static |
| Setup complexity | Medium-High | Low |
| Ongoing maintenance | High (ML tuning) | Medium |
| Agent productivity | +20-30% potential | Baseline |
| Customer satisfaction | +5-15% improvement | Baseline |
Sentiment Analysis in Copilot
Sentiment Detection Levels
Extremely Negative (-2)
├─ Angry, frustrated, hostile
├─ Risk: High churn likelihood
└─ Action: Immediate de-escalation
Negative (-1)
├─ Disappointed, concerned
├─ Risk: Medium churn likelihood
└─ Action: Empathy + quick resolution
Neutral (0)
├─ Standard interaction tone
├─ Risk: Low
└─ Action: Normal service
Positive (+1)
├─ Satisfied, pleased
├─ Risk: None
└─ Action: Reinforce positive experience
Extremely Positive (+2)
├─ Happy, delighted
├─ Opportunity: Upsell/cross-sell
└─ Action: Leverage positive sentiment
Integration Scenarios
With Workforce Optimization
Copilot + WFO
├── Agent assisted by Copilot
├── Interaction recorded
├── Quality scored with AI
├── Coaching recommendations generated
└── Coaching delivered back to agent
With Predictive Routing
Copilot + Predictive Routing
├── Best agent routed to contact
├── Copilot assists during interaction
├── Recommendations improve outcome
└── System learns for future routing
With Analytics
Copilot + Analytics
├── Copilot recommendation usage tracked
├── Impact on metrics measured
├── Dashboards show Copilot effectiveness
└── Data guides optimization
Interview Cheat Sheet
| Question | Answer |
|---|---|
| What is Agent Copilot? | AI-powered real-time guidance system for agents |
| Also known as? | Agent Assist or Copilot Assistant |
| What are the requirements? | Premium edition + Customer Insights module |
| What does it recommend? | Knowledge articles, scripts, next actions, sentiment guidance |
| How does sentiment analysis help? | Detects customer frustration and suggests de-escalation |
| Where is it configured? | Admin → Architect → Agent Copilot |
| What channels does it support? | Voice, chat, email, social media |
| How does it improve performance? | FCR +10-25%, AHT -10-20%, CSAT +5-15% |
| What's required for success? | Quality knowledge base and agent training |
| How does machine learning help? | System learns from recommendations agents use vs. ignore |
| Can agents reject recommendations? | Yes, agents decide what to apply |
| How long until ROI? | 4-8 weeks to see significant improvement |
| What if knowledge base is empty? | Copilot won't have content to recommend |
| How does it work with omnichannel? | Provides channel-specific guidance (voice, chat, email, etc.) |
| What's the biggest success factor? | Quality, current, well-organized knowledge base |
Key Takeaways
- Real-Time AI Assistance - Copilot provides in-the-moment guidance during interactions
- Knowledge-Driven - Quality depends on knowledge base content and organization
- Sentiment Awareness - Monitors emotion and suggests appropriate responses
- Omnichannel Support - Works across voice, chat, email, and social channels
- Premium Feature - Requires Premium edition and Customer Insights module
- Significant Impact - FCR improvements of 10-25% typical
- Machine Learning - System improves recommendations based on agent actions
- Agent Adoption Critical - Success depends on agents trusting and using recommendations
- Ongoing Content Management - Knowledge base requires regular updates
- Quick ROI - 4-8 weeks to measurable improvements
Migration Path from Manual Knowledge Search
Phase 1: Assessment (Weeks 1-2)
├── Audit current knowledge base
├── Identify content gaps
├── Plan reorganization
└── Set quality standards
Phase 2: Content Preparation (Weeks 2-4)
├── Create/update knowledge articles
├── Add metadata and keywords
├── Organize by intent and queue
└── Quality review all content
Phase 3: Copilot Setup (Weeks 4-5)
├── Enable Agent Copilot
├── Configure recommendations
├── Set relevance thresholds
└── Establish monitoring
Phase 4: Agent Training (Week 5-6)
├── Educate on Copilot features
├── Practice with sample interactions
├── Explain recommendation types
└── Share best practices
Phase 5: Pilot & Optimization (Weeks 6-8)
├── Deploy to single queue
├── Monitor and gather feedback
├── Optimize recommendations
└── Plan full rollout
Phase 6: Full Deployment (Week 8+)
├── Enable across all queues
├── Provide ongoing support
├── Monitor metrics
└── Continuous improvement
Additional Resources
Official Documentation Links
- Genesys Cloud Agent Copilot Guide: https://help.genesys.com/genesyscloud/current/en-us/AgentCopilot.html
- Knowledge Management Setup: https://help.genesys.com/genesyscloud/current/en-us/KnowledgeManagement.html
- Customer Insights Module: https://help.genesys.com/genesyscloud/current/en-us/CustomerInsights.html
Support Contacts
- Genesys Sales: sales@genesys.com
- Genesys Support: https://support.genesys.com
- Community Forums: https://community.genesys.com
Document Version Info
Last Updated: March 2026
Source: Genesys PureCloud Official Documentation
Version: 1.0