3.- People and Access
- Access Policies (Attribute-Based Access Control)
- Authorized Organizations (Pairing)
- Divisions (Access Controls)
- Group Telephony & Routing
- Groups (People & Permissions)
- Roles & Permissions (RBAC)
- User profile management
- Work Teams
Access Policies (Attribute-Based Access Control)
What Are Access Policies?
Access Policies implement Attribute-Based Access Control (ABAC) — a layer of fine-grained permission logic that works alongside RBAC (Roles & Permissions) and Divisions.
Where RBAC answers "does this role have this permission?", ABAC answers "given the attributes of this user, this resource, and this environment — should access be allowed or denied?"
ℹ️ ABAC does not replace Roles or Divisions. It augments them. Authorization requires both ABAC policy evaluation and standard permission checks to pass.
Enable ABAC First
Before any access policies take effect, you must enable the feature at the org level:
Admin → Organization Settings → [toggle] Enable Attribute-Based Access Control
Policies can be created and saved before enabling, but they will not be enforced until the org setting is on.
Core Concepts
The Three Attribute Types
| Attribute Type | What It Describes |
|---|---|
| Subject | The user or entity requesting access (their roles, division, group membership, etc.) |
| Resource / Object | The thing being accessed (a user profile, a recording, a gamification scorecard, etc.) |
| Environment | Contextual factors (IP address, time of day, etc.) |
Policy Structure
Each policy contains:
| Element | Description |
|---|---|
| Name | Identifier for the policy |
| Description | Purpose and context |
| Target | The API calls this policy applies to — written as domain:entity:action (e.g., authorization:grant:add) |
| Subject | Who the policy applies to — user, group, client, or all |
| Effect | ALLOW or DENY |
| Conditions | Boolean logic (Any = OR, All = AND) using TypedAttribute key-value pairs |
Default-Deny Logic
⚠️ DENY overrides ALLOW. If a subject matches both an ALLOW and a DENY policy, access is denied.
Access is granted only when all three are true:
- Subject satisfies an ALLOW policy's conditions
- Subject has the required traditional permission
- Subject does not match any DENY policy
The Three Built-In Policy Types
Genesys Cloud ships three pre-built policy templates covering the most common ABAC use cases:
1. Cannot Grant New Roles
Purpose: Prevents non-admin users from granting roles they do not themselves hold.
Use case: Stops a supervisor from escalating privileges by assigning a role they don't have to another user — even if they technically have the authorization:grant:add permission.
How it works:
- Checks if the subject is an admin
- Checks if the subject already has the role being granted
- If neither condition is true → DENY
2. Cannot Update Certain User Profile Fields
Purpose: Prevents specified profile fields from being modified by regular users — while still allowing supervisors or admins to edit them.
Use case: Lock fields like employee ID, HR data, or contact info so agents cannot self-edit them, but managers can still update them.
How it works:
- Uses
profile.fieldscondition — case-insensitive check against a list of restricted field names - If the field being modified is in the restricted list AND the subject does not have a manager-level role → DENY
Restricted field values (configured in policy JSON as preset attributes):
| Category | Example Field Values |
|---|---|
| Name | name, name.firstName, name.lastName |
| Contact Info | contactInfo, contactInfo.phone_work, contactInfo.phone_work_2 |
| HR Fields | hr (entire section) |
| Images | images, images.profile |
| Biography | biography |
| Location | location |
| Relationships | relationships |
ℹ️ Using a section name (e.g.,
contactInfo) restricts the entire section — equivalent tocontactInfo.*. Add specific sub-fields only when partial restriction is needed.
Full list: Admin → People & Permissions → Access Policies → Templates → Cannot Update Certain User Profile Fields — or see the Genesys Resource Center Restricted fields value list.
3. Access Control for Gamification Scorecard and Insights
Purpose: Limits supervisors to viewing gamification data only for agents within their reporting hierarchy, while admins retain full access.
How it works (hierarchy tiers):
| Role | Access Scope |
|---|---|
| Supervisor | Direct reports only |
| Manager of managers | Up to 3 levels deep in hierarchy |
| Admin (designated role) | Full access to all gamification data |
Use case: Prevents supervisors from browsing gamification performance data for agents outside their team.
Creating an Access Policy
Option A — From a Template
- Admin → People & Permissions → Access Policies
- Click Templates
- Select the desired template
- Modify the
domain,entity, andactionfields in the target if needed - Edit the
subject,effect, andconditionsections in the Policy JSON - Optionally toggle Enable Policy to activate immediately
- Click Save
Option B — From Scratch
- Admin → People & Permissions → Access Policies
- Click Create Policy
- Write the full Policy JSON manually
- Use Validate Syntax tab to check for errors before saving
Policy JSON Syntax
{
  "name": "Policy Name",
  "description": "What this policy does",
  "targets": [
    {
      "domain": "authorization",
      "entity": "grant",
      "action": "add"
    }
  ],
  "subject": {
    "type": "user"
  },
  "effect": "DENY",
  "conditions": {
    "all": [
      {
        "attribute": "subject.role.names",
        "operator": "notContains",
        "value": "Admin"
      }
    ]
  }
}
Condition operators: equals, notEquals, contains, notContains, startsWith, in, notIn
Logical operators:
any→ OR (at least one condition must be true)all→ AND (every condition must be true)- These can be nested for complex logic
Validation and Testing
Before deploying a policy:
-
Click Validate Syntax tab — checks for:
- Missing mandatory fields
- Invalid attributes
- Incorrect data type comparisons
- Preset attribute conflicts
-
Click Test Policy tab — paste sample subject/resource/environment data and run a simulated evaluation to confirm expected ALLOW/DENY result before enabling
Enabling and Managing Policies
| Action | How |
|---|---|
| Enable a policy | Toggle Enable Policy on the policy detail page |
| Disable a policy | Toggle off — policy is retained but not enforced |
| Edit a policy | Admin → Access Policies → select policy → Edit |
| Delete a policy | Admin → Access Policies → select policy → Delete |
| View all policies | Admin → Access Policies → table view with status |
Permissions Required
| Action | Permission |
|---|---|
| Create / edit / delete policies | Authorization > Policy > Add, Edit, Delete |
| View policies | Authorization > Policy > View |
| Enable ABAC org setting | Organization Settings admin access |
⚠️ The ABAC feature itself must be enabled in Organization Settings before any policies are enforced, regardless of permissions.
Important Behaviours and Gotchas
- DENY always wins — if a user matches both an ALLOW and a DENY policy, they are denied
- ABAC + RBAC are additive — a user needs both the RBAC permission AND to satisfy the ABAC ALLOW policy to gain access
- Policies apply immediately after enabling — test in non-production if possible
- Preset attribute names must use only alphanumeric characters, periods, or underscores — no spaces or special characters
profile.fieldscondition is case-insensitive — field name matching does not require exact case
See Also
- Roles & Permissions — the RBAC layer that ABAC works alongside
- Divisions & Access Control — division scoping, which also intersects with ABAC subject conditions
- Organization Settings → Security & Compliance — where ABAC is enabled at the org level
- User Profile Management — for context on which profile fields can be restricted
Authorized Organizations (Pairing)
What Are Authorized Organizations?
Common use cases:
- A support vendor or MSP managing a customer's org
- A Genesys partner administering a client environment
- A parent company accessing a subsidiary org
- Genesys Product Support pairing with your org to troubleshoot
💡 Telecom analogy: Think of this like a Federated Trust between two PBX systems — a technician from System A uses their own credentials to manage System B without needing a local extension or station created for them in System B.
Hard Constraints (Exam Critical)
| Constraint | Detail |
|---|---|
| Same AWS region required | Pairing is only possible between orgs in the same AWS region — cross-region pairing is not supported |
| Max 25 users | A maximum of 25 users from the requesting org can be authorized to access the target org |
| No license consumption | Authorized users do not consume a license seat in the target org — they are billed to their home org |
| Admin tasks only | Authorized users cannot receive ACD interactions (calls, chats, emails), use internal chat, or access the agent dashboard |
| Division access | Authorized users are automatically granted access to all divisions assigned to the roles they receive in the target org |
How Pairing Works — Two Sides
Pairing involves two org administrators: one who requests access and one who grants it.
Side 1: Creating a Pairing Request (Requesting Org)
The org that wants access initiates the request:
- Admin → People & Permissions → Authorized Organizations
- Click Create Pair
- In the selection box, type and select the users or groups from your org who need access
- Click Create Pairing Link
- Click the copy icon to copy the unique URL
- Manually send the link to an administrator of the target org (via email, chat, etc. — Genesys does not send it automatically)
⚠️ The pairing link must be sent out-of-band. Genesys does not email it to the target org.
Side 2: Accepting a Pairing Request (Target Org)
The org being accessed approves and assigns permissions:
- Open the pairing link received from the requesting org
- Review the prompt and click Yes, I authorize access
- You are taken to the paired organization management page
- Click on the users or groups included in the request
- Assign the specific roles they need (e.g., Admin, Architect, Telephony Admin)
- Click Save
⚠️ Until roles are assigned, authorized users have zero permissions in the target org. Accepting the pairing alone grants no access.
Role Assignment in the Target Org
Roles assigned to authorized users work the same as regular role assignments with one important note:
- The roles assigned determine what the authorized user can do in the target org
- Division access is automatically scoped to all divisions attached to those roles
- Roles should follow least-privilege — only assign what the partner/vendor actually needs
Common role assignments for external access:
| Scenario | Suggested Roles |
|---|---|
| Genesys support troubleshooting | Admin (temporary, revoke after session) |
| Partner building Architect flows | Architect access, flow designer permissions |
| Vendor monitoring dashboards | Read-only supervisor / analytics roles |
| MSP full management | Admin or Master Admin (use with caution) |
Managing the Pairing
Revoking Access
- Go to Admin → People & Permissions → Authorized Organizations
- Delete the pairing
- This immediately terminates all active sessions for the authorized users in your org
Cloned Users
Pairing vs. Regular User Creation
| Factor | Authorized Org (Pairing) | Creating a User in Target Org |
|---|---|---|
| License in target org | Not consumed | Consumed |
| Identity / credentials | Home org credentials | Target org credentials (separate account) |
| ACD interactions | Not allowed | Allowed (if role permits) |
| Internal chat | Not available | Available |
| Max users | 25 | No pairing limit |
| Region requirement | Must match | No restriction |
| Best for | Temporary admin / vendor access | Permanent staff |
Permissions Required
| Action | Permission |
|---|---|
| Create pairing request | People & Permissions admin access |
| Accept pairing request | Admin in the target org |
| Assign roles to authorized users | Authorization > Grant > Add in the target org |
| Delete/revoke pairing | Admin in the target org |
See Also
- Roles & Permissions — role assignment principles that apply to authorized users
- Divisions & Access Control — how division scoping affects authorized user access
- Organization Settings → Security & Compliance — IP allowlists and auth controls that also apply to authorized users
Divisions (Access Controls)
Divisions are logical boundaries within a single Genesys Cloud organization. They allow you to group configuration objects — queues, flows, users, scripts, schedules — and then control who can see and manage them by scoping roles to specific divisions. This page covers how divisions work, what objects they control, their limits, and how they interact with roles.
Navigation Path
| Task | Path |
|---|---|
| Create and manage divisions | Admin → People & Permissions → Divisions |
| Move objects between divisions | Admin → People & Permissions → Divisions → select division → relevant object tab |
| Assign a division to a user's role | Admin → People & Permissions → People → select user → Edit Person → Roles tab → select role → Divisions box |
| Assign a division to a group's role | Admin → Directory → Groups → select group → Roles tab → Assign Roles → select division |
1. What Divisions Are
A division is a logical container inside your Genesys Cloud organization. You can organize them by business unit, office location, country, brand, or any classification that fits your org structure.
📌 Key concept: Divisions do not create separate organizations. Everything still lives inside one Genesys Cloud org. Divisions just control who can see and manage what within that org.
The access control model:
Role + Division = Scoped Access

Example:
  Supervisor role + Indianapolis division
  = Can only supervise agents and queues in Indianapolis
  = Cannot see or modify anything in San Francisco division
2. Limits & Rules
| Item | Value / Behavior |
|---|---|
| Maximum divisions per org | 50 |
| Division name character limit | 500 characters |
| Objects per division | An object can belong to only one division at a time |
| Divisions per user | No limit — a user can have roles scoped to multiple divisions simultaneously |
| Home division | Every org has exactly one — cannot be deleted, can be renamed |
| Default for new objects | All new configuration objects are assigned to the Home division (also referred to as "All division") by default |
3. The Home Division
Every Genesys Cloud organization starts with a single division called the Home division.
| Behavior | Detail |
|---|---|
| Cannot be deleted | The Home division is permanent |
| Can be renamed | You can rename it to fit your naming convention (e.g., "Global", "Corporate") |
| Default assignment | All new objects — queues, flows, users, schedules — are assigned to Home by default when created |
| Access scope | A role assigned to "All divisions" covers the Home division plus all divisions you create |
⚠️ Operational note: When an admin creates a new configuration object, it automatically lands in the Home division. If that object should be restricted to a specific division, you must move it manually. New objects in Home are visible to anyone with org-wide access.
4. What Objects Can Be Assigned to a Division
Divisions control access to two categories of objects: configurable and transactional.
Configurable Objects (admin-placed)
These are objects you explicitly assign or move to a division:
| Category | Objects |
|---|---|
| Routing | Queues, Flows (Architect), Call routing, Message routing, Schedules, Schedule groups, Emergency groups |
| People | Users, Groups |
| Outbound | Contact lists, Campaigns, DNC lists, Rule sets |
| Quality & WFM | Scripts, Coaching appointments, Learning modules, Management units, Wrap-up codes |
| Data | Data tables |
Transactional Objects (auto-tagged)
These objects are automatically associated with divisions as they move through the system. You do not manually assign them.
| Transactional Object | How Division Is Applied |
|---|---|
| Voice, callback, chat, email, message conversations | Tagged with the divisions the interaction encounters as it routes |
| Recordings | Inherit the division of the interaction |
| Presence history | Associated with the user's division |
| Audit data | Tagged with the division of the object being modified |
📌 Reporting impact: Analytics views display data scoped to the user's division access. If Diane Able only has access to the Indianapolis division, she only sees metrics for conversations that touched Indianapolis queues or agents — even if those conversations also touched other divisions.
5. How Roles + Divisions Work Together
A role defines what a user can do. A division defines where they can do it.
Example org: Three divisions — Indianapolis, San Francisco, Corporate
| User | Role | Division | What They Can Access |
|---|---|---|---|
| Ellen Templar | Manager | All divisions | All queues, users, and flows across all three divisions |
| Diane Able | Supervisor | Indianapolis only | Only Indianapolis queues, users, and flows |
| Dex Cooper | Supervisor | San Francisco only | Only San Francisco queues, users, and flows |
📌 Important distinction: Ellen Templar's user object lives in the Indianapolis division (that's where her profile data resides). But Ellen's role access is scoped to all divisions. These are two separate things — the division an object belongs to vs. the divisions a user's role can access.
6. Assigning Divisions to Roles
When you assign a role to a user, you also select which division(s) that role applies to.
Via user profile:
Admin → People → Edit Person → Roles tab → select role → click Divisions box → type and select division → Save
Via role membership (bulk):
Admin → Roles/Permissions → locate role → More → Change Membership → select users → Save
📌 When assigning roles via a group, the division assignment is set on the group's Roles tab. All group members inherit that role+division combination. You cannot edit individual members' division assignments when inherited from a group — you must edit the group itself or remove the member from the group.
7. Moving Objects Between Divisions
Because every object must belong to exactly one division, moving objects is the primary way to organize your access control structure.
Admin → People & Permissions → Divisions → select target division → click the relevant object tab (Queues, Flows, Users, etc.) → add objects
⚠️ Exception — External Contacts: You cannot reassign existing External Contacts or External Organizations to a different division after they are created. If a contact is misconfigured into the wrong division, you must delete it and recreate it in the correct division.
8. Transfer & Search Restrictions by Division
By default, agents can search for and transfer interactions to users and queues in any division. You can restrict this so agents can only transfer within their own division.
Permission to restrict cross-division transfers:
Conversation > Communication > Target
Granting this permission to a user's role limits their search and transfer capabilities to only users and queues within the divisions assigned to their role.
| Without Target permission | With Target permission |
|---|---|
| Agent can search/transfer to any user or queue org-wide | Agent can only search/transfer within their assigned divisions |
9. Division-Aware Role Management
This is an org-level setting (see Security & Compliance page) that changes how role grants are controlled.
| Setting | Effect |
|---|---|
| Disabled (default) | Any admin can assign any role to any user regardless of division |
| Enabled | Admins can only grant roles within divisions they themselves have access to. An Indianapolis admin cannot grant roles that scope to San Francisco. |
⚠️ This is an architectural decision. Enabling Division-Aware Role Management is a significant change — all role assignments become division-scoped operations. Coordinate with your access control design before enabling.
10. Limitations
| Limitation | Detail |
|---|---|
| Not full data isolation | Divisions restrict access but do not provide 100% data separation. Some resources are shared org-wide regardless of division. |
| Edge devices are shared | Edge devices (telephony hardware/software) are shared across all divisions and cannot be scoped to a single division. |
| Max 50 divisions | Plan your division structure carefully — you cannot exceed 50 in a single org. |
| Need complete isolation? | If you require total data isolation for legal or high-security reasons (e.g., separate business entities), Genesys recommends creating separate organizations rather than divisions. |
Quick Reference: Build Order for Divisions
When setting up divisions for a new org, follow this sequence:
| Step | Action |
|---|---|
| 1 | Plan your division structure (by BU, location, brand, etc.) |
| 2 | Create divisions under Admin → People & Permissions → Divisions |
| 3 | Create your configuration objects (queues, flows, users) and assign them to the correct division at creation time |
| 4 | Move any existing objects from Home to their appropriate division |
| 5 | Assign roles to users with the correct division scope |
| 6 | Enable Division-Aware Role Management (optional — only if your org requires admin-level division scoping) |
📌 Cross-reference: Division assignment is part of the Architectural Build Order page — divisions belong in Phase 1 (Global Foundation) and must be created before queues and flows so objects can be assigned to the right division at creation time.
Last verified against Genesys Cloud Resource Center – March 2026
Group Telephony & Routing
What Is Group Telephony?
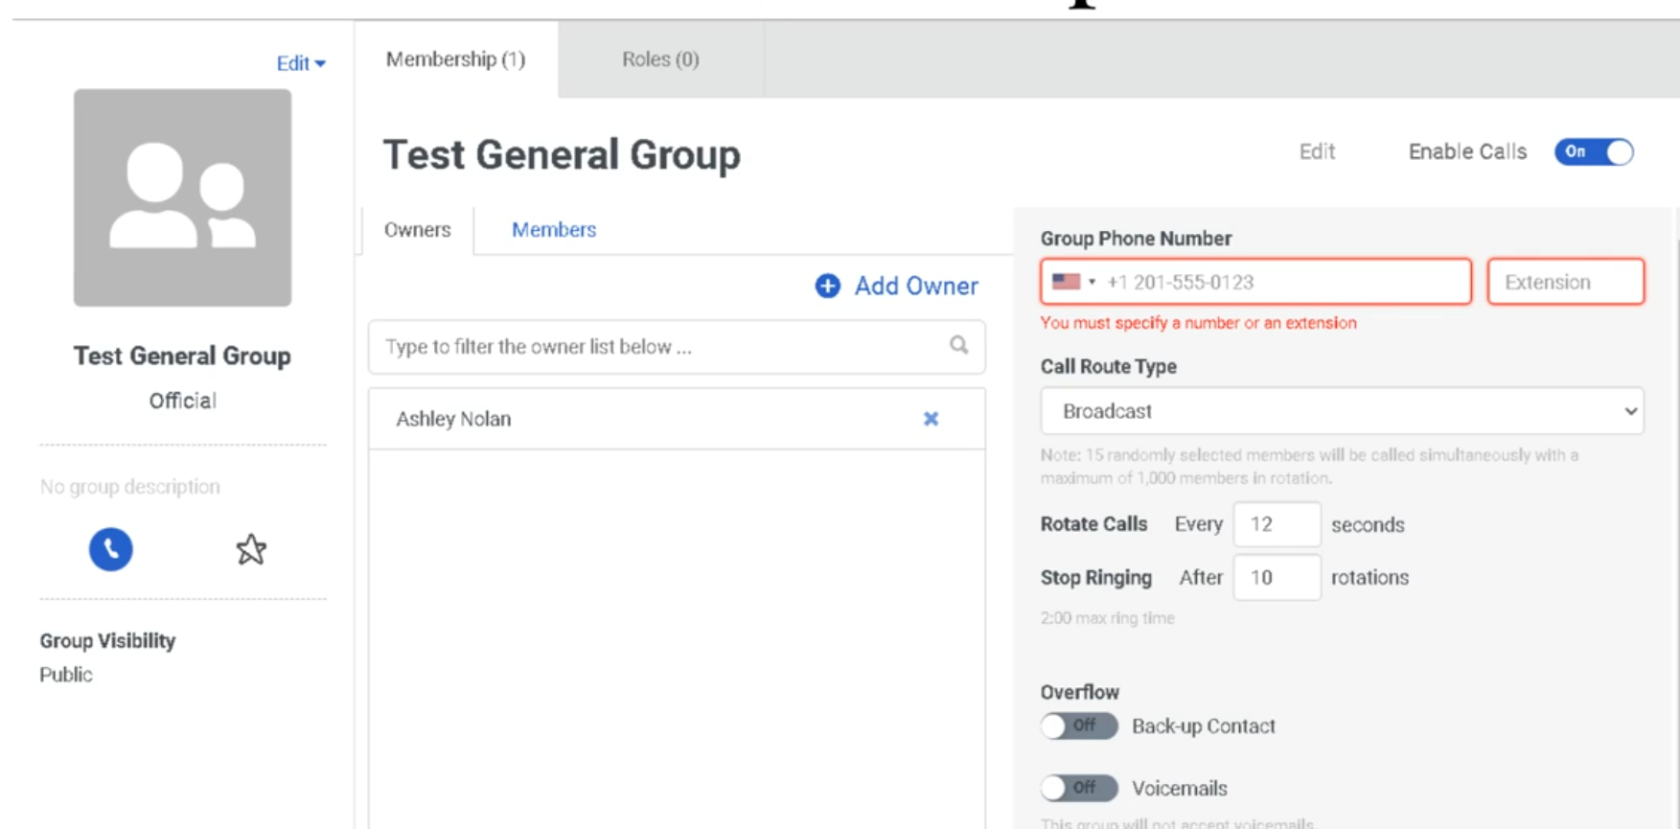
Group Telephony allows a General Group to have its own phone number or internal extension. When that number is called, Genesys routes the interaction to group members using one of three call route methods.
ℹ️ Group Telephony applies to General Groups (Official or Social) only. Work Teams and Skill Expression Groups do not support direct telephony configuration.
Enabling Calls on a Group
- Admin → Directory → Groups
- Open the target group
- Toggle Enable Calls to On (found on the left panel or top of the group profile)
- Click Edit next to the phone settings
- Configure the fields below
- Click Save
Phone Configuration Fields
| Field | Description |
|---|---|
| Phone Number / Extension | Assign a DID (external) or internal extension to the group |
| Call Route Type | How incoming calls are distributed to members — see below |
| Backup Group | A secondary group that receives calls if no member in the primary group answers |
Call Route Types
This is the most important setting in Group Telephony. Choose one of three methods:
Broadcast
- Rings all group members simultaneously (up to 1,000 members)
- First member to answer gets the call
- Best for: urgent notifications, on-call teams, small groups where speed matters
Sequential
- Rings members one by one in a defined list order
- Moves to the next member only if the current member does not answer
- Best for: tiered support escalation, defined coverage order
Rotary (Round-Robin)
- Rings the next person in the list based on who took the last call
- Distributes load evenly across the group over time
- Best for: shared coverage teams where equal distribution matters
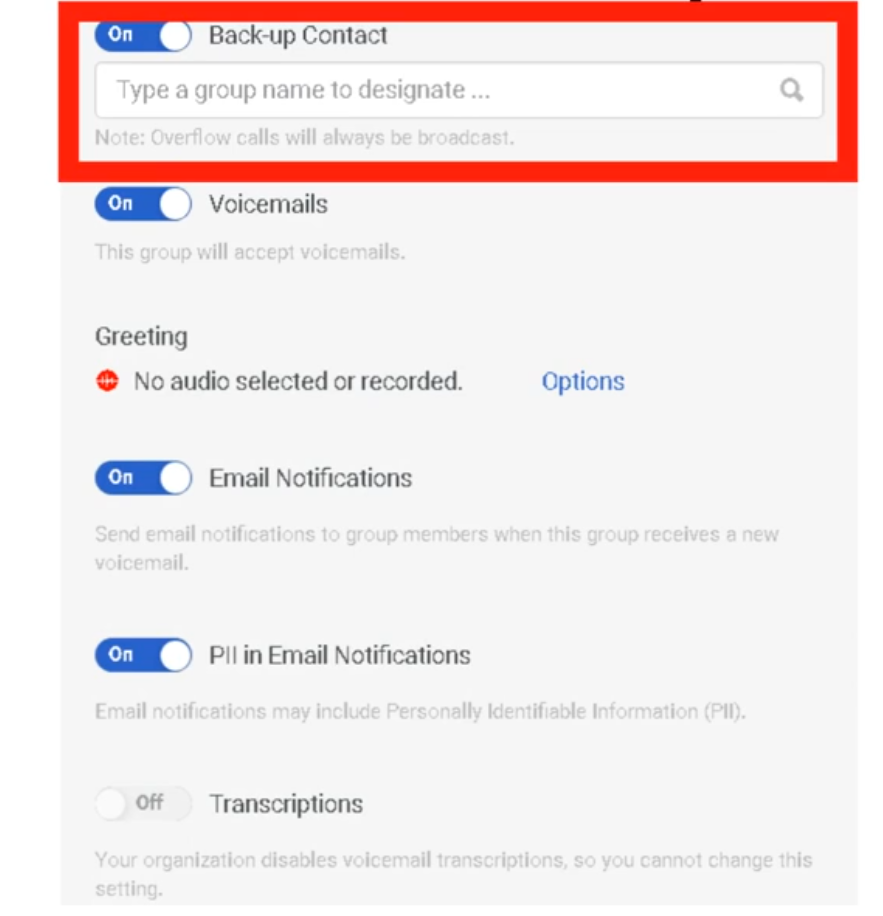
Backup Group
If no member in the primary group answers, calls can overflow to a Backup Group.
- The backup group must already exist before it can be assigned
- The backup group uses its own Call Route Type independently
- Useful for: after-hours coverage, overflow to a supervisor group, redundancy
Group Voicemail (Optional)
If no one answers — including the backup group — calls can fall to a group voicemail box.
To configure:
- Toggle Voicemail to On on the group profile
- Configure the following:
| Setting | Description |
|---|---|
| Greeting | Click the red record button to record live, or upload a .wav file |
| Email Notifications | Sends an alert to group members when a new voicemail arrives |
| Transcription | Includes a text version of the voicemail in the email notification (if available for your org) |
Call Routing Flow (Summary)
Incoming call to group number/extension
        │
        ▼
Call Route Type applies
(Broadcast / Sequential / Rotary)
        │
        ├── Member answers → Interaction connected
        │
        └── No answer
              │
              ▼
        Backup Group (if configured)
              │
              ├── Member answers → Interaction connected
              │
              └── No answer
                    │
                    ▼
              Group Voicemail (if enabled)
Key Differences: Group Telephony vs. ACD Queues
| Feature | Group Telephony | ACD Queue |
|---|---|---|
| Routing engine | Simple list-based (broadcast/sequential/rotary) | Full ACD (skills, priority, utilization) |
| Agent availability check | No — rings regardless of status | Yes — only routes to available agents |
| Reporting | Basic | Full performance views |
| Architect flow integration | No | Yes |
| Best for | Internal teams, small groups, direct extensions | Contact center interactions |
Permissions Required
| Action | Permission |
|---|---|
| Configure group telephony | Directory > Group > Edit |
| Assign phone numbers to groups | Telephony admin access may be required for DID assignment |
See Also
- Groups (People & Permissions) — creating and managing the group itself
- Queue & Routing Management — full ACD routing for contact center interactions
- Work Teams — supervisor-managed agent groups (no telephony)
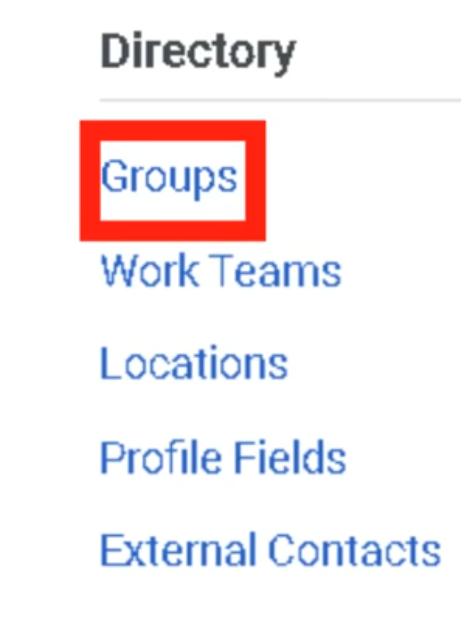
Groups (People & Permissions)
Genesys Cloud has two distinct group systems that serve completely different purposes. This page covers Directory Groups — the groups used for access control, role assignment, queue membership, and communication. Do not confuse these with Work Teams (WFM-specific groupings) or group workspaces (document sharing). All group management lives under Admin → Directory → Groups.
Navigation Path
| Task | Path |
|---|---|
| Manage all groups | Admin → Directory → Groups |
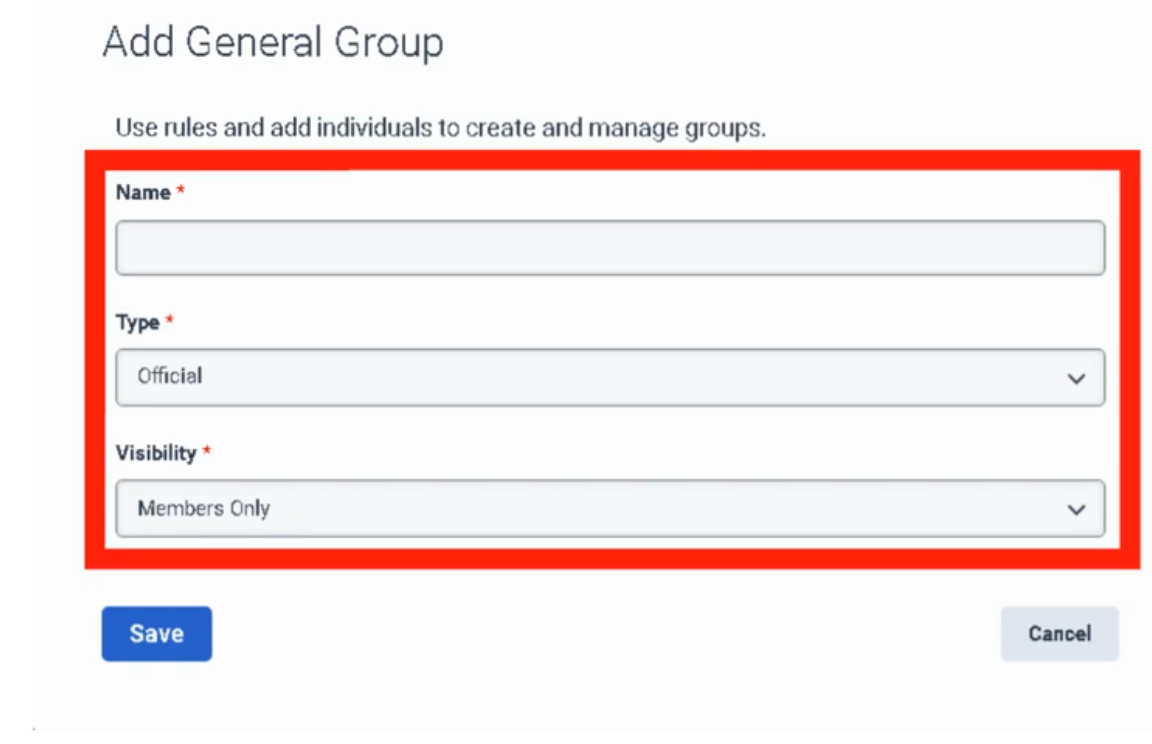
| Create a group | Admin → Directory → Groups → Add Group |
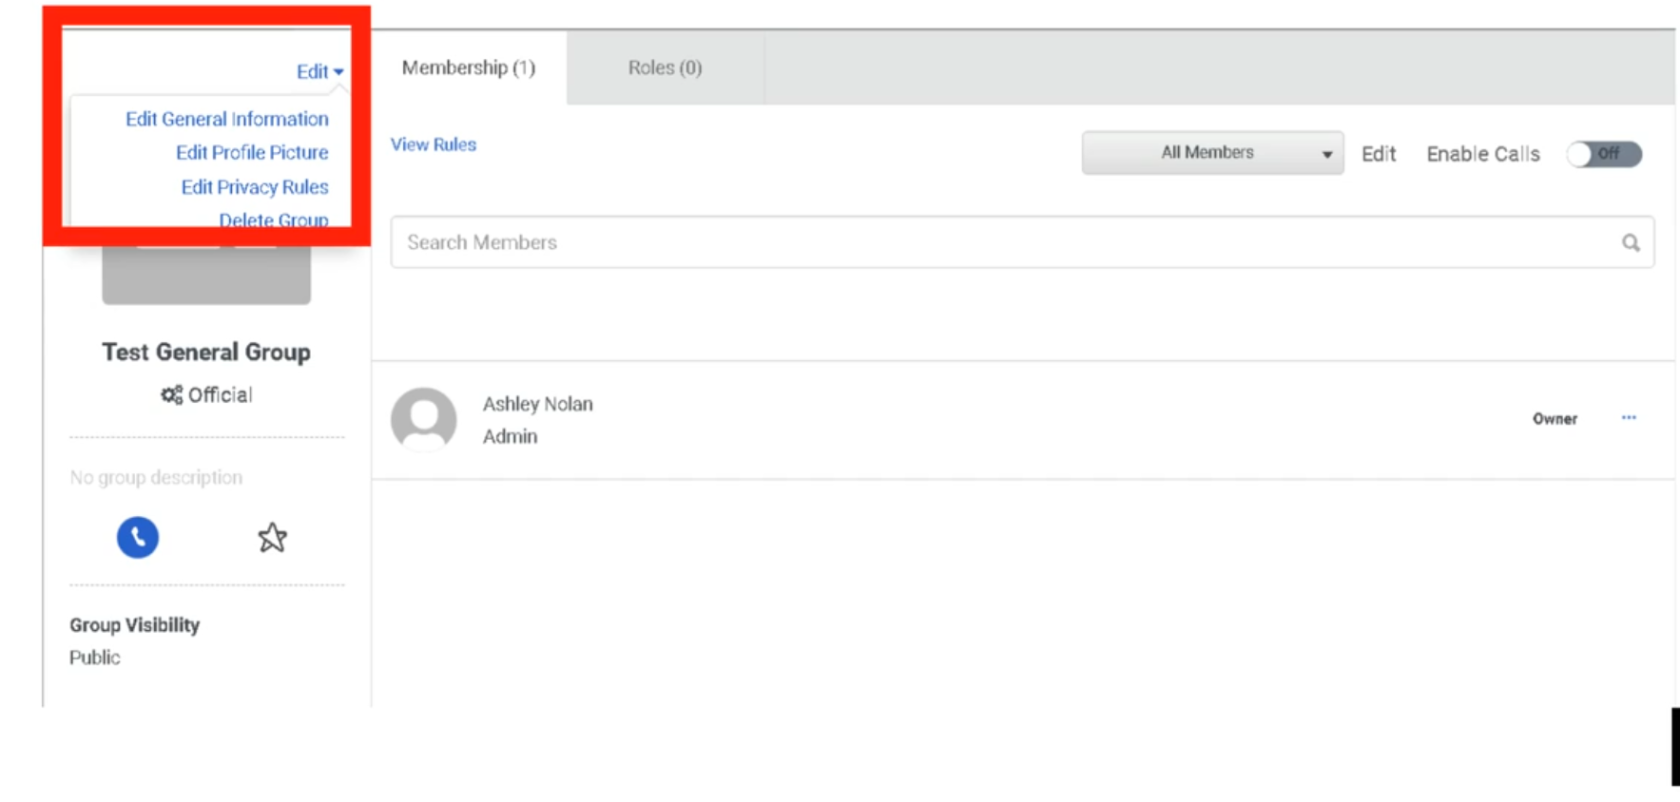
| Edit a group | Admin → Directory → Groups → click group name |
| Assign roles to a group | Admin → Directory → Groups → select group → Roles tab |
Required permissions:
| Permission | Required For |
|---|---|
Directory > Group > View |
Viewing groups |
Directory > Group > Edit |
Editing groups and managing membership |
Directory > Group > Add |
Creating new groups |
Directory > Group > Delete |
Deleting groups |
1. Two Types of Groups
Genesys Cloud has two fundamentally different group types, each with distinct behavior and use cases.
General Groups
Manual or rule-based groups used for communication, role assignment, and directory organization.
| Feature | Detail |
|---|---|
| Membership | Added manually one at a time, or automatically via membership rules based on profile data and org hierarchy relationships |
| Chat room | Genesys Cloud automatically creates a persistent chat room with the same name when a general group is created |
| Profile page | Has a group profile page showing members, contact info, and group photo |
| Roles | Can have roles assigned directly — all group members inherit those roles and division scopes |
| Group types | Can be designated as Official (work-related) or Social |
| Deletion | Deleting a general group does NOT delete the associated chat room. Chat rooms cannot be deleted. |
When to use general groups:
| Use Case | Example |
|---|---|
| Role assignment at scale | Create "Outbound Supervisors – Monterrey" group, assign the Supervisor role + Monterrey division once — all members inherit it automatically |
| SME identification | "SBC Experts" group makes specialists findable via directory search |
| Project teams | Temporary groups for cross-functional projects |
| Location-based teams | "Monterrey Floor 2" for announcements and group chat |
| Queue membership via Bullseye routing | Assign groups to bullseye routing rings in queue configuration |
Skill Expression Groups
Dynamic groups whose membership is automatically managed by the system based on ACD skill and language proficiency conditions.
| Feature | Detail |
|---|---|
| Membership | Fully automatic — the system adds/removes members when their ACD skill assignments or proficiency ratings change |
| Update speed | Membership changes take effect within approximately 1 minute of a skill change |
| Chat room | No chat room is created for skill expression groups |
| Primary use | Dynamically populating queue membership or bullseye routing rings based on agent skills |
| Inactive members | The Membership tab always shows total member count including inactive users |
Example skill expression:
| Expression | Meaning |
|---|---|
English > 3 |
Includes all agents whose English language skill proficiency is greater than 3 |
Spanish >= 4 AND SBC_Support >= 2 |
Includes agents with both Spanish proficiency ≥ 4 and SBC Support skill ≥ 2 |
📌 Key distinction: General groups are managed by admins or rules based on profile data. Skill expression groups are managed entirely by the ACD skill engine based on skill assignments. Use skill expression groups when your queue membership should automatically track skill levels.
2. Group Limits
| Limit | Value |
|---|---|
| General groups per org (recommended max) | 500 |
| Skill expression groups per org | 300 (contact Customer Care to exceed) |
| Primary conditions per skill expression group | 10 |
| Subconditions per primary condition | 10 |
| Groups a single user can belong to | Up to 100 official + 100 social (200 total) |
| Individual members added manually (recommended max) | 1,000 per group |
3. Group Membership — General Groups
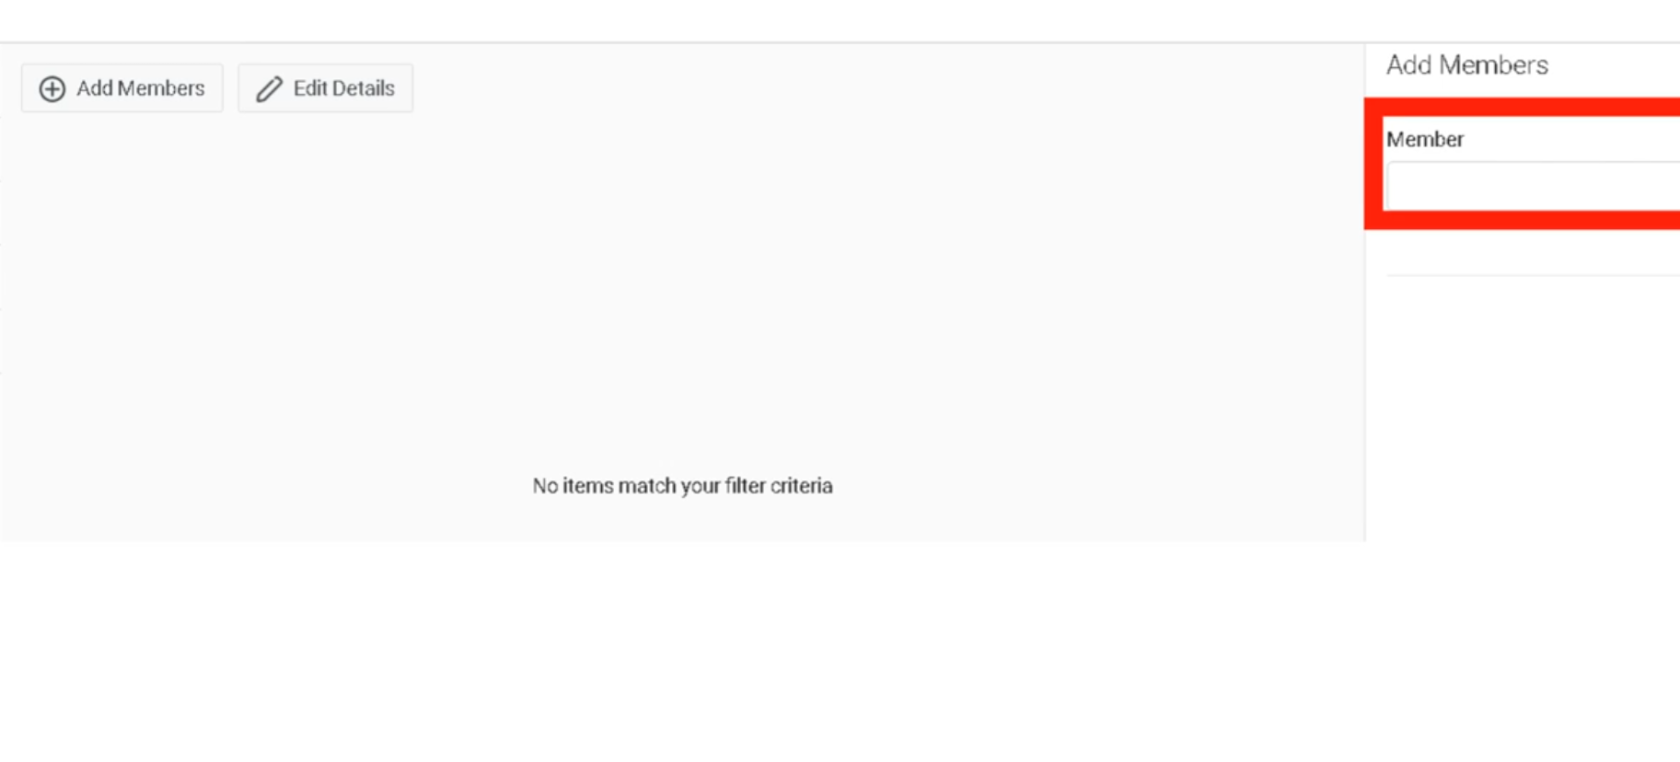
Manual (Individual) Membership
Add users one at a time via the group's Membership tab.
Admin → Directory → Groups → select group → Membership tab → Edit → Individuals tab → search and add
📌 Members added individually are not affected by changes to membership rules. Manual additions are permanent until explicitly removed.
Automatic Membership Rules
Rules automatically add or remove members based on profile data and org hierarchy relationships.
| Rule Type | Example |
|---|---|
| Profile tags/certifications | All users tagged with "Cisco" |
| Reporting relationship — Superiors | Everyone in the management chain above a specific person |
| Reporting relationship — Subordinates | All direct reports below a specific manager |
| Inclusions / Exclusions | Include everyone from a rule, then exclude specific individuals |
Admin → Directory → Groups → select group → Membership tab → Edit → Inclusions tab → define rule
Owners vs. Members
| Role | Capabilities |
|---|---|
| Owner | Full editing rights — can modify group settings, membership, and roles |
| Member | Limited rights — can participate in group chat, appears in group directory |
📌 When you create a group, you are automatically its owner. If you create a group on behalf of someone else and don't want editing rights, remove yourself as an owner after creation. If you remove yourself as owner, you lose editing rights unless you have the
Directory > Group > ViewandDirectory > Group > Editpermissions assigned to your role.
4. Group Membership — Skill Expression Groups
Admin → Directory → Groups → Skill Expression tab → select group → Membership tab → Build Skill Expression
Membership is built by defining conditions using ACD skills and language proficiencies with relational operators (greater than, equal to, greater than or equal to, etc.) and logical operators (AND, OR).
⚠️ Skill expression groups are dynamic. If you modify an agent's ACD skill assignments or proficiency ratings, their membership in any skill expression group that references that skill updates automatically within approximately 1 minute.
5. Assigning Roles to Groups
One of the most powerful uses of general groups is bulk role assignment. When you assign a role (with a division) to a group, every current and future member of that group inherits that role scoped to that division automatically.
Admin → Directory → Groups → select group → Roles tab → Assign Roles → select role → select division → Save
| Behavior | Detail |
|---|---|
| New members | Automatically inherit all roles assigned to the group upon joining |
| Removed members | Lose all roles inherited from the group upon removal |
| Role editing | Roles inherited from a group cannot be edited on an individual user's Roles tab — you must edit the group or remove the user from the group |
| Division-Aware Role Management | If enabled org-wide, admins can only assign roles to groups within divisions they themselves have access to |
📌 Best practice: For large teams with shared permissions (e.g., all Monterrey supervisors), use a group + role assignment instead of assigning roles to each user individually. This dramatically reduces maintenance overhead when staff changes occur.
6. General Group Types: Official vs. Social
When creating a general group, you designate it as Official or Social. This affects how users can search and filter groups in the directory.
| Type | Use Case | Workspace Eligible? |
|---|---|---|
| Official | Work-related — teams, departments, projects, queues | ✅ Yes — can be added to group workspaces |
| Social | Non-work — interest groups, social clubs | ❌ No — social groups cannot be workspace members |
7. Groups and Chat Rooms
| Behavior | Detail |
|---|---|
| Creating a general group | Automatically creates a persistent chat room with the same name |
| Deleting a general group | Deletes the group but not the chat room — chat rooms cannot be deleted |
| Skill expression groups | No chat room is created |
📌 If you create test groups or temporary groups, be aware that their associated chat rooms persist indefinitely even after the group is deleted.
8. Limits & Operational Notes
| Item | Guidance |
|---|---|
| Keep org group count under 500 | Genesys recommends no more than 500 groups per org for performance |
| Limit individual manual members to 1,000 | For groups with larger populations, use membership rules instead |
| Disable group calls when adding members | For best results, temporarily disable group calls while bulk-adding members |
| Workspace access via groups | When an official group is added to a workspace, any user added to the group automatically gains workspace access — use carefully for sensitive files |
Quick Comparison: General vs. Skill Expression Groups
| Feature | General Group | Skill Expression Group |
|---|---|---|
| Membership management | Manual or profile/hierarchy rules | Automatic via ACD skill conditions |
| Chat room created | ✅ Yes | ❌ No |
| Profile page | ✅ Yes | ✅ Yes |
| Role assignment | ✅ Yes | ✅ Yes |
| Queue/bullseye routing | ✅ Yes (manual) | ✅ Yes (dynamic) |
| Max per org | 500 (recommended) | 300 |
| Membership update speed | On admin action or rule trigger | ~1 minute after skill change |
Last verified against Genesys Cloud Resource Center – March 2026
Roles & Permissions (RBAC)
Genesys Cloud uses a Role-Based Access Control (RBAC) model. Permissions are the individual "keys" that unlock specific actions. Roles are the "keyrings" — pre-packaged bundles of permissions assigned to users. Roles also control licensing: the license assigned to a user corresponds to the most expensive permission in any role they hold.
Navigation Path
| Task | Path |
|---|---|
| Manage roles and permissions | Admin → People & Permissions → Roles/Permissions |
| Assign roles to a user | Admin → People & Permissions → People → select user → More → Edit Person → Roles tab |
| View permissions assigned to a user | Admin → People & Permissions → People → select user → More → Edit Person → View Permissions tab |
1. How RBAC Works in Genesys Cloud
Organization
└── User
    ├── Role A  (e.g., Employee)     → permissions bundle
    ├── Role B  (e.g., User/Agent)   → permissions bundle
    └── Role C  (e.g., Supervisor)   → permissions bundle
        └── Each role scoped to a Division (optional)
| Concept | Description |
|---|---|
| Permission | A single granular toggle — e.g., Routing > Queue > Edit. Genesys Cloud has over 2,000 individual permissions. |
| Role | A named bundle of permissions. Assigned to users. |
| Division | An optional scope applied to a role assignment. Limits the role's power to objects in that division only. See the Divisions & Access Control page. |
| License | Automatically determined by the most expensive permission in any role assigned to the user. You don't choose a license directly — it follows the role. |
📌 Permission changes can take up to 5 minutes to take effect after being saved.
2. The Golden Rule of Default Roles
⚠️ Never modify the permissions of a default role directly.
Instead:
- Find the default role closest to what you need
- Click More → Copy Role
- Rename the copy
- Add or remove permissions from the copy
Why: Default roles receive automatic permission updates from Genesys as new features are released. If you modify a default role, you may lose those updates — or receive them unexpectedly. Keeping your custom logic in copied roles protects you from both problems.
To restore a default role to its original state:
Admin → Roles/Permissions → find role → Edit Role → Restore Default Role
⚠️ Restoring a default role removes any permissions you added and restores any you deleted. There is no partial restore.
3. Default Roles Reference
Foundation Roles (All Orgs)
| Role | Auto-Assigned? | Can Be Removed? | Purpose |
|---|---|---|---|
| Employee | ✅ Yes — all users | ❌ No | Baseline role. Allows basic system access: read org data, edit own profile, use Collaborate (chat). Does NOT allow receiving ACD queue calls. |
| Admin | ✅ Yes — org creator only | ✅ Yes (from others) | Full org control. Manages global settings, invites users, assigns roles. Automatically assigned to whoever creates the organization. |
| Master Admin | ❌ No | ✅ Yes | All permissions needed to administer the entire organization including contact center. Commonly assigned to partner/vendor support users who need full access. Has all Admin permissions plus contact center administrative rights. |
| People Admin | ❌ No | ✅ Yes | HR-style user management. Create, edit, and delete users; manage role and permission assignments. Only exists in organizations created after June 1, 2022. |
Contact Center Roles
| Role | Purpose | Key Requirement |
|---|---|---|
| User | The agent role. Required for anyone who needs to be a member of an ACD queue and receive routed interactions. Without this role, a user cannot be added to a queue. | Must be assigned alongside Employee |
| Supervisor | Floor manager. Monitor live calls, manage agent queues, view real-time dashboards, handle wrap-up codes, view Queue and Agent dashboards and reports. | Requires CX license |
| Outbound Admin | Manages outbound dialing campaigns, contact lists, DNC (Do Not Call) lists, and call analysis rules. | Requires Outbound license |
| Outbound Agent | Frontline role for outbound campaign agents. Gives the agent the specific interface to receive outbound dialing interactions. | Requires Outbound license |
| Quality Administrator | Manages encryption keys, recording policies, evaluation forms, and calibrations. Can be scoped by queue using permission conditions. | Requires CX 3 |
| Quality Evaluator | Listens to recordings, fills out evaluation forms, annotates recordings, provides coaching feedback. | Requires CX 3 |
| Script Designer | Builds the agent scripting pop-up screens that display customer data and talking points during interactions. | — |
| Planner Admin | Workforce Management role. Handles forecasting, agent scheduling, and adherence monitoring. | Requires WFM license |
| Wallboard User | Minimal permissions. Designed for a dedicated display computer showing real-time queue statistics on a wall screen. | — |
Telephony & Technical Roles
| Role | Purpose |
|---|---|
| Telephony Admin | Manages telephony infrastructure: Sites, Edge devices, phone stations, extension pools, and call routing. Focuses on the "pipes." |
| Genesys Cloud Voice Admin | For customers using Genesys as their carrier. Allows purchasing phone numbers, managing number inventory, and viewing voice billing. |
| Integration Server | Technical role used by Bridge Connectors (local software) to communicate securely with the Genesys Cloud API. |
| SCIM Integration | Provides the API permissions needed for System for Cross-domain Identity Management — used to auto-sync users from Azure AD, Okta, or similar IdPs. |
| Developer | For technical staff building custom integrations and external applications against the Genesys Cloud API. |
Communication Roles
| Role | Purpose |
|---|---|
| Communicate User | Allows a user to have a phone extension and make/receive standard business calls. Non-ACD only — not for queue agents. |
| Communicate Admin | Manages the non-contact-center telephony side: user-to-user calling, company-wide alerting. |
| Trusted External User | Minimum-permission guest role for users from a different Genesys Cloud organization granted temporary access for support or collaboration. Only available in orgs created on or after May 17, 2017. |
📌 Legacy role names: If your organization was created before 2020, you may see old role names. The current names are:
User(formerly PureCloud User / Engage User) andSupervisor(formerly PureCloud Supervisor / Engage Supervisor).
4. Roles and Licensing
⚠️ The license assigned to a user is determined by the most expensive permission in any role they hold. You do not manually assign licenses — they follow the roles.
| Example | Result |
|---|---|
| User has only Employee role | Collaborate license (lowest cost) |
| User has Employee + Communicate User | Communicate license |
| User has Employee + User (Agent) | CX 1 or higher (depends on queue config) |
| User has Quality Evaluator | CX 3 license triggered |
| Master Admin assigned to a digital-only org | May trigger full CX 2/CX 3 voice license — requires manual permission removal |
📌 If you run a digital-only organization (no voice), be careful with the Master Admin role. Its default permissions include voice-related rights that will trigger a full CX 2 or CX 3 license. Remove the voice permissions from Master Admin or use a custom role instead.
5. Custom Roles
When no default role fits your need exactly, create a custom role:
| Step | Action |
|---|---|
| 1 | Click Add Role (build from scratch) or find a similar default role and click More → Copy Role |
| 2 | Enter a name and optional description |
| 3 | Click the Permissions tab and select the checkboxes for each permission needed |
| 4 | Click Save |
Best practices:
| Practice | Reason |
|---|---|
| Copy an existing role rather than building from scratch | Faster, less risk of missing required permissions |
| Keep the number of roles minimal | Simpler to audit and maintain |
| Modify existing roles rather than creating new ones when possible | Reduces role sprawl |
| Only create a new role when a subset of users genuinely needs different permissions | Avoids unnecessary complexity |
6. Assigning Roles to a User
| Step | Action |
|---|---|
| 1 | Under View, select All to see all available roles |
| 2 | Search for the role name |
| 3 | Click the toggle in the Assigned column to enable it |
| 4 | Optionally, click the Divisions box to scope the role to specific divisions |
| 5 | Click Save |
📌 You can also assign roles in bulk from the role side:
Admin → Roles/Permissions → find role → More → Change Membership.
7. Minimum Role Set for a Standard Agent
Every agent in an ACD contact center needs at minimum:
| Role | Why |
|---|---|
| Employee | Auto-assigned. Cannot be removed. Baseline access. |
| User | Required to be a member of an ACD queue and receive routed interactions. |
Without the User role, you cannot add the person to a queue.
Last verified against Genesys Cloud Resource Center – March 2026
User profile management
User profiles are the "digital identity" of every person in the Genesys Cloud organization. They drive the internal directory, org hierarchy views, and ACD skill assignments. This page covers what profiles contain, who can edit what, and how admins configure profile fields org-wide.
Navigation Paths
| Task | Path |
|---|---|
| Edit a specific user's profile | Admin → People & Permissions → People → select user → More → Edit Person → Person Details tab |
| Configure org-wide profile fields | Admin → Directory → Profile Fields |
| View the org hierarchy | Any user profile → Hierarchy icon |
Required permissions:
| Permission | Required For |
|---|---|
Directory > User > View |
Viewing any user profile |
Directory > Userprofile > View |
Viewing profile field data |
Directory > Userprofile > Edit |
Editing profile field data |
Directory > Organization > Admin |
Configuring org-wide profile fields and sections |
1. What a Profile Contains
A Genesys Cloud user profile is more than a contact card — it feeds the internal directory search, the org hierarchy, and (indirectly) ACD routing via skills and certifications.
| Profile Section | Contents |
|---|---|
| Contact Information | Work phone, mobile, email, other numbers |
| Contact Preferences | Primary contact method — phone vs. email (set by the user) |
| Relationships | Manager field — drives the org hierarchy/reporting tree |
| Location | Office, city, floor (admins can upload floor plans) |
| Groups | Group memberships the user belongs to |
| Skills & Certifications | Tags that become keywords for directory search |
| Education | Optional — populated by the user |
| Photo | Must be uploaded by the user — admins cannot upload on behalf |
| Custom sections | Any additional sections configured by your admin via Profile Fields |
📌 Searchability: Every piece of data entered into a profile becomes a keyword in the advanced directory search. If you tag a user with "SBC" or "Spanish," other users and Architect flows can find them by that term.
2. Admin vs. User Responsibilities
A key distinction in Genesys Cloud profile management: some fields are user-controlled, others are admin-controlled.
| Action | Who Does It |
|---|---|
| Upload profile photo | User only — admins cannot upload photos on behalf of a user |
| Set primary contact preference (phone vs. email) | User only |
| Edit contact information, relationships, location | Admin (via Edit Person → Person Details tab) or User (via their own profile) |
| Add skills, certifications, tags | Admin (via Edit Person → ACD Skills tab or Person Details) |
| Set the Manager field (reporting hierarchy) | Admin |
| Configure org-wide profile sections and fields | Admin only (via Admin → Directory → Profile Fields) |
📌 Users without a manager assigned do not appear in the org hierarchy view. Always populate the Manager field when creating users if your org uses the hierarchy view for supervision or reporting.
3. Org Hierarchy View
The hierarchy view lets anyone in the org browse the reporting structure — who reports to whom, peers, and direct reports.
| Detail | Value |
|---|---|
| How it's built | Automatically generated from the Manager field on each user profile |
| Updates | Genesys Cloud updates the hierarchy view automatically when an admin changes the Manager field |
| Access | Available from any user's profile page |
| Requirement | Users must have a Manager assigned to appear in hierarchy views |
4. Profile Fields Configuration (Admin)
Admins can customize the org-wide profile structure by adding new sections and fields, renaming existing ones, reordering them, and enabling or disabling them.
What Admins Can Do
| Action | Notes |
|---|---|
| Add a new section | Creates a new grouping on all user profiles org-wide |
| Add fields to a section | Defines what data is collected in that section |
| Rename fields or sections | Change display labels; can be translated for multi-language orgs |
| Reorder fields and sections | Controls the order they appear on the profile |
| Disable a field or section | Hides it from profiles without deleting it |
| Enable a disabled field or section | Restores visibility |
Critical Limitation
⚠️ Profile sections cannot be deleted once created. They can only be disabled (hidden). Before adding any new section, ensure it has been approved by your organization — you cannot undo it.
This applies to sections specifically. Individual fields within sections can also not be deleted, only disabled.
5. Tags — Skills and Certifications
| Purpose | How It Works |
|---|---|
| Directory search | Tags become search keywords. Search "Cisco" or "SBC" and find all users tagged with those terms. |
| Group creation | Tags can be used as parameters to create dynamic groups of users who share a common attribute. |
📌 Tags are distinct from ACD Skills, which are the structured skills used by the routing engine to match interactions to agents. Tags are informal and used for human searchability; ACD Skills are formal and used by the system.
6. Locations
Admins can create Locations (office buildings, cities) and assign users to them via their profile.
| Feature | Detail |
|---|---|
| Create locations | Admin → Directory → Locations |
| Floor plan upload | Admins can upload a floor plan image for a location, enabling precise office mapping |
| Profile assignment | Users are assigned to a location via their profile's Location field |
Summary: Profile Editing Tabs (Edit Person Page)
When an admin opens Edit Person for a user, they see multiple tabs:
| Tab | What It Controls |
|---|---|
| Person Details | Full profile — contact info, relationships, location, custom fields. Opens in edit mode. |
| Roles | Assign/unassign roles. The license cost shown corresponds to the most expensive permission in the role. |
| Division & Licenses | Shows which division the user belongs to and which licenses are consumed |
| View Permissions | Read-only view of all permissions currently assigned to the user |
| Phone | Assign a phone station (WebRTC or physical) |
| ACD Skills | Assign ACD skills and languages with proficiency ratings for routing |
| Utilization | Configure how many simultaneous interactions the user can handle per media type |
Last verified against Genesys Cloud Resource Center – March 2026
Work Teams
Navigation: Admin → Directory → Work Teams Also accessible via: Menu → User Management → Work Teams

What Are Work Teams?
Work teams are supervisor-managed groups of agents used to monitor performance and manage workforce operations collectively. They are distinct from Groups (People & Permissions) in purpose and behaviour.
⚠️ Not related to Microsoft Teams. Genesys Cloud Work Teams and the Microsoft Teams integration are completely separate features.
Work Teams vs. Groups — Key Differences
| Feature | Work Teams | General Groups |
|---|---|---|
| Primary purpose | Performance management & WFM | Routing, chat, role assignment |
| Membership rule | One team per division per user | Users can belong to multiple groups |
| Division requirement | All members must share same division | Members can span divisions |
| Chat room created | No | Yes (automatic) |
| Role assignment | No | Yes |
| Queue membership | Yes (add team to queue) | Yes (add group to queue) |
| Schedule management | Yes (WFM schedules) | No |
| Automatic membership | No (manual only) | Yes (rule-based or skill expression) |
Org Limits
| Item | Limit |
|---|---|
| Work teams per org | 200 (contact Customer Care to increase) |
| Work teams per user | 1 per division |
| Division requirement | All members must belong to the team's assigned division |
Creating a Work Team
- Click Admin
- Under Directory, click Work Teams
- Click New Team
- Fill in the required fields:
| Field | Notes |
|---|---|
| Name | Appears in views and lists |
| Description | Purpose/context for the team |
| Division | All members must belong to this division |
- Add members — you can only add users from divisions where you have the Assign permission
- Save
Adding a Work Team to a Queue
Work teams can be assigned to queues in place of individual users.
⚠️ Mutually exclusive: You cannot mix individual users and a work team on the same queue. If you switch from users to a work team, the previously selected individual users are removed.
Steps:
- Admin → Contact Center → Queues → select queue
- Click the Members tab → Groups tab
- Click Add Group → search for and select the work team
- Click Add Selected → Save
What Supervisors Can Do with Work Teams
Work teams enable the following supervisor capabilities:
Performance Monitoring
- Filter Agent Performance / Detail views by work team
- Filter Agent Status view by work team
- Filter Agent Evaluation view by work team
- Filter Queue Performance Detail by work team
Workforce Management
- View and edit WFM schedules by work team
- Schedule activities for an entire work team at once
- Filter Real-time Adherence by work team
- Assign quality policies to a work team
Audit & Tracking
- Work team membership appears on the People page
- Changes to work team membership are recorded in the audit trail
Permissions Required
| Action | Permission |
|---|---|
| Create / manage work teams | Groups > Work Team > Add, Edit, Delete |
| Add members from a division | Groups > Work Team > Assign (for that division) |
| View work teams in WFM schedules | Groups > Work Team > View (non-conditional = all teams in management unit) |
ℹ️ If you have no Work Team permissions at all, the work team selector does not appear in WFM schedule views.
Relationship to Divisions
- When creating a work team, the division controls which users are eligible for membership
- A supervisor can only add users from divisions where they have the Assign permission
- Users can belong to one work team per division — so a user in multiple divisions could technically be in one work team in each
Relationship to WFM Business Units and Management Units
Work teams operate within the WFM scheduling hierarchy:
Business Unit
  └── Management Unit(s)
        └── Work Teams (filter / schedule view layer)
Work teams are not the same as management units. Management units group agents for forecasting and scheduling capacity (max 1,500 agents). Work teams are a supervisory filter and scheduling activity tool layered on top.
See Also
- Groups (People & Permissions) — for routing, role assignment, and chat rooms
- Queue & Routing Management — for assigning work teams to queues
- Divisions & Access Control — division membership rules affect work team eligibility
- Architectural Build Order — work teams are built in Phase 3 (People), after users and before queues